
Struggling With Autoposition
Not a fan of the autoposition, but I had to tackle it for the drink robot because unlike servo recorder, I needed the robot to precisely grab a cup and repeat positions over and over. Which he does.
First of all I have read every "?" by every button and slider and I still dont get most of whats happening.
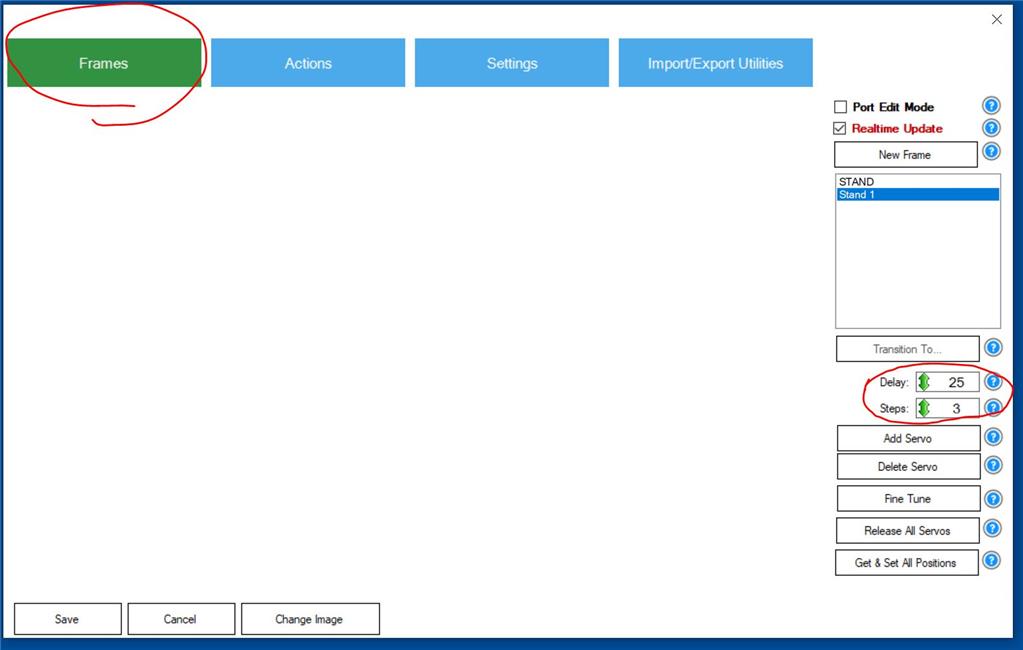
My issue is understanding the redundancy of different speeds and steps in all the windows and how that affects the servos in each one. Of the three windows I understand "Frames" window the best as this is where you begin and can see the effects on the servos.
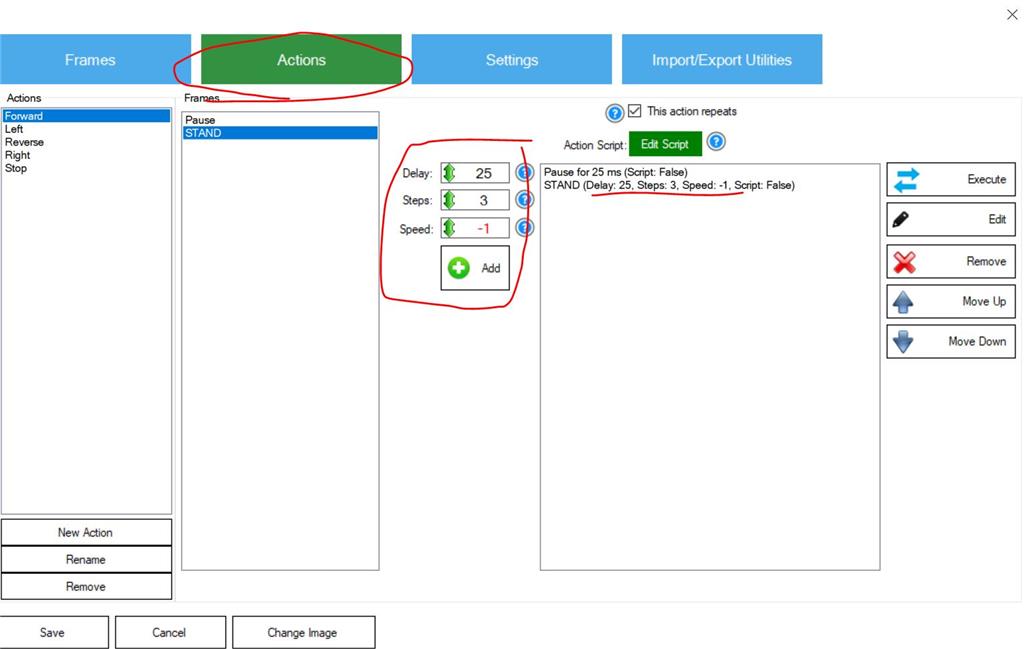
But as I move on to the "Actions" tab I am again shown delay and steps and now speed. The speed here goes from -1 to 20. I understand I can change this for each frame, but after I set the motions and then decide to go back and edit the speed button on the right, there is no noticeable speed change to my animation ( i also understand that the higher the number the slower the motion)
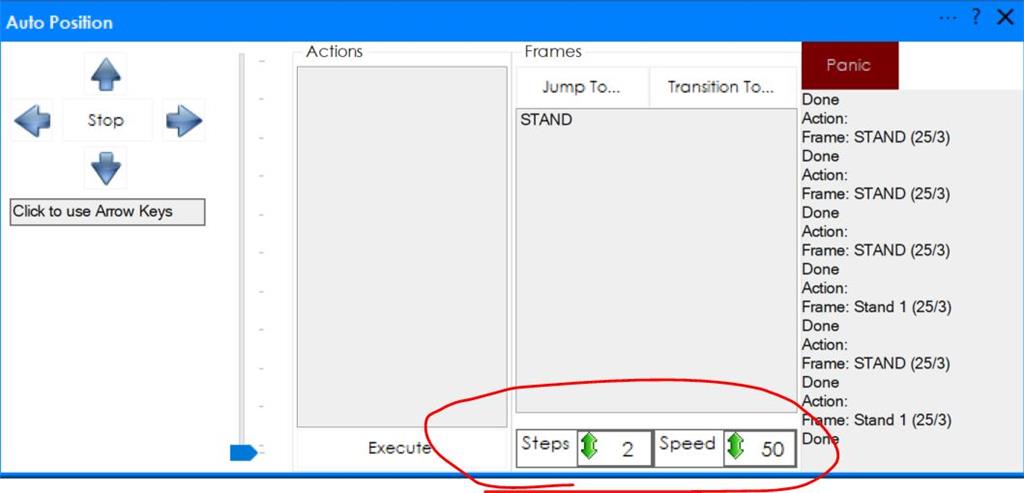
Finally, when actions are set up and you go to the main window for Auto Position I am again presented with another STEP and SPEED, this time the speed goes to 0-50. Why?
Yesterday I broke part of the drink robot because I am struggling with this animation system. Its ok if you are playing with a toy sized robot, but when programming a lifesized robot, things can go expensively wrong, when disaster strikes or worse someone gets hurt.
Please take the time to explain to me how this redundancy is supposed to work.
Related Hardware (view all EZB hardware)

Related Robot Skill (view all robot skills)

i added titled group boxes in the config menu for editing an action to help you as well
Well, that explains it. LOL.
I also struggled with these concepts when I was setting up my B9 arm movement animations. It took me a bunch of testing and trial and error to figure it out. I really don't think I fully understood everything in the end however I did get most of my actions to look smooth.
Luckily during the learning curve I didn't break anything! Sorry about your loss @Will. I know you worked hard on your Bartender.
I'll be going back soon and redoing some animations and redoing others. I fully expect to have to relearn this control again. Hopefully next time it will be a more pleasant experience.
Thank you for the additional info. I always appreciate the time you take to explain. I'll digest as much as I can today AFTER I do my taxes
My main issue I had was understanding how to adjust the speed and smoothness of an animation for the actions. It seemed if I changed the speed number in the edit window, I did not notice a change in speed in the animation.
@dave, The damage that was done was fixable but learning/testing on a full robot is scary as hell. I don't have a robot revolution robot to test with to get to know the system so I was taking it slow, by the end of the day I was so frustrated and tired that I made a critical error and moved the robot in a way that forced part to break.
I’ll expand on the delay and steps for ya later today. I wrote that stuff at 5 am so I’m glad it was coherent lol
I updated the Auto Position manual to explain the Steps and Delay values, as well as how to consider defining frames. If you watch any of Bob Houstons InMoov videos (doing math), or Richards (bartender inmoov), you can visualize how each frame was defined.
Here's a copy of what was added to the manual....
*NOTE: this copy and paste below is from the manual. View the Auto Position manual to see the latest revisions. The manual is updated and this post will not be updated.
Example: Picking up a cup Assume you have a simple robot arm with 2 joints (shoulder & elbow) and a gripper. You may wish to pick up a cup and raise it into the air. We can consider this entire motion sequence an Action, which consists of a collection of Frames. Let us first define the start and end of the desired Action. As you can imagine, there are many steps between the start and end with the robot suddenly holding a cup. The Auto Position makes this very easy to accomplish by splitting the Action into a collection of frames.
You can begin by defining the Frames required to complete the Action. The Frames are snapshots of how the robot can achieve the task. Notice in this example, the task is split into smaller frames. Frames are defined rather than having to program every servo movement. Later, the frames are added to an Action so they can be replayed programmatically.
Step/Delay Settings Hypothetically, let’s assume a frame moves the robot from this example Start frame to End frame. The Auto Position will perform calculations using the start & end positions to interpret the movement positions. The algorithm will ensure all joints positions arrive at their destination position at the same time during the transition. This behavior is repeated for the transition of each Frame of an Action.
Example: Steps: 5, Delay 20 Using these Steps and Delay values, the Auto Position will send 15 movement commands to the EZB with a 20ms delay between each command. The Auto Position has determined to send 15 movement commands because that is the largest difference between servo positions is 75. With a Step increment of 5, that leaves 15 movement commands. All remaining servos that have smaller position differences will use smaller steps, thus arriving at their destination at the same time. The largest step will be used for the servo with the largest position difference.
The shoulder will move 5 positions per command. The elbow will move 2.3 positions per command. There will be a 20ms delay per command. This ensures both the should and elbow joint positions arrive together at the destination frame positions.
Holy smokes this is so so much easier for me to understand. It’s a very complex skill and there is obviously more happening under the hood than I understood before. I’m going to put this to practice tomorrow. Thanks and I’ll let you know if I have any other questions.
A big thanks!
Of course, anytime Will!
The latest release has the Auto Position changes and bug fix for the transition button: https://synthiam.com/Products/ARC/Releases/ARC-2021-04-11-00-Early-Access-Runtime-20502