
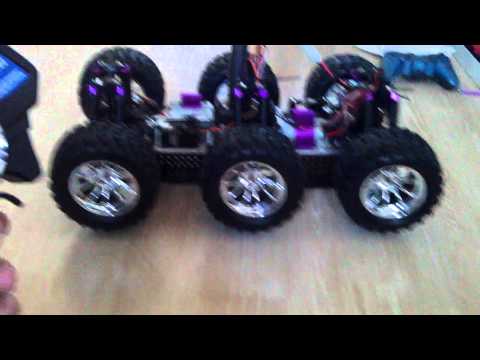
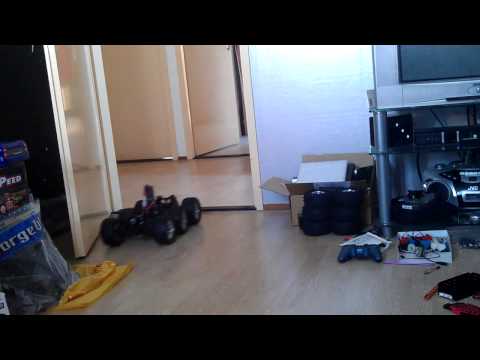


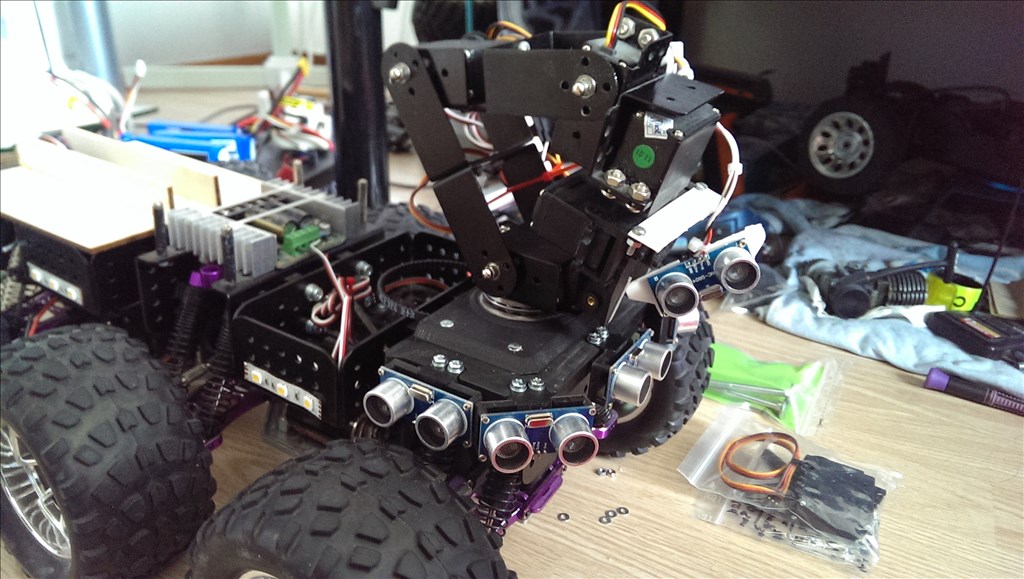


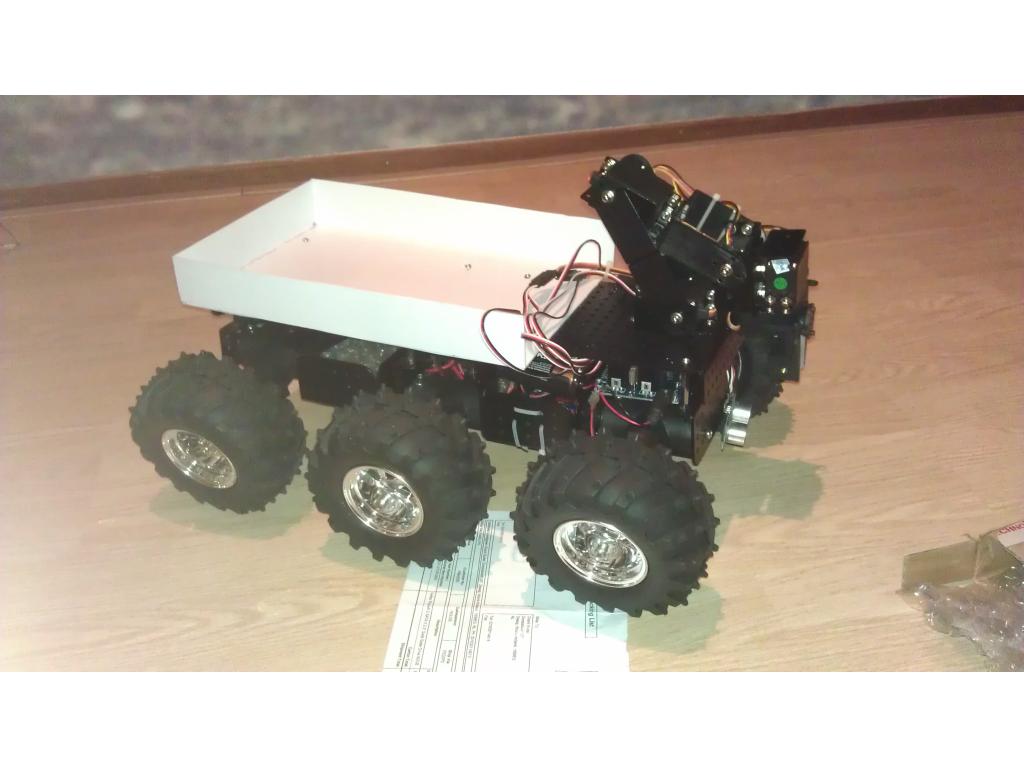
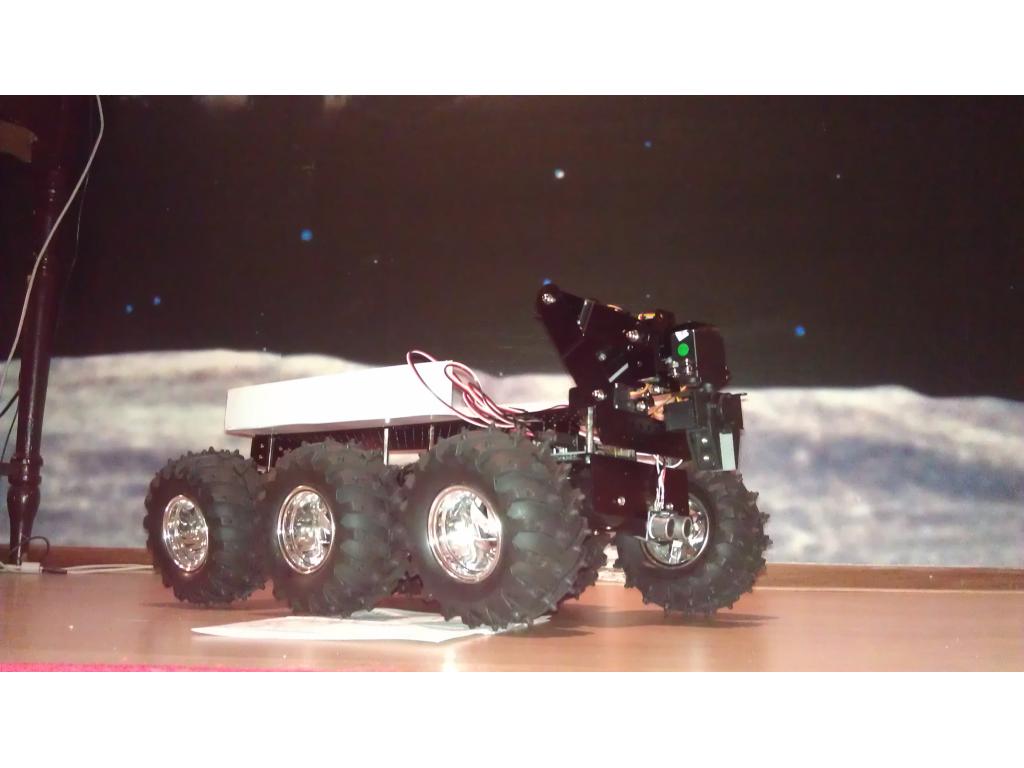
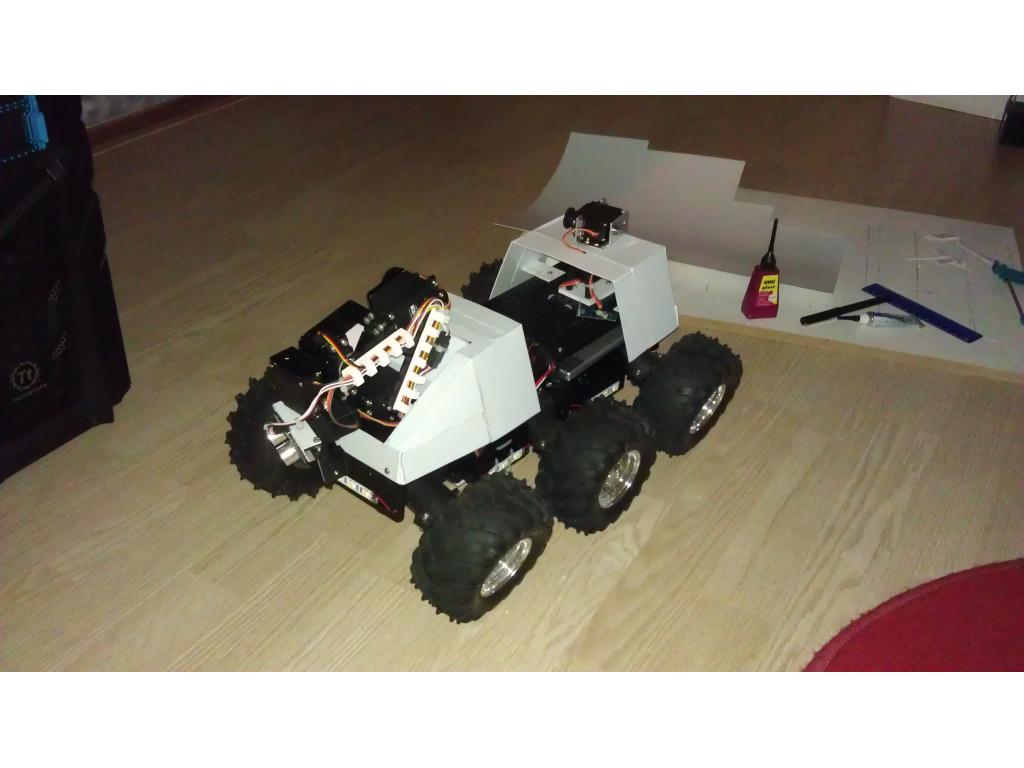
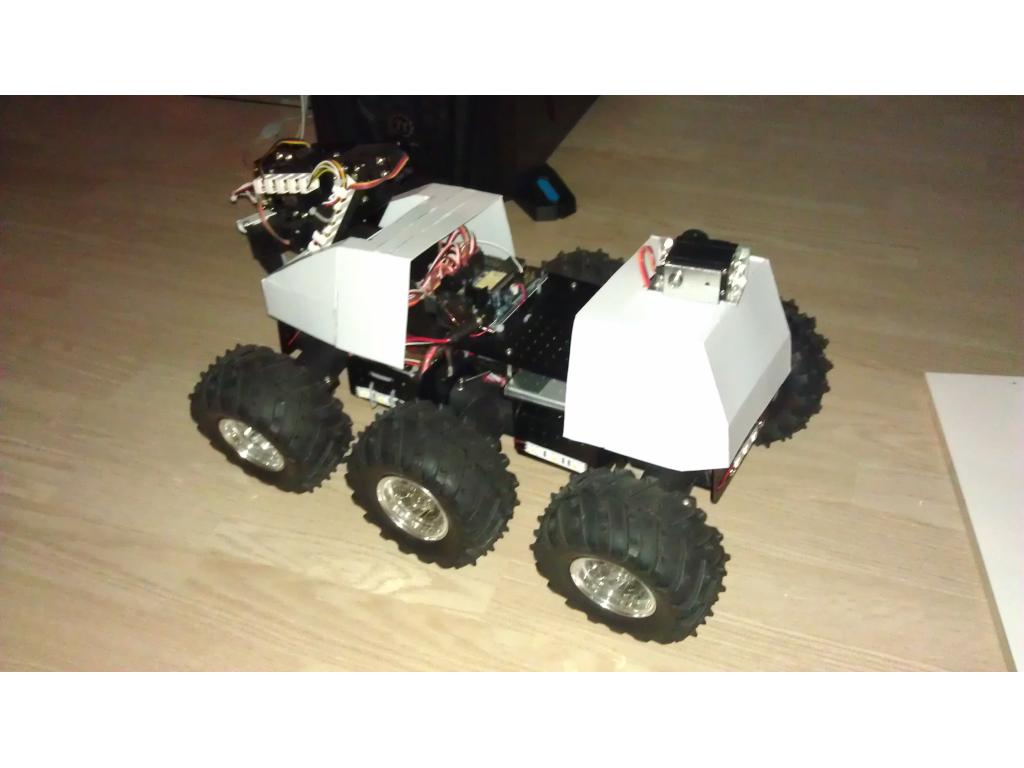
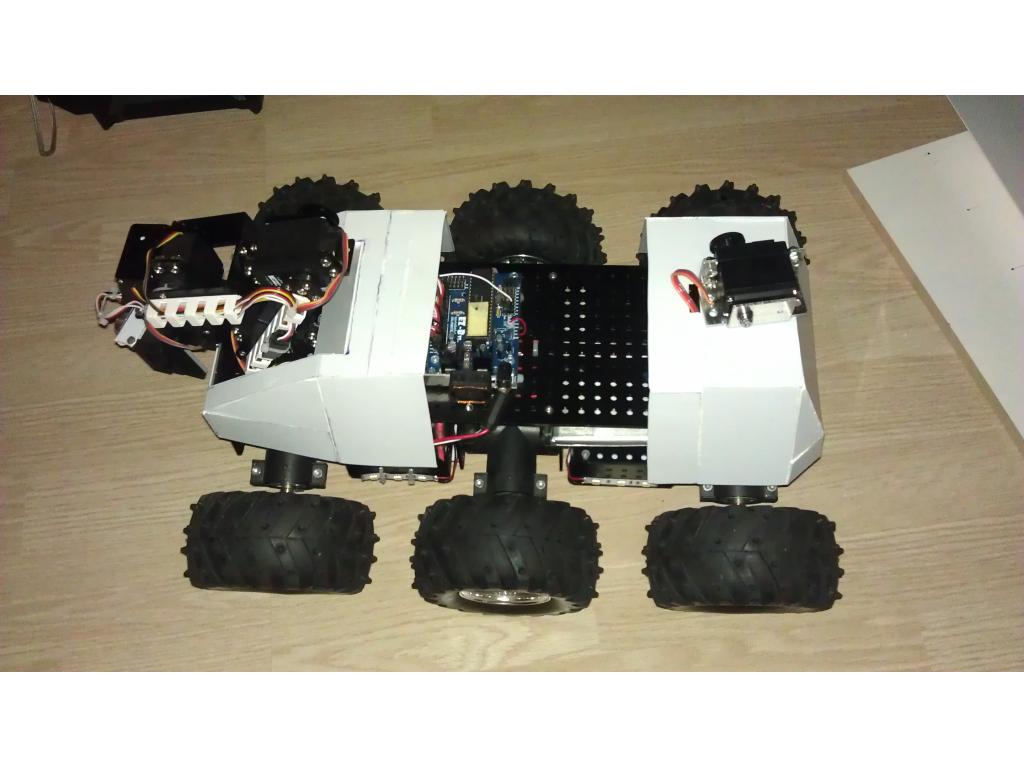
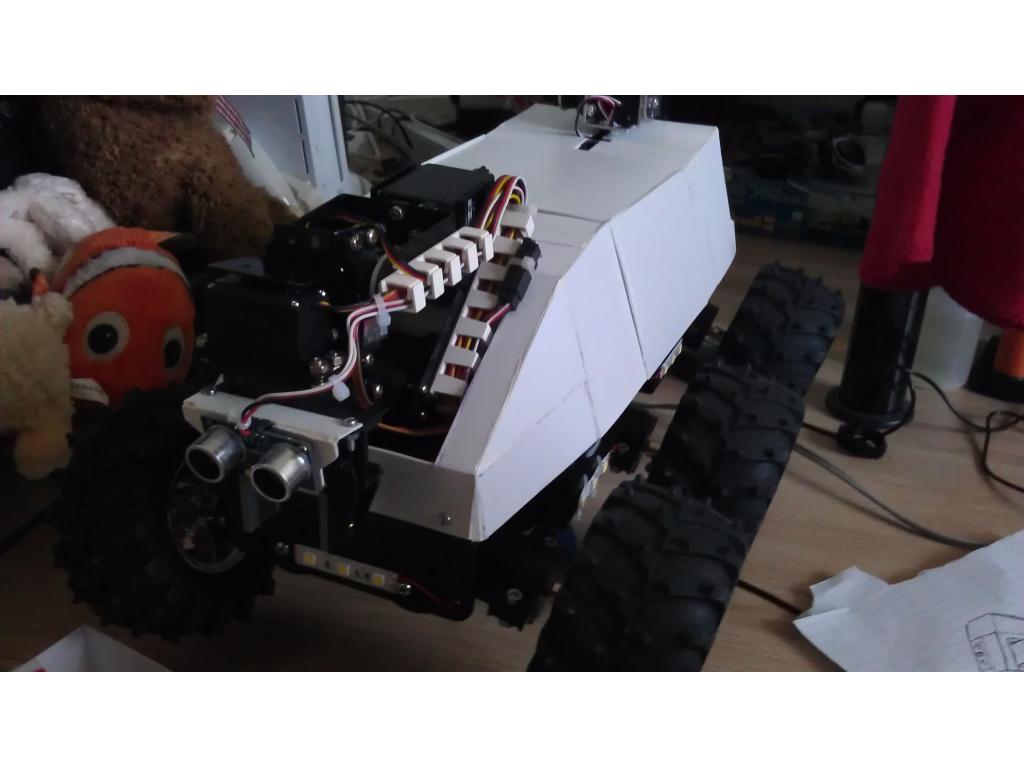
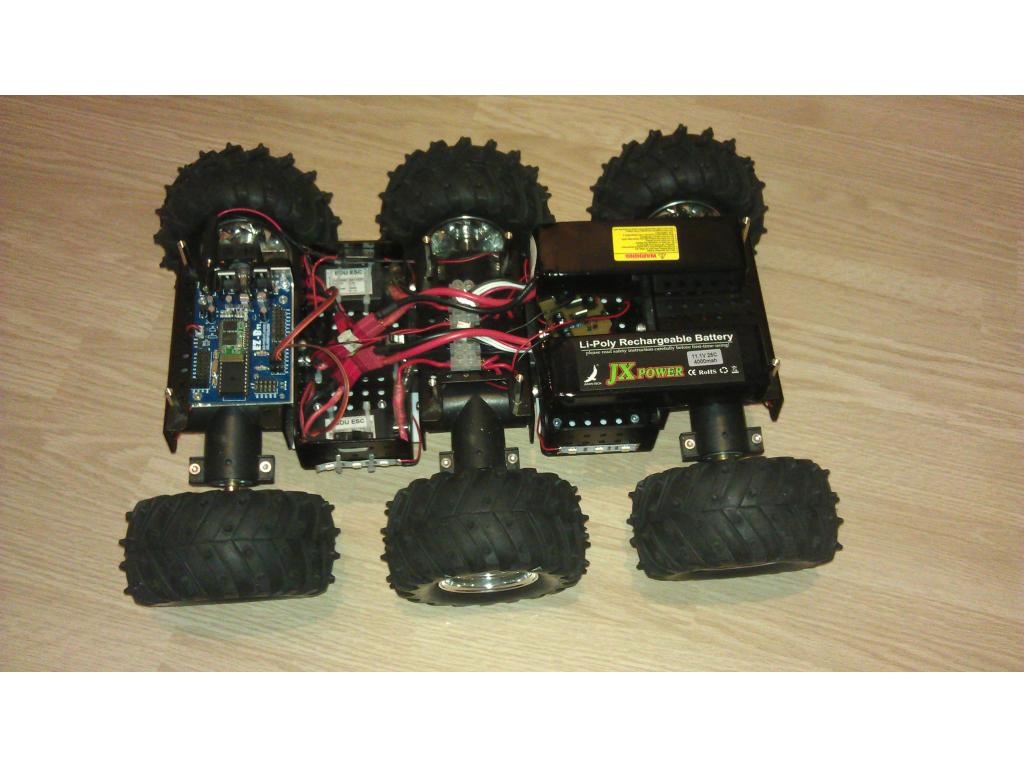
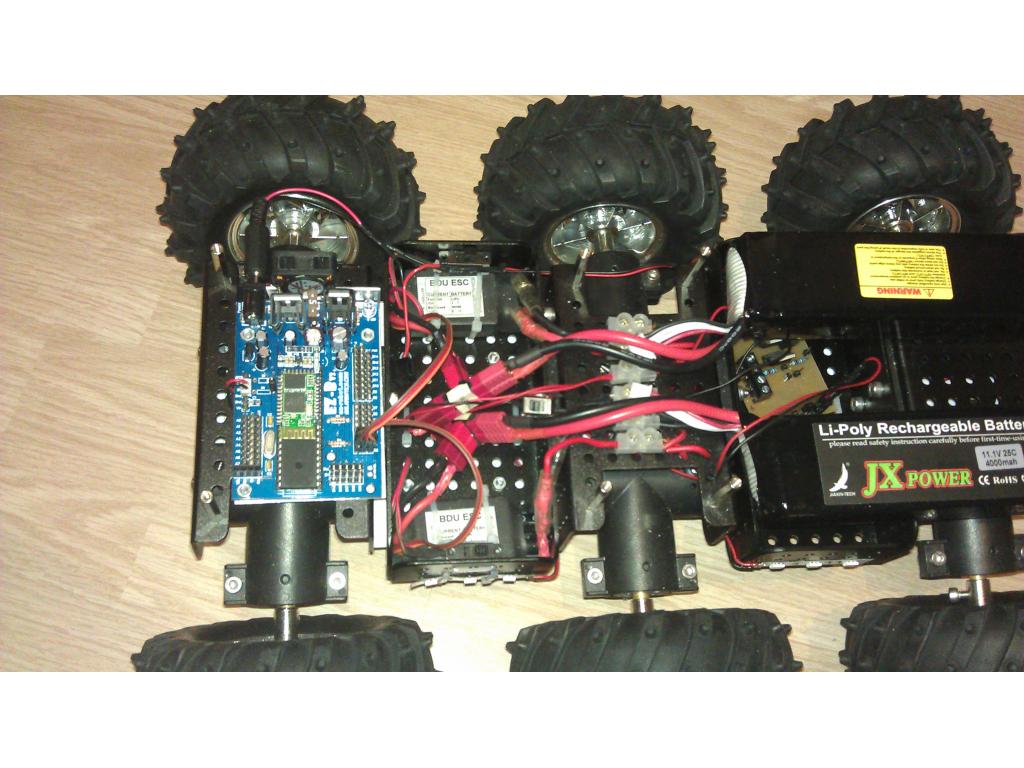

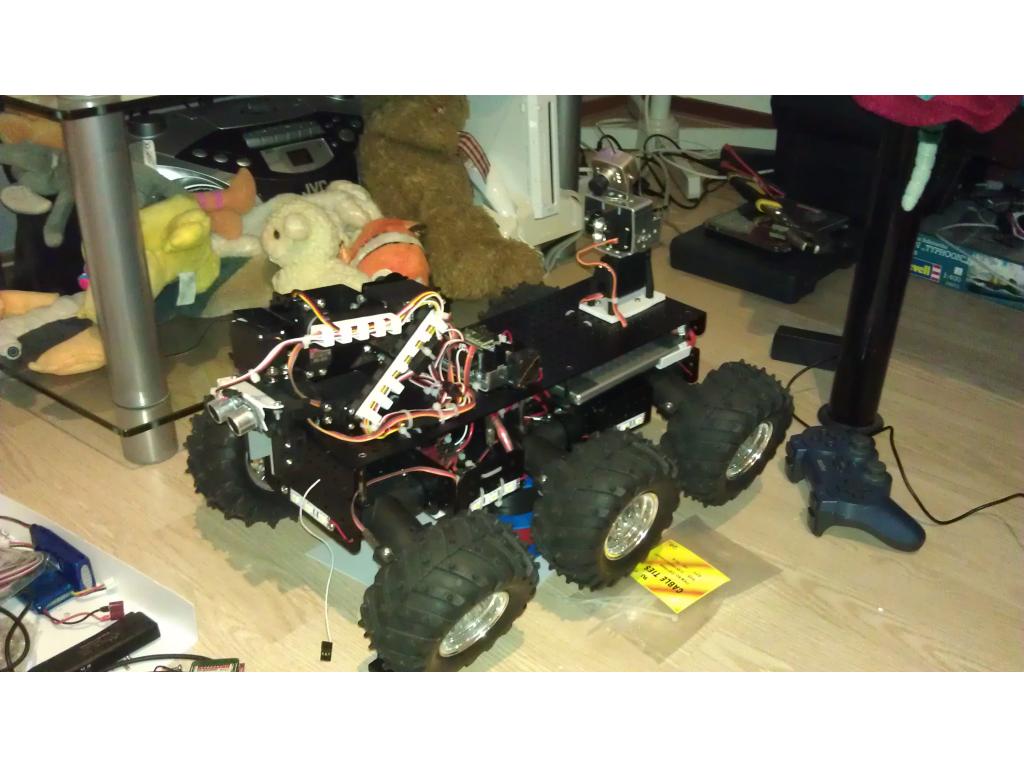


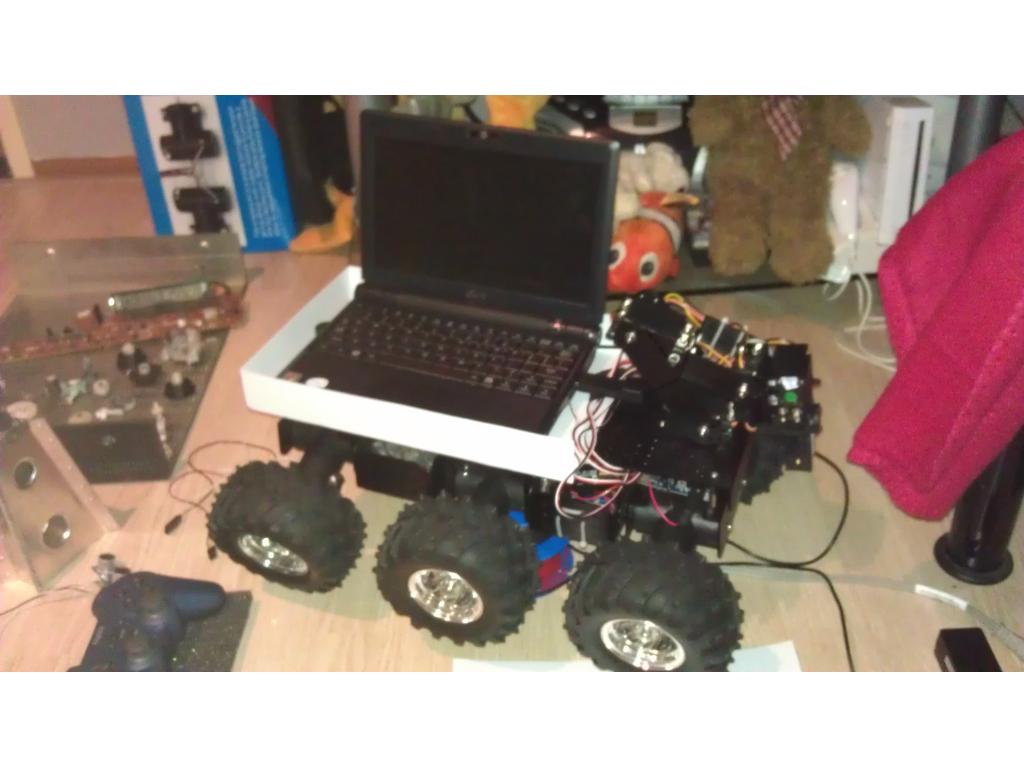
Hello fellow EZ-B'rs, As I finally discovery how to upload photos I thought it was time to share my robot with the world. It's called R.O.O.S.T.E.R which stands for: Remote Online Operating Scientific Testing Electronic Robot (took me about an hour to come up with that, but I like it).
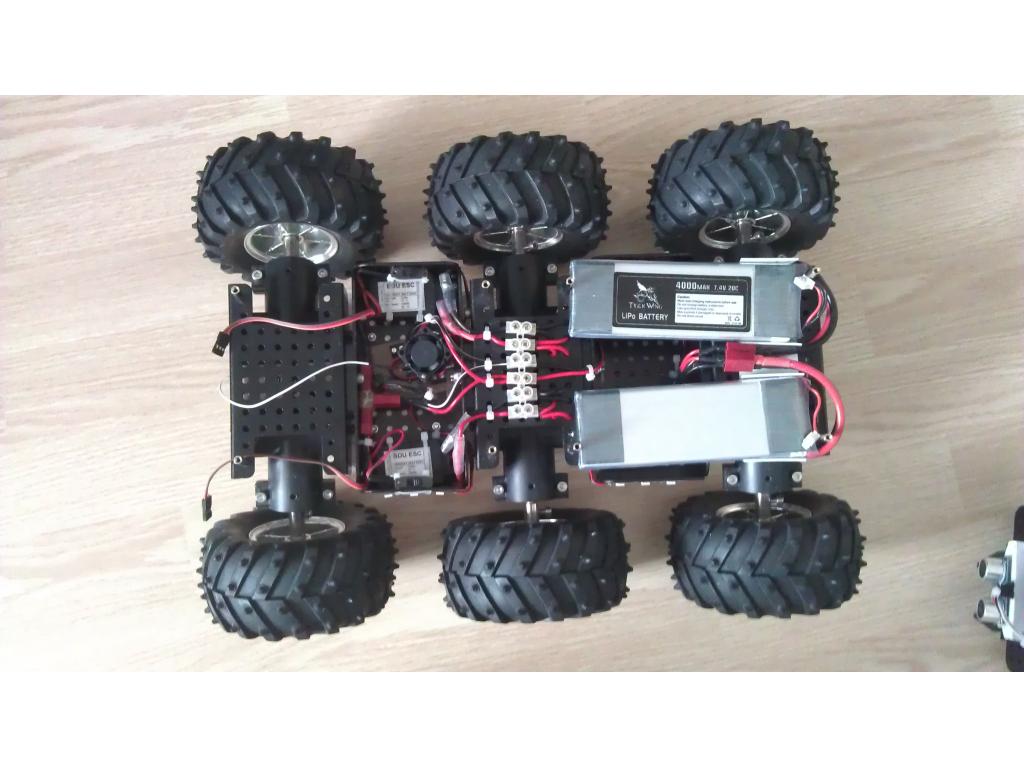
The specs:
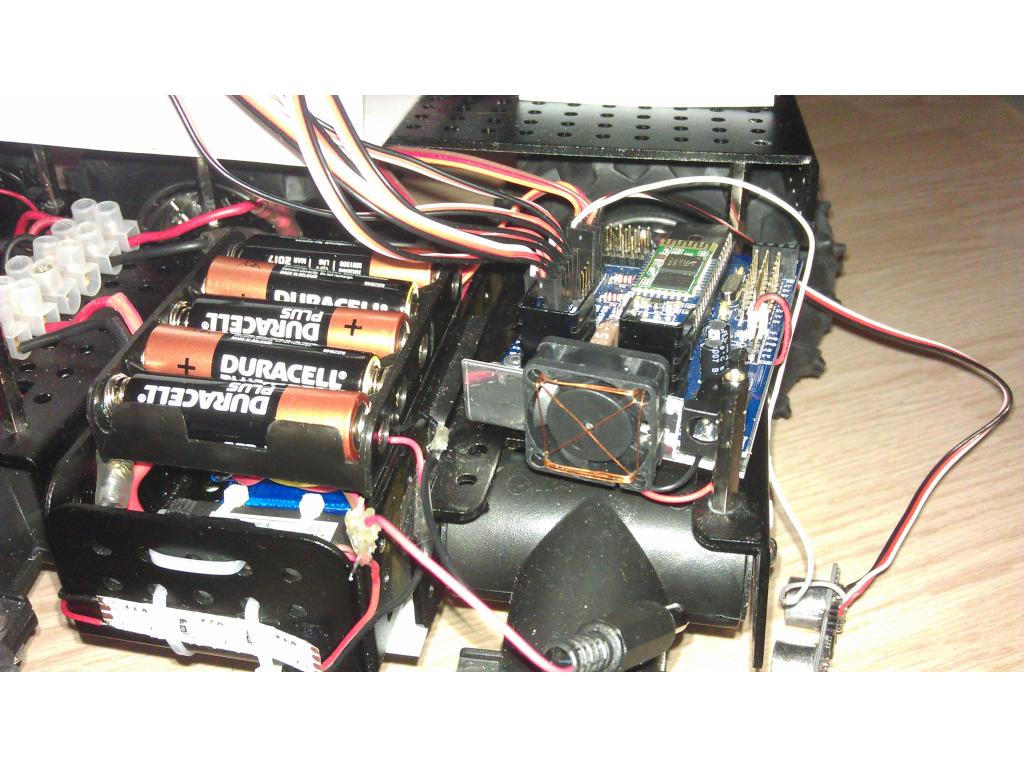
- 6x 6v 6A motors
- 2x 20A Rc Car ESCs
- 2x Reddragon 2s 25c 1200mAh
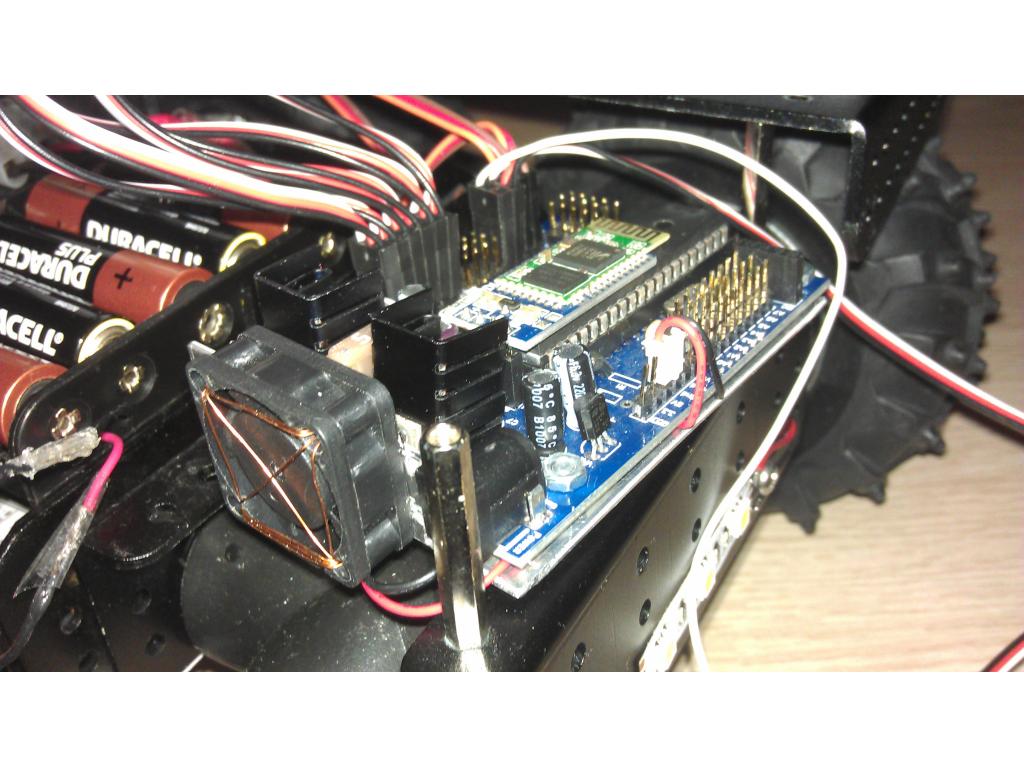
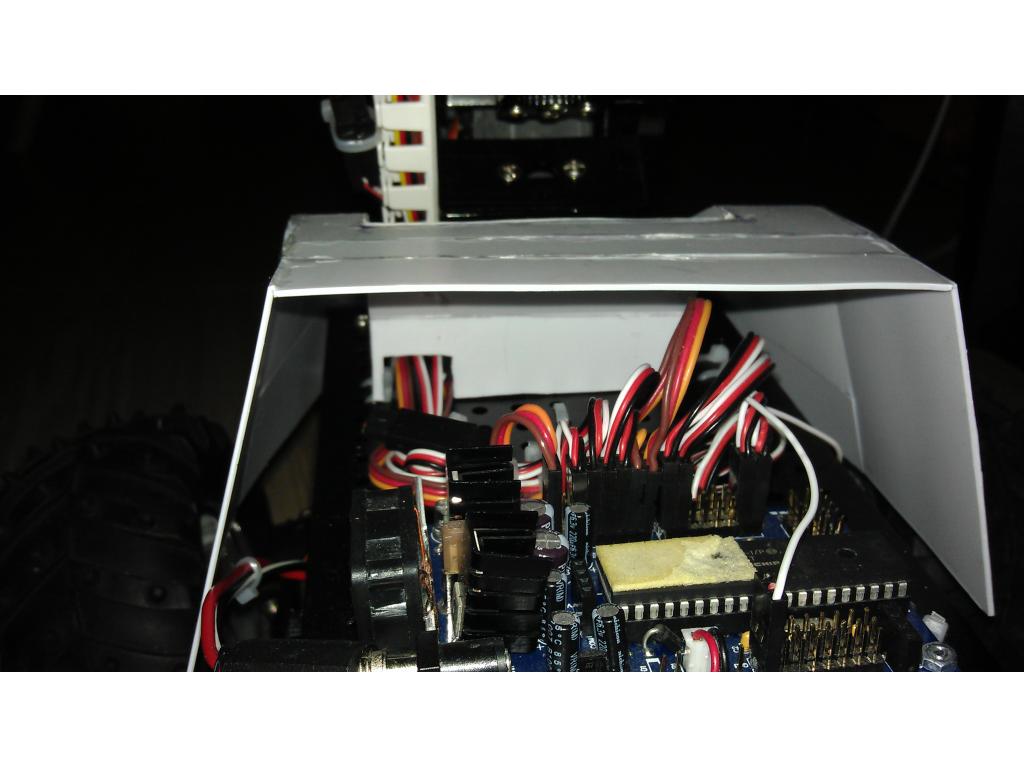
- Ofc the Ez- B
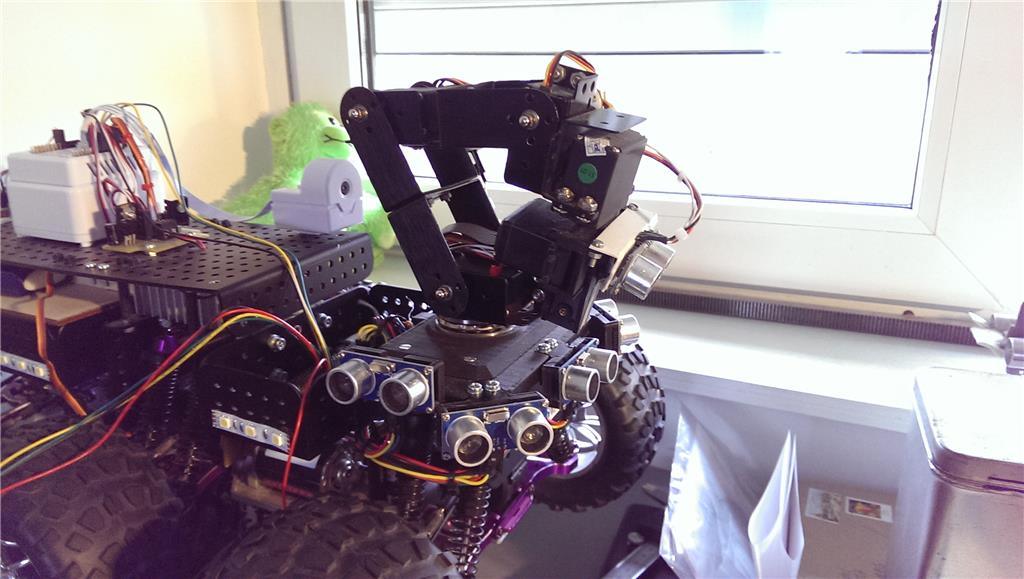
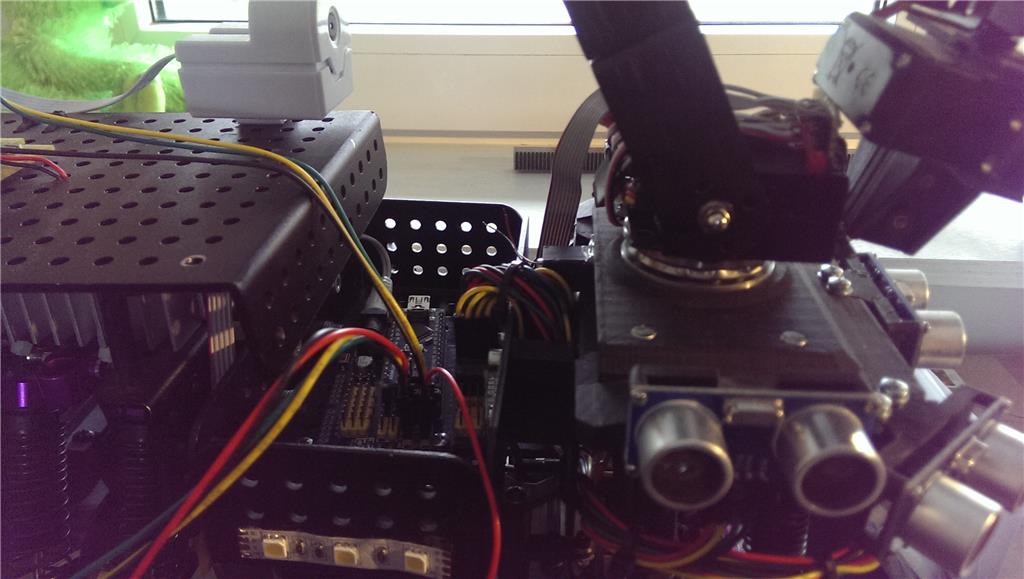
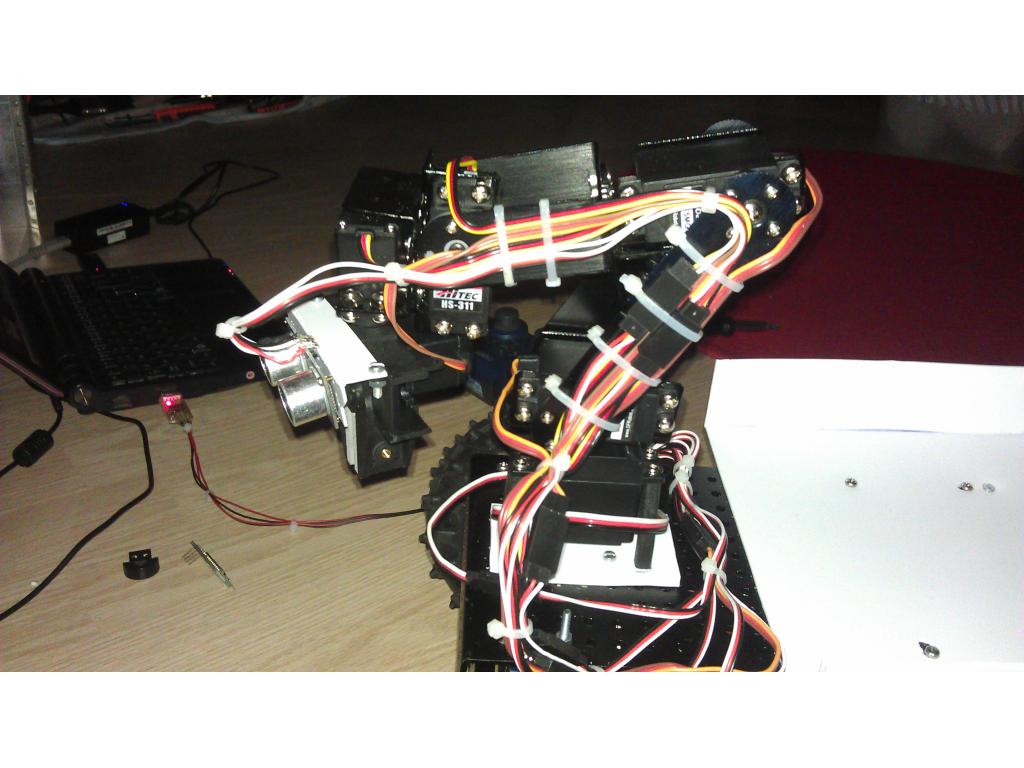
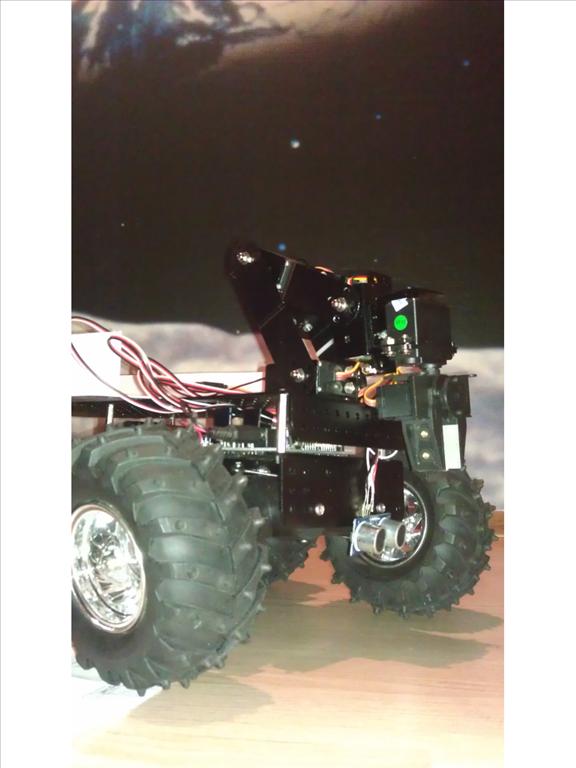
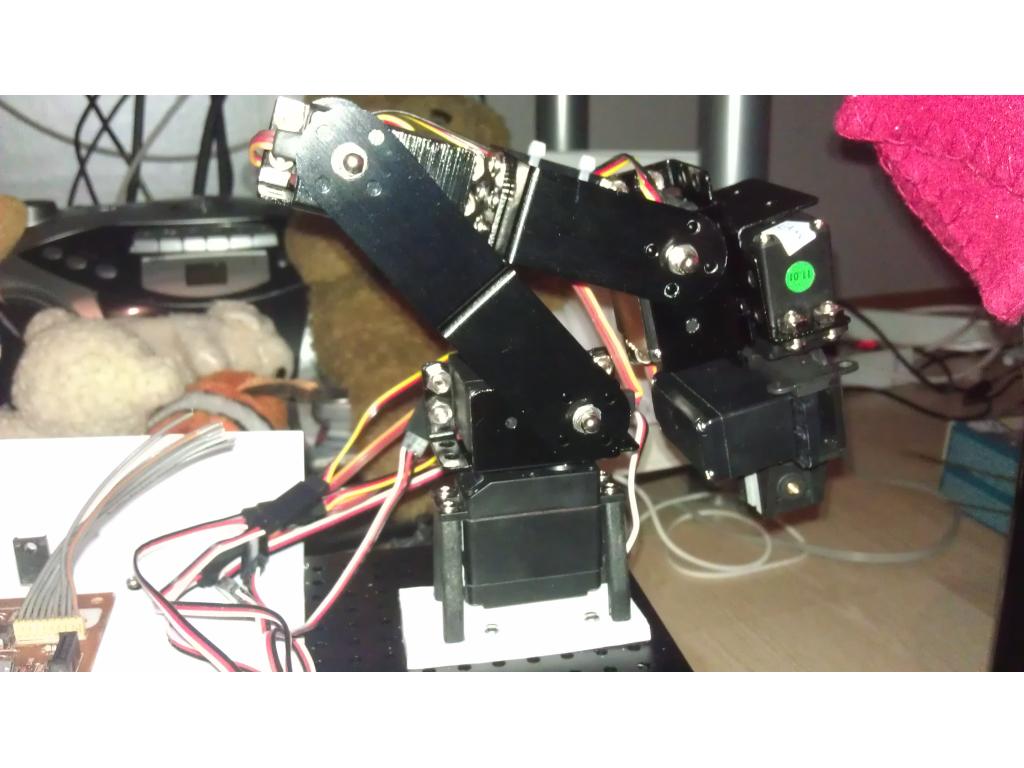
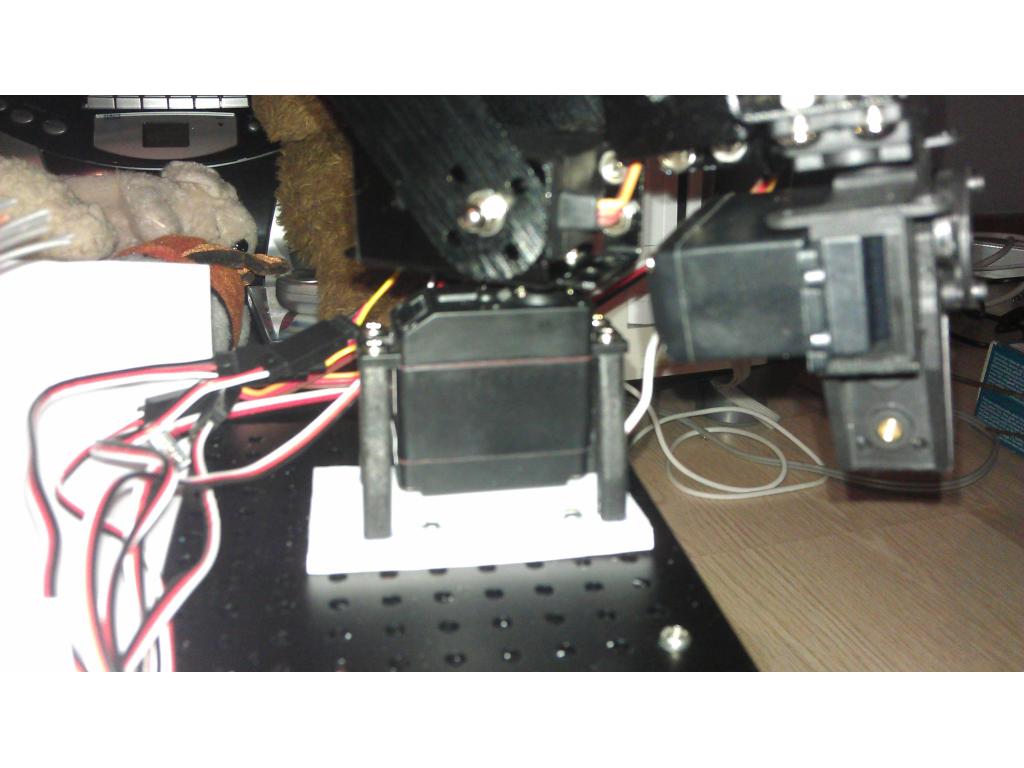
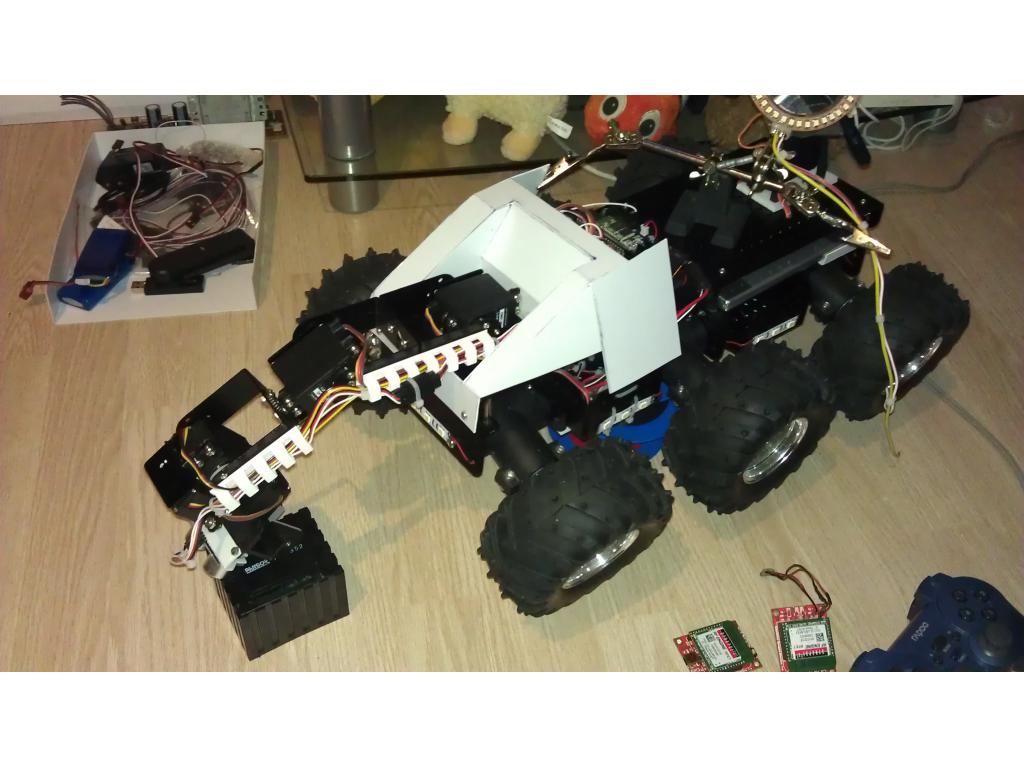
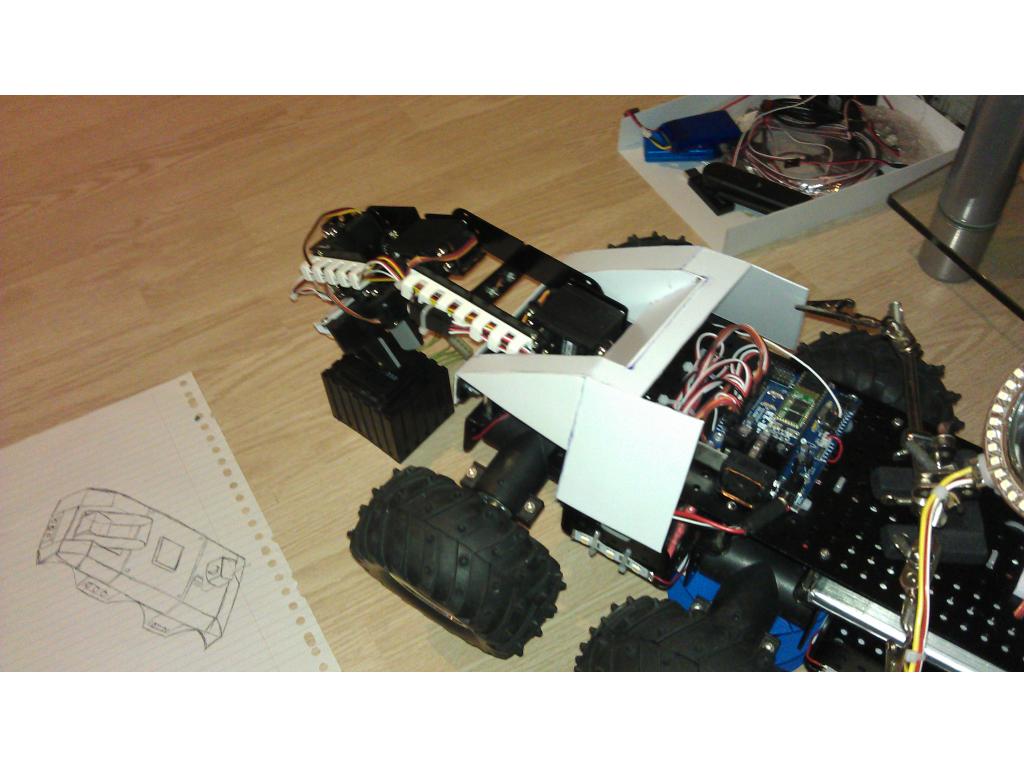
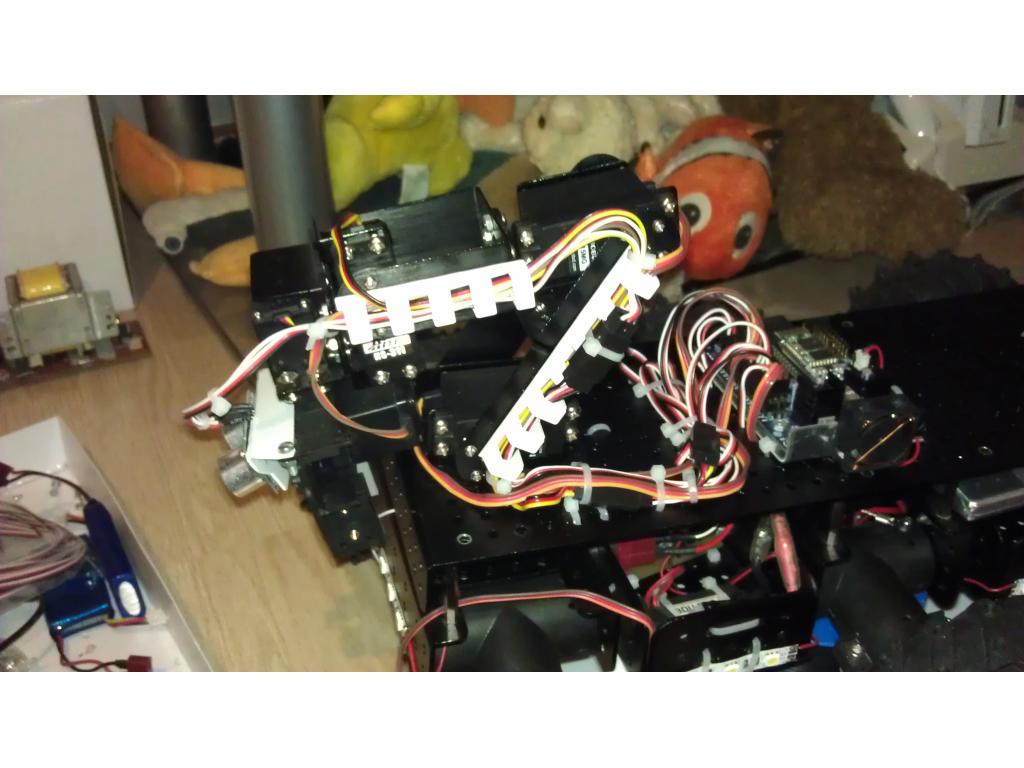
- Dfrobot 5dof robotic arm
- Asus Eee pc 900hd
- Ping sensor (well... I sort of broke it... It got stuck between the robot and the wall...)
Why I'm building it? Because I can, robots are Awsome, the EZ-B rules and I got tired of burning/shocking myself when I'm testing one of my "crazy" contraptions.
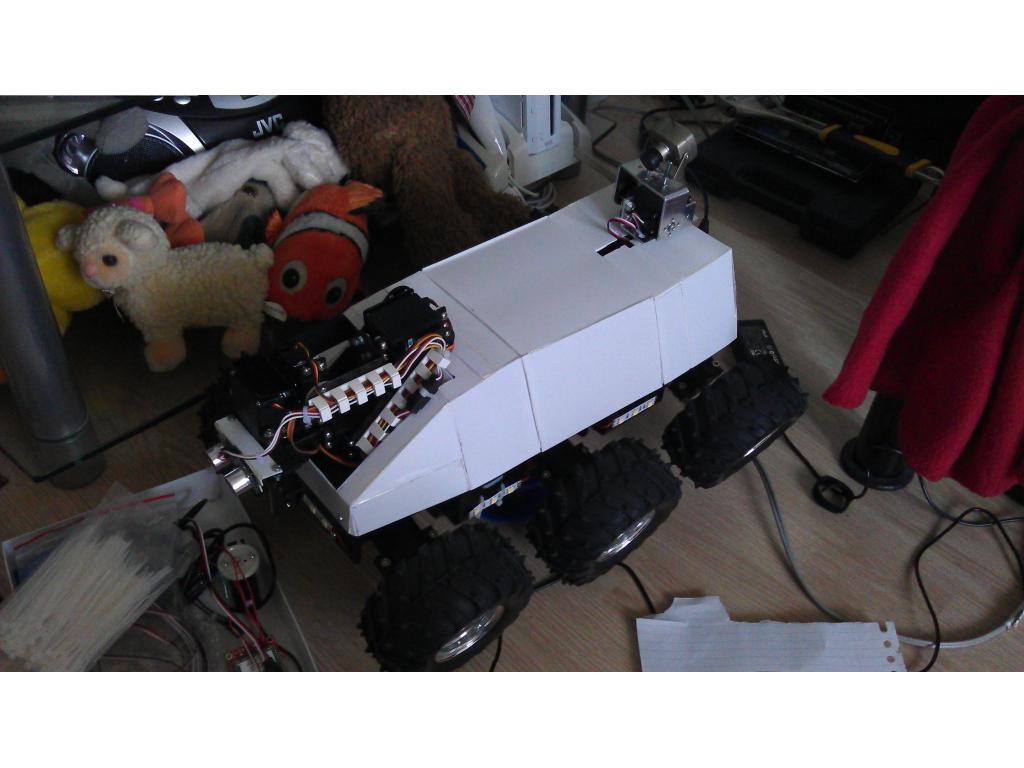
Up coming updates for robot:
- A rotationplatform for the arm.
- 2 gigantic lipo batteries.
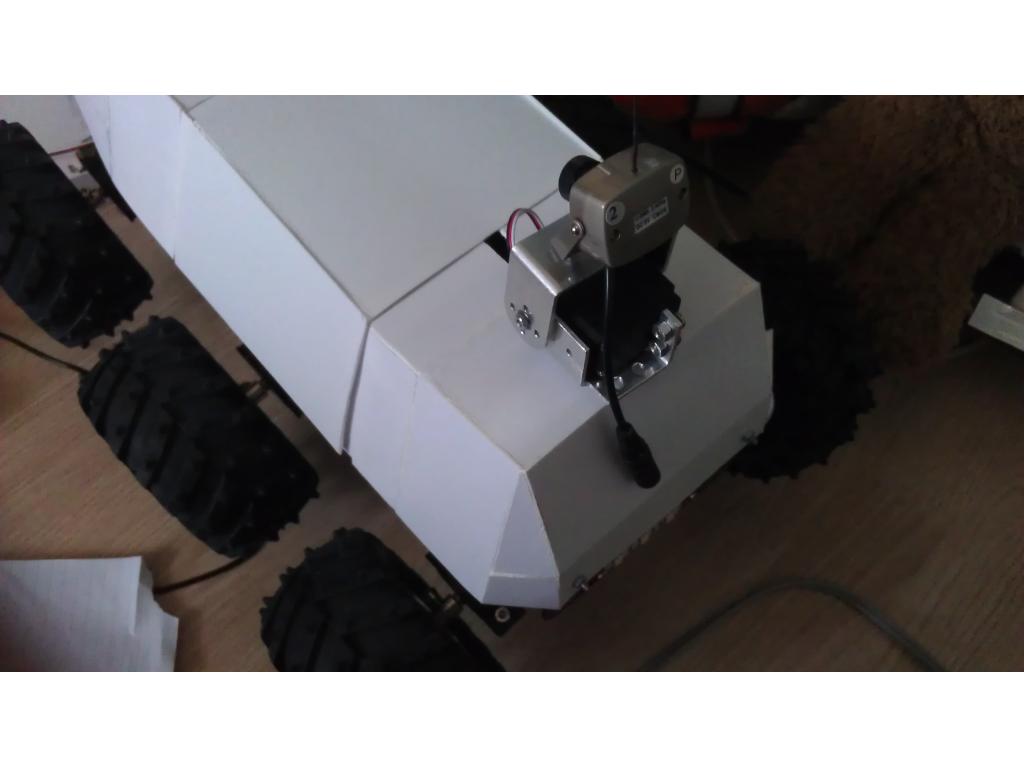
- camera+ pan/tilt turret.
- Small rockets
- mini mini-gun
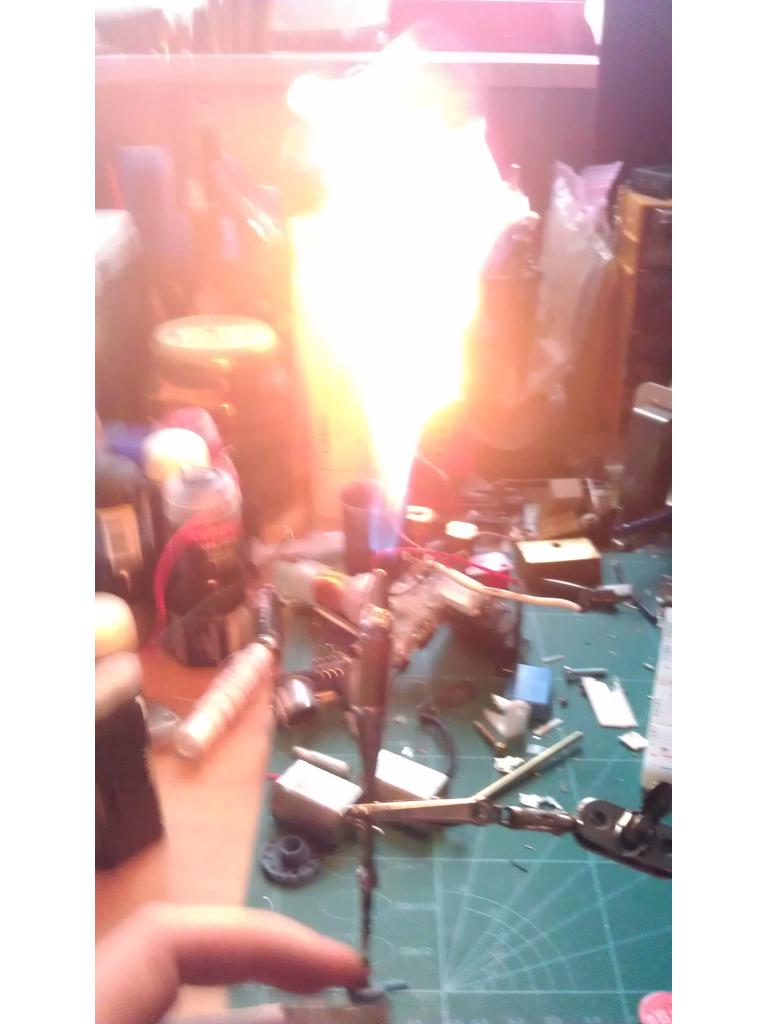
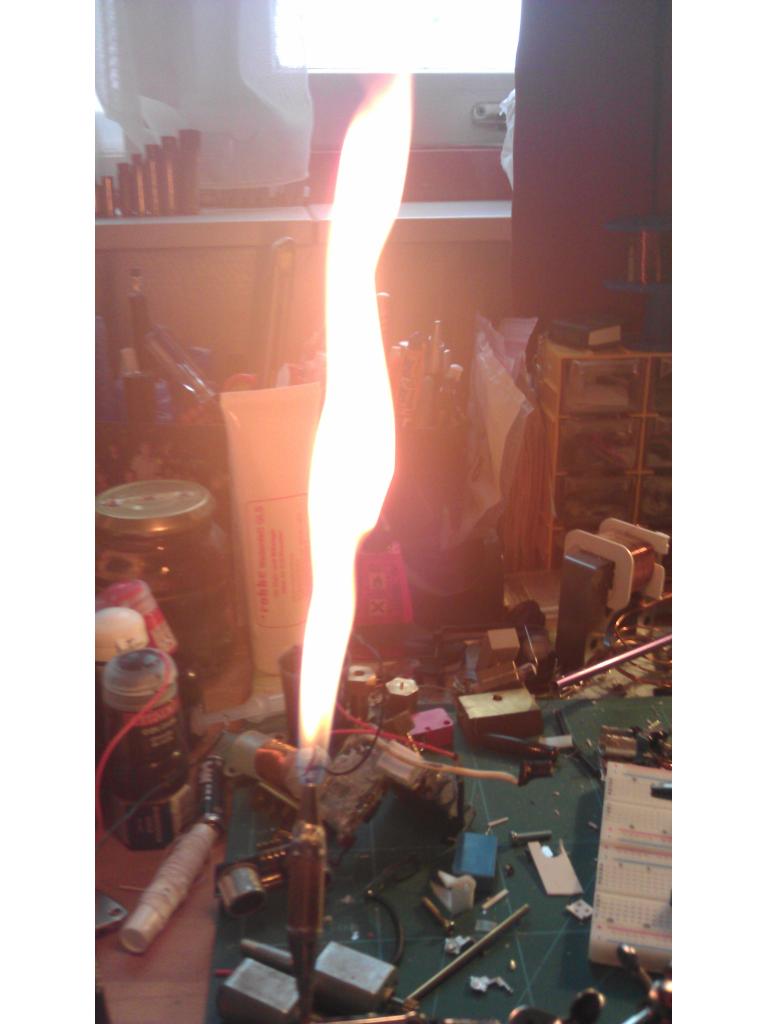
- Flamethrowler (a failed version of a liquid fueled rocket, but it's working if you call it something else)
- coilgun
- railgun
- Lots of other things I can come up with.
By budel0
— Last update
Discover more robots
Edbot's RE3D The ROBOT Has Been Watching Too Much...
RE3D tried to audition for a Superbowl commercial but got rejected and now blames me.
Luis's Using A Mq-? Sensor With The Ezb4 And ARC
Demo video posted-watch the demo and enjoy; creator happy to answer any questions.
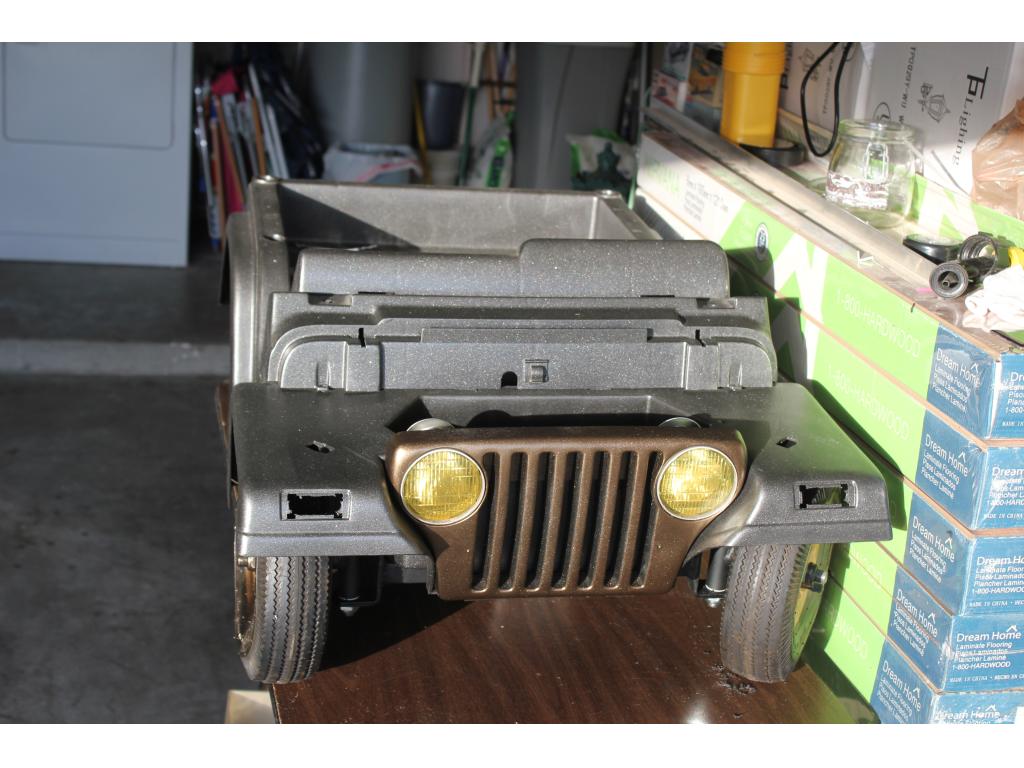
Robotz12248's Pictures Of My Robo Jeep
Robotic Power Wheels jeep platform using EZ-B for control, dual 12V batteries, R/C drive, pan/tilt camera, siren, LEDs...

Thanks guys, I'm doing my best and I try to work on it as often as possible, even though school and my internship are eating all my time...
@Raybot Well if you really want to, I can provide you with all the CAD files and the parts list of everything I used. I might even be able to have some the parts manufactured for you, though that might become (very) expensive. Mine where made at my internship (www.tristrambudel.com) and some I made myself(got all the blueprints, or I can make them).
@Niek Yea, I'm a mechanical engineering student, currently in my 3rd year at the Hogeschool van Amsterdam(HvA).
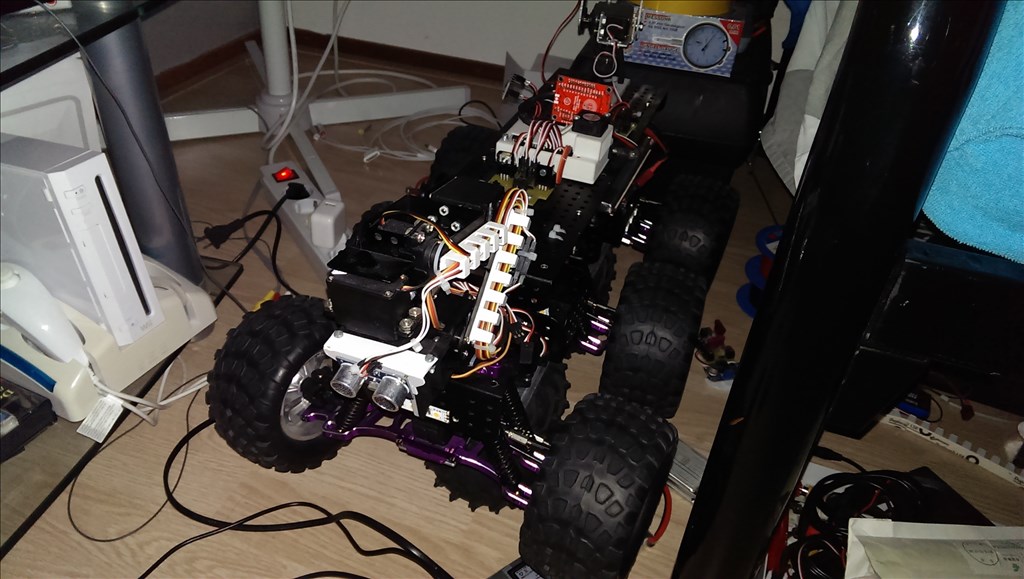
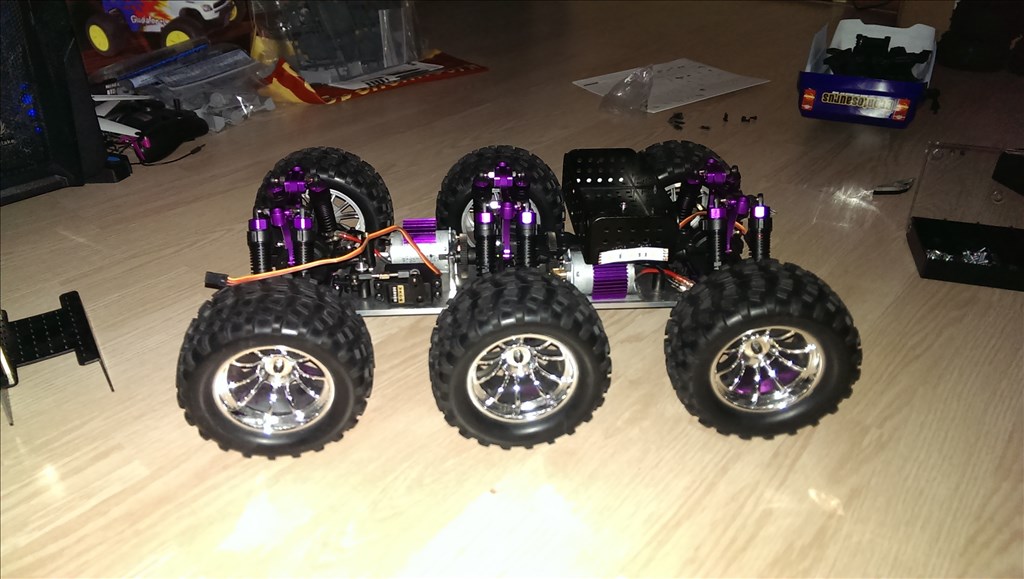
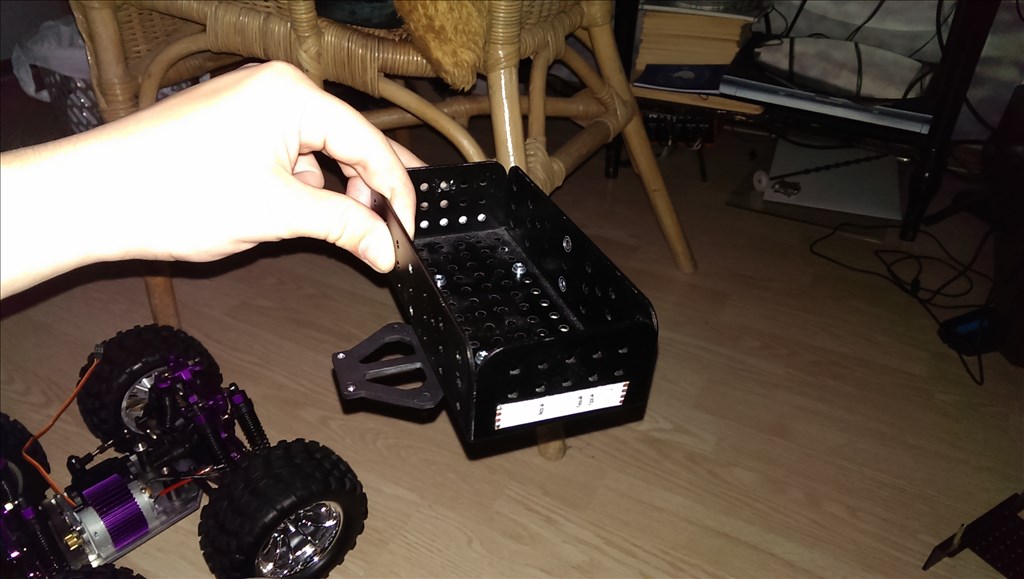
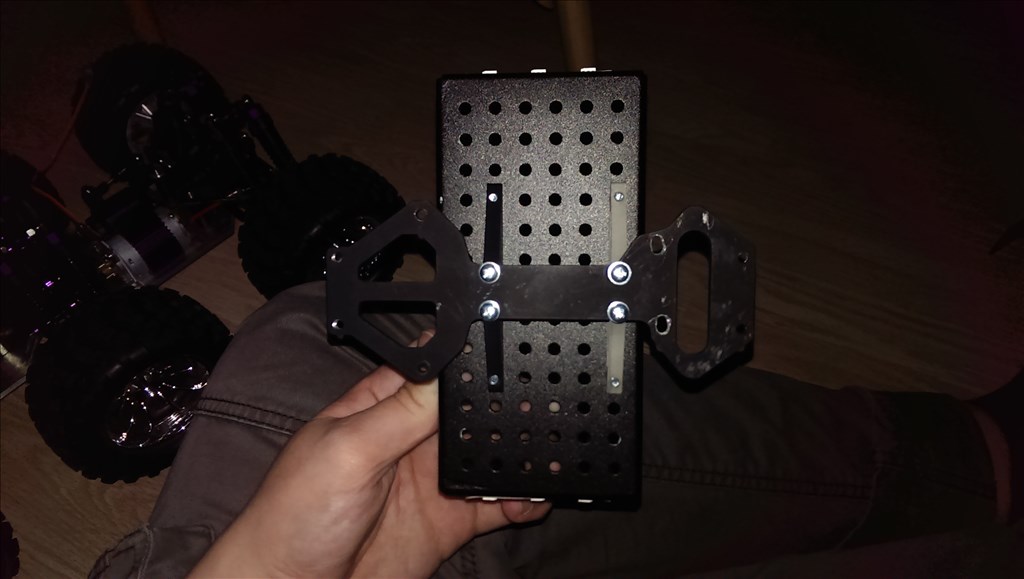
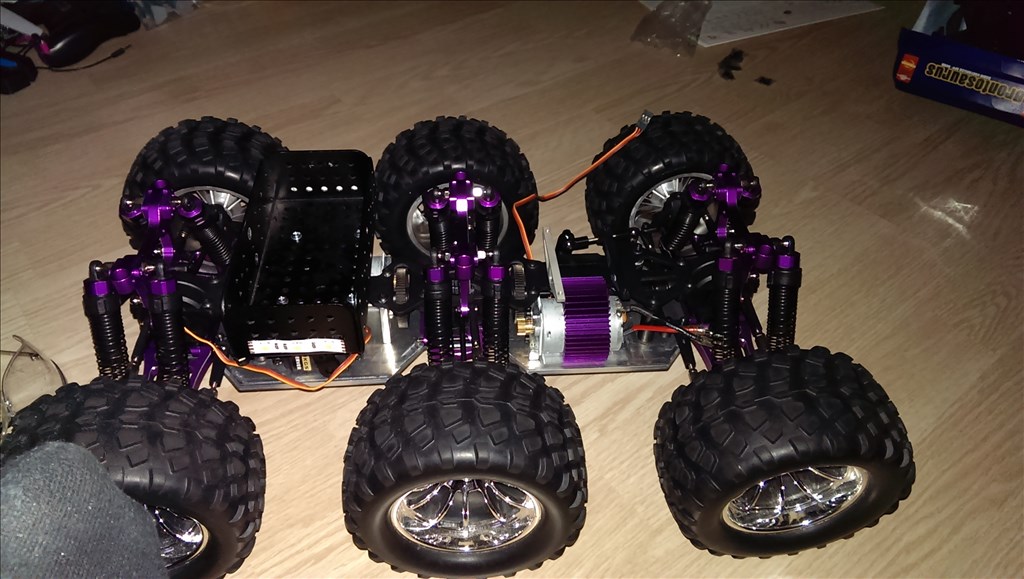
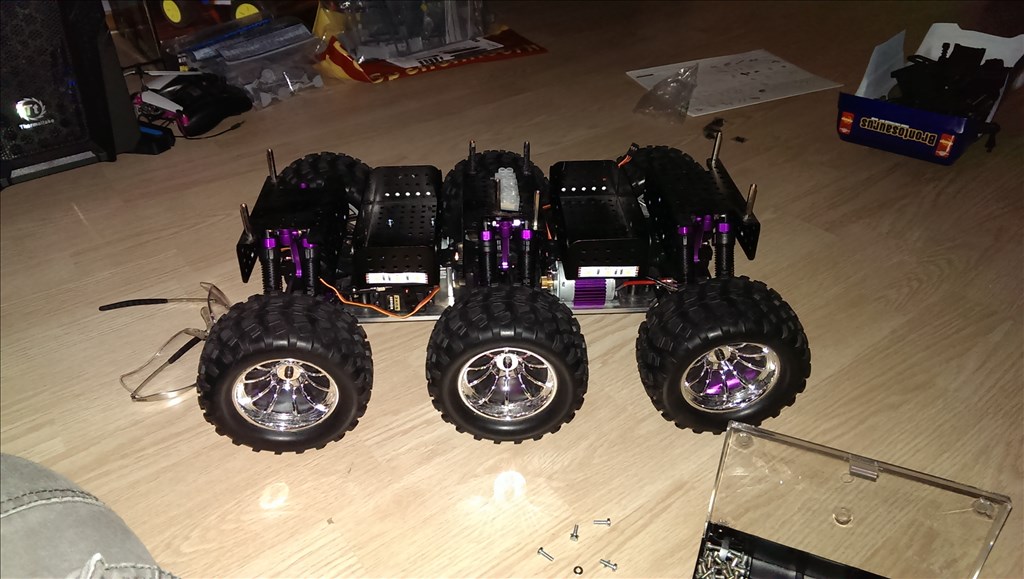
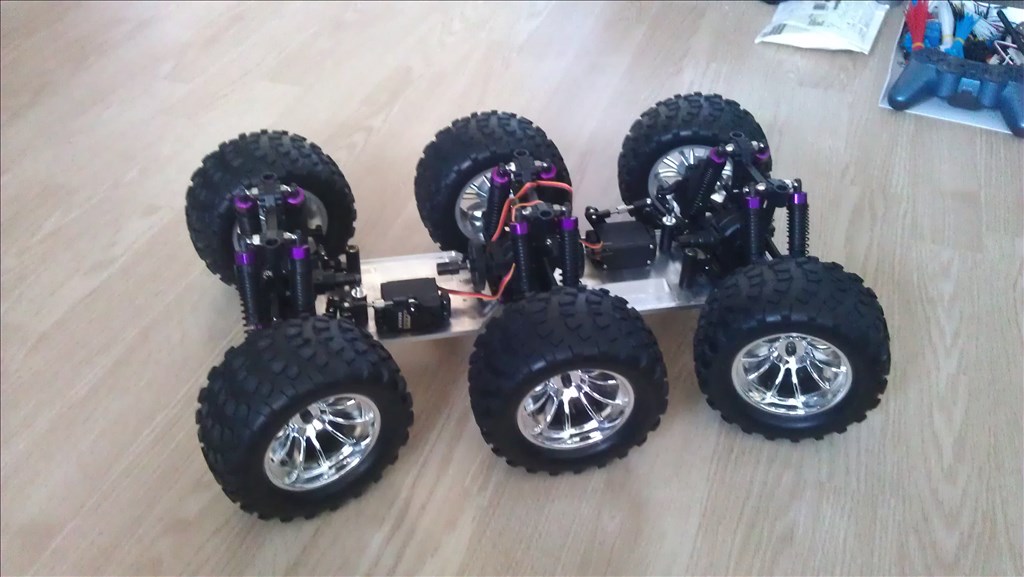
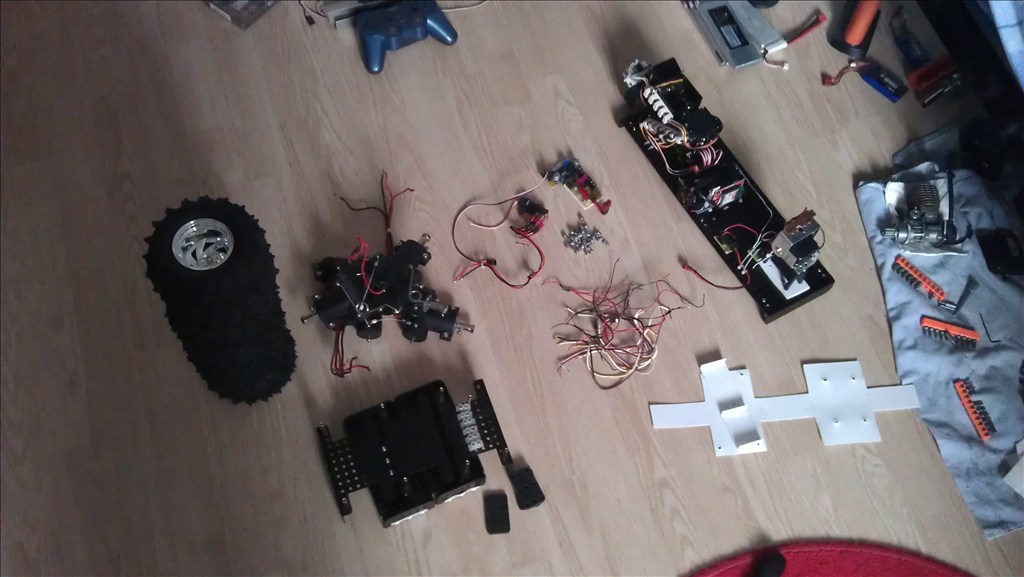
Here's another update,
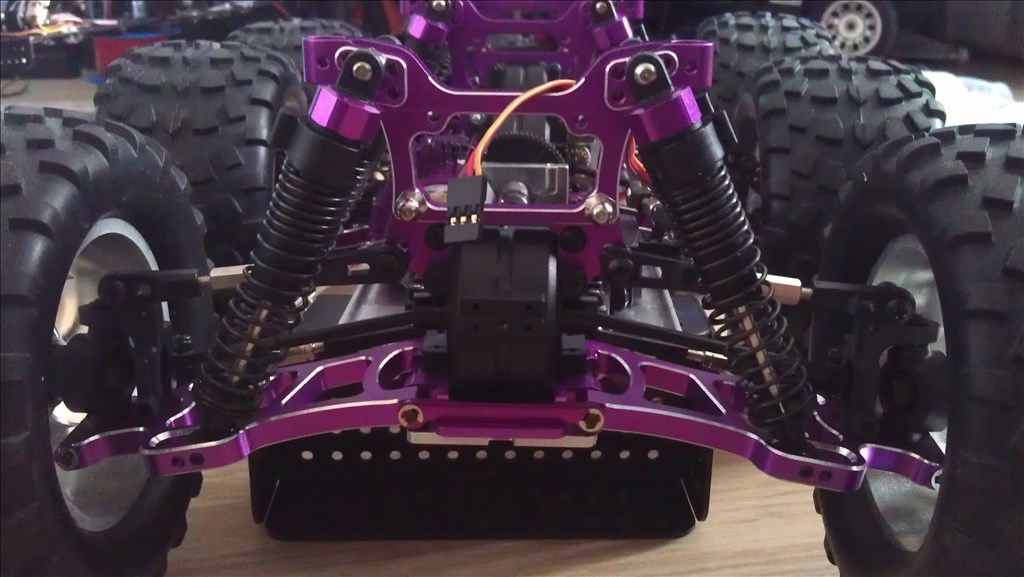
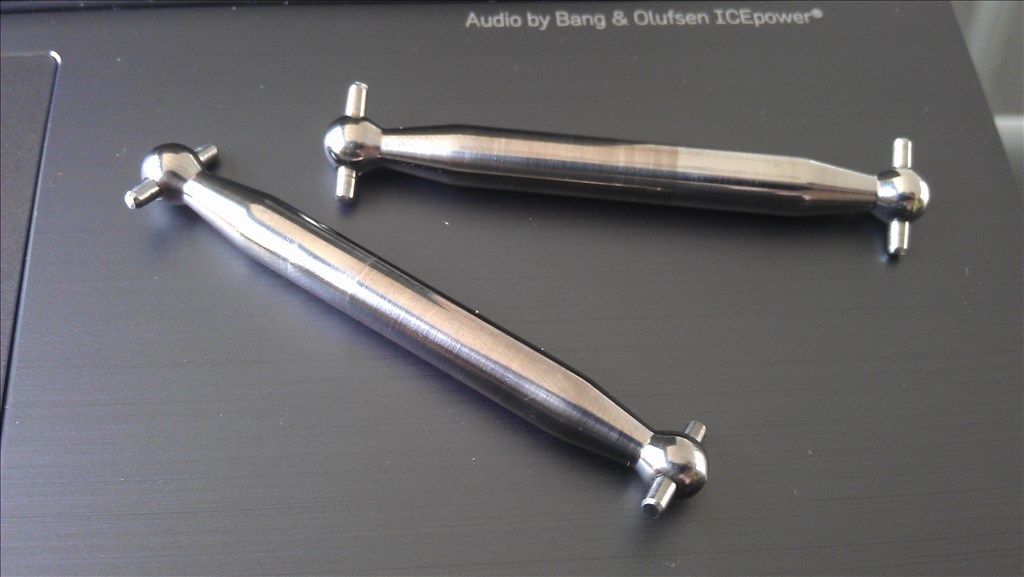
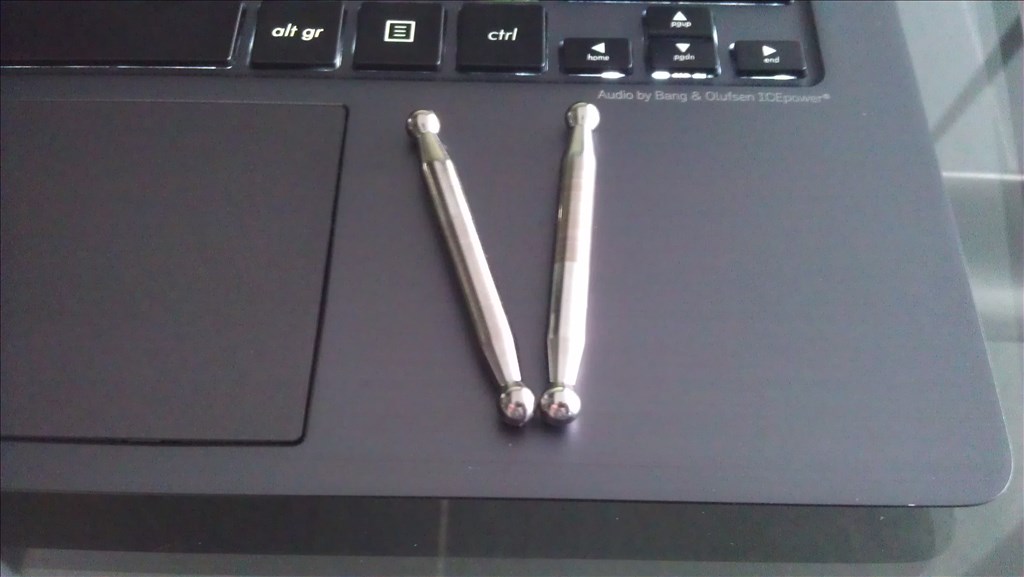
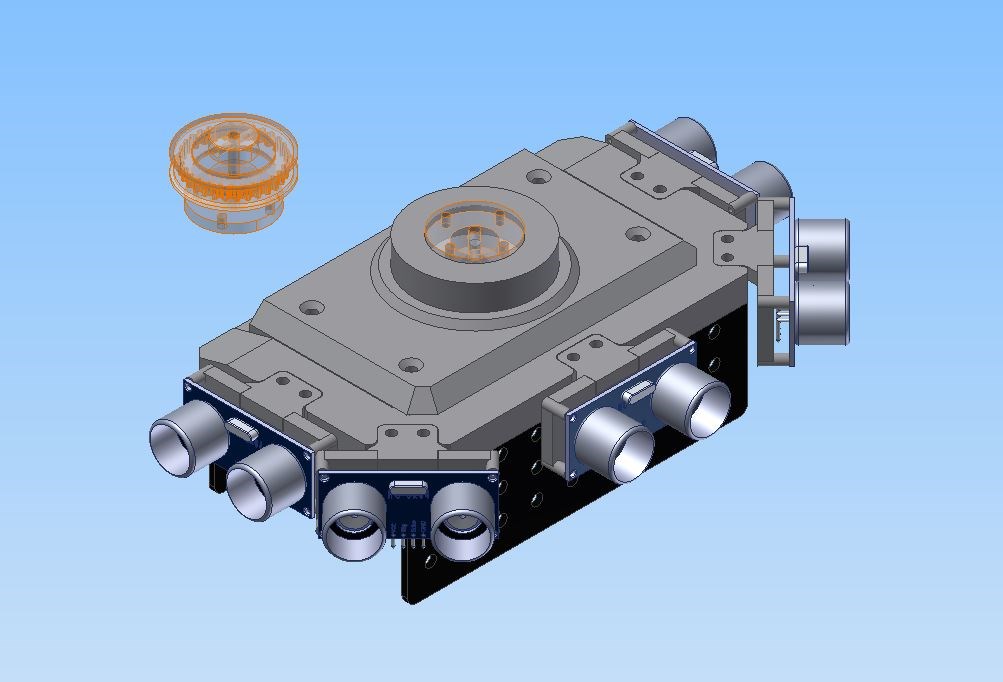
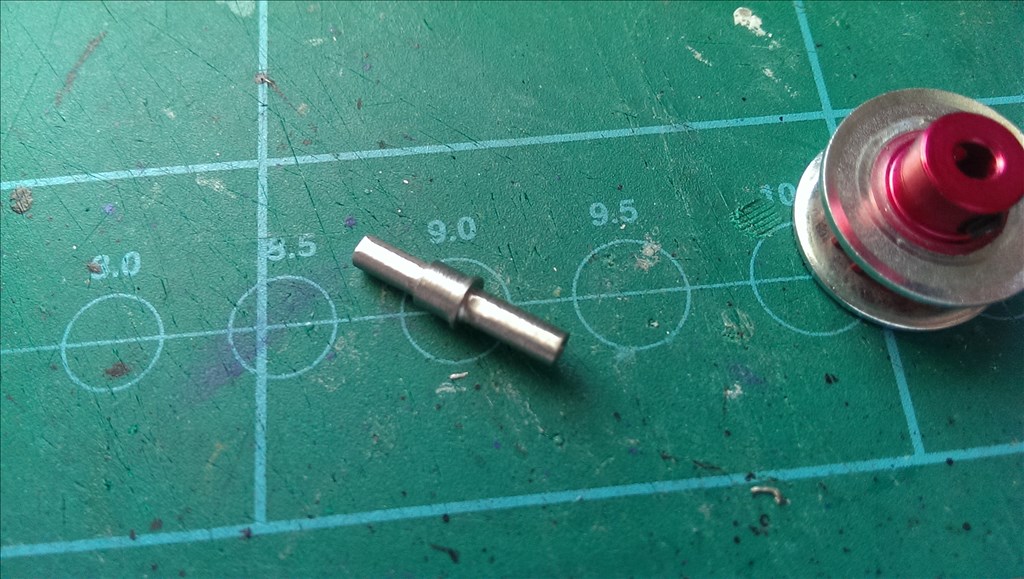
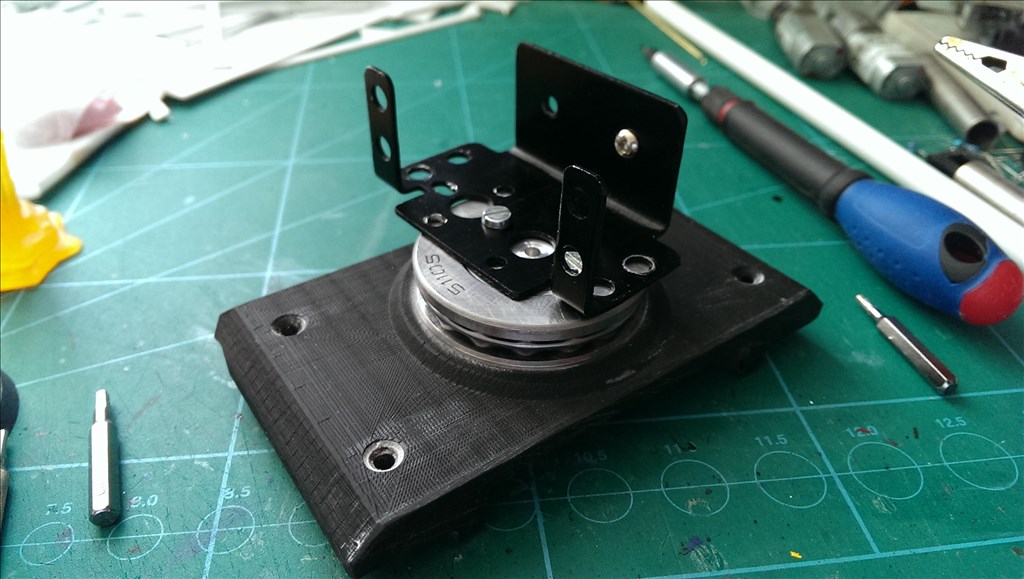
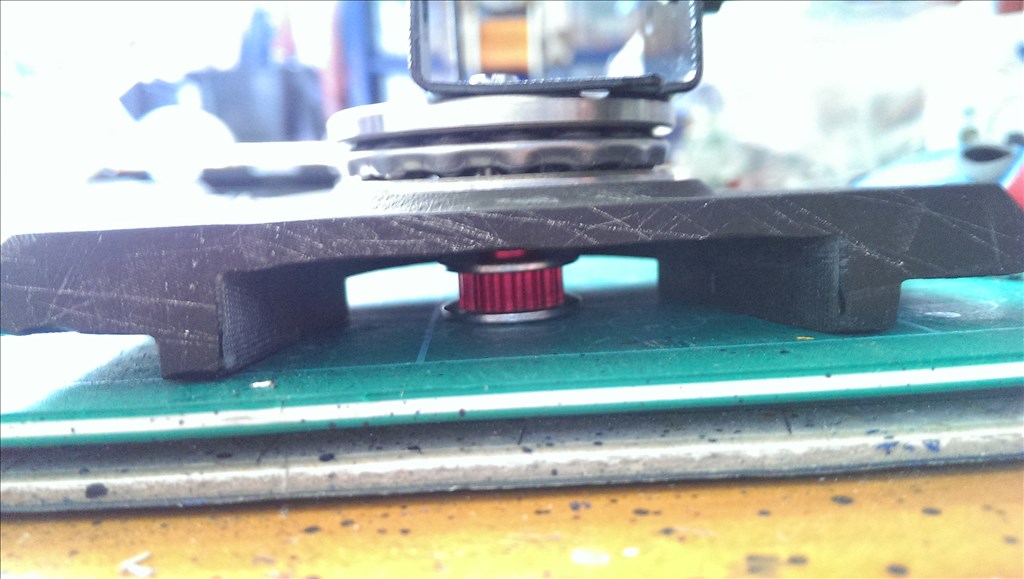
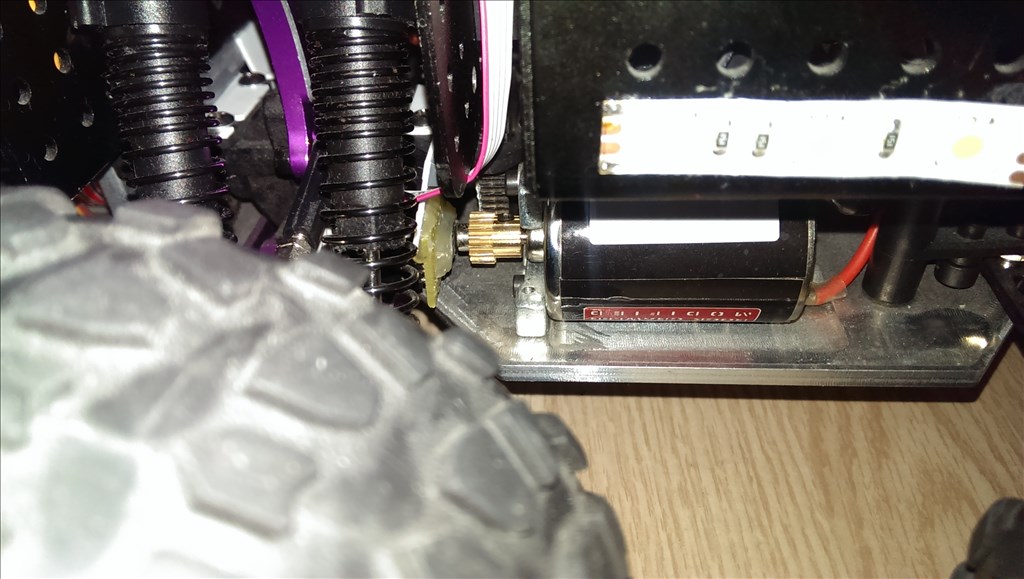
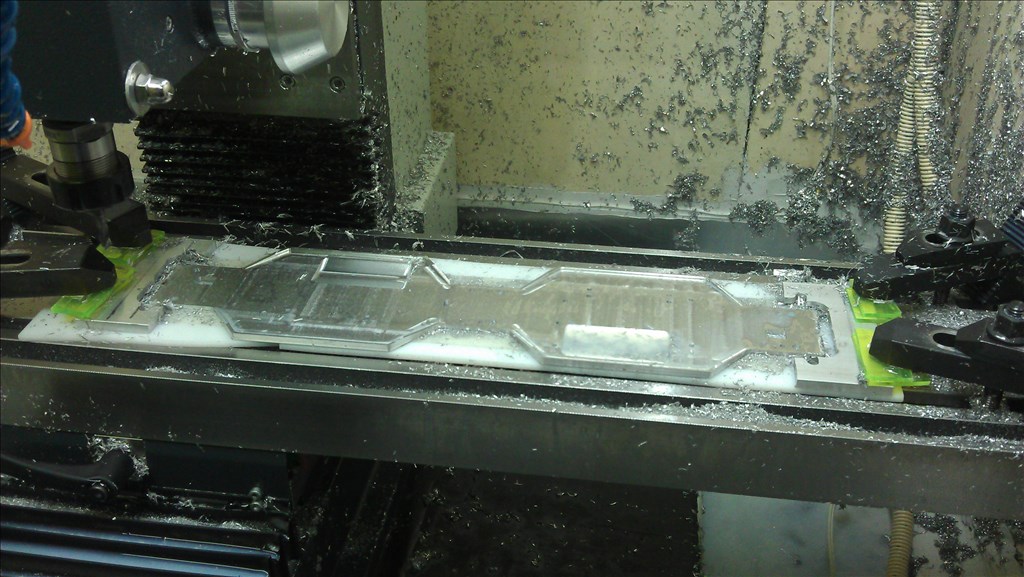
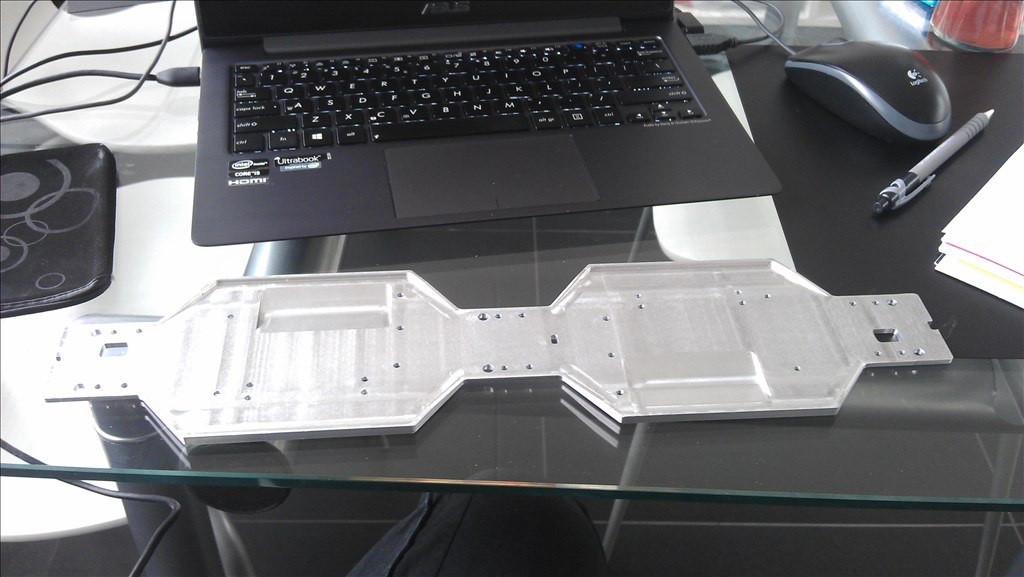
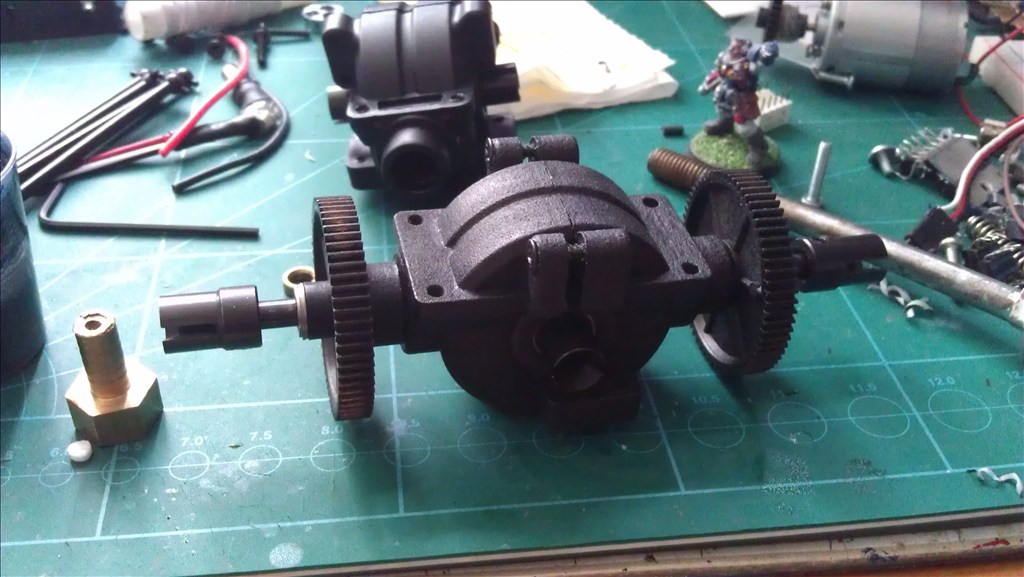
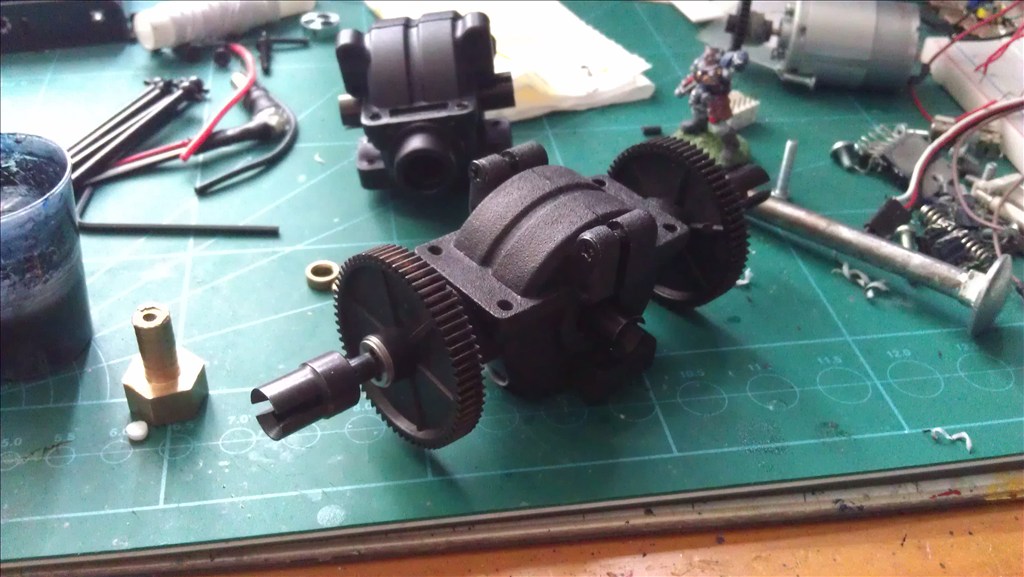
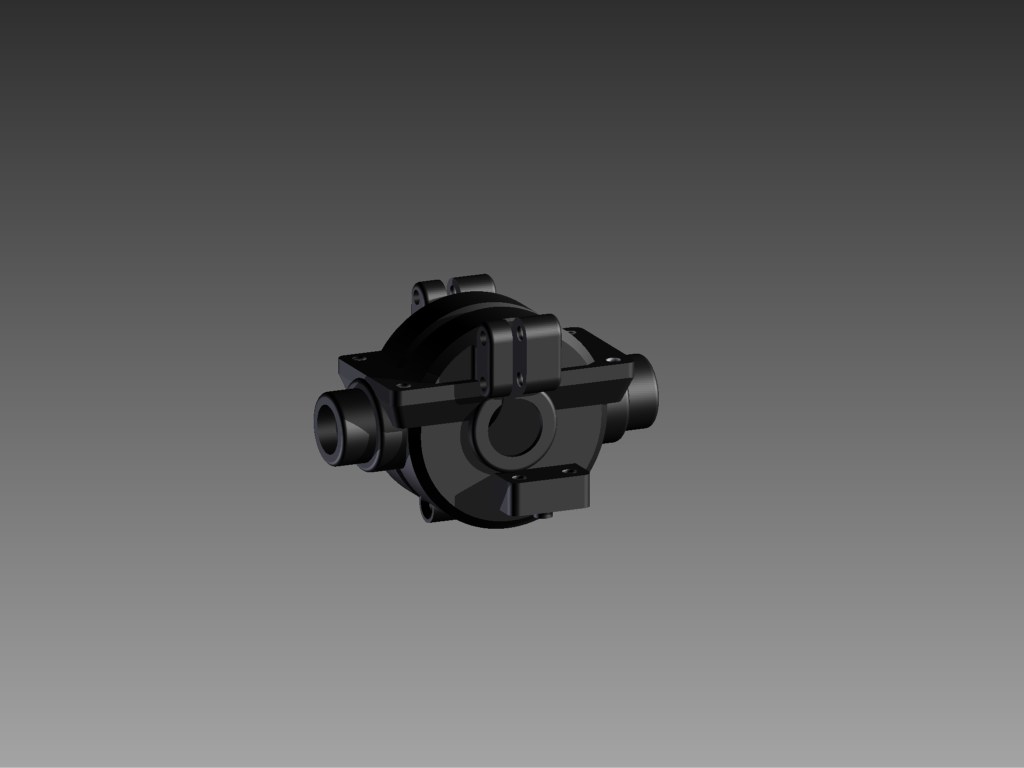
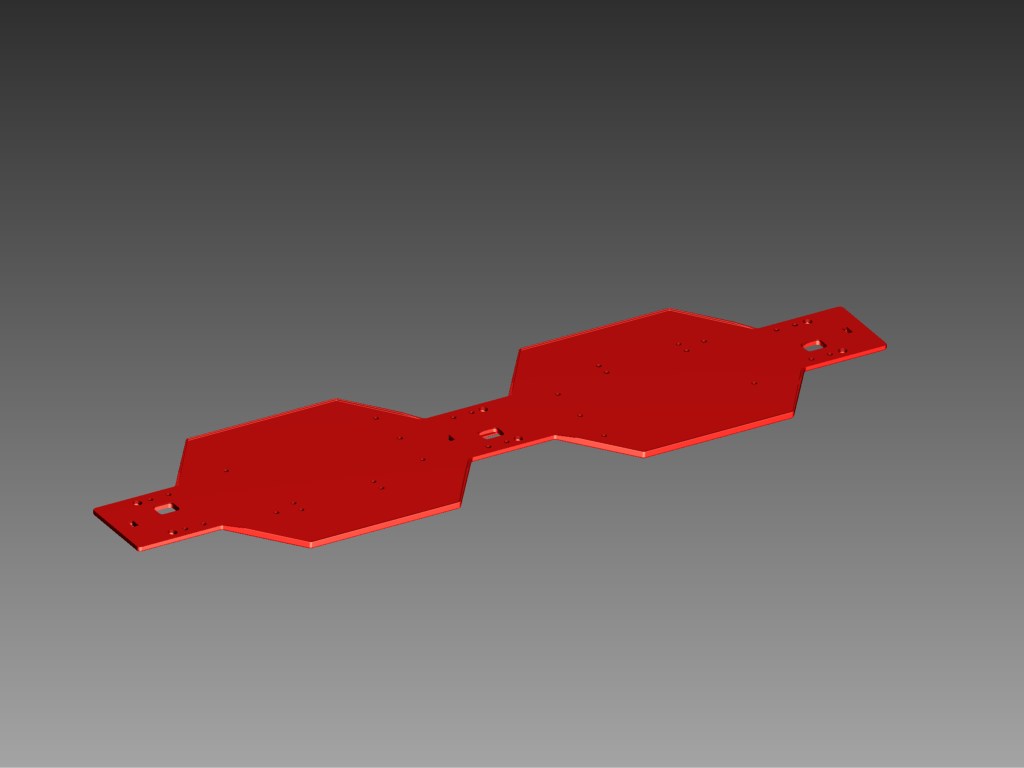
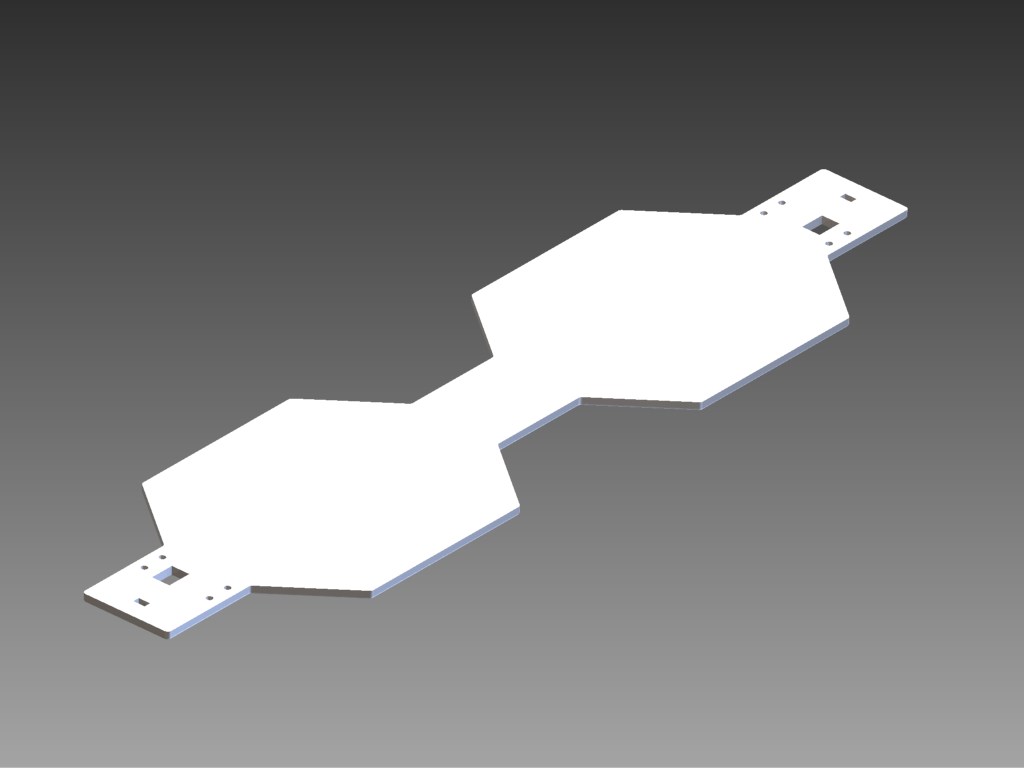
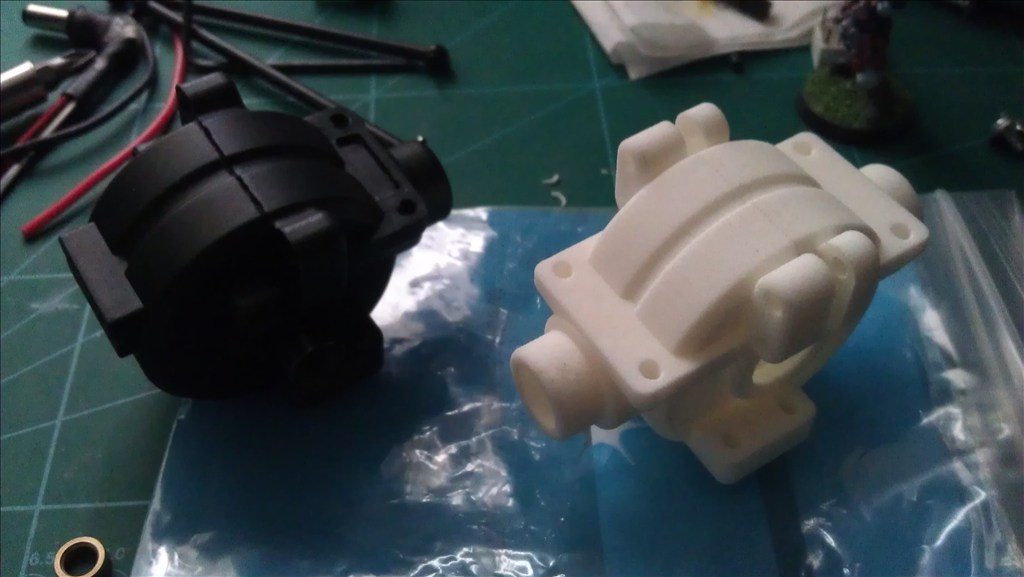
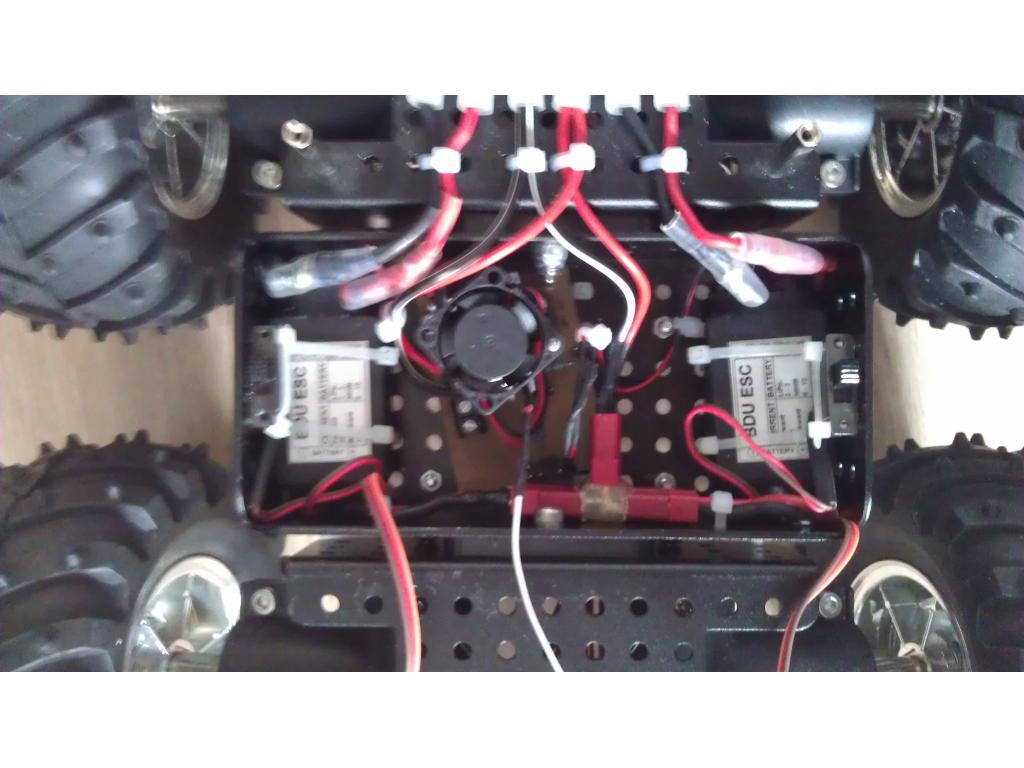
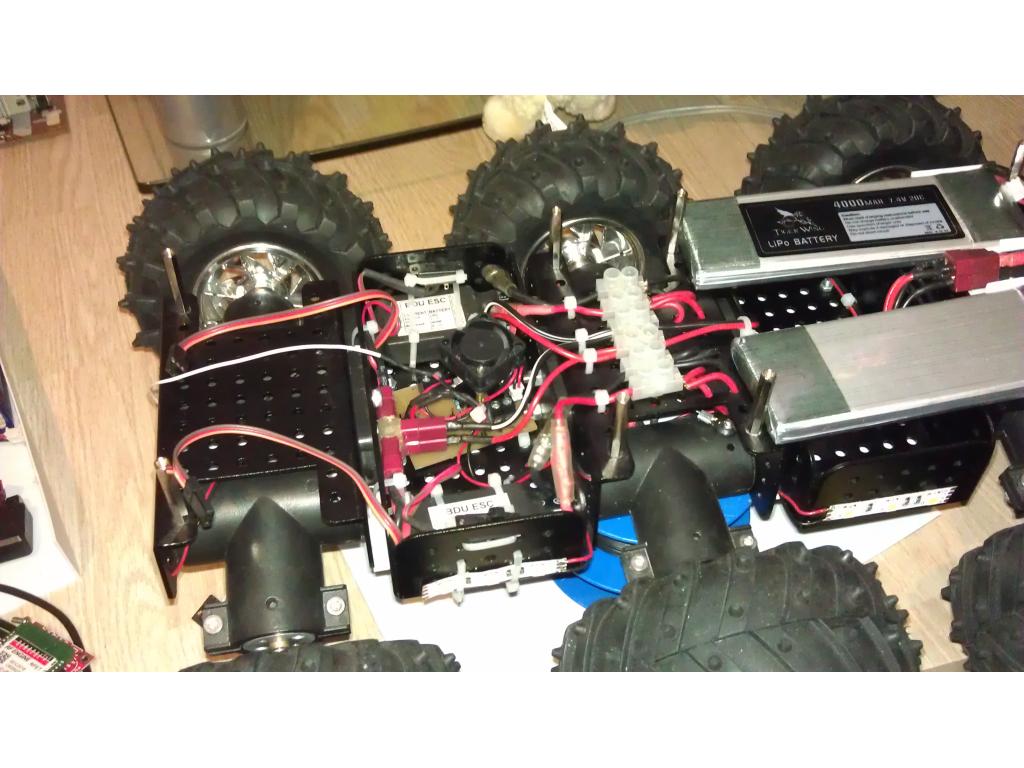
After I had almost completely finished the new drive system I noticed that some of the plastic parts of of my suspension where a bit too flexible. So I figured lets exchange them with aluminum parts.
The new parts include:
On the ToDo List:
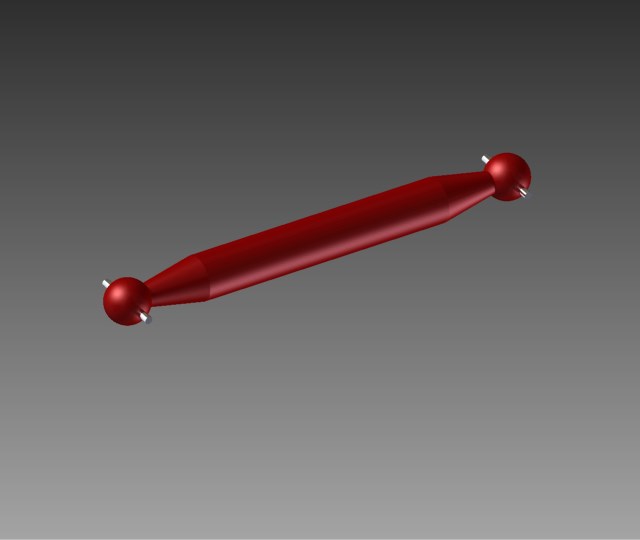
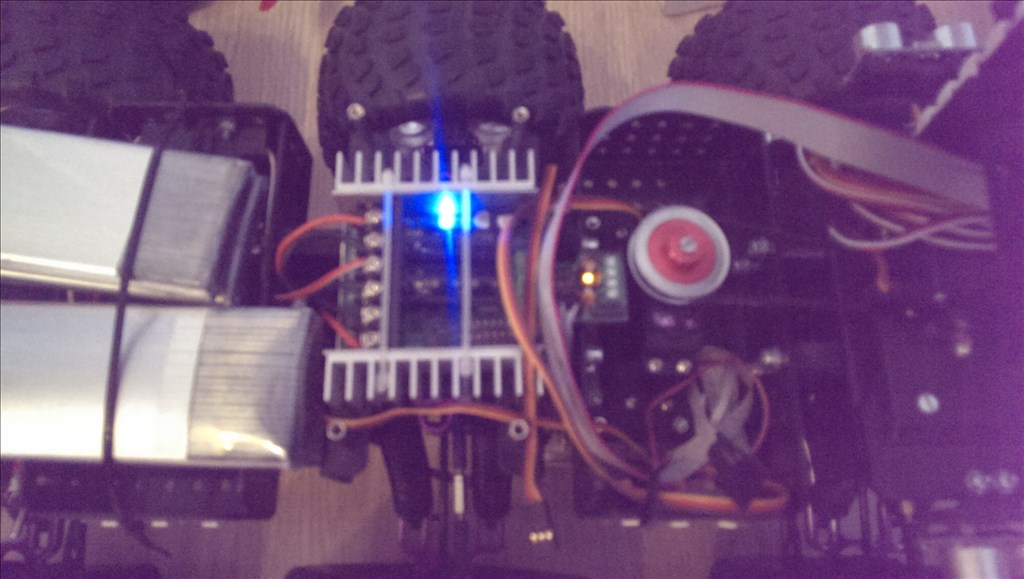
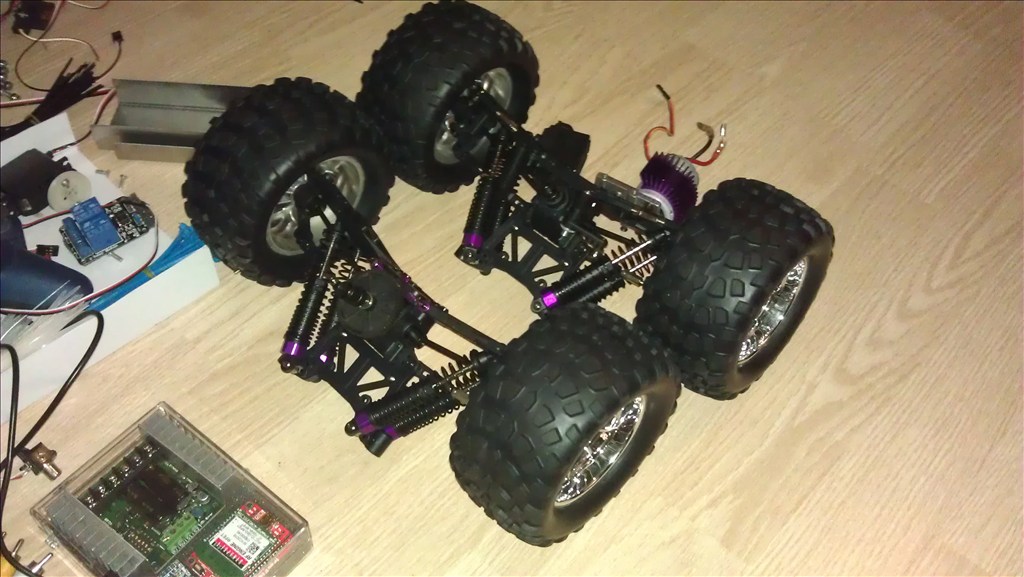
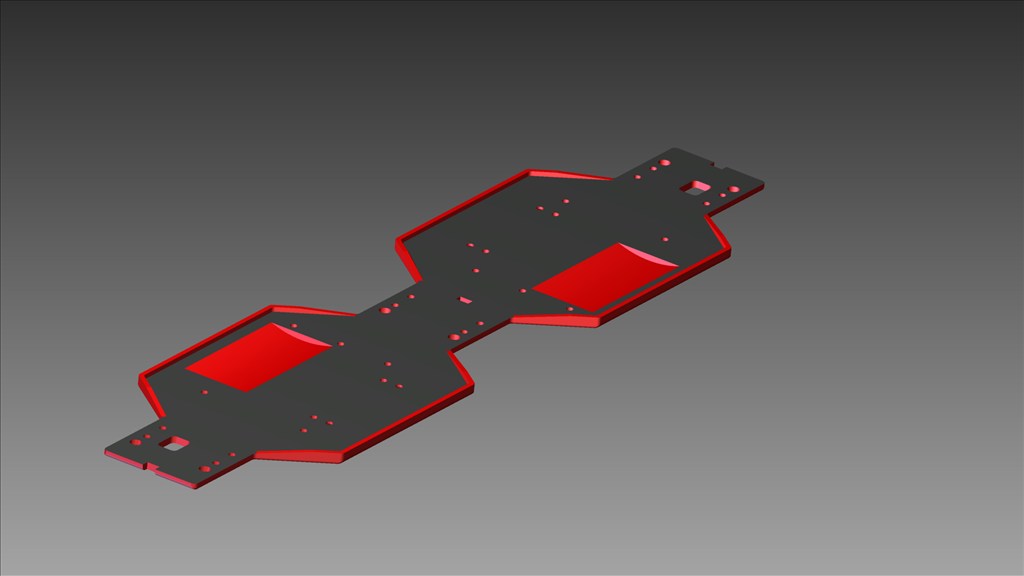
Another update: Approaching the end of the upgrade of the propulsion system used in this project. Today I had the time to install some new parts, that I designed:
Only a few (2 new ones) more parts and then I'm finished with this part of the project. So... I'm already thinking about new things to desgin and add, maybe a brushless gimbal, just because they're awesome and I'll have smooth video once I've added a wireless camera. And I'm thinking about adding a rotation pad for the arm, also thinking about a stock model of the arm with another EZ-b and potmeters so if you'd change the position of the stock model, the arm would copy it. But I'll keep thinking about it, in 1 or 2 weeks I'm starting an rc tricopter build as "mini" project (no EZ-b involved, maybe in the future) based on the Rotor Bones Batbone from FliteTest.
To be continued.
Sweet !
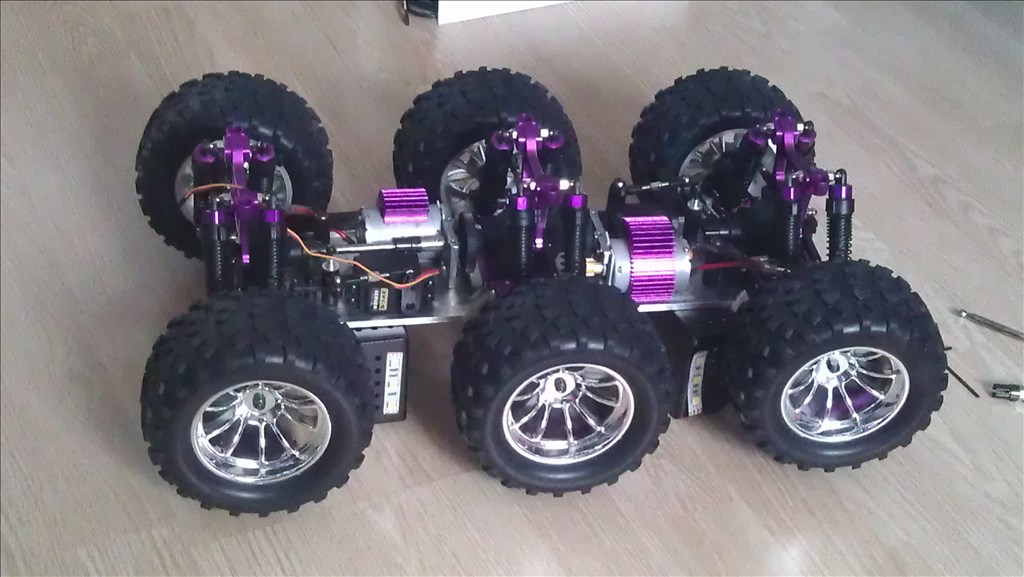
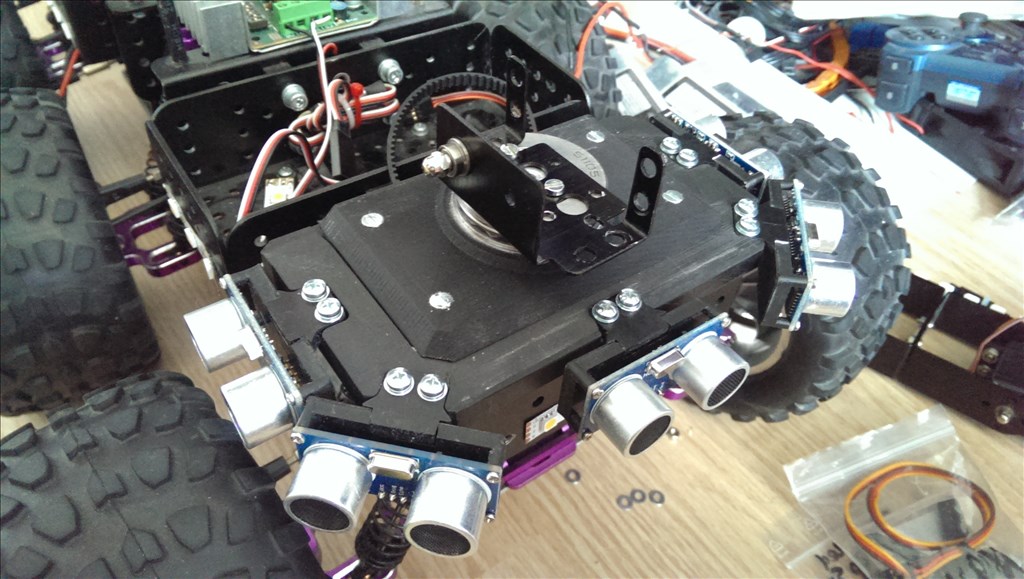
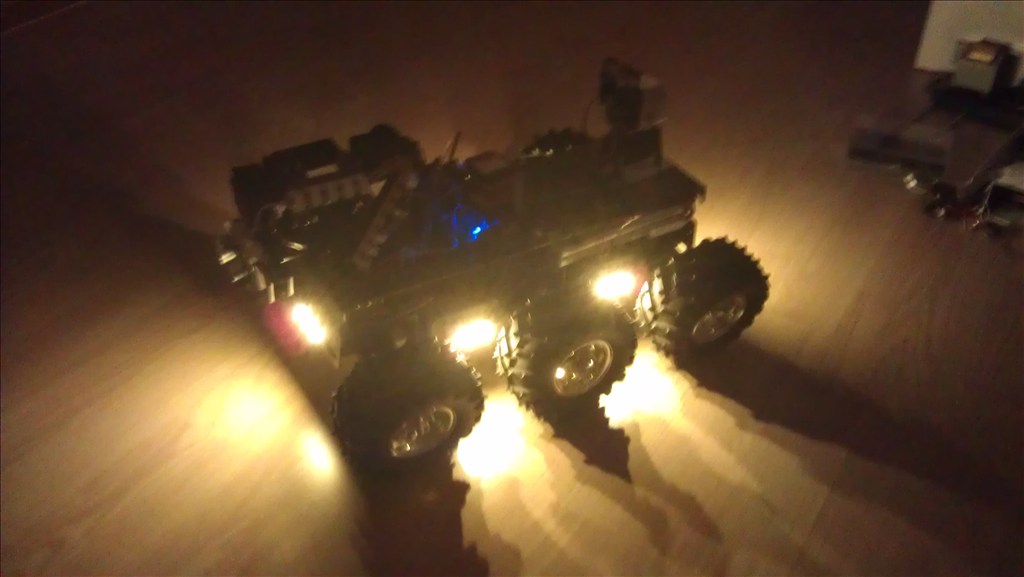
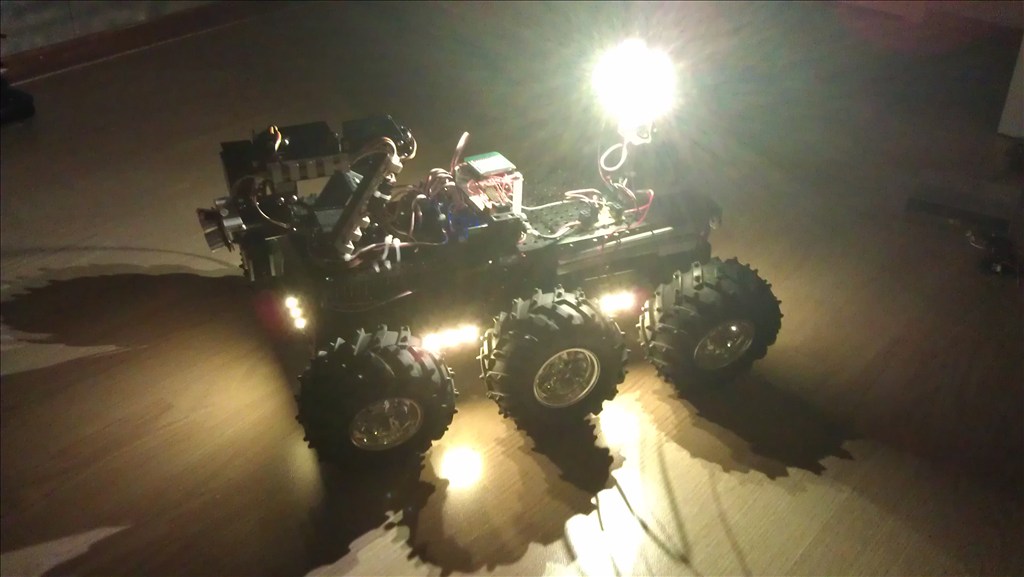
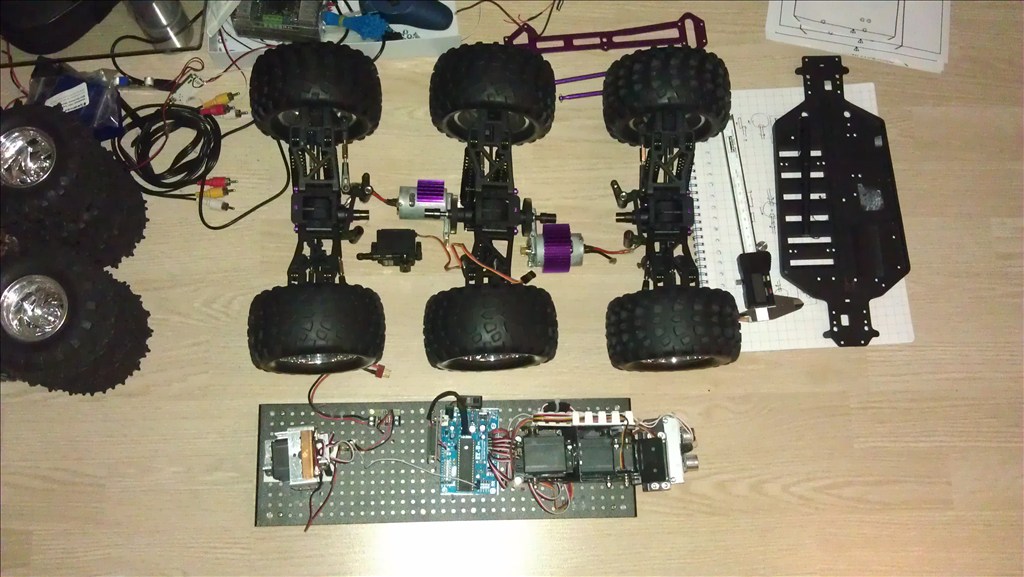
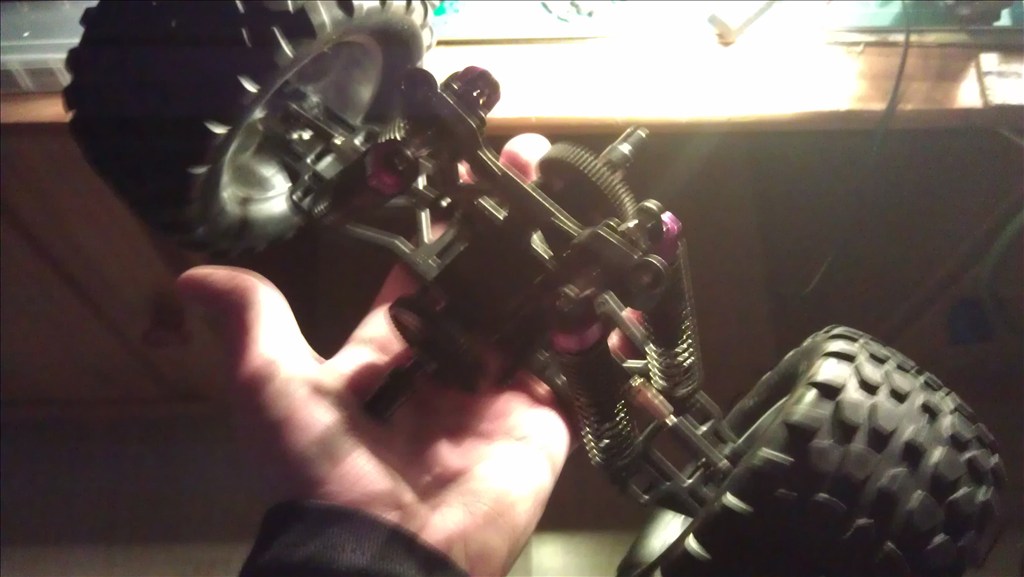
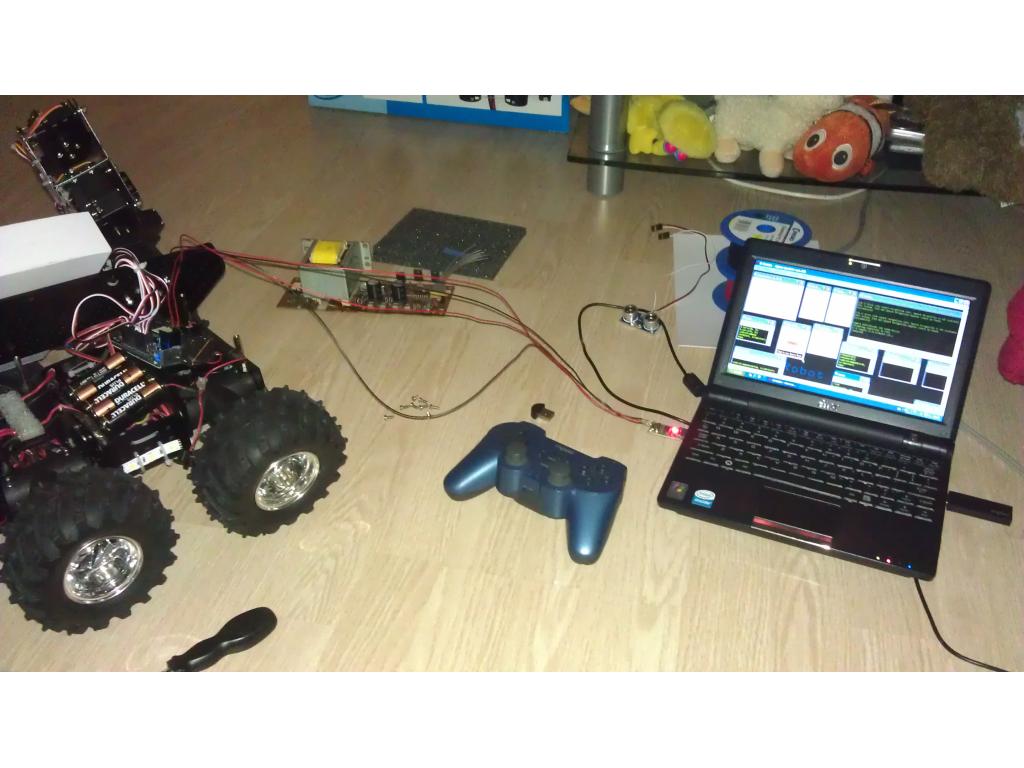
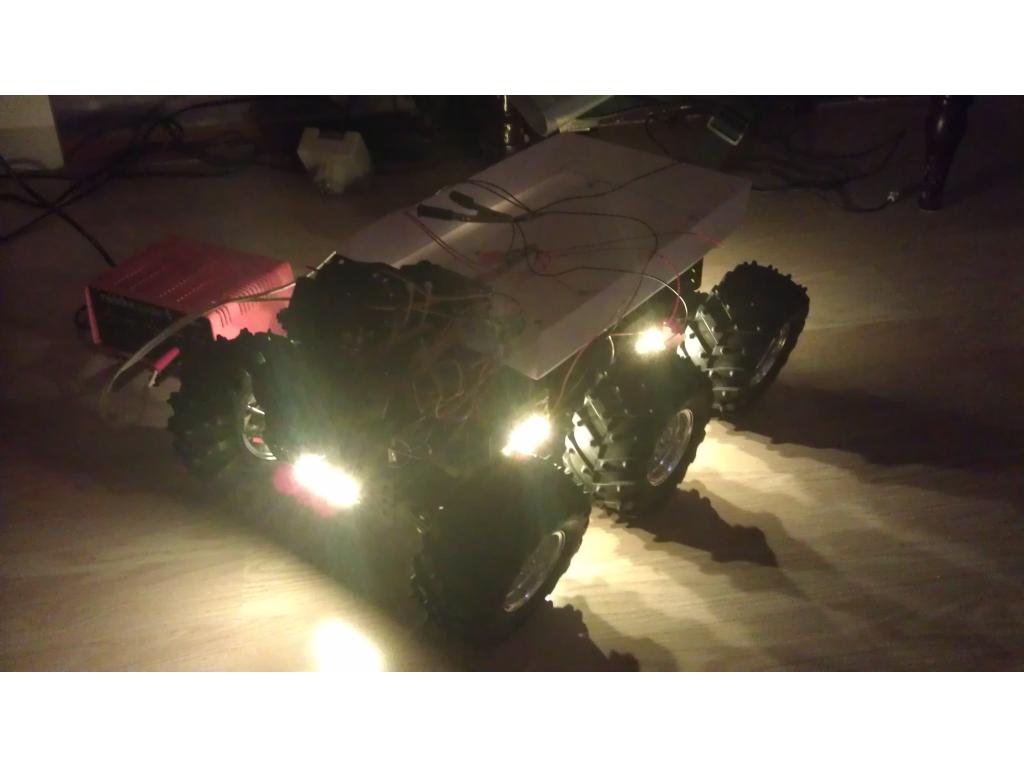
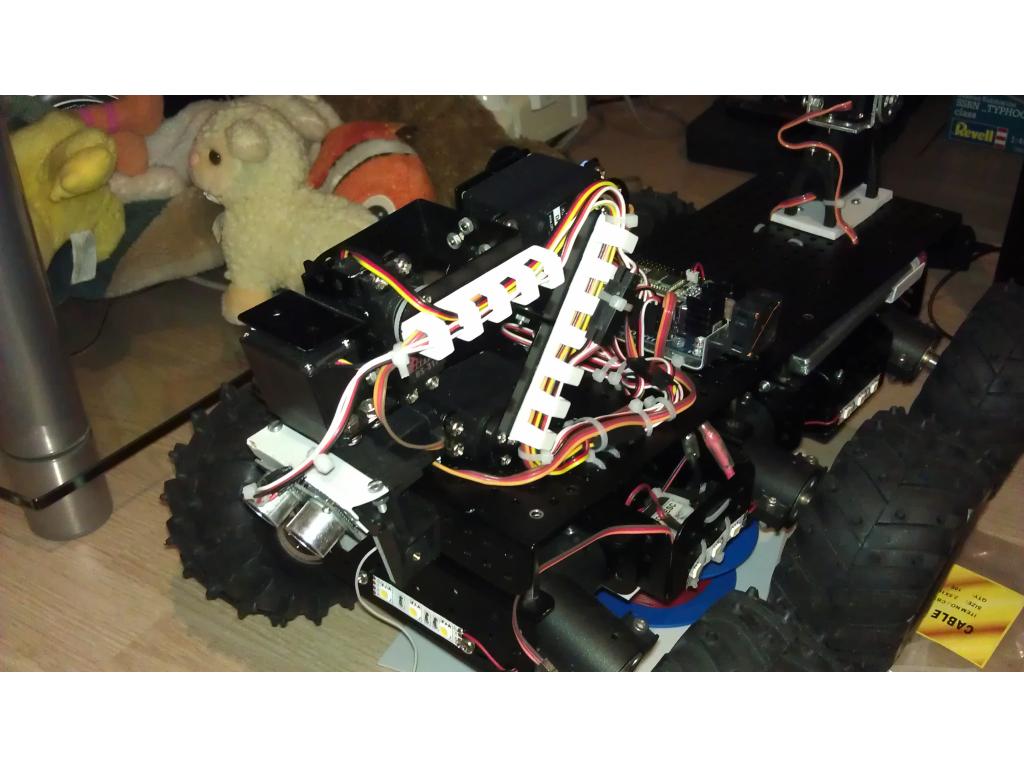
It has been a while since my last update. But the project hasn't stopped, it has only been on hold for a while. Since my last update I've made a lot of changes to the R.O.O.S.T.E.R. and most of them aren't visible.
It now looks like:
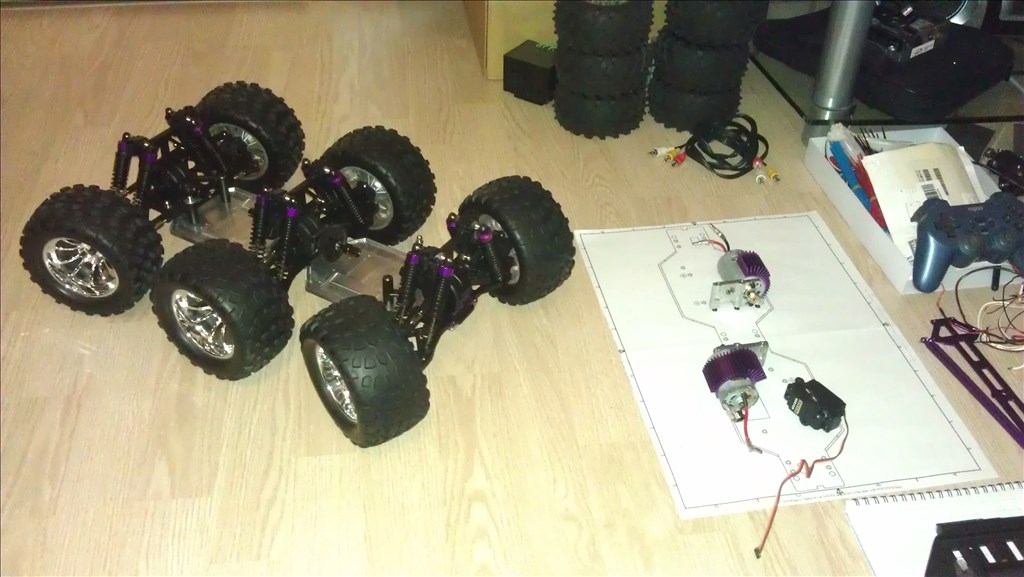
The entire drive system upgrade has been succesful. After a long time of testing and tuning, everything works, from the axles to the gearboxes and front and aft stearing.
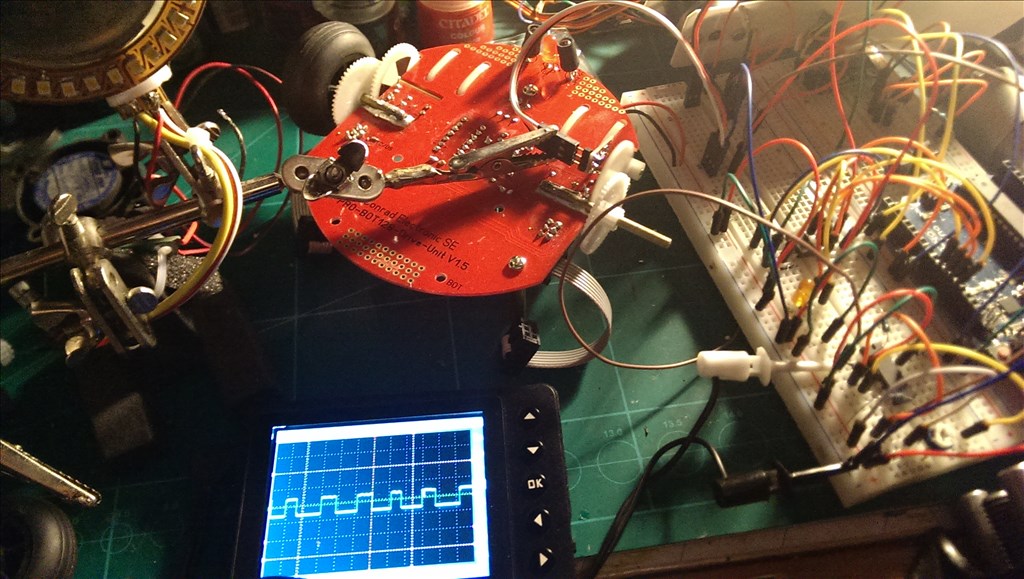
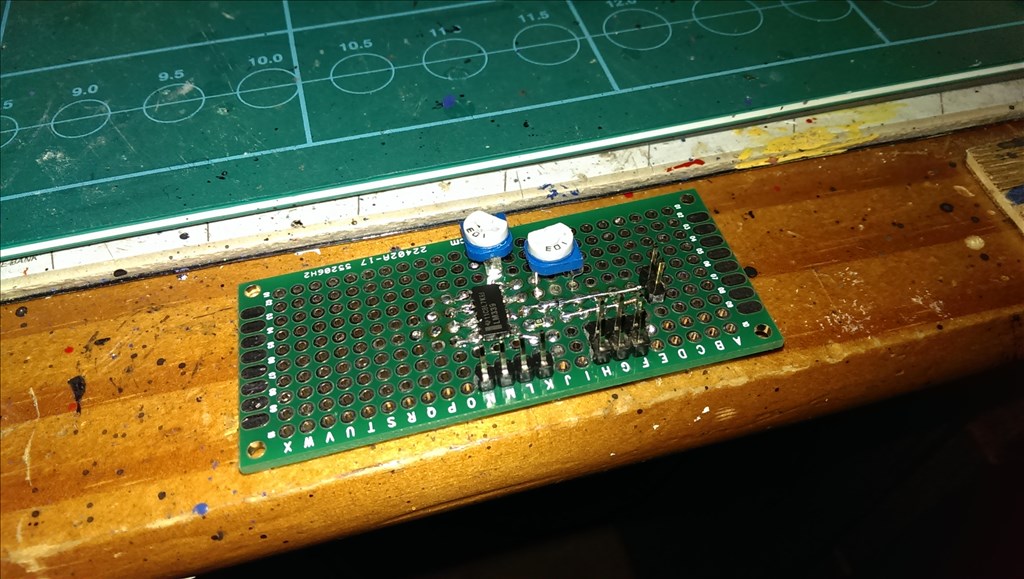
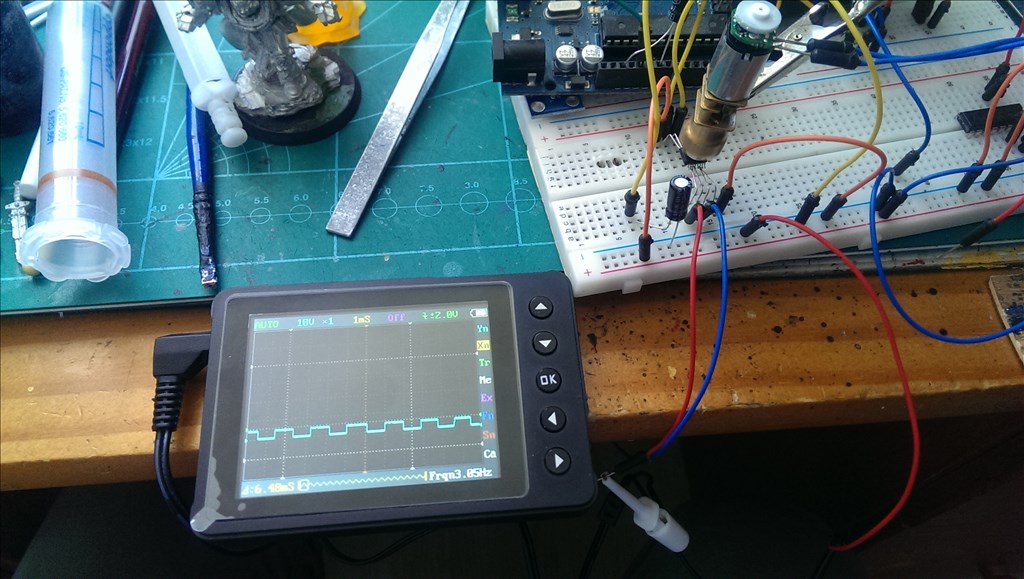
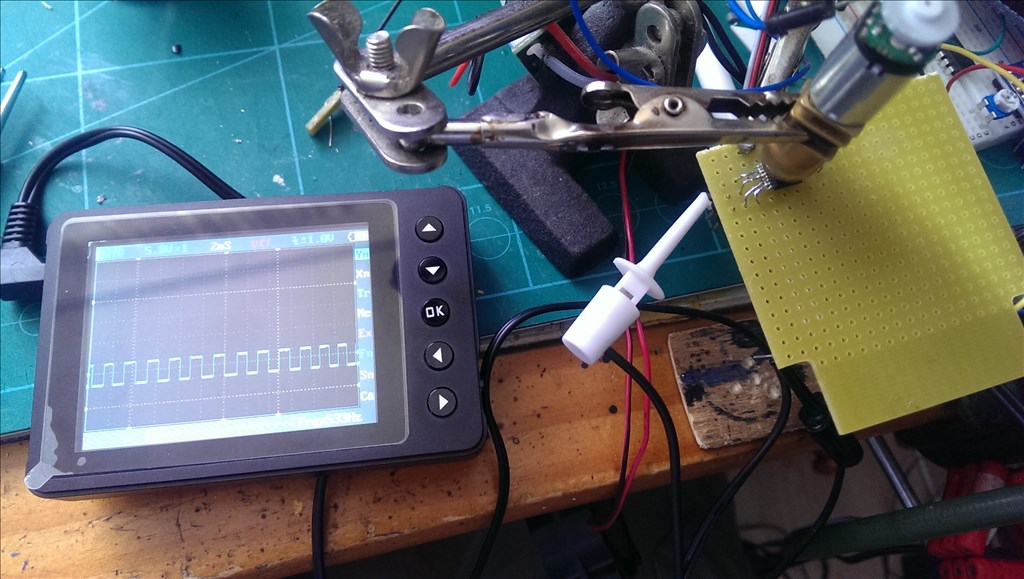
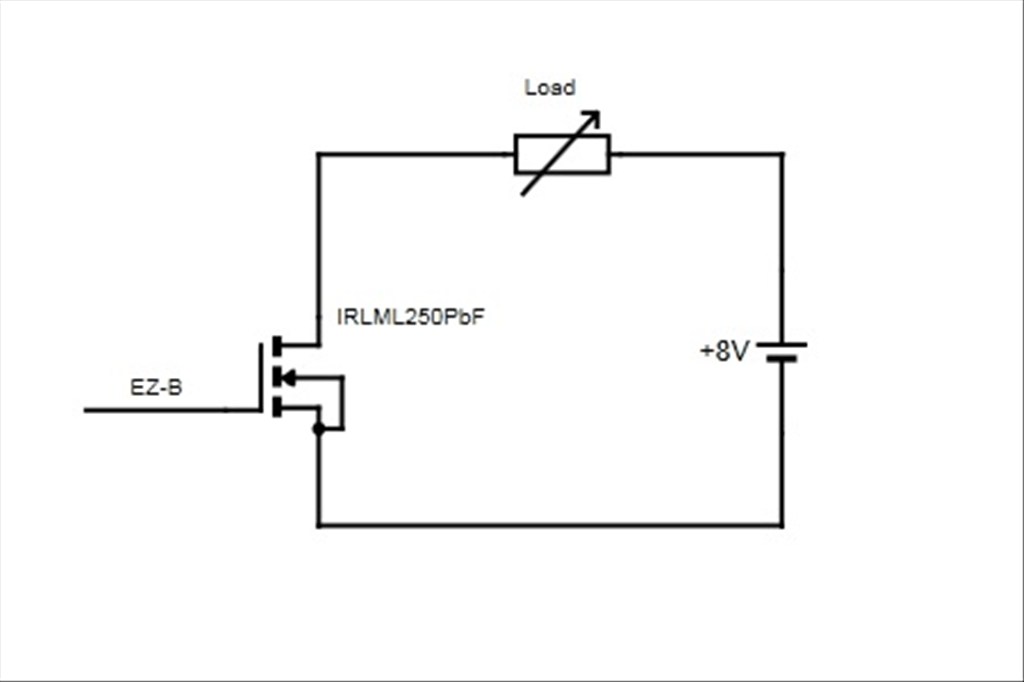
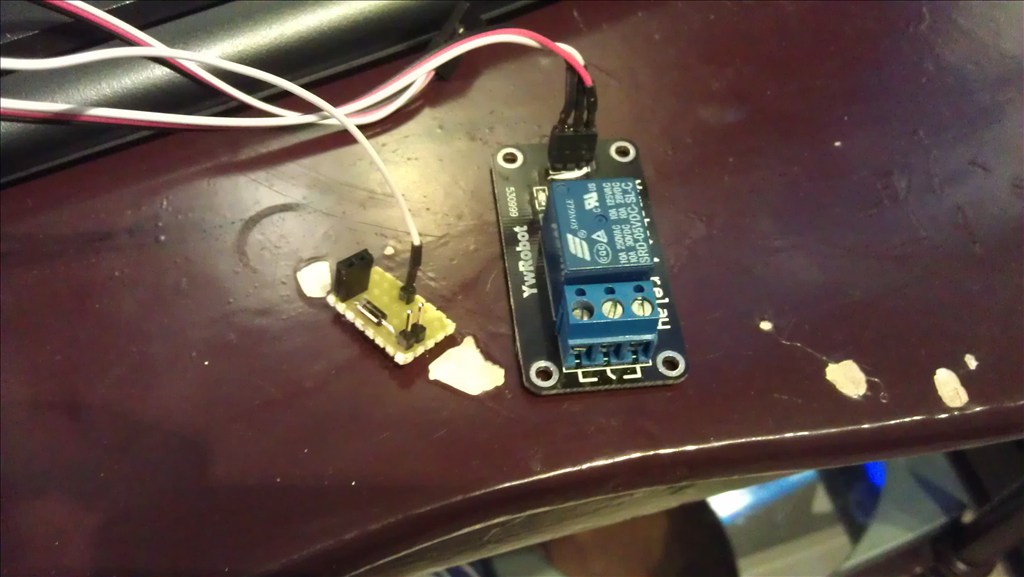
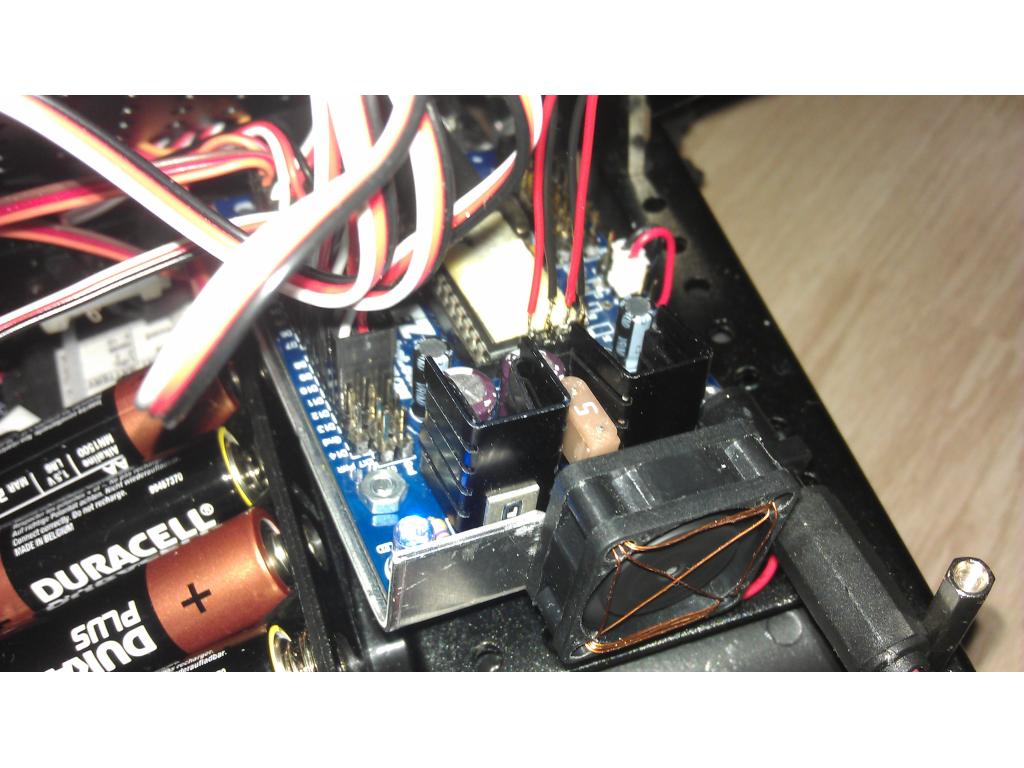
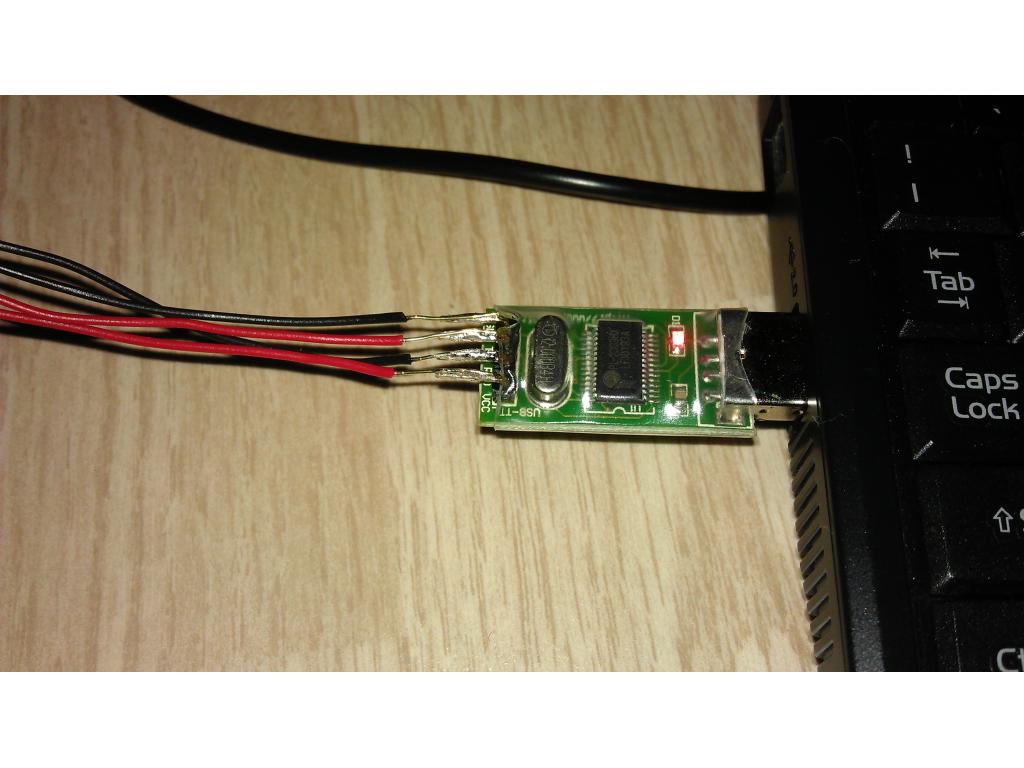
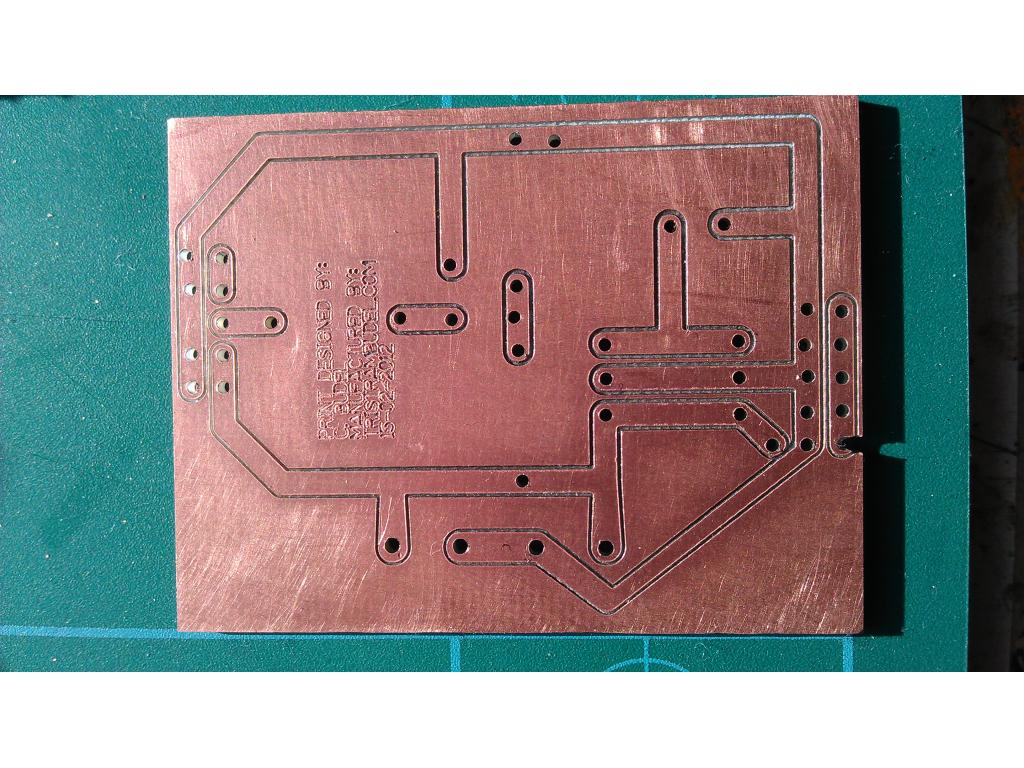
So what am I now working on? Well, some of you might know that I have bought a Kangaroo X2, to controll the sabertooth that drives my motors. To use a Kangaroo X2 you need either analog sensors or quadrature encoders as feedback. For the last few days I've been building a circuit to condition the signals coming from 4 IR reflectance sensors.
I started of with building the circuit on my breadboard and testing it.
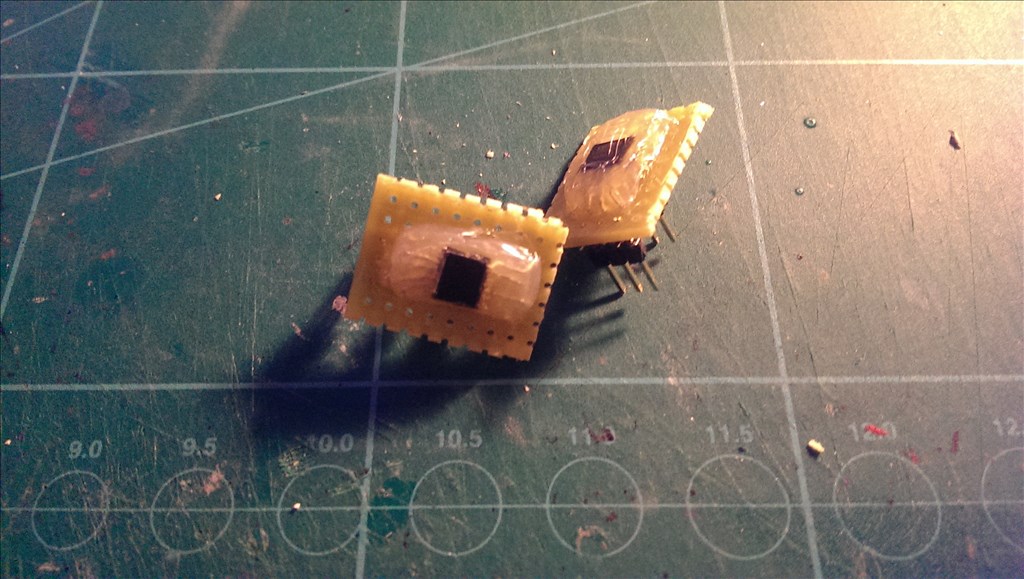
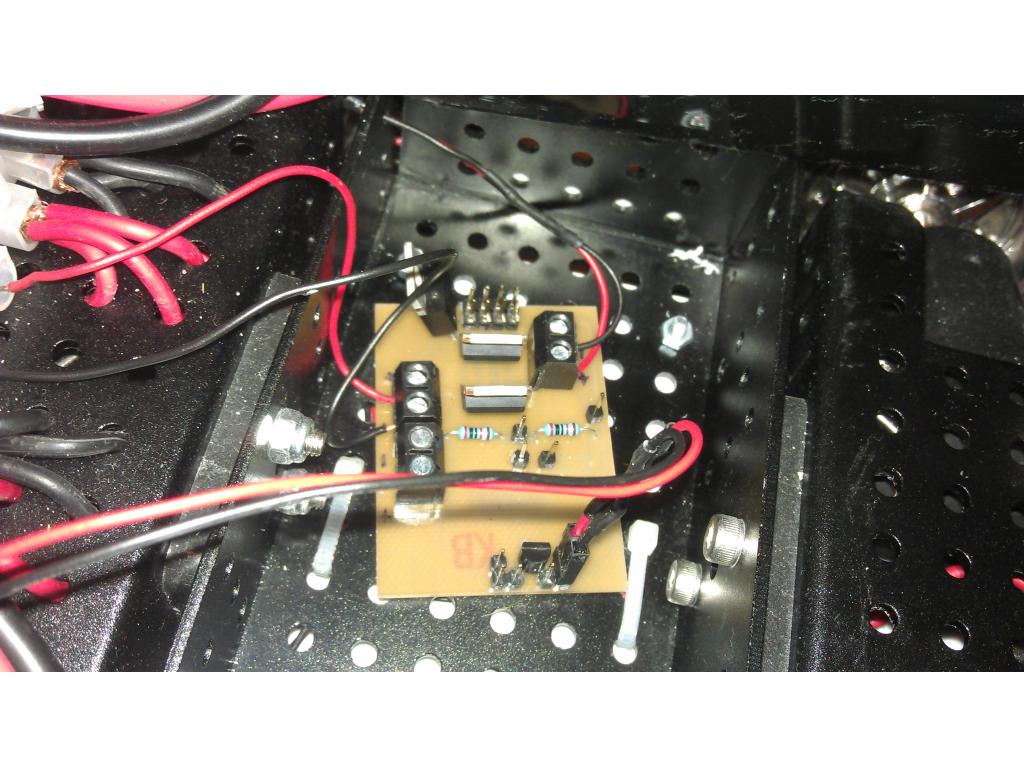
It all seems to be working as planned, so today I started with stuffing it in to something smaller. And after some midnight soldering it looks like
So far its only half done. I still need to add the components of the last 2 channels. But I was proud enough that I thought I'd show it before it's done. Never had any education about this, just the internetz.
I'm going to try to finish it tomorrow or somewhere next week, so I can test it with the Kangaroo X2.
@budel0 hay i like to make this to but will u please tell me that what parts r u using on this? full detail BOM
and please tell the full procedure to with photos or diagram if possible.
cool!
awesome looking bot