

-636348381130562972.jpg)

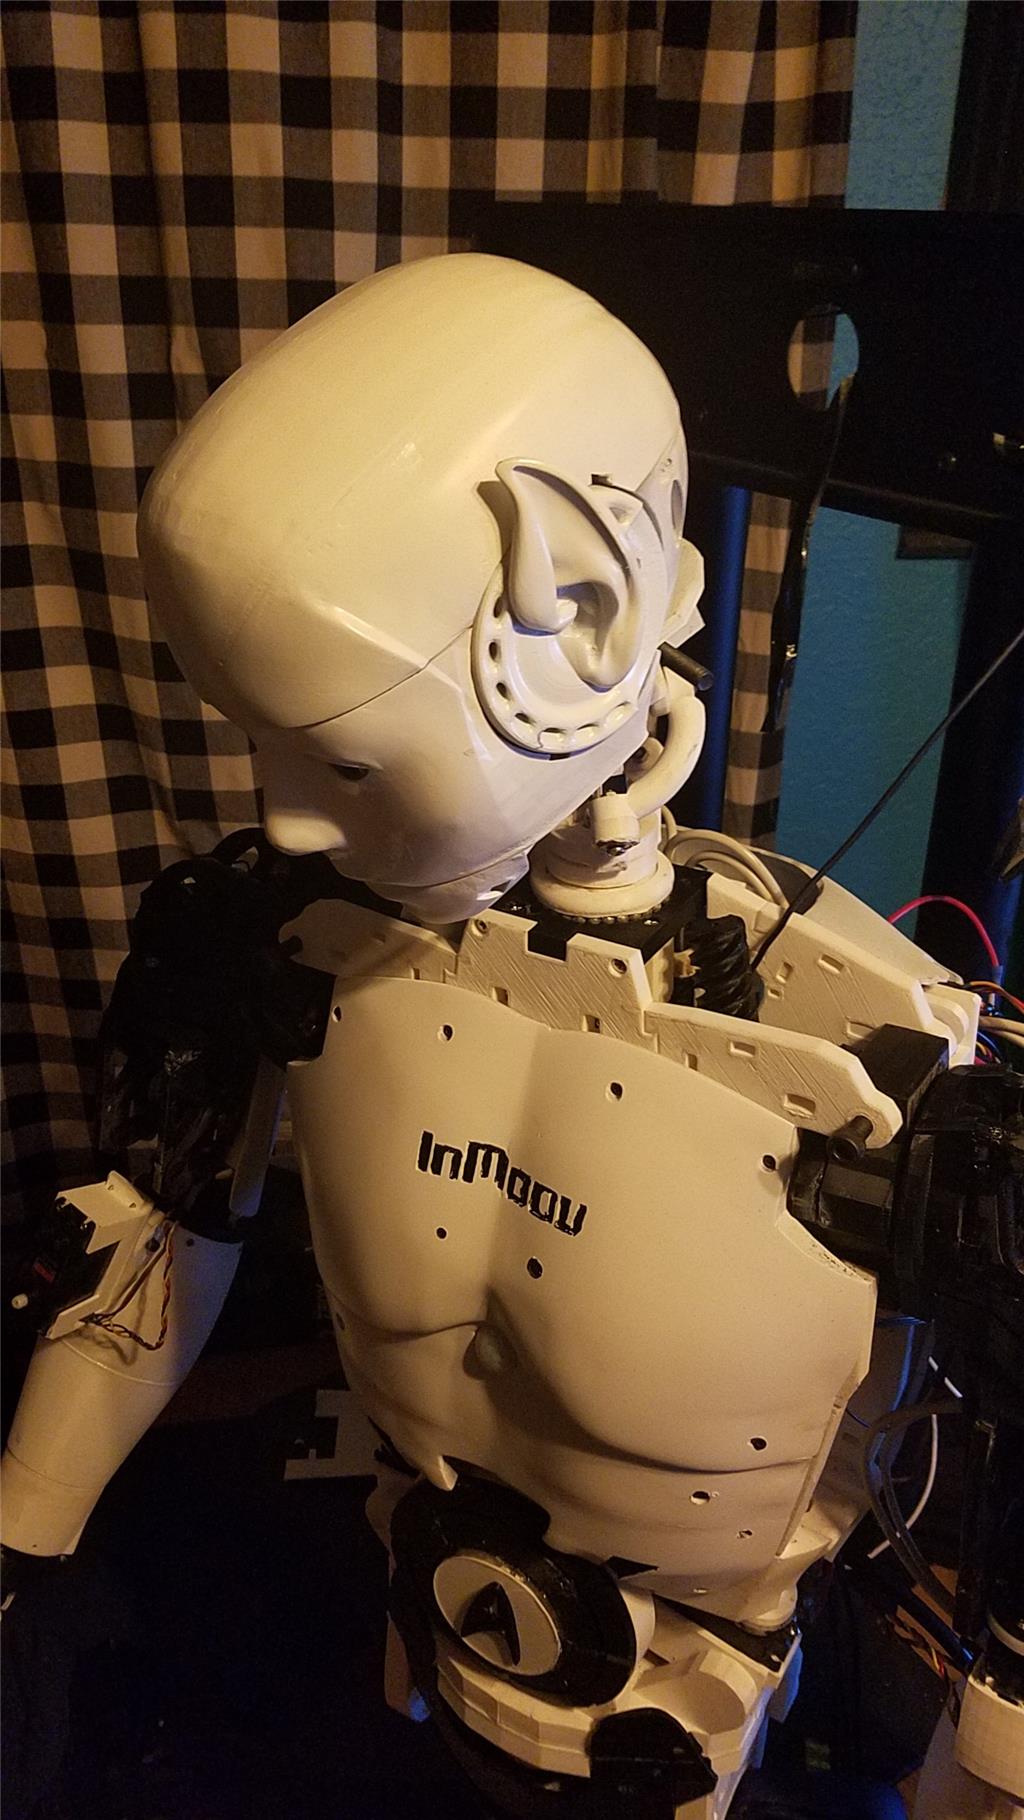
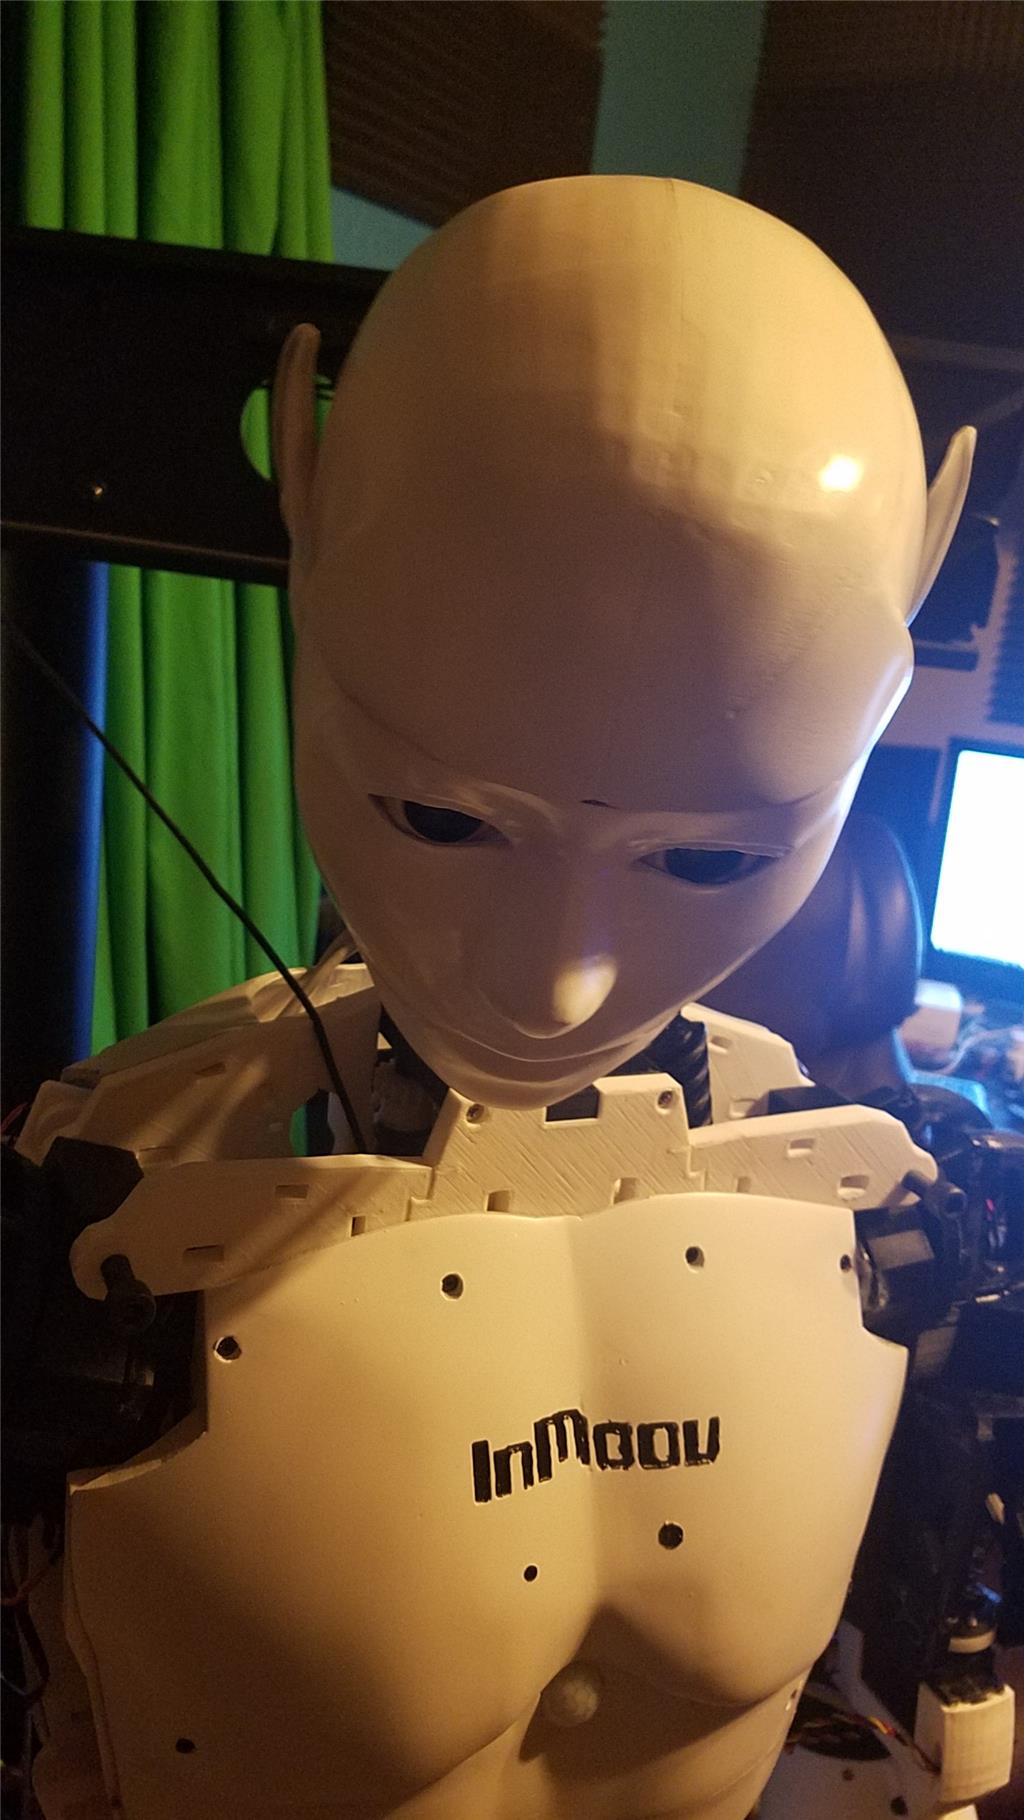


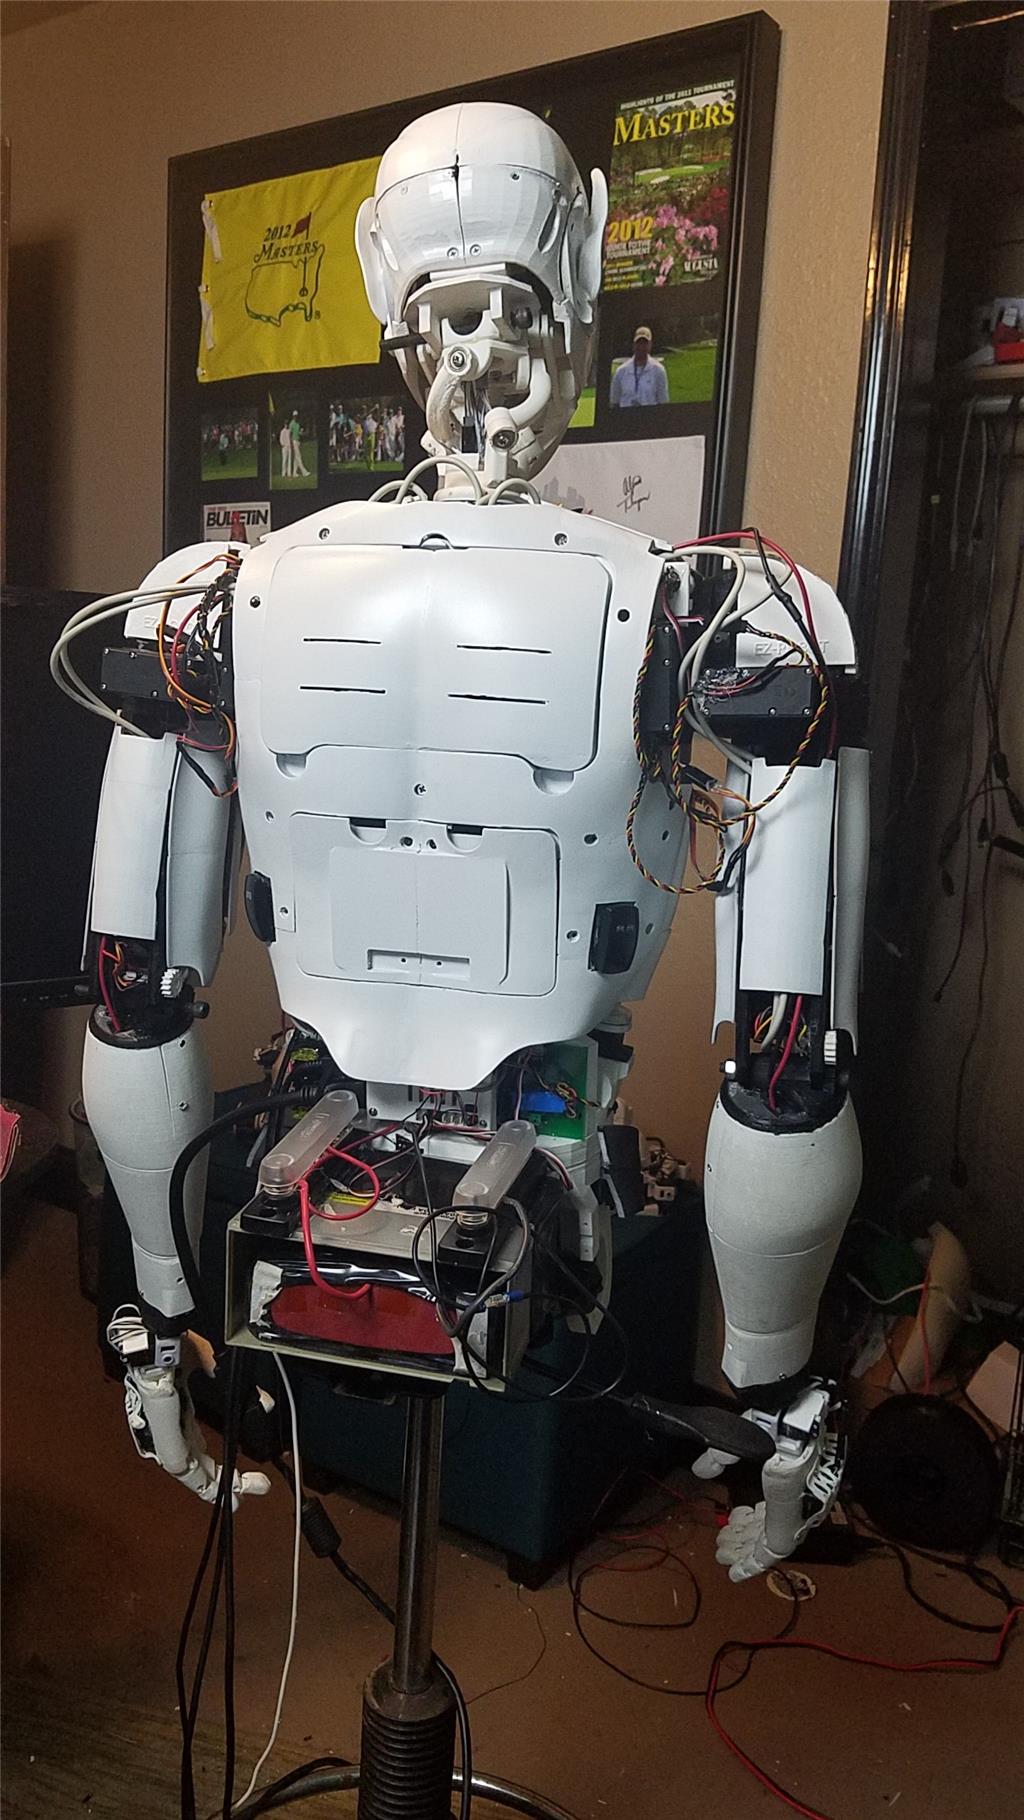
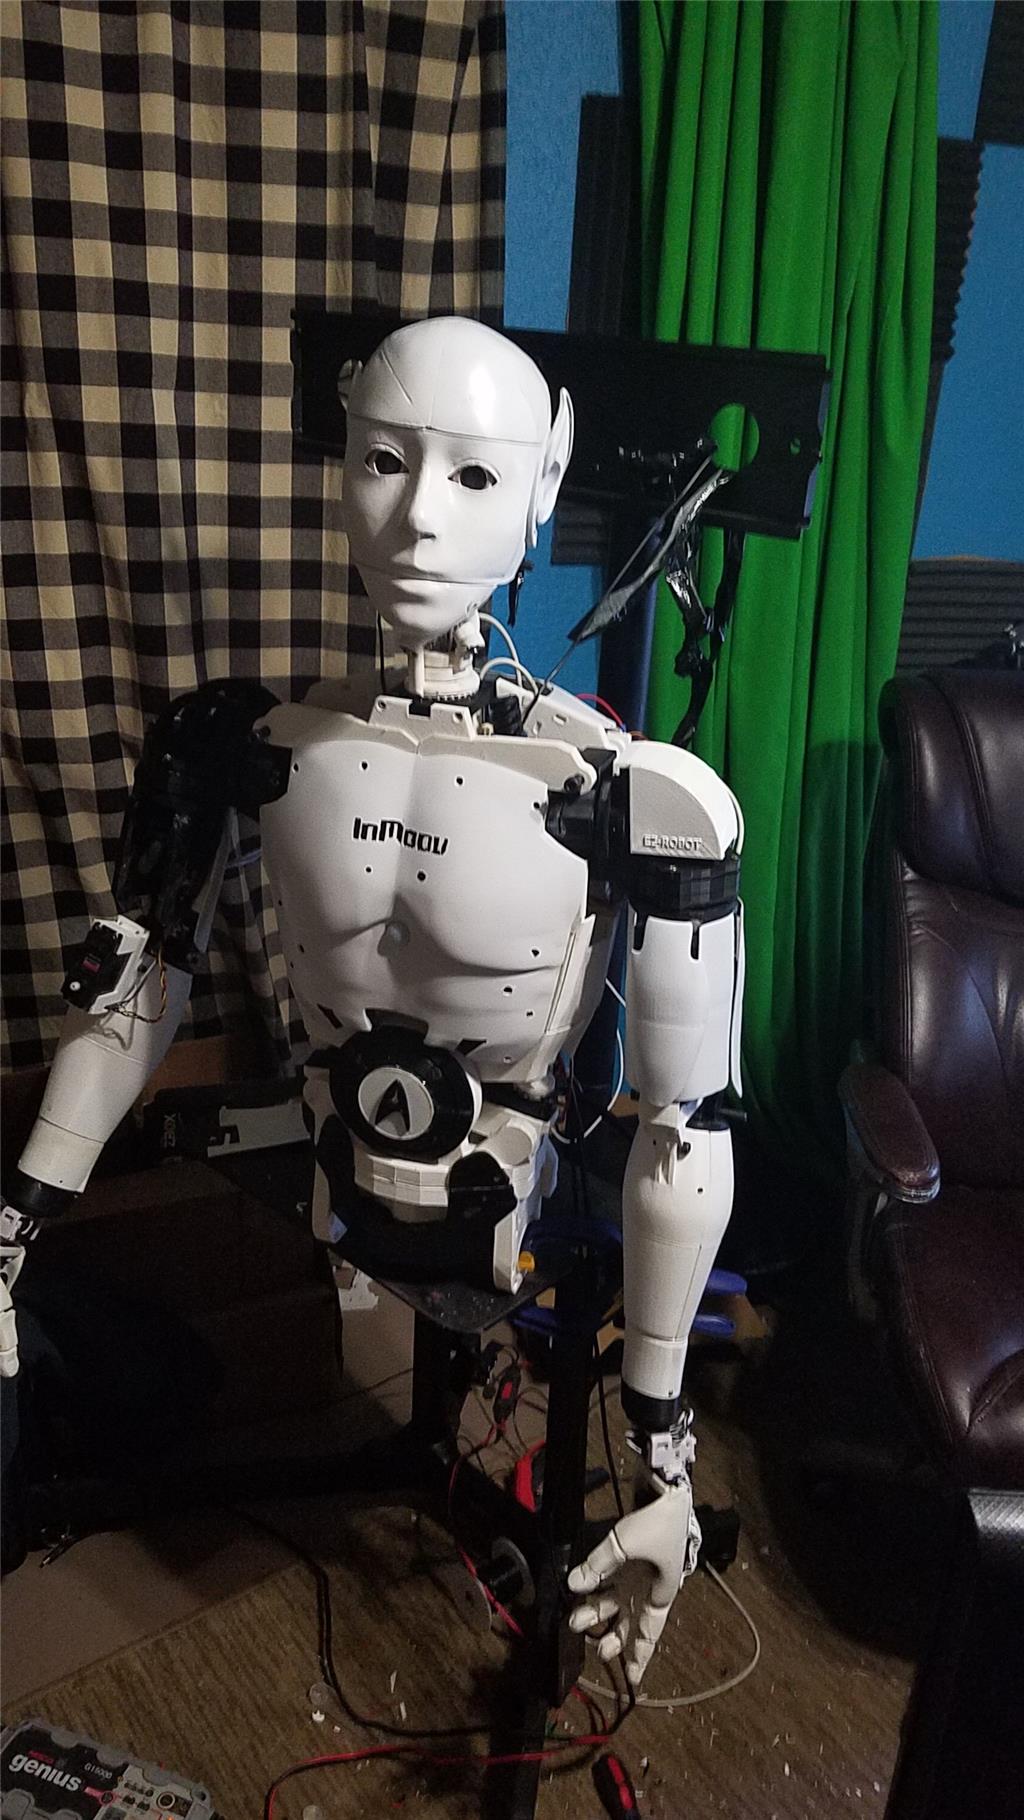
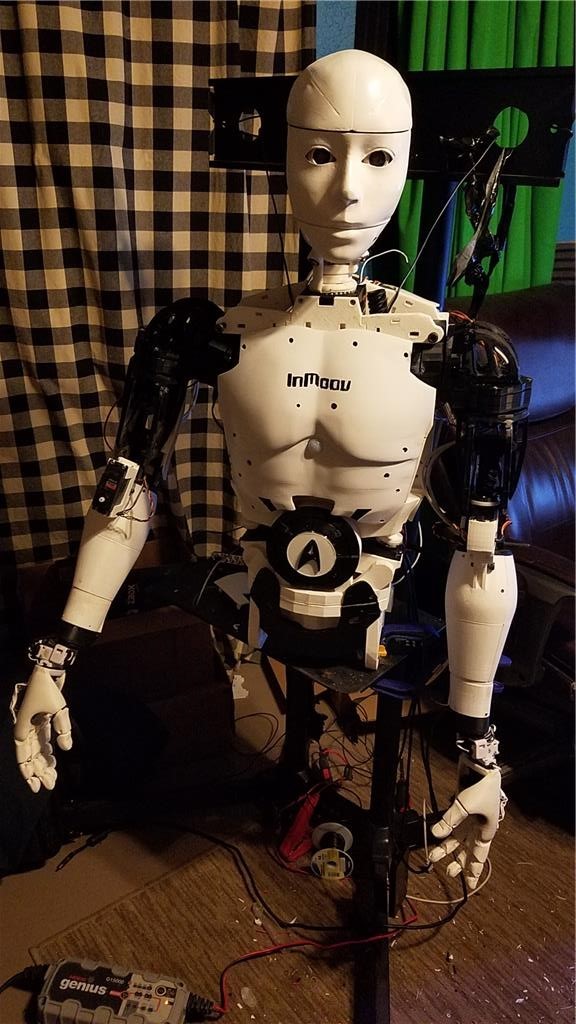
I have decided to start my InMoov project. I think I will call him Spock out of respect to Leonard Nimoy who passed away on the day that I started this project.
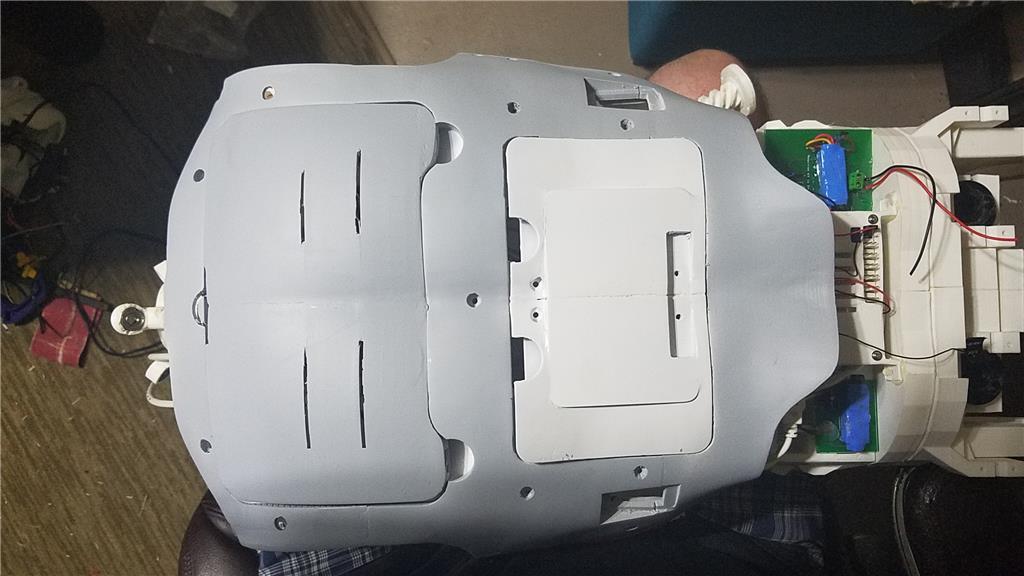
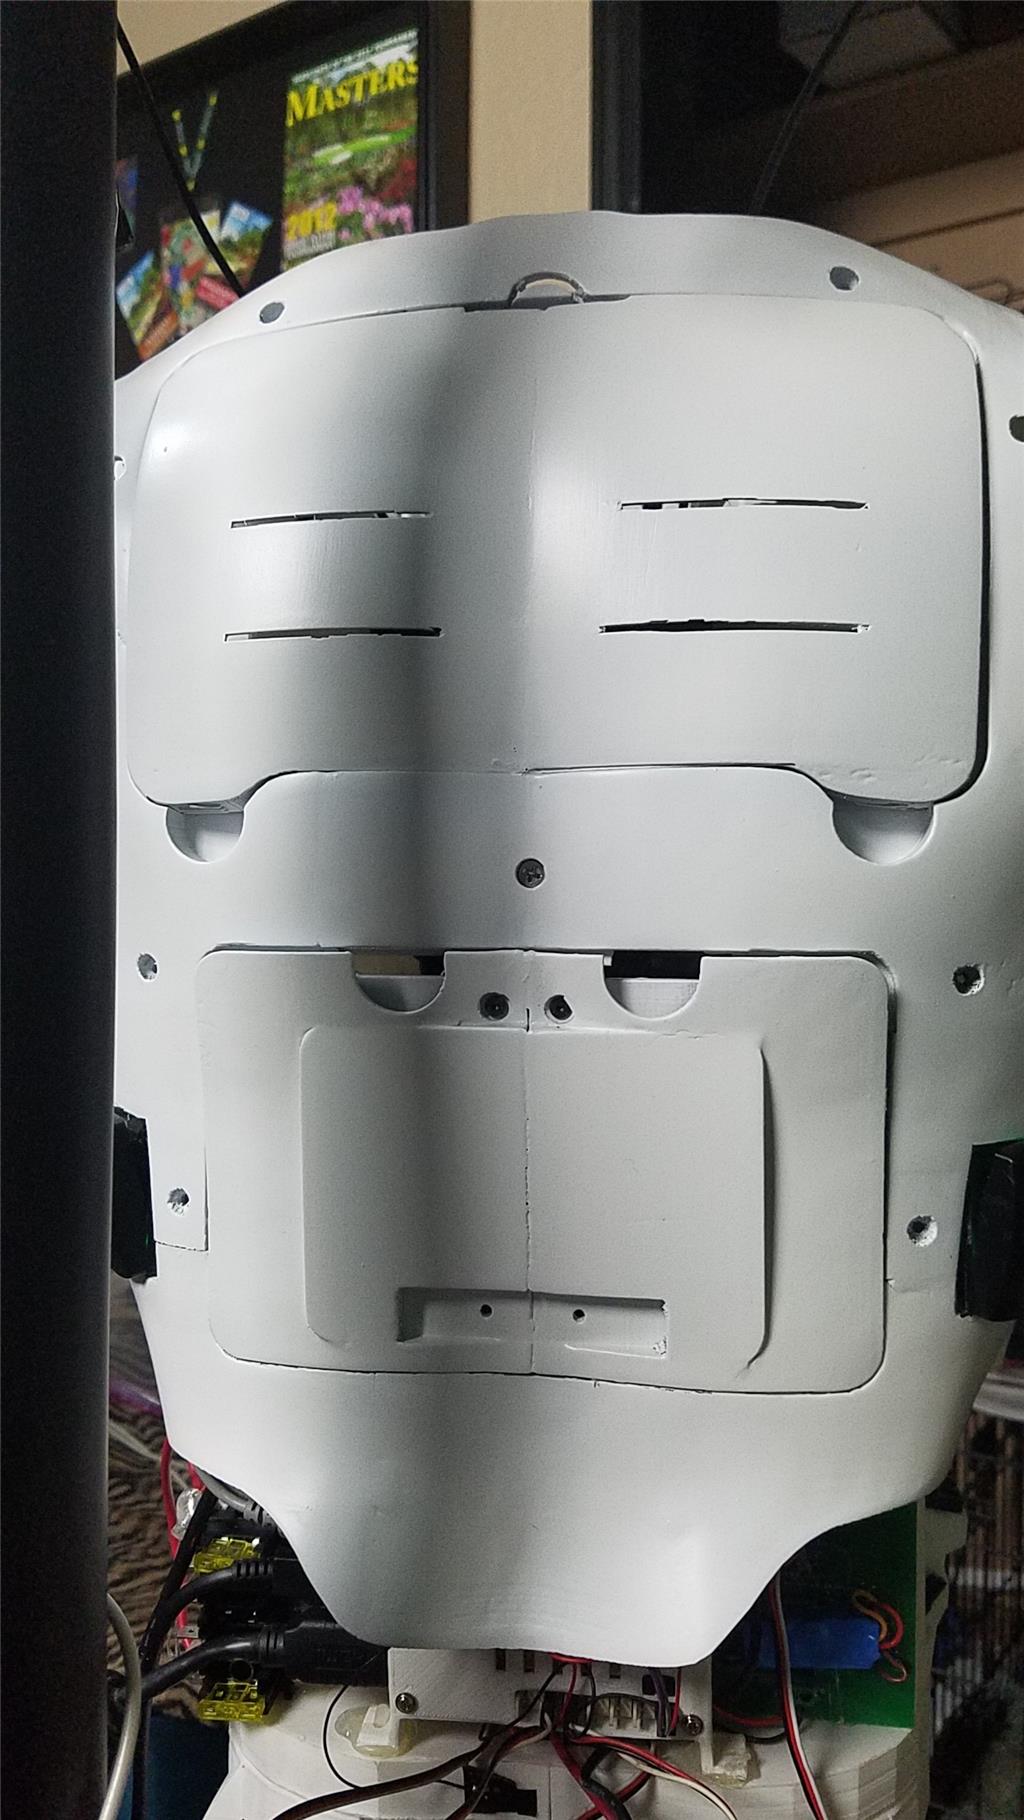
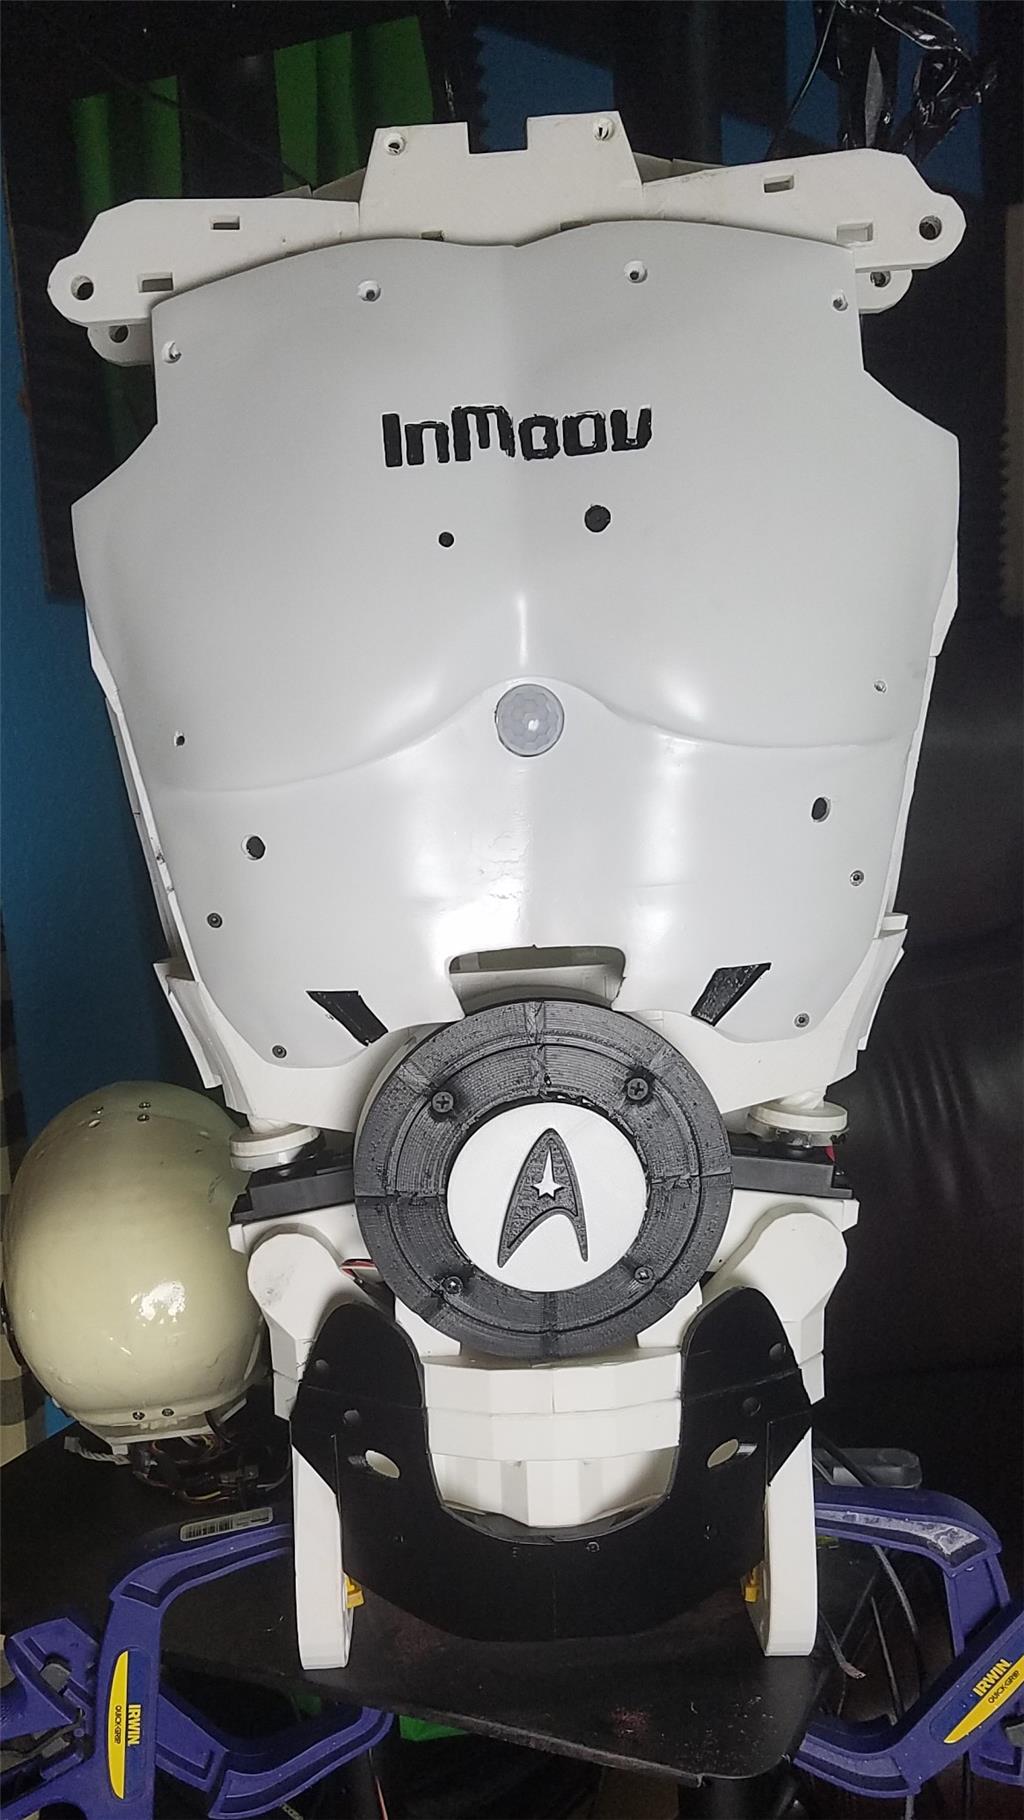
I am editing this post so as not to confuse people with the current configuration. I continue to update this post with the latest photos. If you are reading this for the first time, don't be confused. There have been a lot of changes to the InMoov over the past couple of years including starting over.
https://synthiam.com/Community/Questions/7398&page=21 Post 203 starts the rebuild of the InMoov.
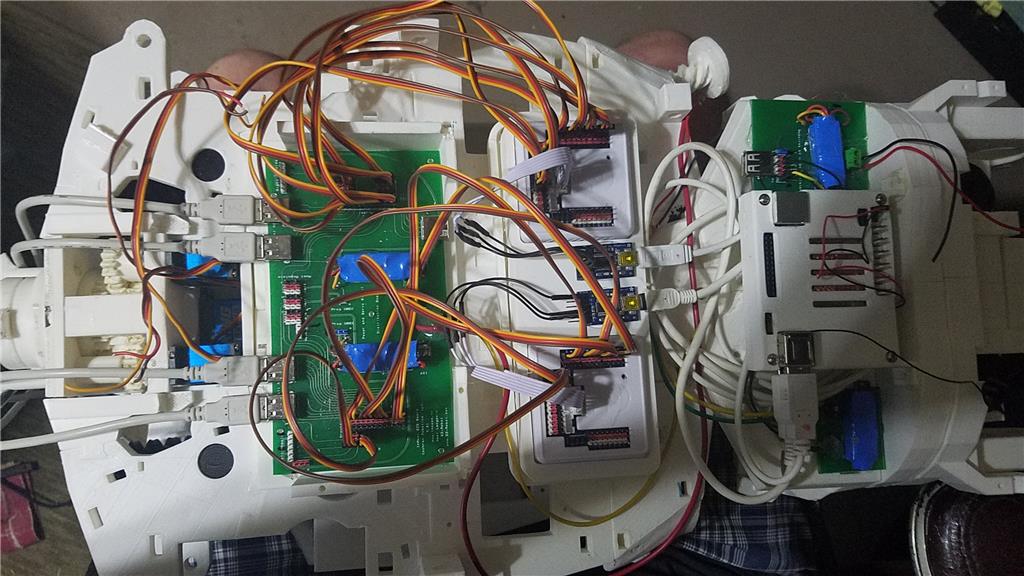
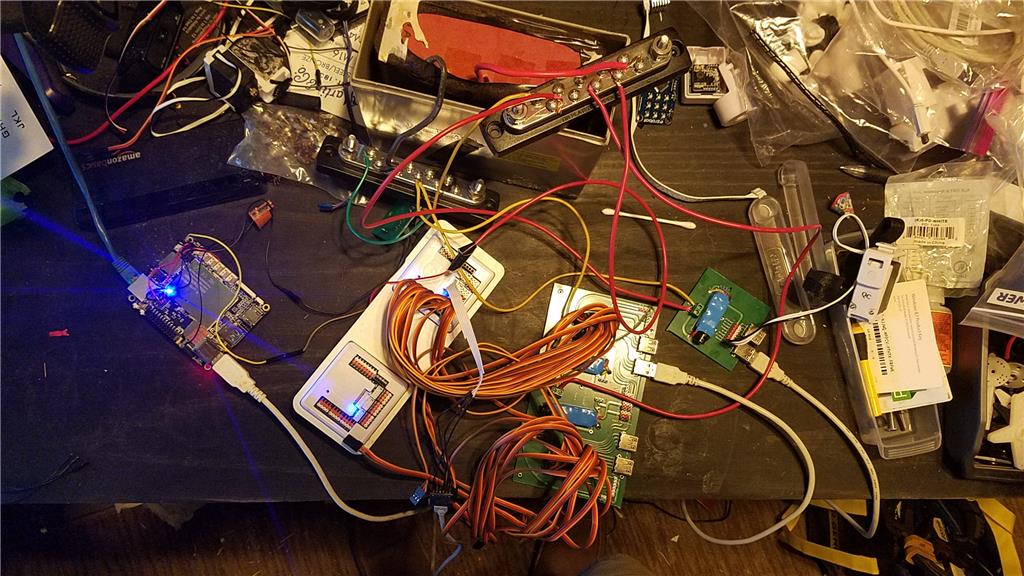
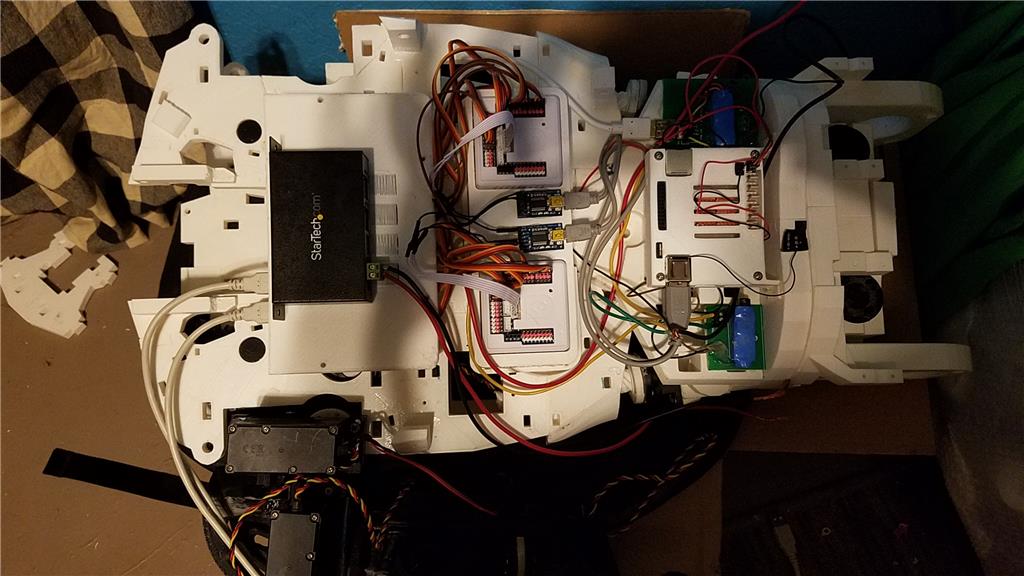
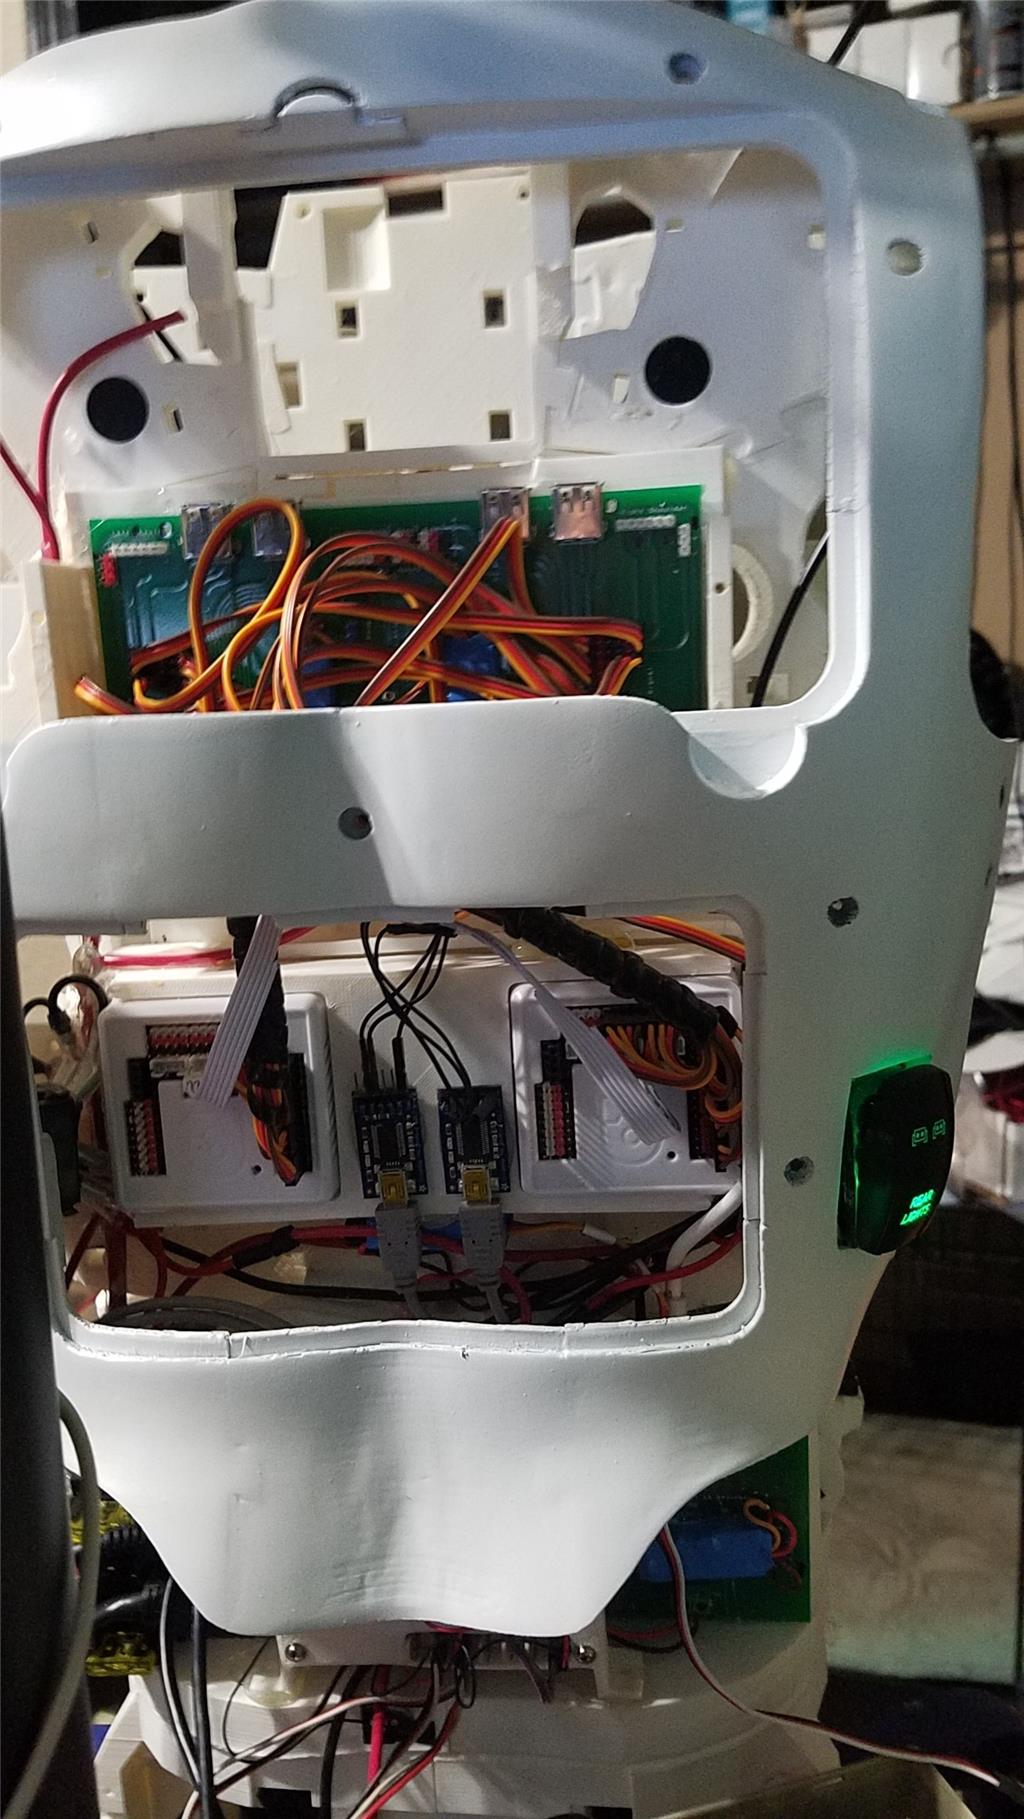
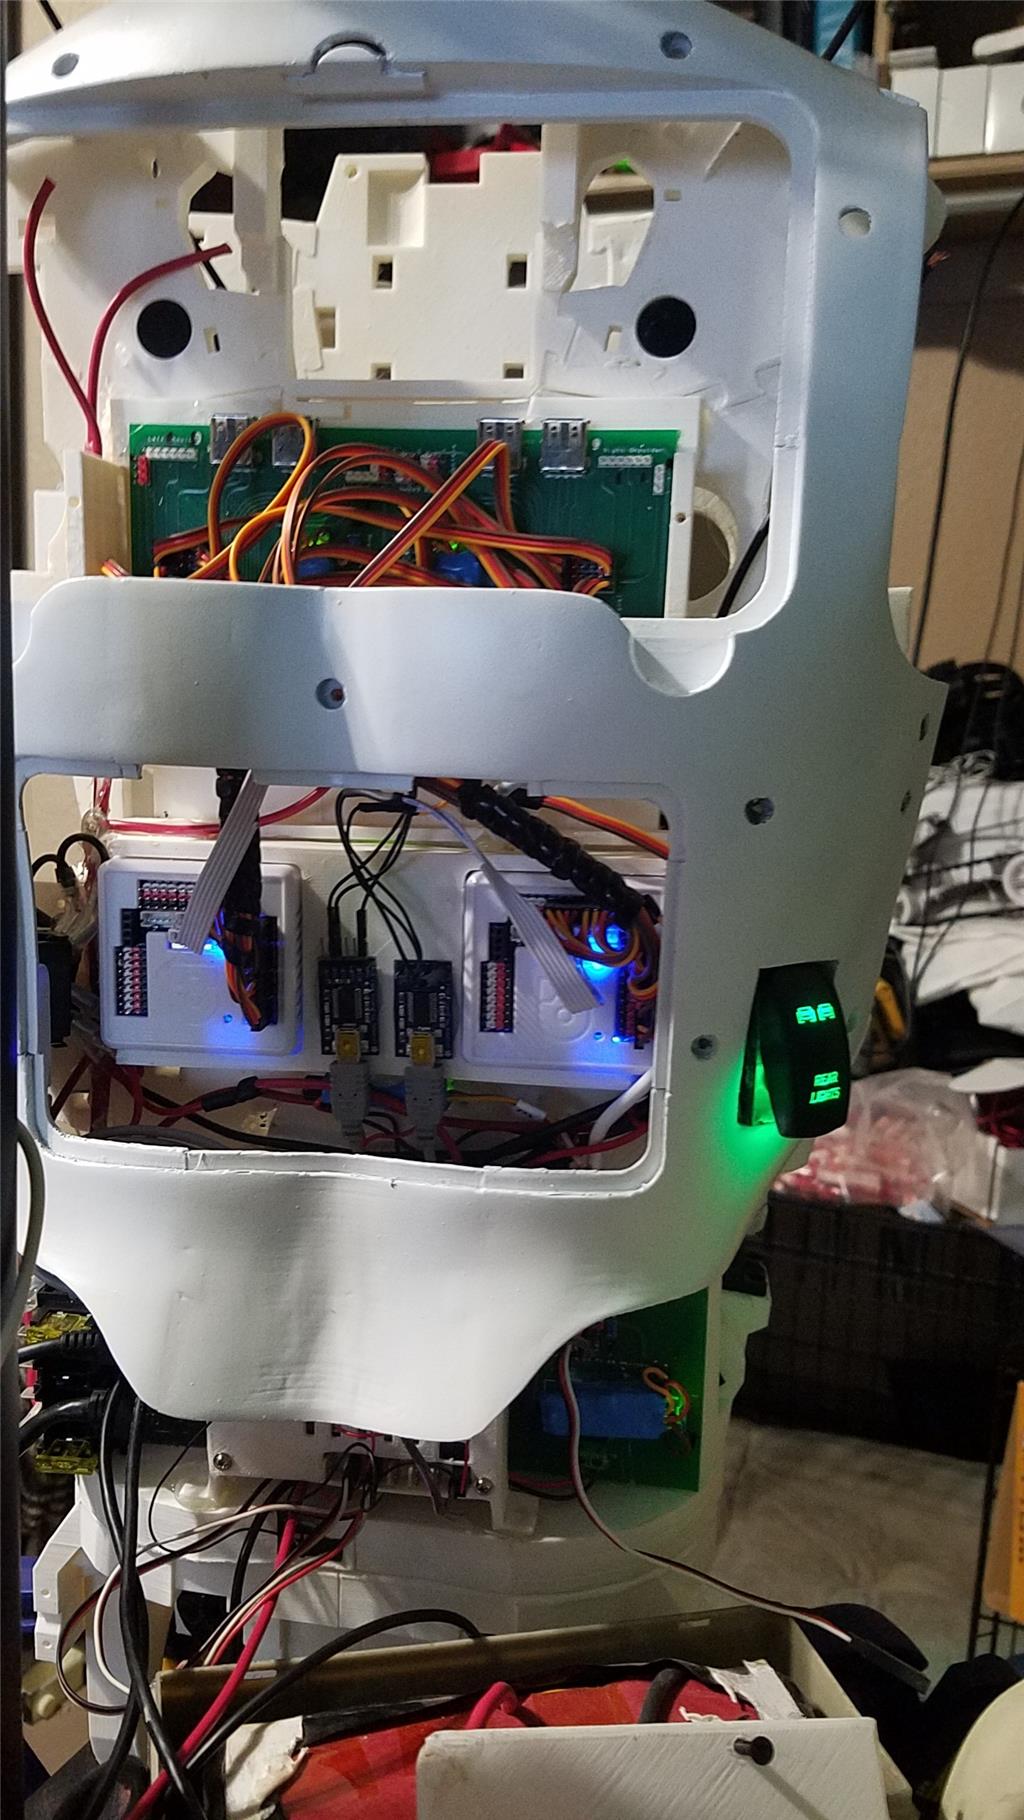
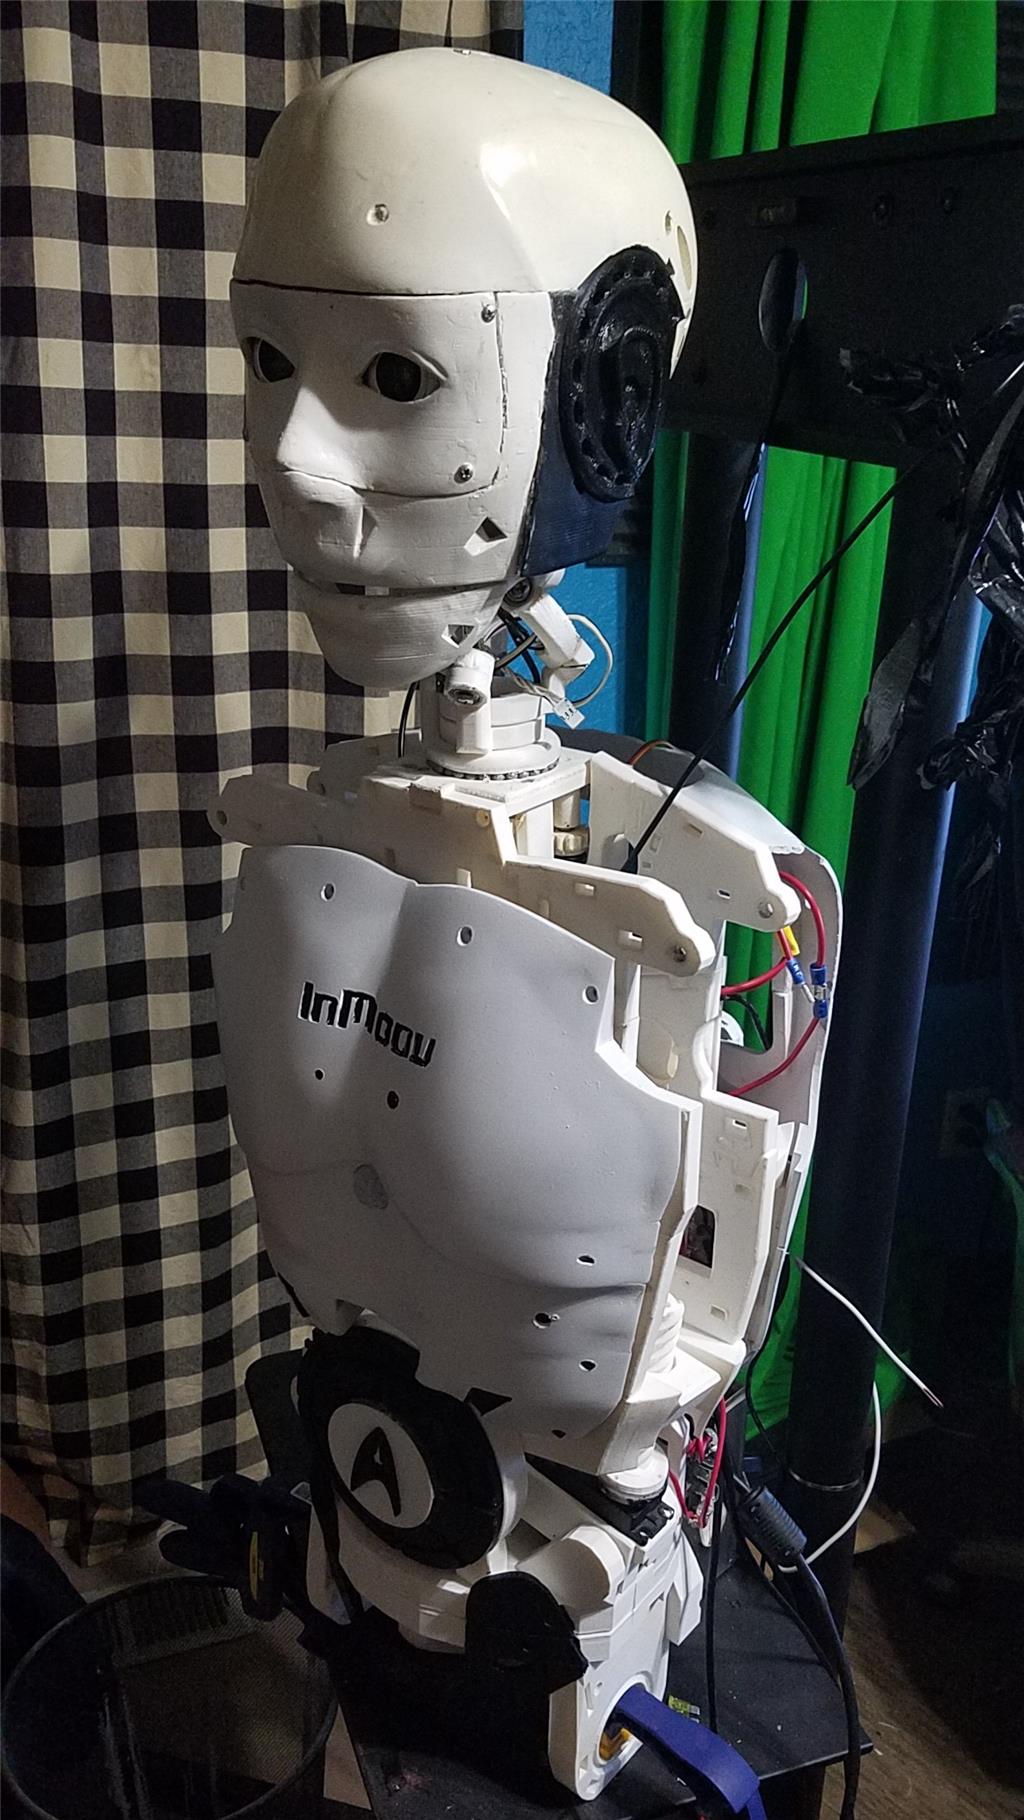
I have decided to use an onboard computer. I chose the Latte Panda due to it having an onboard arduino Leonardo and also because it uses little power.
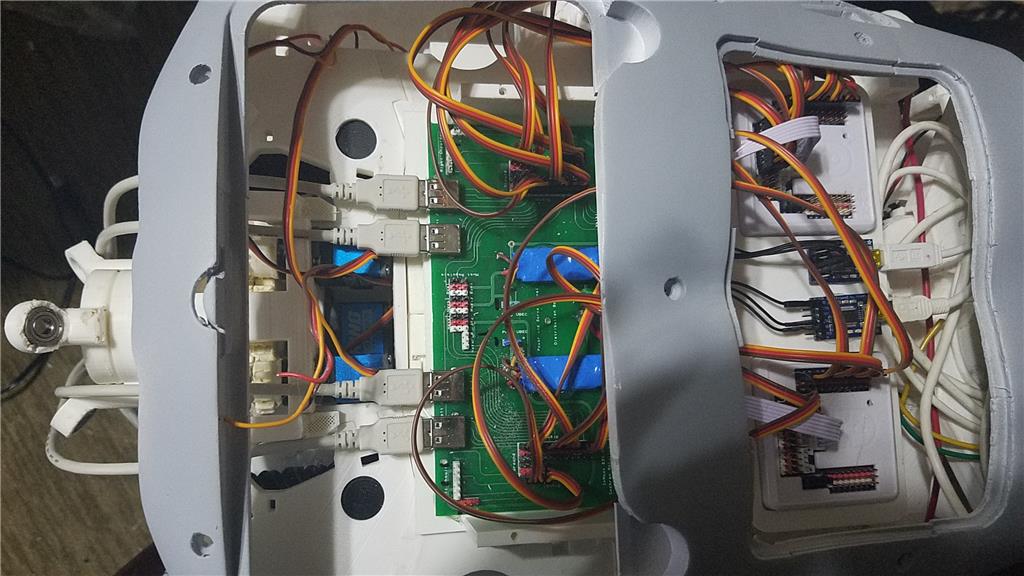
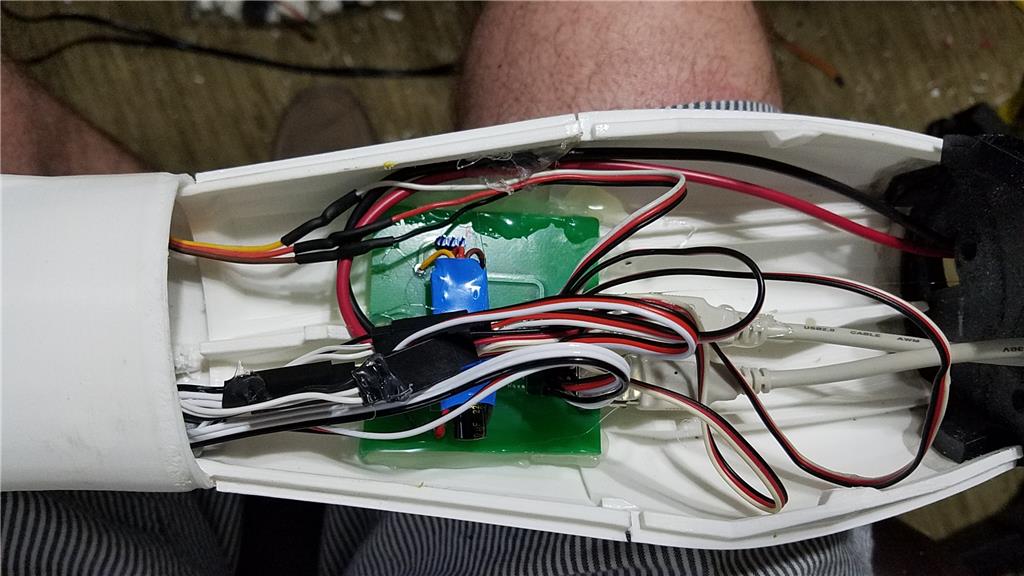
I used 2 EZ-B controllers connected via the camera port to Adafruit FTDI friend boards. This allows the Latte Panda to have a non-wifi dependent connection to the EZ-B's. I use a powered USB hub connected to the USB3 port on the Latte Panda to attach other items.
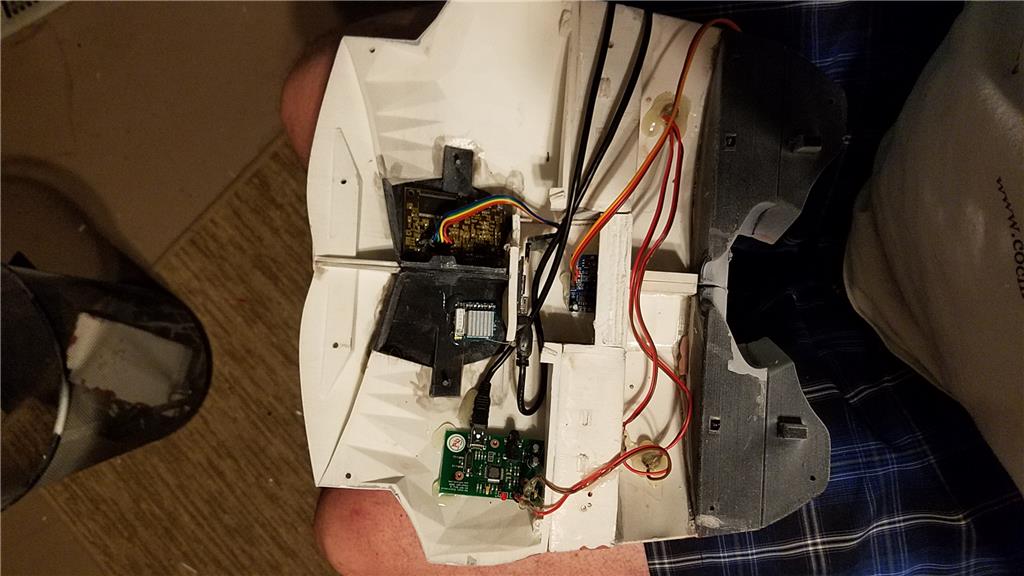
The Omron HVC-P is used to identify people, emotions, human bodies, hands, age and gender. It is attached to the Latte Panda via an FTDI friend which is then connected to the powered USB hub. It is mounted in the chest of the InMoov. I also use a 3 element microphone which is a MXL AC-404 microphone. It is disassembled and the board and microphone elements are mounted in the chest of the InMoov. This mic board is connected to the Latte Panda via a usb cable which is attached to the powered USB hub. There is a USB camera in the eye of the InMoov which is connected to the Latte Panda via the powered USB hub.
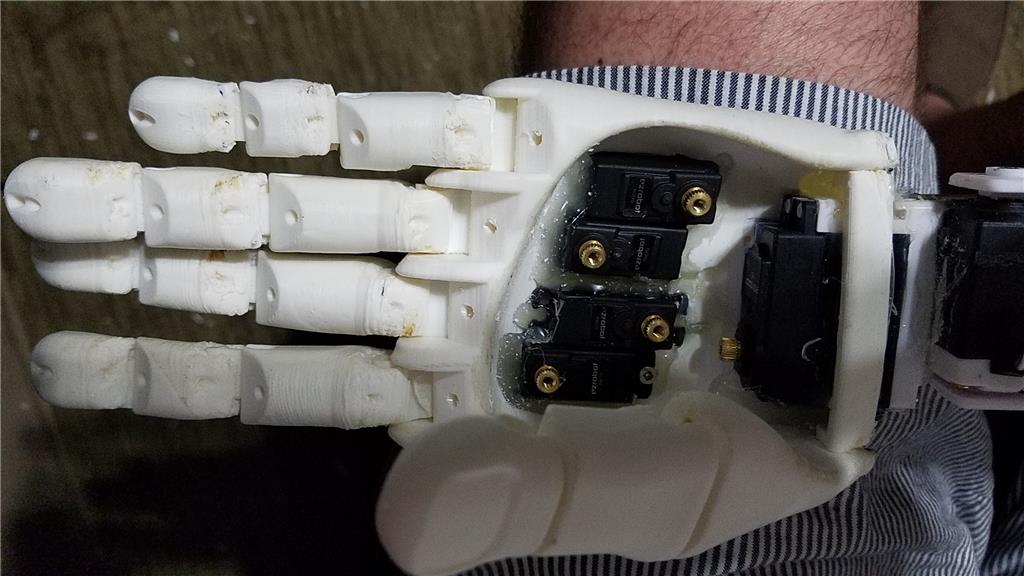
I chose to use the Flexy hand with the InMoov. The design is far more rugged than the original hand and works very well. There are 4 EZ-Robot Micro Servos in the palm of each hand which controls the main fingers. The thumb is controlled by an EZ-Robot HD servo. The wrist waves and uses an EZ-Robot HD servo to do this motion. I use the standard Rotational wrist.
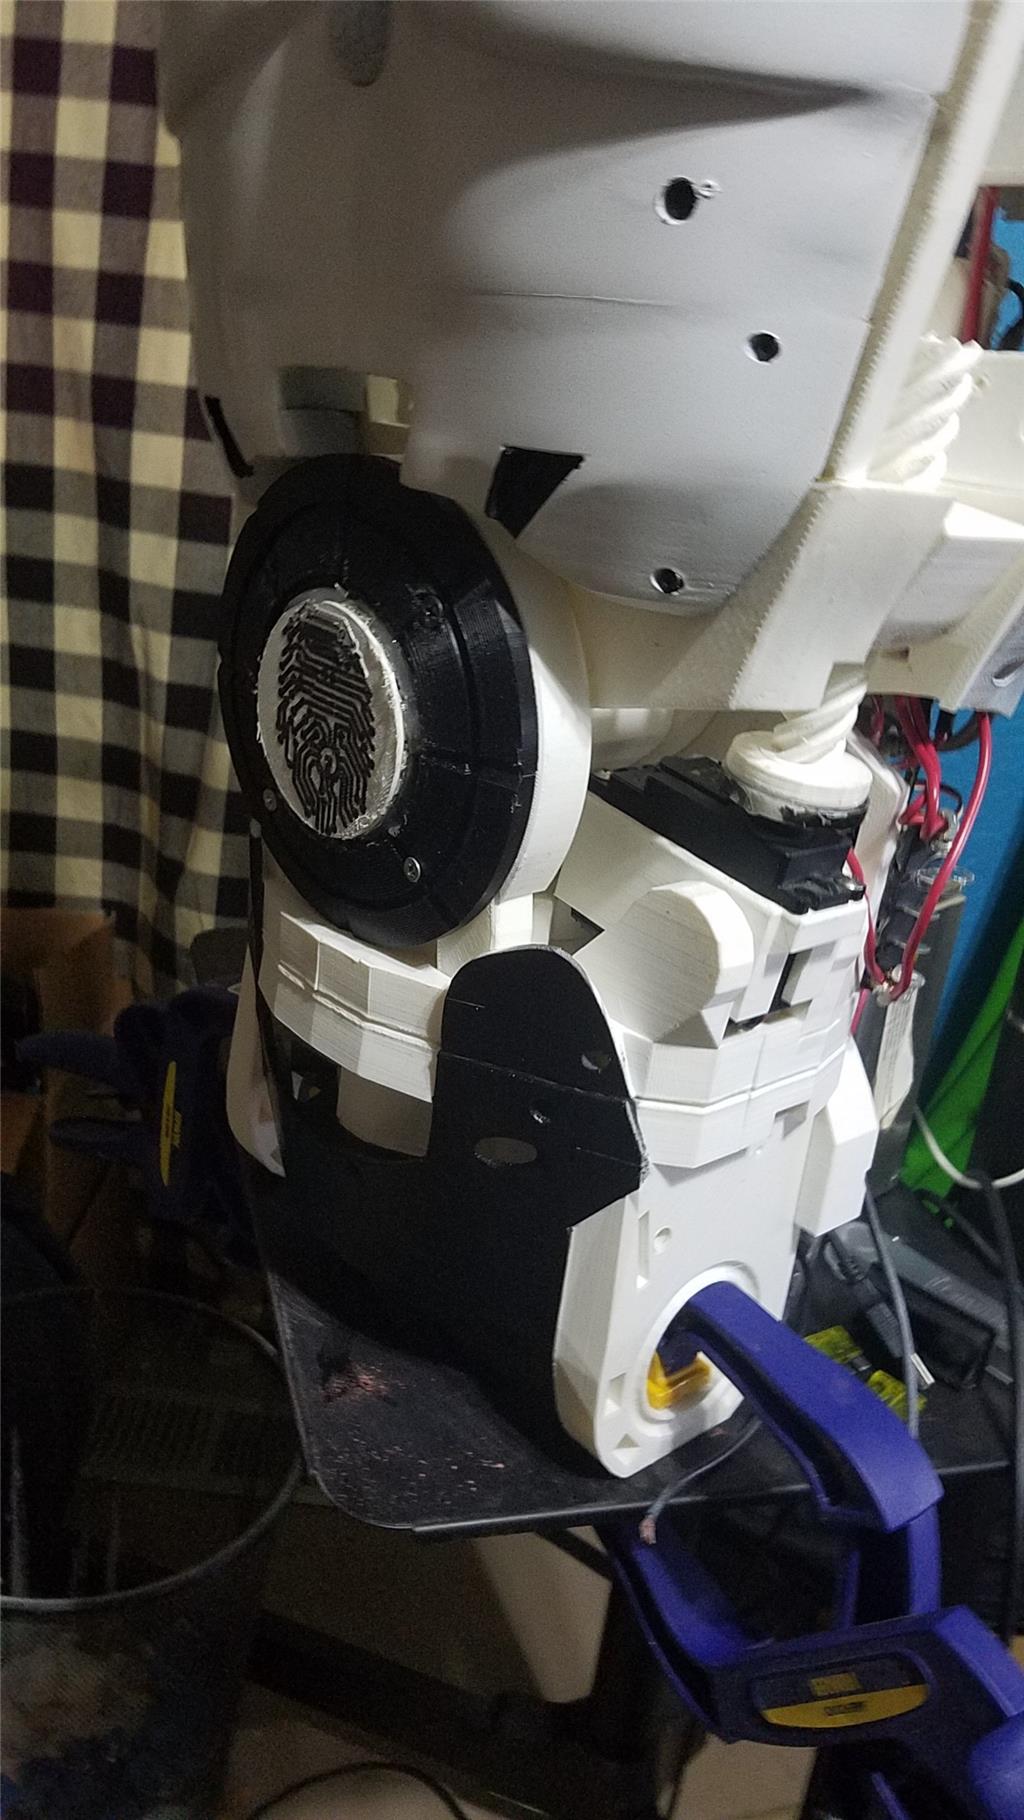
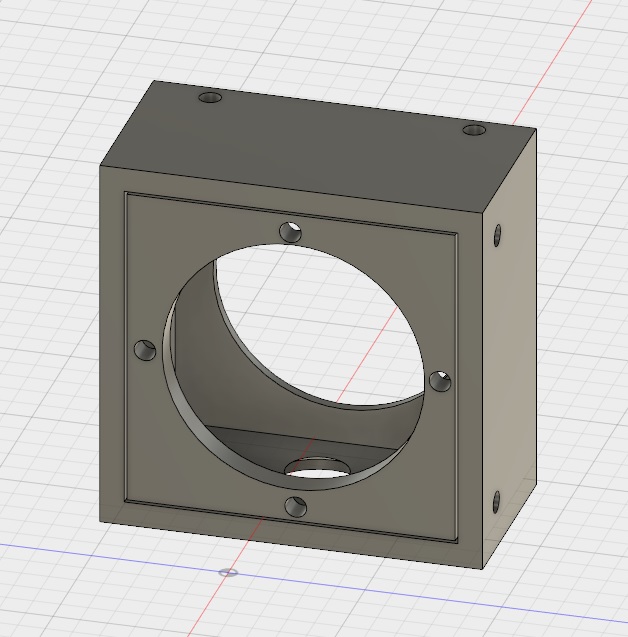
I have castle BEC's for power in the following locations set to the following voltages. Forearm's - 6.2 V - Controls fingers, wrist and elbows Custom power distribution board (2) set to 6.2 V controlling head, neck and Shoulder servos. EZ-B's - set to 6.1 V - it is mounted in the controller mounting plate and connects to the EZ-B fused power boards from a power base. Latte Panda - Set to 5.1 V and is mounted to the EZ-B controller mounting plate. Waist - set to 6.2 V and is mounted in the lower right side of the back. This provides power to the lean and pivot waist motors..
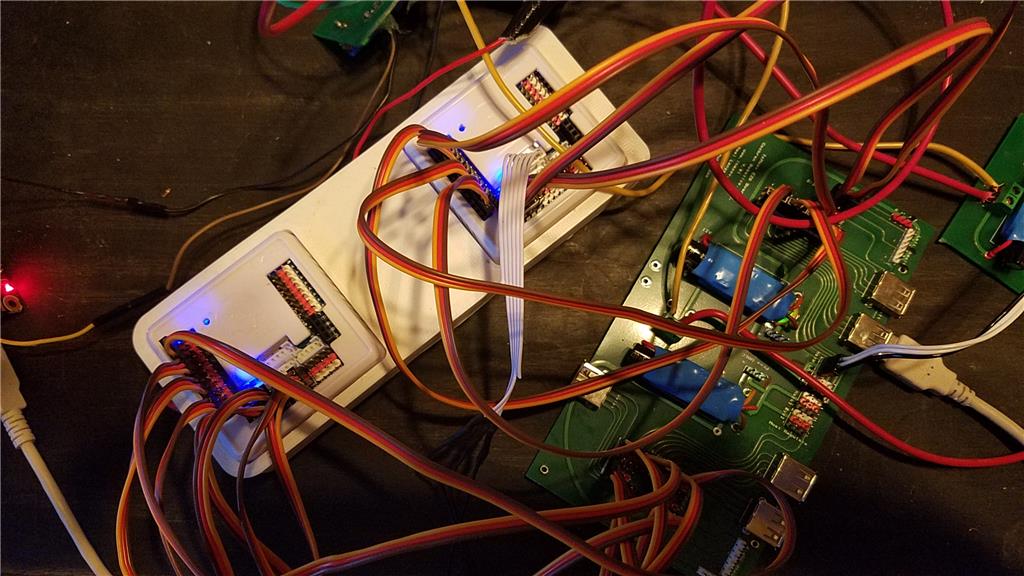
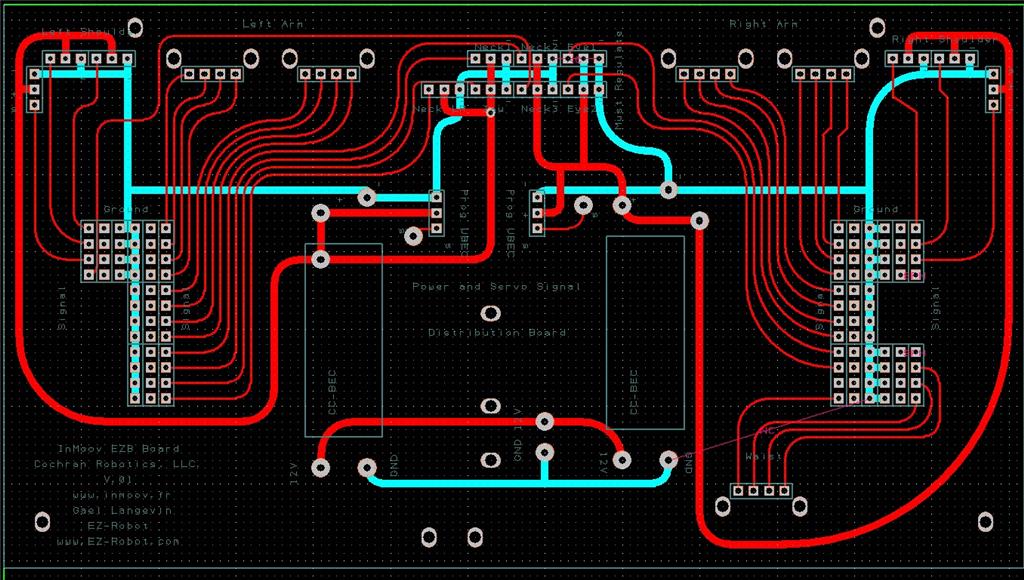
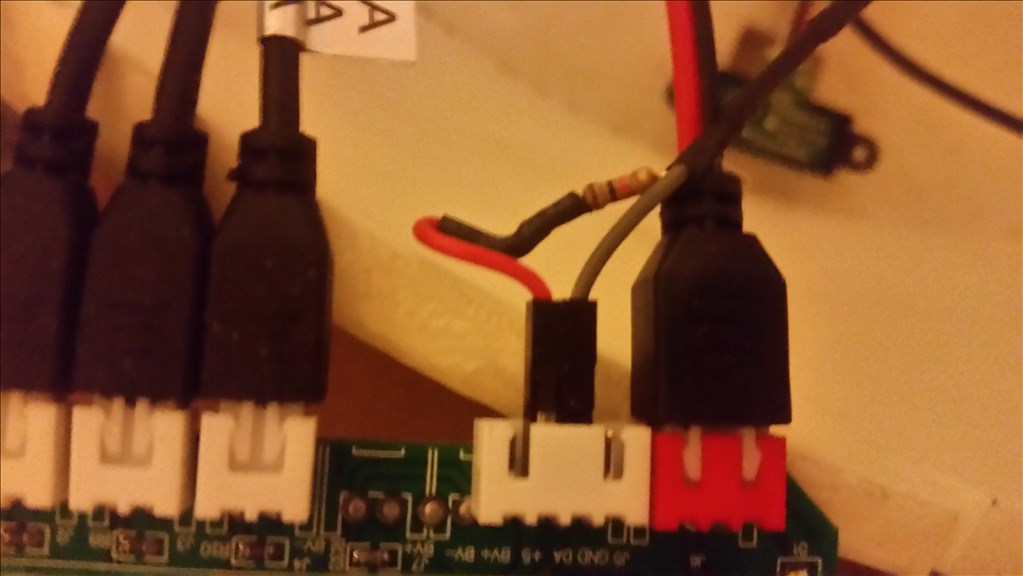
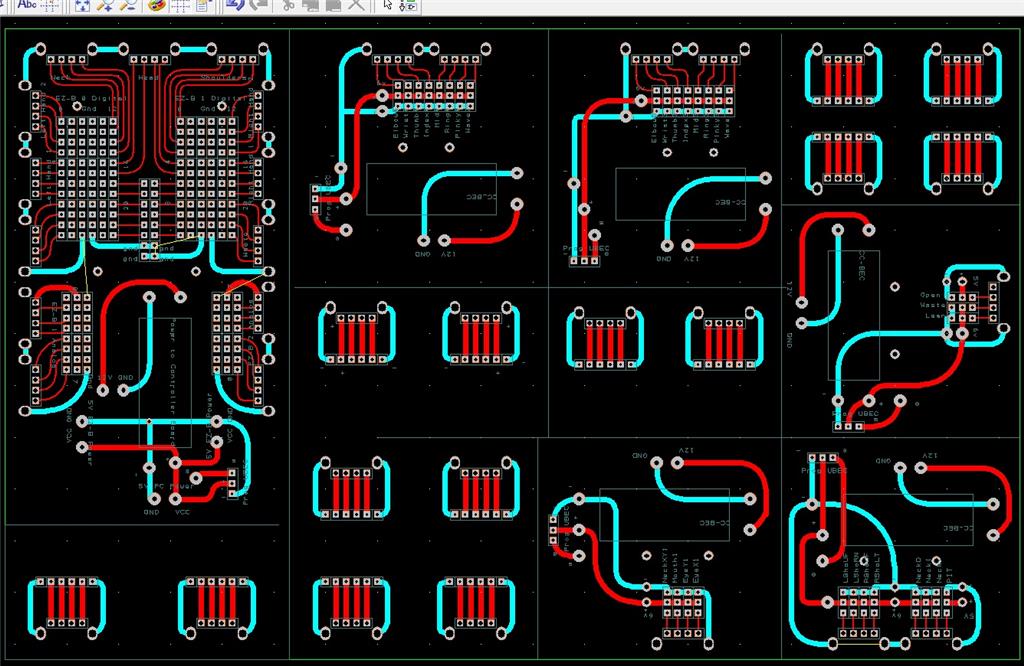
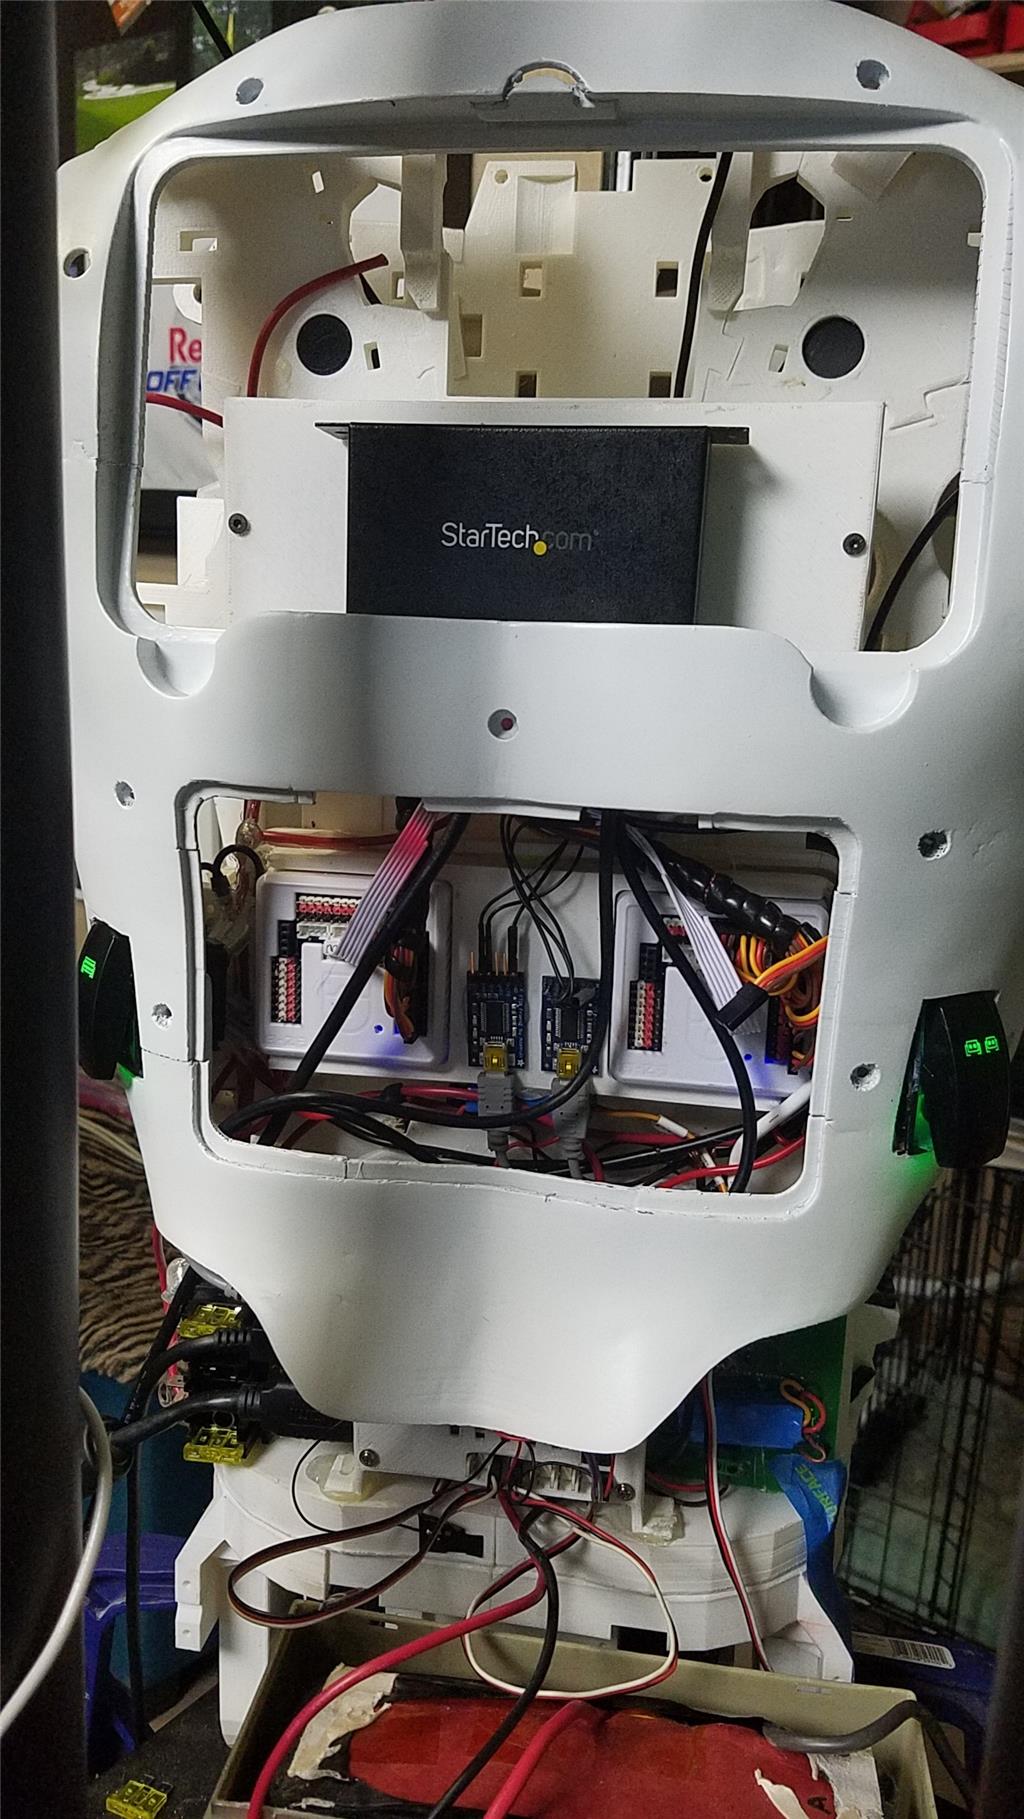
There are some custom power and signal distribution boards. These are in the forearms, lower back and in the upper back. The upper back or main board connects to these distribution points via USB cables to provide signal to the other boards for servos. The main board also has servo connector pins that are for the neck, head and shoulders. This allows the power to be distributed between multiple BEC's and also allows the servo signal cables to be shorter and more protected via the USB cables.
For power I use a LiFePo4 battery that is rated at 30 amps. It has the balanced charging circuit built into the battery and also has a low voltage shutoff built into the battery. This protects the battery and allows the battery to be charged with standard car chargers.
I put switches on the back on the InMoov which are rated at 20 amps at 12 volts. These are rocker switches that allow the user to pretty much slap the switch to turn it off. There are two of these switches. The servos for the elbows and fingers are on one switch. The latte panda, neck, shoulders, EZ-B's, waist motors and some lighting is on the other switch.
I also added a fuse block. This allows 20 amp fuses to be put in line to help protect things. The switches above drive the fuses for each of of the motors listed in that section.

-636348716348649435.jpg)

Discover more robots
Leversofpower's Un2003a 28Byj48 Stepper Motor Project
Hoolagen1's Pics Of Progress.......

@ David can you give details on the Ninja flex you used. You said in your show it was really easy to print with. I've stayed away from it as i heard a lot of people couldn't get good prints and in the end Ninja built their own hot end for that product.
Can you share you settings and was there a heated bed, what you used on the bed to get it to stick, layer height etc?
@fxrtst, I used a knock off brand of flexible filament and printed it at 240 degrees on an unheated bed - it stuck good. I've printed it at both .1mm and .2 mm both work good. The biggest trick is to get it feed through the extruder. I use a Makerbot Rep 2 printer so first I had to print a modification for the extruder and I have to make sure that most all of the PLA was out of the extruder before trying to load the flexible filament.
I will be interesting to hear how Davids experience with it was.
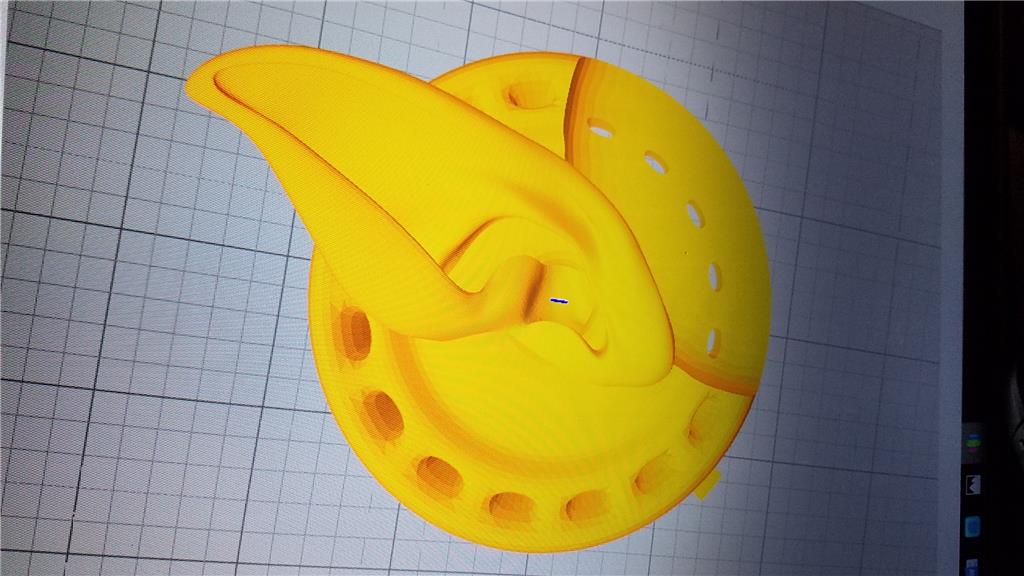
I edited the Post #281 I uploaded the flexible InMoov fingers STL's to Thingiverse.
I used NinjaTek Cheetah. It is less flexable than Ninja Flex (made by the same company). I knew I wouldn't need much and I didn't want to drop $75 on a full spool incase it didn't print well.
I made no changes to the extruder or hot end and printed it in the middle of their recommended settings at 230 for the hot end temp and 40 (room temp or so) for the heatbed. I printed it on blue pads that I love from Flash forge. I am sure they just took someone elses product and put their name on them.
The filament flowed very smooth and consistent and stuck to the plate really well. I used a raft (always do) and the parts came off the raft really easy. The parts came out very well and had no warping or anything like that.
The filament feeds better due to it not being as flexable as Ninja Flex. I have tried to rip the parts (even a single layer of the raft) and it didn't rip. I have cut it with a razor blade and it is tougher to cut than ABS. It is tough stuff for sure.
I bought 50 grams to test with. I dont know the shelf life or anything like that. I dont know how well it stores in heat or cold. I think it probably does fine, but I dont know on that front.
I printed the joints pretty solid. They are small and I used 3 top and bottom layers, along with 3 shells. because these joints are small, that didnt leave much for infill.
If I were trying to print a ball that bounces, I wouldnt use Cheetah. If I wanted flexable but rugged, I would use Cheetah. From what I researched before I bought it, its not as stretchy as Ninja Flex, but feeds easier, prints easier and is more durable.
Thanks for the info, i'm going to order some and give it a try.
one more thing, and i will have to check on the speed, but you do need to print a little slower than normal. I cant remember the speed off the top of my head. There are recommended settings on their website.
I have had a bit of time today to work on my InMoov. I just completed the Power/Signal Distribution boards and tested them out. The cool thing on these is that there is a 3 pin header on the boards which allows me to reprogram the Castle Creations BEC's without removing them from the boards. This allows for someone to quickly adjust the voltage via the Castle Programmer for any of the output side of the BEC's. This is important simply because to mount the BEC's I cut the wires on them pretty short. All boards passed signal and voltage tests. It is hot and I am worn out. I think I will be resting for the rest of the day to prevent costly mistakes.
The larger BECs from Castle don't have the issue of not being able to program them because the programmer doesn't plug into the power output cables. Basically, I had to make a way to still program these smaller ones while having them mounted more securely than just the 3 pin output cable. Also, very short wires should help prevent as much resistance for power from these BECs.
Another nice benefit of having these pins is that another device can be powered through these pins that doesn't require signal. For example, a light or something that needs the same input power as the BEC is providing for output power (6.2 V in my case now) can be powered from the pins left available to allow programming.
What about rafiki? confused
I am trying to get this guy done to take to shows. After that, I will get back to finishing Rafiki.