Bob's Debut

bret.tallent

USA

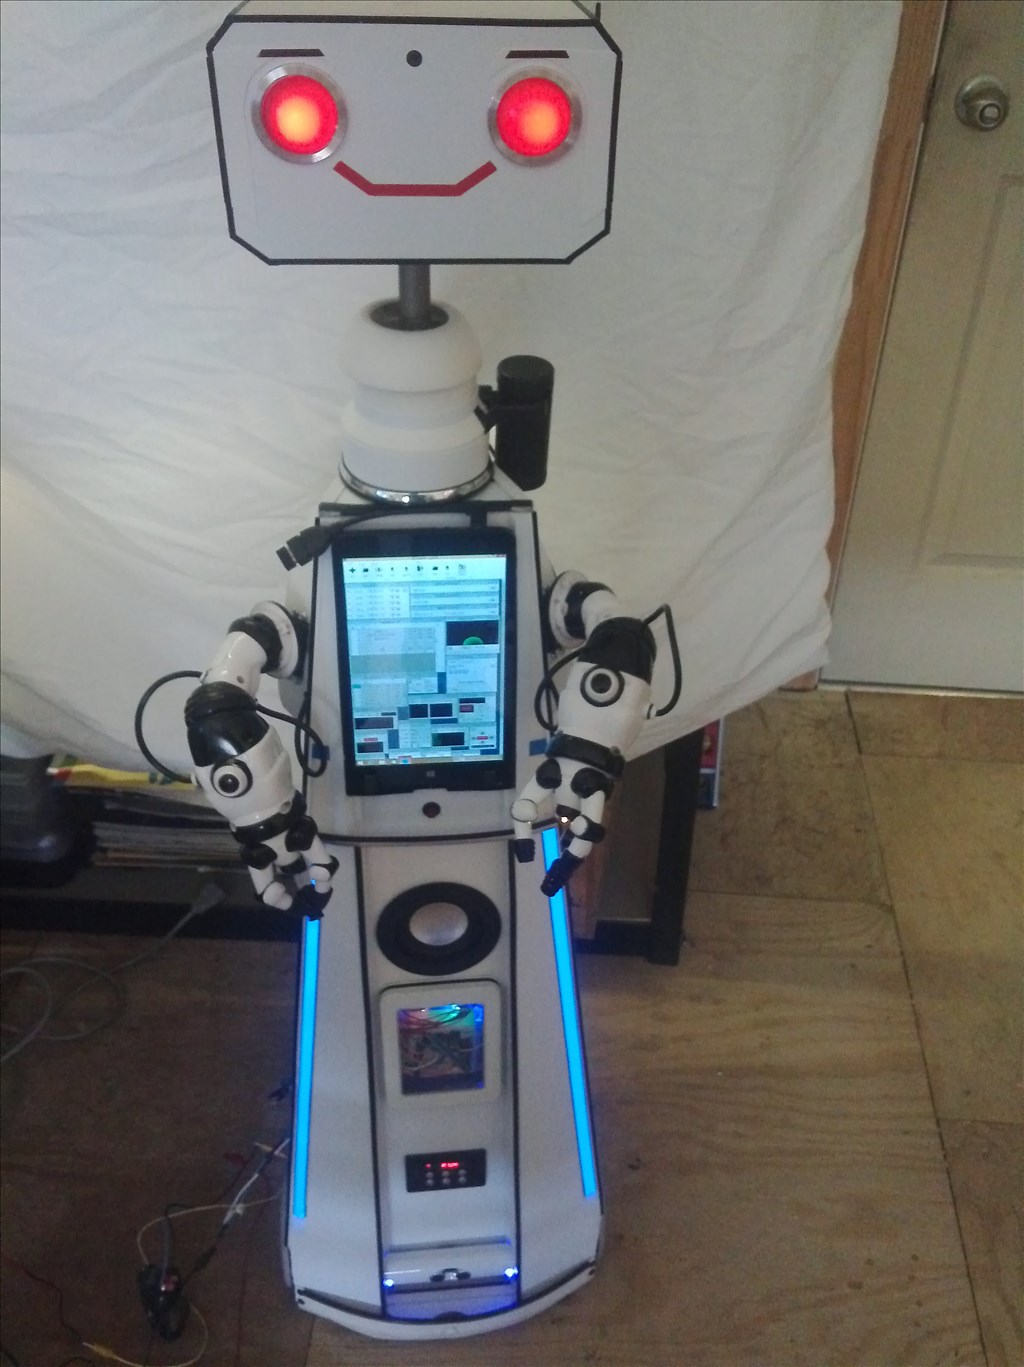
You may or may not have seen the documentation of my omnibot build (B.o.b. - Bret's Omnibot), but here he is completed. Bob's Mods: Camera, head turning, right shoulder articulated, left shoulder, elbow, wrist, and claw articulated, sonar, lighting, EL wire accents. I am just working on him here with my joystick gamepad, playing with different functions. But Bob is ready to go - and thanks for the salt little guy.

without further adieu - Bob:

By — Last update

ARC Pro

Upgrade to ARC Pro

Elevate your robot's capabilities to the next level with Synthiam ARC Pro, unlocking a world of possibilities in robot programming.

United Kingdom
#1  

What an awesome little bot love the claw and the flashing front panel lights

#3  

great job!!!!

Great looking bot!!!!!

Very smooth movement....I love it!!!!!

#4  

Handsome Bot!

I think the EL wire was a super cool idea.

PRO
Synthiam
#5  

Very cool Bret! I've always liked this photo of it. The black is great!

User-inserted image

#6  

Bret, Hats off to you! Outstanding job! That arm is awesome. The lights are the bomb too!

Canada
#7  

"liked" it ... the whole bot looks solid, great work. Feel like he could give a good TV style "judo chop" with that claw:)

#9  

Very nice job bret!!!!!! Lookin' good!!!!!!! you ended up doing some of the same things I did on myOmni. EZ-B in the cassette draw. I was thinking about a black paint job trimmedwith gold. I ended up with silver overall with gold trim. I went through your build pics but didn't see one on how you mounted the head servo. Do you have any pics of the set up? I had got everything done accept for his head set up. That bot got put on hold for a bit when I went on to other projects. I wanted to use my EZ-B in another project. I will eventually finish him. Again nice build! Oh, I did some similar LED's in his front plate too. Rock on!!!!! Lloyd

#10  

@Lloyd - Thanks! Sorry, I did not get any pics of the head servo. But what I did was to mount a piece of angle plastic across the bot (using hot glue) and cut a hole in it so the servo would just slip down into it. Then I secured the servo horn to to a flat piece of aluminum and mounted that to the head. I hope that is clear. If not, I can make up some drawings.

#11  

Very nice!

#12  

I think I follow what you did. However, like the old saying goes.................a picture is worth a thousand words.Once I get the head servo in I can swap in one of my EZ-B's and bring him to life. Thanks. Lloyd

#15  

So do you have a omnibot.project omnifreak?

#16  

By the way, what did you do with the flashing LED's? Did you use EZ-B digital pins or did you create a circuit to flash them?

#17  

I used and LED chaser circuit and randomly placed the LEDs. Then I tied that to an EZ-B digital pin to turn it off and on. You need to use a TIP120 transistor to do this. I posted instructions on someone else's link but can't find it now.

#20  

Thanks for the response. I'll have to give it a try. Makes for a veryyyyyyyyyyyy cool display!!!!!!

#22  

Super cool robot. Looks great black with all the lights flashing. I need to get more EZ Bs to make more of my robots smarter.