


Hi everyone.
This is the first of two posts talking about the inspiration and features of my home robotics build. In the first post I talk about the inspiration behind the build of K-9 2.0. The second post explains the features and build details.
So, after a year in the making, I am pleased to present a project I've been wanting to do for years, pretty much since the first time I saw the little fella in Doctor Who when Tom Baker (one of my favourites) was playing The Doctor. K-9 was pretty much my all time favourite characters in the show and with that in mind, and with my love of dogs and my love for robots, it was logical that building my own K-9 unit some day was in the stars.
Some of you have already had a brief viewing of him when he gave a Birthday message to the EZ-Robot team, and Donned a moustache for Movember, but now his build is pretty much complete its time to bring him to the showcase. I have included a "How he was made" video at the end of the post.
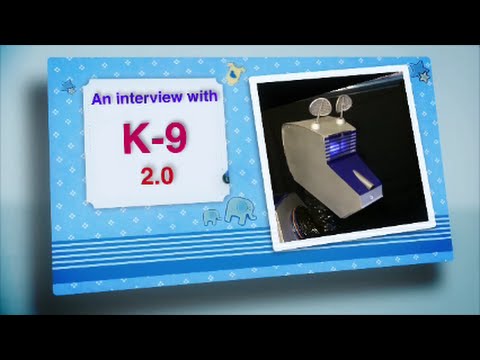
So, why K-9 2.0? K-9, because it's a cool name and the clever play on words. I just couldn't change that, and I couldn't call him FiDo (whovians will know what I mean by that). 2.0, well those of you in the know have already noticed my K-9 looks a little different to the one's seen in the show. This is because I wanted to give him a newer, slightly more modern look but still keep the original shape I fell in love with as a child (don't like the new one in the new kids show. Looks too much like a toy to me). I also wanted to have a more personalised look and shy away from building a replica, although I very nearly did. (I hope I haven't offended any K-9 aficionados out there with his new look).
Okay, why now? I had an accident a while ago now resulting in injuring my back and left leg which left me unable to work or do much else for a while. So, looking for something to do to keep my mind and hands busy, and not become a couch potato, I thought "I want to build something". So needing to keep costs as low as possible, I got together a load of material I had from around the home, old R/C tanks, Cardboard, MDF sheets, LED fairy lights, old web cams, and numerous other bits and peace's laying around my home just crying out to be used. First of the blocks was a robot which didn't turn out very well. To heavy for the R/C tank drivetrain.

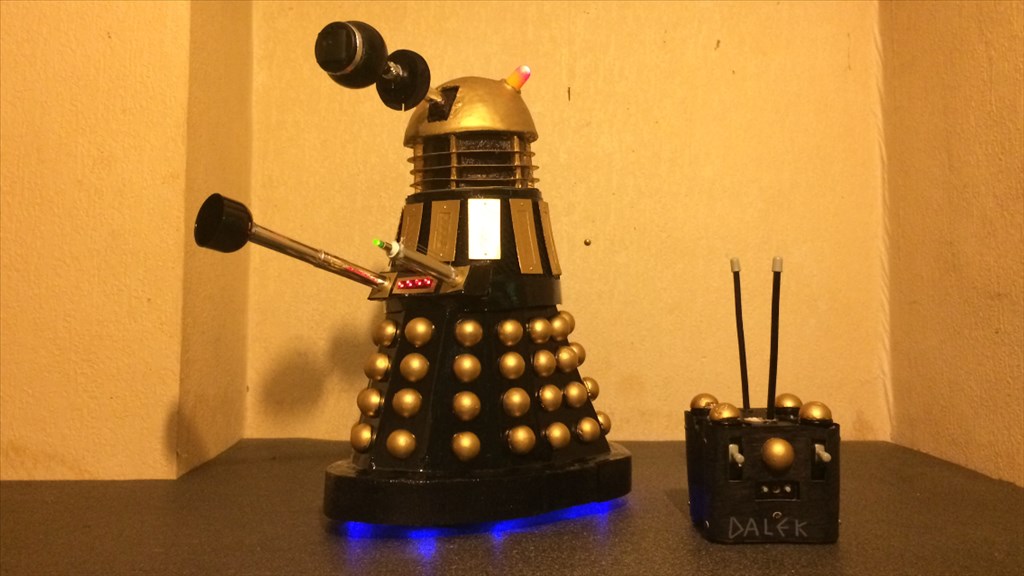
Then came cardboard Dalek BOB (Built Out of Boredom). He was a lot more successful, and was a lot of fun to build.
During BOB's build my mind started going in to overdrive, and that where the K-9 build came in. So after BOB was finished I drew up some plans and made a Cardboard K-9 prototype.
Again, he was was a lot of fun to build but I wanted bigger and better. At this point I had a lot more mobility so I decided, let's just do it.
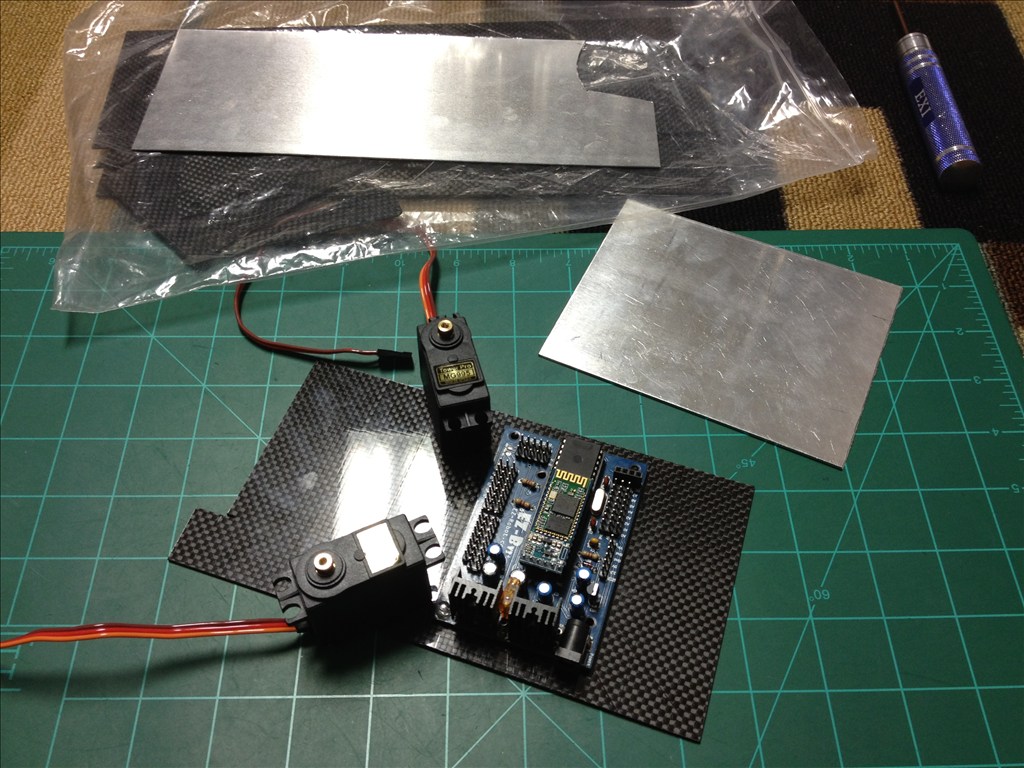
My (not so) little robotic pooch nearly turned out very different, and I'm not talking about how he looks. After making the R/C bots I had three strong motors and one last working R/C control and receiver. So I drew up some blueprints, I got my tools together and dusted of the MDF sheets. I was going to make a full size similar dimension R/C K-9 and hack some PIR sensors and audio equipment to install inside of him. I started on the chassis first (as seen in the "making of" video below) just working a couple of hours a day or night, and a few weeks later pretty much had it complete and started to make the body frame. During a not very good day as my back gave out again, I was searching the interweb when I came across a fun, crazy, interesting company's website. I think it was called "EZ-Robot" but I can't be sure(s) (pardon the pun DJ). This changed everything. Microcontroller, servos, face/colour/object recognition and so much more, this was for me, or rather K-9. After spending days going through the website and forum I made a shopping list and placed my order. Due to the pre-order status for orders at the time, this gave me time to crack on with the build and hopefully get most of it done. About 3 weeks after I finished the main part of the build I got that all important email, "Your order has been dispatched".
My goodies arrived a few days later and it was "game on". I started playing around with ARC and my new EZ-B v4 and was well impressed. This lead to a few small changes in K-9's design, but for the better as it turned out. It was about this time I became more active in the forum asking questions I got really stuck with and was amazed with the community members response times and willingness to help. If it wasn't for you guys, K-9 wouldn't be half the robot he is now, so thank you all who took the time to respond and help. No joke, this is the only forum I look at on a daily basis and that I am active in.
Well as I mentioned, the build is pretty much complete now, and everything installed and working. I still have a couple of ideas I would like to implement at some point like adding microphones to his ears, adding a smoke detector in his eye panel and a couple of other things. But for now I'm going to concentrate on ARC and set a lot more things up. I've done a fair bit such as setting up servo positions, sound files, face and speech recognition, but there's much more to explore and still have a couple of teething problems I need to iron out.
The video below is the first of a few to come. It is a slideshow of some of the photos and video clips I took during the build and testing. As I said earlier, I still need to sort out a couple of issues I'm having, and once that's done and everything is hunky-dory, I will put up at least a couple more videos of K-9 in action for you guys.
In post #2, I have put down a few more details of K-9's features, abilities and build design along with a few things I am planning to do if possible. So, as some of you already know, this is my very first attempt at building a microprocessor controlled robot, with no scripting/coding knowledge or "qualified" woodwork/electrical experience but, even if I do say so myself, I don't think he turned out too badly. But it's not what I think that matters (well perhaps a little bit), it's what you guys think. Well I hope you enjoyed this insight to how K-9 2.0 came to be (and if you kept reading this far, then fair play to you), and I hope you enjoy the video. I would love to hear your thoughts and opinions, things you may have done differently, things you do like and things you don't. I'm pleased with the way he turned out and I hope you like him too.
Again, thanks to all of you that helped me along the way, and for those who are just browsing or are new here, I hope K-9 2.0 inspires you in some way with your own robot builds.
Steve G.
Discover more robots
Cardboardhacker's 1/2 R2d2 Scratch Build
-634767667799482421.jpg)
Sfoy's My Frankenbot - Robosapien, Hearoid, Ottobot Head

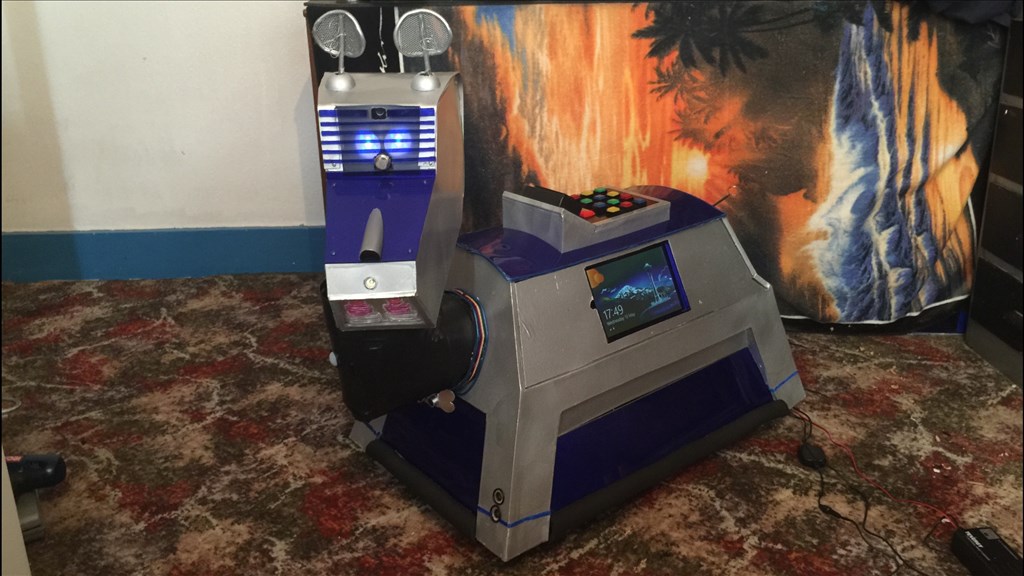
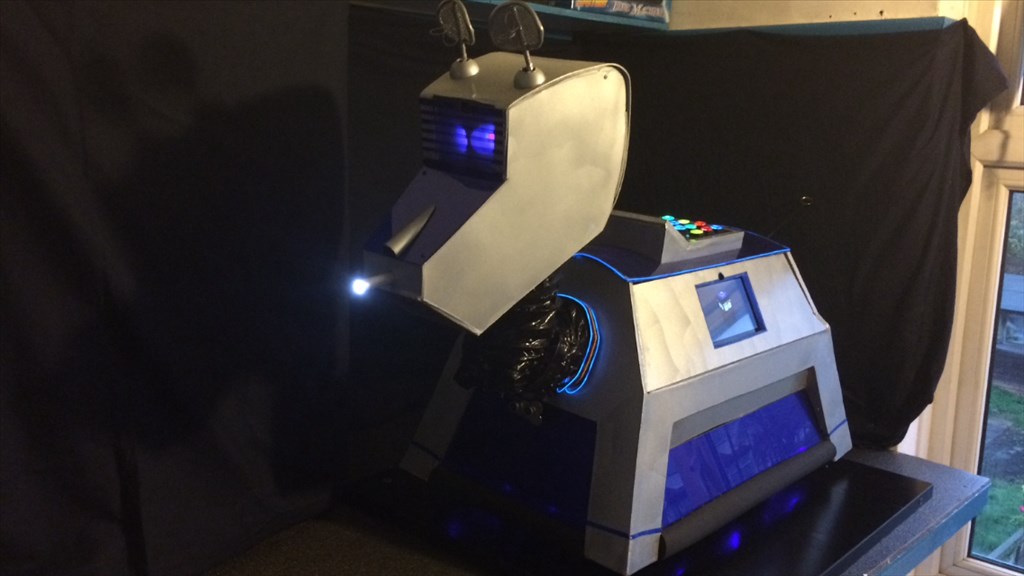
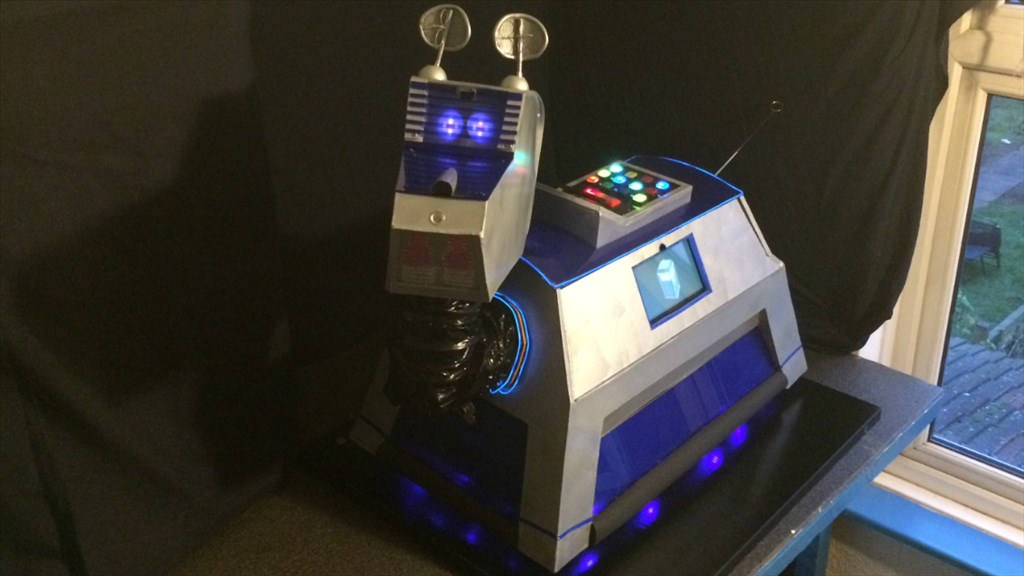
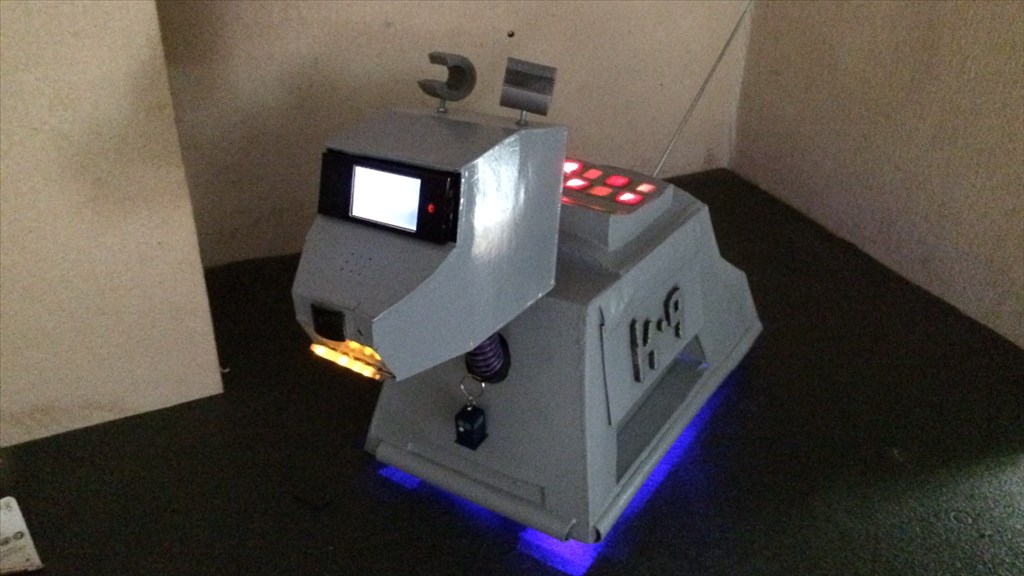
K-9 2.0 features.
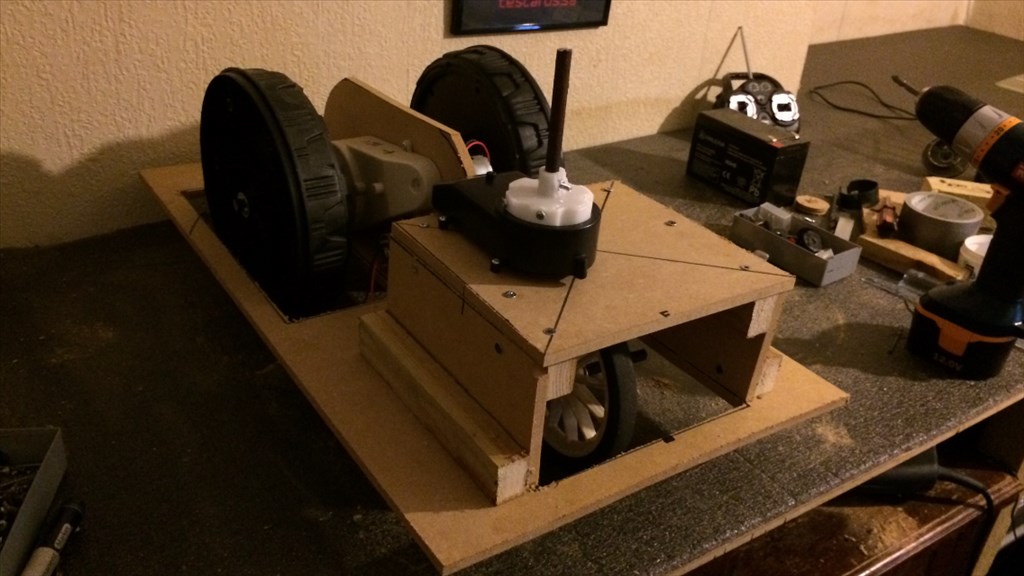
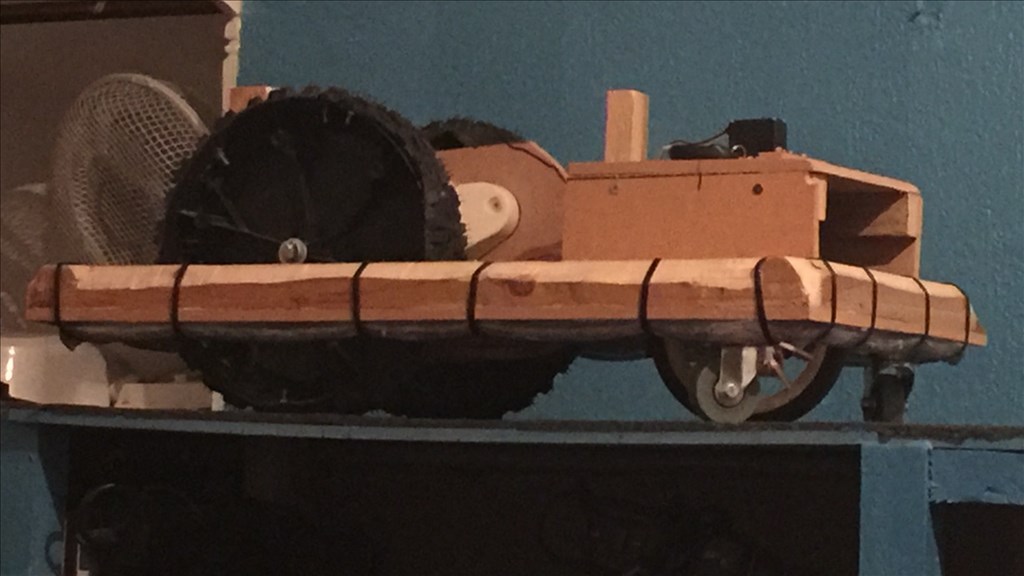
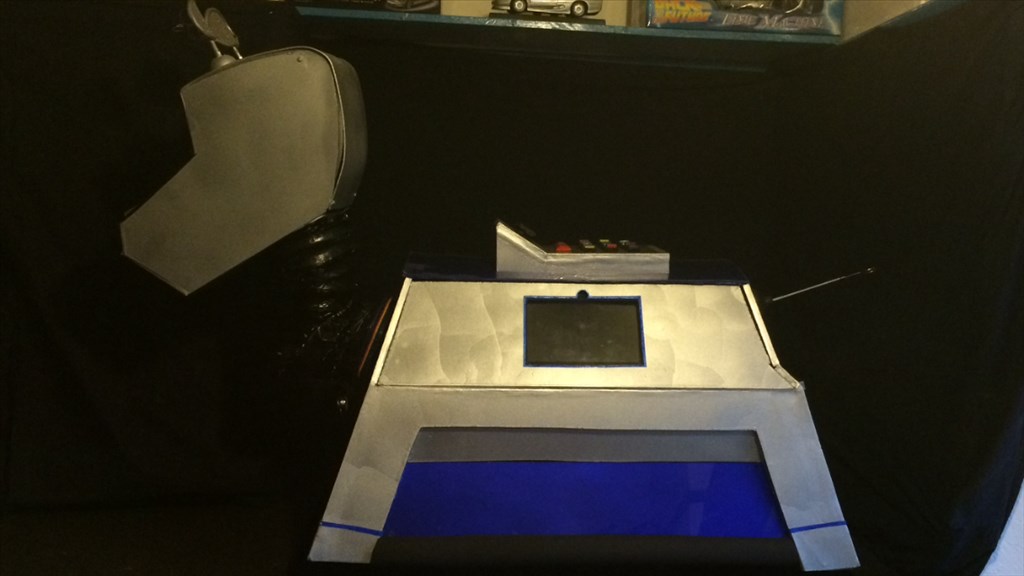
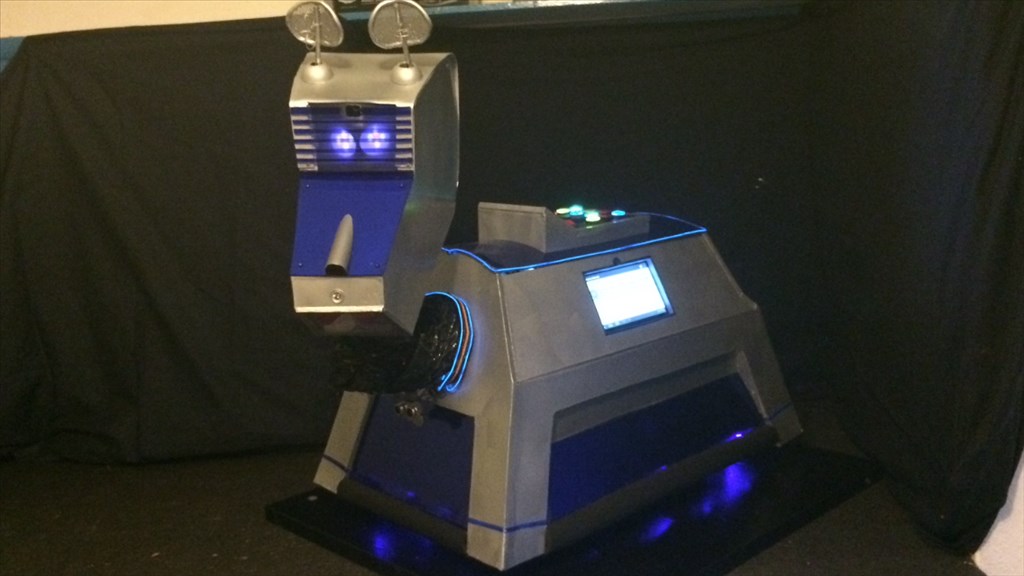
Chassis/drivetrain.
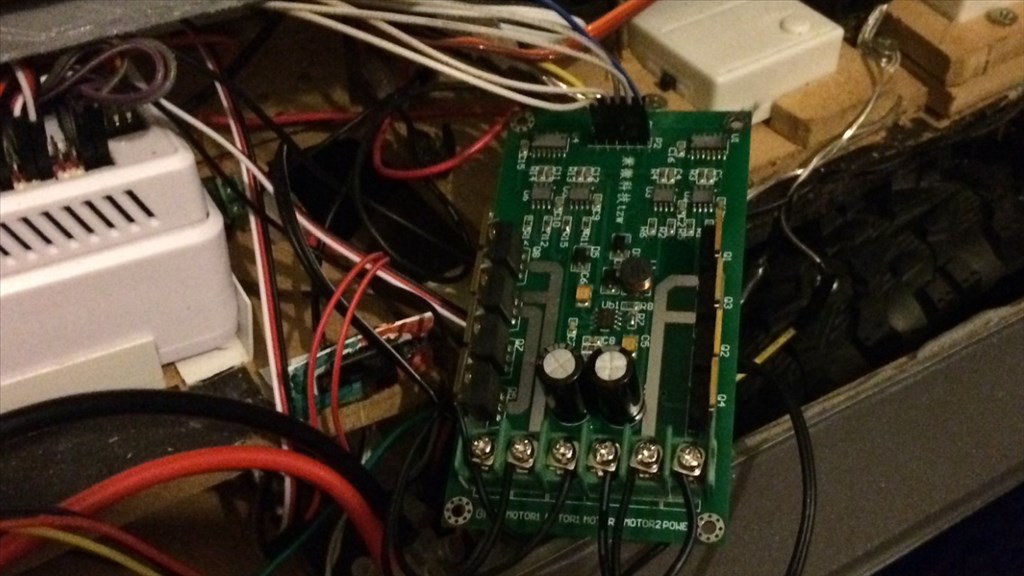
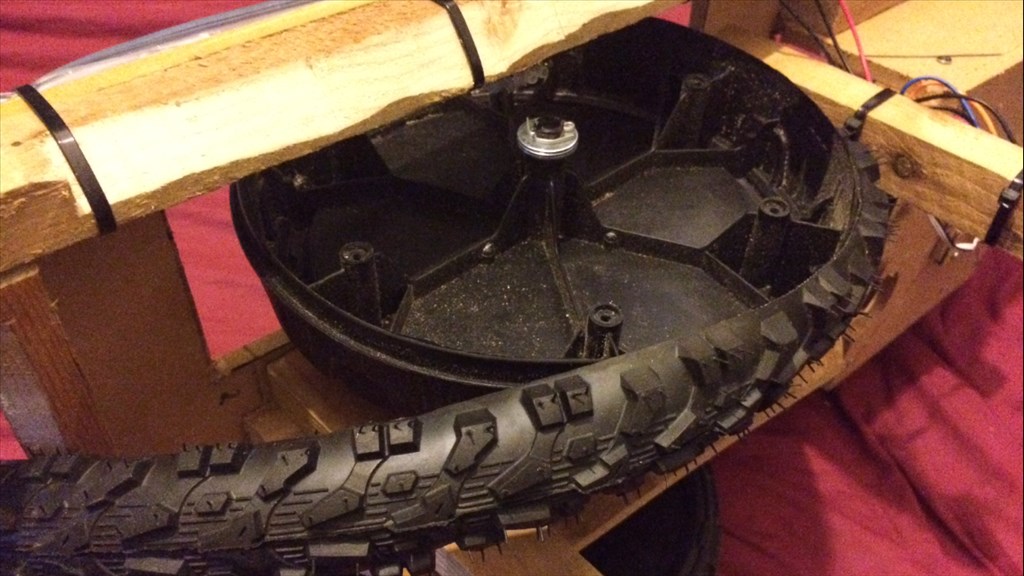
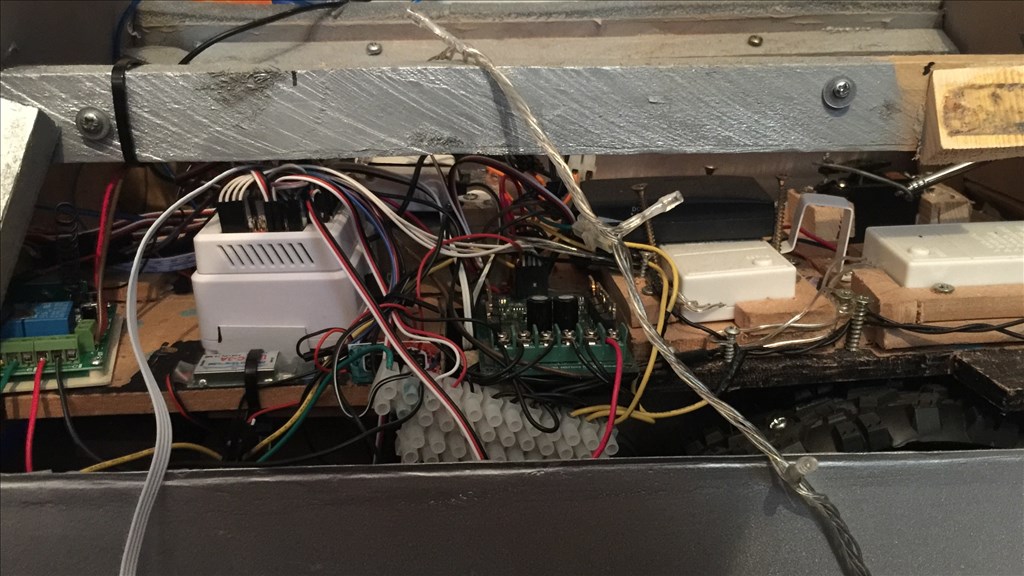
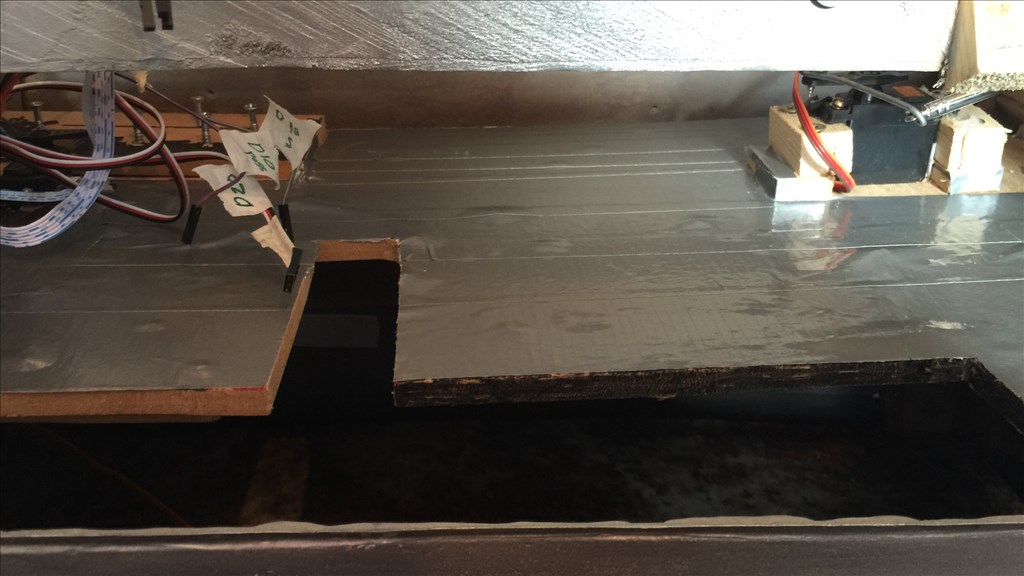
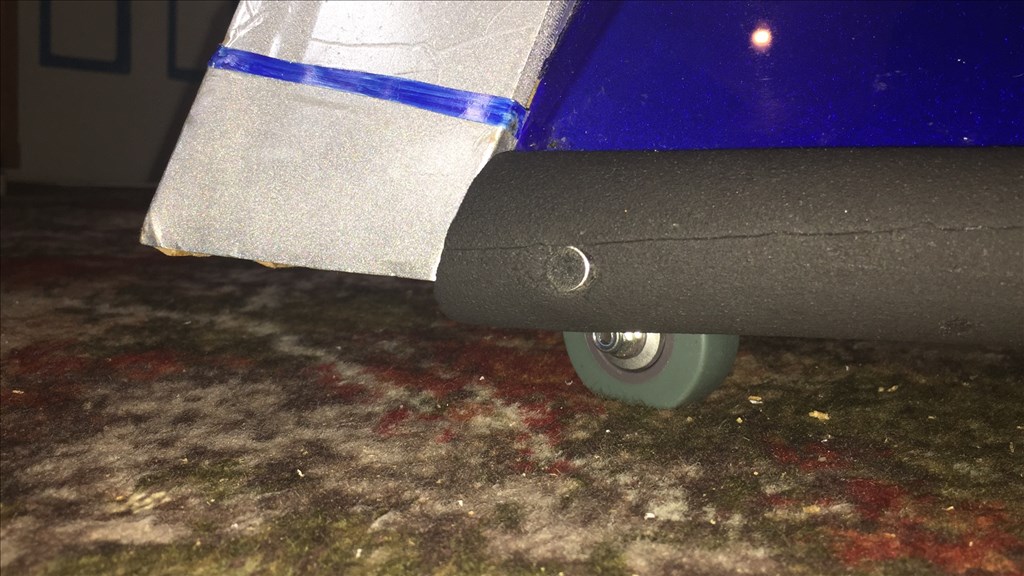
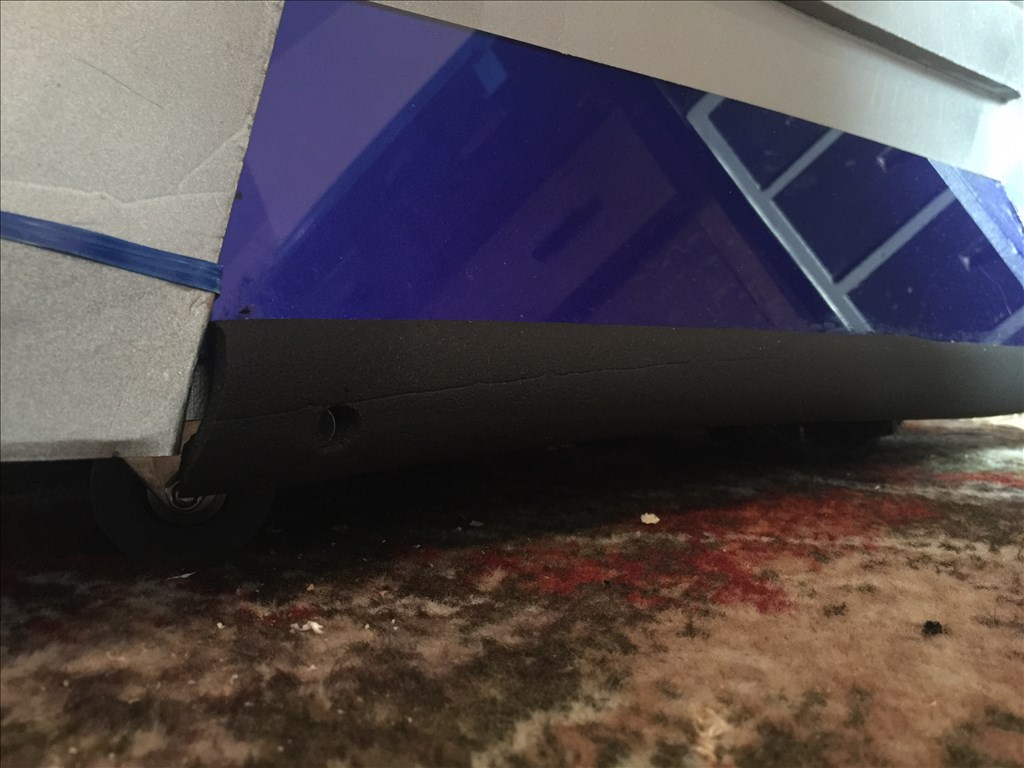
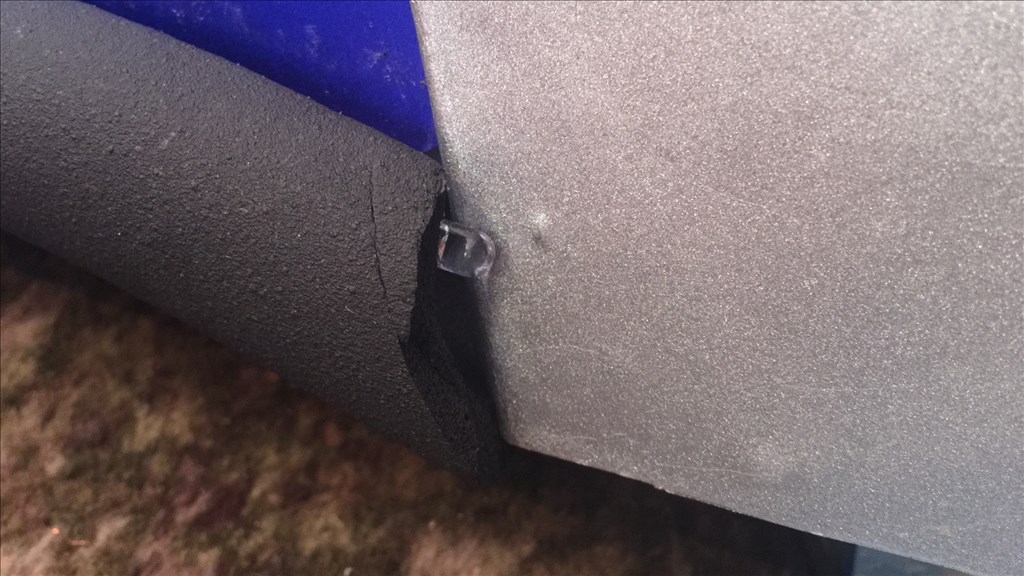
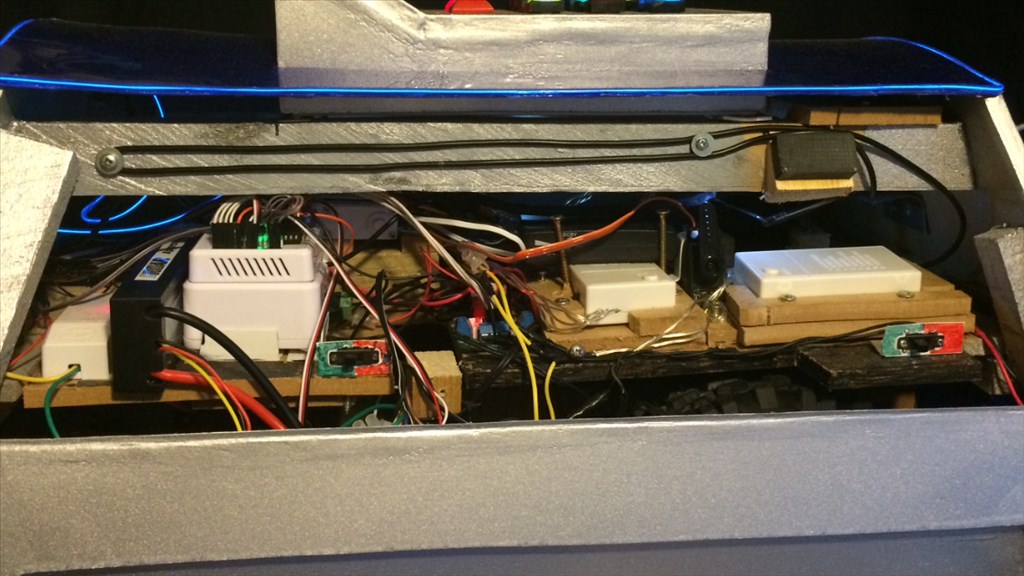
The chassis is made from MDF and 2x1 battons which makes a very strong platform. The drivetrain is made from 2x 12v drive motors which came from an old kiddies ride-on car. Very strong with lots of torque. These are wired in to a 2.5 amp L298 H-bridge, but I am upgrading this to a 10 amp motor controller as this is one of the issues, MENTIONED HERE, that I'm having with the final part of the build. The steering is made from wood and has a single un-powered wheel. This turns by a lazy Susan bearing and is powered via a heavy duty servo. The whole chassis is designed to easily separate from the body for maintenance.
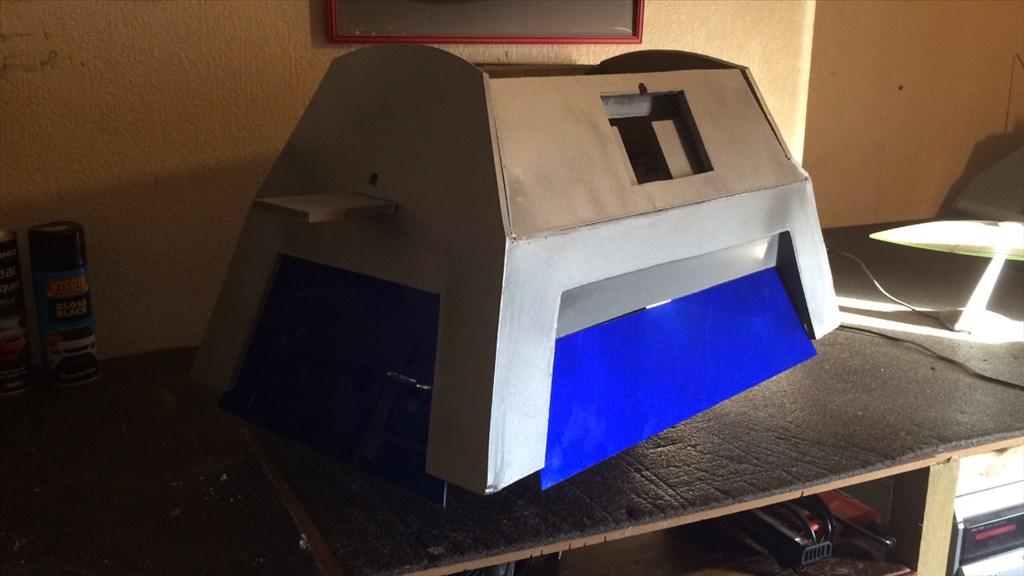
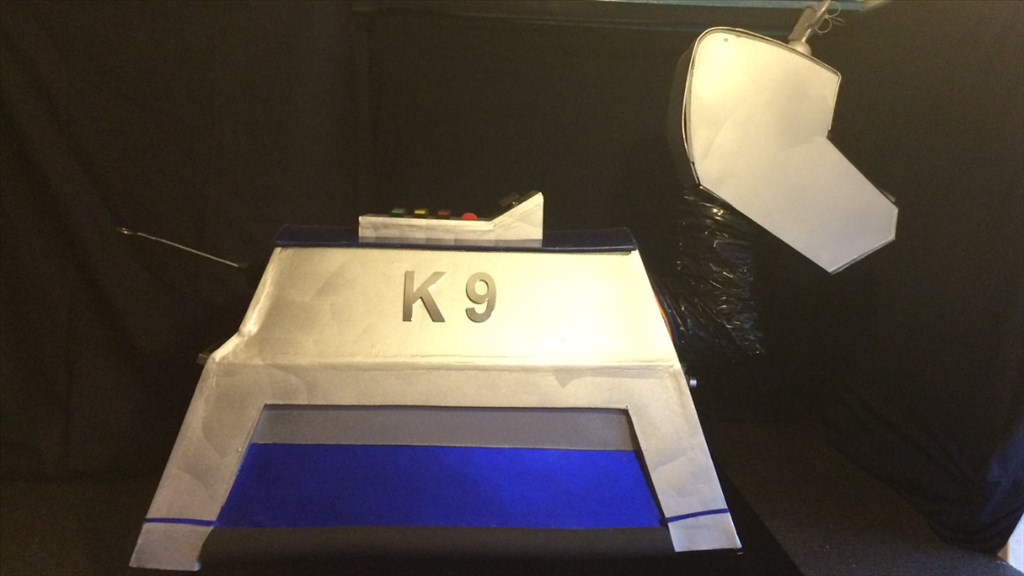
Body.
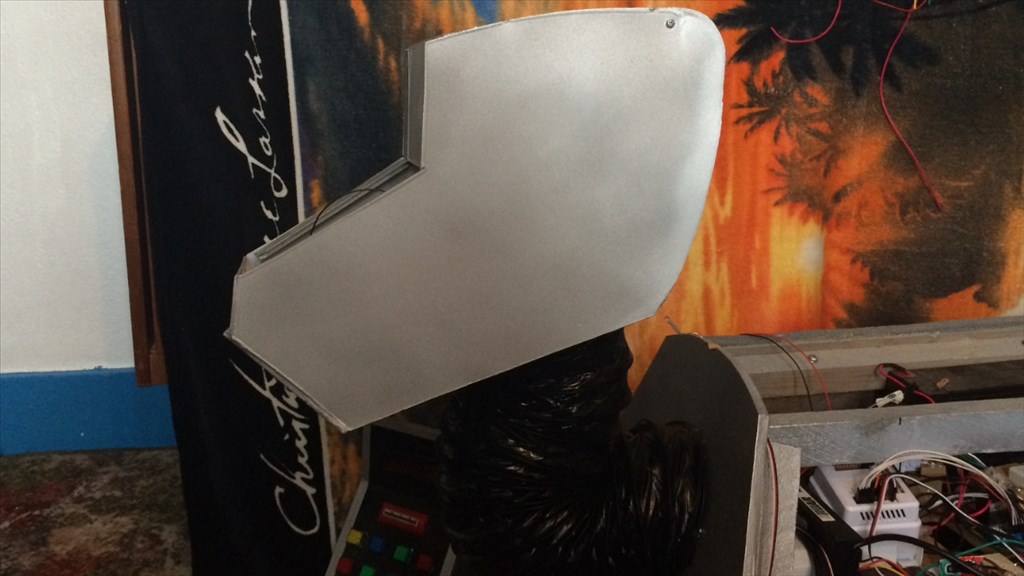
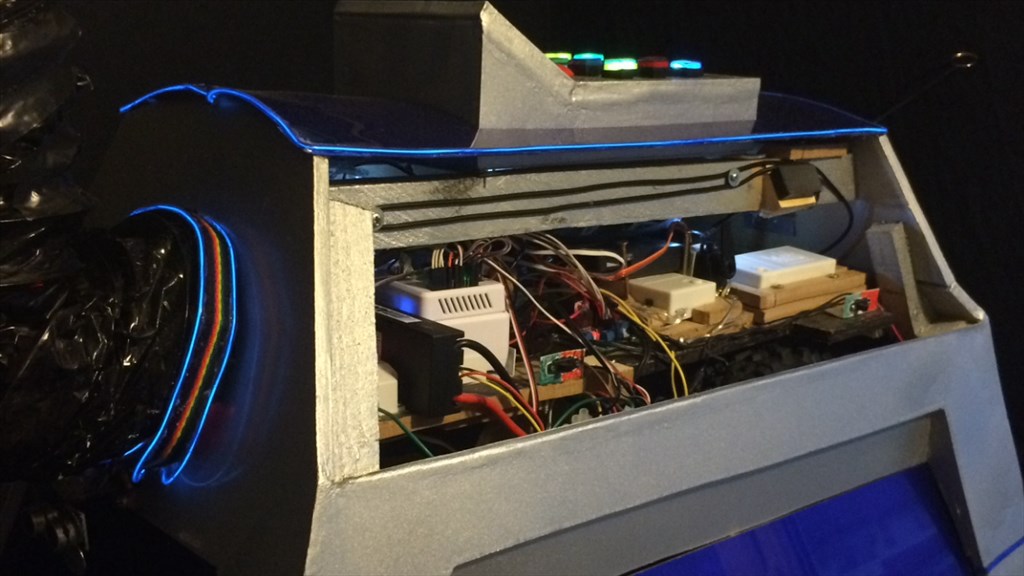
The body section is made from MDF, 2x1 battons and blue acrylic sheets. I wanted to use the acrylic to give K-9 a bit more of a modern look and also liked the idea of having him in two main colours. I sprayed one side of the acrylic panels with silver paint so they have a shiny metallic blue look when they catch the light, and I didn't want them see through. I did the same with the dorsal panel but used a heat gun to melt it in to a curved shape.
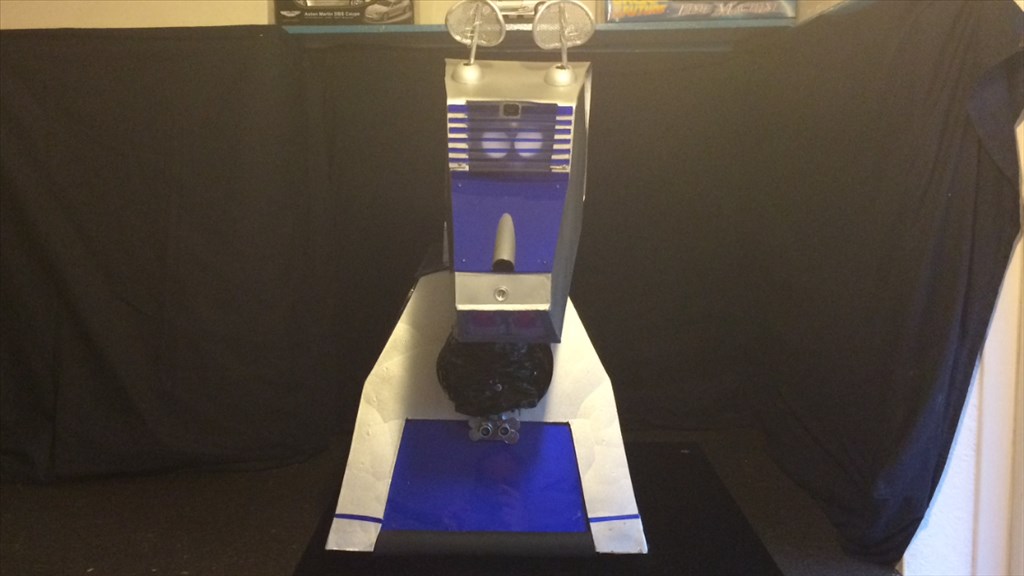
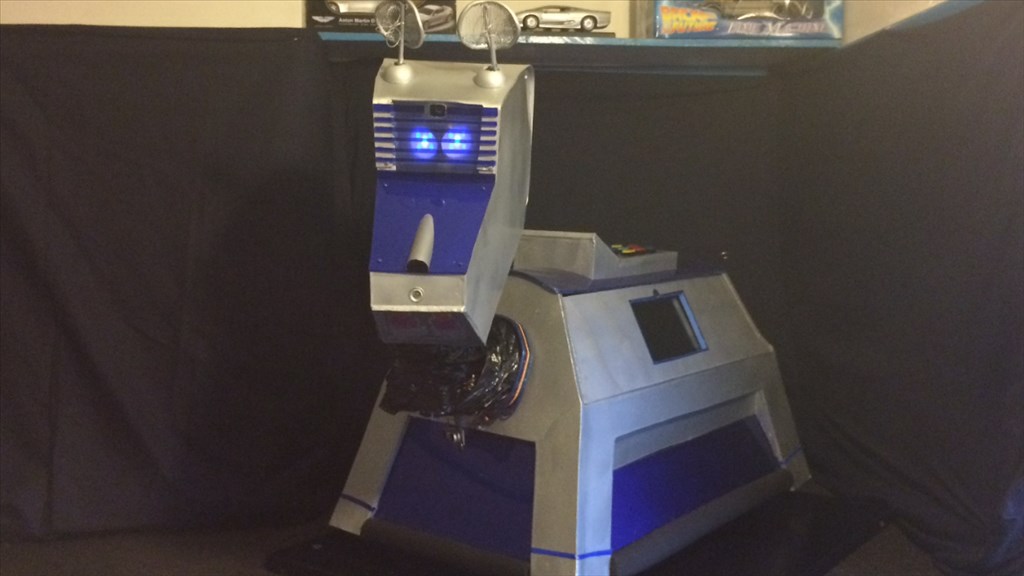
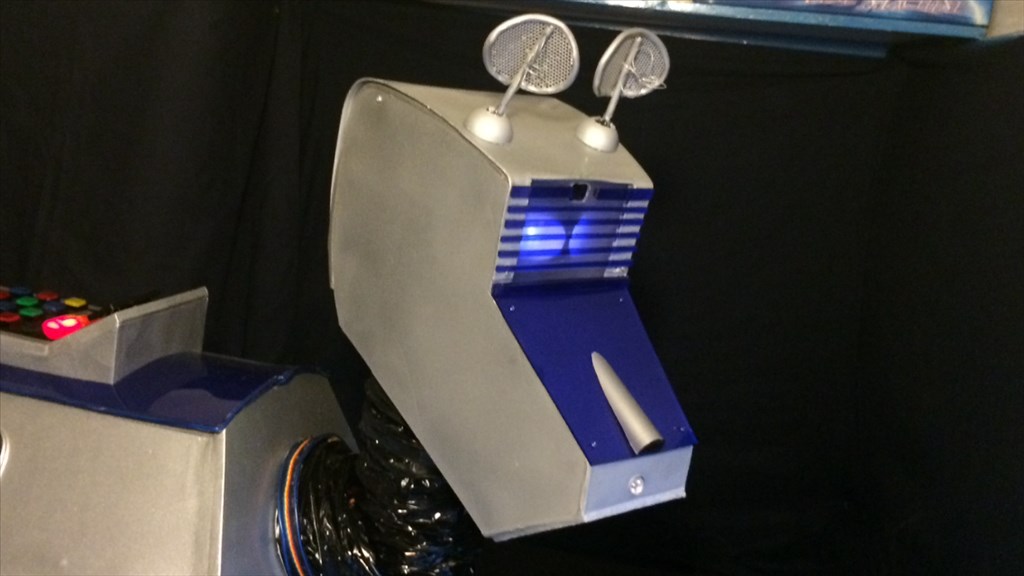
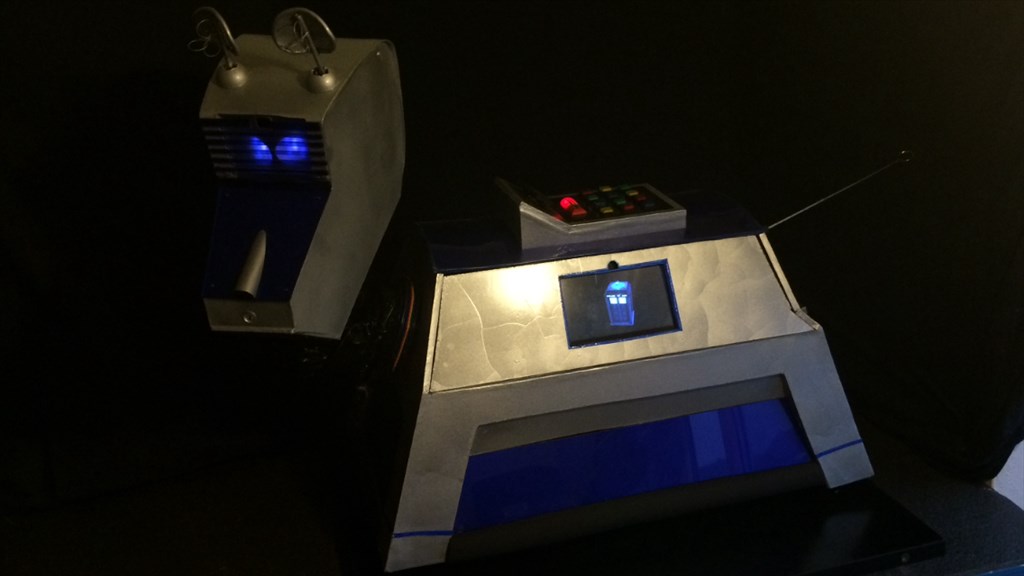
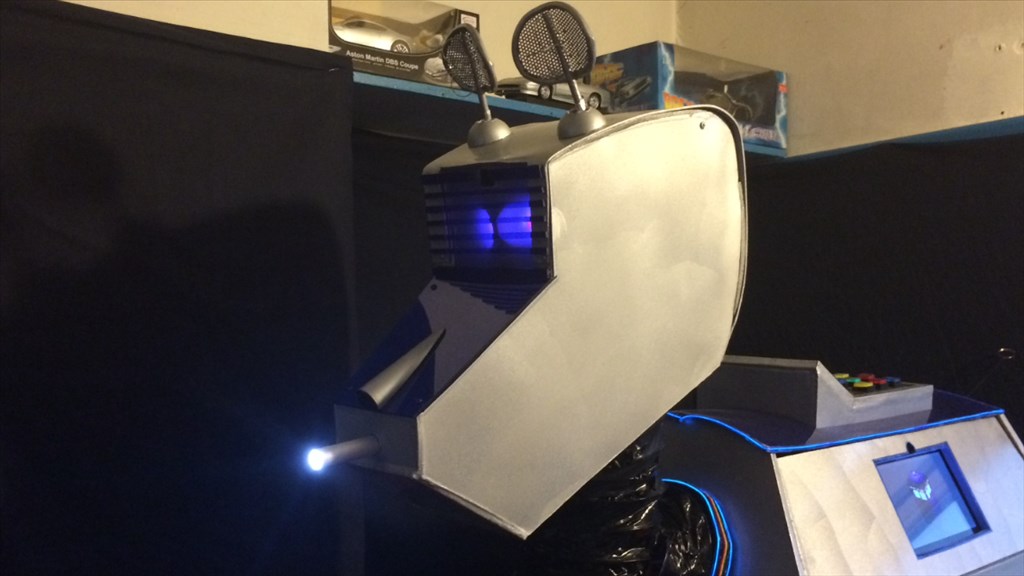
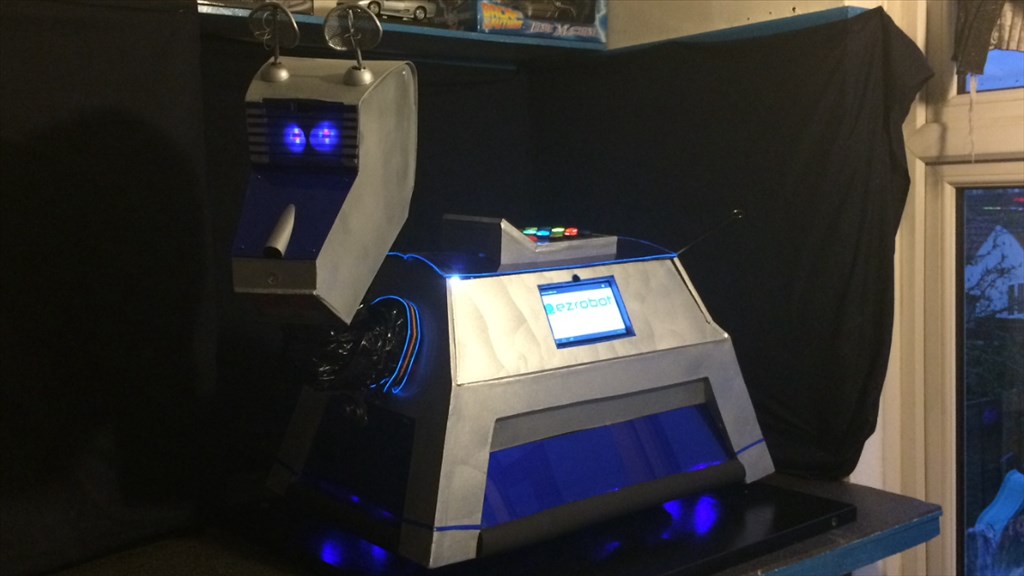
Head.
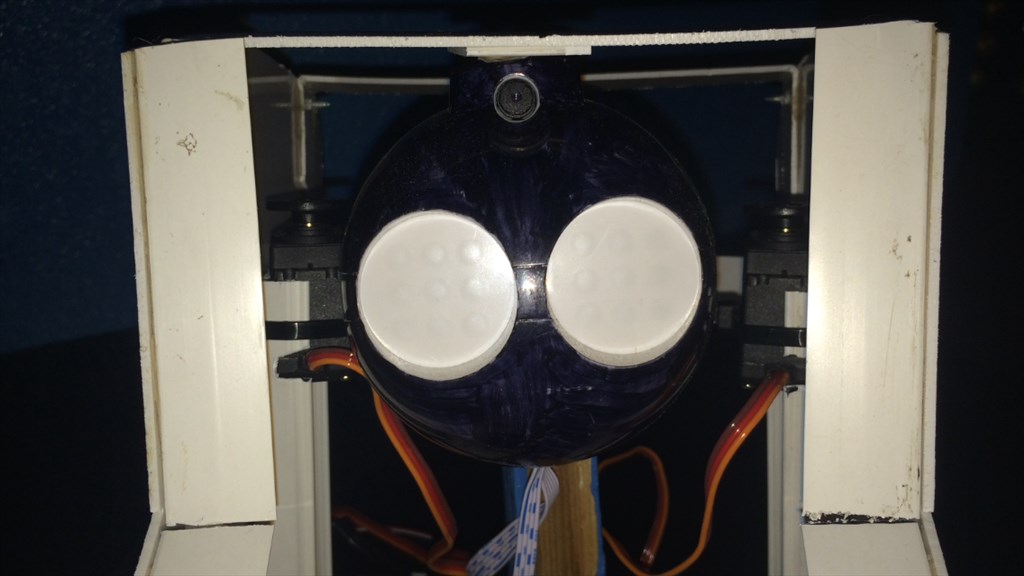
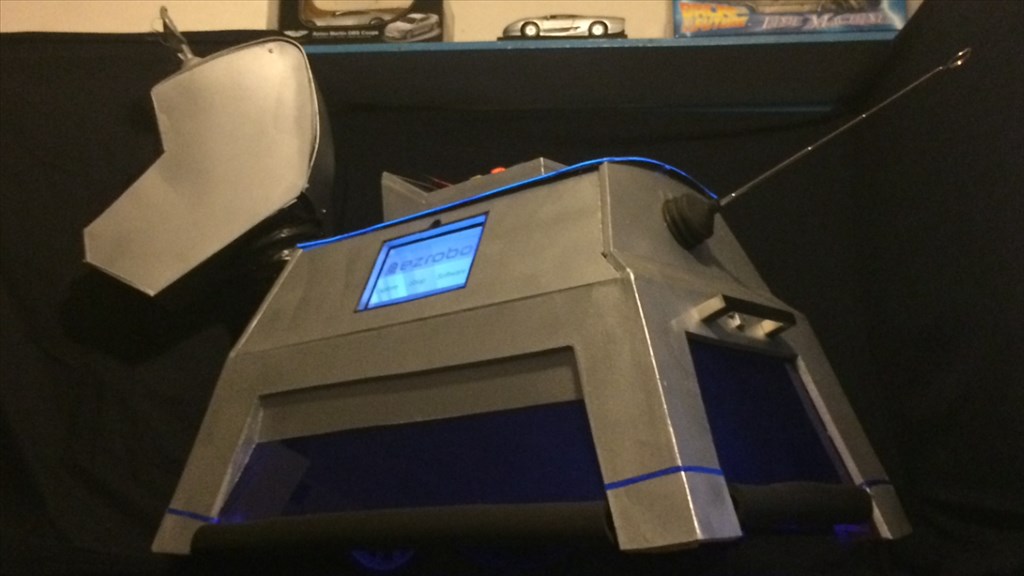
The head is made from PVC sheets. It was going to be MDF but it was just to heavy for the servo to lift it. Using PVC also gave me a bit more room to work with. I used the same principle to melt the top of the head in to shape as I did with the acrylic and heat gun. The head contains a JD head for the RGB eyes and camera. I removed the servos and used these for the rotating ears. Another servo is used for K-9's nose which is explained later.
Neck.
Made using a Small disc of MDF and 4x4 Batton. I made a "push & pull" lever design from the batton for the head to look up and down powered by a HD servo, while the lower part is fixed to another lazy Susan baring and HD servo to look left and right.
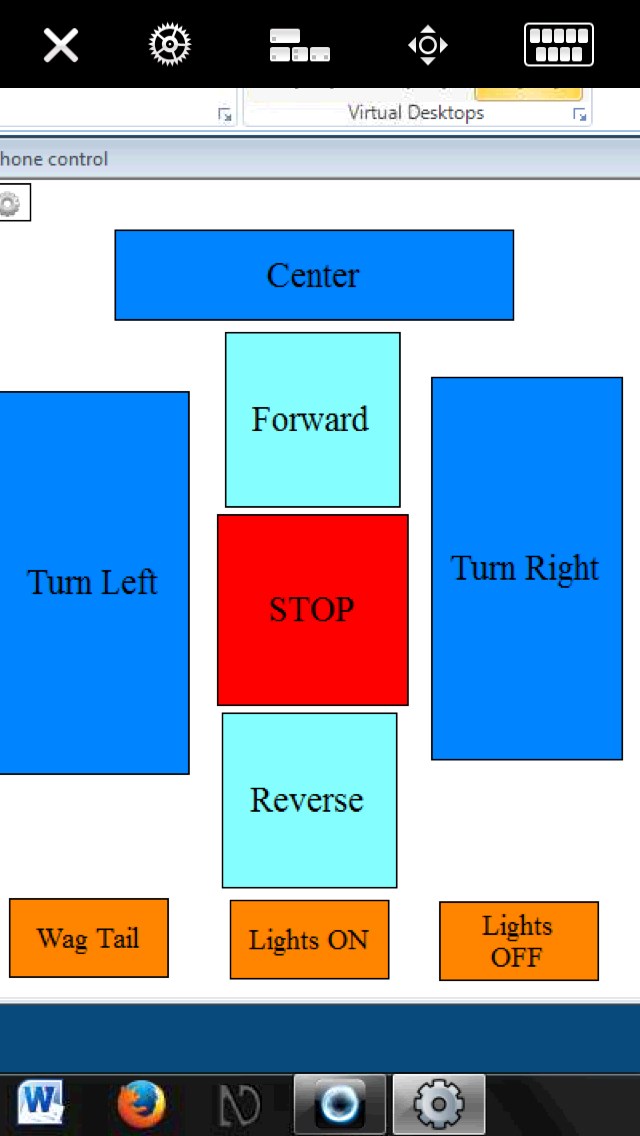
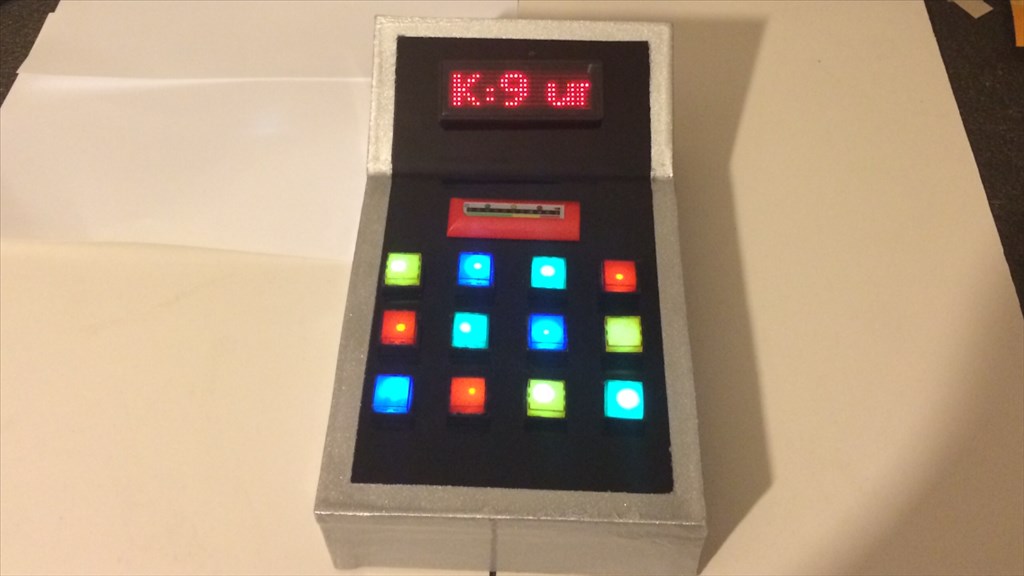
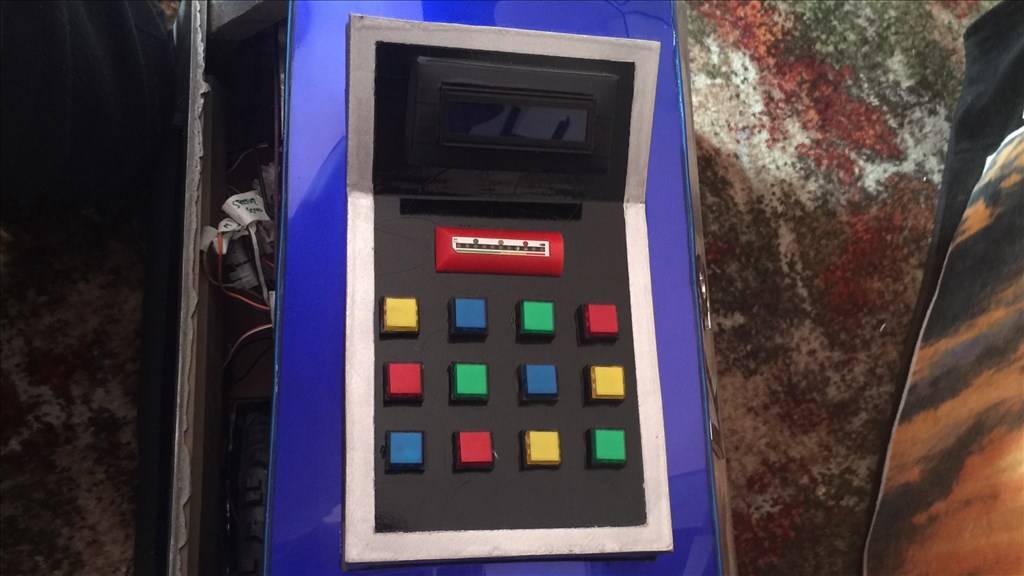
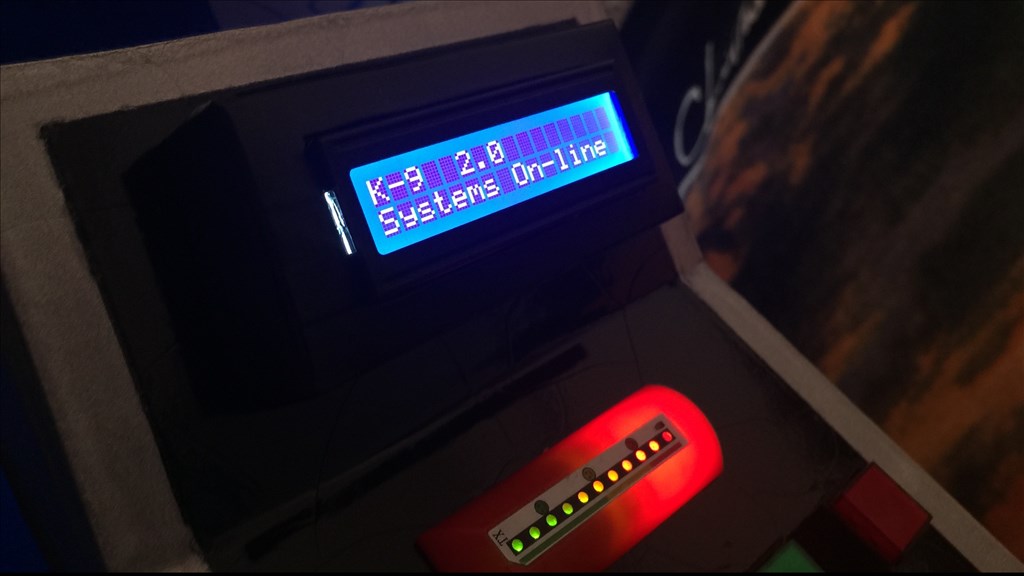
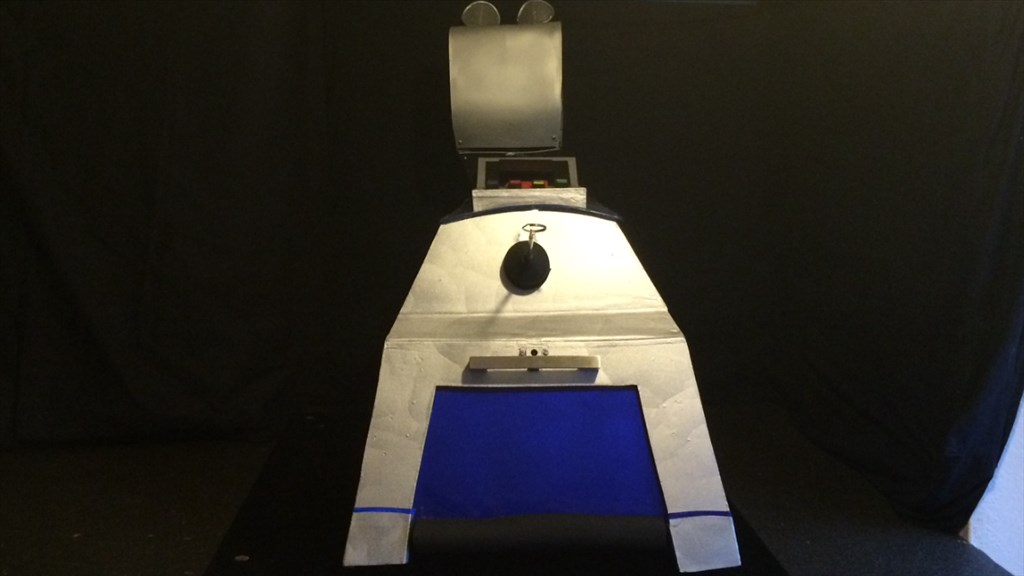
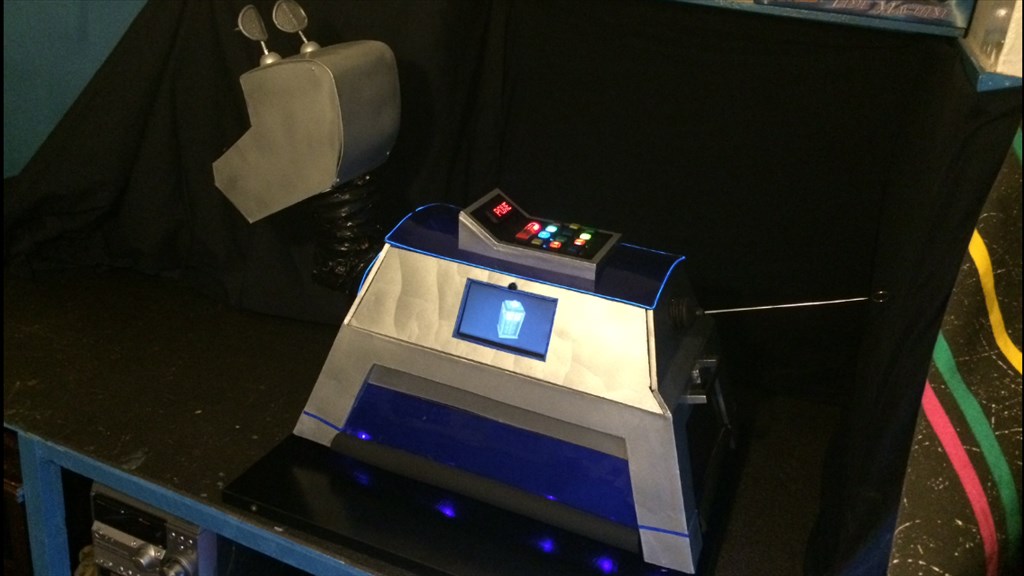
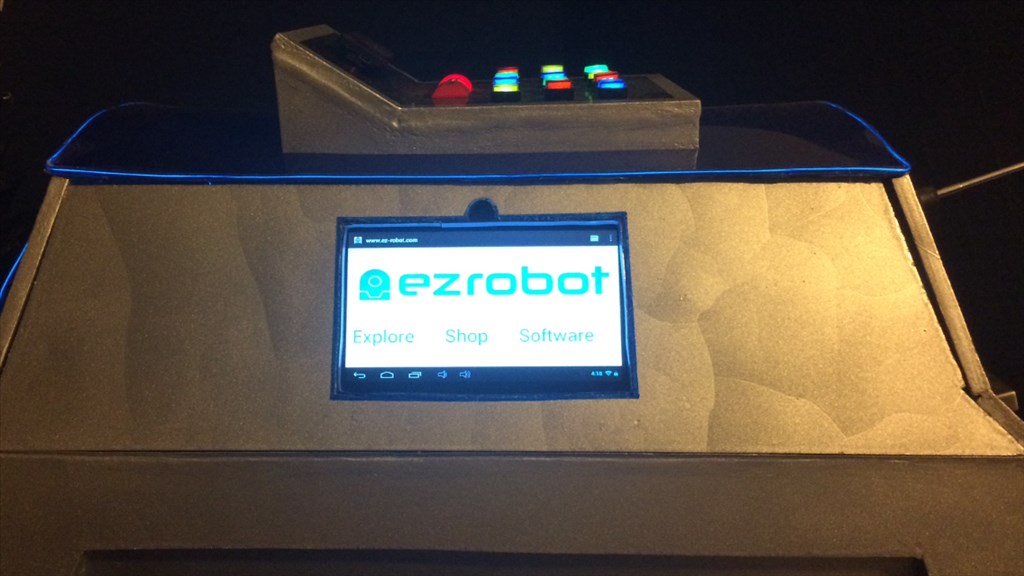
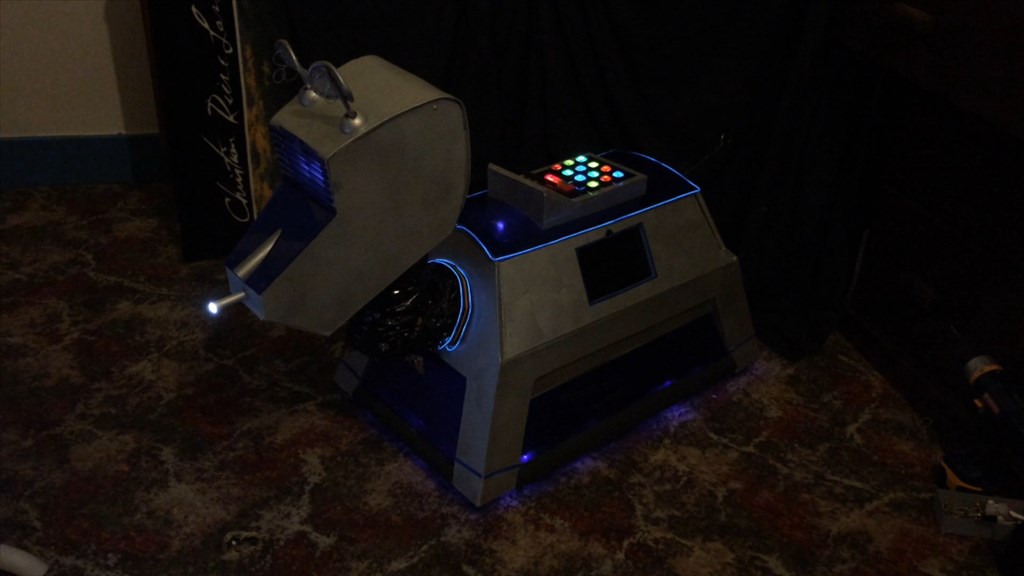
Control panel.
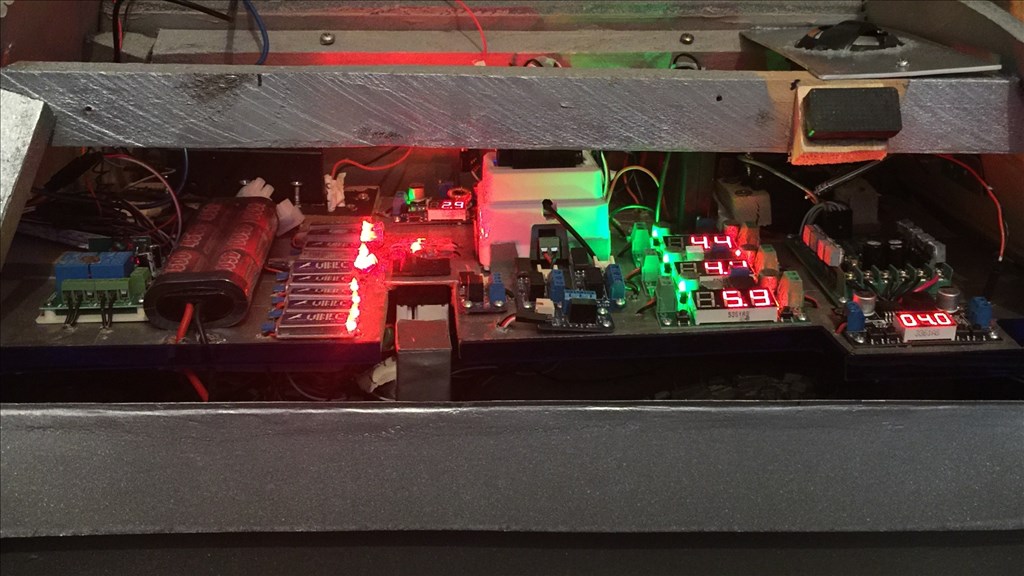
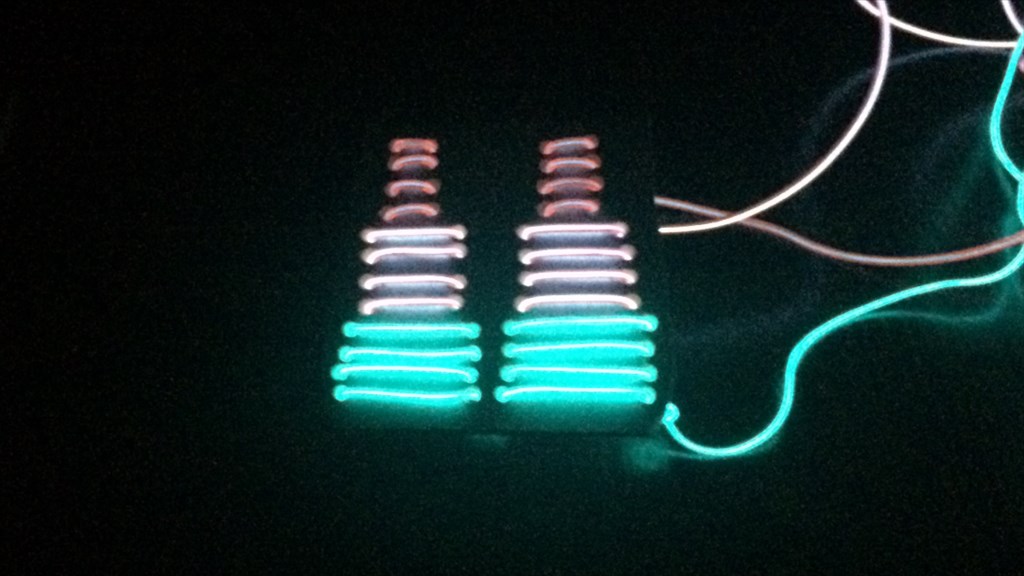
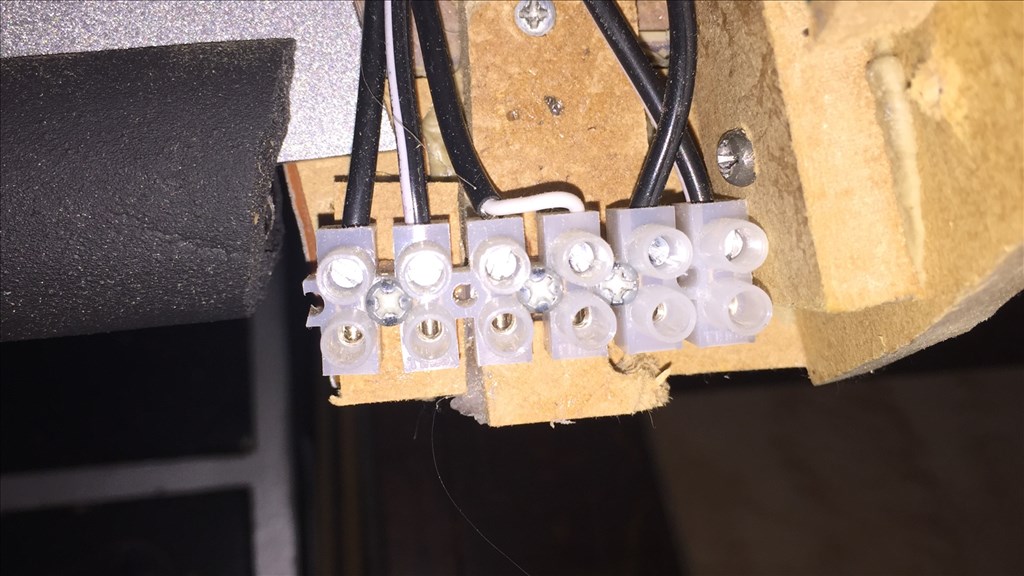
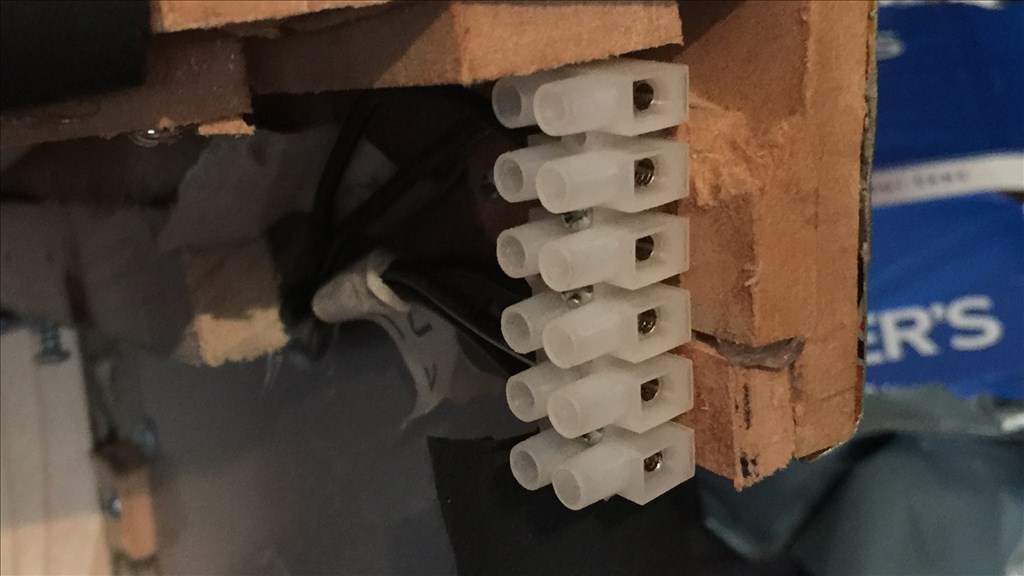
MDF again, with some coloured buttons I found online. These were hollowed out and some clear 8 phase fairy lights inserted. These turn on/off via one servo, while the different phases change via another servo. These have sound effects added via a soundboard and are button, control command() of voice activated. There is a LED battery meter installed and a scrolling dot matrix message display which i had laying around. The control panel can be removed for maintenance access.
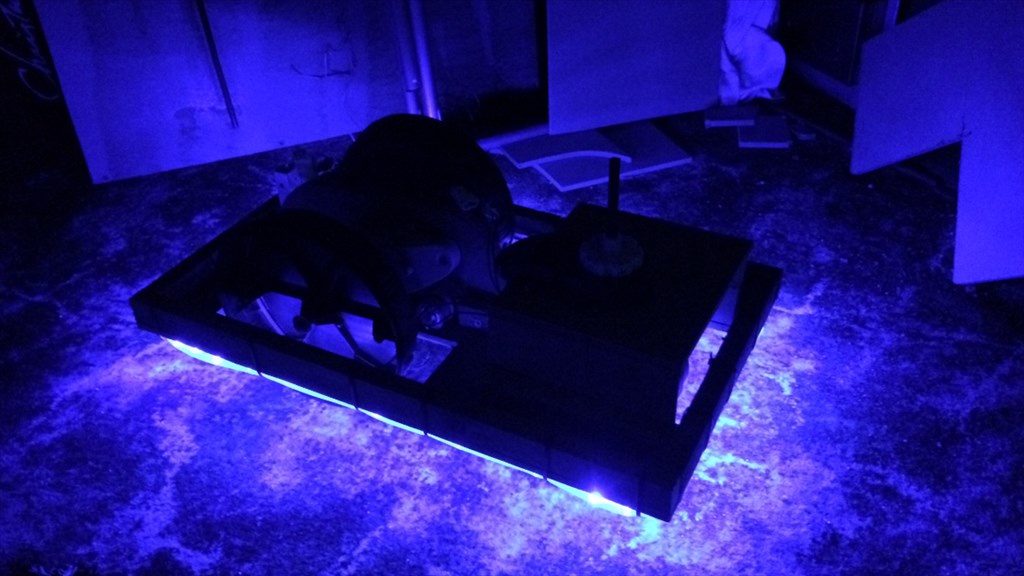
Under chassis lighting.
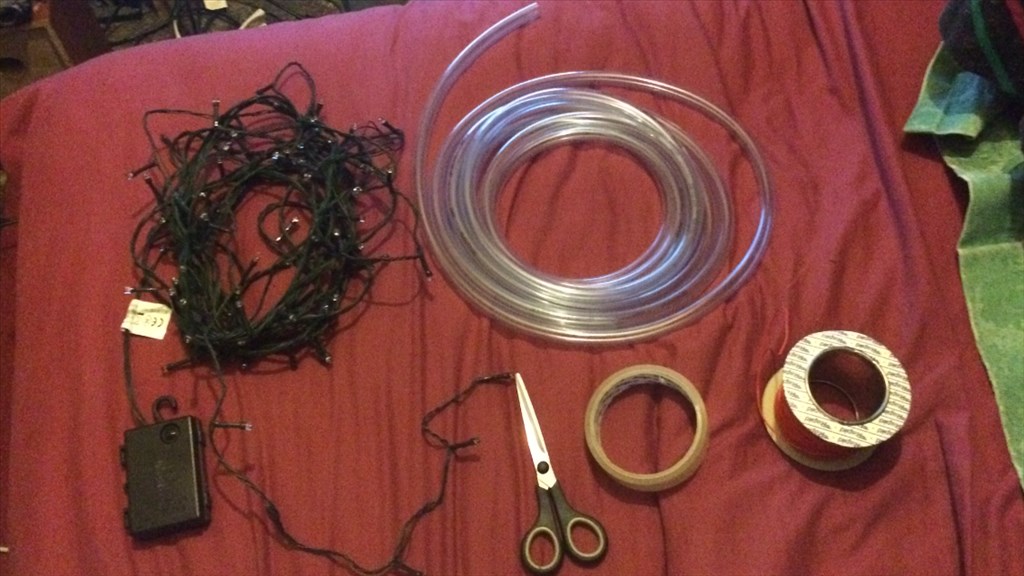
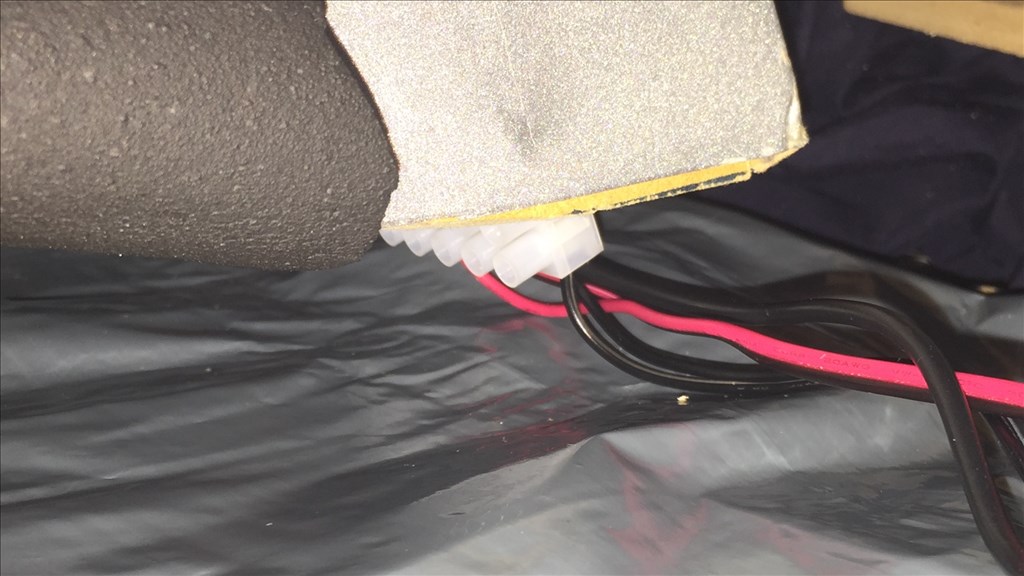
These were made using some blue 8 phase fairy lights and some clear hose pipe. I fed the lights in to the hose and attached it to the chassis with zip-ties. The power and phase change use the same servos as the control panel, and are button, control command() or voice activated with sound effects.
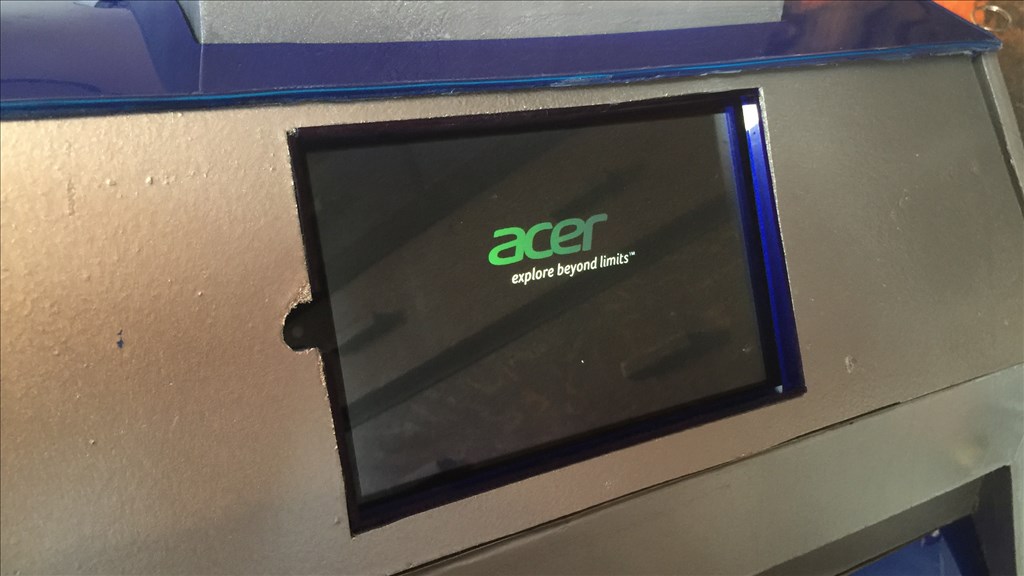
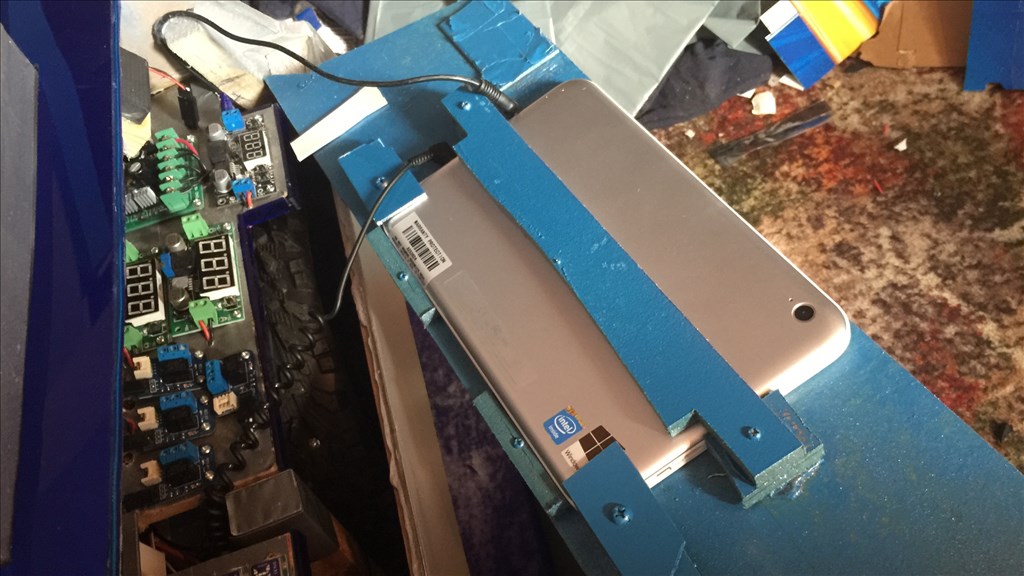
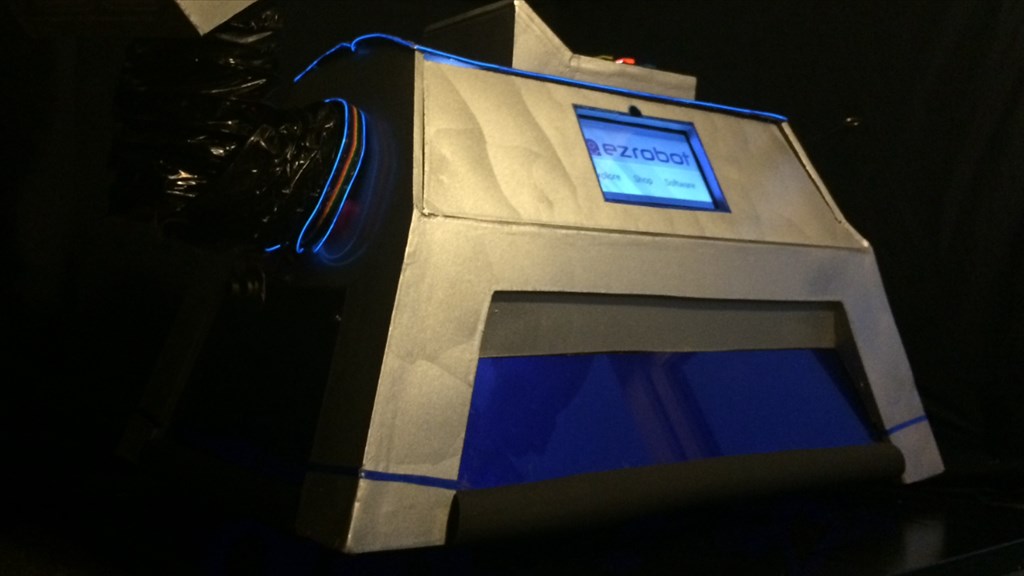
Inspection panel/VDU
This is designed to be easily removed for maintenance access. It clips in to place with a magnet and houses a touchscreen tablet PC. This is K-9's VDU, and displays a diagnostic information animation, but is a fully working tablet so can be used for web browsing, playing video ect. This can be easily removed if needed by sliding it out when the panel is removed.
Tail.
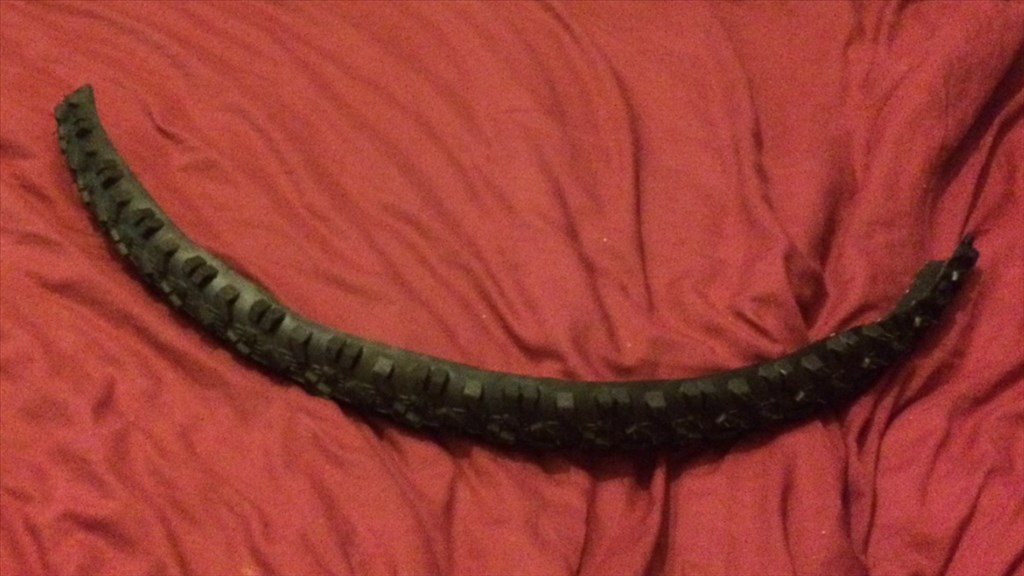
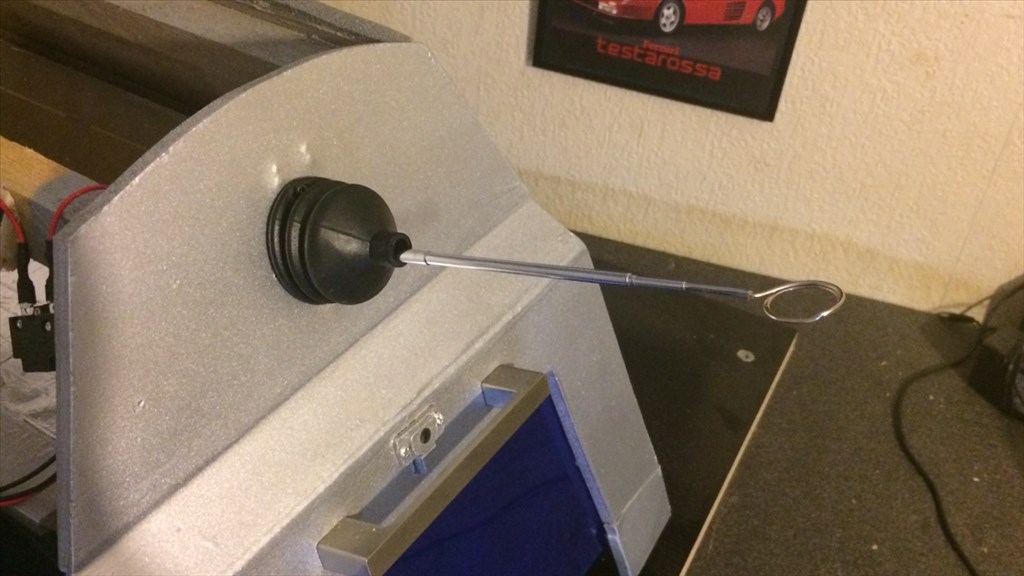
A telescopic aerial and a keyring was used to make the tail. This is connected to a servo and wags left and right. The gaiter is a cars steering rack boot.
Lights.
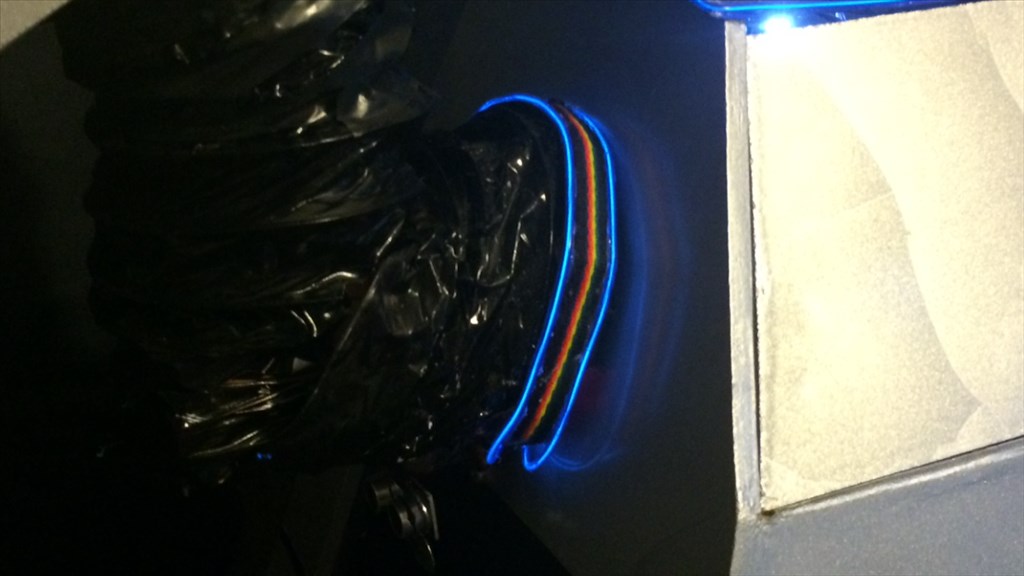
Control panel and chassis lighting is, as mentioned, 8 phase fairy lights. The collar and dorsal edge lighting is a length of EL wire and has 3 phases, again controlled by a servo. I was going to edge light the "K" and "9" insignia on the side of his body, but you cannot bend this stuff too much, and it would have looked messy when the light was off, so I decided against it. So I used the access wire I had for his collar.
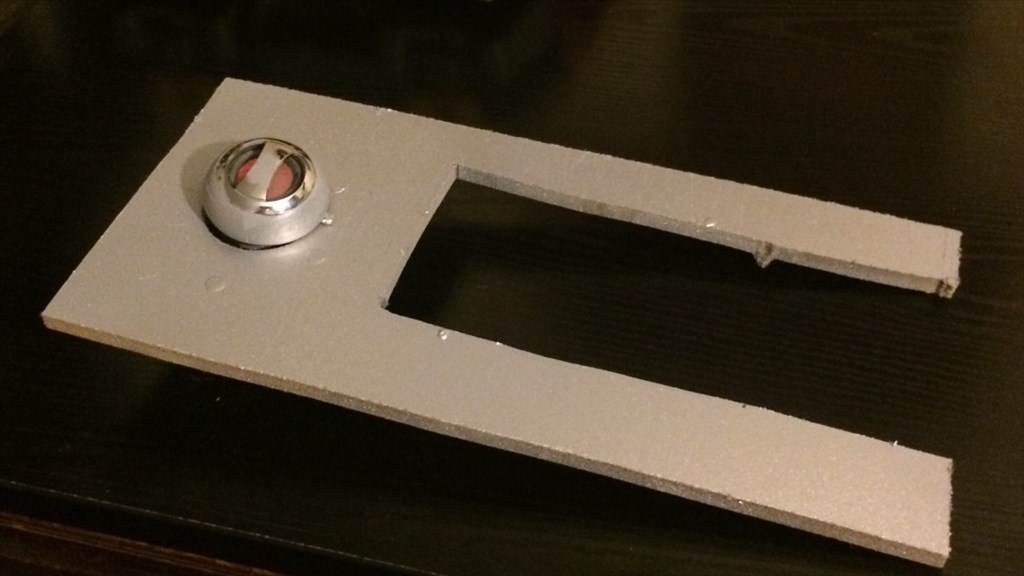
Torch/Laser.
Initially I was going to use a laser pointer but didn't see the point of shining a red dot on the wall, and a little dangerous if kids are around and it shines in their eyes. I wanted something useful. I then thought water pistol, but water and electronics, no no no. I did come across a pen size blow torch and initially thought "cool". Then straight away thought "very NOT cool" if kids are around again. So I found the cheapest brightest LED torch I could find and that is what K-9 has.
Using a servo with a linkage it deploys and retracts very smoothly. Using the same servo, the end presses down on to a soft momentary switch when deployed and activates the light. This works great in a dark room when using the camera. This is button, voice, and control command() operated, with a sound effect.
Ears.
I sacrificed one of my stereo speaker grills to make his ears. Two rubber antennas and some steel wire hold it all together and then painted silver. These then fit to the two servos in the head. These are CC(), voice, button controlled. Some scripts have sound effects, some do not.
Eyes.
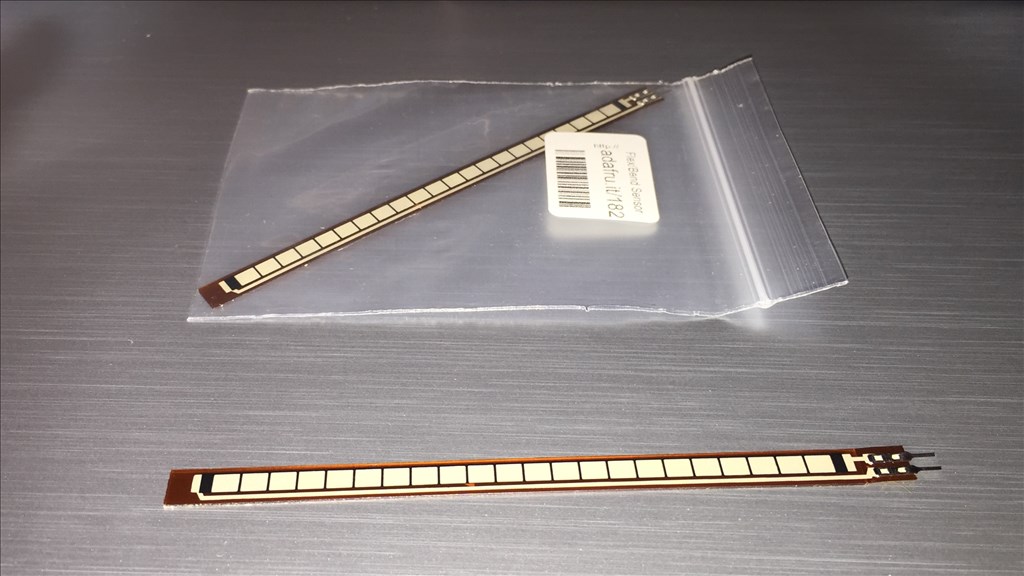
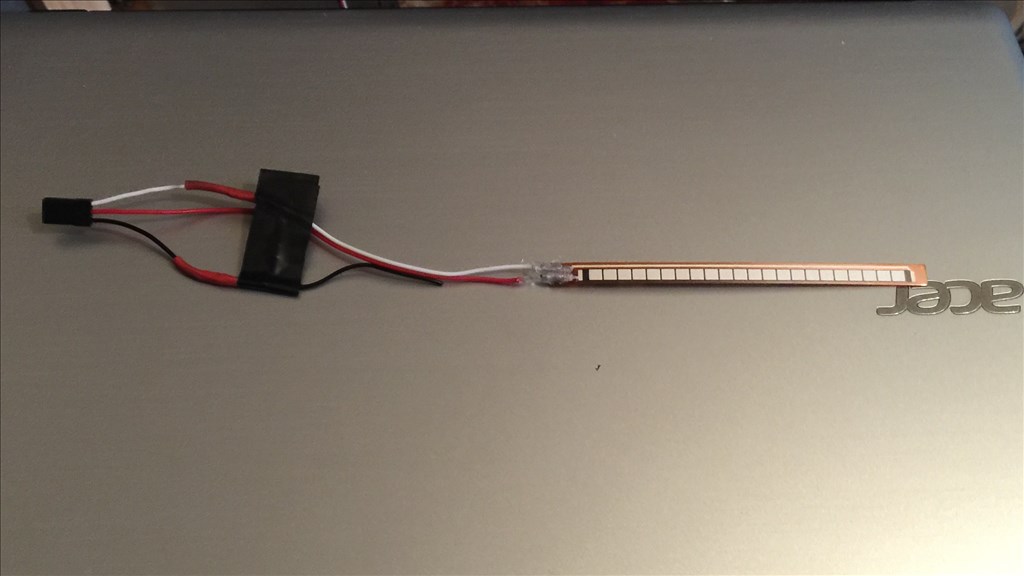
The eyes are the RGB LED panel in JD's head. I have set up several animations of different designs and linked to various Controls.
Mouth.
Being a Knight Rider fan, I've always liked K.I.T.T's voice box, so I wanted to do something similar for K-9. All I used for this was some sound activated EL wire with the microphone unit located in the body next to a speaker I installed. I measured a design an drilled holes in to a peace of PVC and threaded the wire through.
Speaker.
I got lucky with the speaker I'm using. It's Bluetooth but has a aux headphone socket, an they both work together. This means that the EZ-B (which I added a headphone socket to) and tablet PC are both jacked in to the speakers aux socket via a 2 to 1 adapter, and my iPhone can connect via Bluetooth without one cancelling the other out. More on the iPhone connection later. I have EZ-B soundboards set up with phrases and sound effects which all go through the speaker clearly.
Collar.
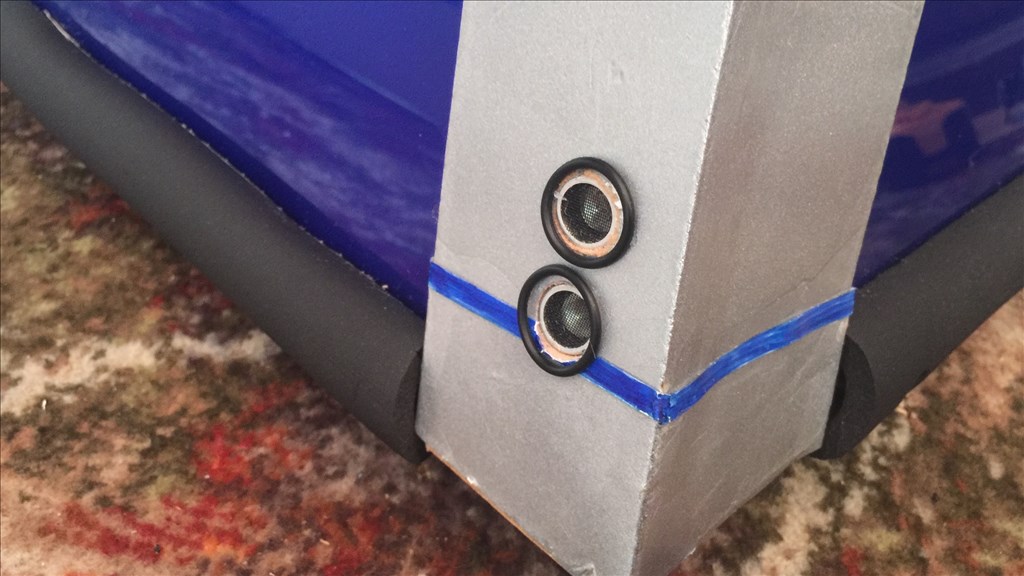
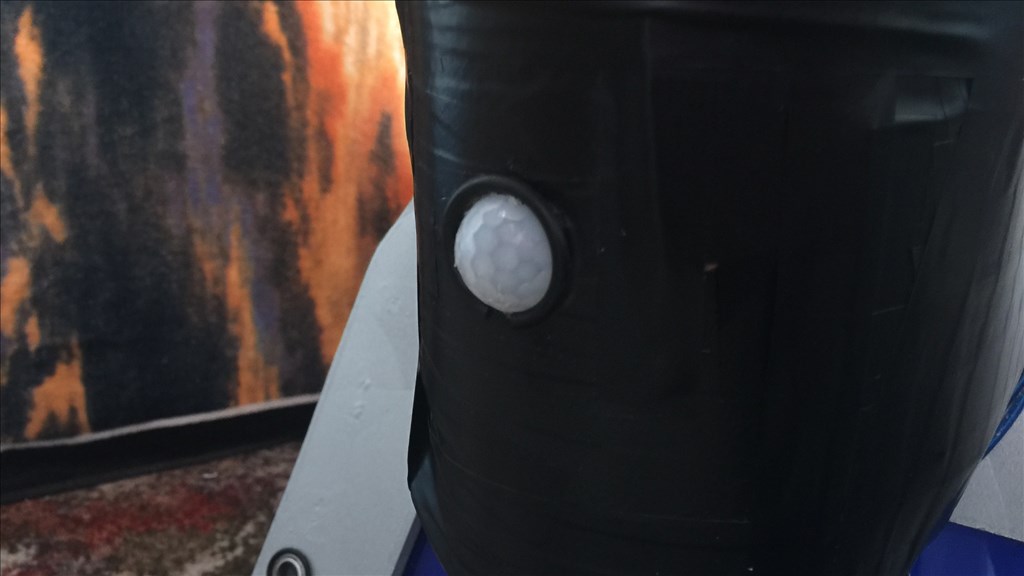
The collar is a peace of ribbon stuck to a peace of cardboard, and the excess EL wire attached to each side. Underneath is the ultrasonic sensor and a servo for object detection and avoidance. The dog tag is simply a peace of cardboard cut out and some aluminium tape stuck to the front. I thought about doing a spanner, but my craft skills were not up to the challenge that day, so a bone it is.
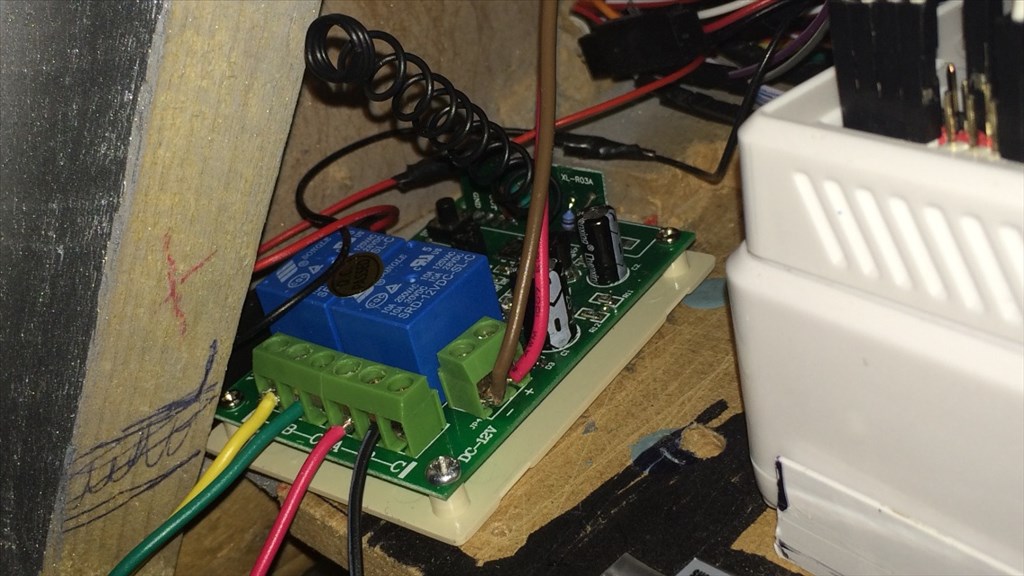
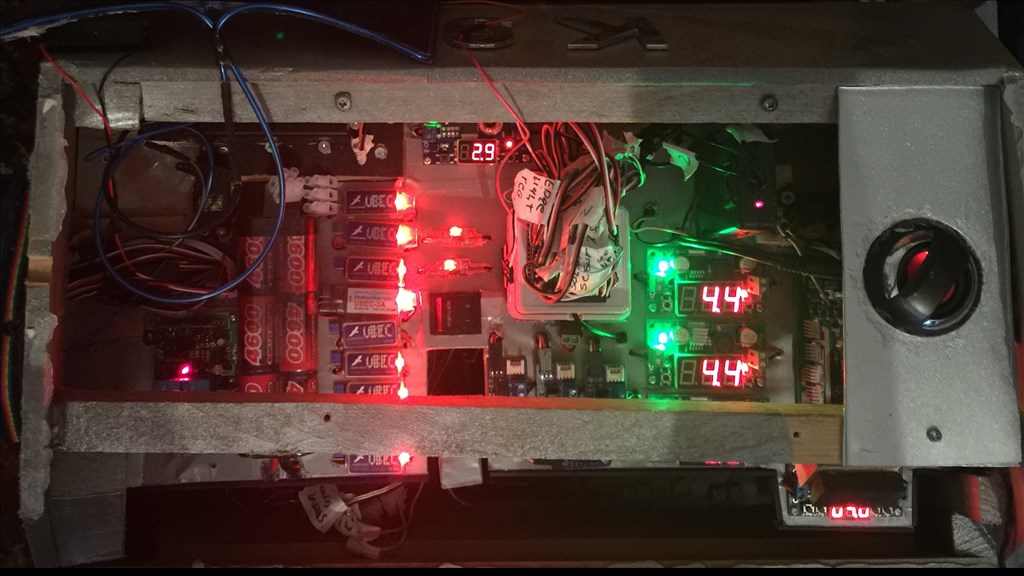
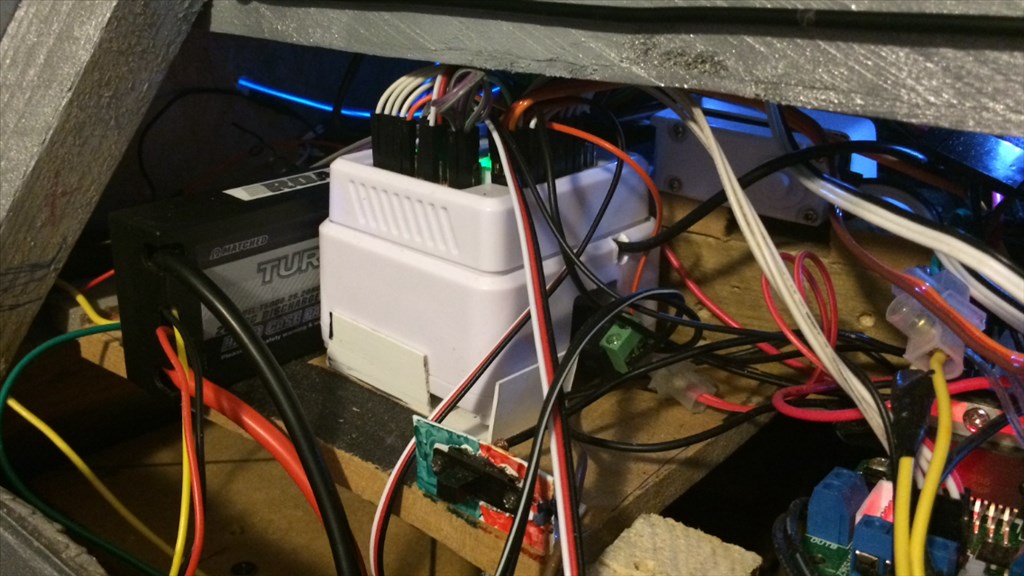
EZ-B v4 power.
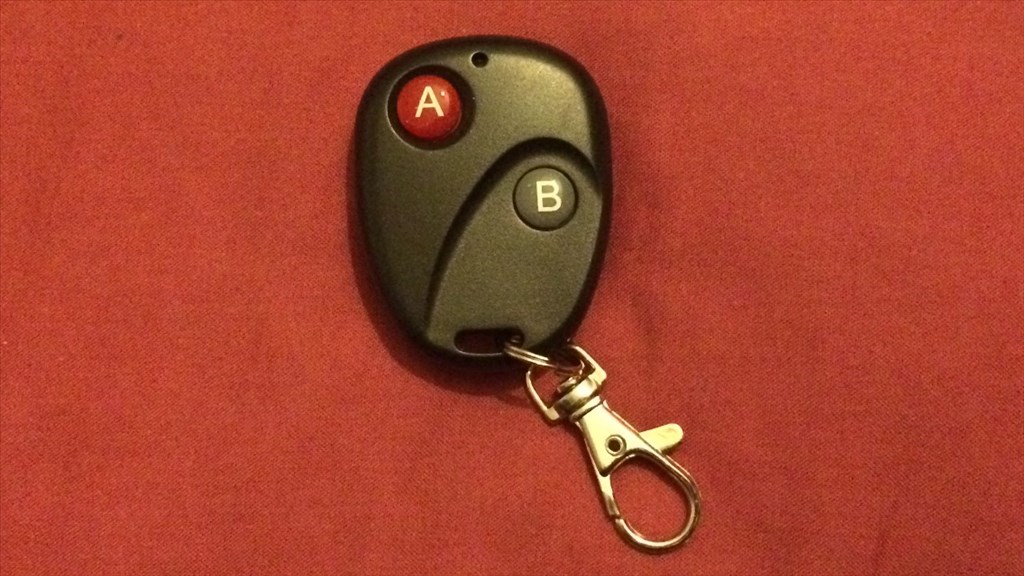
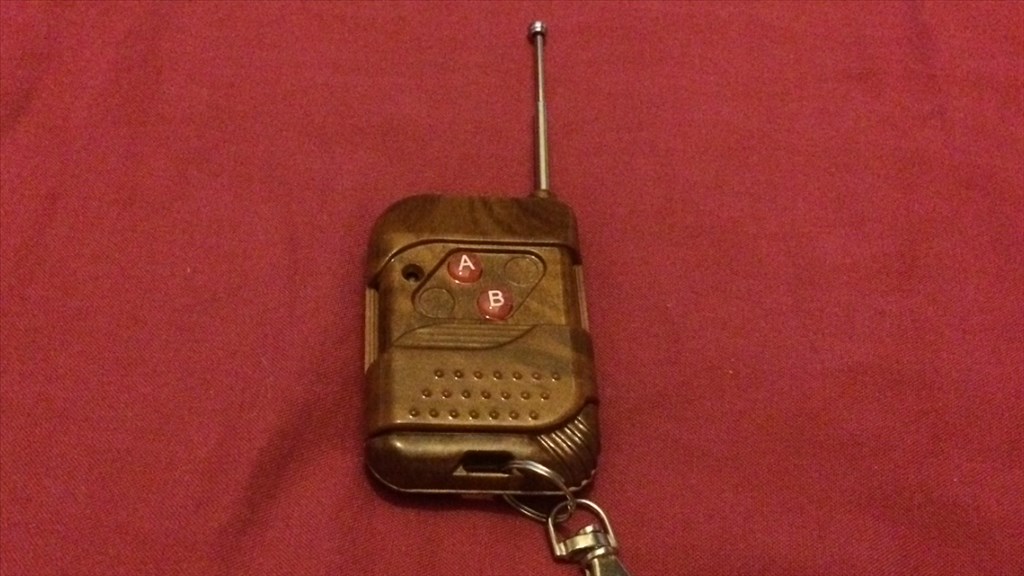
The v4 I have installed is powered via a 7.4v LiPo battery. The v4 is routed through an inferred power switch relay so it can be turned on or off via a remote control key fob (similar to a car alarm fob).
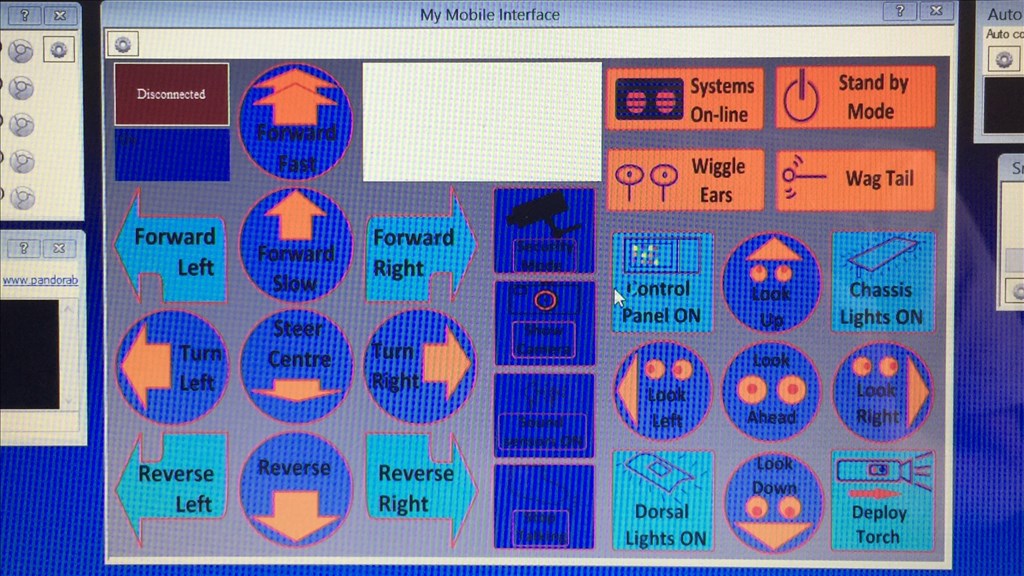
ARC project.
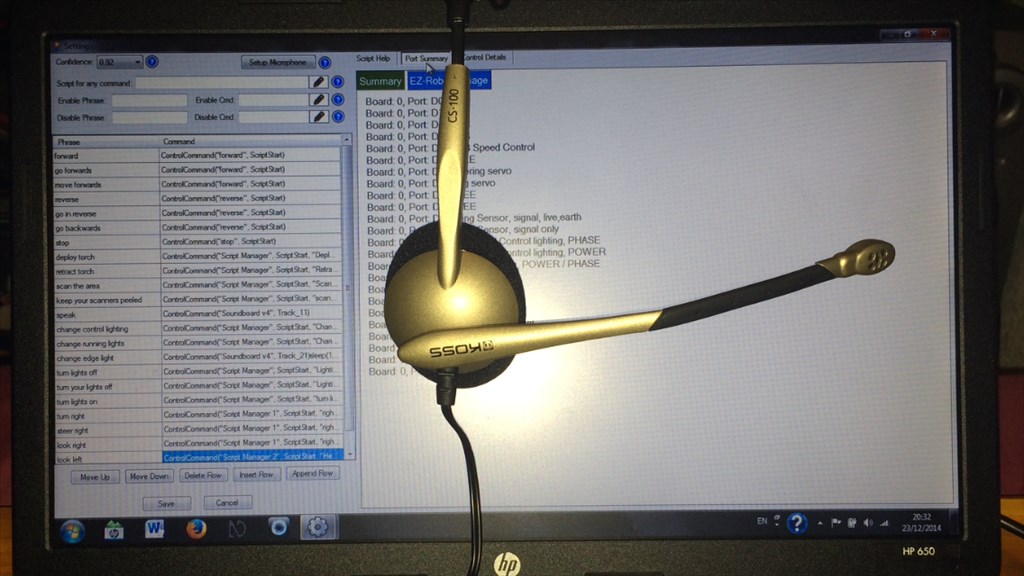
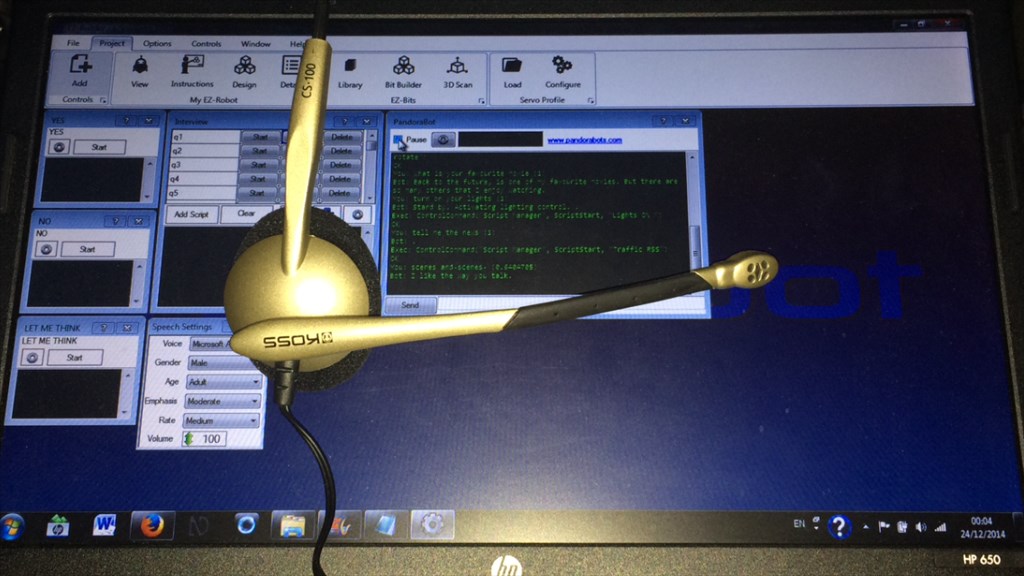
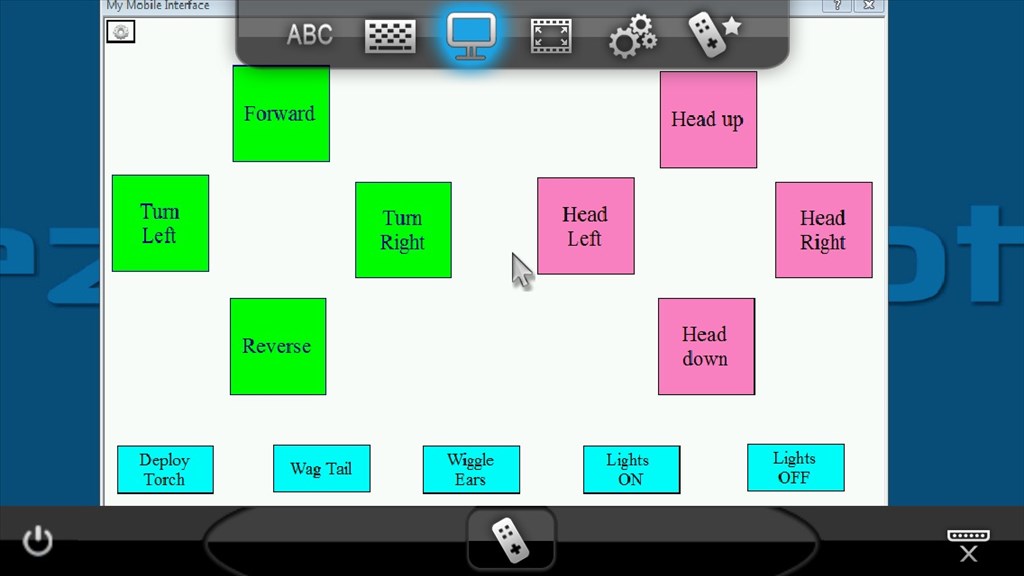
Most of what is mentioned above is currently set up for a game controller, speech recognition, control commands, linked to other controls, and are in a personality generator. The personality generator is currently set to tell a random joke, a random fun fact, or to say some other random stuff. His ears, eye animations, lights, head and tail are all connected to various personality commands. Other controls I have set up are auto connect, face / colour / movement recognition, script manager for all movements, speech recognition, joystick control, and the RGB animator. Once I get the couple of bugs I have sorted out, this ARC list will be much longer.
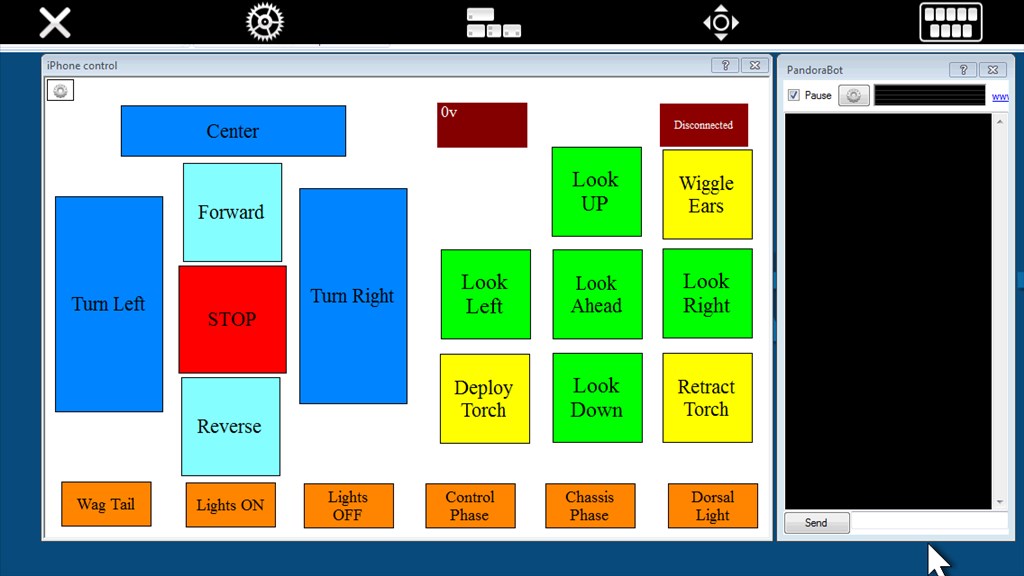
iPhone connection.
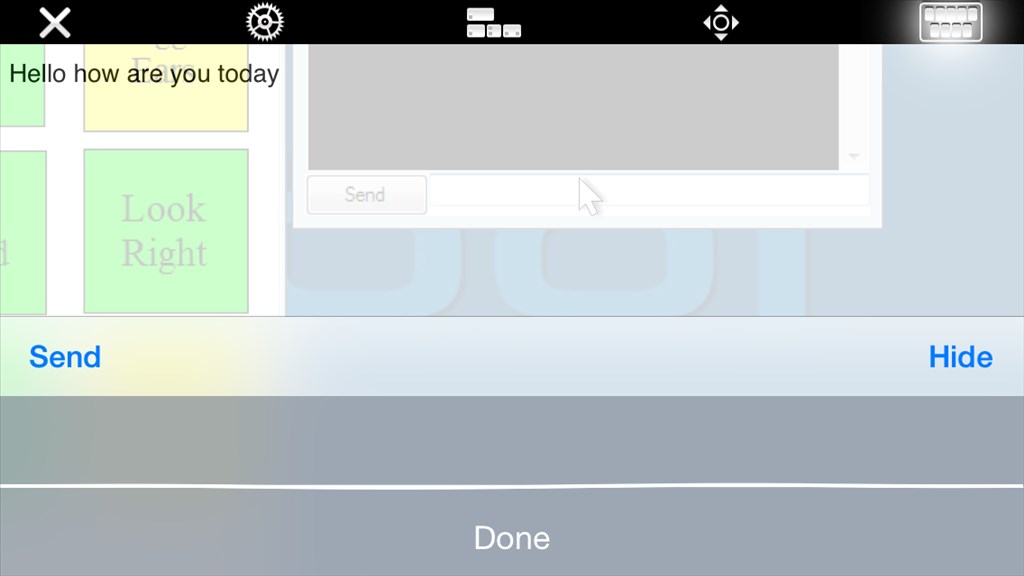
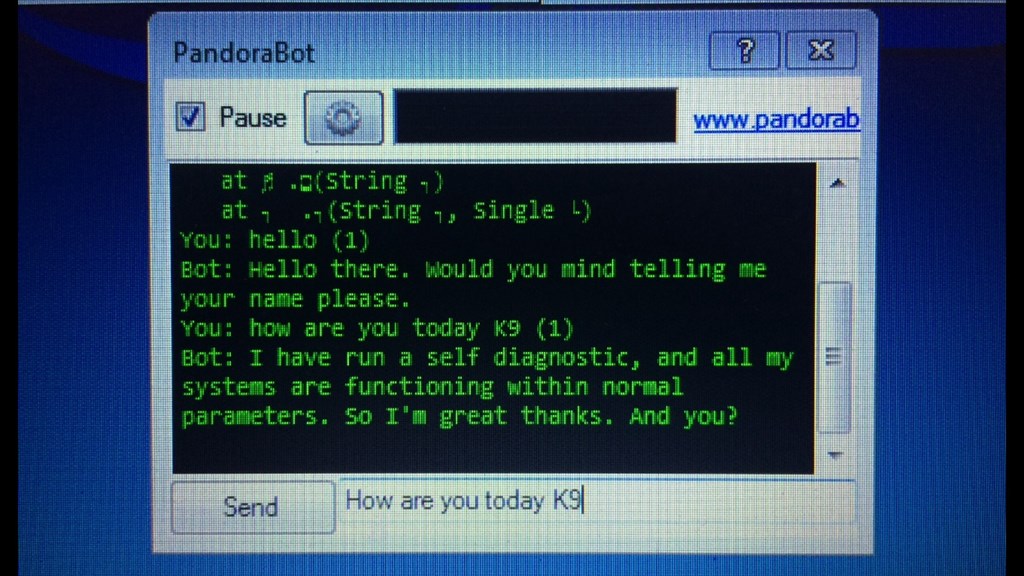
The primary feature for K-9 was to have the ability to speak, and when I say speak, I mean to have a conversation. This was very important for me to include this. I did start to use pandorabots a while ago now and was fun to begin with, but being free meant it was unreliable, and still is.
I had a Chatbot app on my iPhone I used for the cardboard K-9 prototype which I had already started training, and comes with its own robotic sounding speech synthesis engine, and an added bonus it uses the iOS speech recognition extremely well, not just with my voice, but with any one of my family and friends. With the exception of pressing the speech to text button and the send button, I could have a very easy conversation with my bot. So this is what I'm using to talk and to have others talk to K-9. Even though I'm training him, he does have his own quirky personality. This where the Bluetooth comes in. The EZ-B can play all the sound effects ect via the speakers aux, and the iPhone still streams audio as well without unplugging the aux. So with this in mind I recorded a load of phrases of the robot voice and imported them to an EZ-B soundboard. I have also made ringtone recordings of people in my iPhone contacts as well as other alert tones so K-9 can now tell me who is calling, texting or emailing me without looking at the phone, or just tell me I have an incoming phone call, text message, email, reminder alert, Callander alert, alarm or voice mail. I will make a video of this to better demonstrate this.
What's next.
Swap out the L298 2.5 amp motor controller for the 10 amp one that I have ordered. Hopefully that will sort out his drive system problems.
I would like to do is add is a smoke detector in his eye panel so if he does detect smoke he can tell me and sound an alarm, maybe even tell me where he detects it.
To get him as fully autonomous as possible. I want to map out the ground level of my house so K-9 can roam around on his own and maybe do security checks.
I would also like to add a small microphone in each of his ears so he can hear and react to which side he hears a sound. I've seen the control for this in ARC and would love to implement this at some point.
I want to get a stronger servo for his head, specifically the vertical servo, as when he lifts his head there is sometimes a lot of buzzing and I really want to eliminate that. Problem is the high torque servos, 25kg and over, are quite expensive.
I'm still trying to find a way of reducing the maximum speed of the drive motors when I use a joystick, which is talked about it this THREAD.
I want to set up some RSS feeds so K-9 can tell me the news, weather, time ect. I have had a play with this, but the only thing with this for me right now is he will have to use a different voice.
I would love to have the ability to use the Chatbot app I'm using now, and tie it in with ARC so I can run scripts and actions when he speaks through the app, like what the pandorabot control can do.
To make him fly, because he is REALLY heavy lol.

Well that's pretty much it for now. I hope you found some of this interesting, and as I said in post #1, I would love to hear your thoughts and opinions.
Thanks for reading.
Steve G.
Nice work. I can't say I read what you wrote but watched the video (I felt lazy).
My guess is a certain CEO will love this (as for me, I've never even watched Dr Who... I know, I'm a disgrace).
Very impressive build. I am going to be borrowing a lot of your ideas for my Steampunk K9. You have solved a lot of the problems I have been thinking about.
Alan
eek...
Sir, you have TOOOOO much time on your hands! This is awesome! I really like the lighting effects. Brings out FiDo's futuristic side so much more!
Totally awesome, fantastically designed and built project. I love fabricated projects! Looking forward to more videos. Steve S
Very nice! What fun. I would really love t build a K9 someday soon. Thanks for the inspiration. I love your imaginative solutions to hard to control components. You make it look simple. Thanks for the sweet presentation of your little friend.
@Rich.
Yeah there is a fair bit to read. I got a little carried away. Anyway I'm really pleased you like K-9 and the video too.
@thetechguru.
Borrow away dude. I really can't wait to see your steampunk K-9 project. That sounds like it's going to be very cool indeed. I'm glad you liked my lil 4 legged, er, 3 wheeled friend.
@technopro.
Way to much time on my hands? My friend, you have NO idea lol. A little more than I wanted that's for sure. Anyway thanks for your kind words. I'm really glad you like "K-9" (FiDo, please! I'm glad the Doctor Who people didn't go with that name in the end eyeroll.) yeah, the dorsal edge lighting gives him a little bit of the TRON look don't you think?
@Steve S.
Thank you for you kind words also. I love robots, but like you, it's the "built from scratch" ones I love the most. I'm pleased you like him.
@Dave.Schulpius.
Your more than welcome, and I'm glad you like him (and the video). I really hope you do build your own K-9 unit someday. We need more of them in the world.