


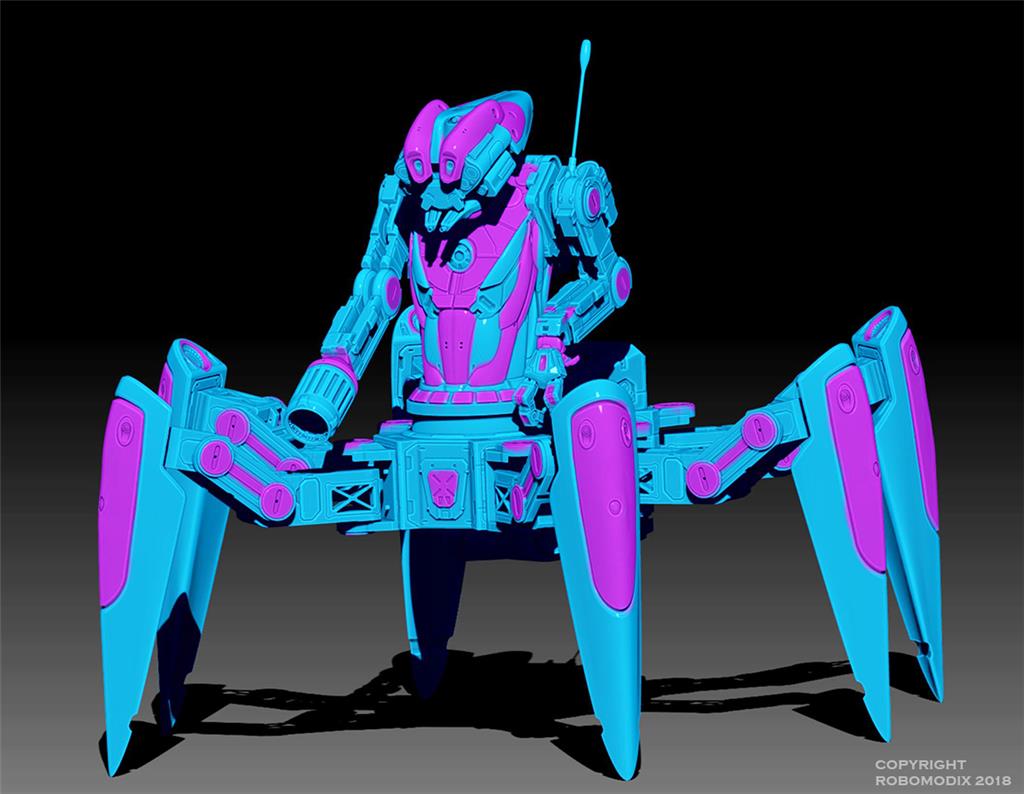
Project:
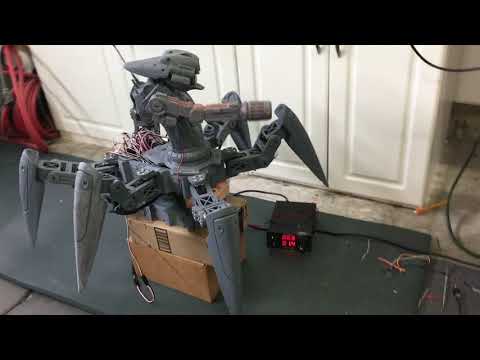
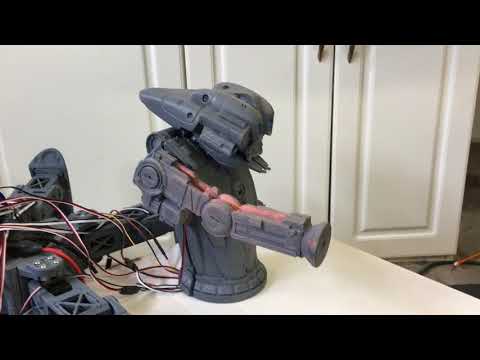
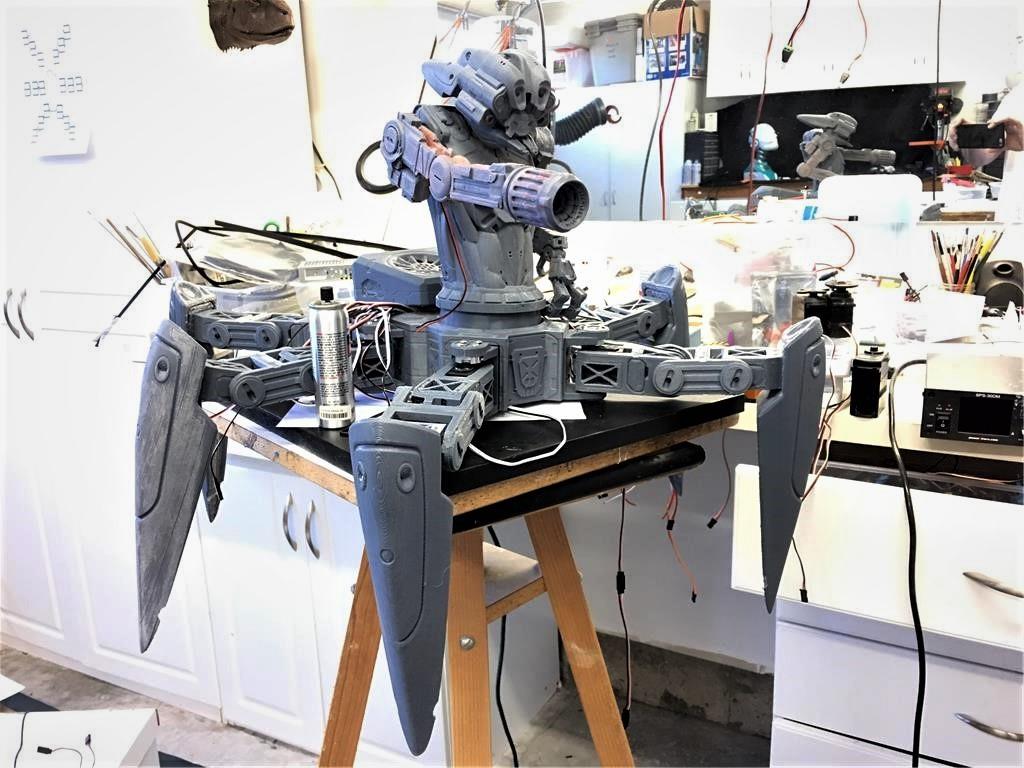
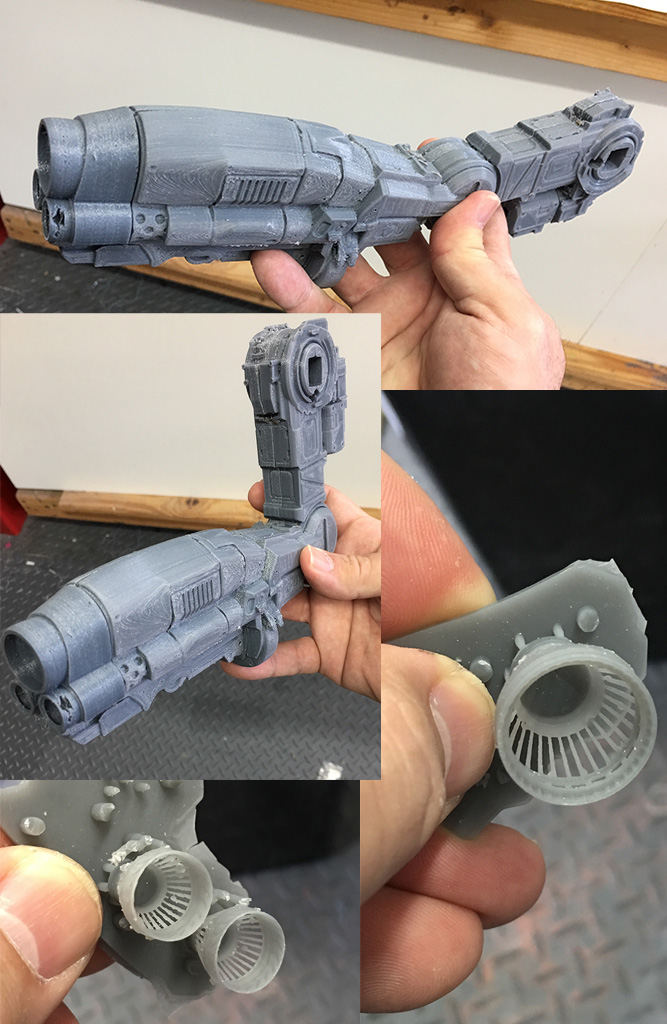
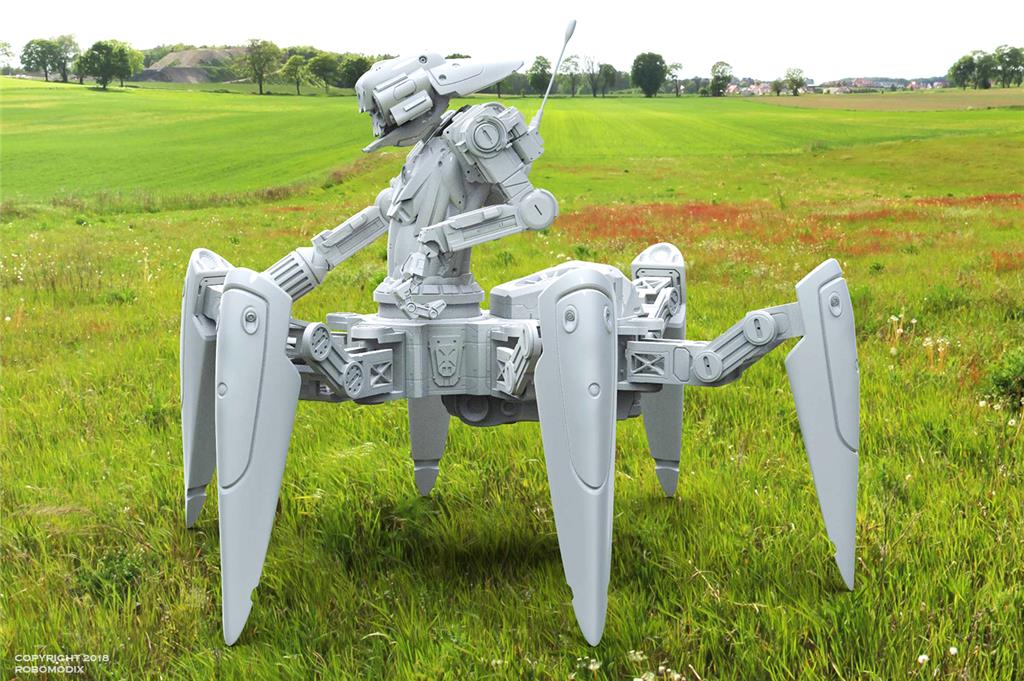
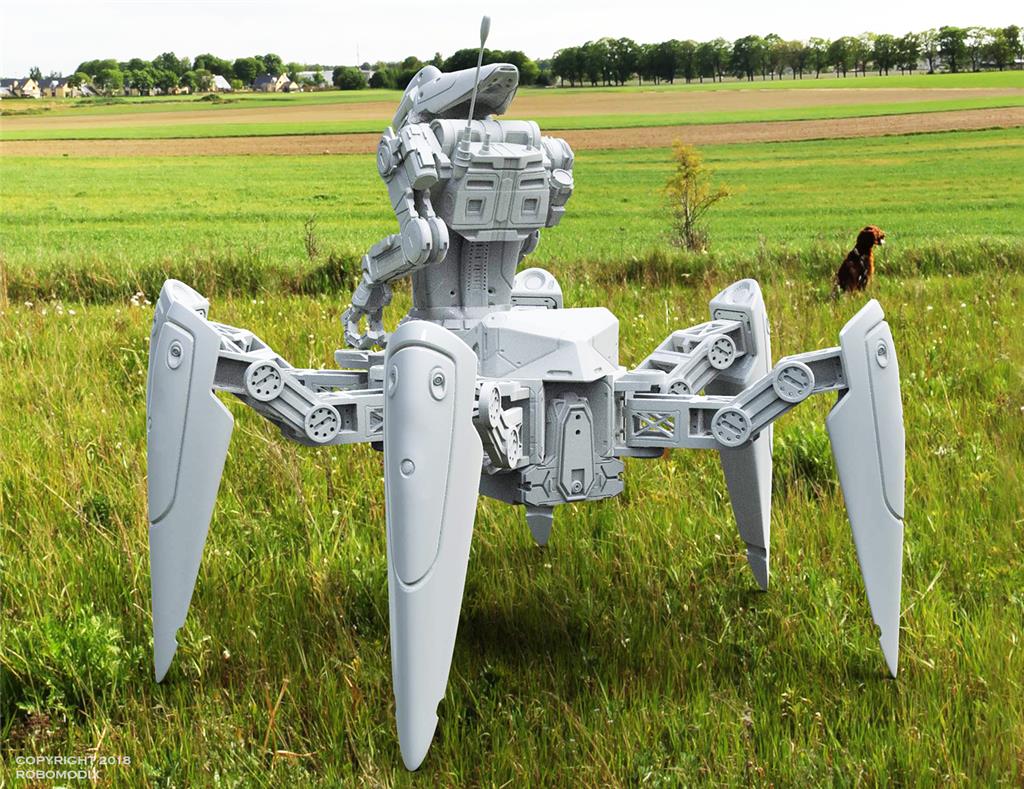
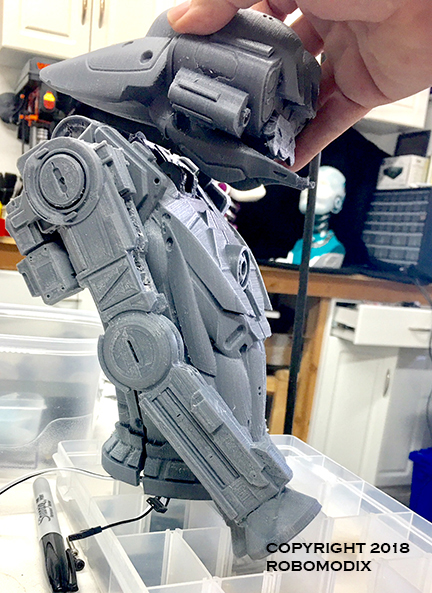
By request, my 6 year old son wanted me to design and build him a Hexapod. So I started to whip up some designs in Zbrush and together we decided what he would look like. "Main thing he has to have dad, is an arm cannon!" So we got that. Then I thought it would be cool to have a robot kinda part of or riding the hexapod. So kinda a centaur bug/robot thingy.
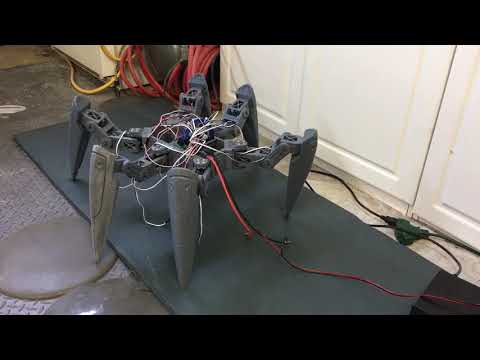
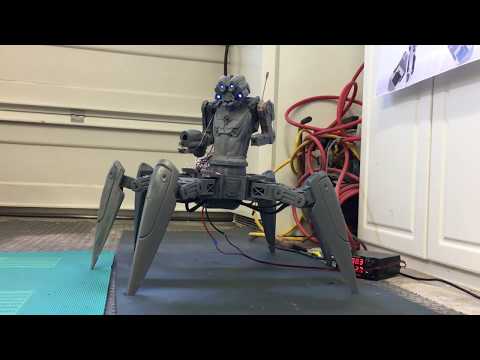
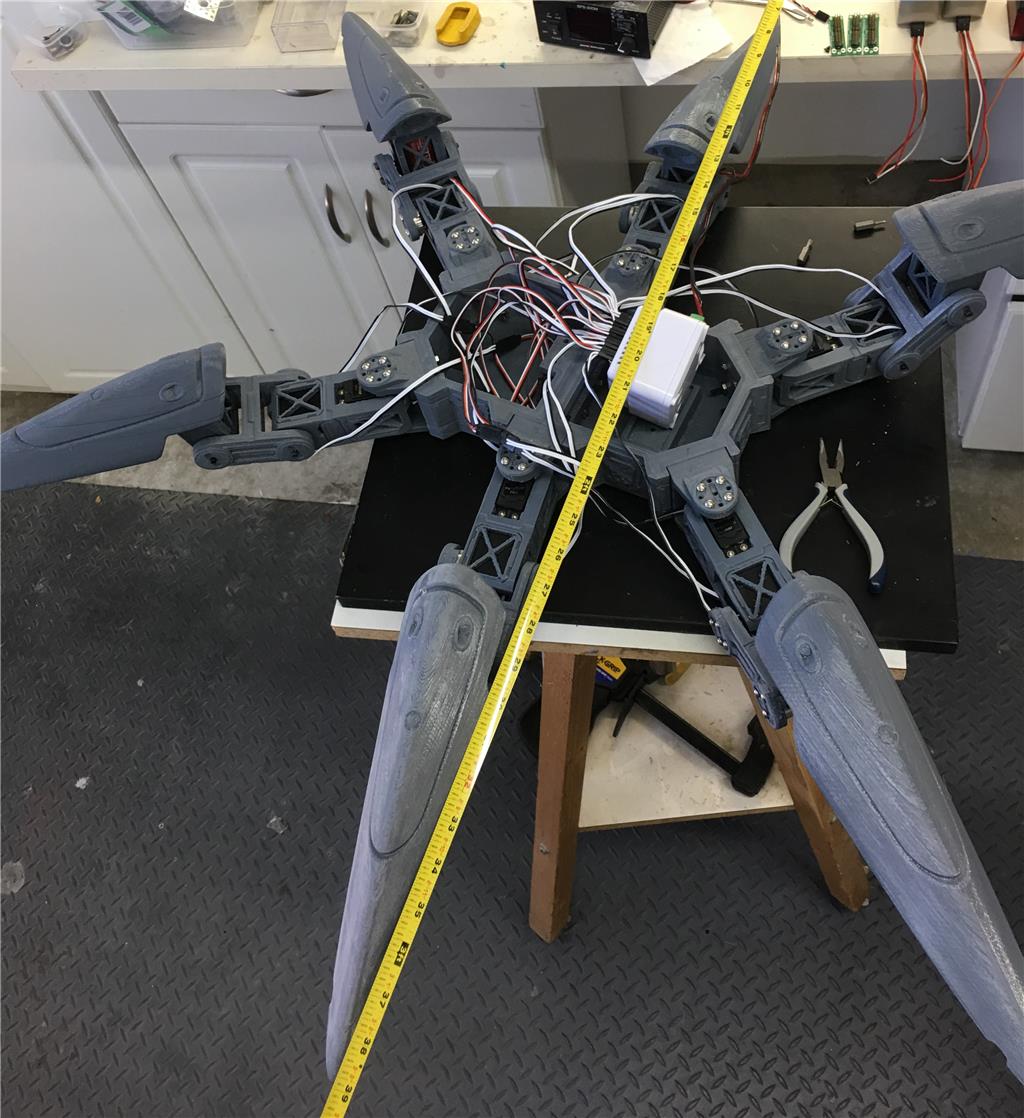
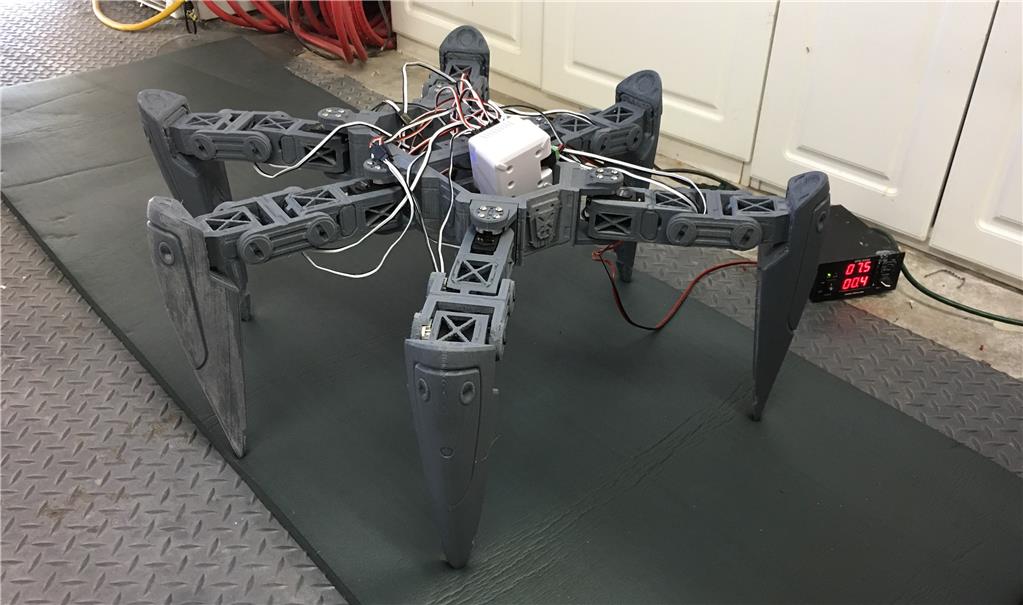
First thing I had do was figure out was how big would be too big? There are alot of reasons why not to go too big, which I ignored. So from an engineering stand point, "will it walk?" is the big question. At first I thought it would be about 5 pounds, then it went to10 pounds and now it might be around 12 pounds...so again time will tell. Maybe it walks once or 2 feet then crumbles!
I sourced out the materials and batteries. Knowing this was going to be a 23 servo design, I wanted a good battery and and chose a 7600 mah lipo. Maybe it will run for 15 min underload... again untested, time will tell.
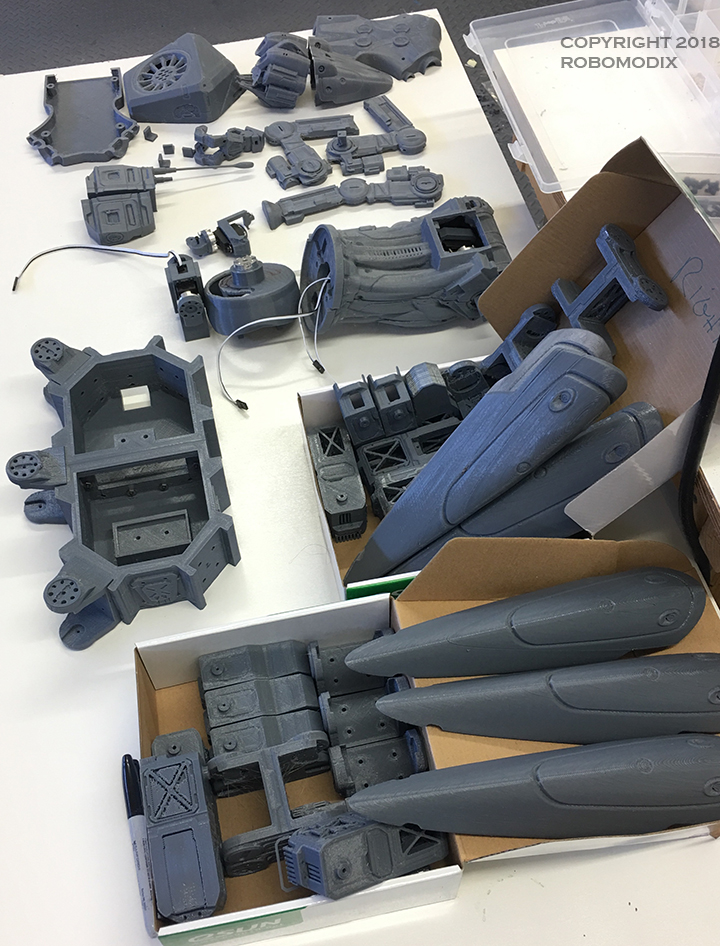
Finally I chose PETG for the print material, due to its strength. Two weeks of printing on 3 printers 24/7. There ended up being 53 individual parts.
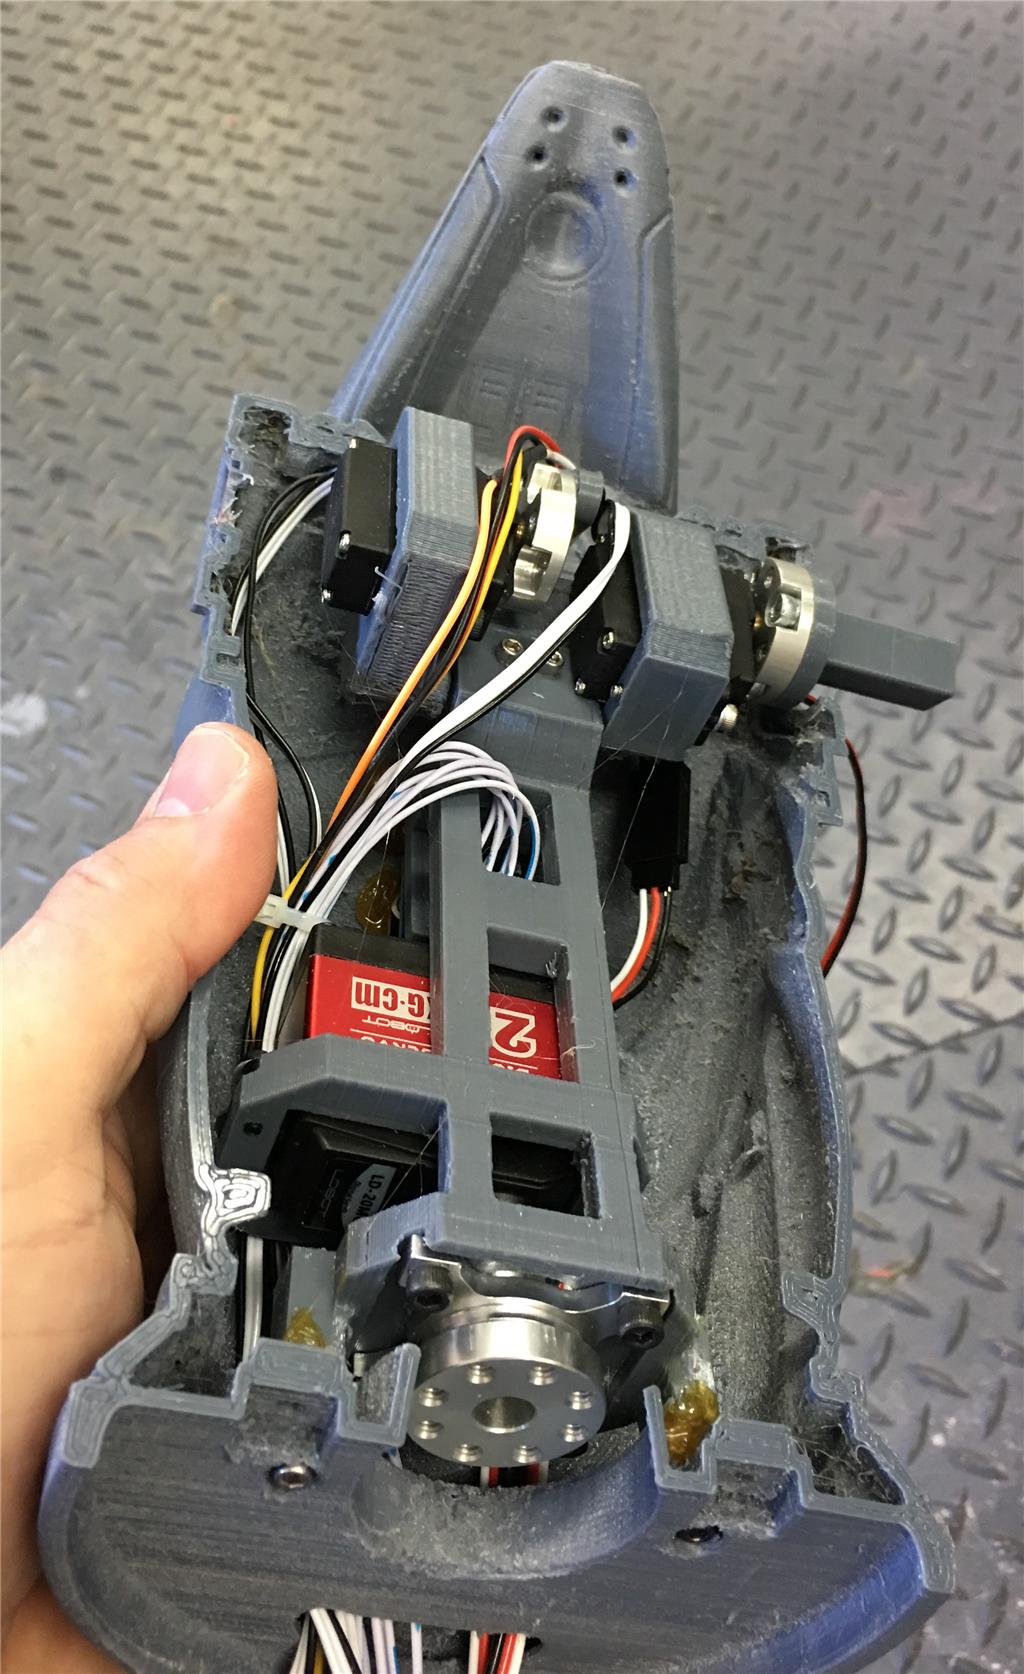
The Motions include 18 axis for the legs, waist forward/back tilt, waist rotate, cannon arm up and down, head up and down and rotate. 23 axis in total. The body is comprised of EZ Robots micro servos and the legs and tilt are the HDD servos also from EZ.
There will be an EZB inside and camera in his chest. A Bluetooth amplified speaker system onboard will allow us to play TONS of robot sounds from BlueZone.
I will updated this project as I finish goals, but if he doesn't walk due to weight or burning out servos due to stress, I will most likely abandon this build, as the next logical step would be to move up to dynamixels, but that would require $5000 worth of servos. A bit much for a toy!
So lets get started!
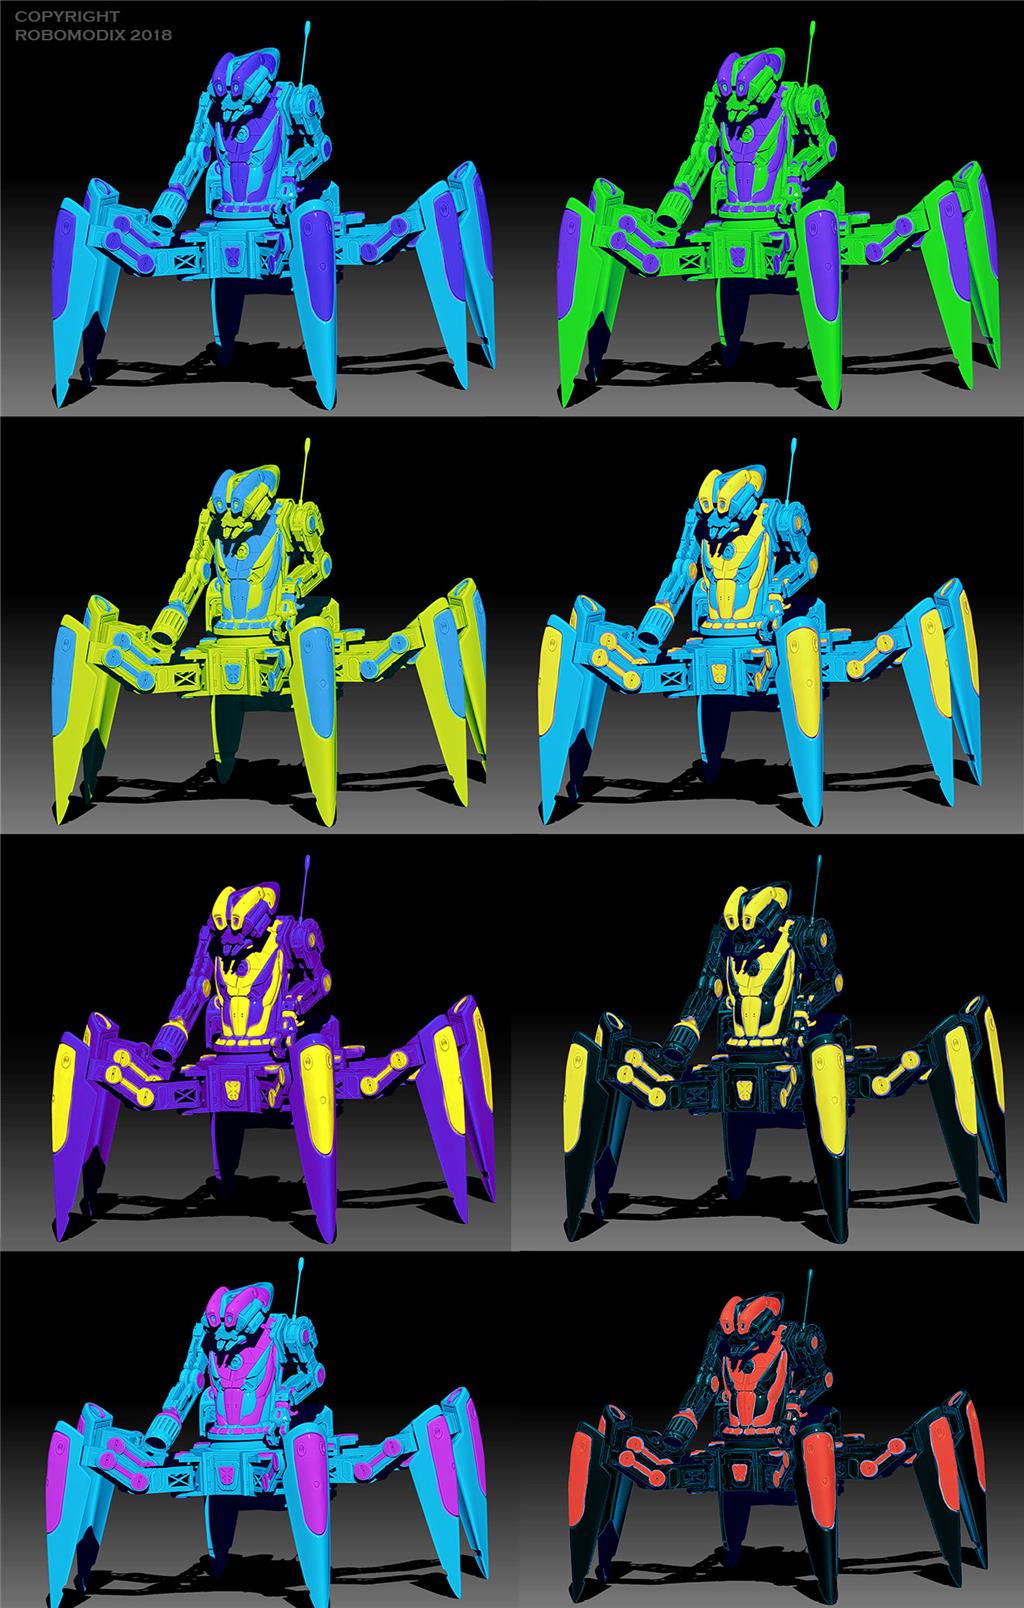
Here is a final design in zbrush and keyshot
Then came the modeled parts each one 3d Printed.
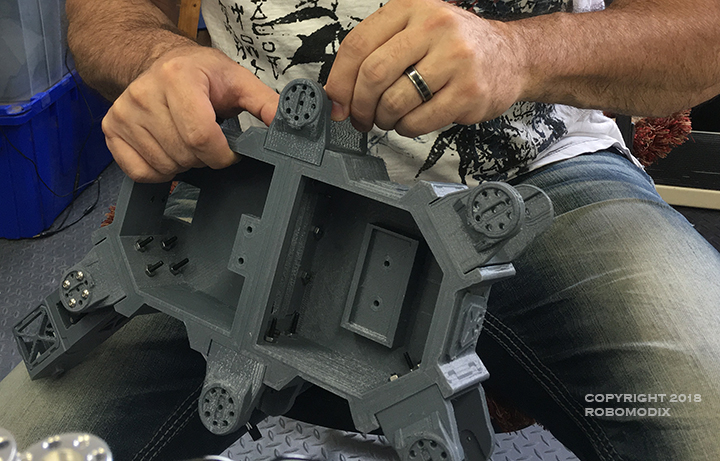
Here I've started adding the axis to the body
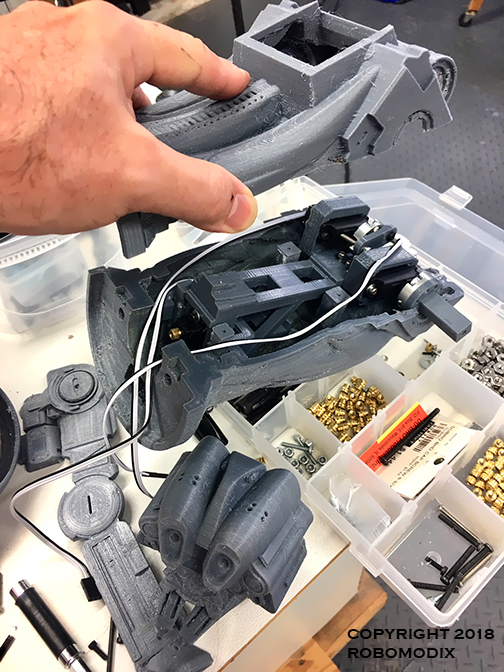
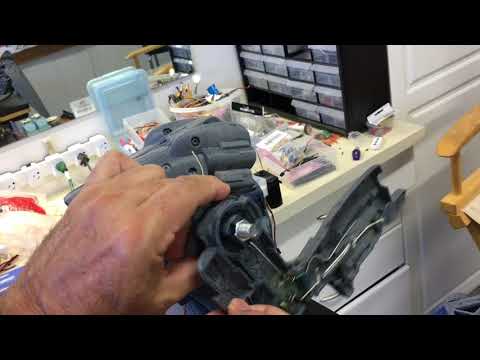
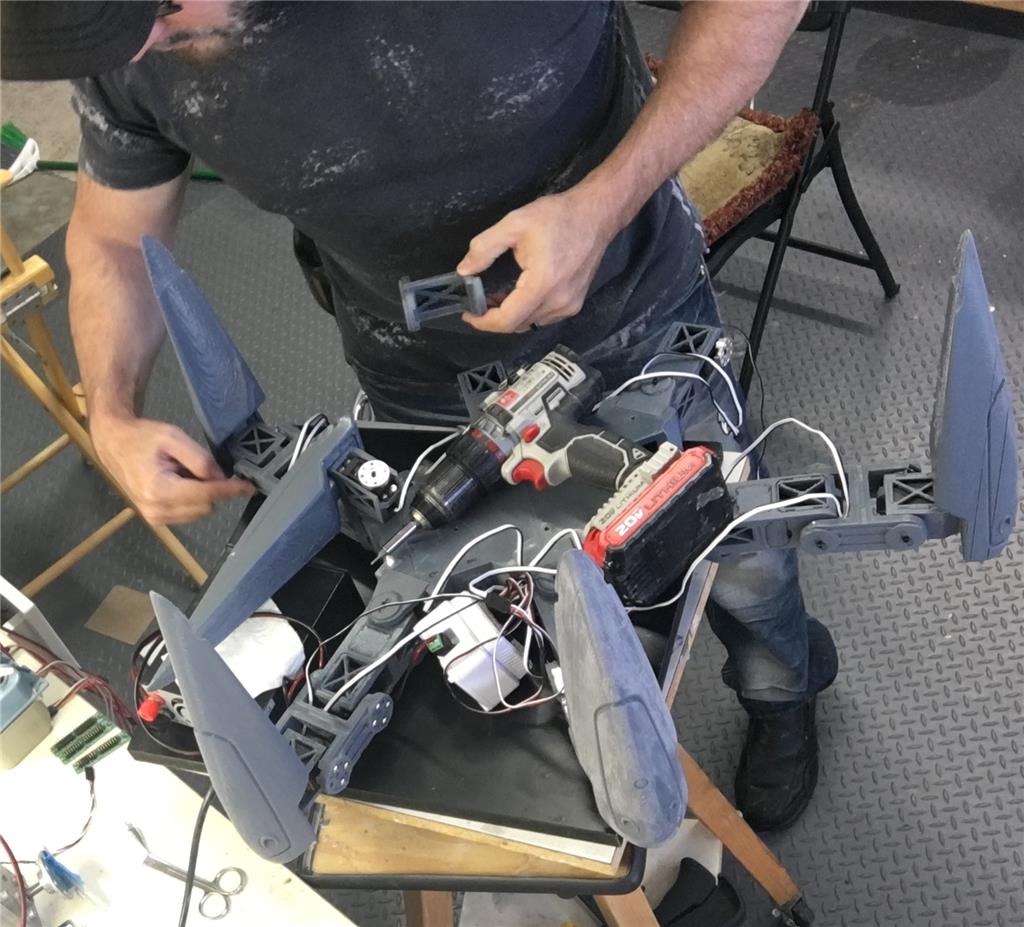
Here I continue on with assembling the main chassis
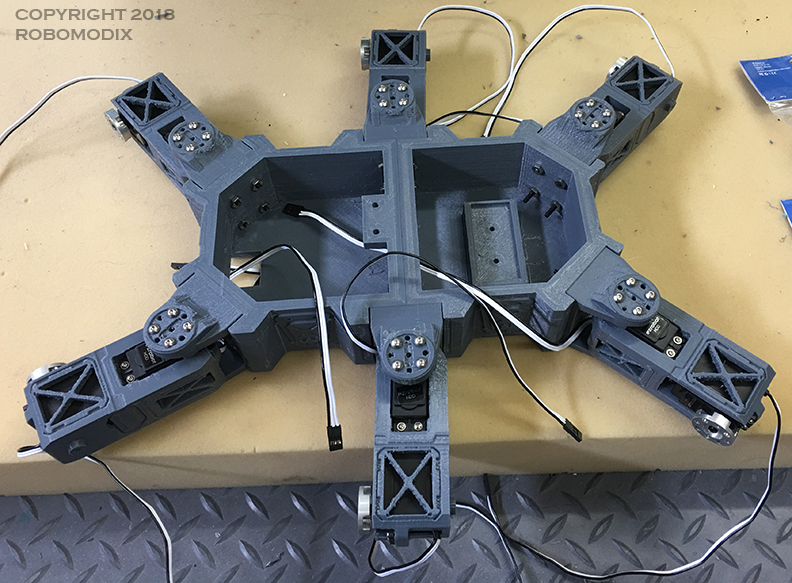
I could only assemble one side of the legs as I am waiting on some servos and screws to arrive.
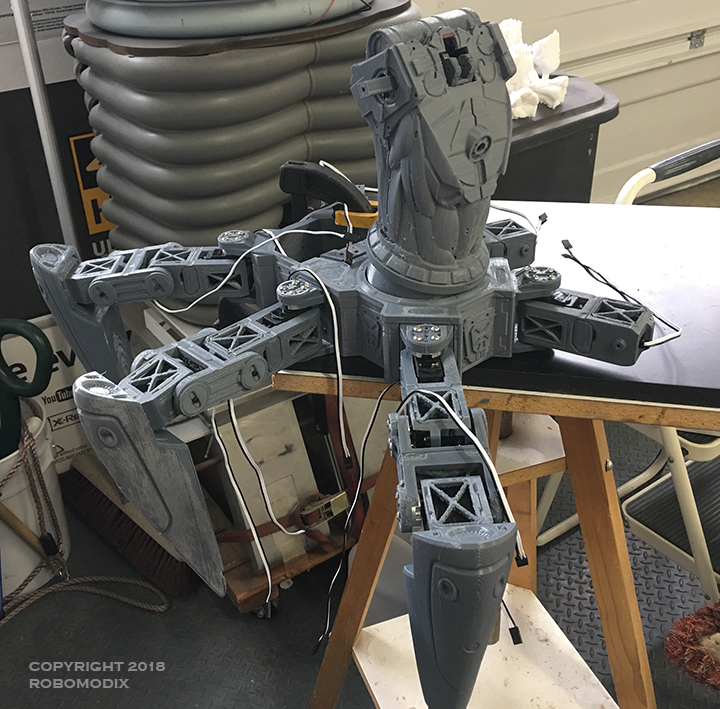
And here is my first sloppy attempt at testing motion with autopoistion:
Discover more robots

Sweetn8's Tj Bearytales Hack
Imrisaac's Ez-B Project V3.0

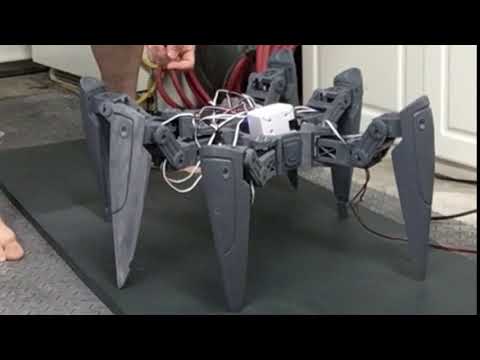
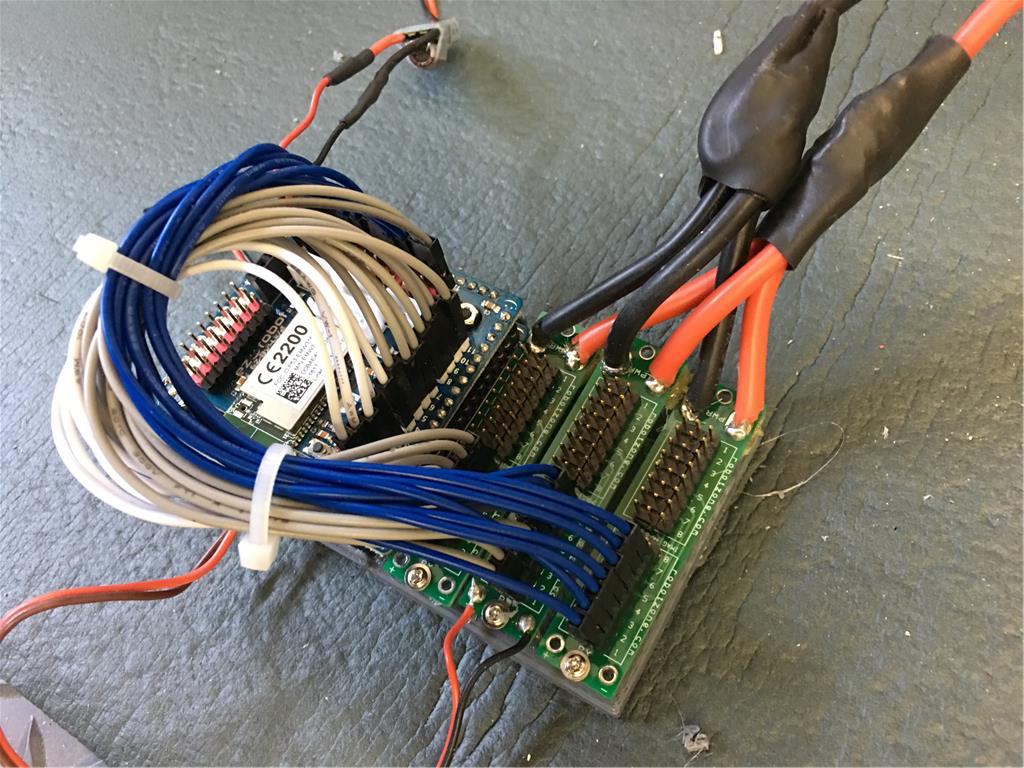
Worked today on rerouting the power. I created a power distribution board which creates a clear path for current. No more brown outs.
This led to a successful second walk. Things are looking ok. The trick is getting at least three legs to touch and three in the air. Struggling a bit with autoposition. None of the servos are exactly in the same position at the same time, and there is the flex in the plastic and backlash with the servos. This will be great to get Unity to export motions to ARC. Alot more room to explore some very complex animations I have in store.
One thing is for sure, it certainly requires a lot of current .. I think I may have seen 14 amps at one point.
Great progress Will!
I like those power distribution boards, do you mind sharing where you got them?
What @Jeremie said... I would love to get a hold of some of those PD boards....
EDIT I think they are servo City servo power boards
Sure, they are here:
Power Boards
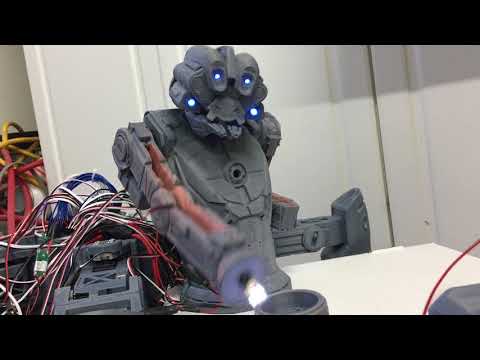
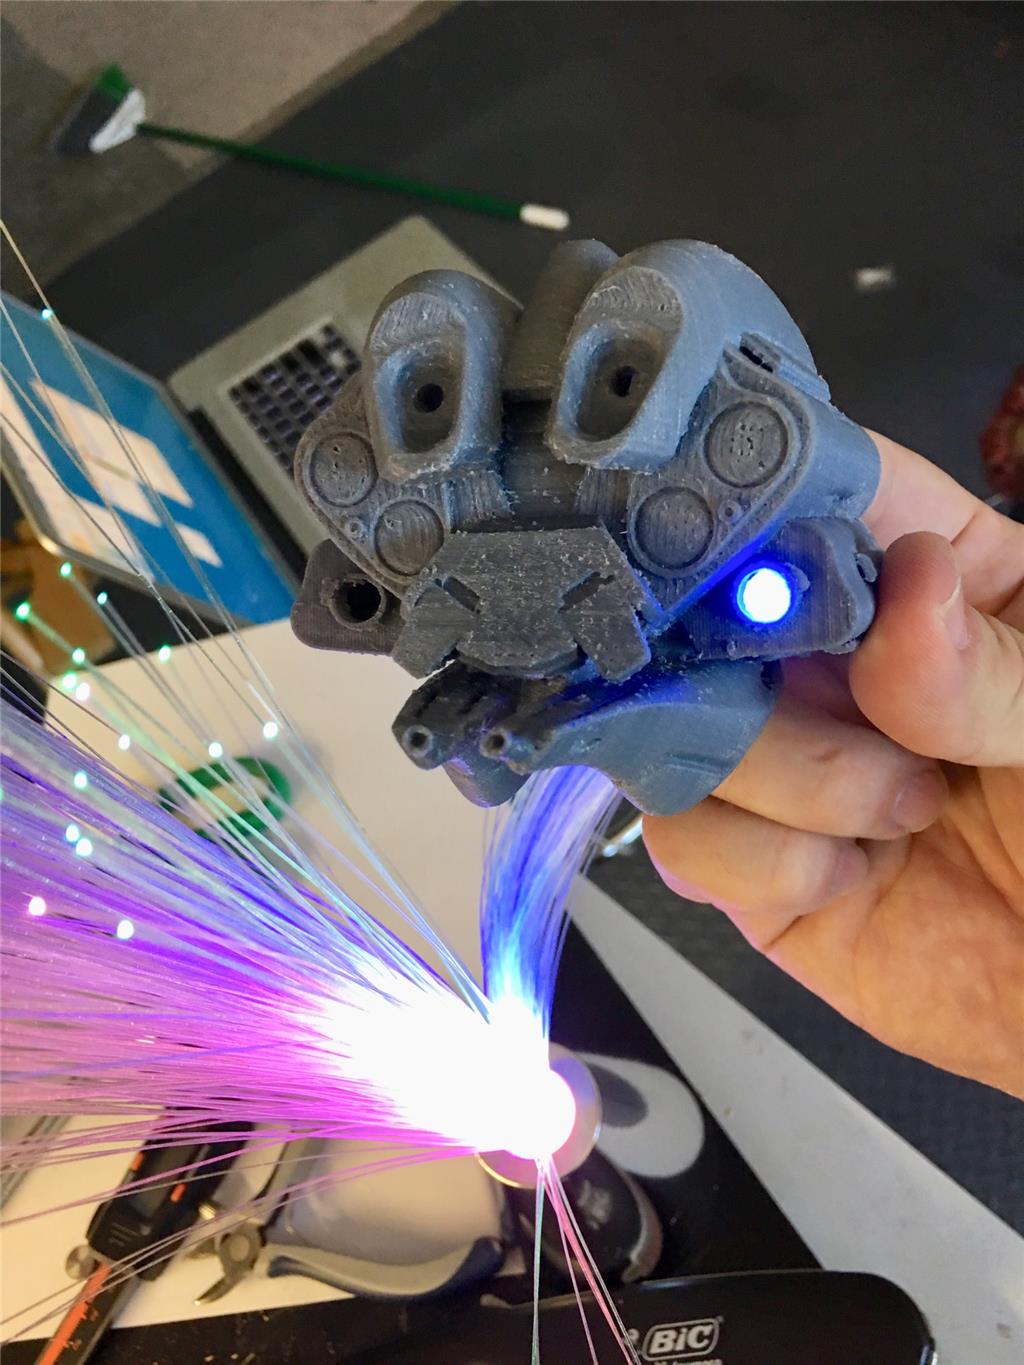
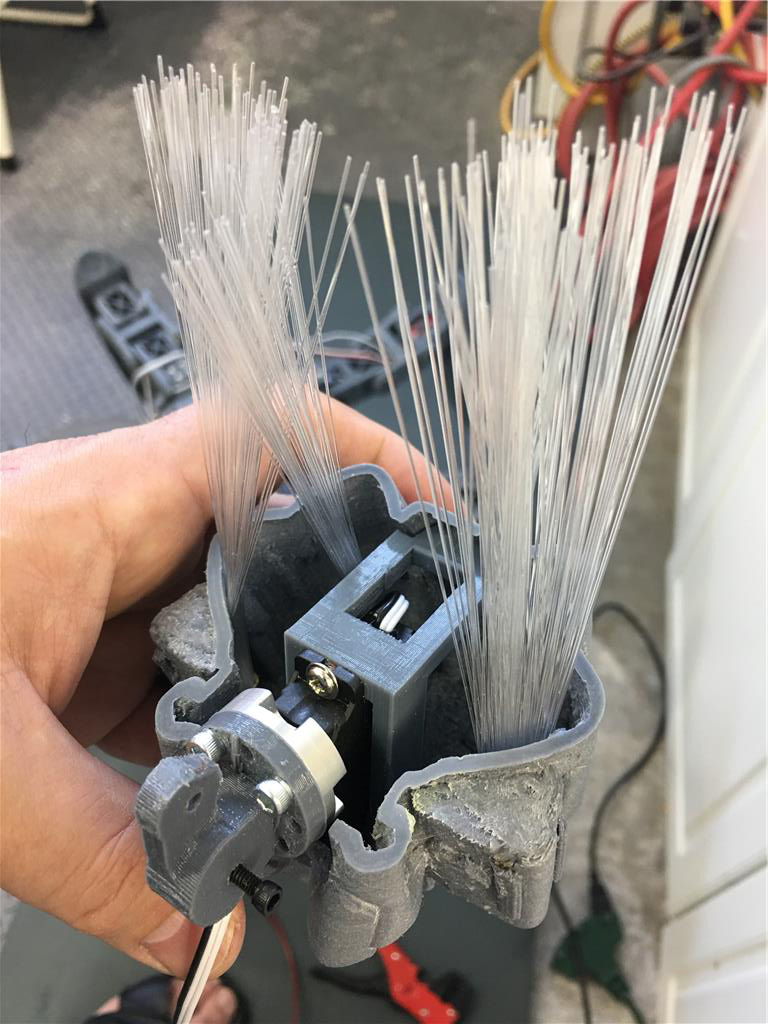
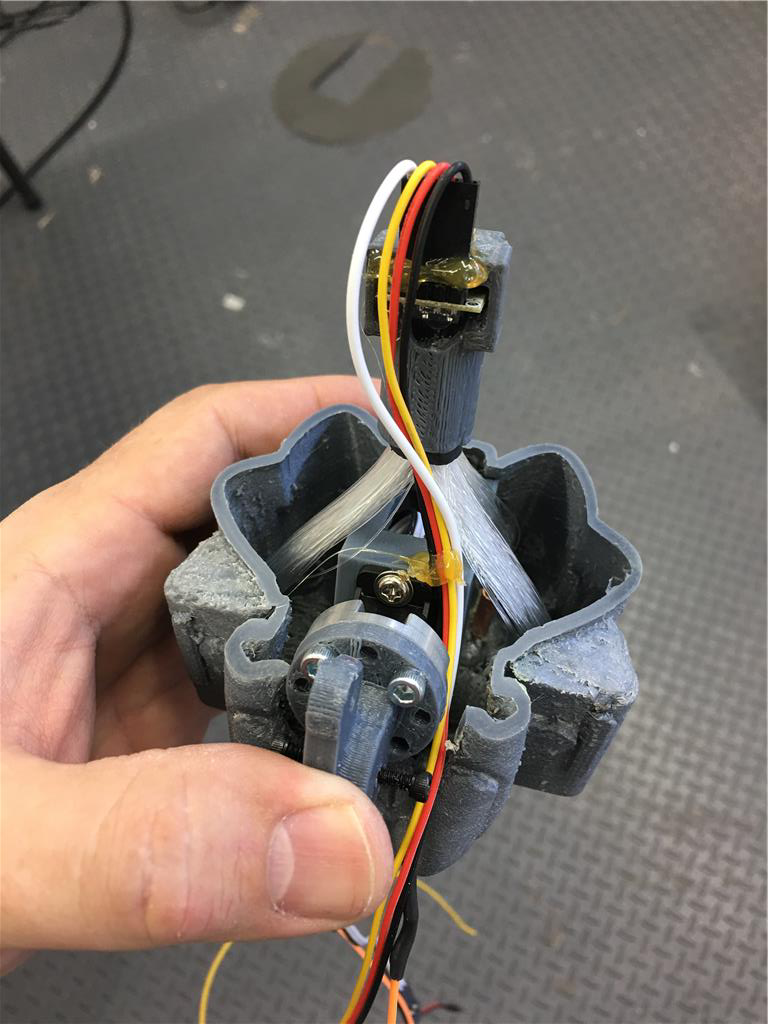
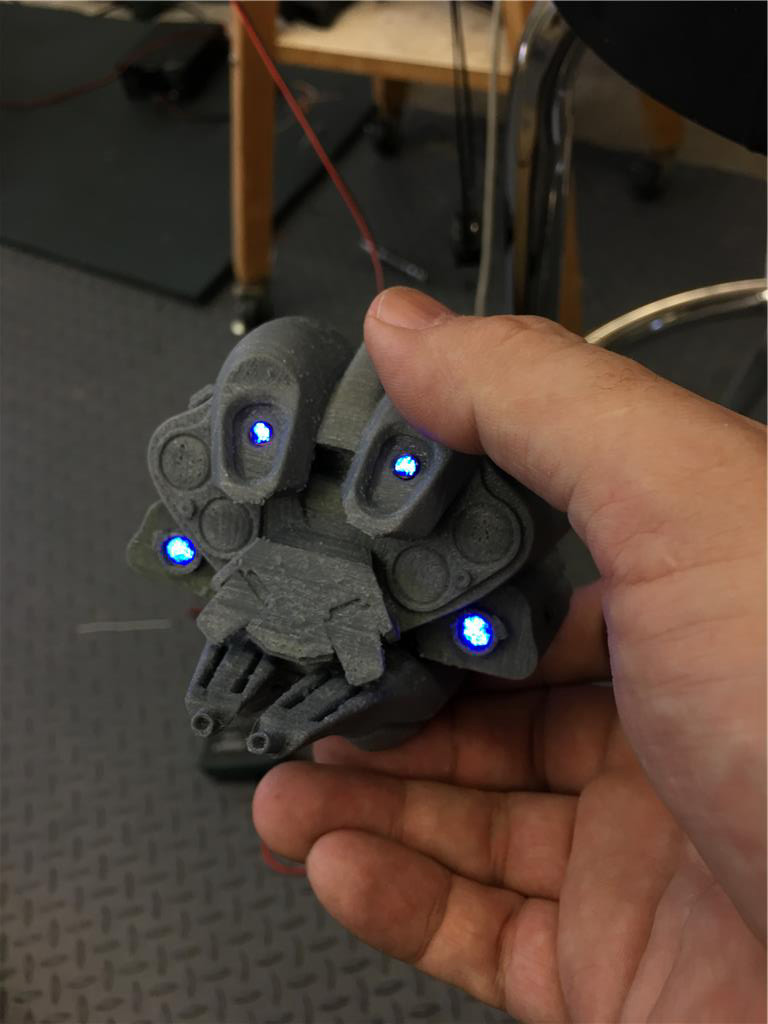
I worked today on the eye lights and installing the head rotate. I did use the fiber optic lamp to route the light to all four lenses. Worked out great. I used blinkM so I can control the eyes from software.
Wow! The eye lights (and everything else) look killer! eek
The fiber lamp is such an AWESOME hack! This made him come alive for me! Epic Project!
I would go with the black and yellow coloring option...makes him look really scary!
Thanks for the good documentation, I am enjoying this build a lot!
This is looking good! Very cool work!