
-636348381130562972.jpg)


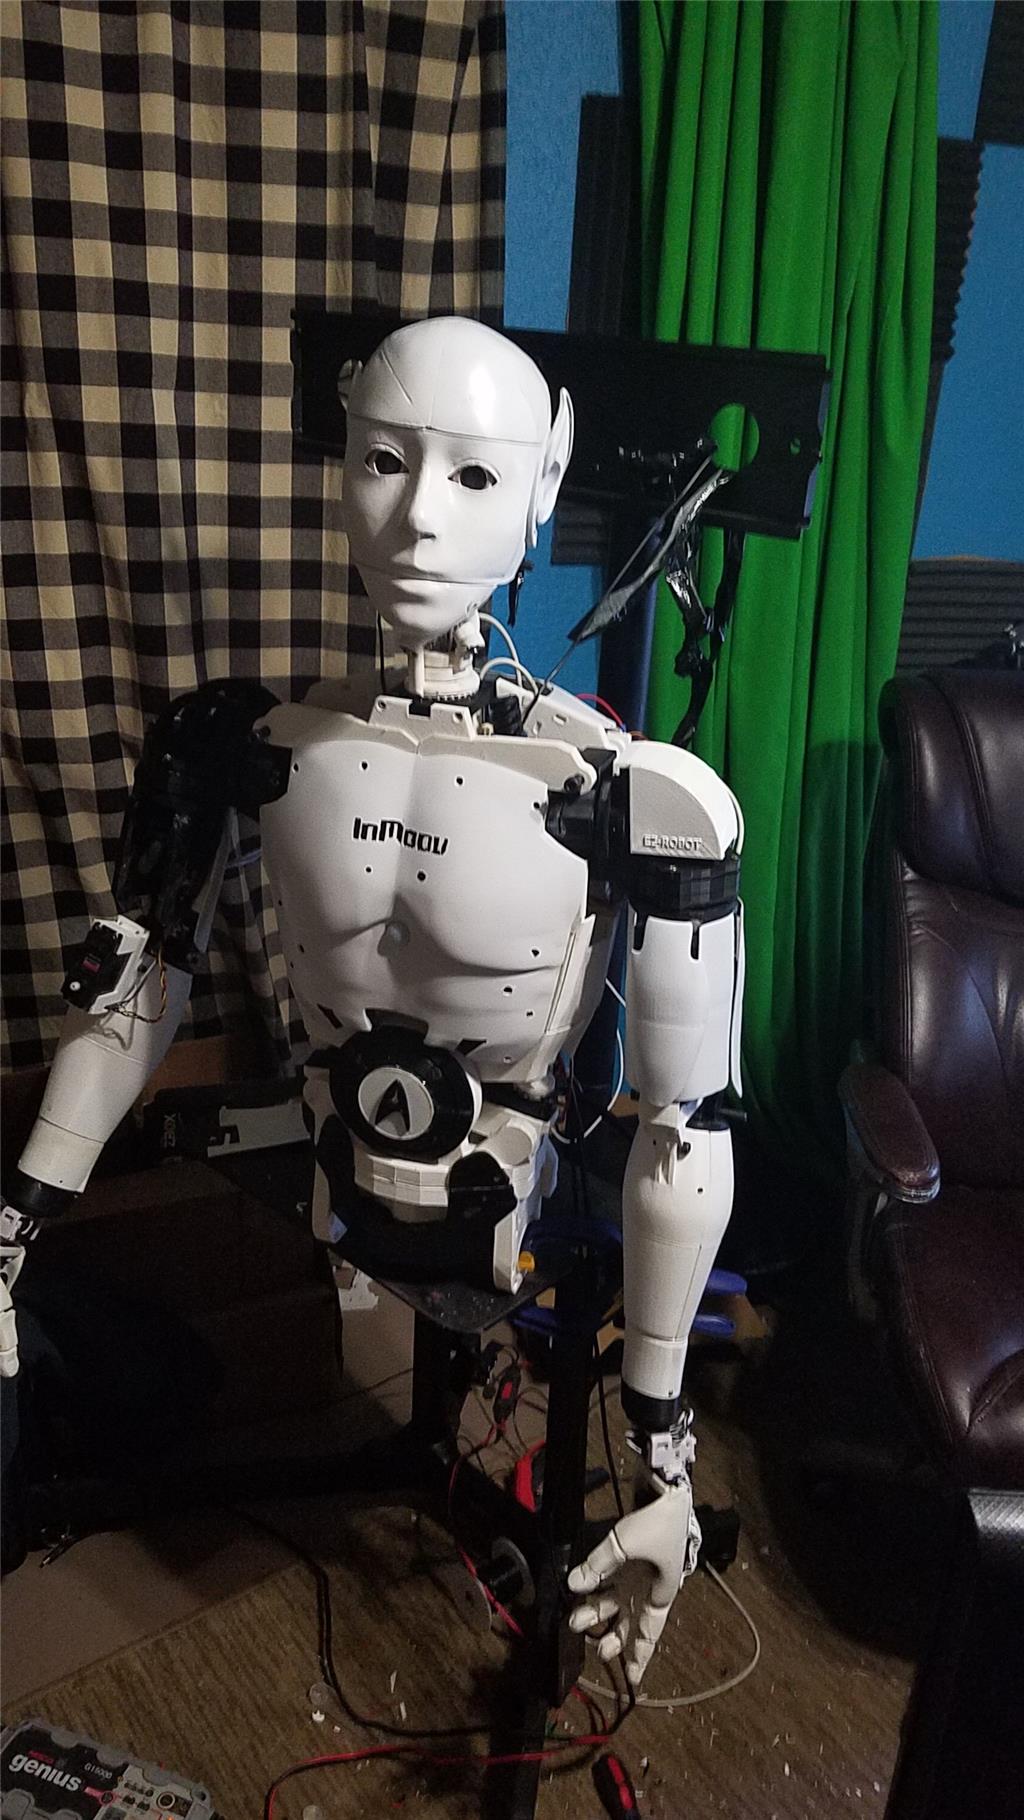
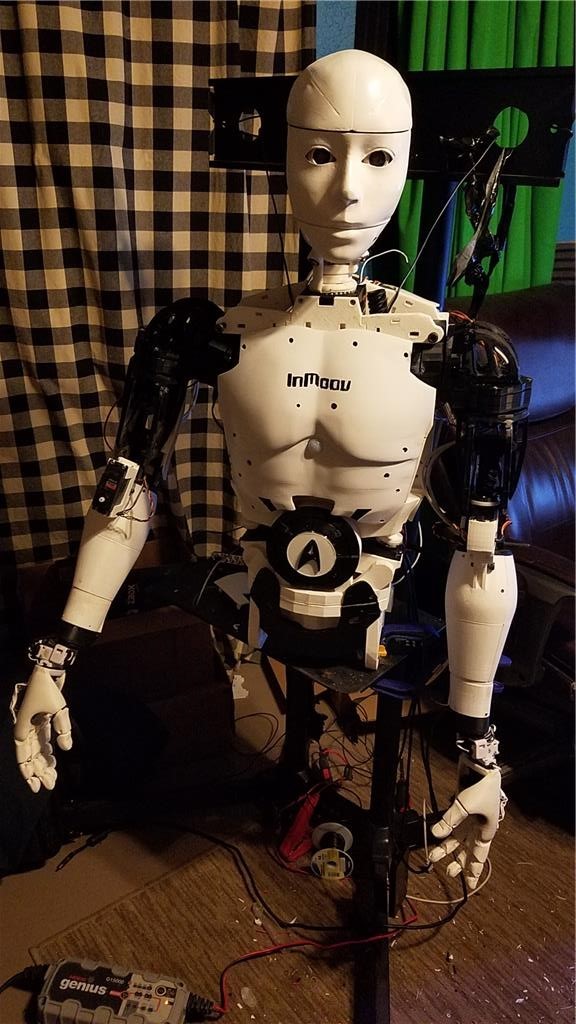
I have decided to start my InMoov project. I think I will call him Spock out of respect to Leonard Nimoy who passed away on the day that I started this project.
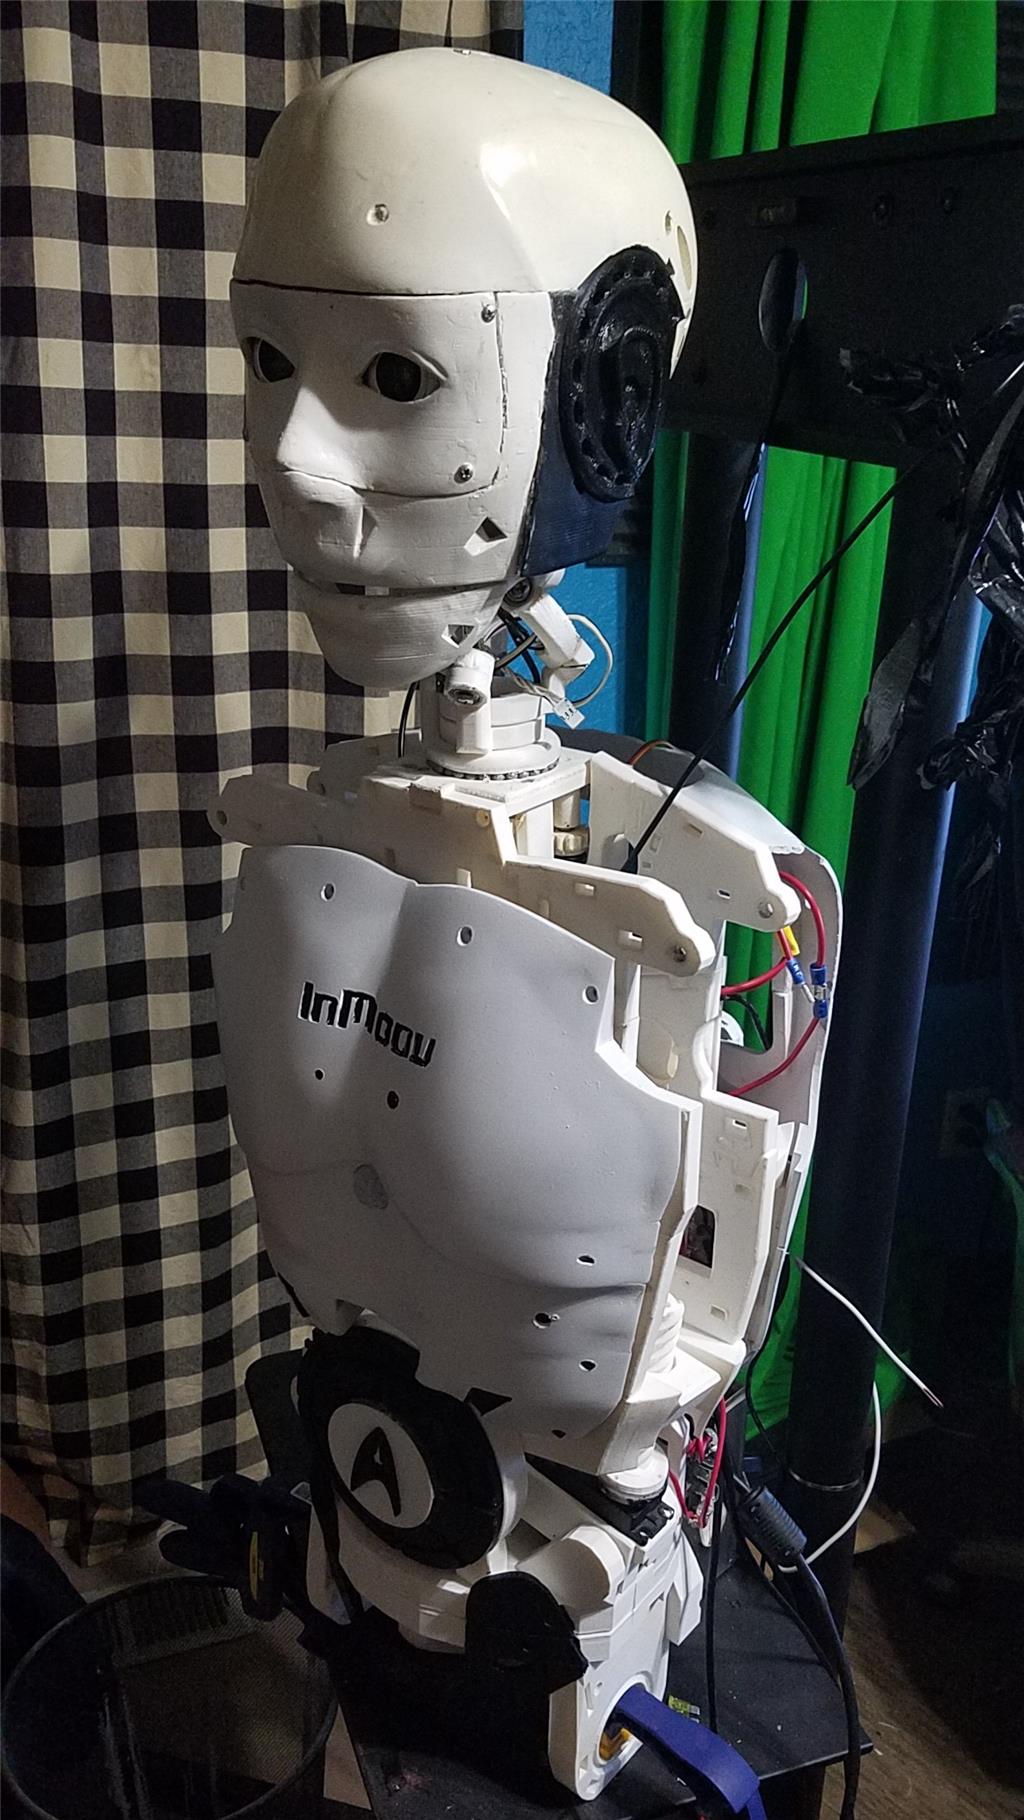
I am editing this post so as not to confuse people with the current configuration. I continue to update this post with the latest photos. If you are reading this for the first time, don't be confused. There have been a lot of changes to the InMoov over the past couple of years including starting over.
https://synthiam.com/Community/Questions/7398&page=21 Post 203 starts the rebuild of the InMoov.
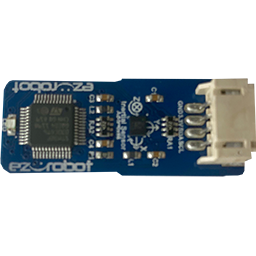
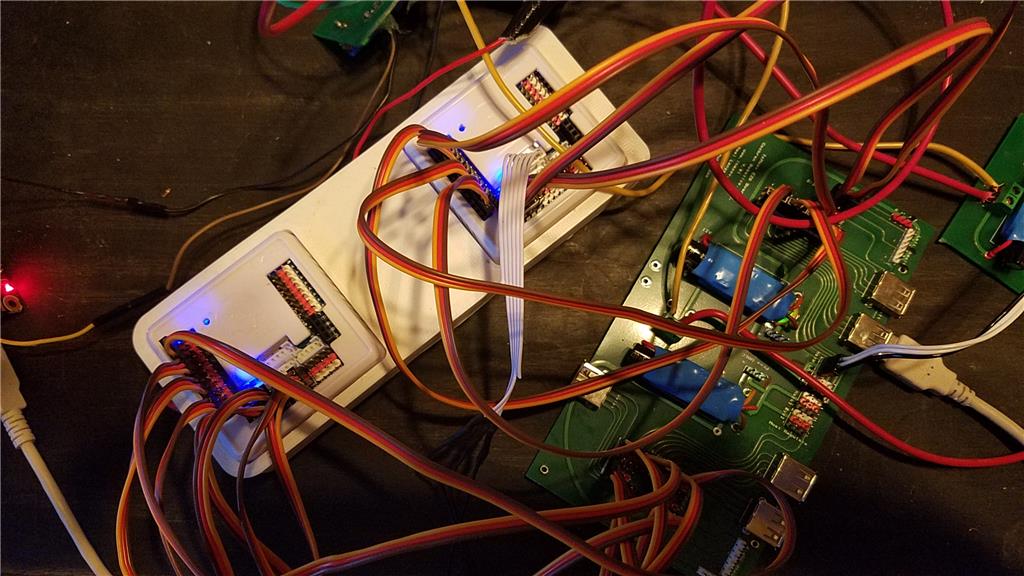
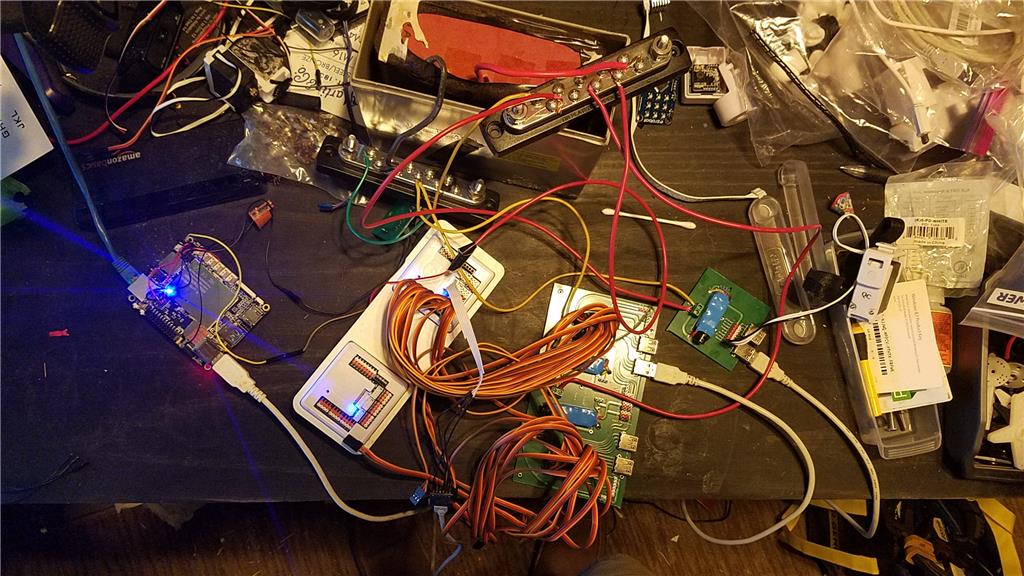
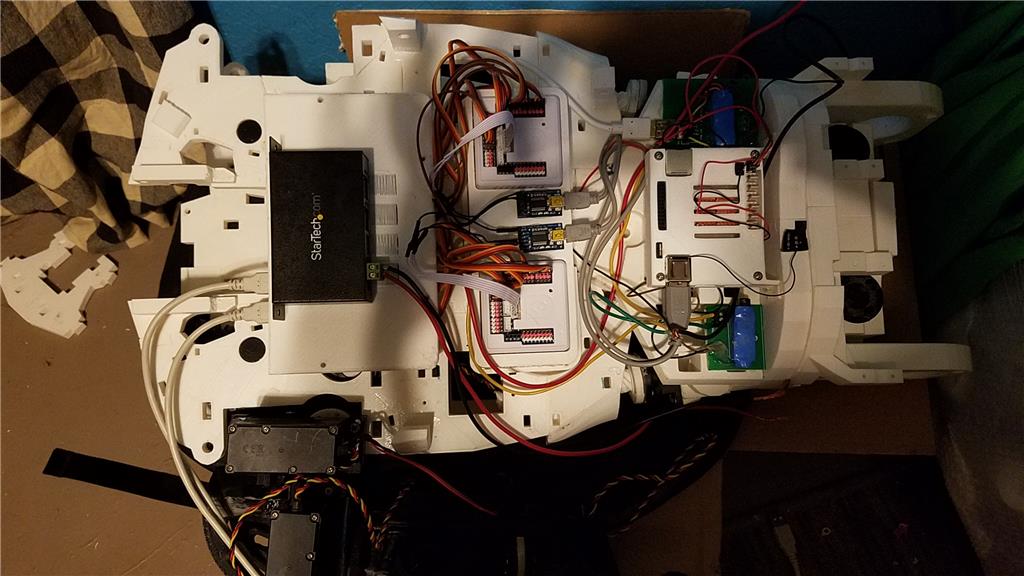
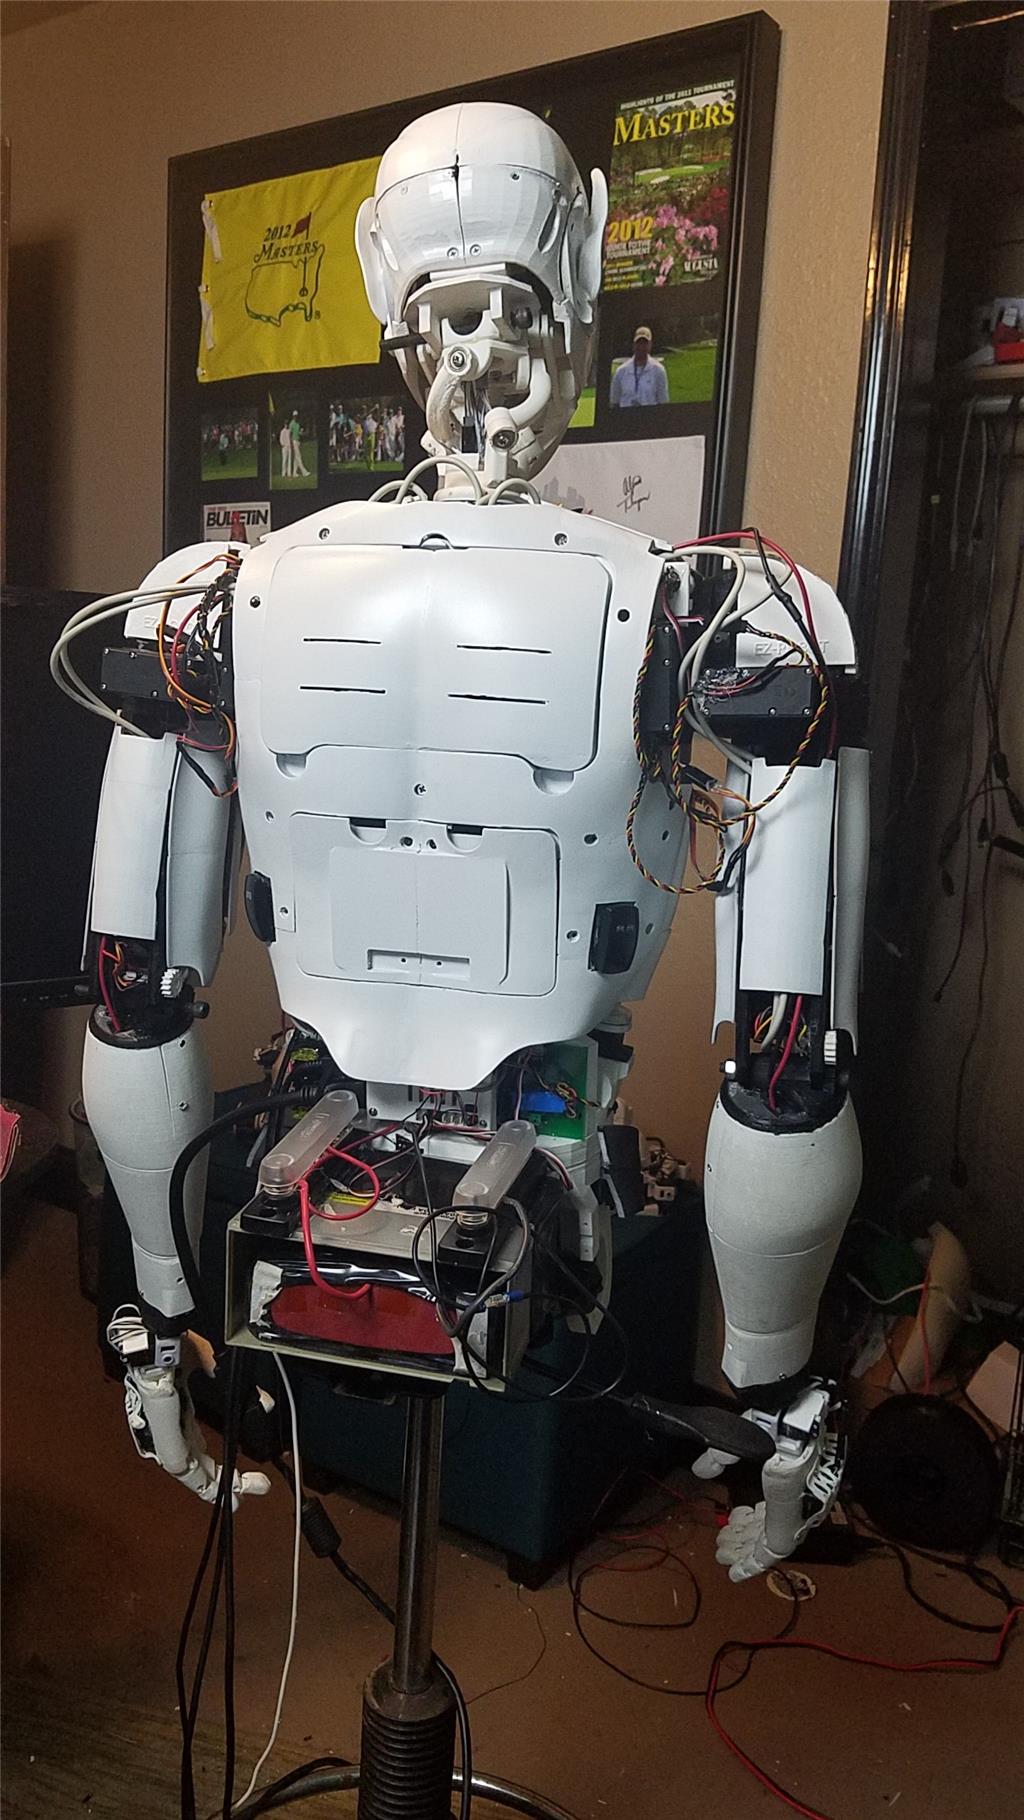
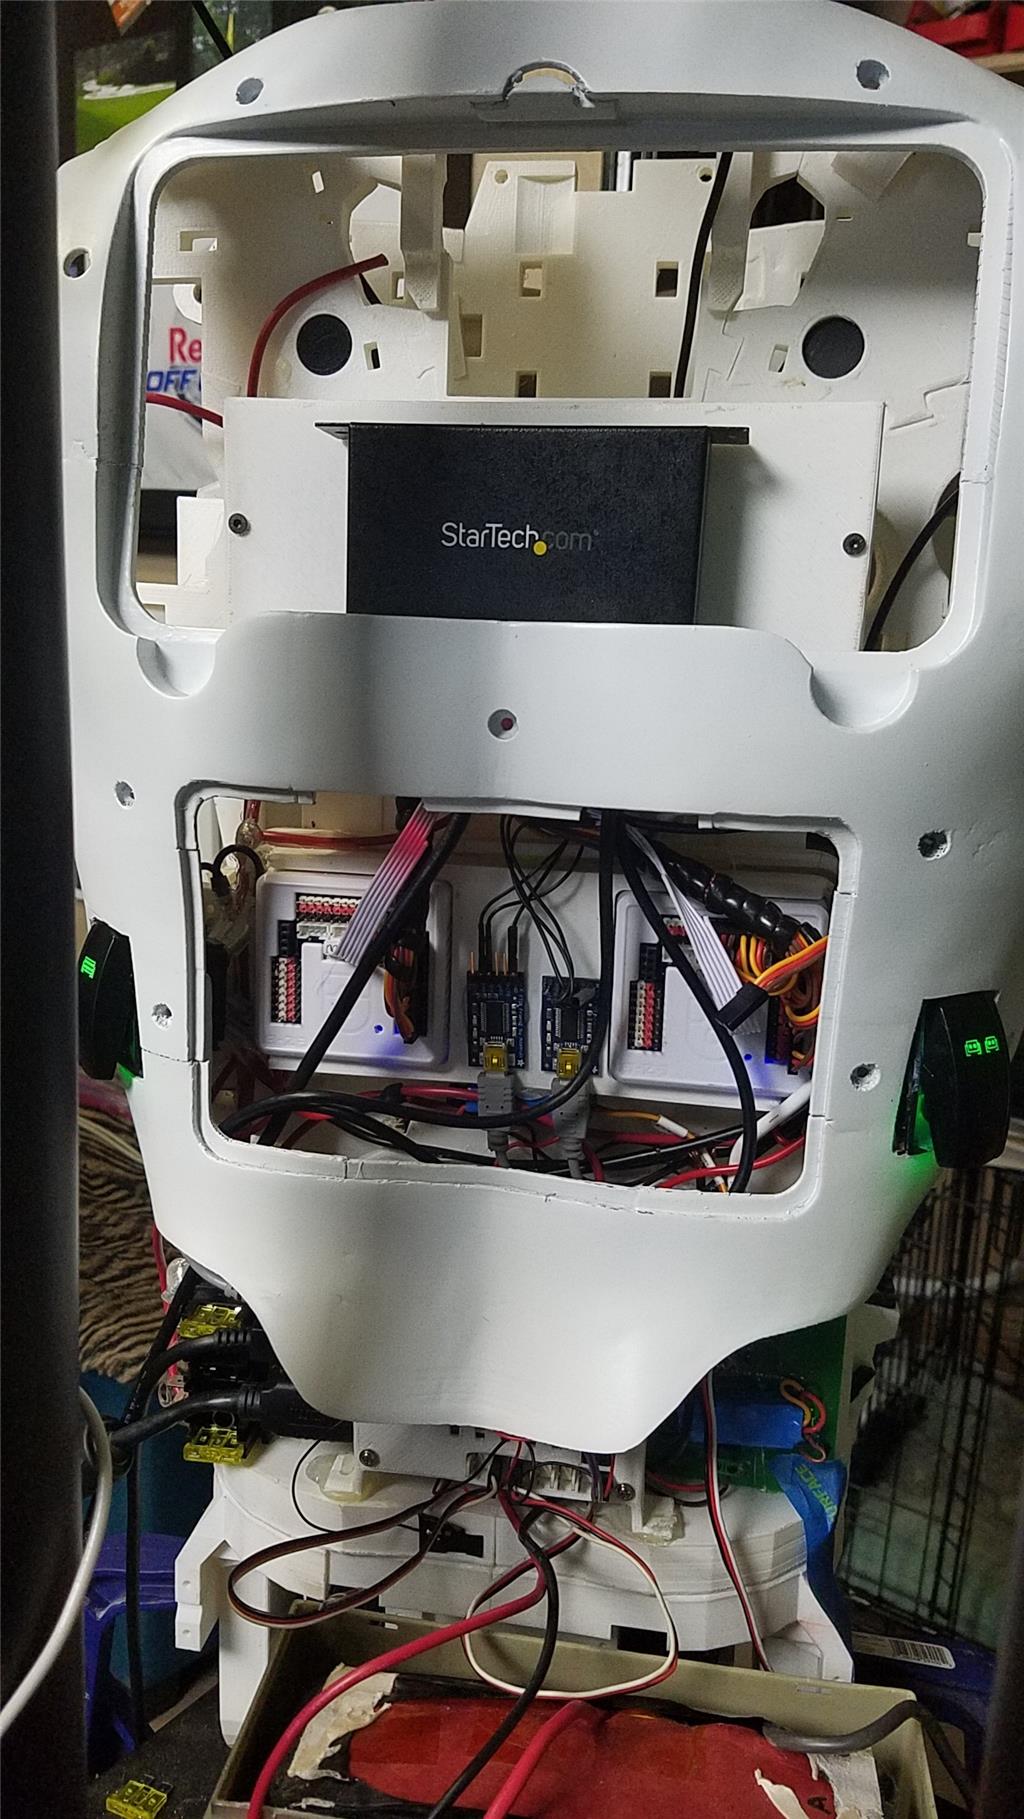
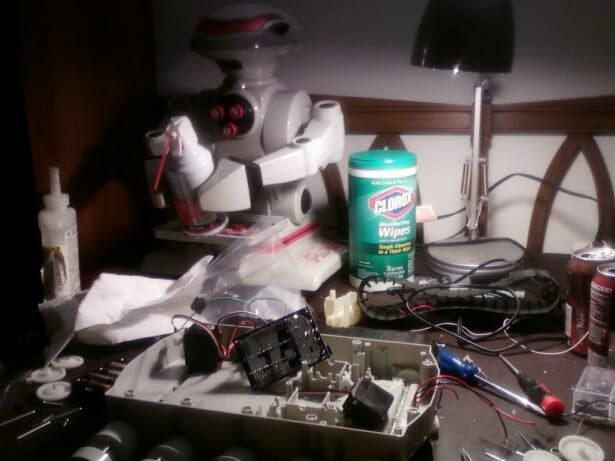
I have decided to use an onboard computer. I chose the Latte Panda due to it having an onboard arduino Leonardo and also because it uses little power.
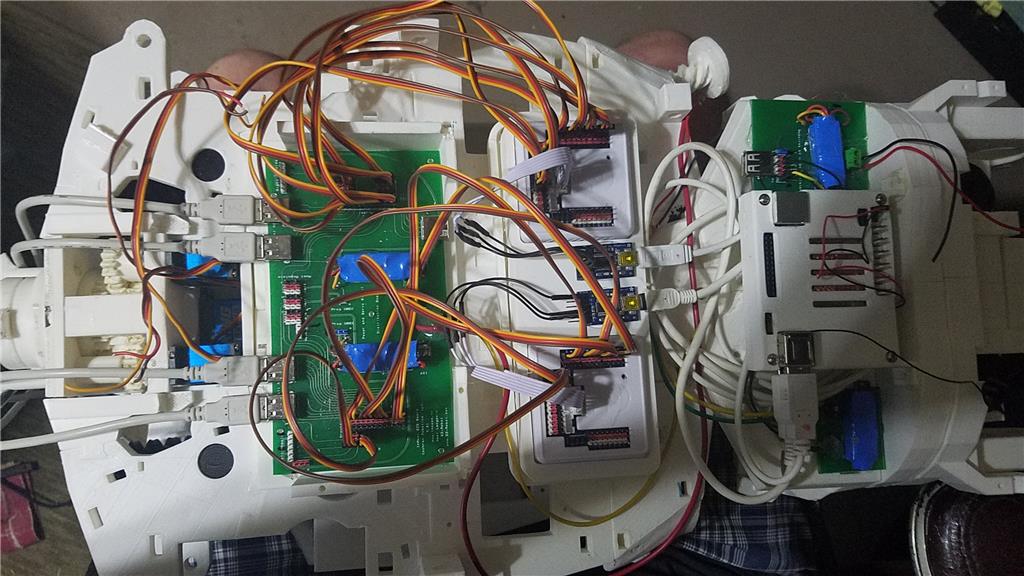
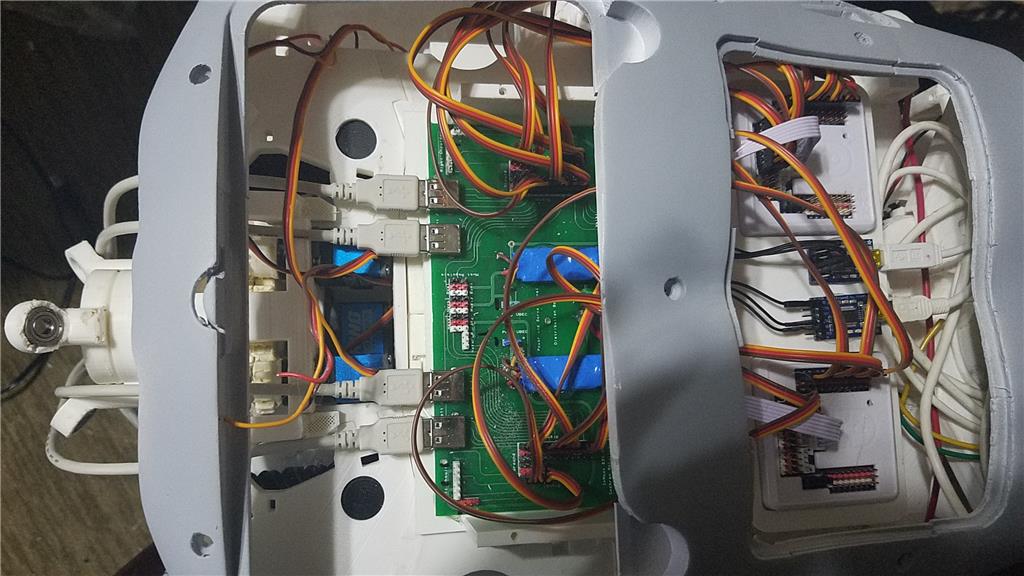
I used 2 EZ-B controllers connected via the camera port to Adafruit FTDI friend boards. This allows the Latte Panda to have a non-wifi dependent connection to the EZ-B's. I use a powered USB hub connected to the USB3 port on the Latte Panda to attach other items.
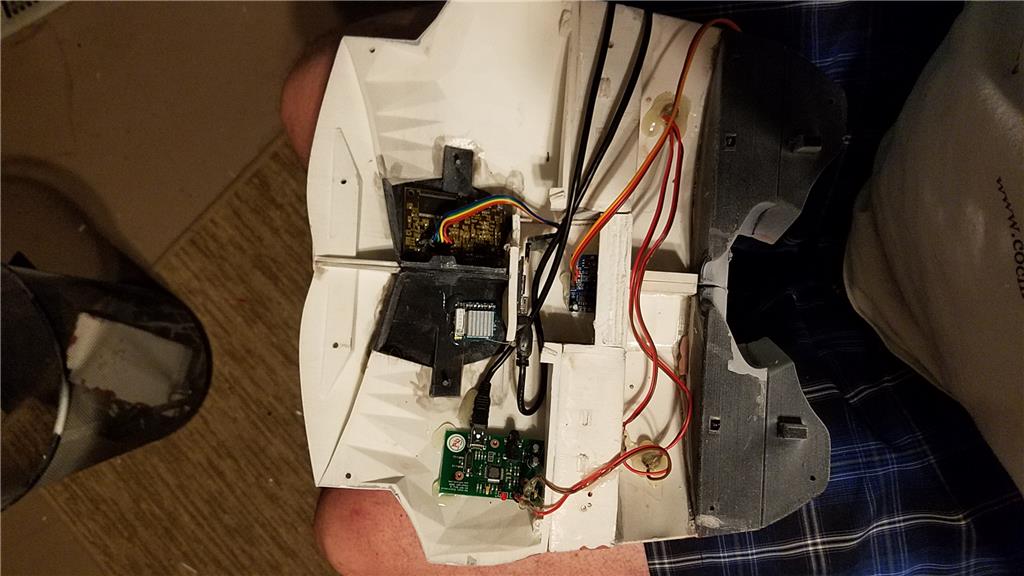
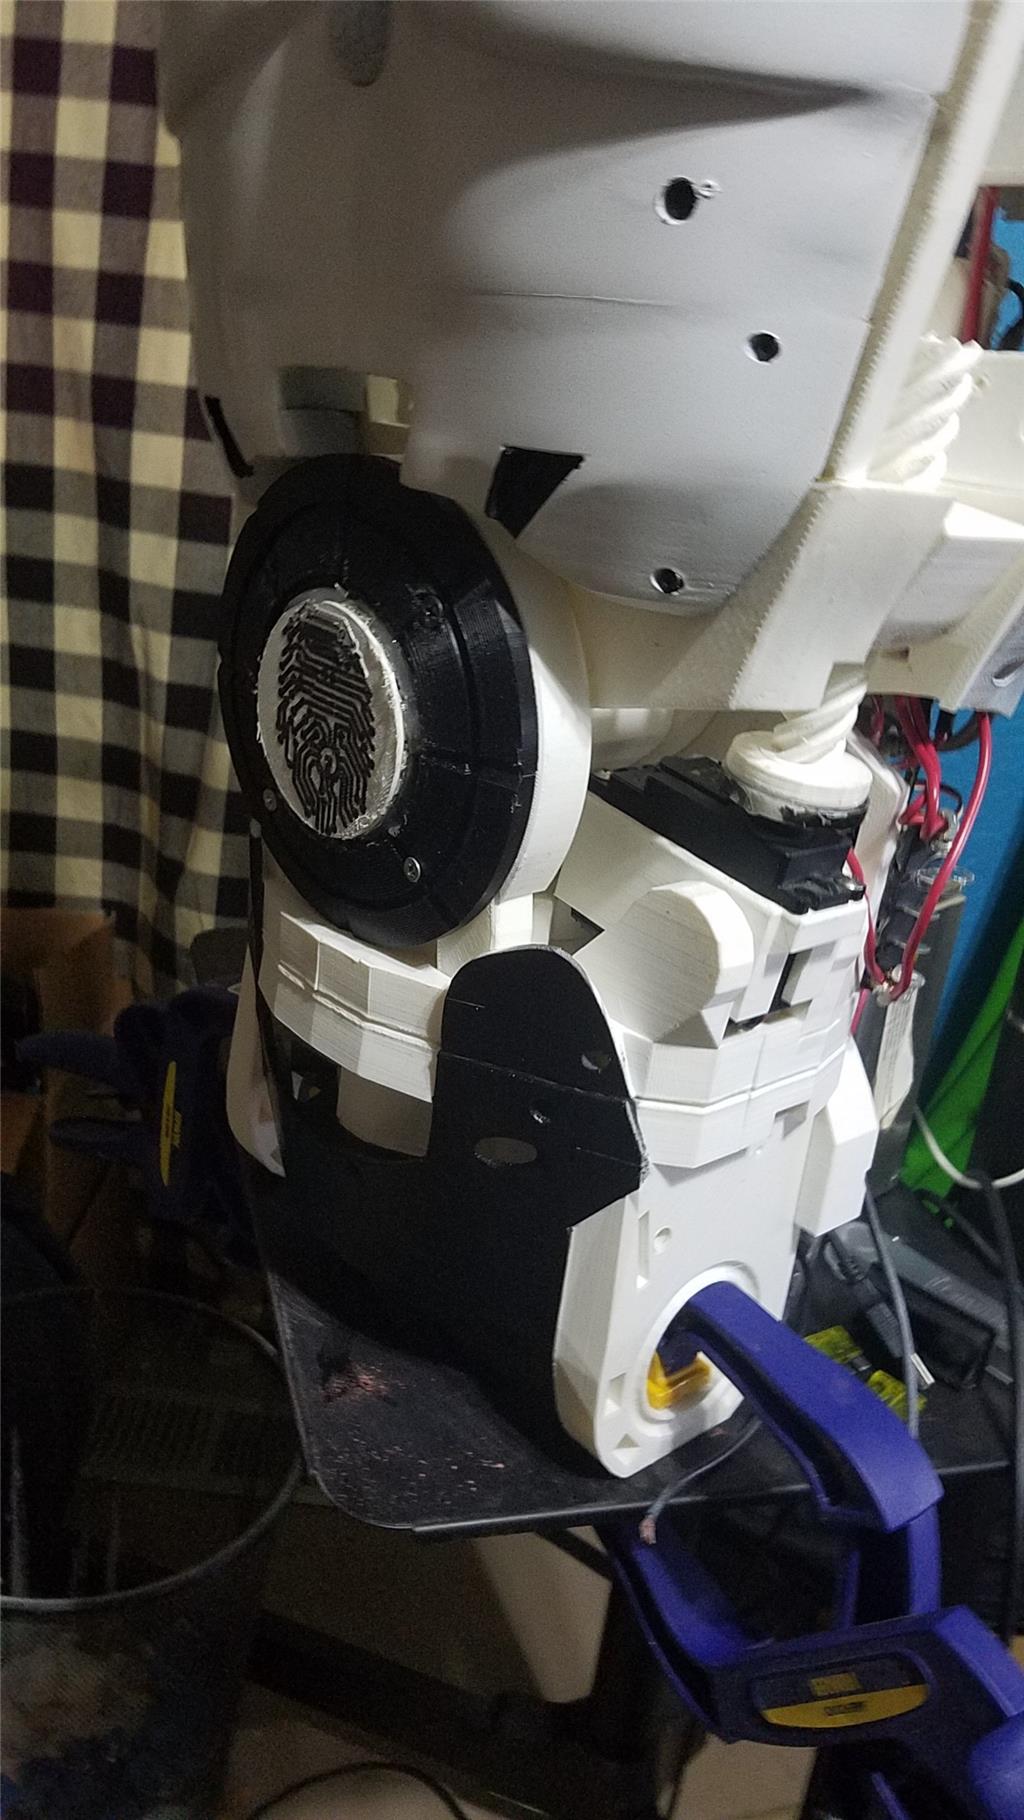
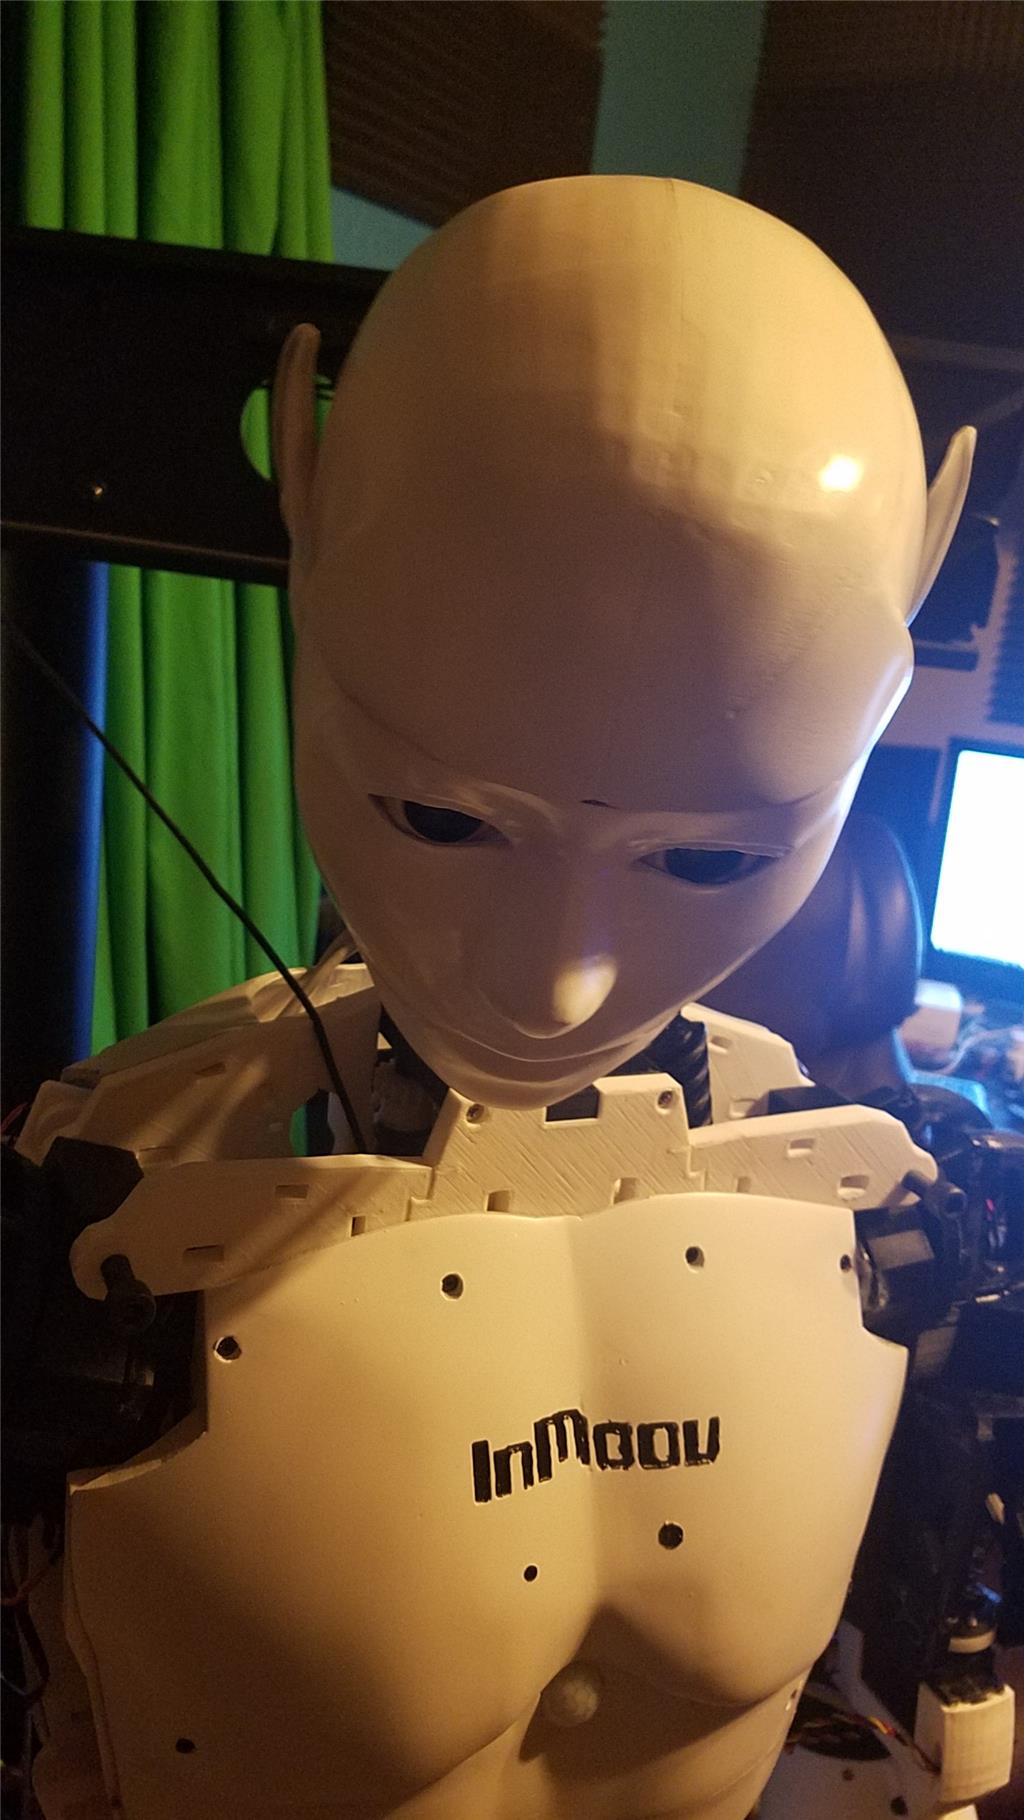
The Omron HVC-P is used to identify people, emotions, human bodies, hands, age and gender. It is attached to the Latte Panda via an FTDI friend which is then connected to the powered USB hub. It is mounted in the chest of the InMoov. I also use a 3 element microphone which is a MXL AC-404 microphone. It is disassembled and the board and microphone elements are mounted in the chest of the InMoov. This mic board is connected to the Latte Panda via a usb cable which is attached to the powered USB hub. There is a USB camera in the eye of the InMoov which is connected to the Latte Panda via the powered USB hub.
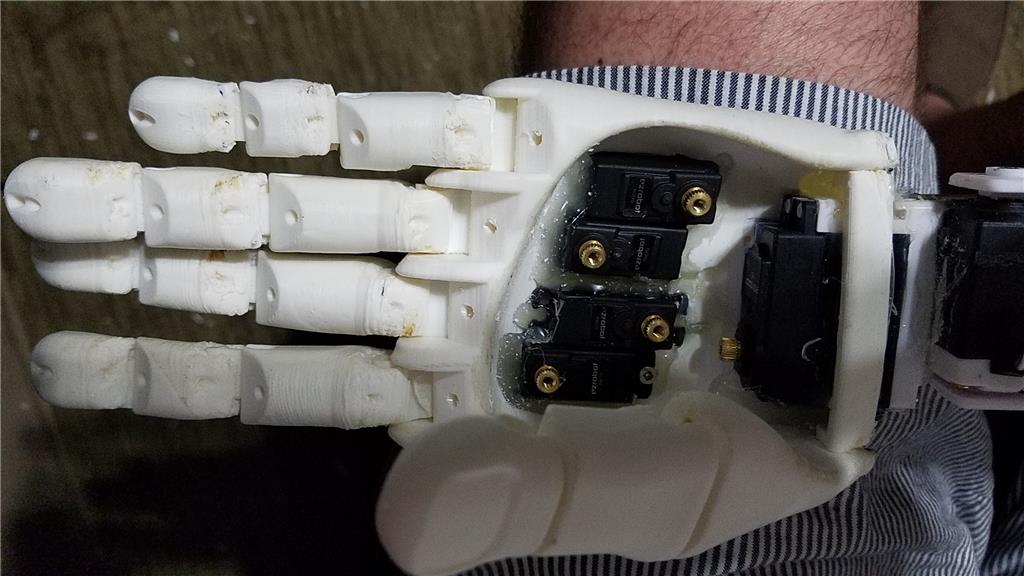
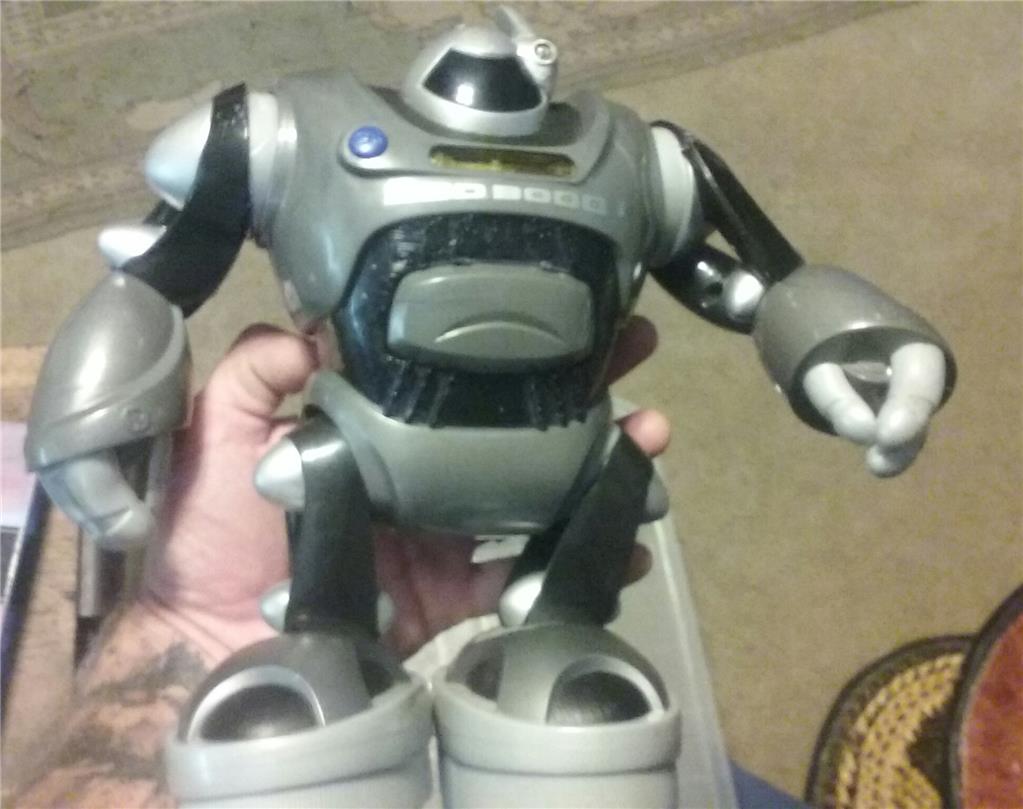
I chose to use the Flexy hand with the InMoov. The design is far more rugged than the original hand and works very well. There are 4 EZ-Robot Micro Servos in the palm of each hand which controls the main fingers. The thumb is controlled by an EZ-Robot HD servo. The wrist waves and uses an EZ-Robot HD servo to do this motion. I use the standard Rotational wrist.
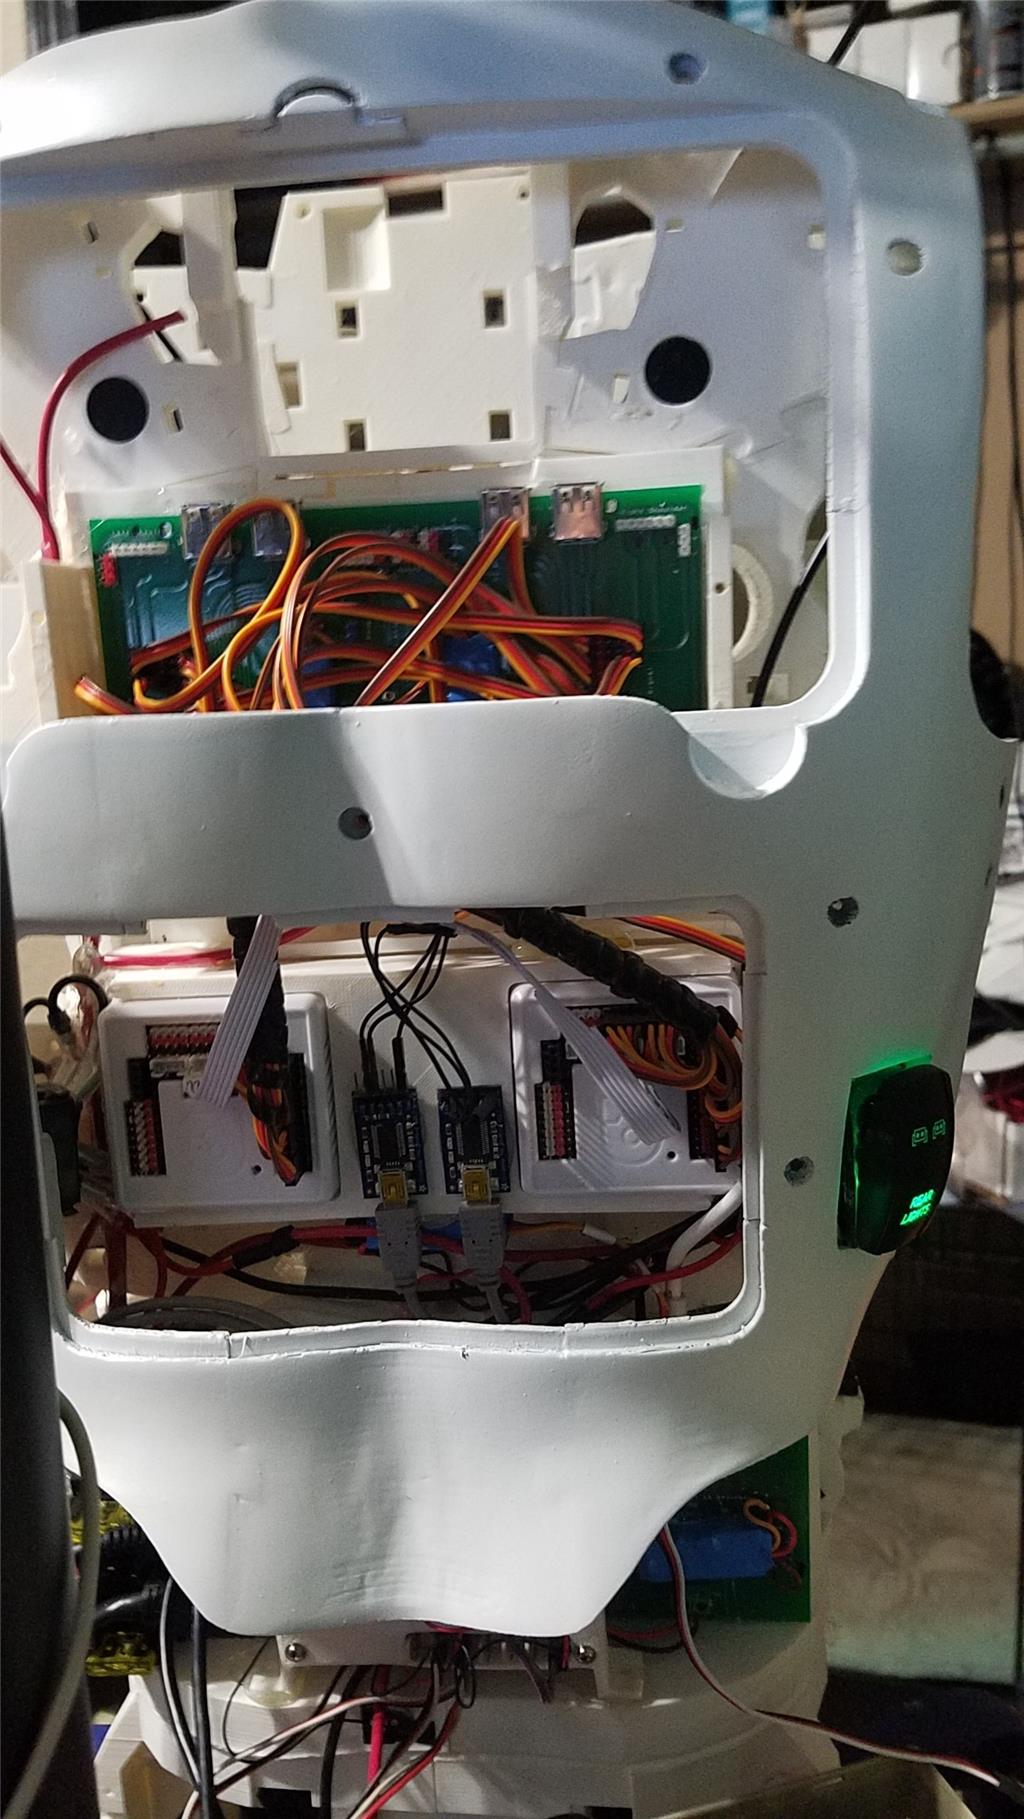
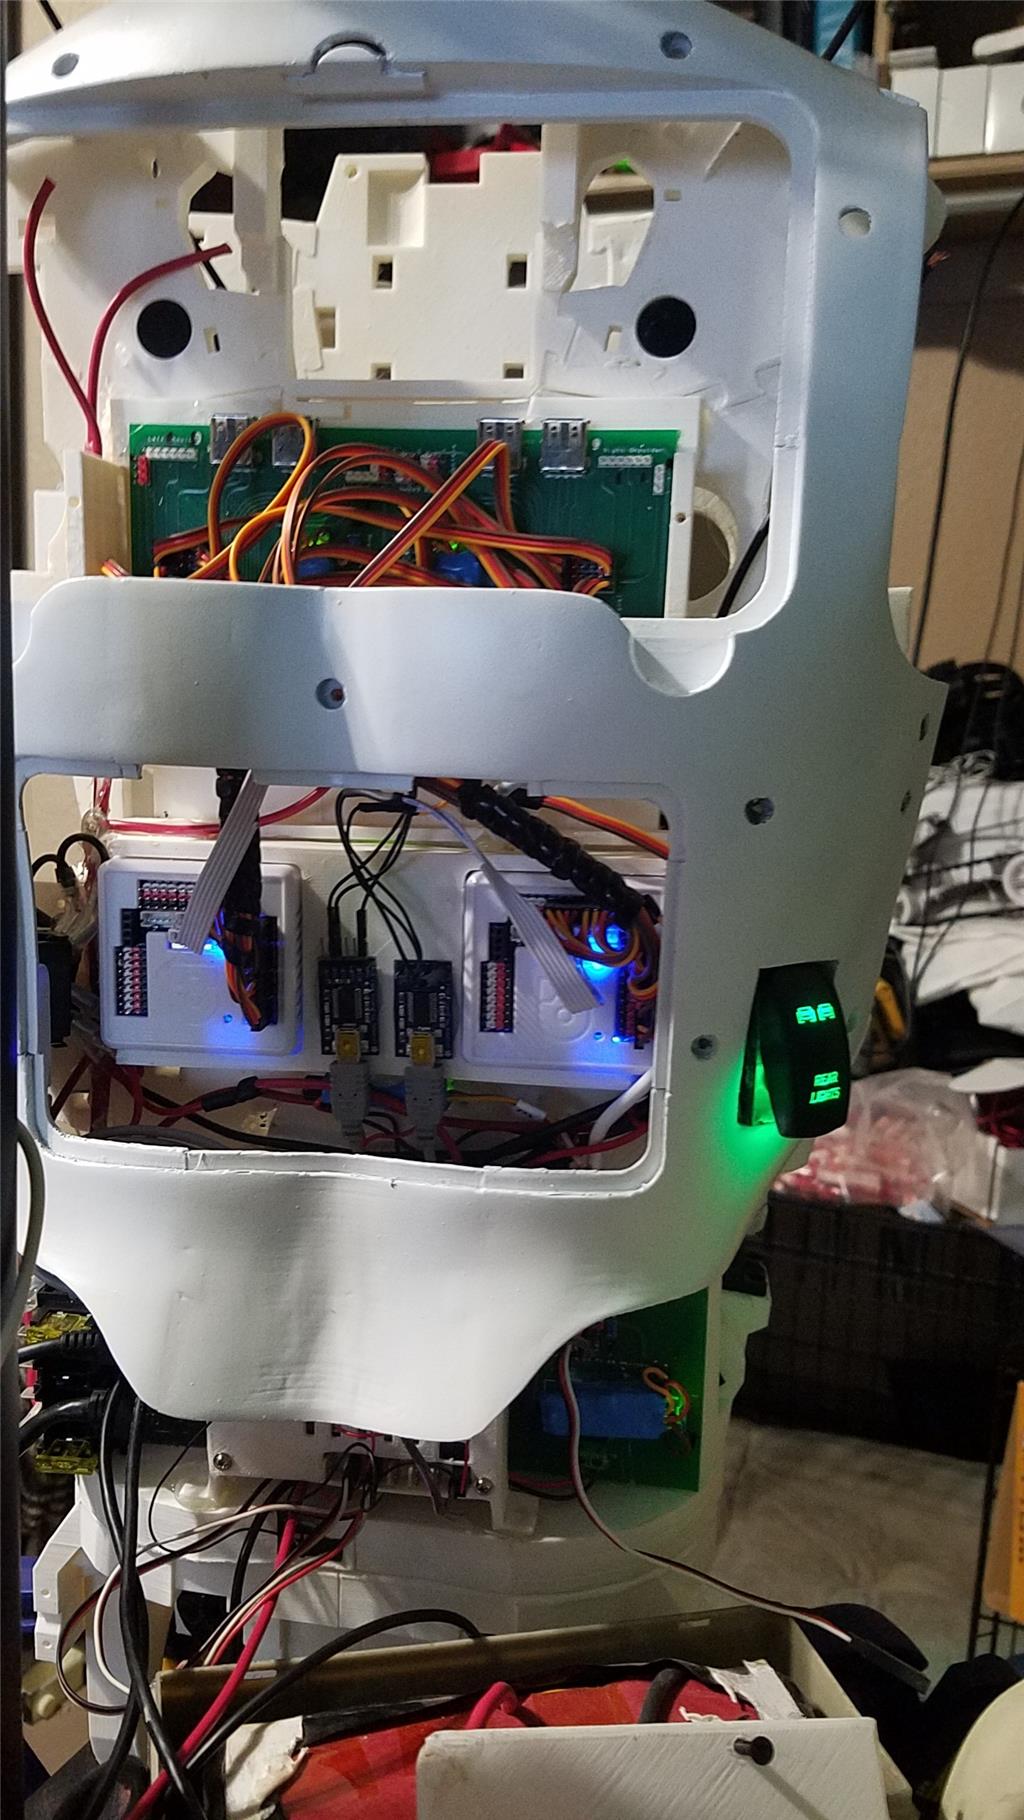
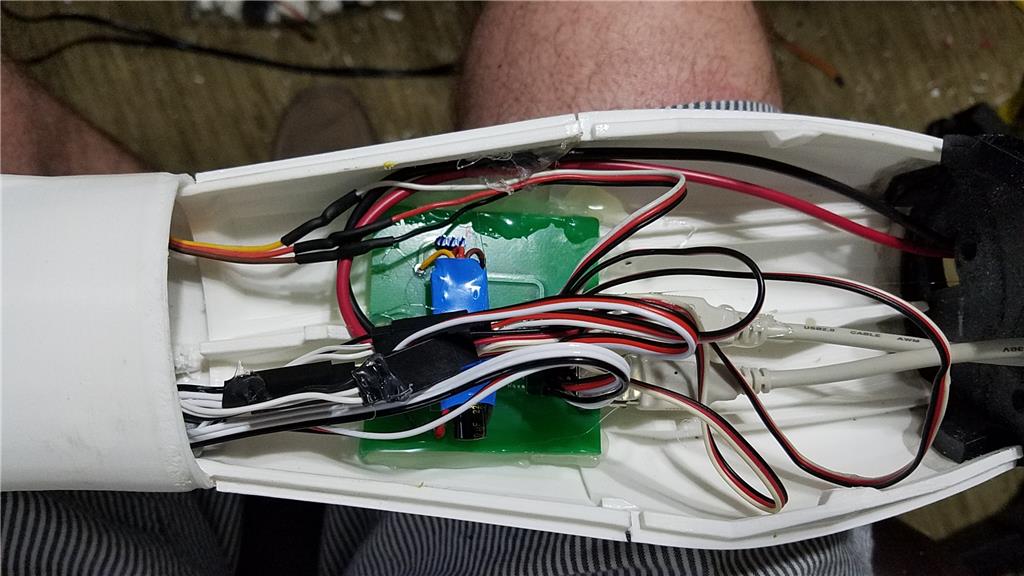
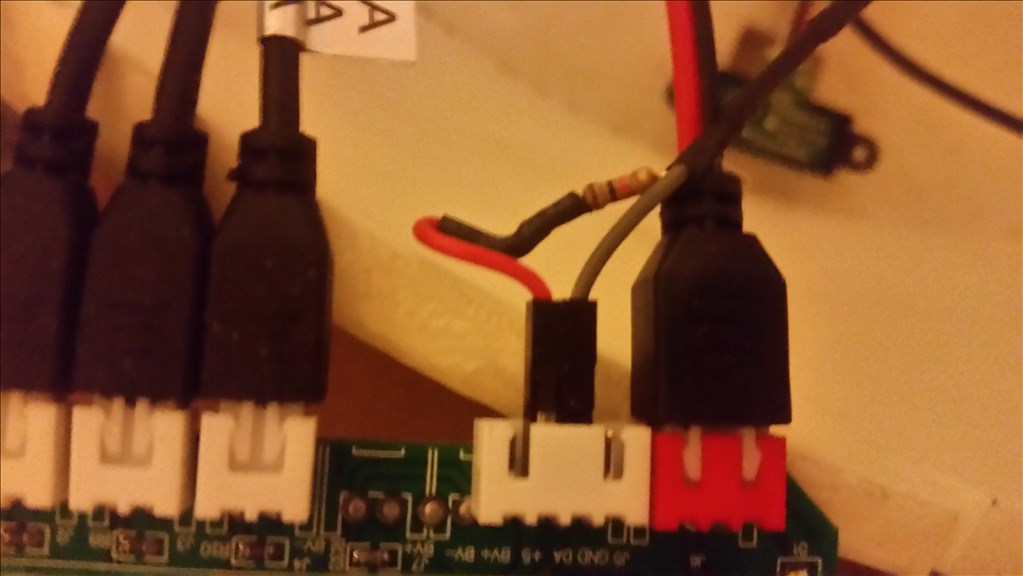
I have castle BEC's for power in the following locations set to the following voltages. Forearm's - 6.2 V - Controls fingers, wrist and elbows Custom power distribution board (2) set to 6.2 V controlling head, neck and Shoulder servos. EZ-B's - set to 6.1 V - it is mounted in the controller mounting plate and connects to the EZ-B fused power boards from a power base. Latte Panda - Set to 5.1 V and is mounted to the EZ-B controller mounting plate. Waist - set to 6.2 V and is mounted in the lower right side of the back. This provides power to the lean and pivot waist motors..
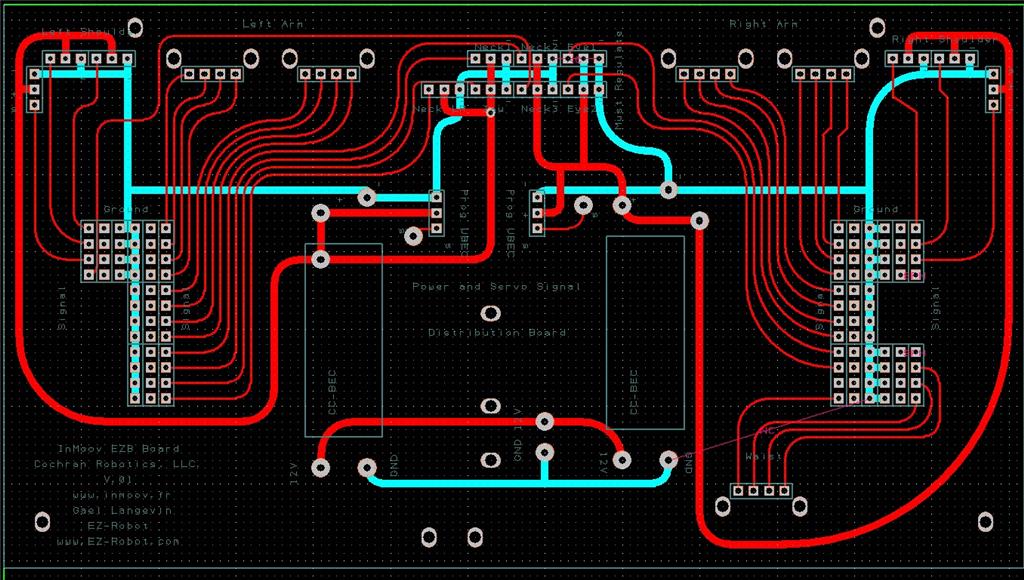
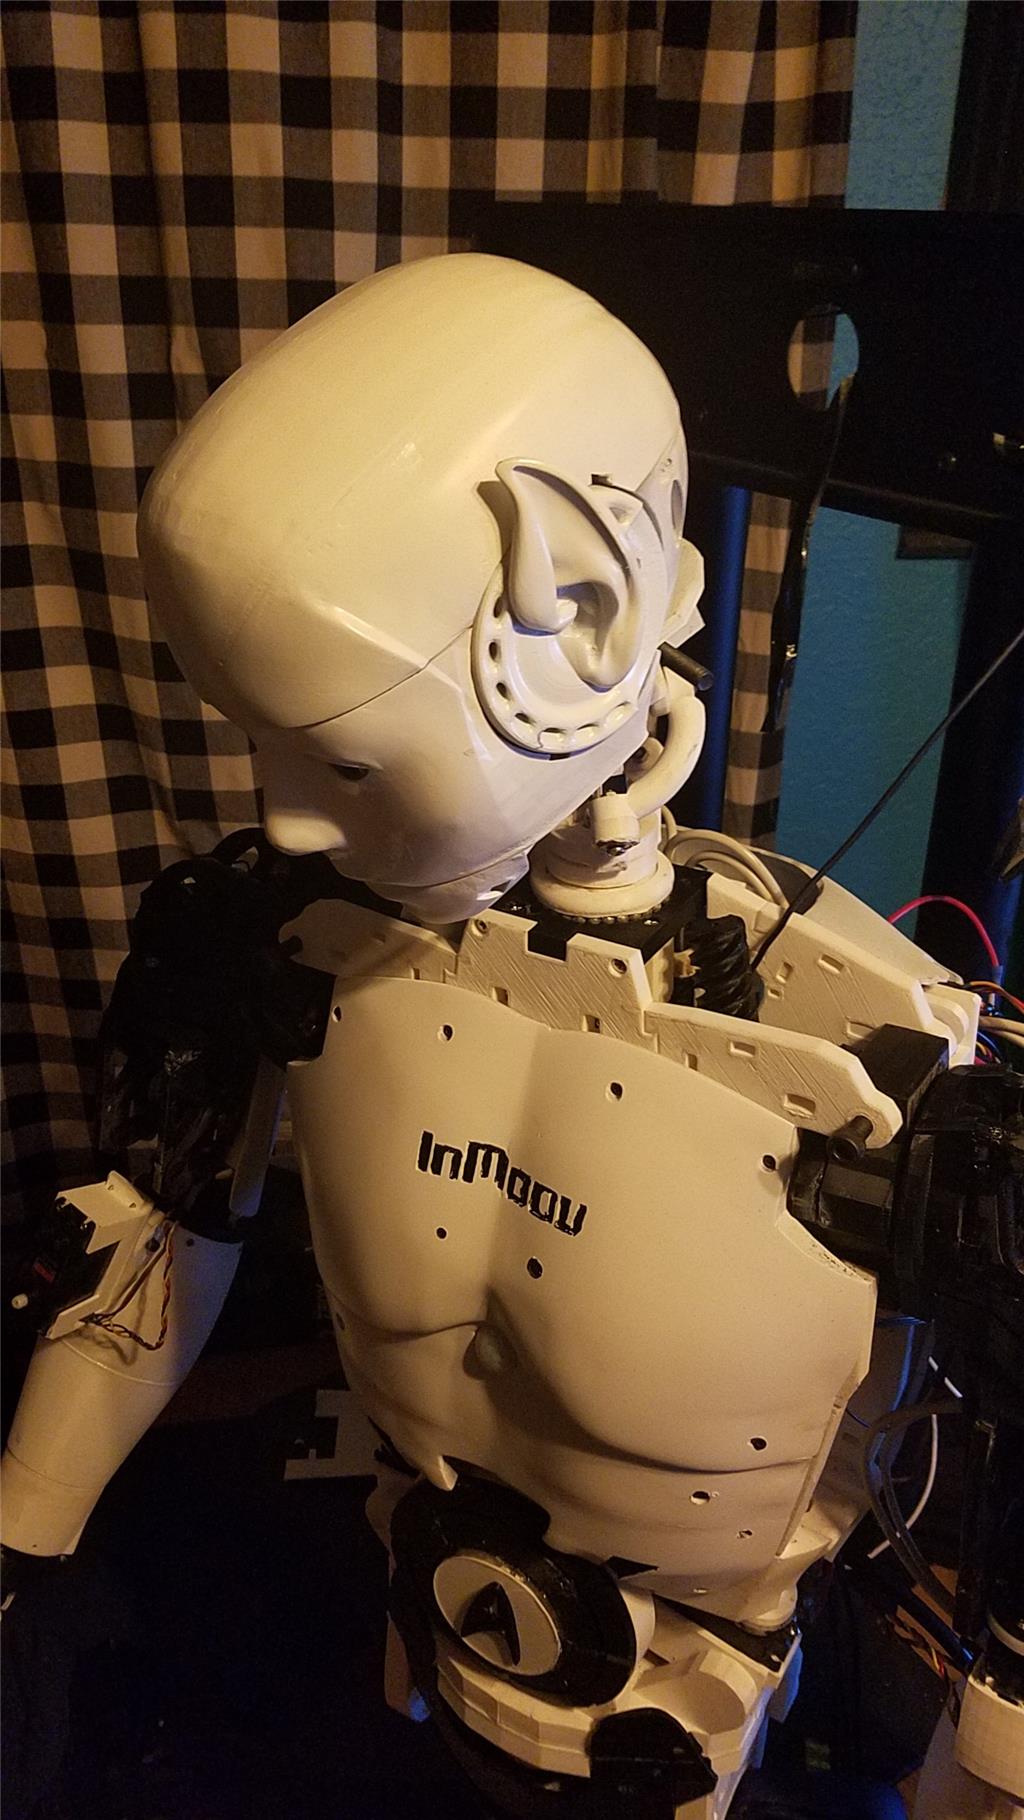
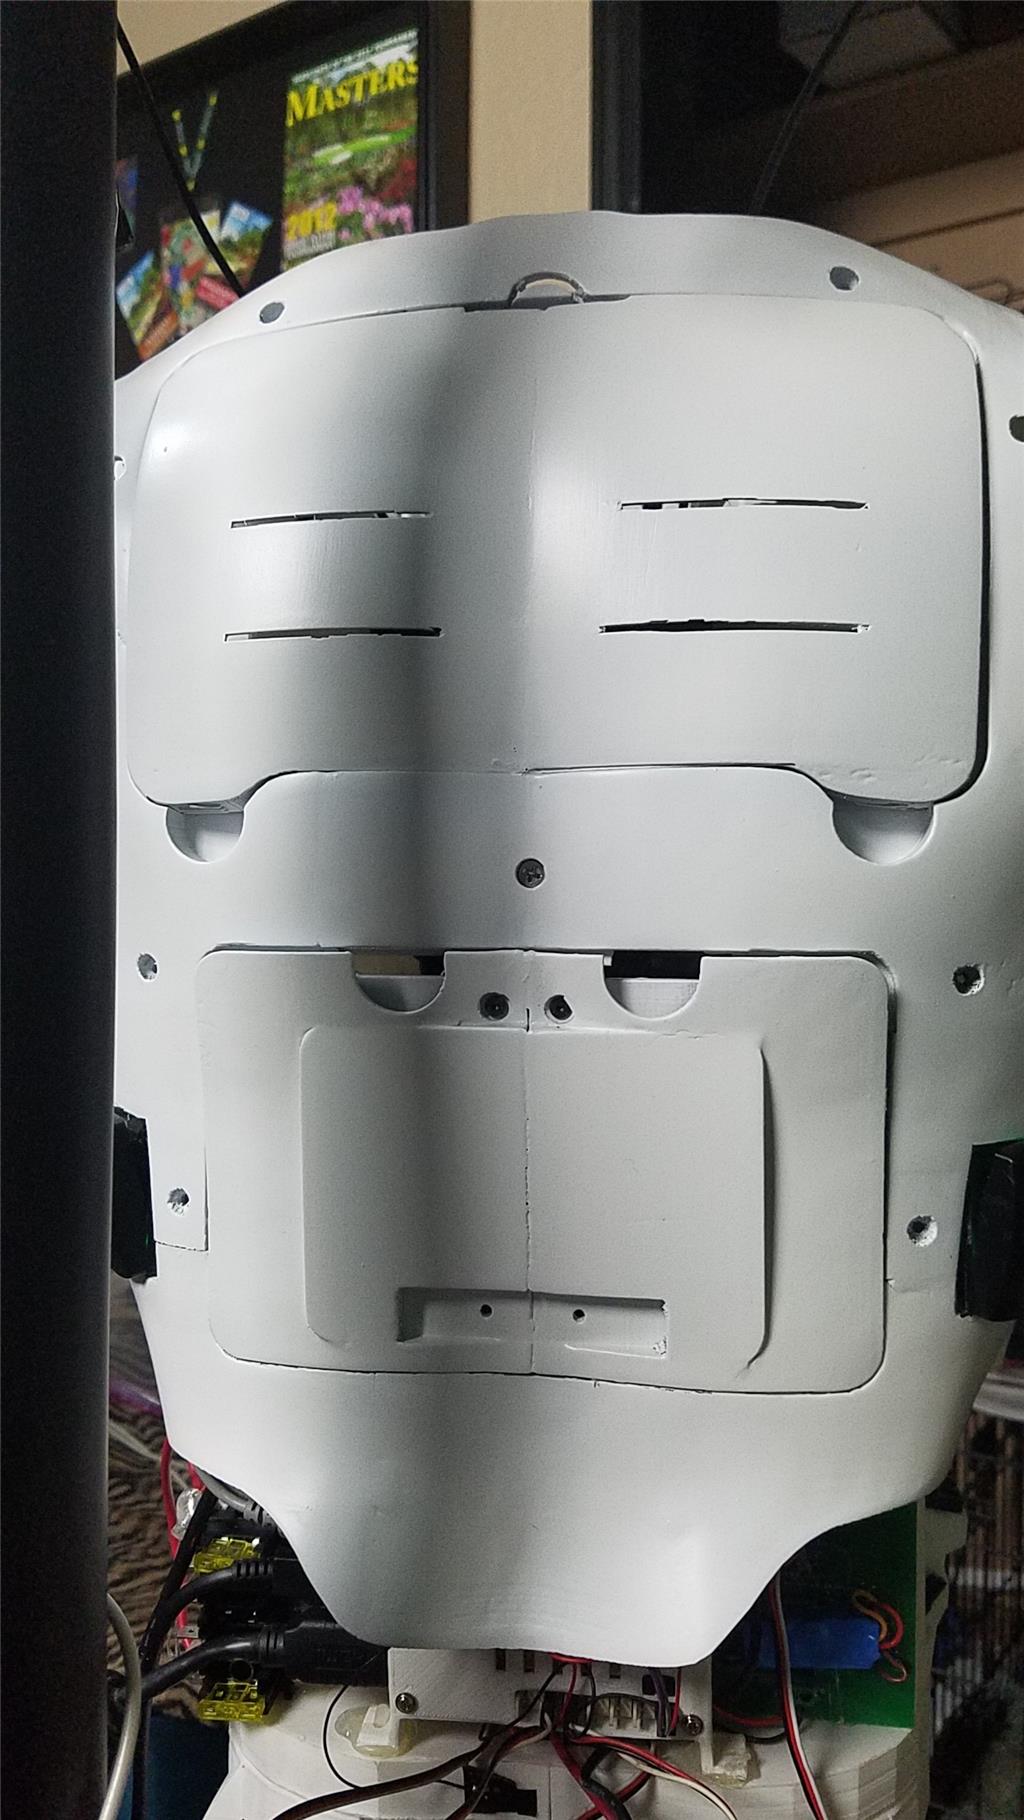
There are some custom power and signal distribution boards. These are in the forearms, lower back and in the upper back. The upper back or main board connects to these distribution points via USB cables to provide signal to the other boards for servos. The main board also has servo connector pins that are for the neck, head and shoulders. This allows the power to be distributed between multiple BEC's and also allows the servo signal cables to be shorter and more protected via the USB cables.
For power I use a LiFePo4 battery that is rated at 30 amps. It has the balanced charging circuit built into the battery and also has a low voltage shutoff built into the battery. This protects the battery and allows the battery to be charged with standard car chargers.
I put switches on the back on the InMoov which are rated at 20 amps at 12 volts. These are rocker switches that allow the user to pretty much slap the switch to turn it off. There are two of these switches. The servos for the elbows and fingers are on one switch. The latte panda, neck, shoulders, EZ-B's, waist motors and some lighting is on the other switch.
I also added a fuse block. This allows 20 amp fuses to be put in line to help protect things. The switches above drive the fuses for each of of the motors listed in that section.

-636348716348649435.jpg)

Discover more robots
Lemon's Arc Upgraded
Jamerperson's BRAD (My First EZB Robot)

Hello David,
nice to see you again - this time in the EZB4 Forum.
Really amazing and incredible work you did! Respect! So nice and cool InMoov.
I rode also your whole article, but one information it's misssing or i am blind.
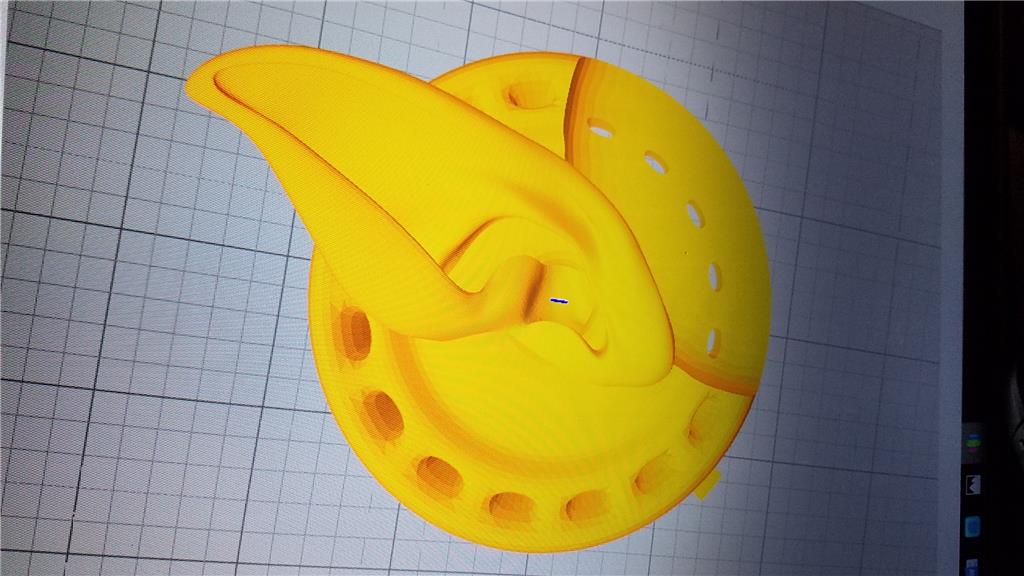
Your Chest with the Screen is so cool, i saw also this chest at the InMoov from Alex from Russia. He until now don't really want to tell where i can get the STL files.
I will be really happy if you can tell me, where are the STL files and maybe what kind of Screen and cameras you use.
I really want to rebuild it, because it will be a good position for a mini PC.
Like we spoke in the InMoov Forum before, i want to use in the future a Odroid PC.
What you use as a PC inside the InMoov, or which tips for powerfull mini PC what i can build in the InMoov you can give me.
best,
Boris
HI BORIS,
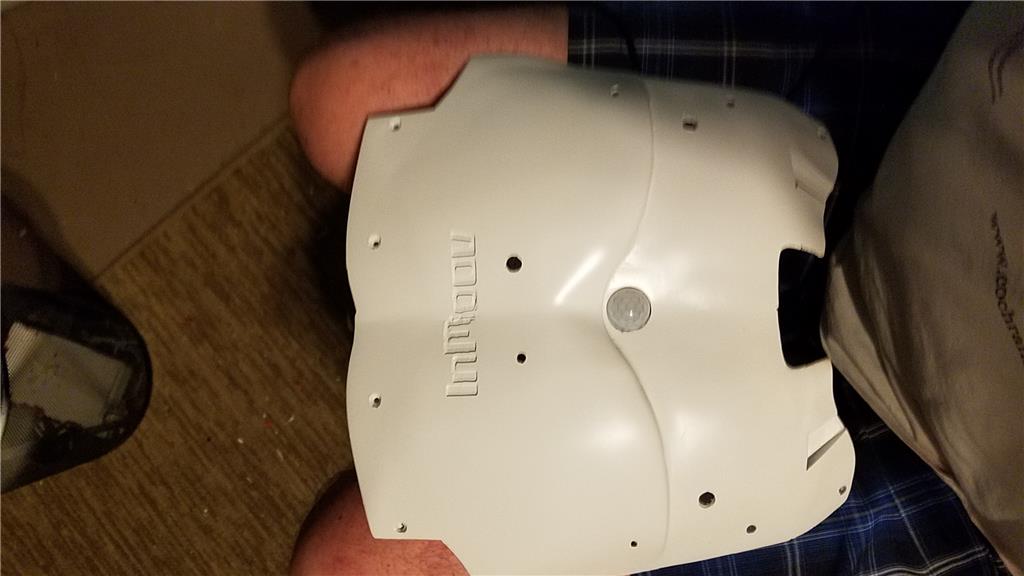
It's great to see you here. Alex hasn't given me permission to send out the bumper he designed so I haven't made it public yet. We traded some work with each other for me to get the STL files. He has also designed legs and different arms and legs.
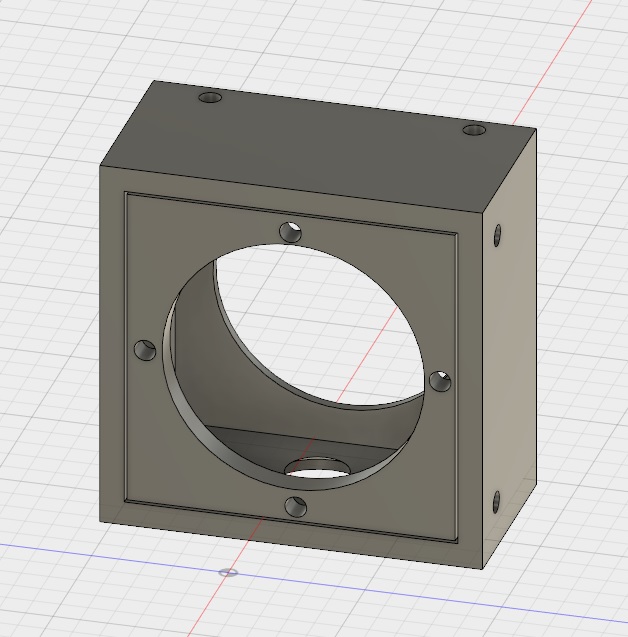
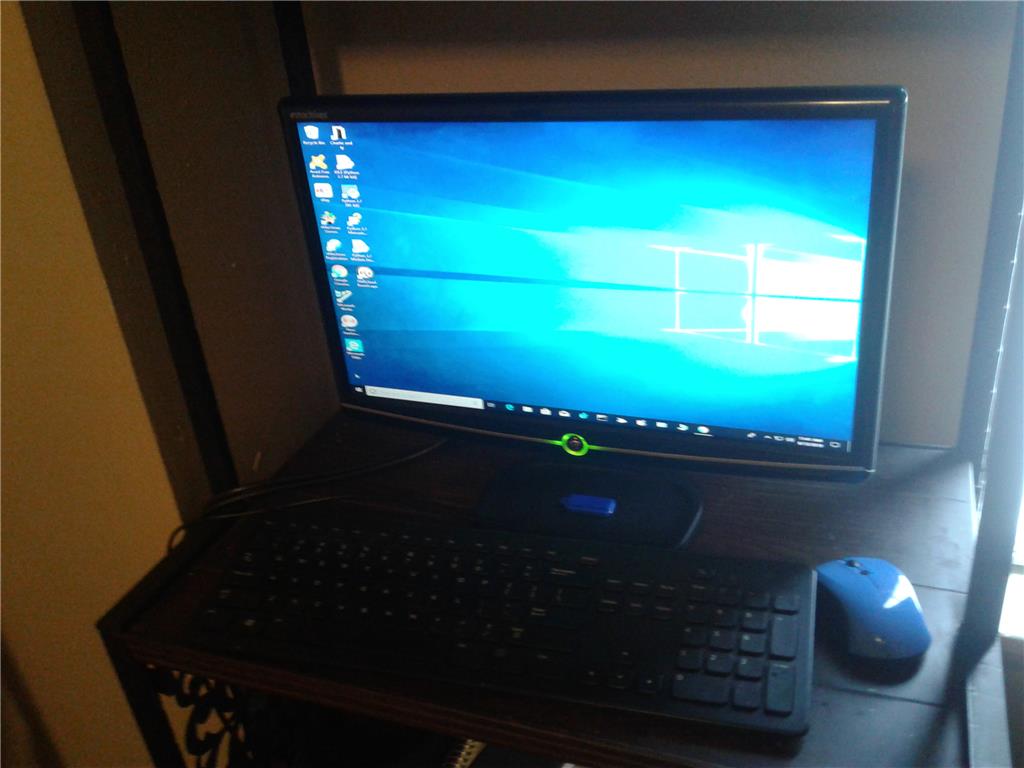
I use the bumper to house a Double Din Lilliput 669GL-70NP/C/T Touch Screen Monitor with HDMI, DVI, VGA, and Auto Switching monitor. It could be used to house a tablet style pc, but I wanted something more powerful. I went with a mini pc who's parts are listed on the first post here. ARC would have no issues running on any new tablet you can buy. I just do a lot of things outside of ARC also and I often overkill a solution.
I plan on working on this project a lot this next week. I try to document everything here that is different than the normal build. I hope to be posting a lot this week.
Hi,
hihihi, yes alex is a really silent person. We wrote on private email, but this also has nothing to say ;-)
MMMM i still waiting maybe maybe
To the Screen: Ok thanxx i only need to know the size..... 7"
but nice your screen with full HD
To the PC:
i found this stronger version of the Odroid:
https://www.pollin.de/shop/dt/NzU2OTgxOTk-/Bausaetze_Module/Entwicklerboards/ODROID_XU3_Einplatinen_Computer_SAMSUNG_Exynos_5422_2_GB_USB_3_0.html
what do you say do this?
The only question for me, its that this Odroid runs with Linux and i must say i prefer more WIndows, thats why i until now no Odroid bought.
Me again,
i had an other idea for a strong and powerfull PC
this:
https://www.fujitsu.com/de/products/computing/pc/desktops/esprimo-q520/index.html
This Esprimo Series are really small, has a lot of USB Connections, strong Prozessor.... but 220 V
Maybe change the power adapter... i am not shure if this can work.
What do you say to this idea?
Boris
That one is plenty powerful. I would put in an Samsung ssd personally. I would also put in plenty of ram. This two things are the largest reason that hardware become obsolete as quickly as it does.
Hi David.
whats happend with you pics?
And your website? https://cochranrobotics.com/
I want to look again to you cool inmoov, but now pic.
Ahhh, and alex send me the STL's for the Chest and he said i can share
Here is the link:
https://www.thingiverse.com/thing:899881
Boris
My service provider was doing maintenance on their hosting server environment.
Not much to update on other than I have been making sure that I know the minimum and maximum values for all of my servos. There are a couple of them that have men a pain but I think I only have a couple more to test out.
I had taken off this week to work on my robot. Unfortunately people found out I was off of work so they all seemed to need something from me.
I decided to go back to the standard neck mainly because I discovered one of my smaller servos was bad and I had a large one burn up. I am saving money for the lower half of him so, I went cheap and went back to the 4 dof neck.
On the base, I think I will take a cheap table that I found from walmart and use it as the structure for the base. The table is a bar style table that is a little taller than 3 feet tall. The top will be cut to match the current waist of the inmoov with a hole in the middle of it to match the hole on the bottom of the inmoov. A pole will pass through these two pieces to tie them together. I will cover 3 sides of the table with plywood which will be cut to the side of the table. which will then become a mold for a fiberglass base that I will build. The table legs will stay in the inmoov to help provide support for the structure if needed. I will build 2 to 3 shelves inside the lower half so that I can separate power from computer from whatever else needs to be separated. I will put doors on the back of the lower structure also. Once this is completed, I will decide on which battery and drive motors are needed and will fit. The largest issue I am having now is the two 12 volt batteries I have are not lasting very long with the computer running off of this source. I think I will have to go with LiFePo batteries and have spent a lot of time researching them. It seems that there are only a couple of vendors that have real ratings and most of these are 2-5C batteries. The ones I am looking at are 100AH batteries so that shouldn't be an issue but making a mistake in this area becomes quite costly.
The other large expense will be the motors to make the inmoov mobile. I need to have some pretty accurate encoders to do what I want to do with him. I hope that the weight wont be to high for me to go with 12 V motors because they cost about 1/4 of what the 24V motors cost with encoders. I may look for some used 24V motors and drop in an encoder but I have barely researched that yet.