


I-Cybie and EZ-B v4 conversion.
Day 1. 23/01/2016
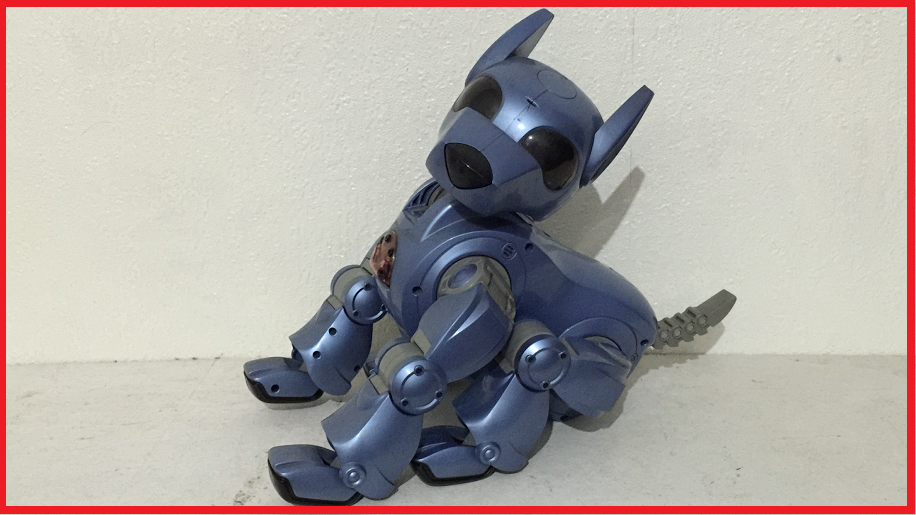
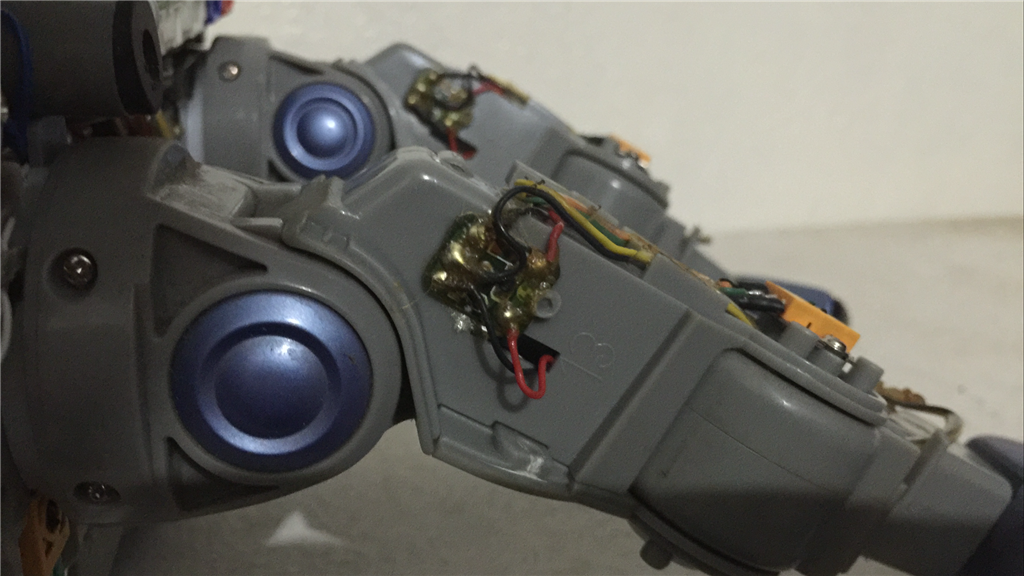
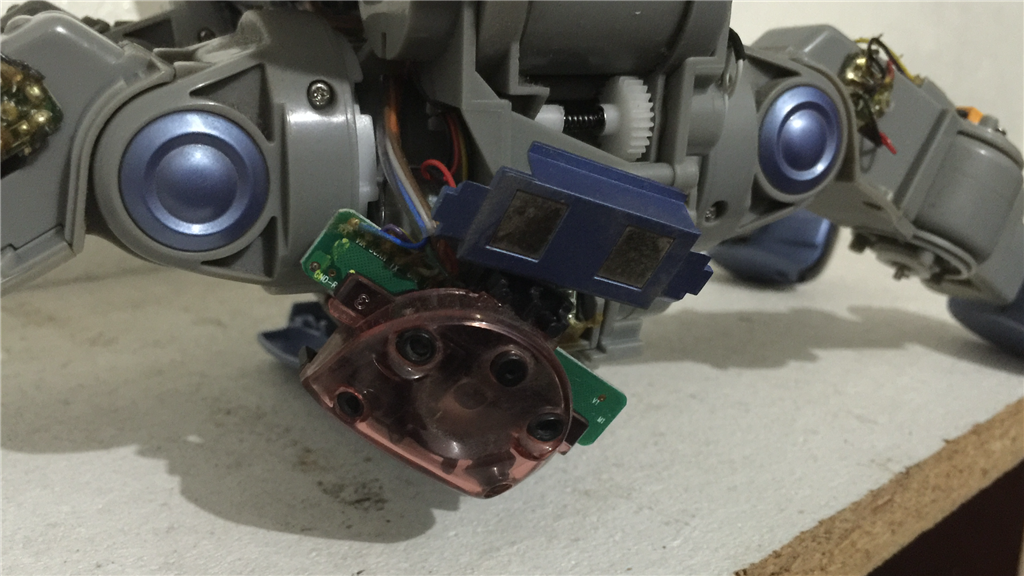
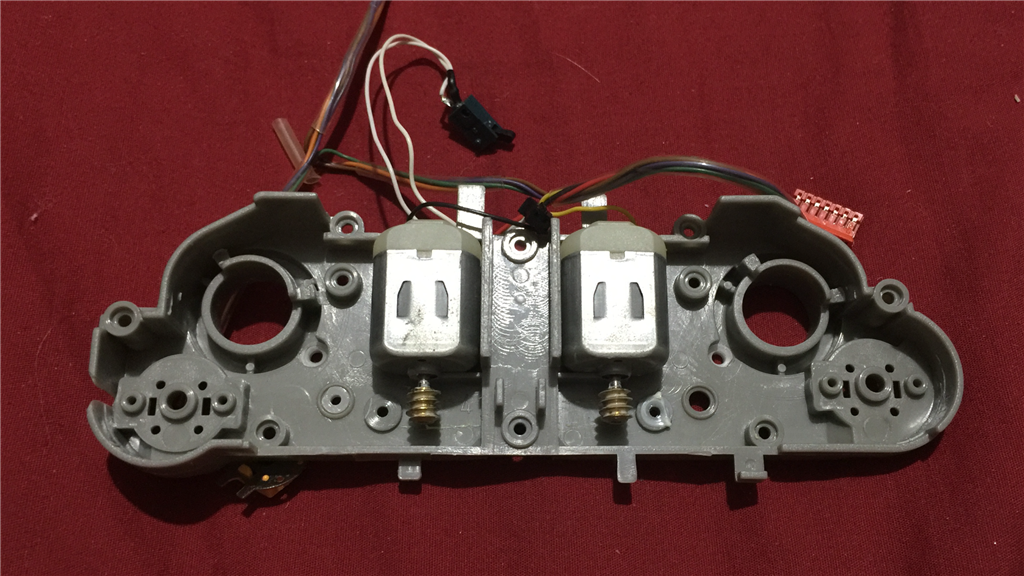
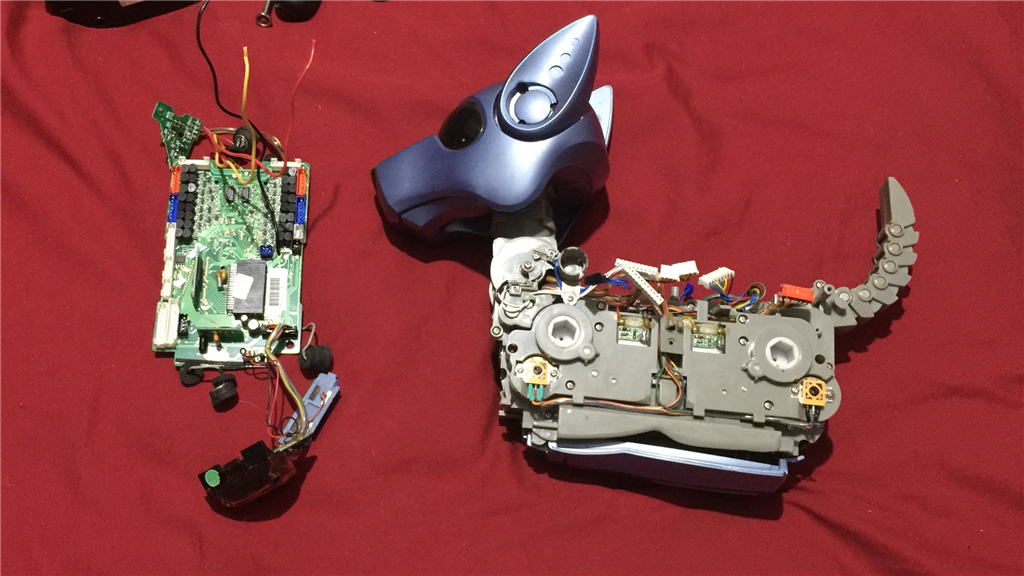
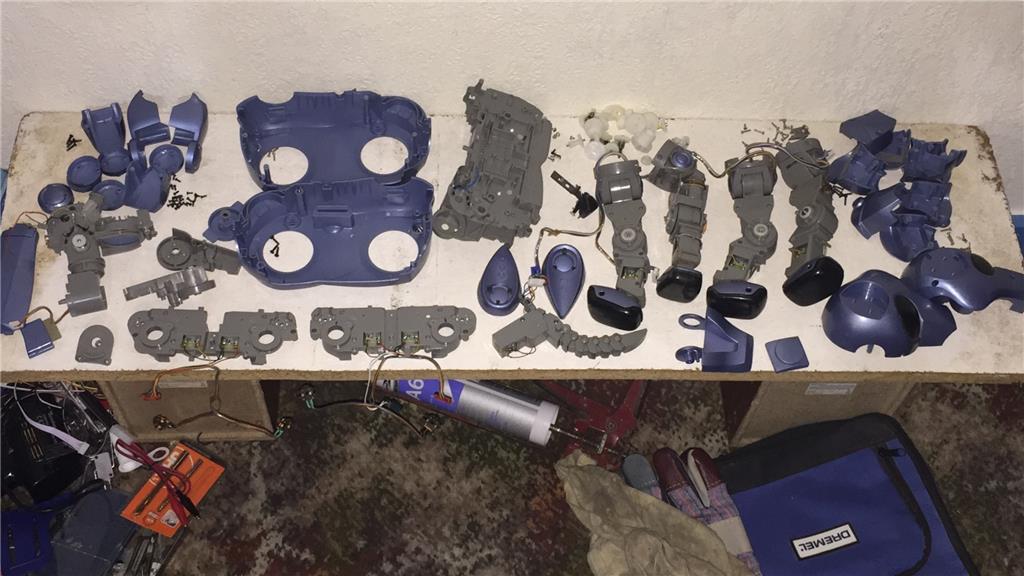
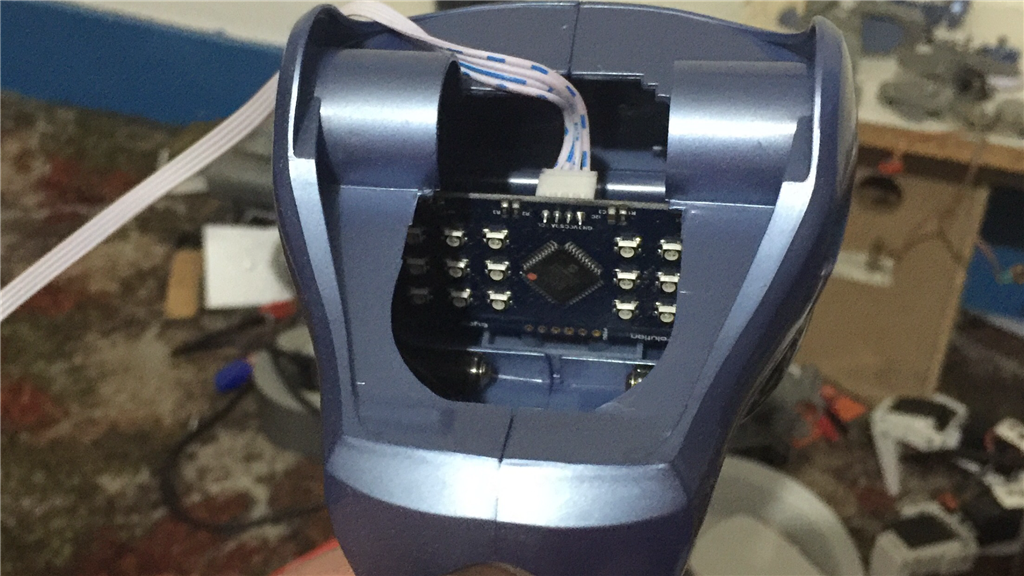
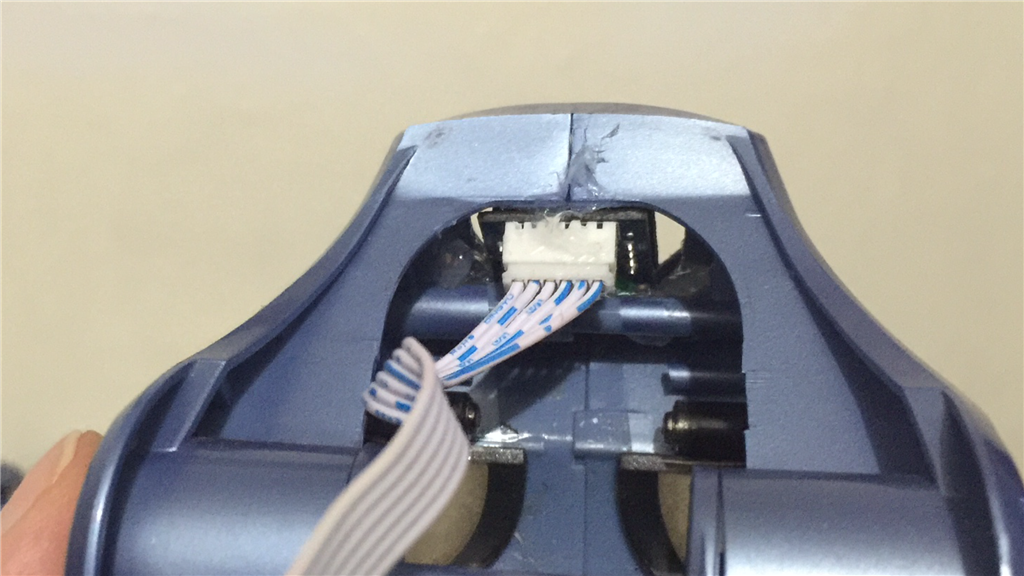
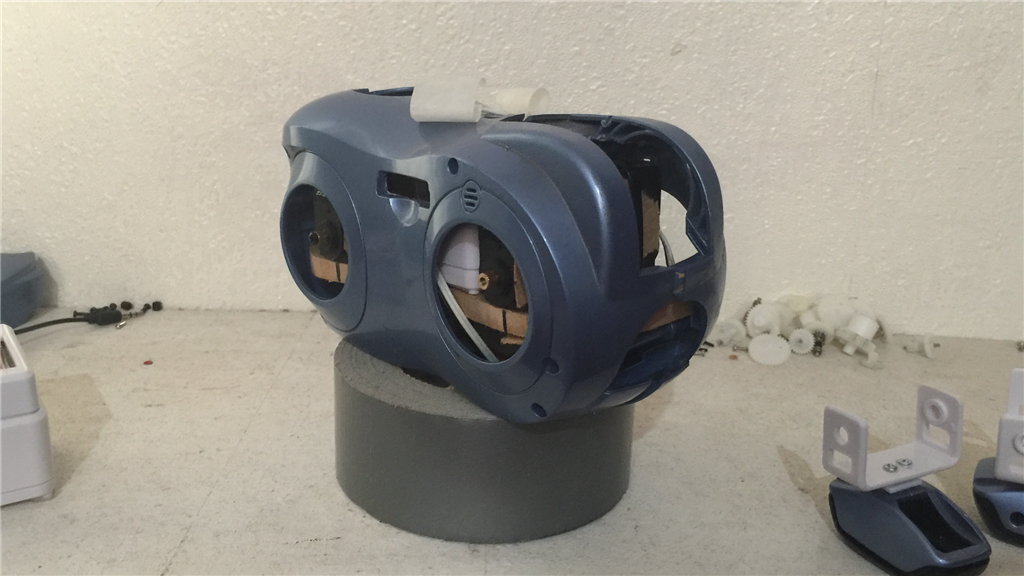
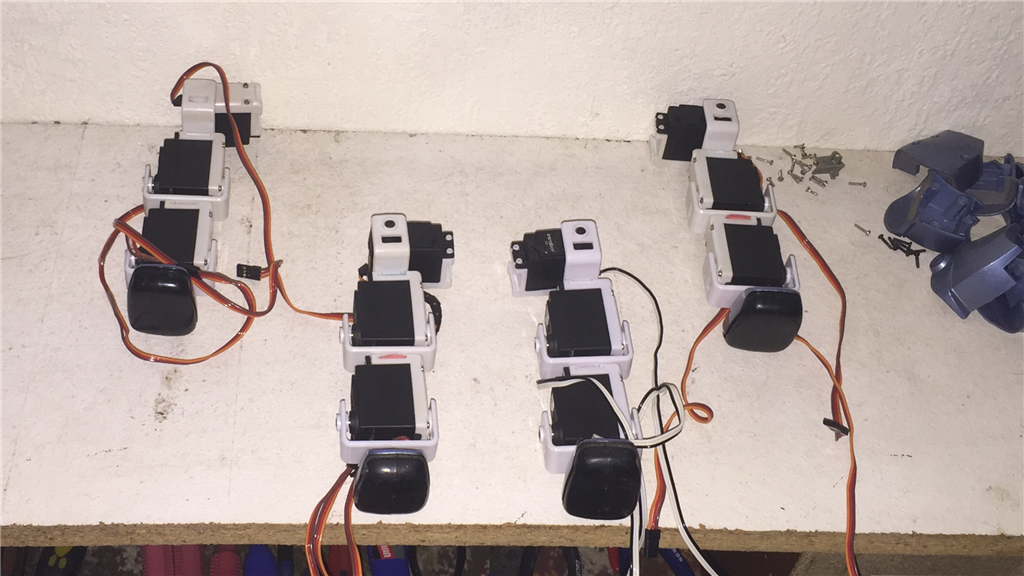
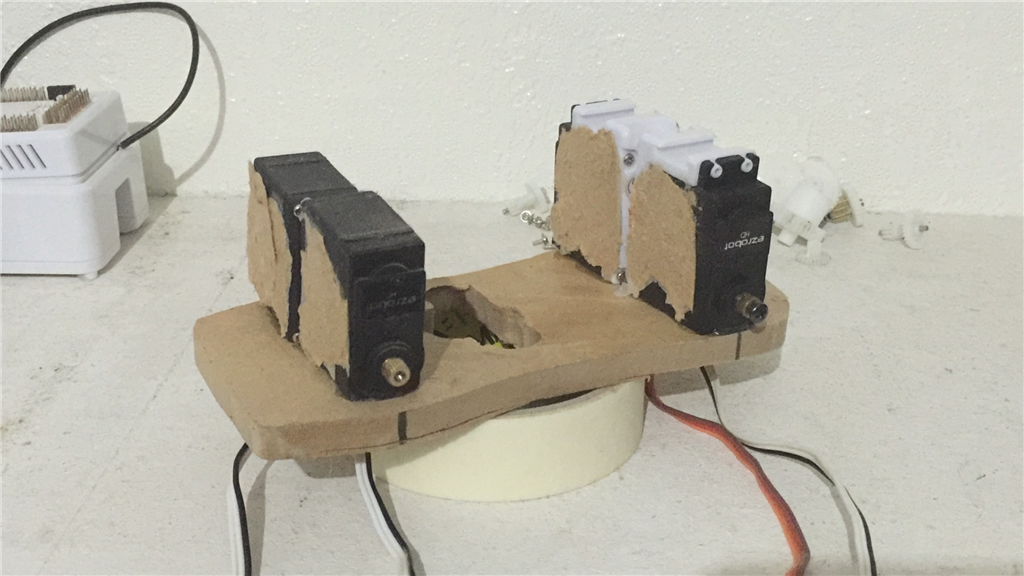
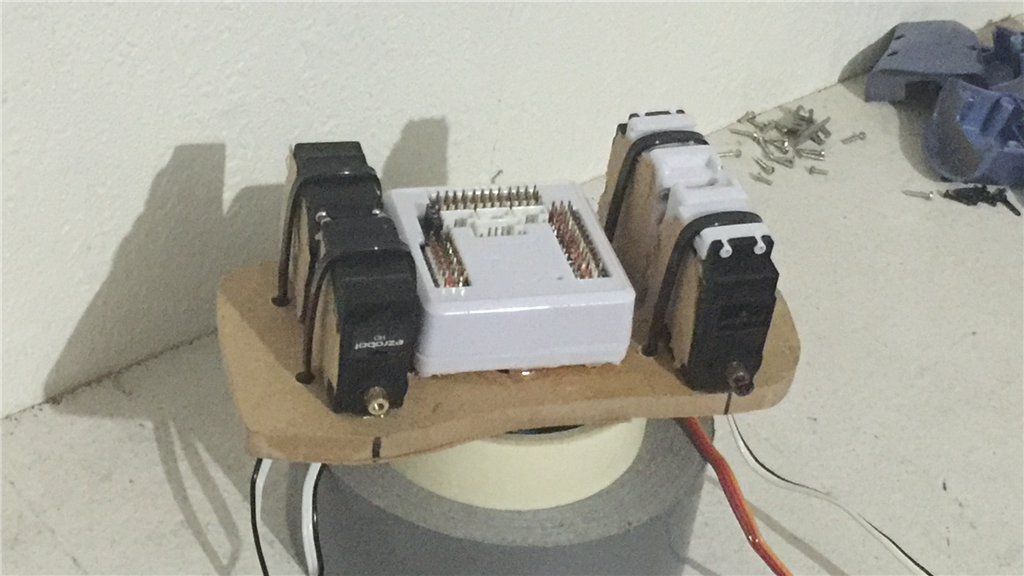
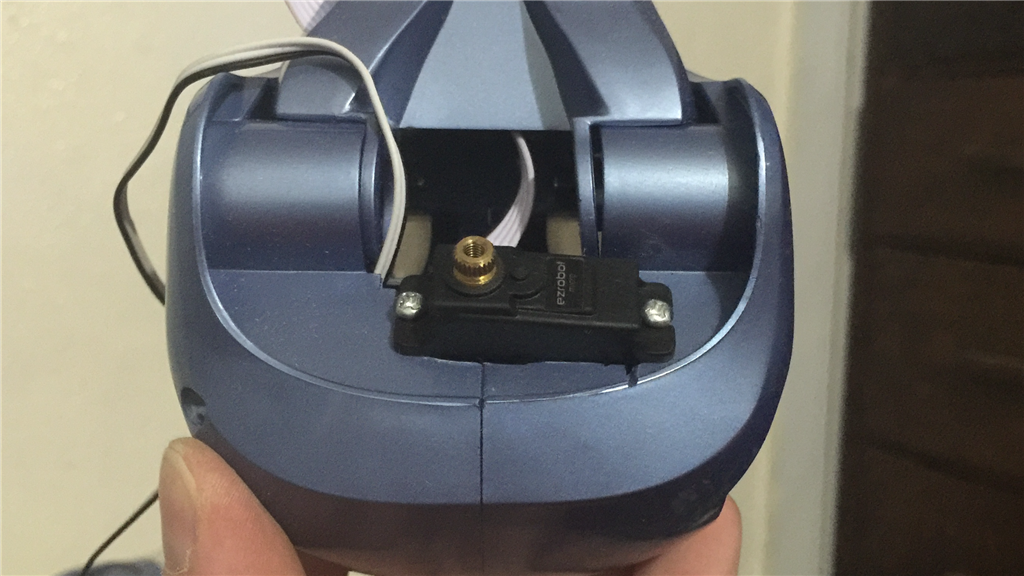
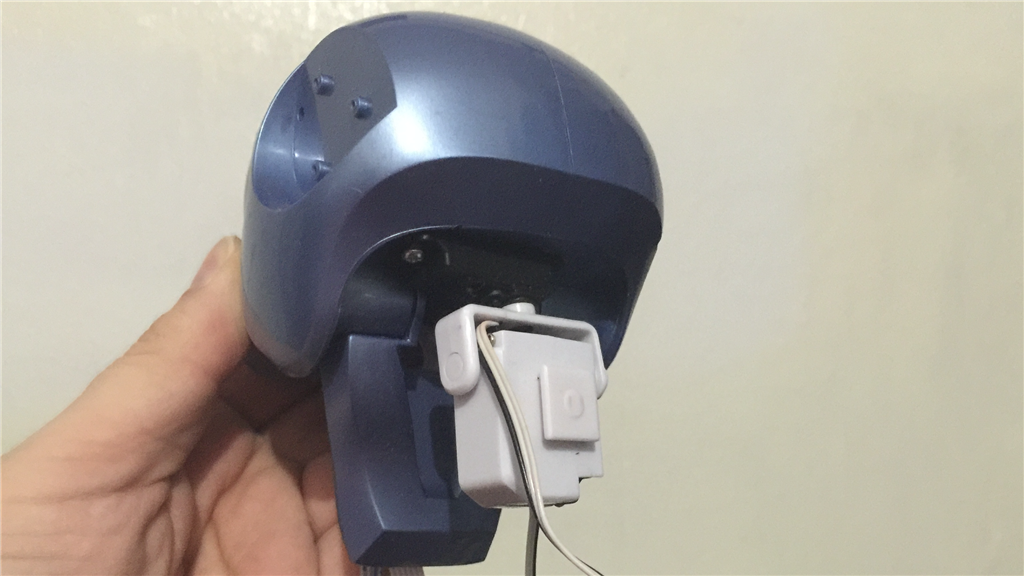
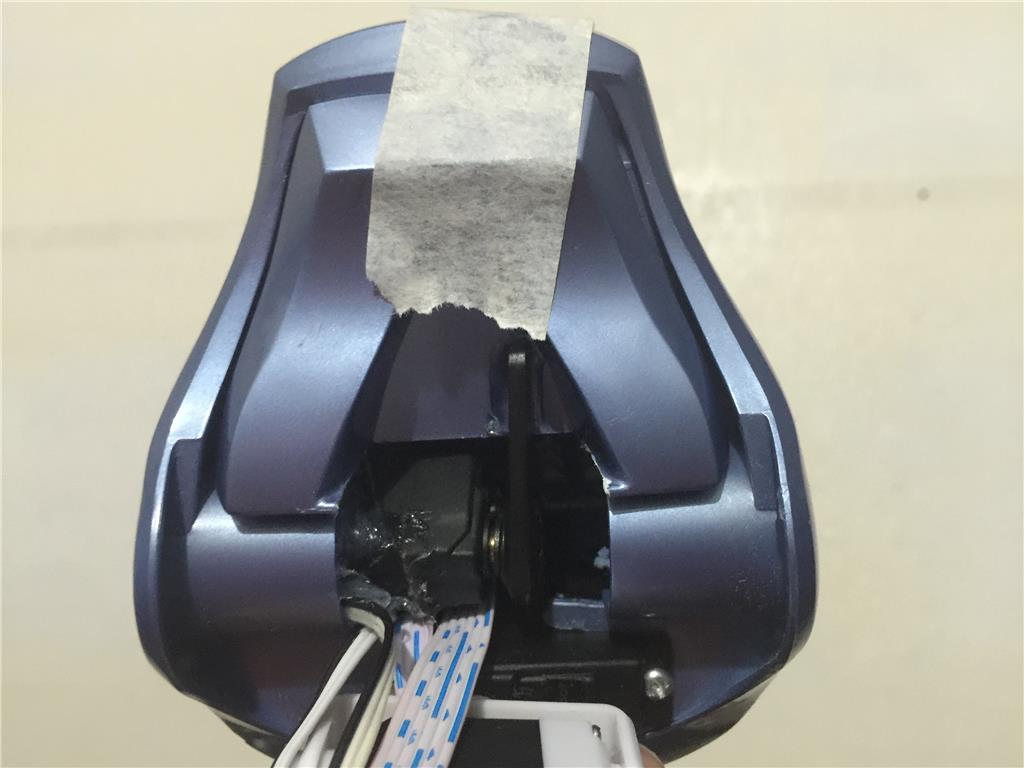
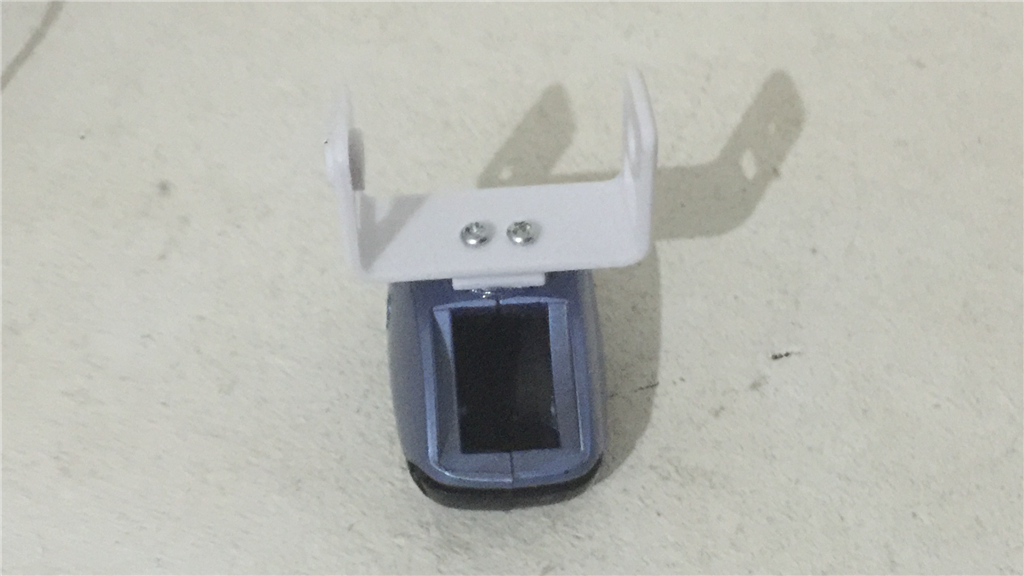
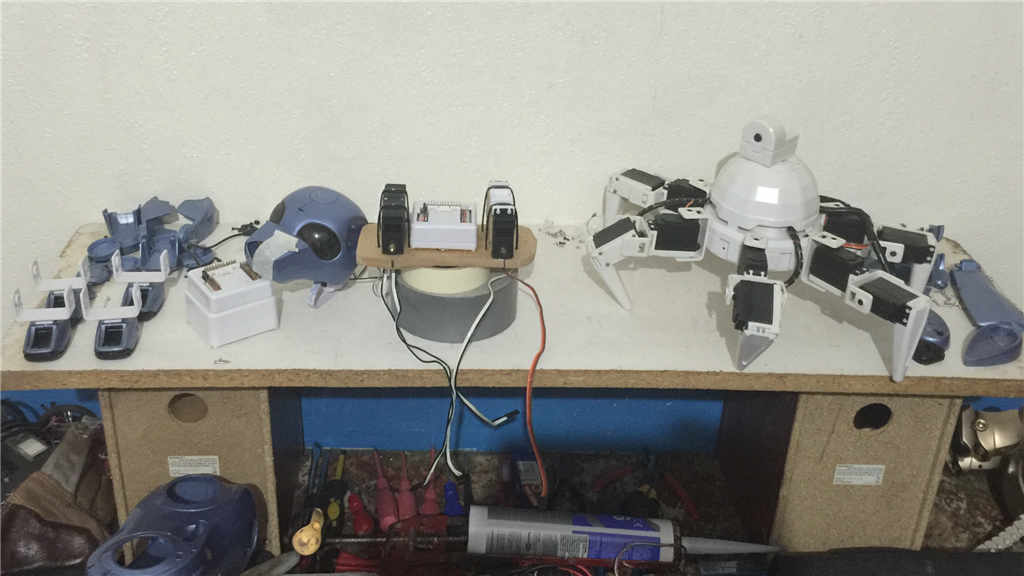
Continuing from my other thread asking if anyone has hacked an I-Cybie, this showcase thread will detail my first EZ-Robot "toy" hack with this little dog. Because of the inner workings and circuitry of the I-Cybie robot dog, the idea to incorporate the EZ-Robot platform in to this little fella will be to completely gut it out, and replace the DC motors with HD servos for the limbs, and a couple of micro servos for the heads pan and tilt action. It will be a tight fit go get an EZ-B, battery, and servos inside, but I think it can be done.
Unlike my previous "Built from scratch" robot builds where I plan out most of what I would like to achieve, and how to go about it, this project I am just going to... well... wing it. I have little idea of the internal layout of the I-Cybie (apart from a few photos I have seen online), so this will involve quite a bit of trial and error.
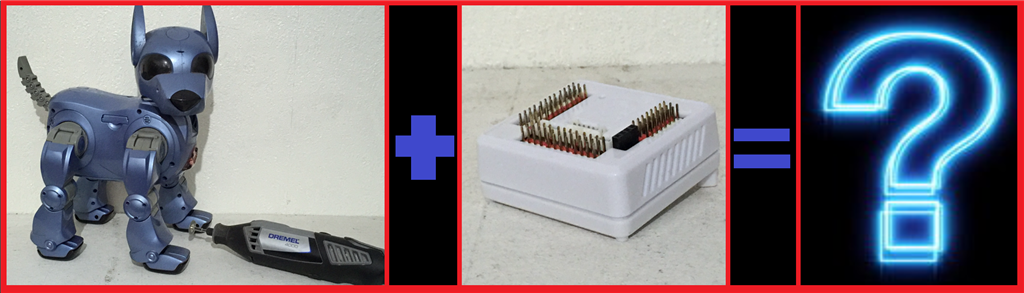
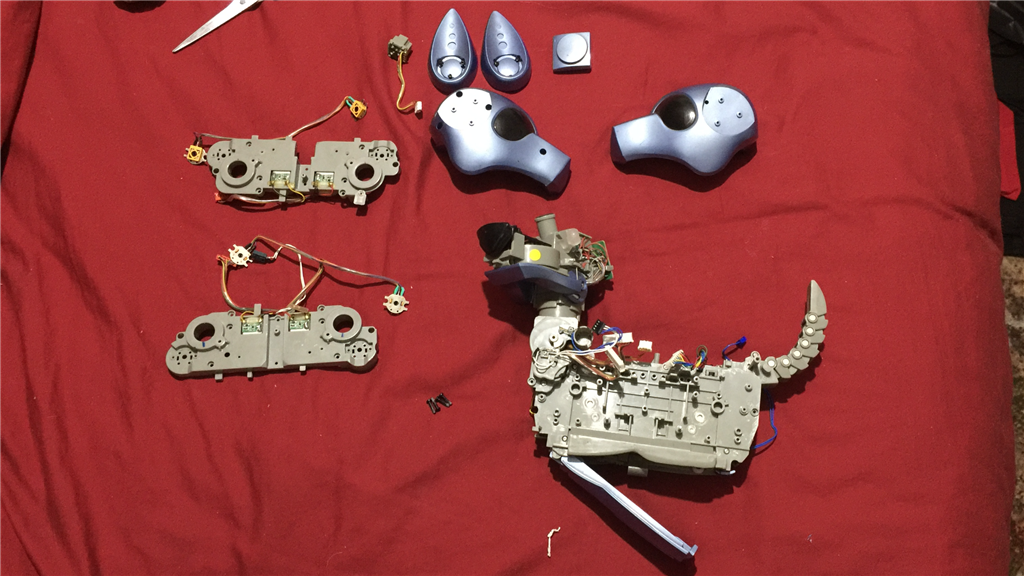
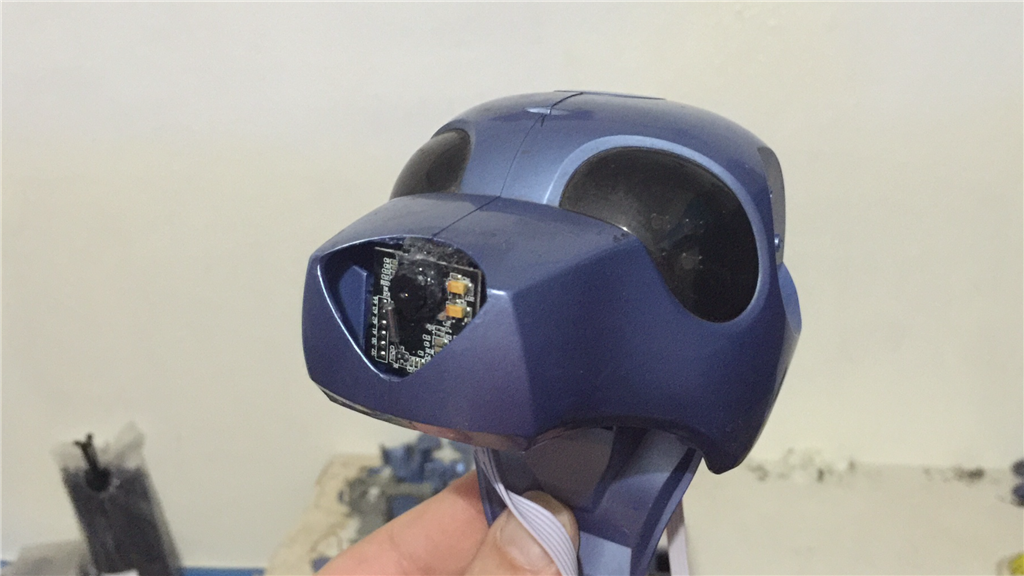
After posting this, I'm going to break out the screwdrivers and start to take the little guy apart. One of the main things I want to have a look at and test once disassembled, is the existing I-Cybie sensors, and test them with a spare EZ-B to see I will be able to use some of them. If not, I'll replace them with EZ-B comparable sensors. Additions will be to change the eye LED's, add a camera, 4 in 1 sensor, and see what else i can fit inside that will be useful.
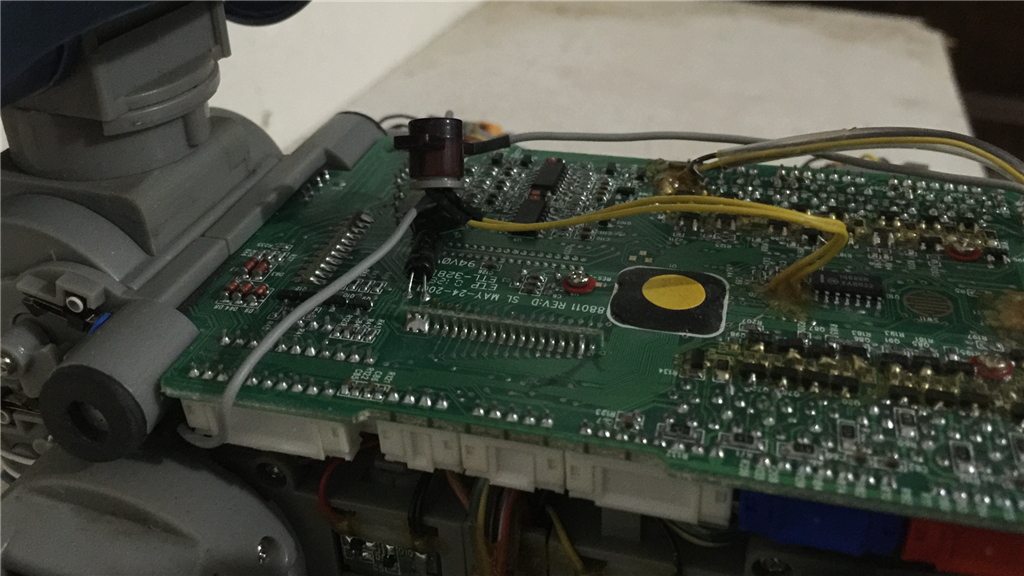
I have no idea how this is going to turn out (hence the first picture, lol), but this should be a fun and unique project, and I think this will be the first I-Cybie to EZ-B conversion project showcase. I'll try to remember to take lots of photos of the insides in case anyone else is tempted to do a hack themselves, and I will document my progress with this project. Below are a couple of thread links about possibly hacking an I-Cybie with an EZ-B...
https://synthiam.com/Community/Questions/162
https://synthiam.com/Community/Questions/152
:)confused Let the head scratching begin... confused:)
Discover more robots
Ezang's Roman The Robot

DJ's Snow Shovel Robot

@Steve... Sounds awesome... Do you have PayPal? How much do you want for it and shipping to Ontario, Canada?
Can you check what kind of video output it has? I am guessing VGA as If I remember correctly you can hook it up to an old TV?
Cheers Richard
Hey Richard.
I'll check the ports later and let you know, but I think you're correct though. That's how I used to use it, on an old tube TV. Like I mentioned, I don't want anything for it bud, but once I confirm everything is hunky-dory, I'll investigate shipping costs and email you. (Yes, I do have a PayPal account).
@Steve.... Cool.... awesome, thanks!
@Steve,
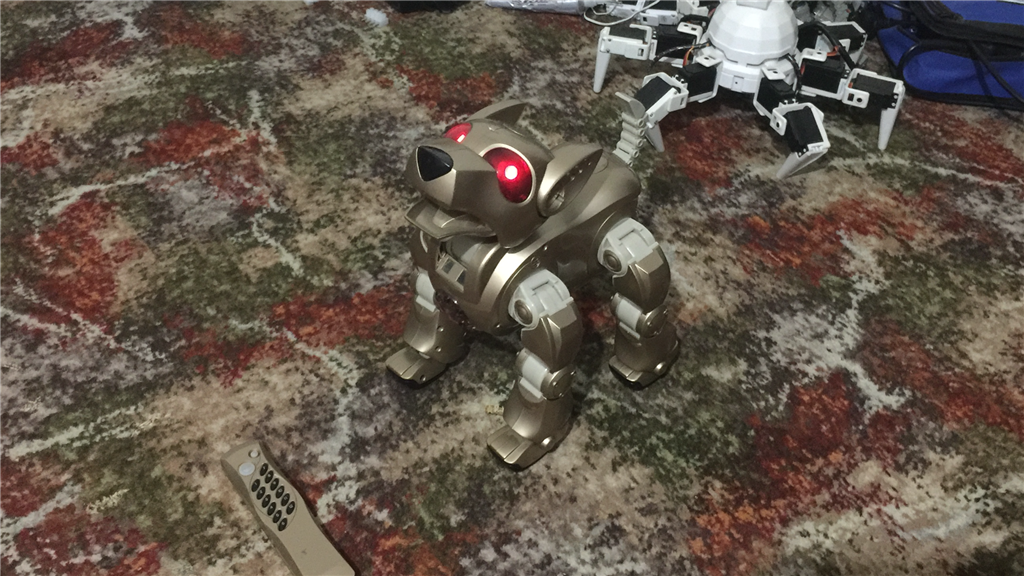
My Cybie arrived today, and its smaller than I expected, see why its so hard to mount every thing in for your EZB hack/rebuild.
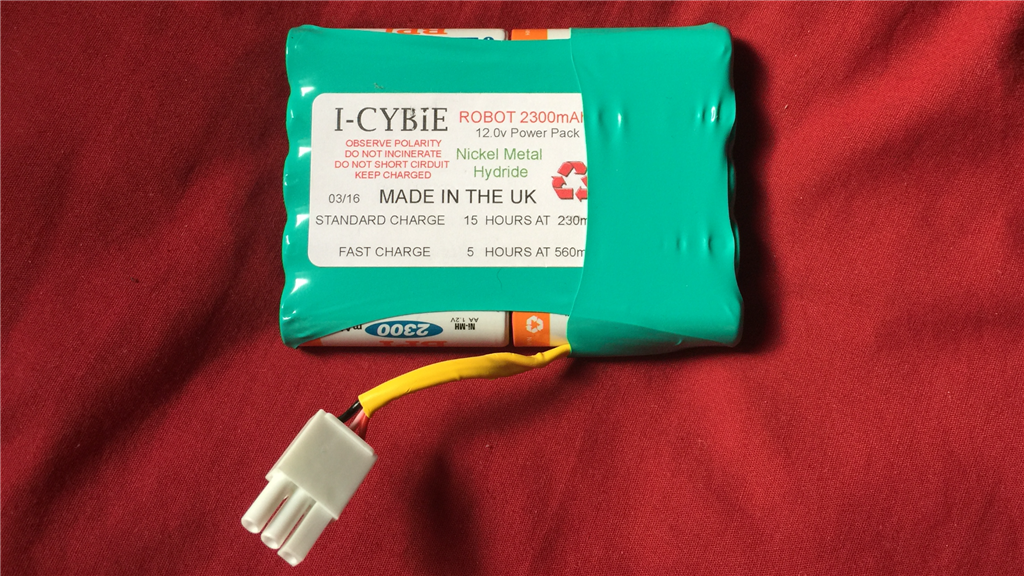
I had to modified the 6/12v battery pack I made up as its a VERY tight fitted for the battery, also I brought 3 pin tamiya connectors, for the 6v & 12v supply, but the 3 pin connector on the Cybie must be a special as it a lot smaller, so I put a tamiya connector of both ends, and it just fits in. I'll also make up a small convertor cable for the Charger.
I got it working, but noticed it doesn't have a on/off switch, as soon as you connect the battery and close the battery lid it powers up, the battery lid as the push switch, but you can't power it off, without removing the battery which is crazy, you can only put it in a pause mode by the remote! I think I'll put a switch on it somewhere? I'm not sure if I going to EZB mine yet, I wait to see how yours goes.
By the way where about do you live in the UK, I live in Berkshire near Reading.
Chris.
@Richard.
About the C64, It actually has an RF/RCA port which I used to run it on a CRT telly, but there are S-video to VGA converters to run the 64 on a VGA monitor if you wished. Apparently the C64 runs great on an LCD flatscreen if it has S-video.
@Chris.
Hey, that's great that your little guy arrived. Yes that are not the biggest robots in the world that's for sure (I'll post an update in a bit). Have to admire the the assembly of that thing.
Nice work with the battery pack. Even the originals are a tight squeeze, but then he (or she) does throw itself around a bit when doing tricks, so I guess it needs to be a snog fit.
That was one thing I forgot about, was the lack of power switch. I haven't used it for years and thought I was going mad when I couldn't find the switch, then remembered it didn't have one confused. Bit of a design flaw in my opinion, so I'm fitting one in my rebuild.
I used to drive around the Berkshire quite a lot a few years back. I'm down in (currently very windy) Surrey near the Wimbledon area.
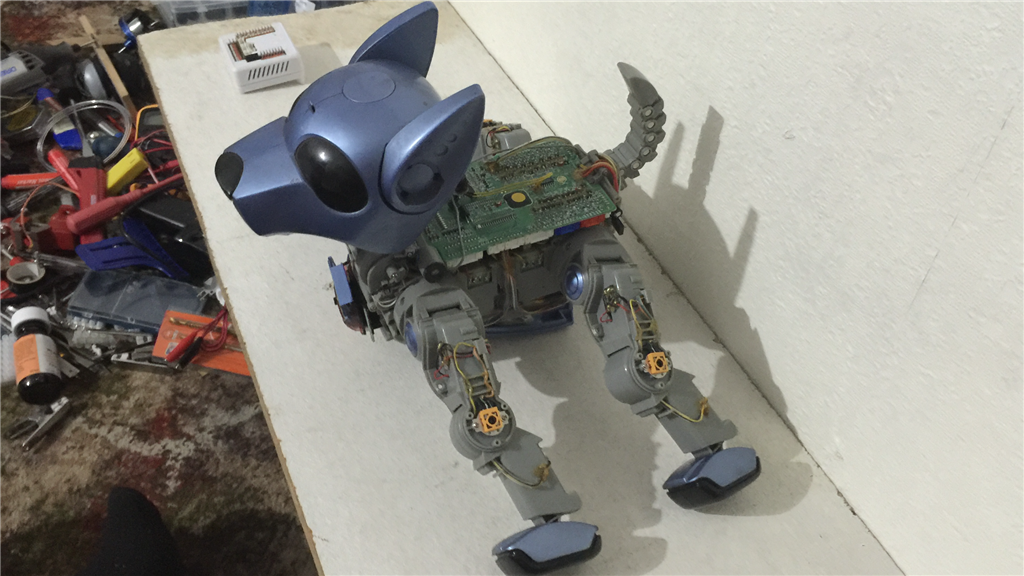
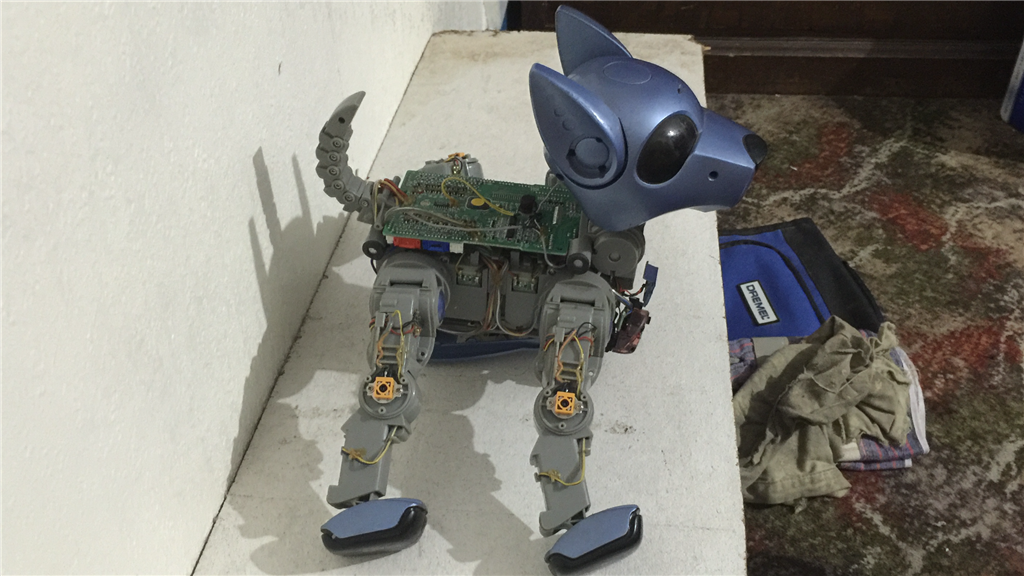
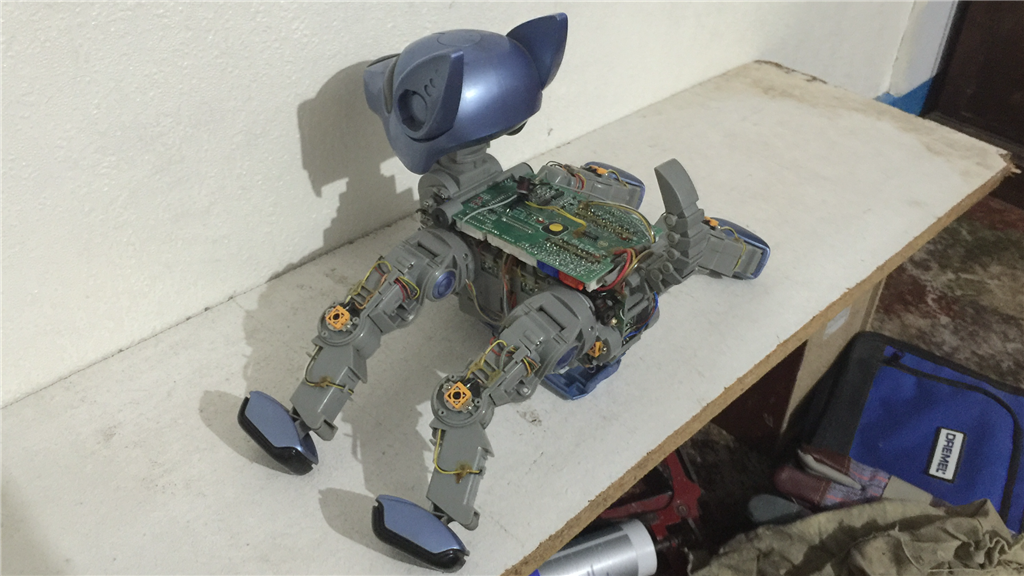
UPDATE: Day 7. 29/01/2016
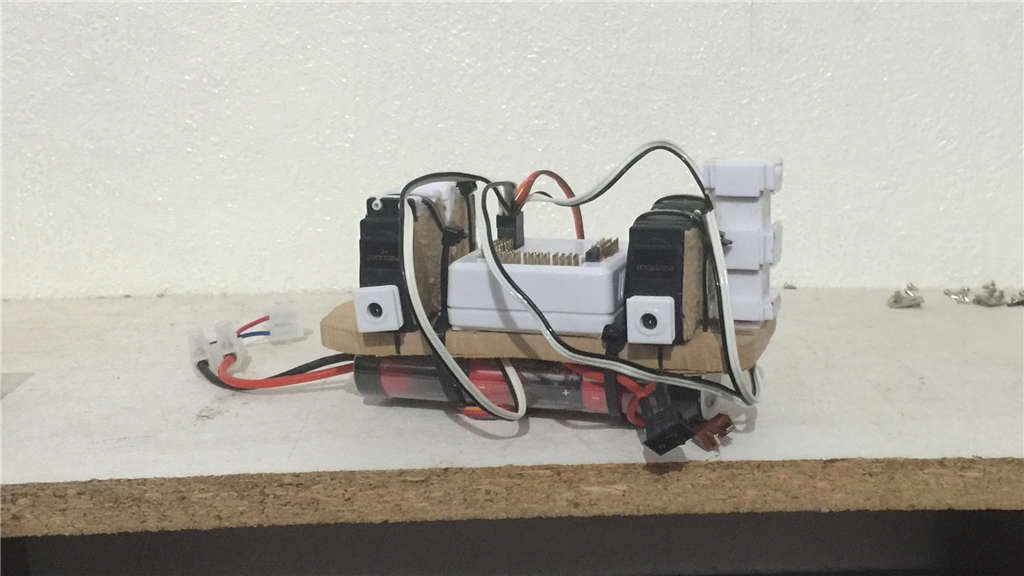
I had a bit more time to get a few more bits done last night, and it's starting to come together now.
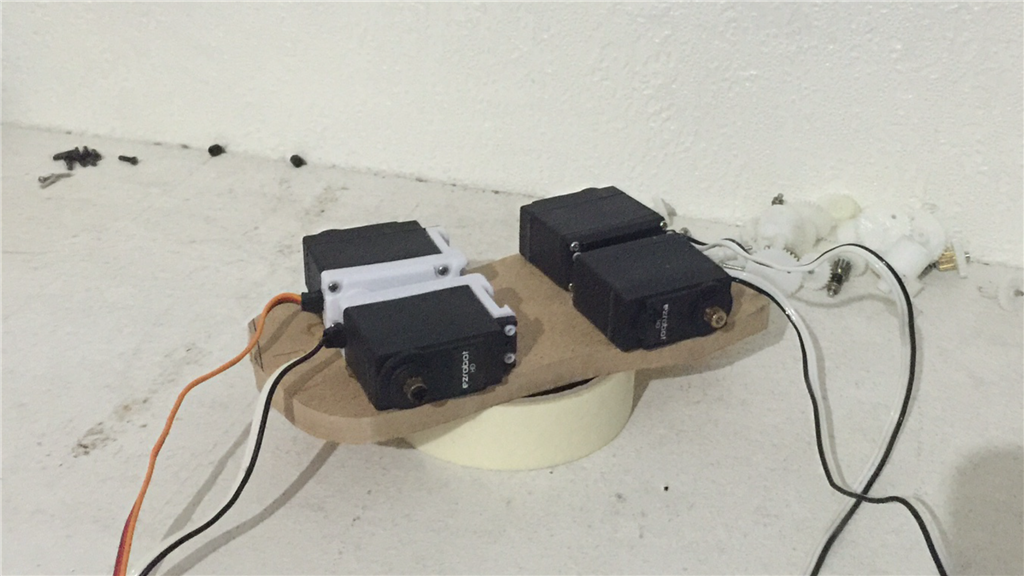
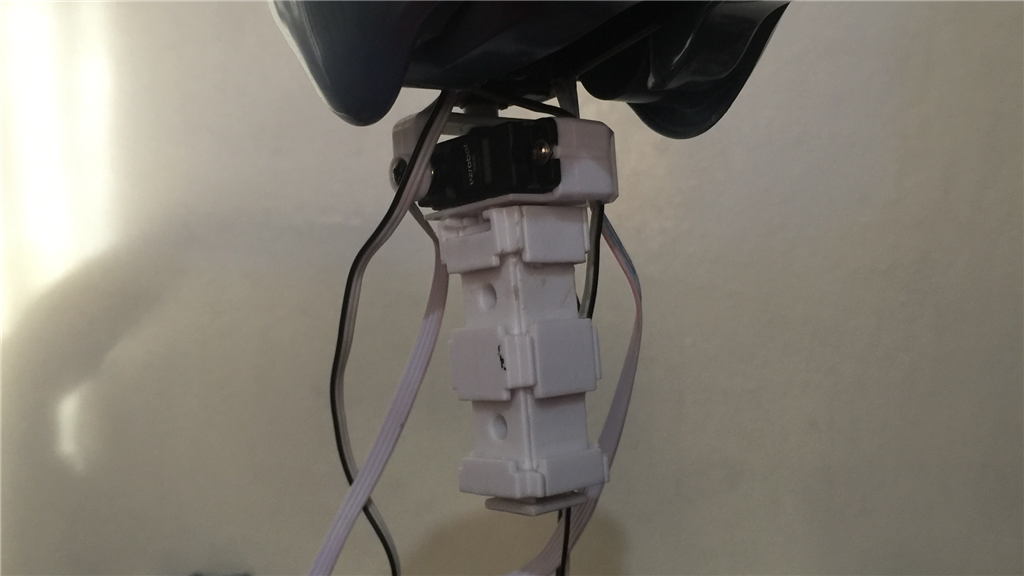
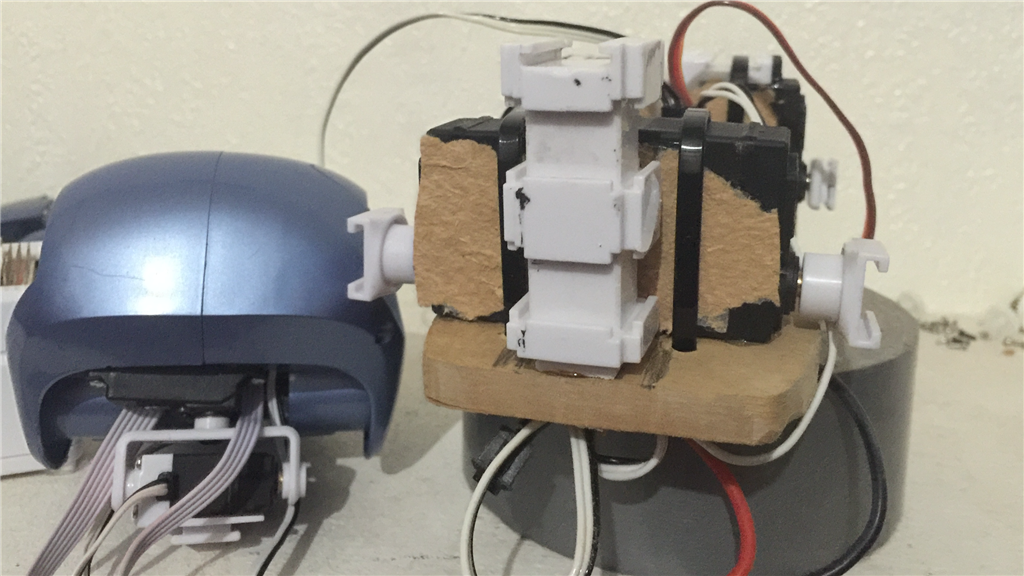
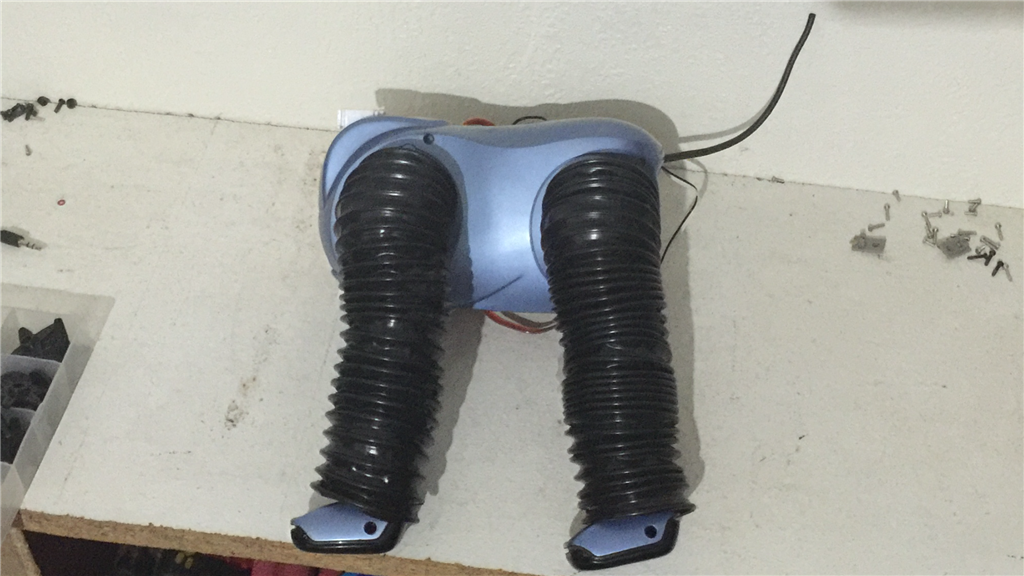
I've used an EZ-Bit extension block for the neck support which is screwed to the body platform.
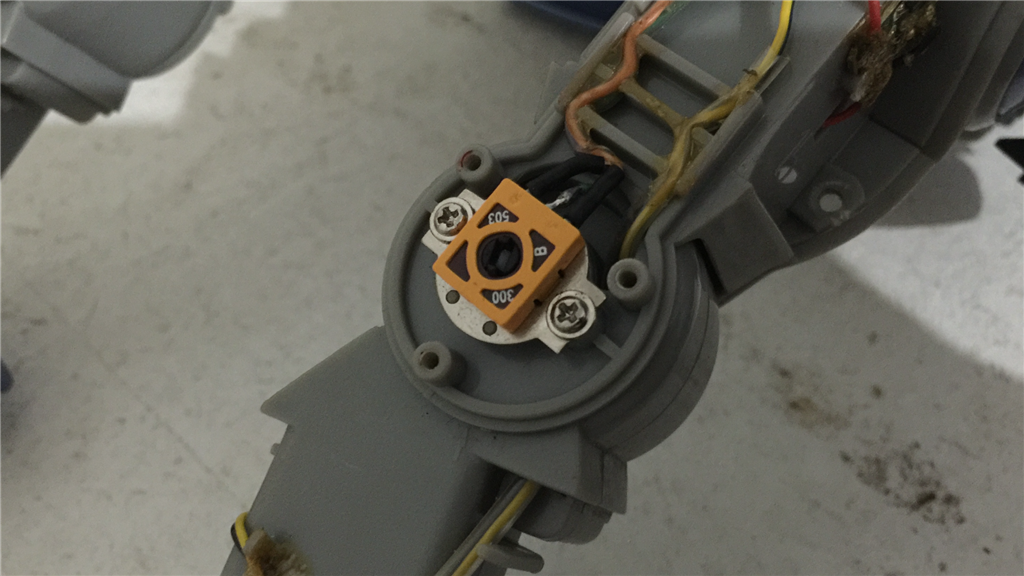
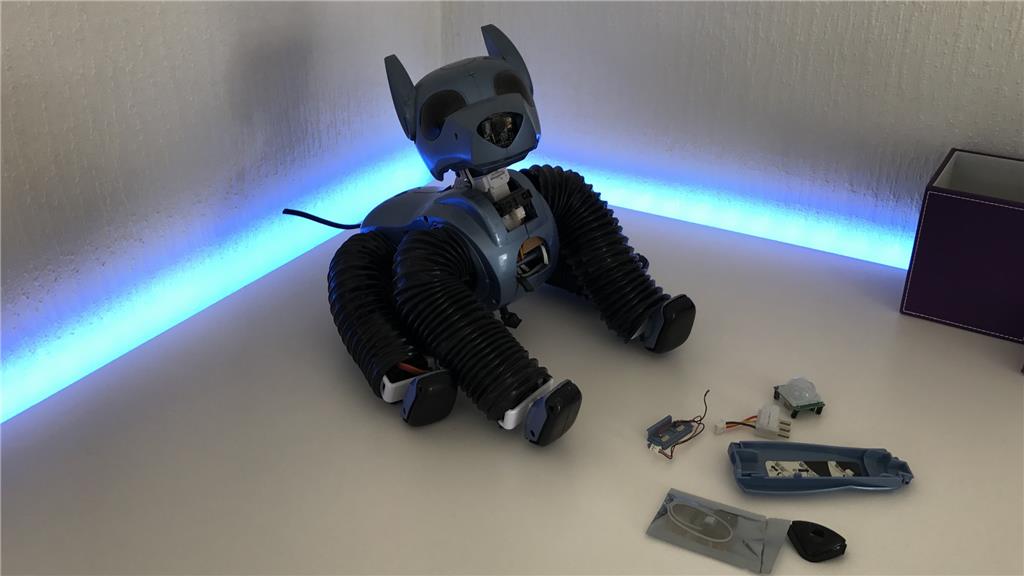
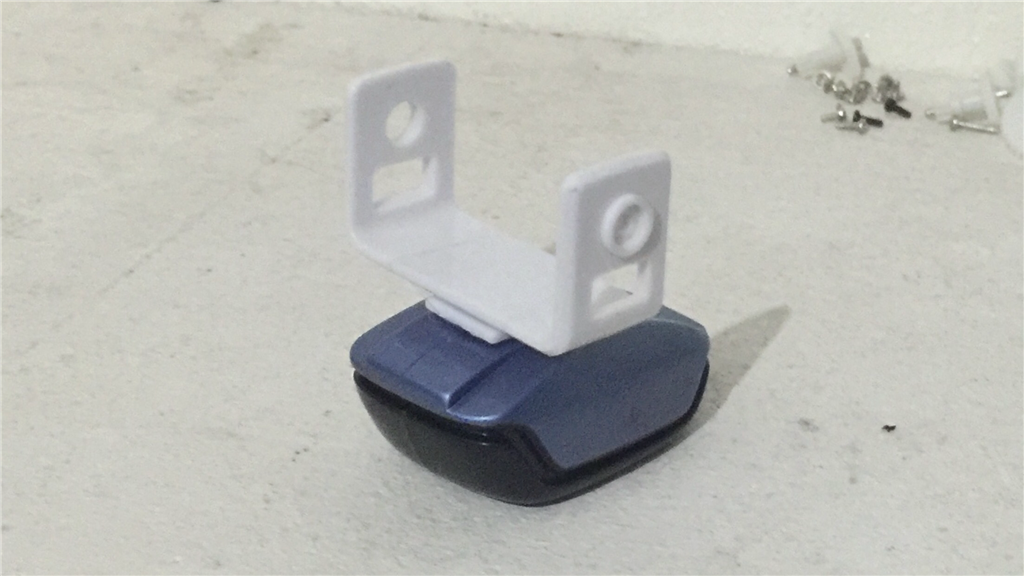
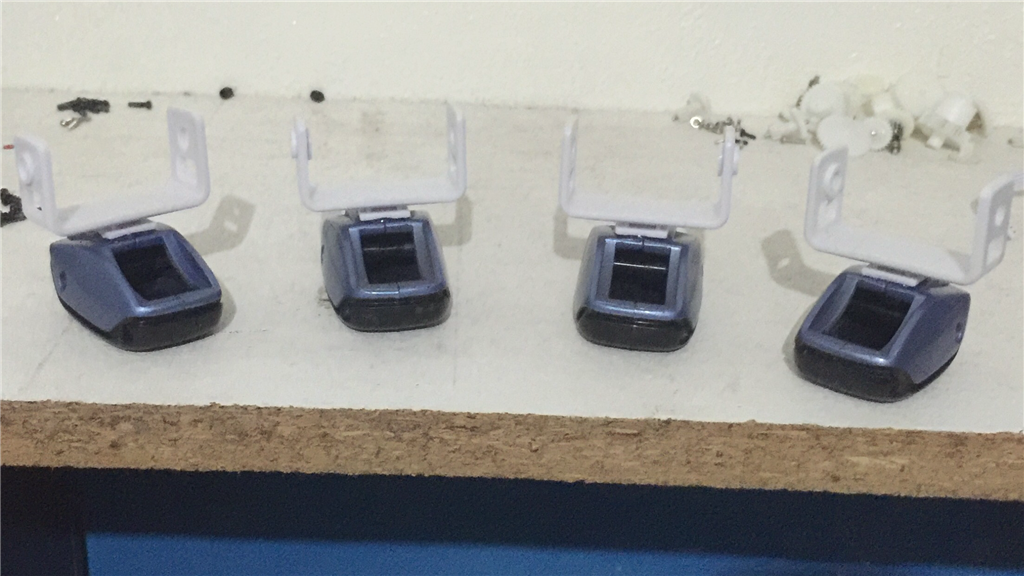
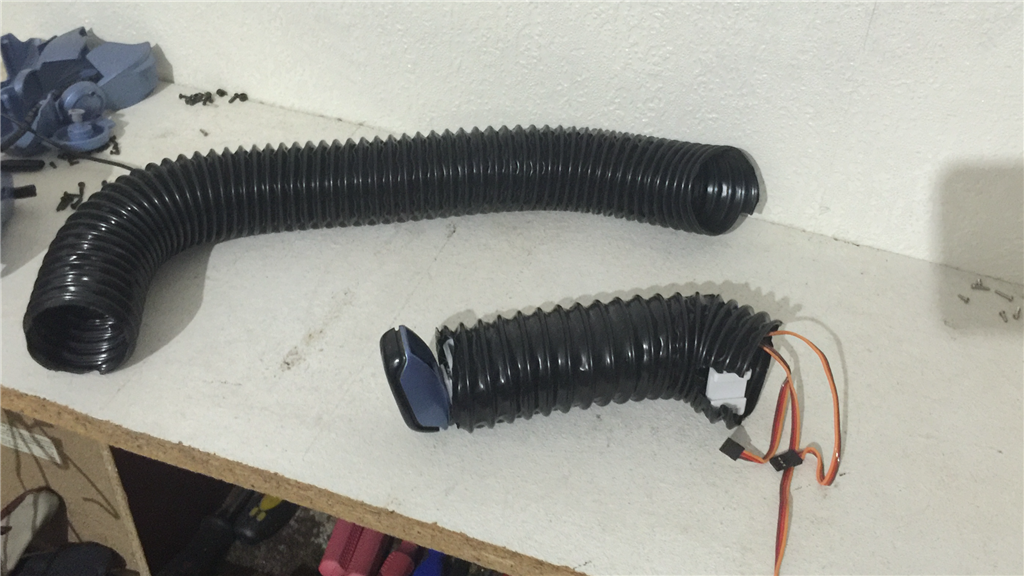
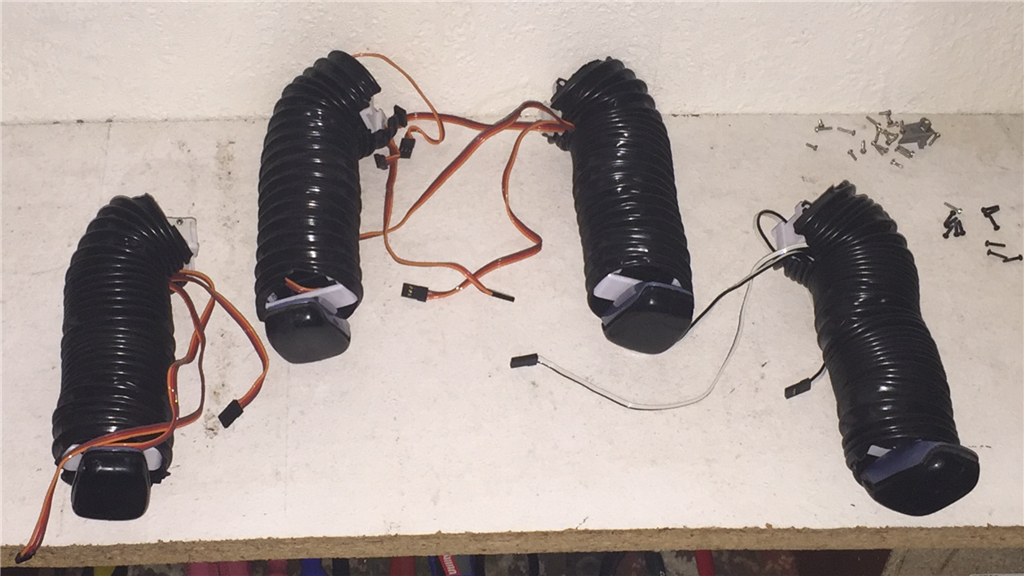
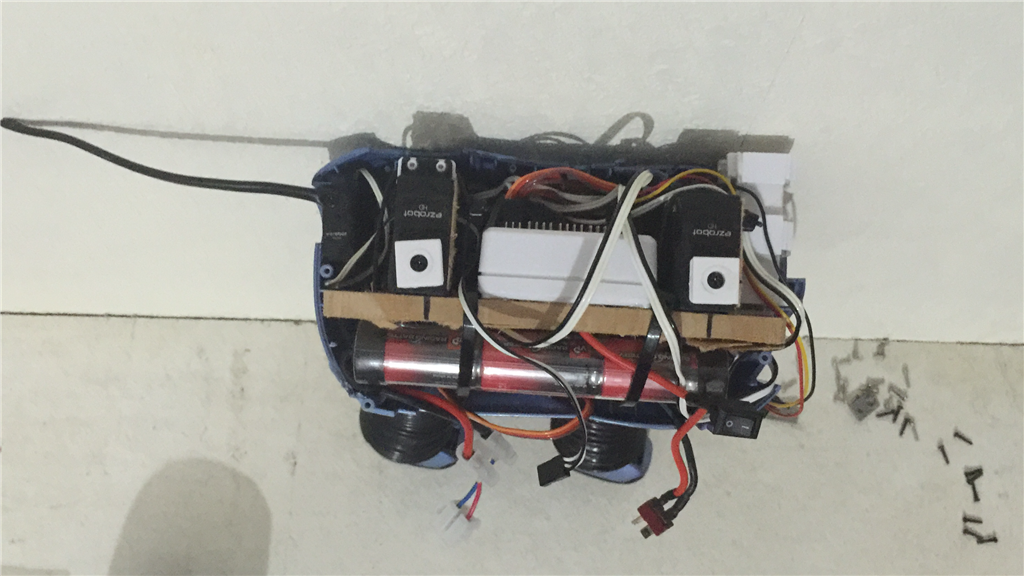
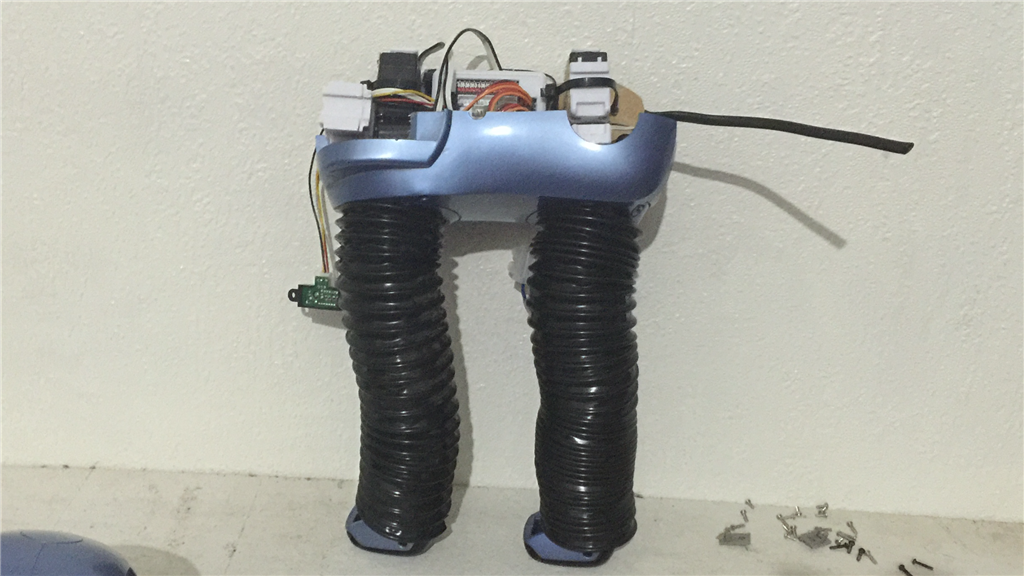
I've fitted the feet to the the leg servos, calibrated the servos, and tried to use the original leg covers to finish the legs off. Unfortunately, even with cutting a load of plastic away to make them fit, they didn't fit nicely and quite frankly, they looked rubbish. So, a length of flexible black corrugated hose cut in to four pieces, then feeding them over the servos, I had instant leg covers which don't look too bad and have enough movement.
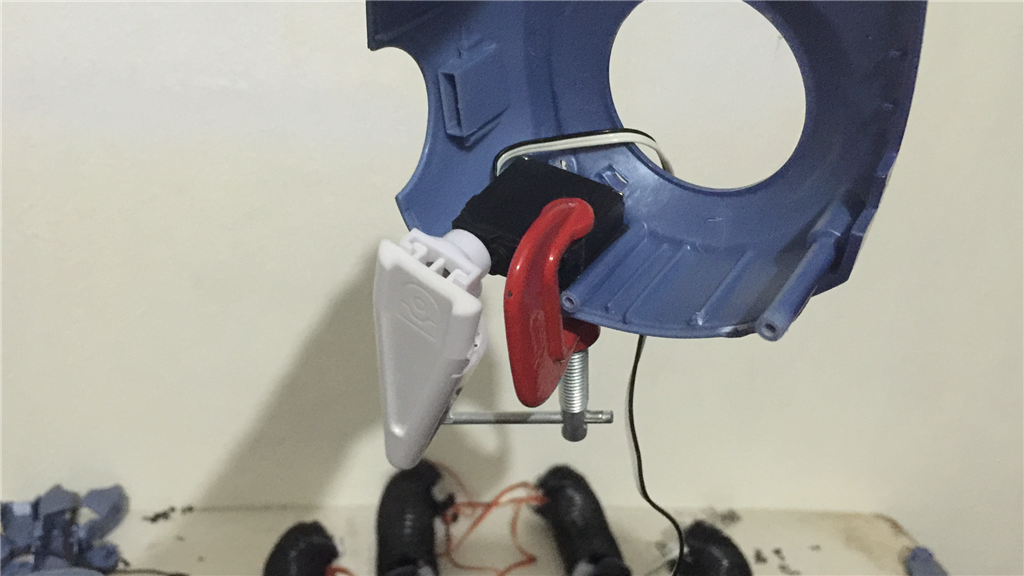
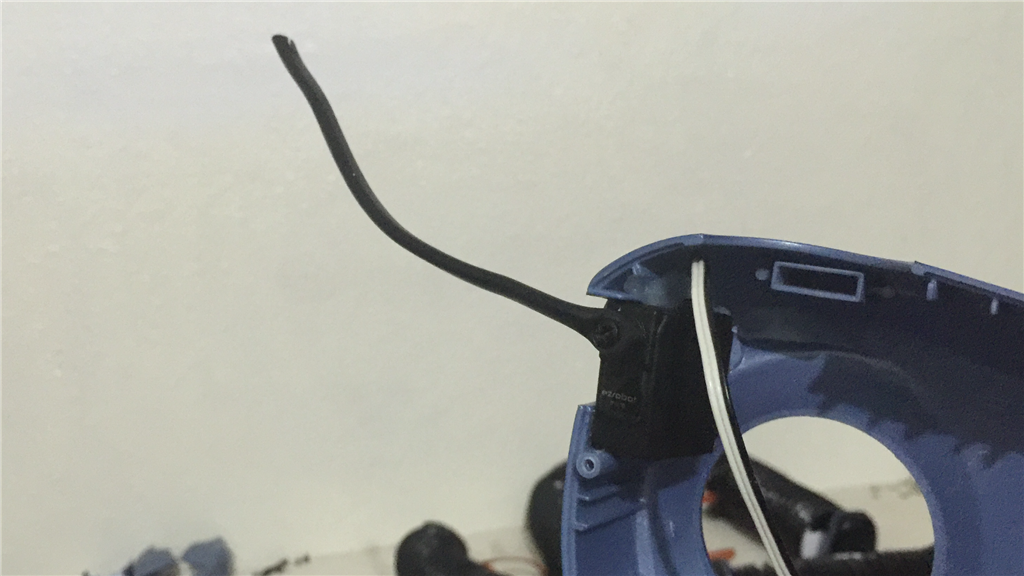
Next job was to finish its tail. I was going to use an EZ-Bit for the tail, but I would have had to cut a lot away from the rear end for full freedom of movement. A piece of two core wire, pulled out the core, then screwed the sheath to the servo. Instant tail.
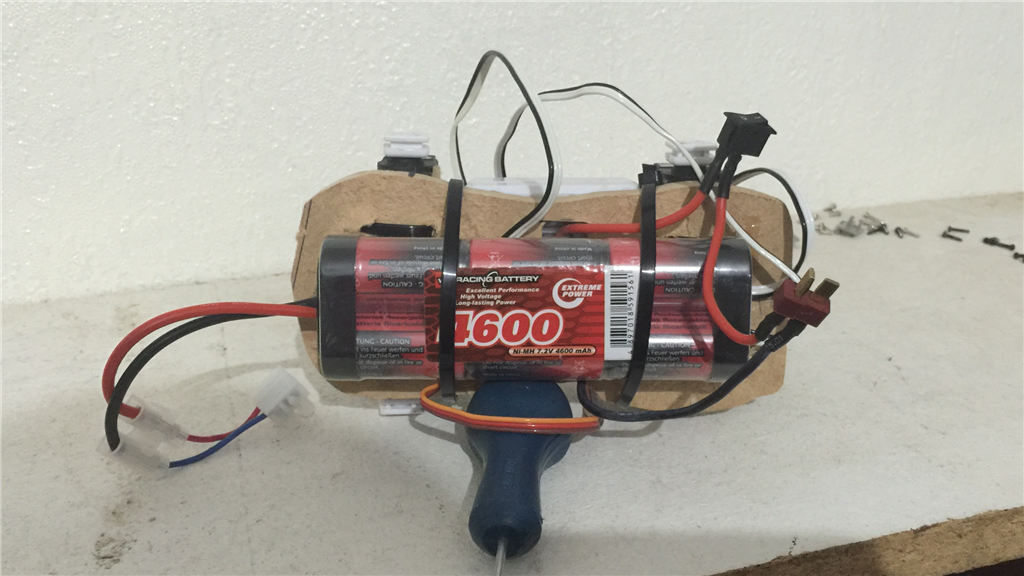
Something that I was trying to work out, was what battery would be best to use. I thought about using Six's LiPo pack, but I would like to get an auto dock 'n' charge thing going on. So I went with a 6 cell 7.2 NiMH pack as this would add weight to make the little dog more stable when walking, it is a perfect fit which makes all of the internals secure when he will do his tricks, plus it should give him a nice long run time between charges. This is simply zip tied to the platform.
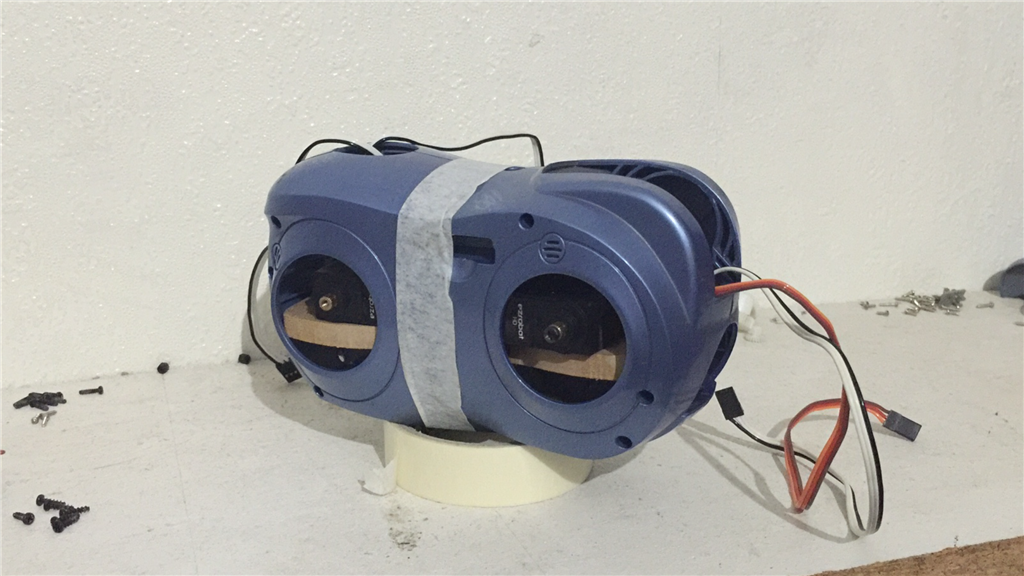
Final job of the evening was to start putting things together. The platform slotted in to place, and two legs were attached. I now have half a dog...
Next jobs will be to fit a PIR and Sharp IR sensor, and the 4 in 1 module. I also need to attach a power switch (in place, but need to house it), then he's pretty much ready to have the head and other legs fitted. Then it will be ARC time.
Hi Steve, Once you get going, there is no stopping you... LOL... I never would have thought of the way you did the legs. They look great. Neat tail also.
I can't believe you got all that stuff in such a small space. It will be interesting where you put the sensors.
I look forward to the next updates.
Ron R