
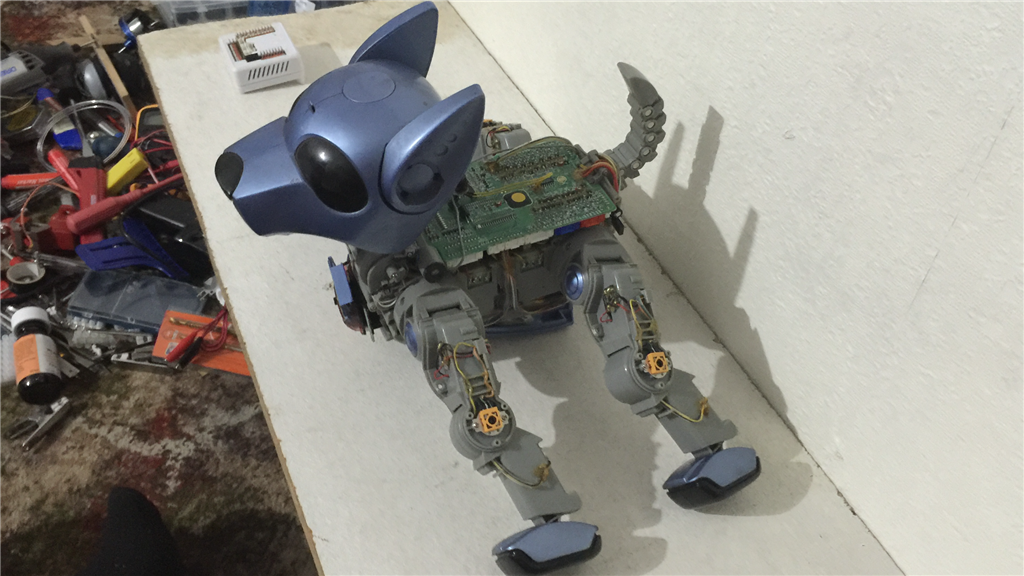


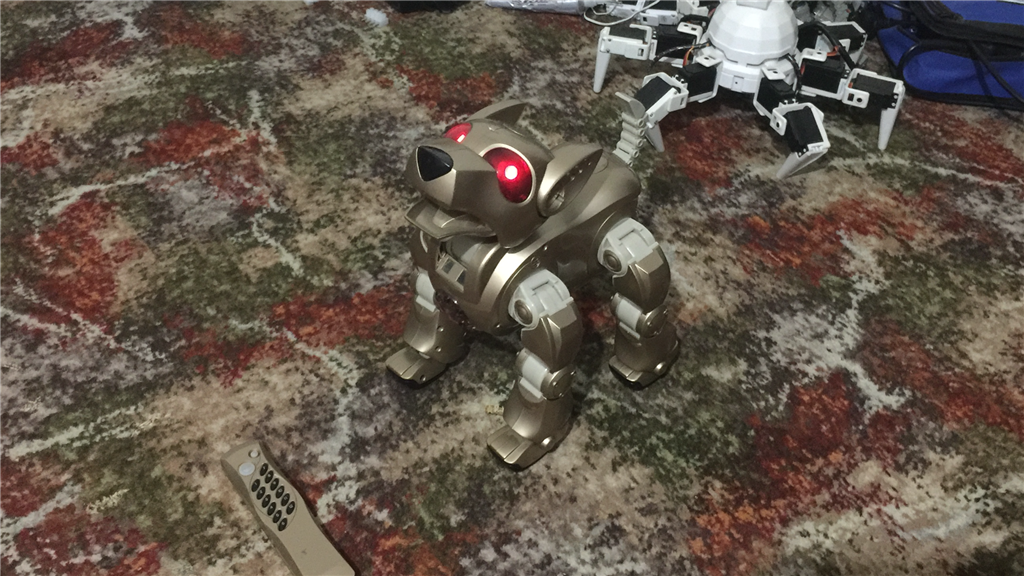

I-Cybie and EZ-B v4 conversion.
Day 1. 23/01/2016
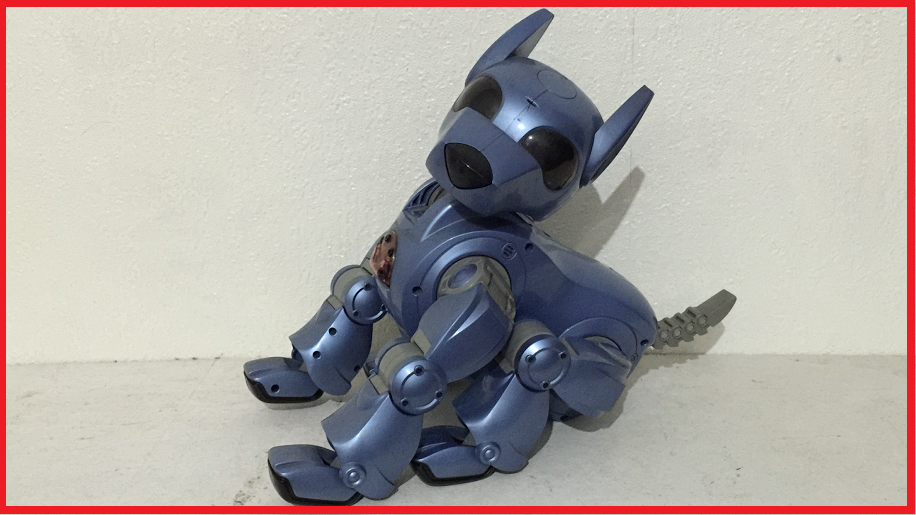
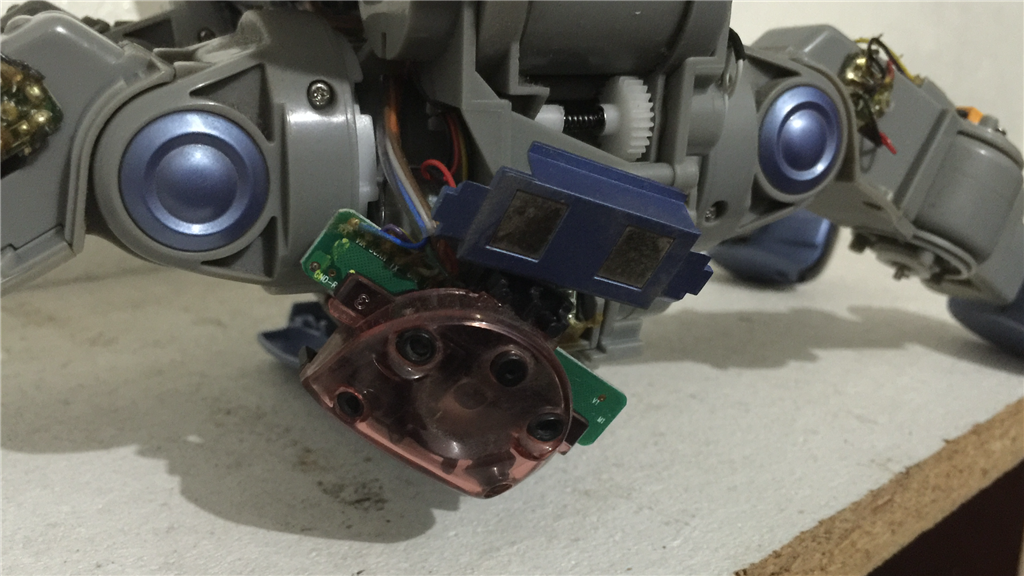
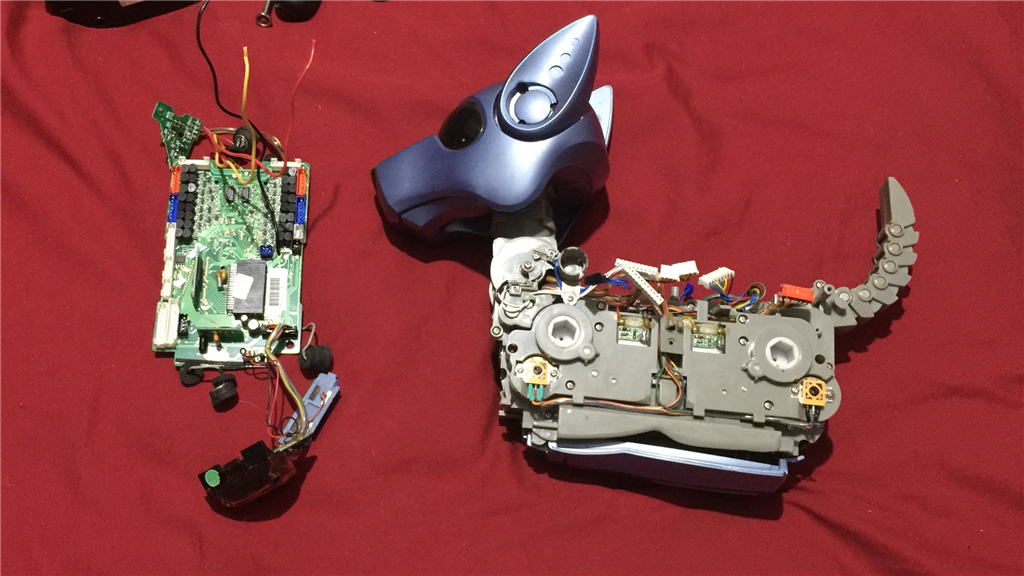
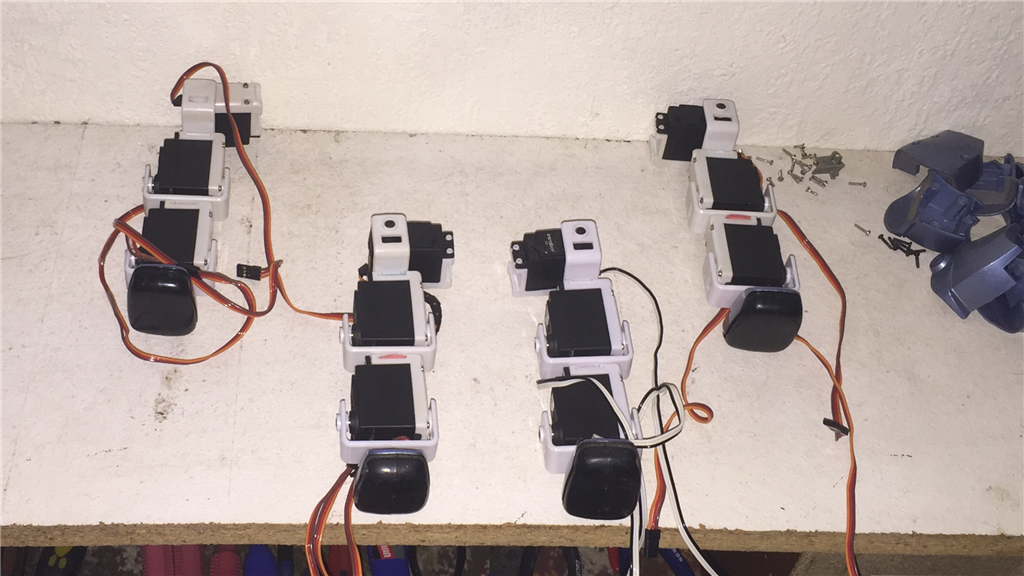
Continuing from my other thread asking if anyone has hacked an I-Cybie, this showcase thread will detail my first EZ-Robot "toy" hack with this little dog. Because of the inner workings and circuitry of the I-Cybie robot dog, the idea to incorporate the EZ-Robot platform in to this little fella will be to completely gut it out, and replace the DC motors with HD servos for the limbs, and a couple of micro servos for the heads pan and tilt action. It will be a tight fit go get an EZ-B, battery, and servos inside, but I think it can be done.
Unlike my previous "Built from scratch" robot builds where I plan out most of what I would like to achieve, and how to go about it, this project I am just going to... well... wing it. I have little idea of the internal layout of the I-Cybie (apart from a few photos I have seen online), so this will involve quite a bit of trial and error.
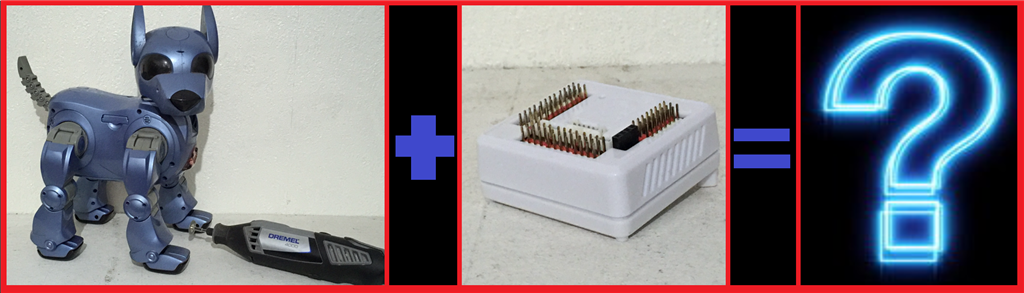
After posting this, I'm going to break out the screwdrivers and start to take the little guy apart. One of the main things I want to have a look at and test once disassembled, is the existing I-Cybie sensors, and test them with a spare EZ-B to see I will be able to use some of them. If not, I'll replace them with EZ-B comparable sensors. Additions will be to change the eye LED's, add a camera, 4 in 1 sensor, and see what else i can fit inside that will be useful.
I have no idea how this is going to turn out (hence the first picture, lol), but this should be a fun and unique project, and I think this will be the first I-Cybie to EZ-B conversion project showcase. I'll try to remember to take lots of photos of the insides in case anyone else is tempted to do a hack themselves, and I will document my progress with this project. Below are a couple of thread links about possibly hacking an I-Cybie with an EZ-B...
https://synthiam.com/Community/Questions/162
https://synthiam.com/Community/Questions/152
:)confused Let the head scratching begin... confused:)
Discover more robots
Jphillipsnj's Inmoov Project
Rob-Bot's My 1St Life Size Robot Build

@Cem.
No problem about the photos. Glad they helped.
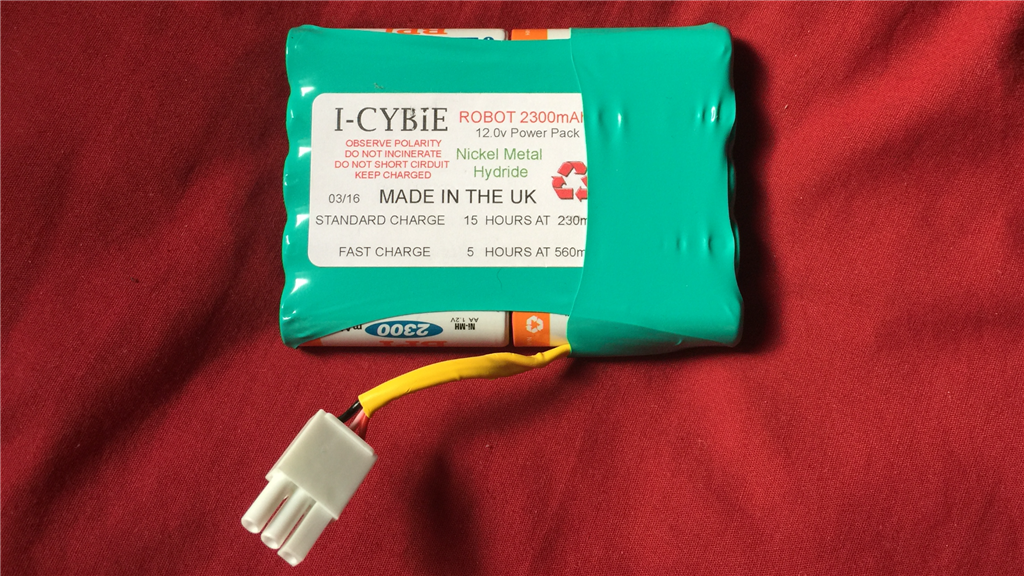
Nice one on getting the one of eBay. Yes the battery packs are a bit pricey, and hard to come by, and the non original battery packs are about 25 which you may have already seen.
@Ron.
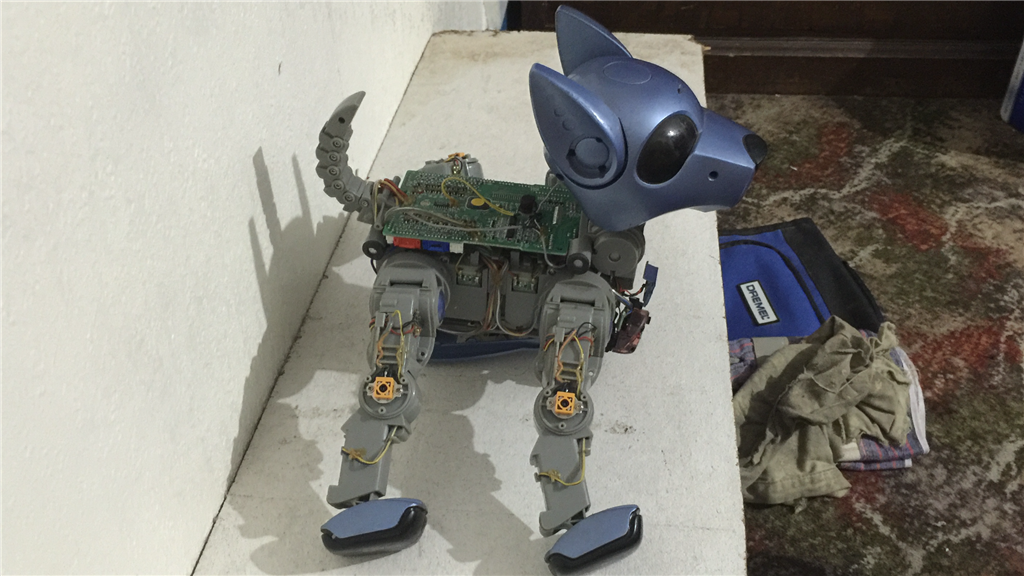
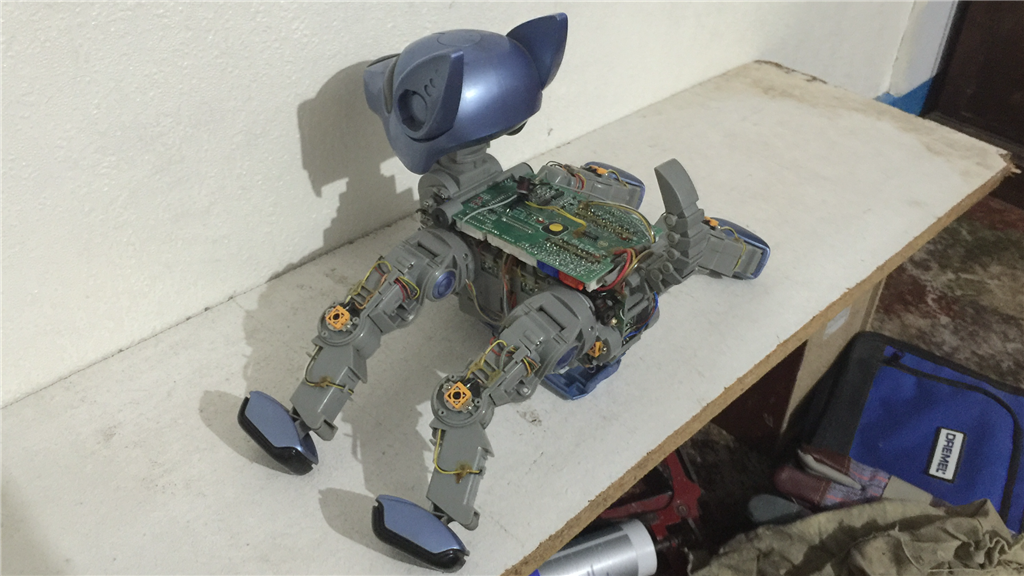
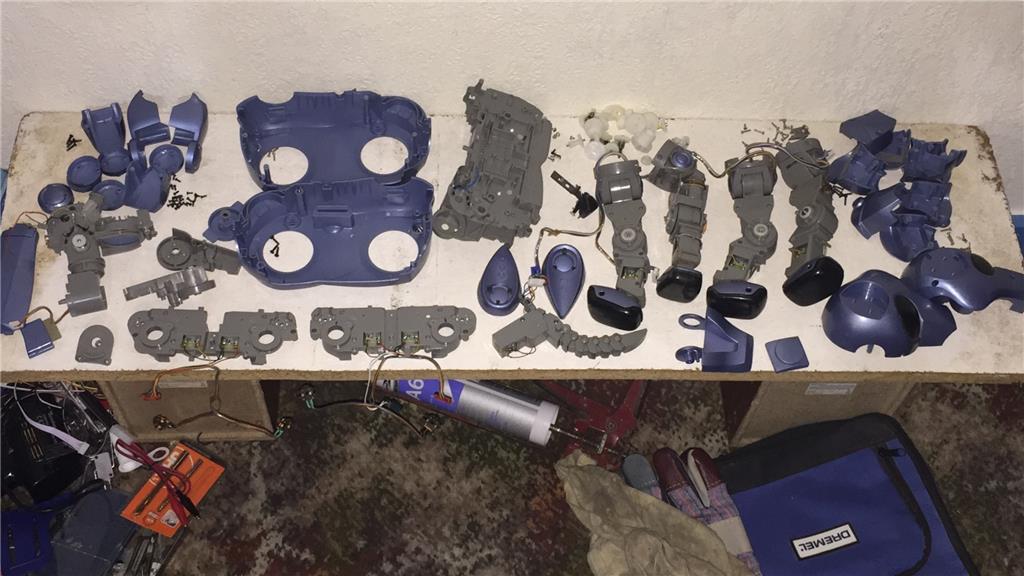
Yes it would be a challenge putting it all back together, but the more I think about doing the conversion, it seems I'll be using a lot less original parts I'll be using. Basic, just the body and head panels. Don't think I can really call this a hack... more of a rebuild.
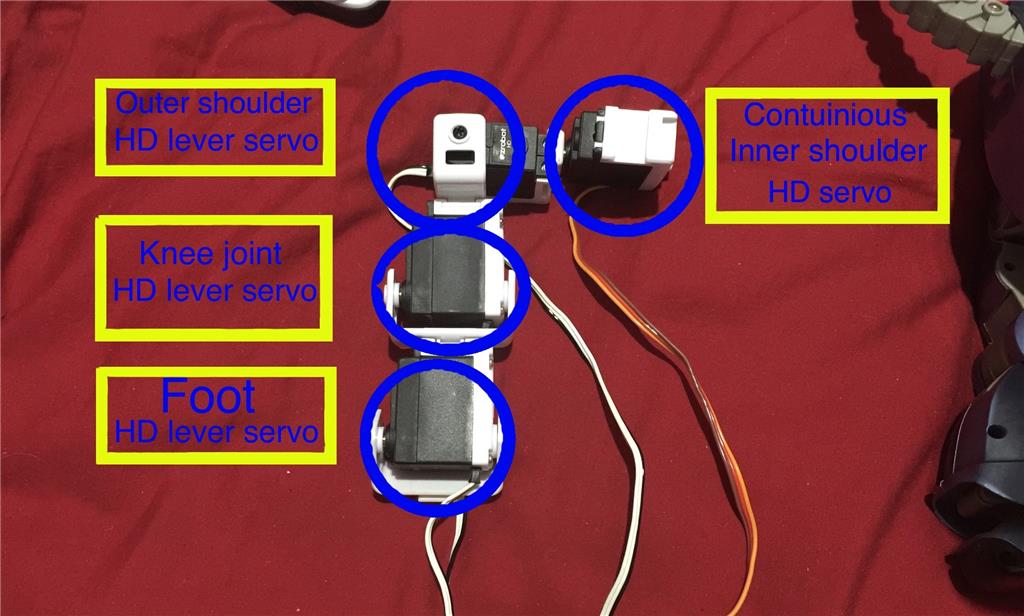
Still not sure about the layout for the insides just yet. The way I have it worked out will be to use standard size HD servos for the legs, and micros for the head. I should just get two rotation servos sitting back to back for the shoulders, and the rest will be a good height...
Definitely looking forward to getting stuck in. Lord only knows what it's going to turn out like thought, lol.
Thanks Dan.
I always fancied one of the Aibo's too, and just missed out on one for a good price on eBay a couple of years back. I thought about making my own quadruped using EZ-Bits some time ago, but never got around to it. This is he next best thing I guess.
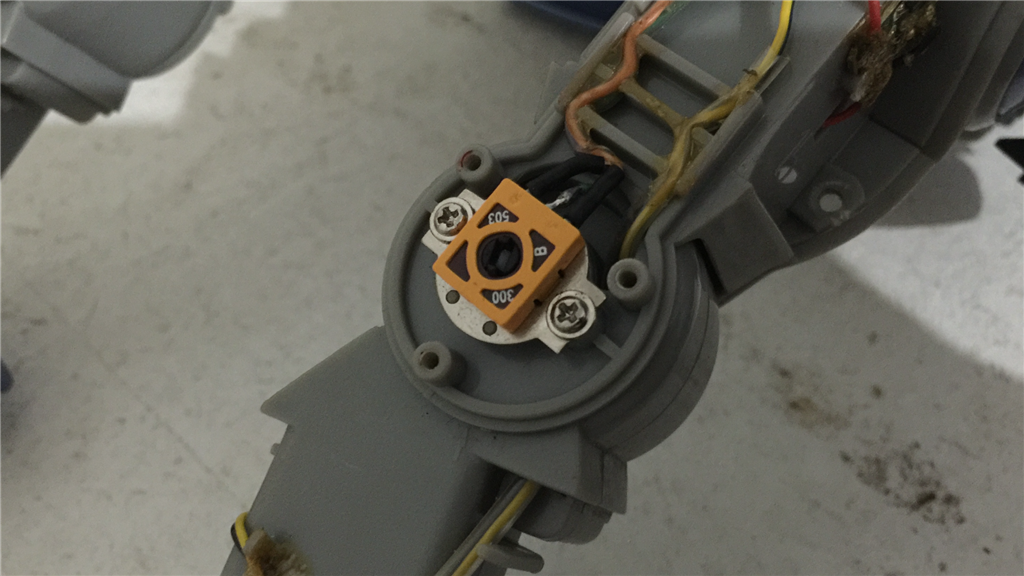
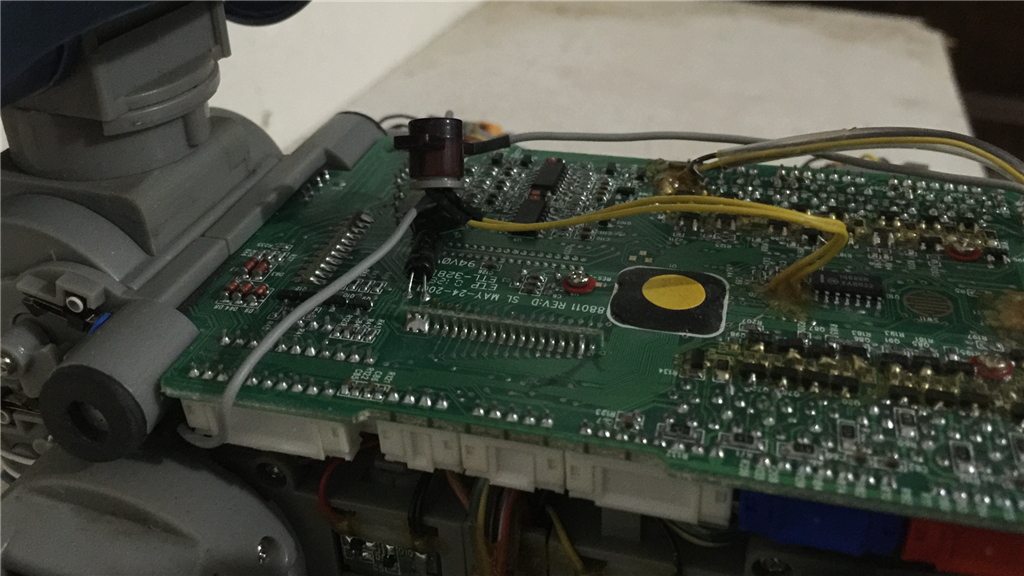
Are the encoders for the motors potentiometers ? If they are maybe you could wire them up as servo. Connect them to standard servo internal boards.. Just a thought.
@rb550f.
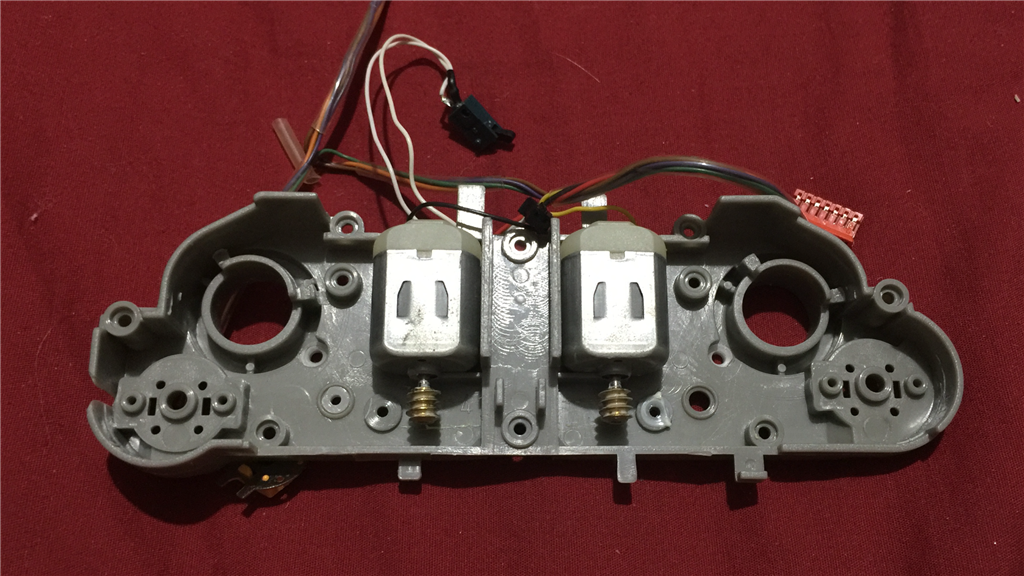
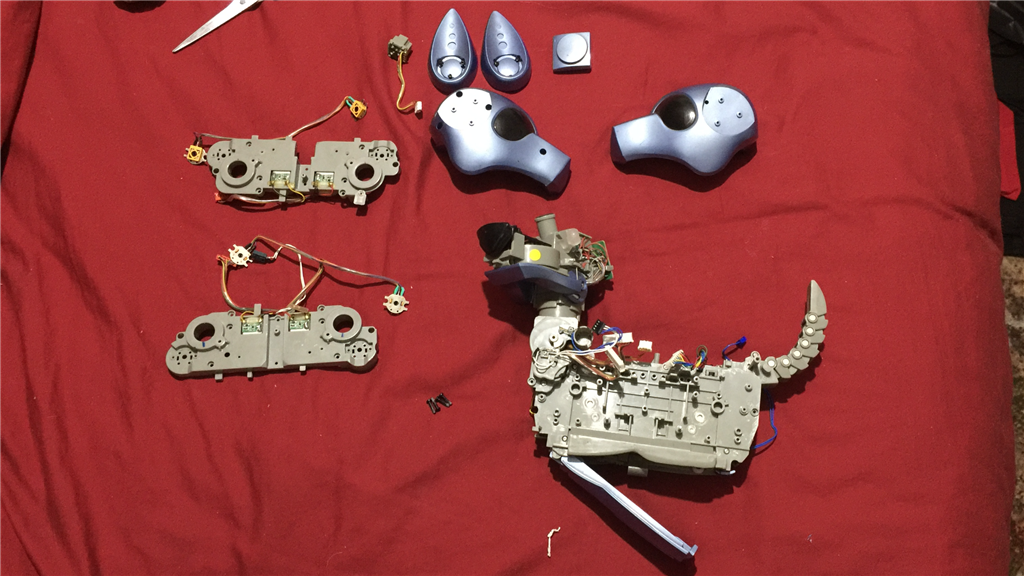
Yes, they are potentiometers that fit to one of the gears. Your idea was one of my initial thoughts, but to keep all 16 motors and gear mechanisms in place would mean zero room for the EZ-B or anything else, which is a shame. And I don't think I would have enough ports to hook up all of the encoders and H-bridges anyway.
Thanks for the idea though.
I was back in my attic today and found another mistery box with some goodies inside. Looks like I have found my next mini project...
I though this was smashed to pieces and was thrown out, but it's in pretty good condition. It's not the U-command version, but the interactive one and stands about 25cm tall. Can't find the control for it, but no matter as I'll do a full EZ-B hack for this much like DJ and others have done.
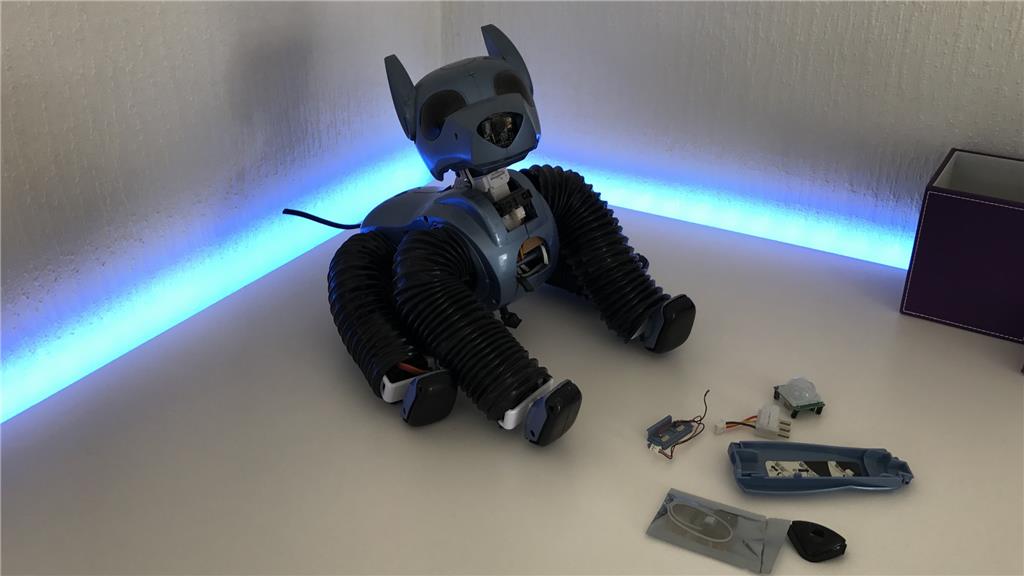
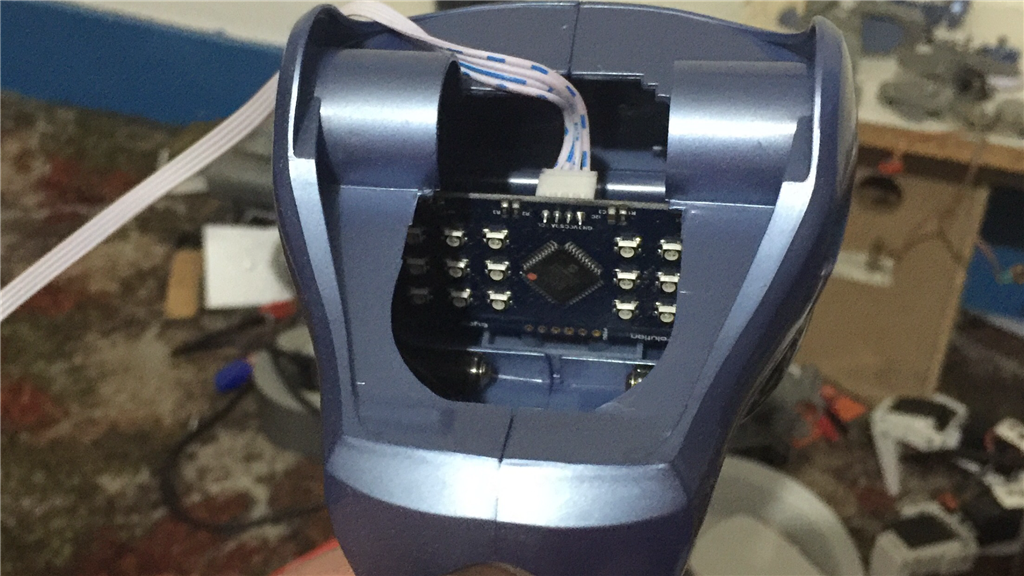
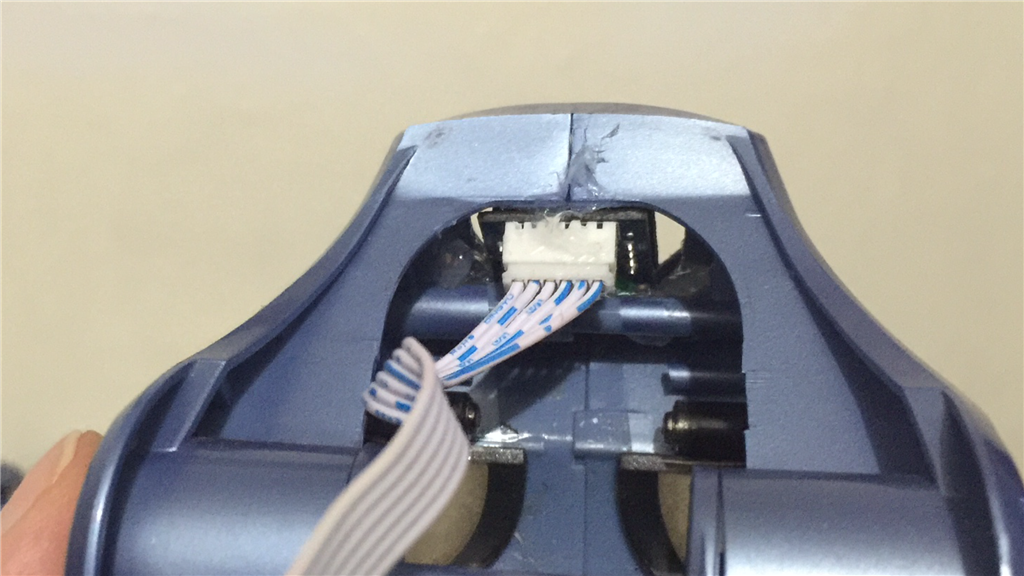
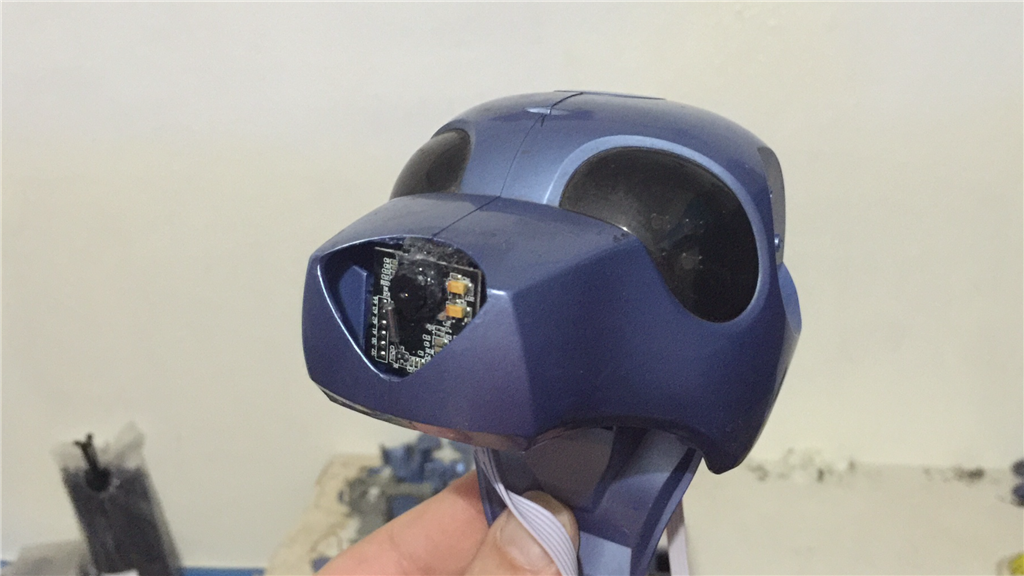
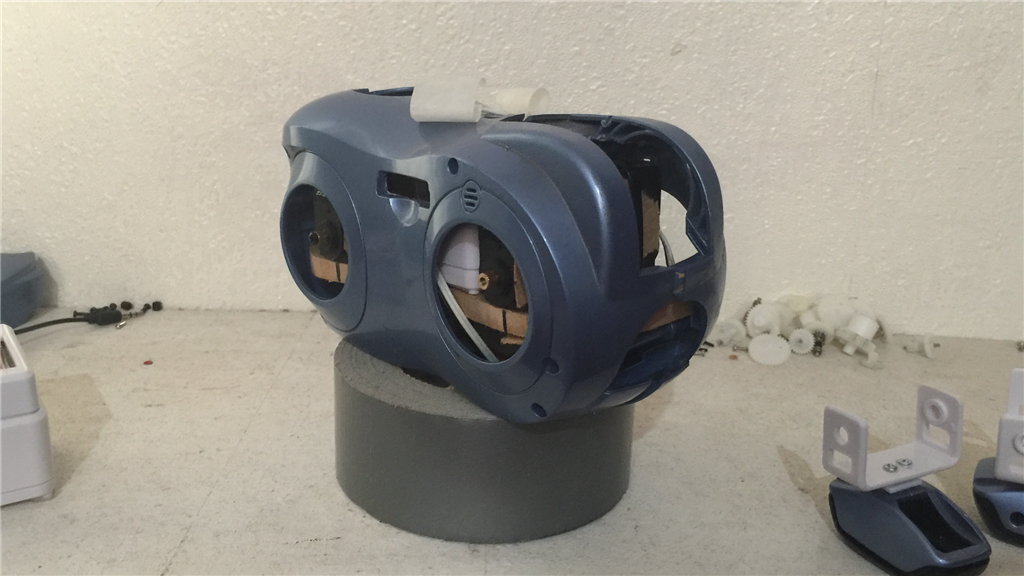
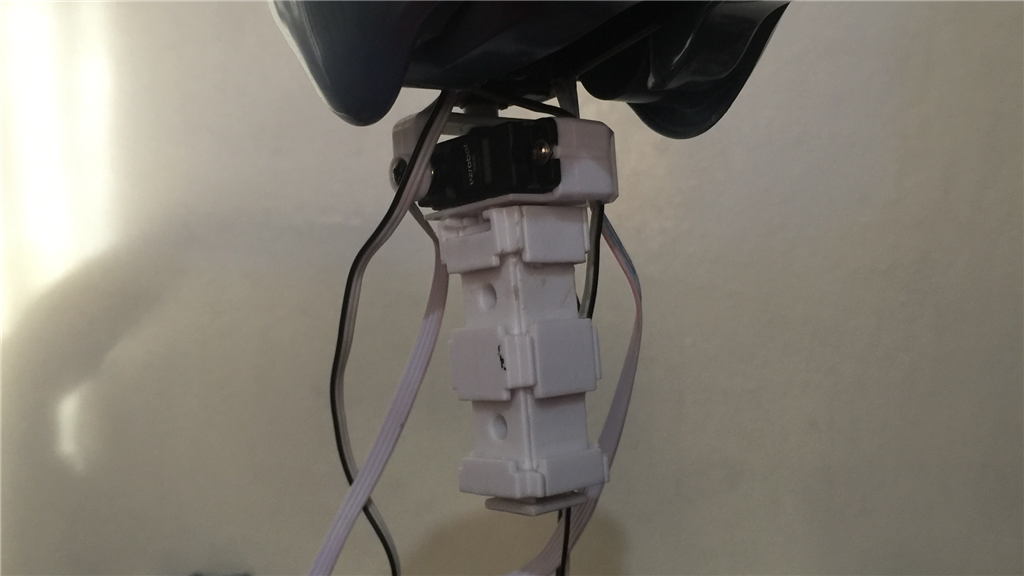
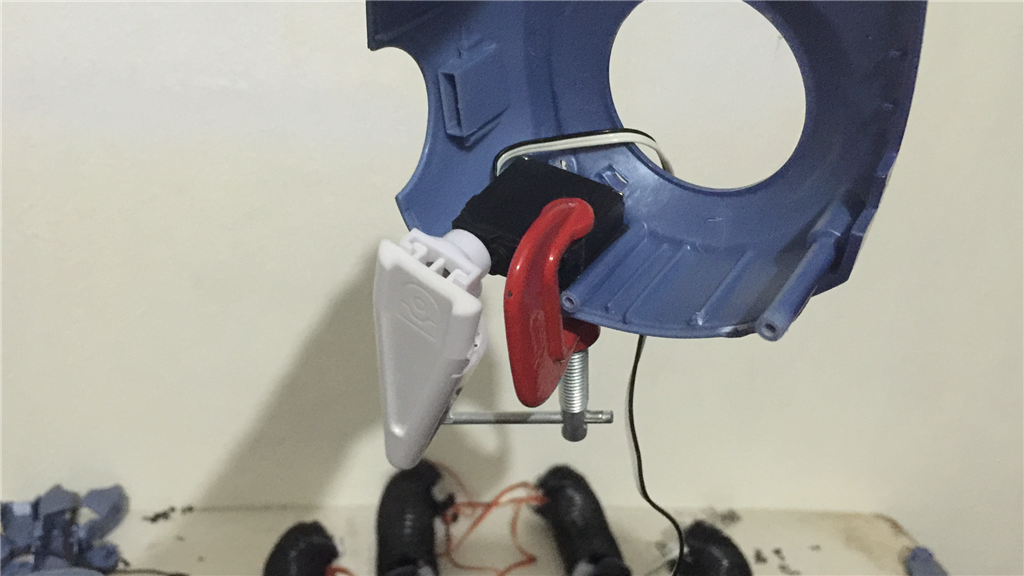
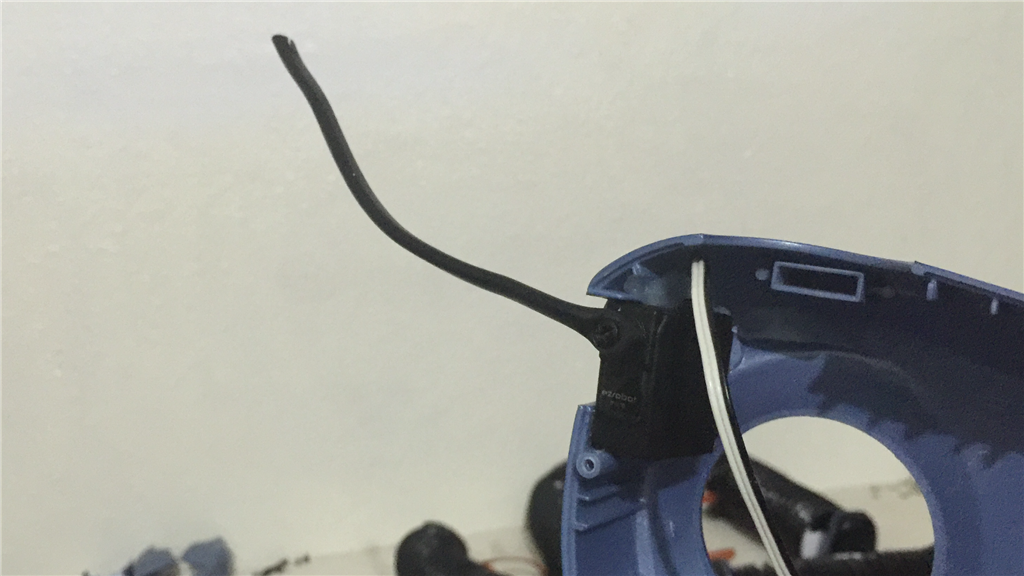
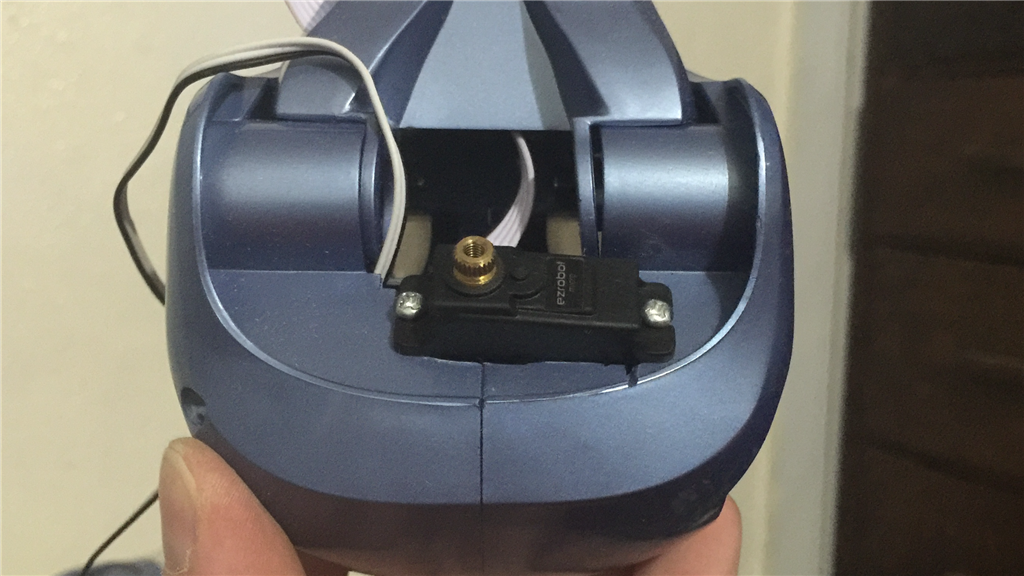
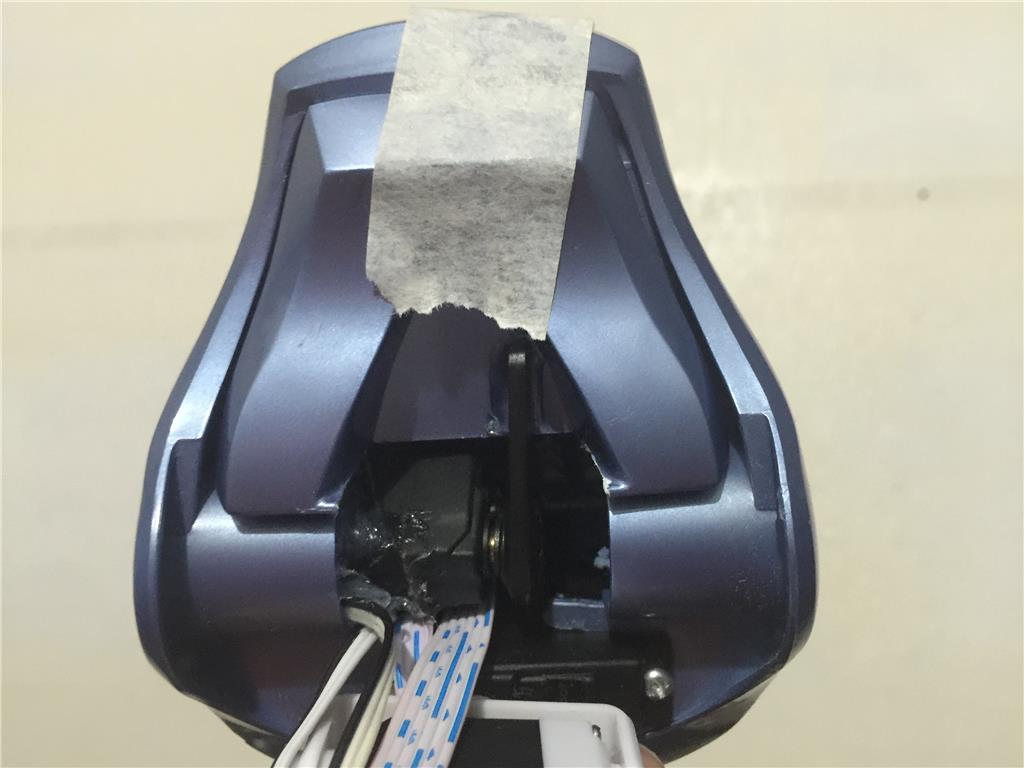
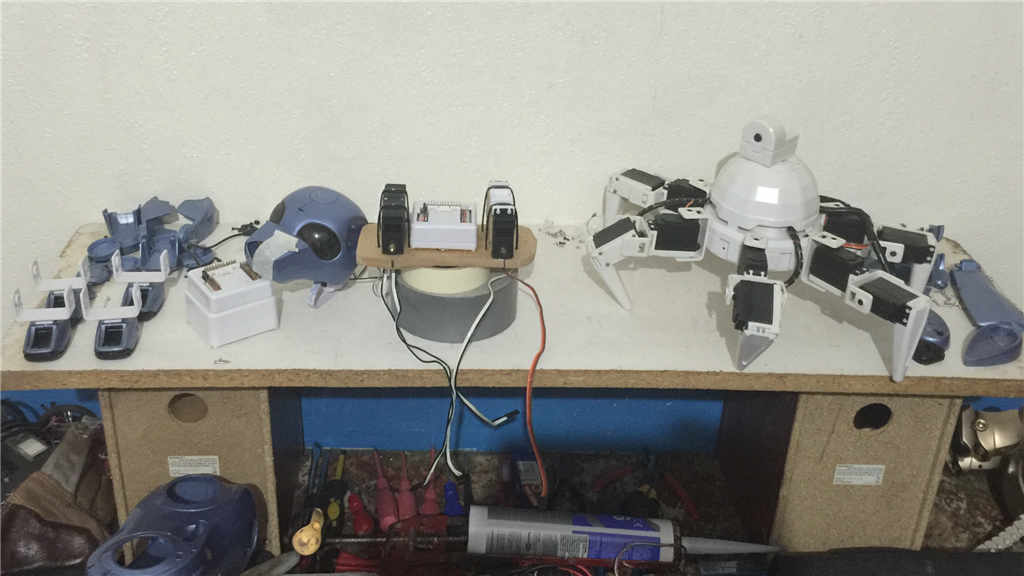
Anyway, back to the dog, and I've got the head setup worked out. I've taken the camera, two micro servos, and RGB array out of JD's head and worked out where to fit them in the dogs head. The RGB array fits just nicely behind the tinted eye covers, the camera will go in the nose, and a bit of cutting in the head panels should house the pan micro servo quite well.
I'll hopefully start work on that tomorrow.
UPDATE: Day 4. 26/01/2016
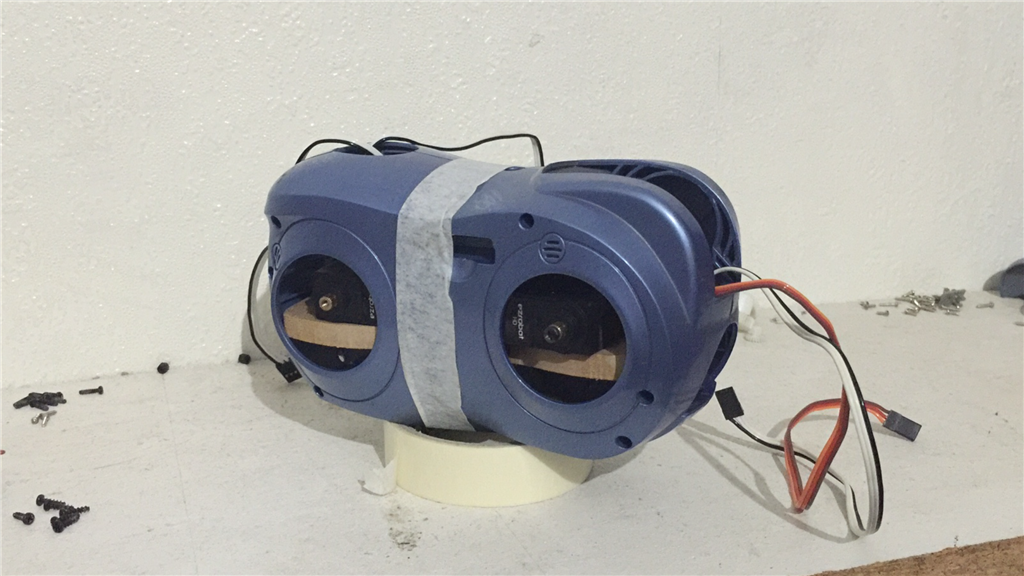
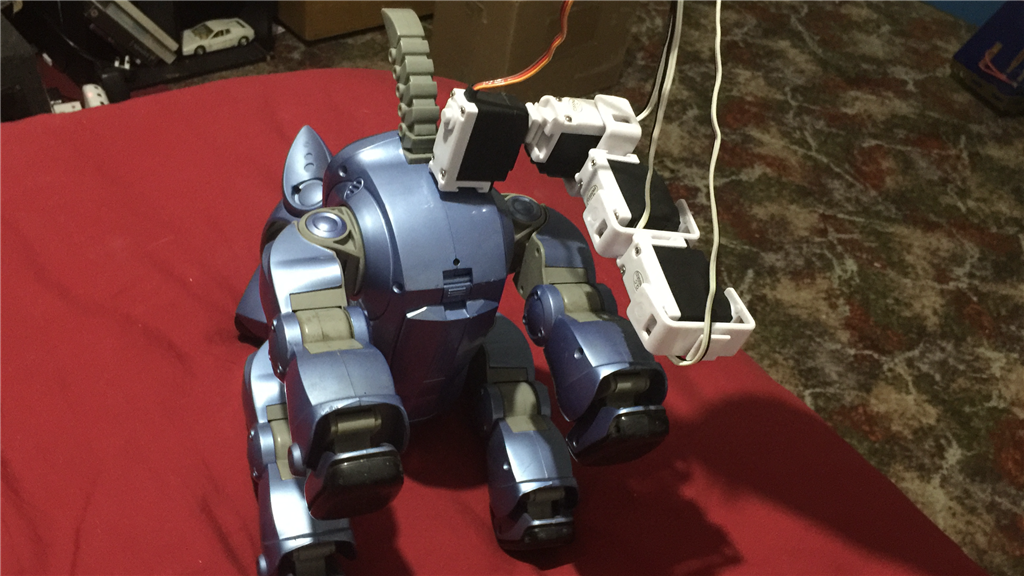
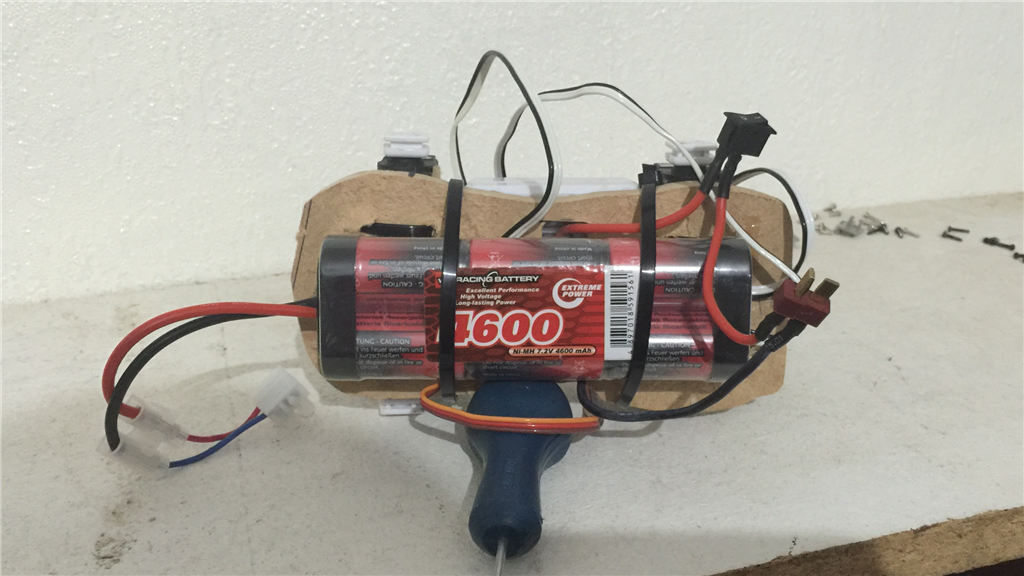
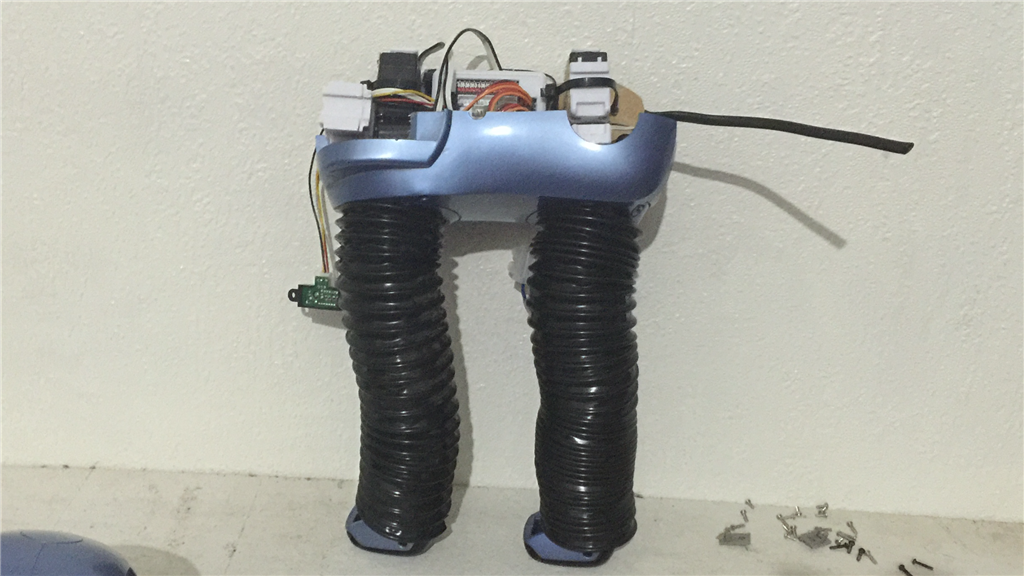
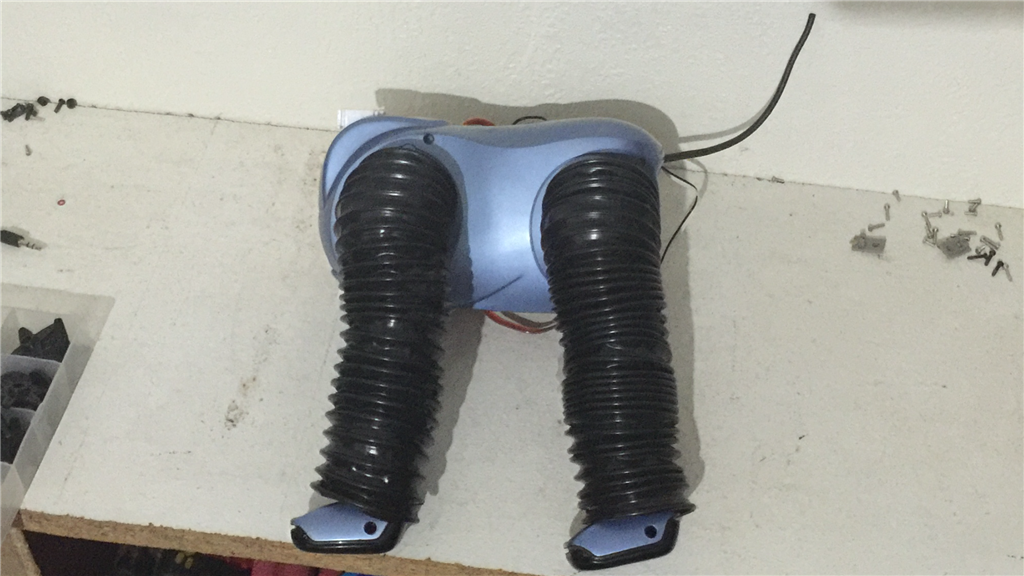
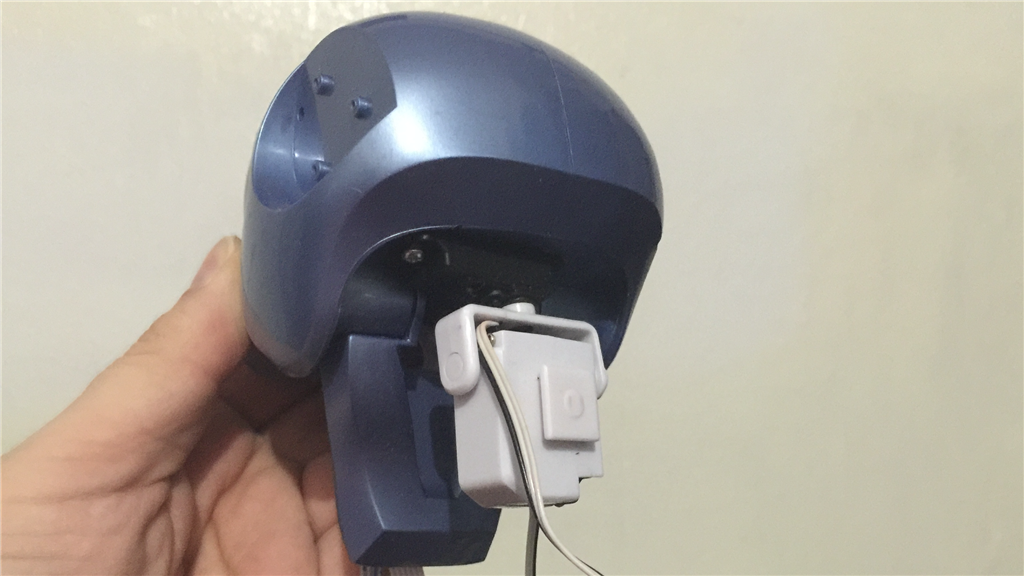
Time for a little progress report. This really is going to be a rebuild and not a hack, otherwise there just won't be the room I need. Anyway, I started work on the head by fitting the RGB panel behind the eyes, and attached the camera in to the nose...
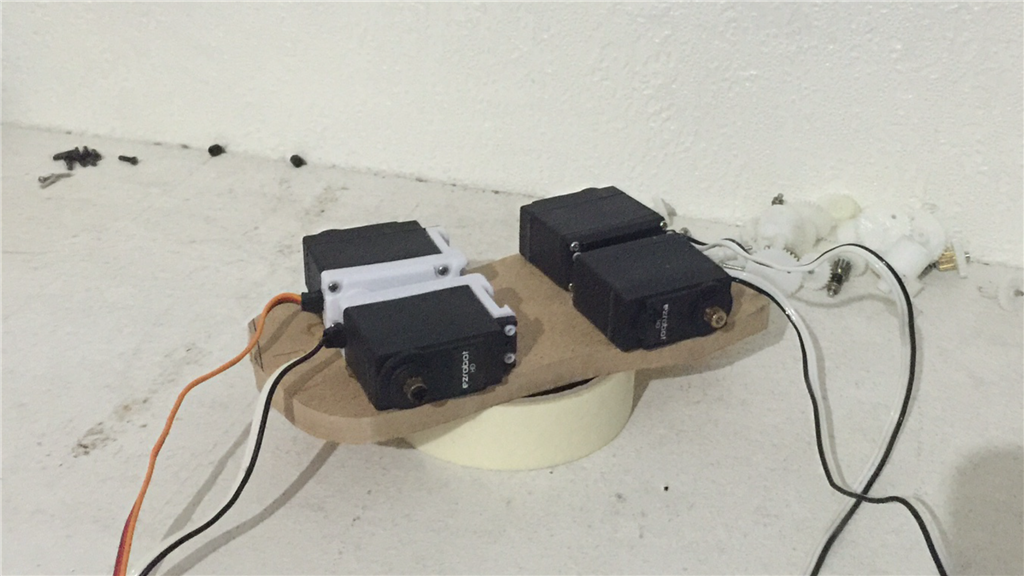
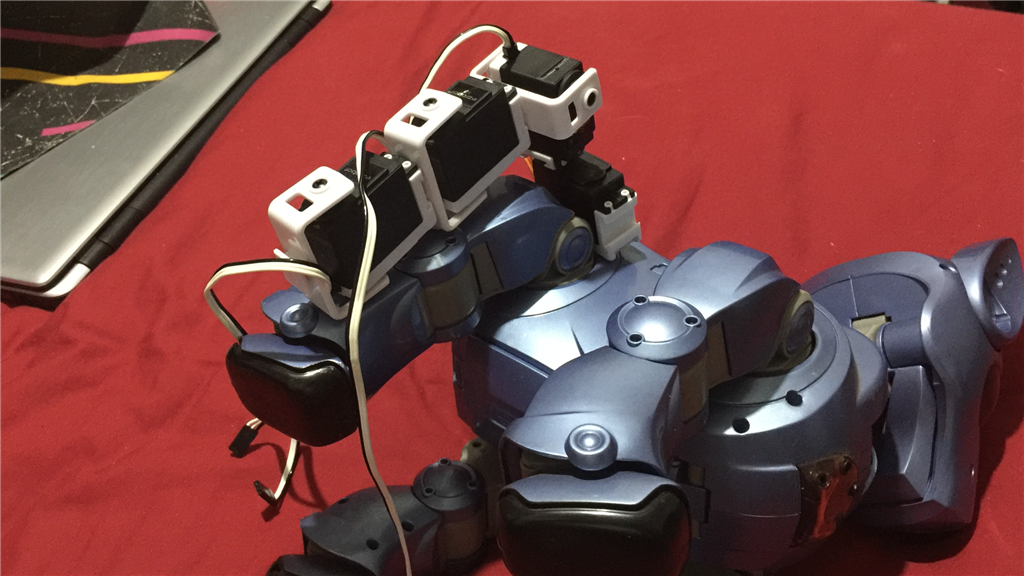
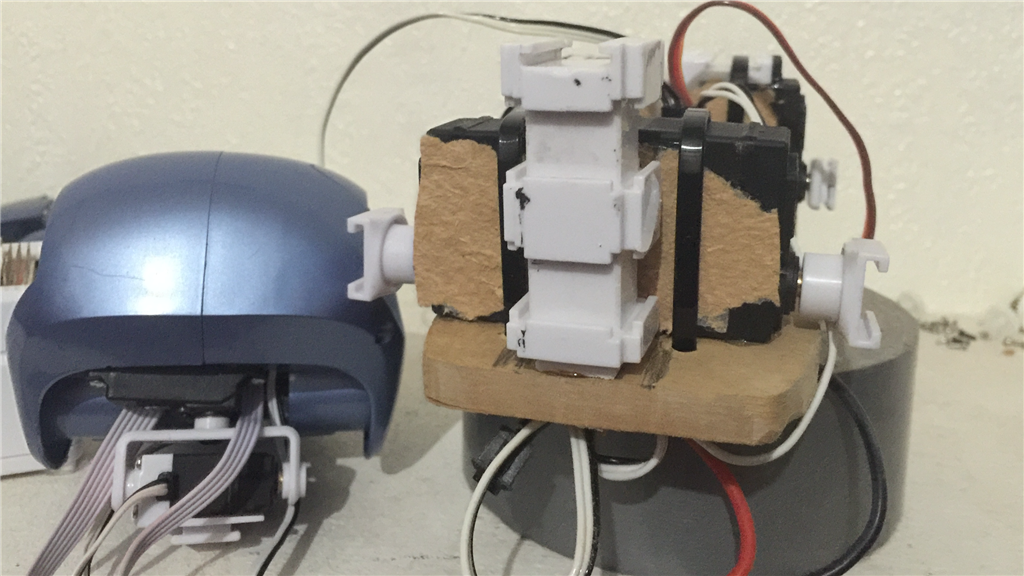
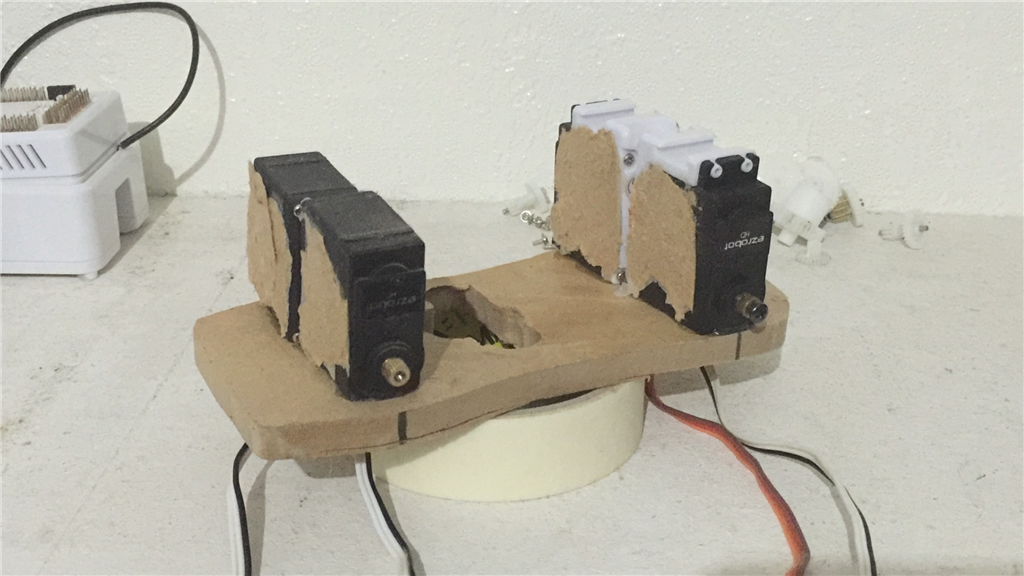
I'll look to using the original nose button to cover the camera up and drill a hole for the lens. Next, I cut out a small MDF platform and mounted the four rotation servos for the inner shoulder joints...
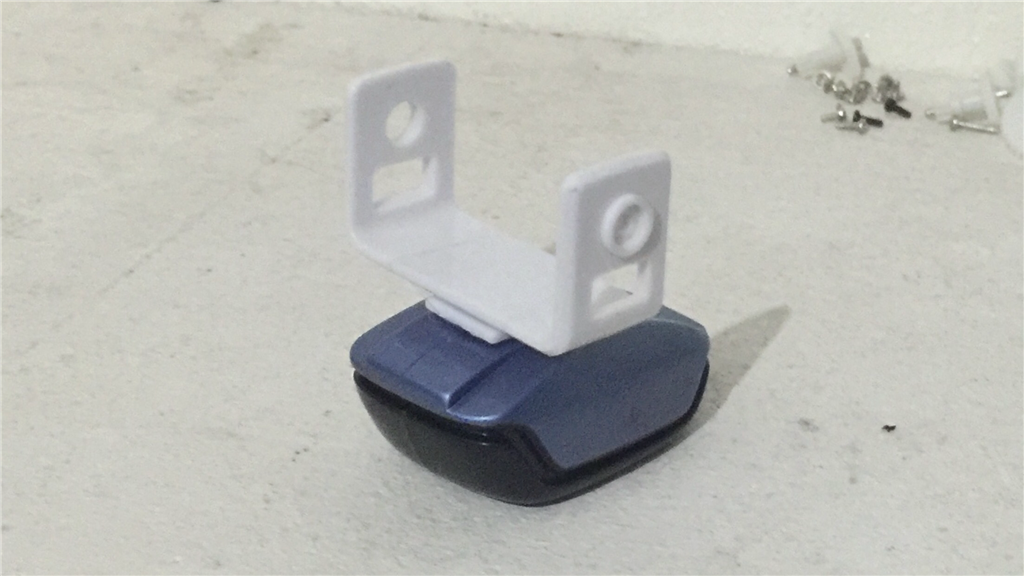
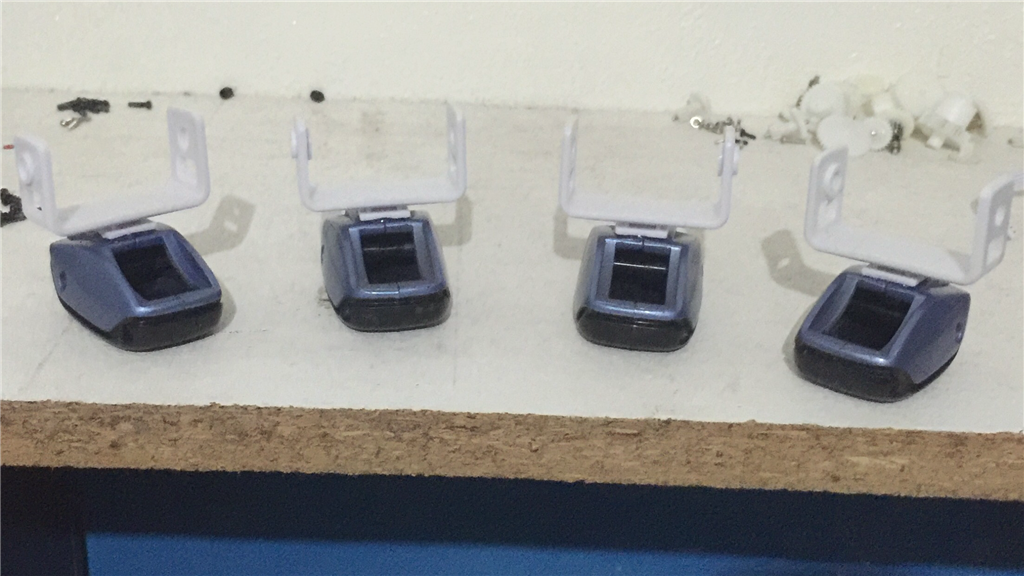
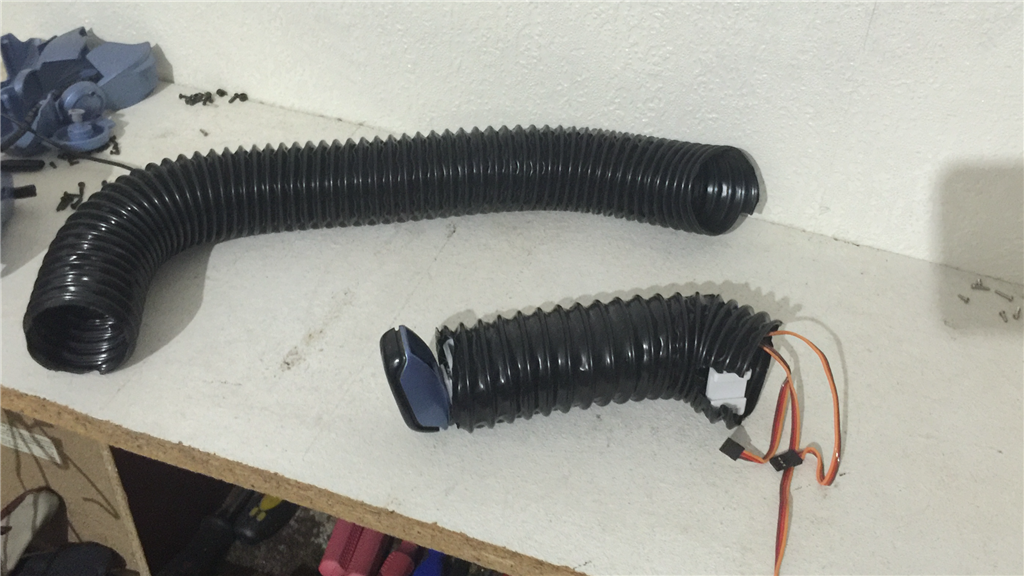
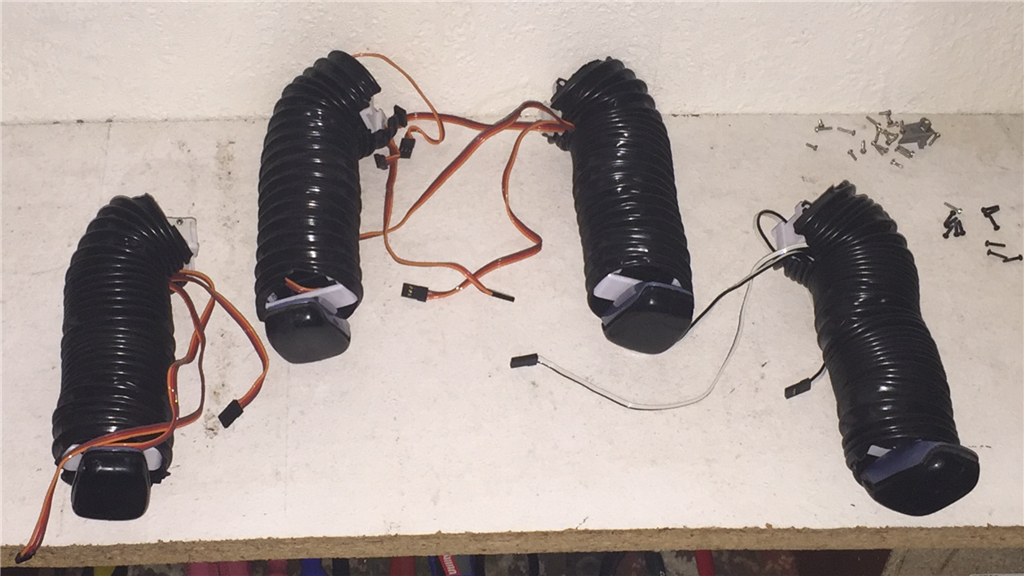
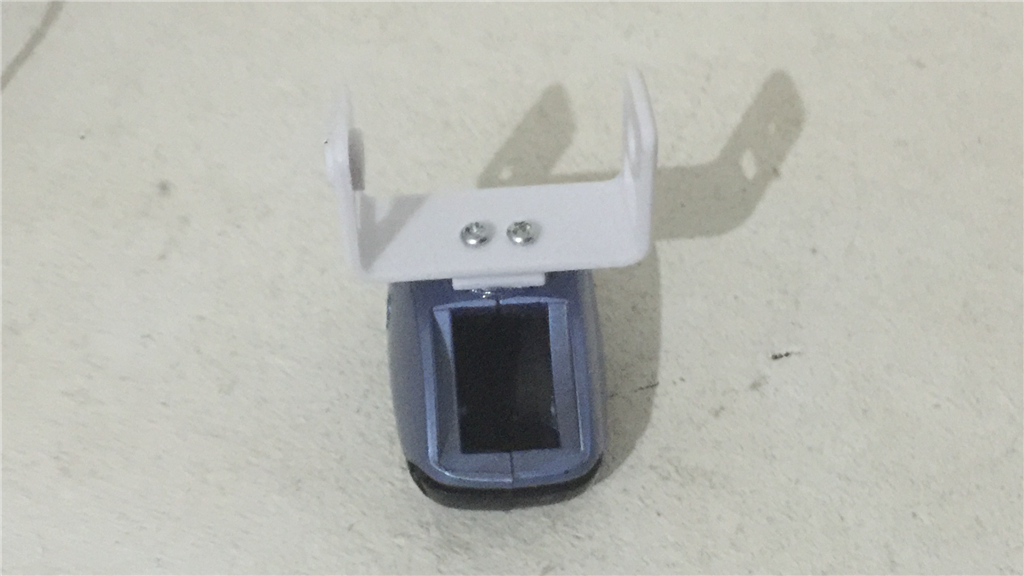
Then I fitted some servo brackets to the original feet. The gaps that are showing on the top of the feet will be filled in with something...
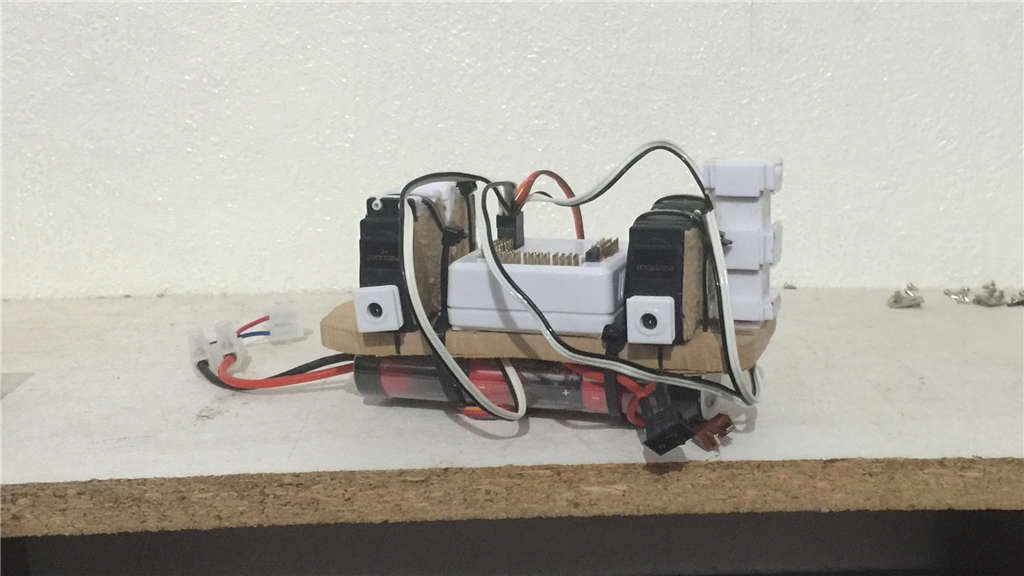
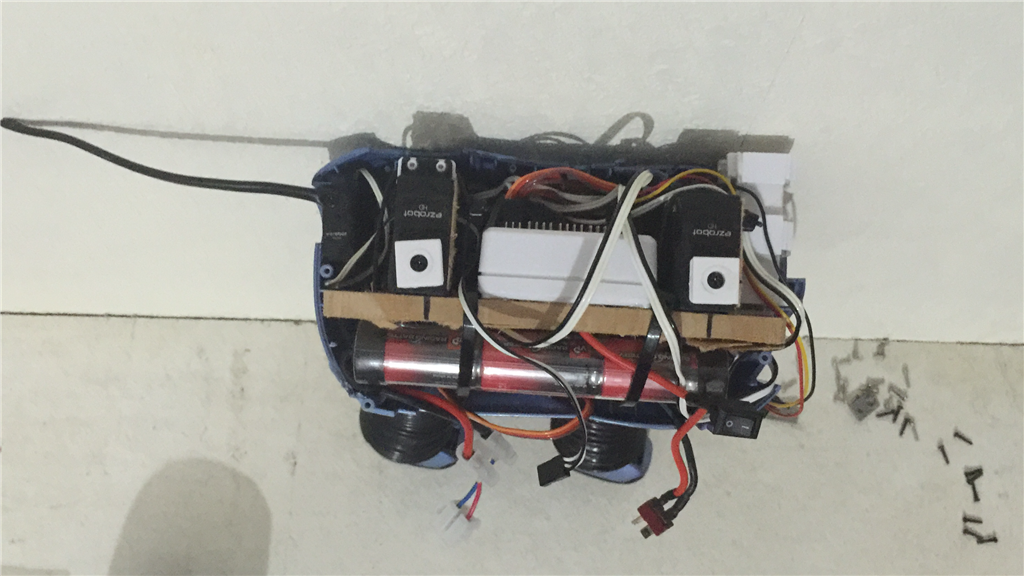
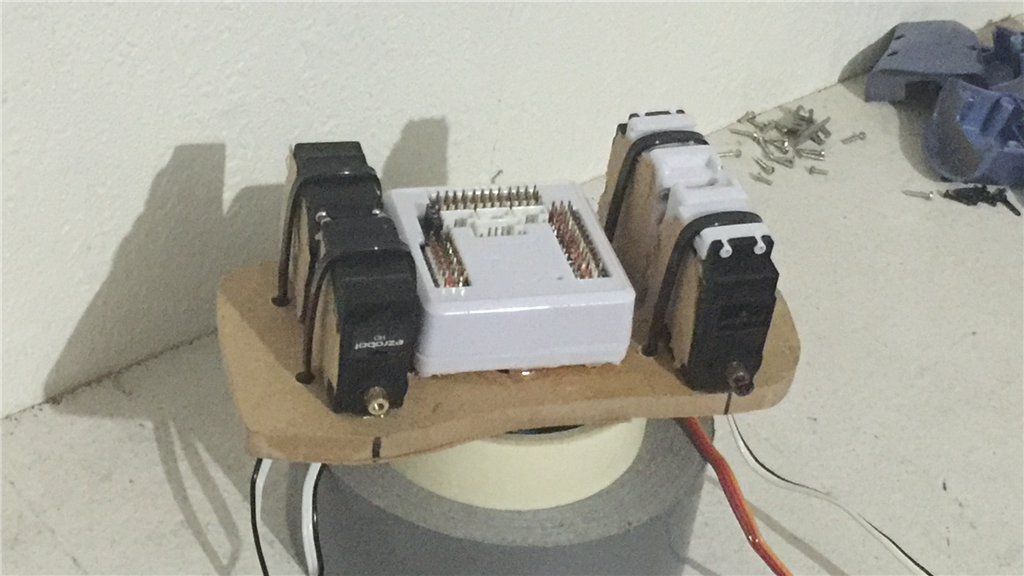
Next I'll strap some zip ties around the shoulder servos for added support, then see about fitting the EZ-B. I'll also fit the micro servos to the head, then to the body.
That's all for now.
its very injoyeble to see this build.