
Hi all
Today, the DIY kit arrived. The packaging and presentation is just great.
At first I thought to convert a U-Command Wall-E, but I also collect vintage toy robots and for a first project and don't want to take the risk to make a mess of Wall-E.
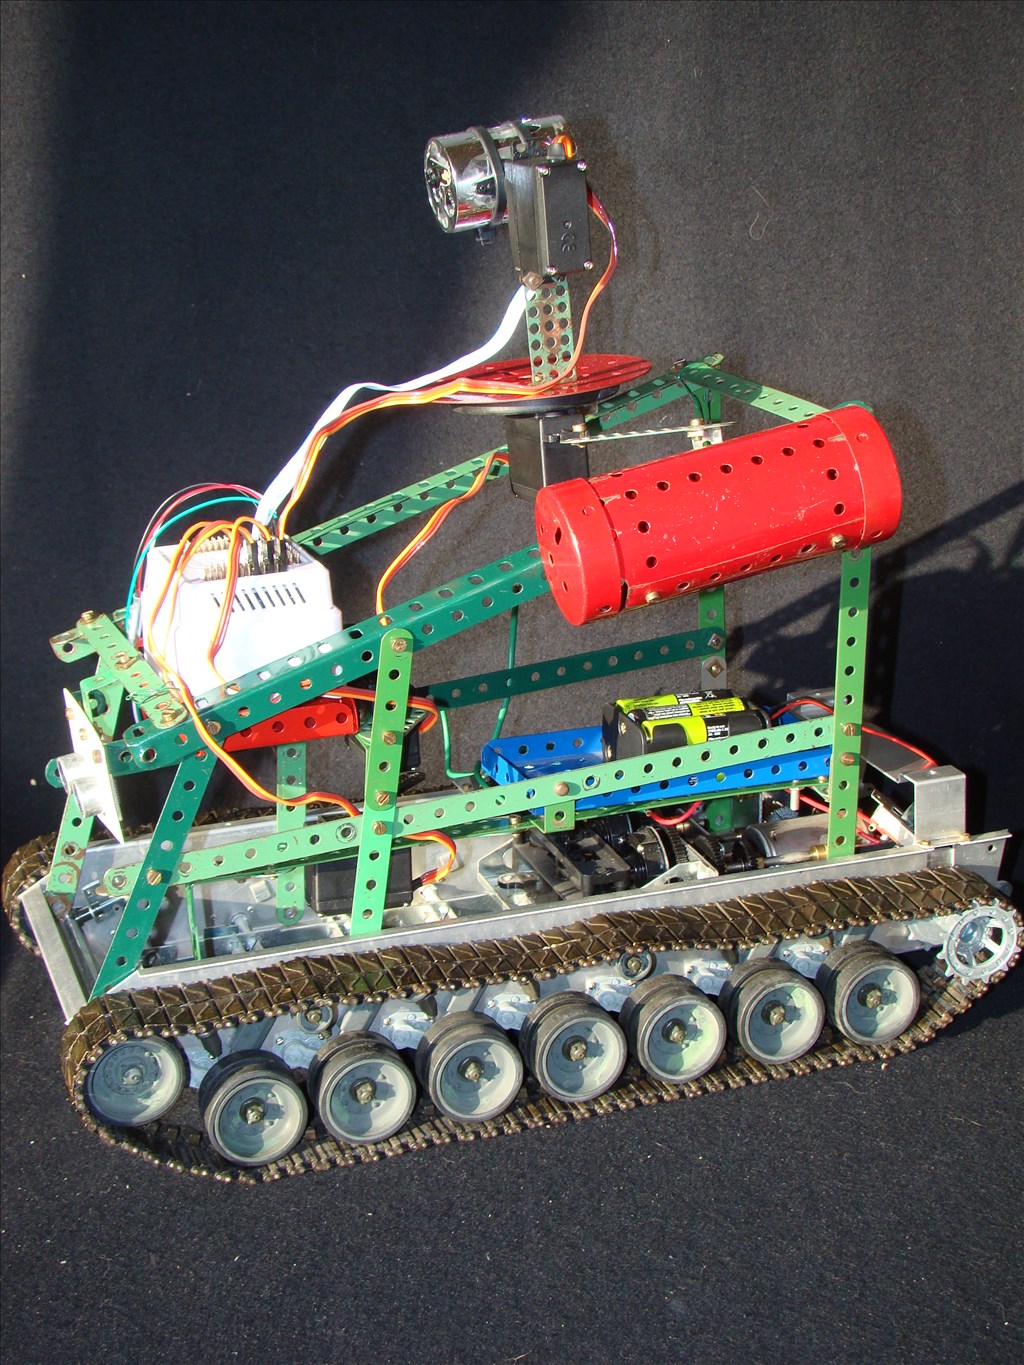
So, I needed to have a different approach and started today to convert a large Tamiya RC Leopard tank which I had since the 1980'ties. I will only keep the chassis, tracks and motor with gear box and will build a new structure using 1950'ties Meccano parts (which I also collect). The structure will contain the servo's, brain, batteries for EZ, separate batteries for the motor of the tank, etc.... When everything works (one day hopefully), I can cover the Meccano structure with plastic sheet , but that is for a future project.
On the IT front, I started with preparing my PC. Installed Virtualbox on my Mac and W7 enterprise edition (modified language Dutch to English to allow voice recognition), installed Service Pack 1 to be able to install version 4.5 of .Net and then installed the EZ software.
I will try to post more in the future with some photos.
kind regards Johan
Discover more robots
Quantumsheep's Camera Robot Mk2
Antron007's Mobi2 (I Like To Score Too)

js1
congrats whit your dev kit.
Impressed with the amount of research you have done so far. Those are great steps to document for others. Thanks for sharing
A quick update I started with powering the EZB. That failed, just a small red flash and a zooming noise. After some help here on the forum, I bought new rechargeable batteries, recharged them overnight and after connecting to the EZB, a nice blue light came on. The Wifi connection was up and running.
My prototype Meccano structure on the tracked chassis is also finished. Nothing fancy yet, very basic, but I found Meccano is really great to test things out. One can mount servo's, fixed them, remove them, etc.. and no glue needed. Super for a first project. I things don't work out, I can easily make changes.
I have mounted four 180degrees servo's so far :
The servo's I had to calibrate so there min-max range was OK and the 90 degrees setting at startup was in an neutral position when mounted in the Meccano chassis.
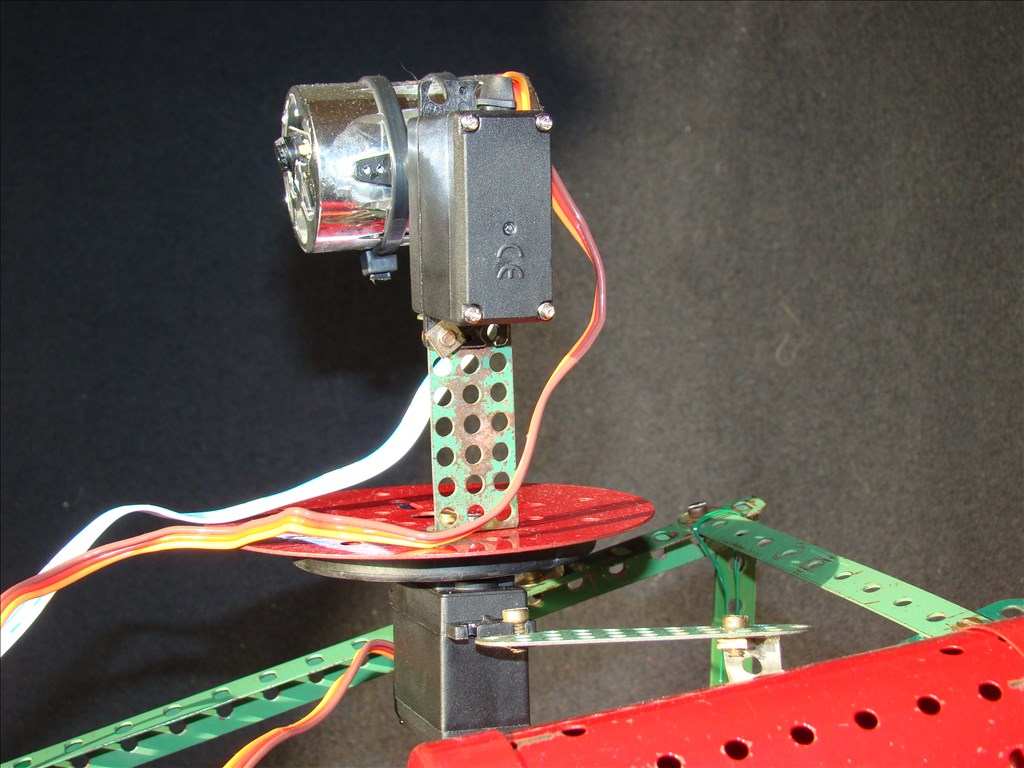
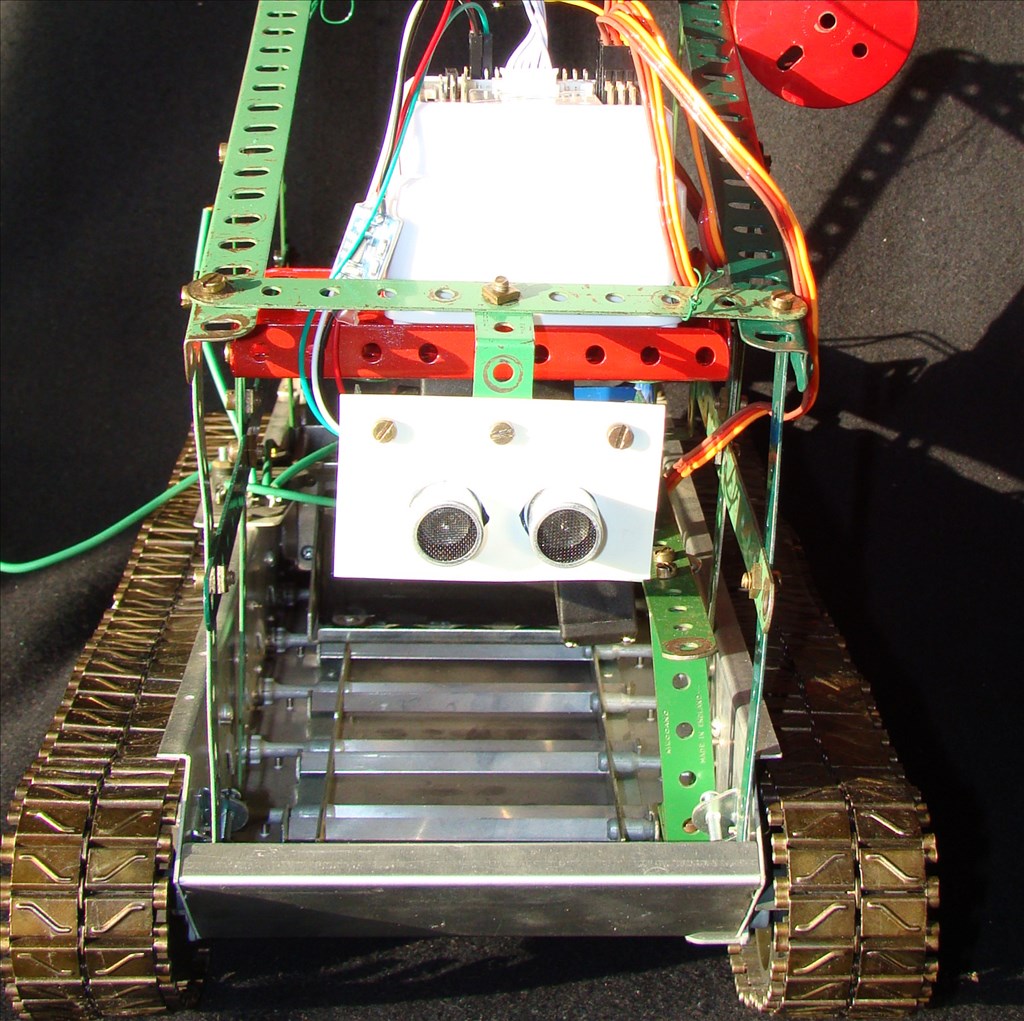
The camera eye was installed and also the radar for avoiding collisions.
I still need to buy a battery for the DC motor to see the vehicle in action and of course the programming will become important then
Best wishes Johan
@JS1.
I look forward to seeing your project. I like the idea of using meccano for a frame/chassis. I used to love playing with that as a kid. Happy memories.
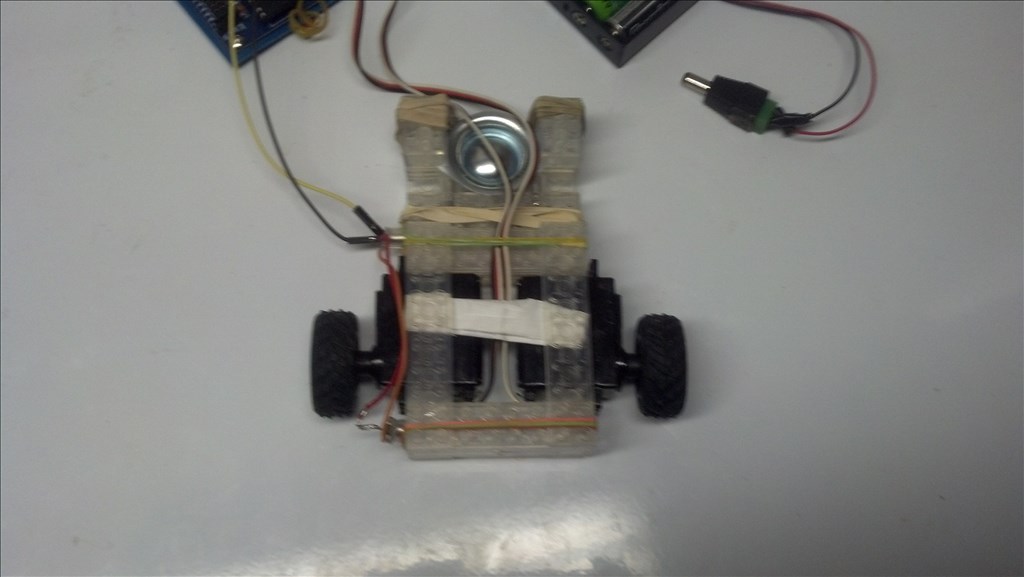
Here some photos of my primitive construction.
It is not yet operational. The motor is from the 1980'ties (no voltage specified), and with my 7.2V battery it is was running very fast during a short test. So I need to reduce voltage to have a more realistic speed. Also, the motor switches direction when changing the + and -. The two available switches for doing this were defective, so I made a DPTD switch which is operated by a servo (not yet on the photo).
With the bad light conditions inside, my camera tests were only successful doing QRC code tracking, so I'm planning to use that in the future for following a path in the house. I already made a small script which first reads a file with the plan of the house, e.g. :
kitchen-living living-kitchen living-hall hall-bathroom etc.
The program reads the file and given a start and end location, the program will calculate a path to follow, eg. from living to kitchen to hall to storage. It only goes four levels deep, and eliminates circular paths. I hope to improve the script with distances (take short route), and compass bearings, but that is all for later when the tank actually runs.
Next step is to reduce the 7.2 battery voltage to 6V so I can move the tank at a realistic speed.
Cheers Johan
@JS1... Nice design.... I use a lot of Vex in my projects so I like metal frame robots like yours... If you use a motor controller like the H-bridge in the store here you will have much more control over your tank drive motors... This includes speed and direction changes... You won't need to use a different battery or the crude servo controlled toggle switching setup... The h-bridge is only $15...
Hi Richard
many thanks for the tip. Do you refer to this one :
https://synthiam.com/Shop/AccessoriesDetails.aspx?prevCat=9&productNumber=14
Kind regards Johan
Yep, that's the one... And @Rich has great tutorials on how to hook it up and use it.... I prefer the sabertooth serial motor controller, but the basic model is around $70 so not cheap but very easy to use and set up....