


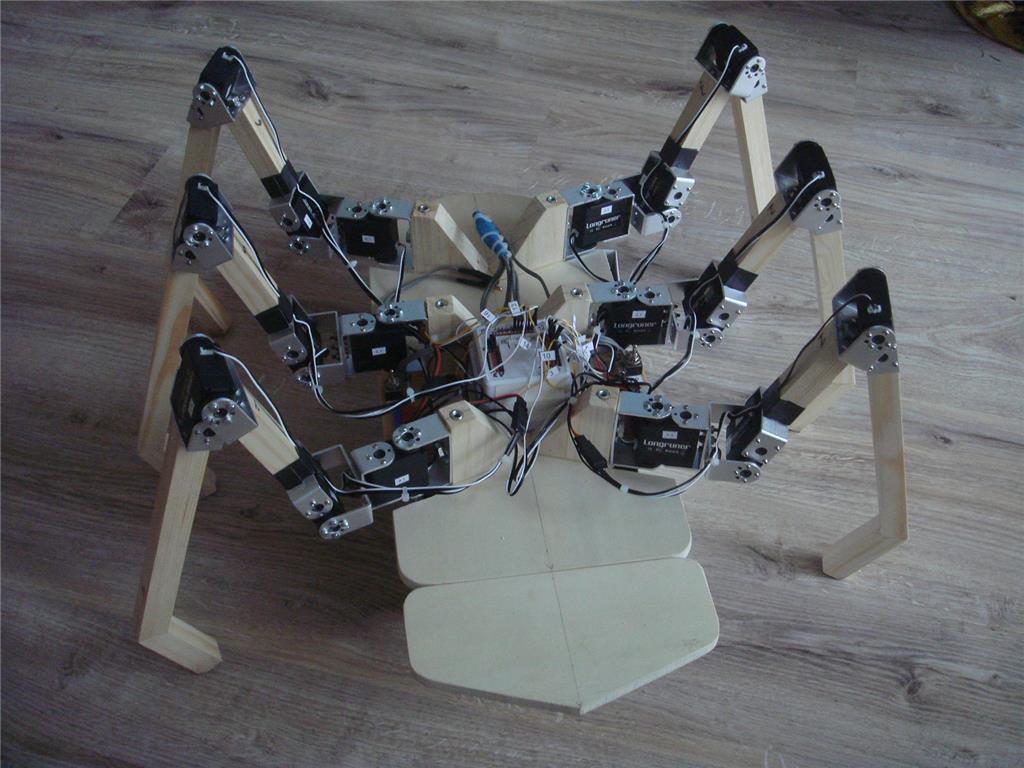
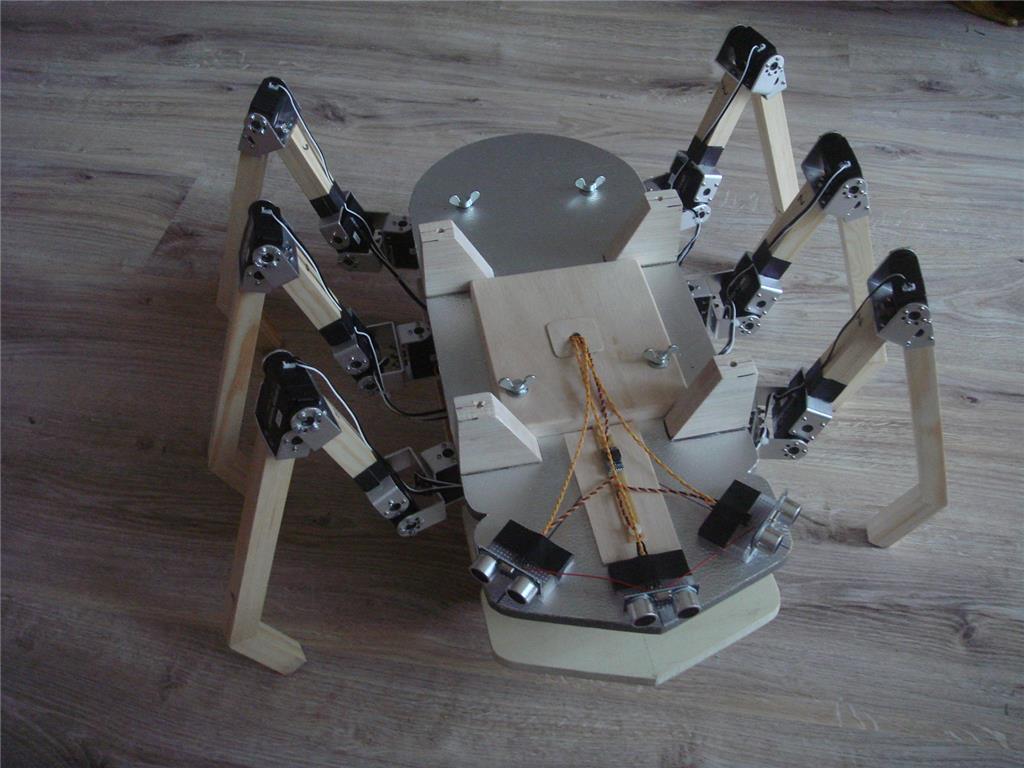
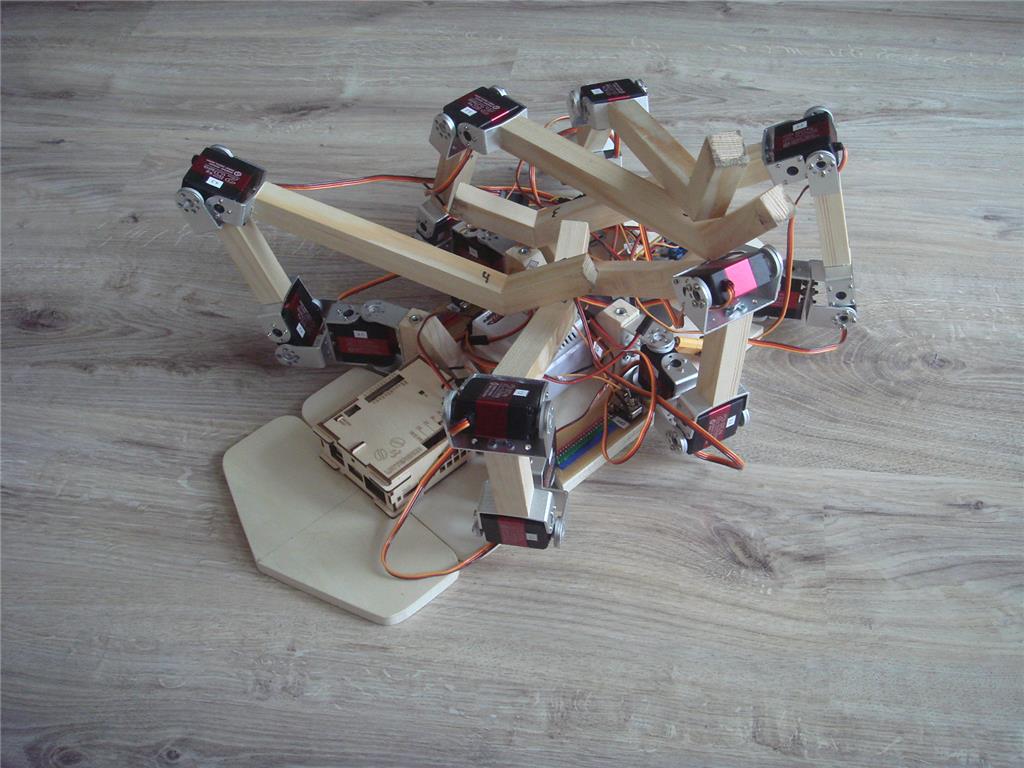
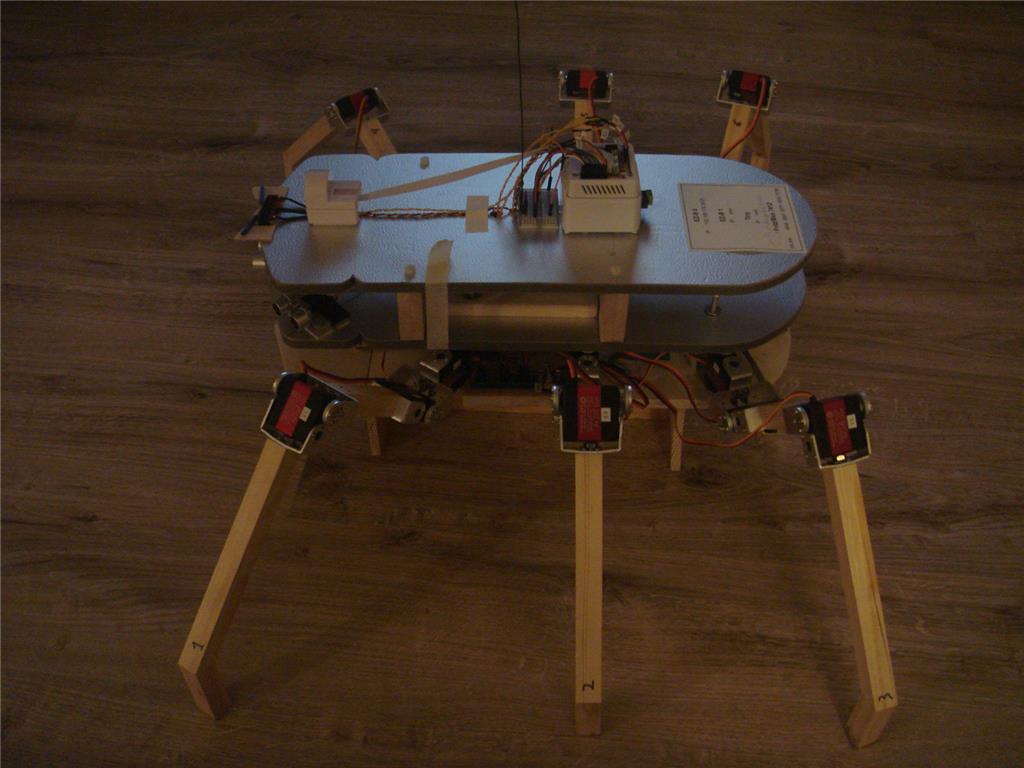

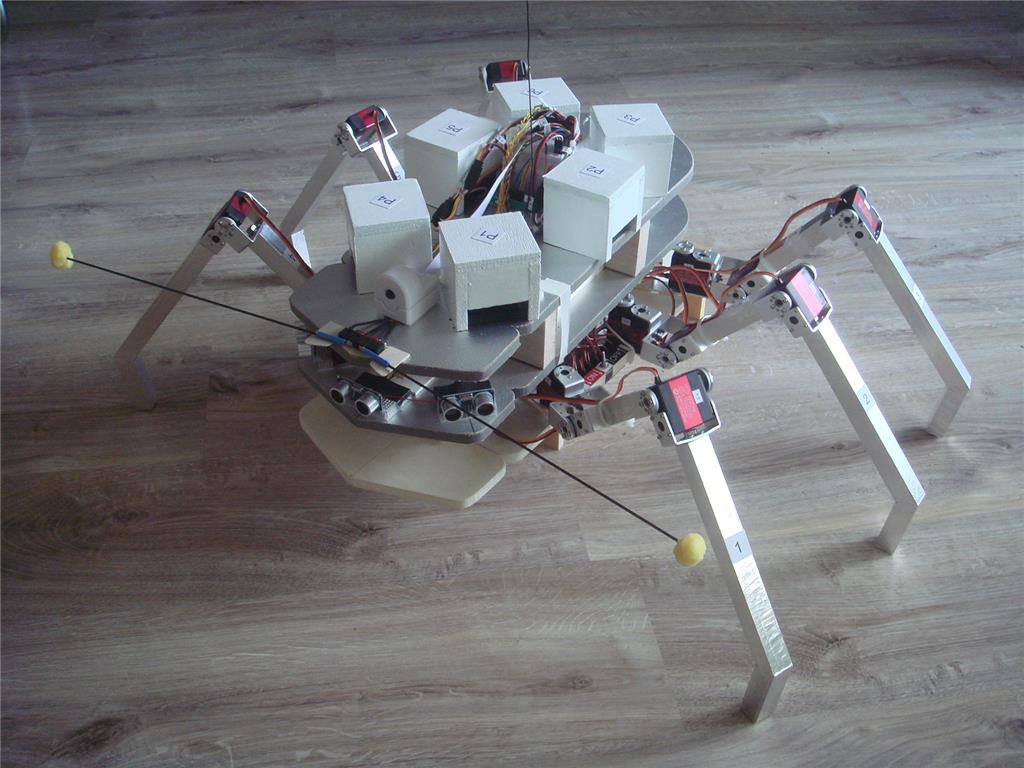


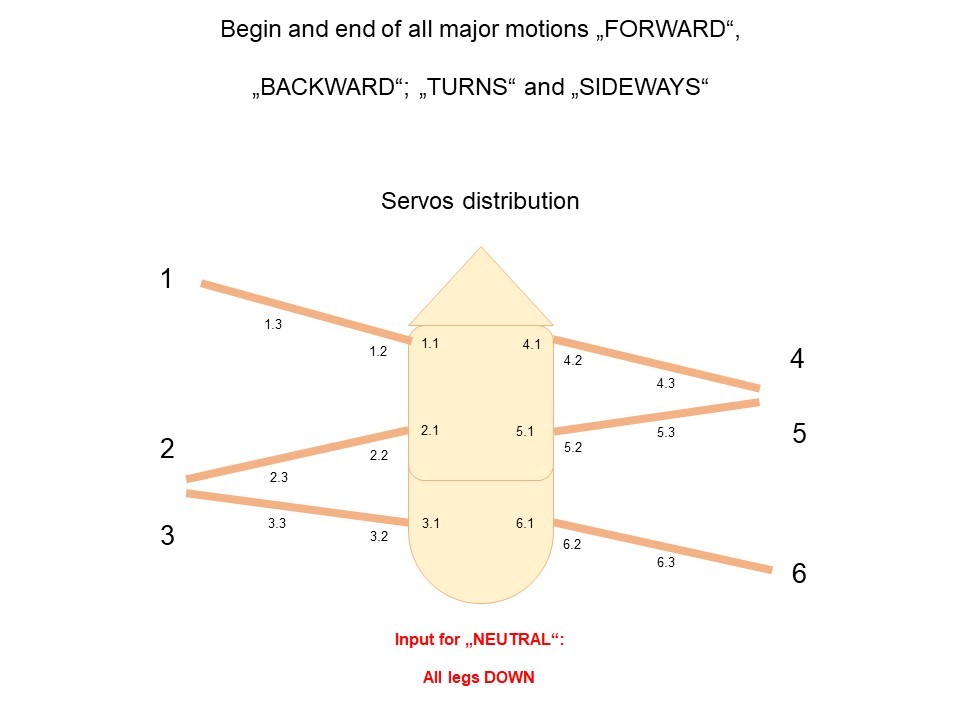
Hi guys, this is the first introducing part of a series, describing an autonomously operating hexapod with about 1 m width (my "large insect"). Idea behind this project: From early childhood on I wanted to build a kind of "mechanical turtle" or similar, being able to "survive" in the garden from spring to fall and doing whatever it would be programmed for, recharging its battery, seeking for shelter in case of rain, etc. Decades later (meanwhile a retired physicist, phd after 30+ yrs. in the space business) it was really time to realise this dream, meanwhile based on modern state-of-the-art electronics and software. Then, a colleague suggested to acquire an EZ-B V4-2 as the core element for such an undertaking and from thereon things picked up speed quite rapidly. As mentioned above, goal is the realisation of a quite large autonomous hexapod. The figure below is illustrating the general shape of this robot as well as the nomenclature for the legs (1, 2, , 6) and the servos (1.1, 1.2, , 6.3), respectively.

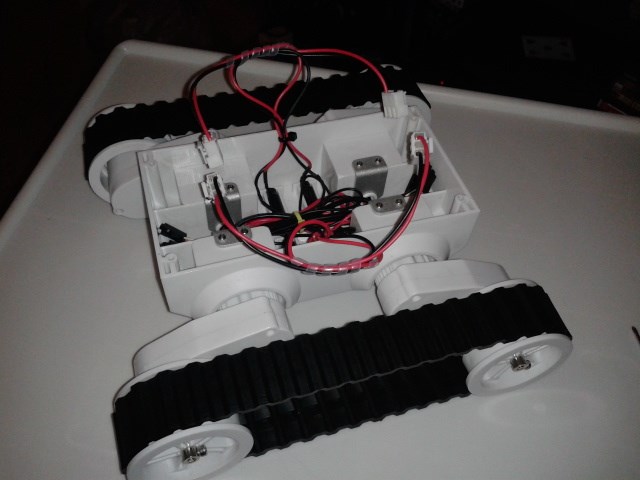
The base plate is made from 10 mm plywood and the legs from 20 mm x 20 mm pine wood. servo base blocks: 20 mm pine wood. A further light weighted plate (2nd floor) will be added later for accommodation of a scanning lidar, etc.. The hexapod’s legs are moved by 18 servos (Longrunner B07K68MK3Y:

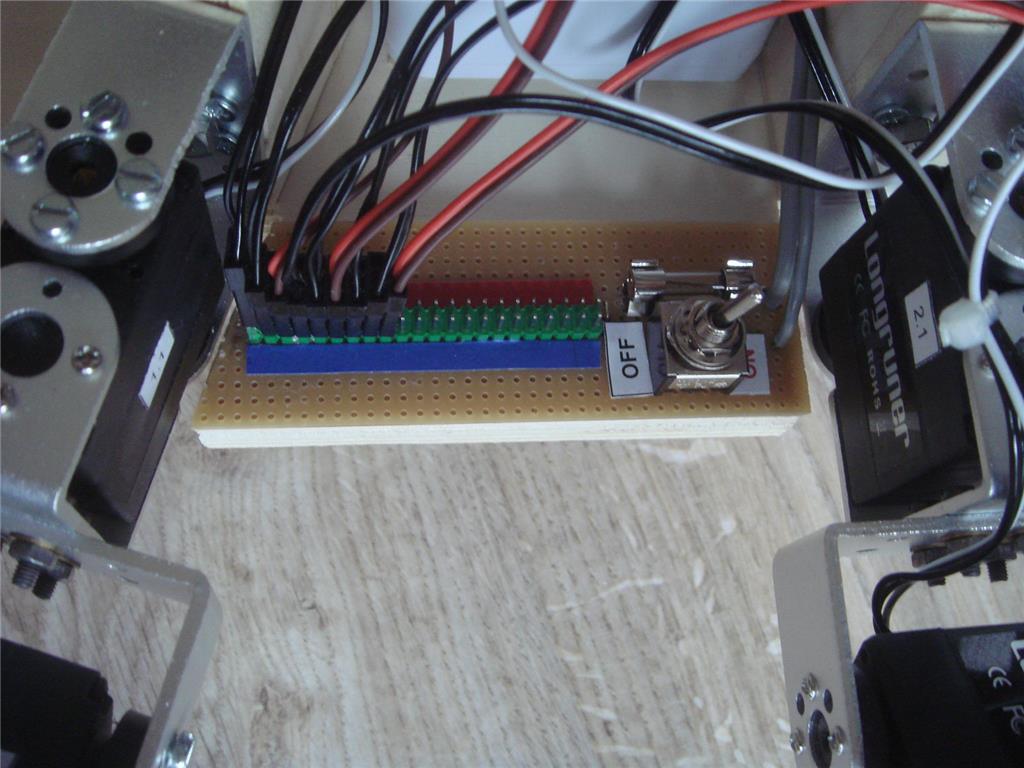
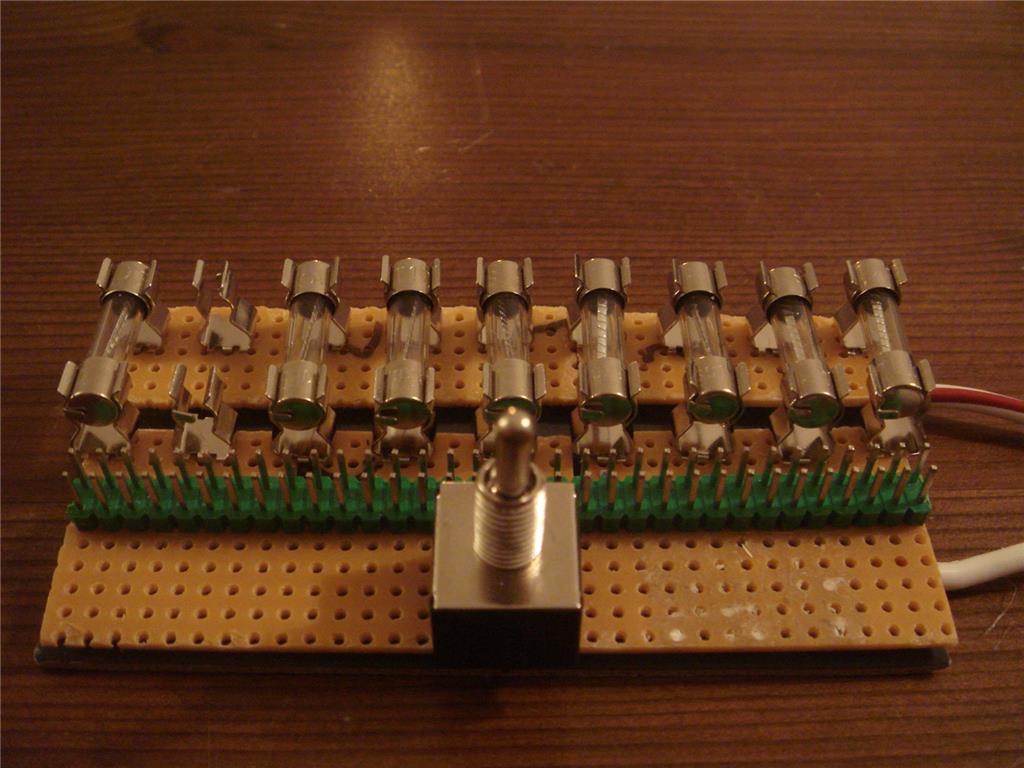
In order to suppress unwanted rapid servo motions during EZ-B initialising, a switchable power distributor was added for each side (servos 1.1 through 3.3 and servos 4.1 through 6.3, respectively). These units are served by a central 2S2P LiPo battery (10.000 mAh) and are protected by individual fuses and are galvanically connected to the EZ-B.

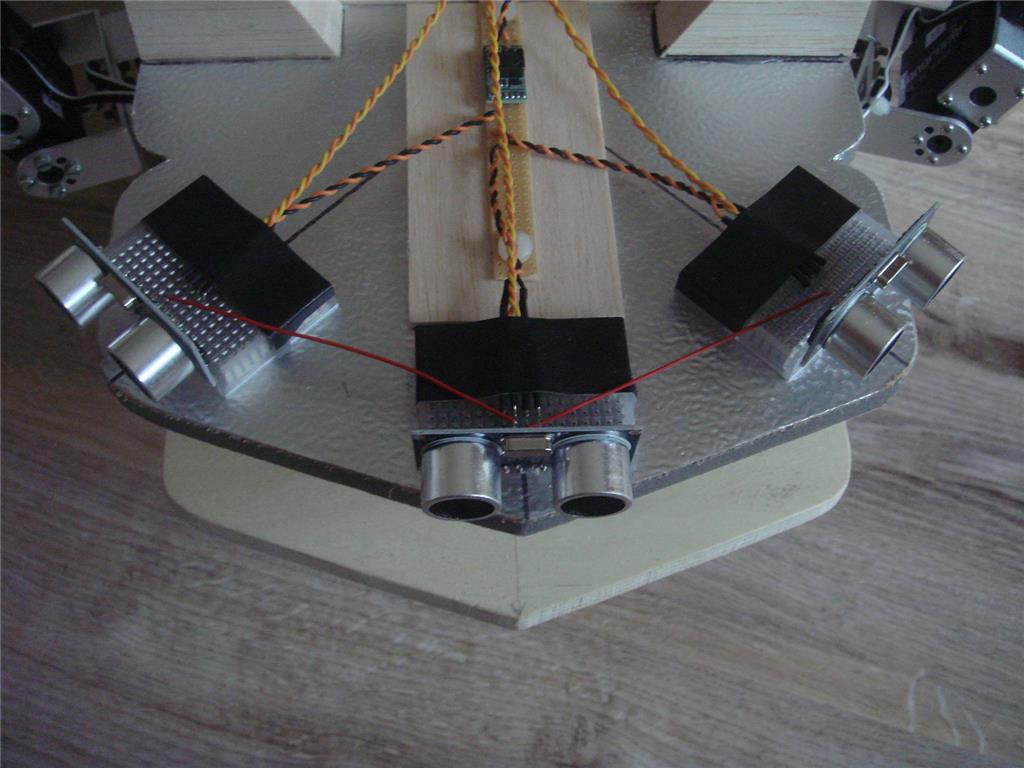
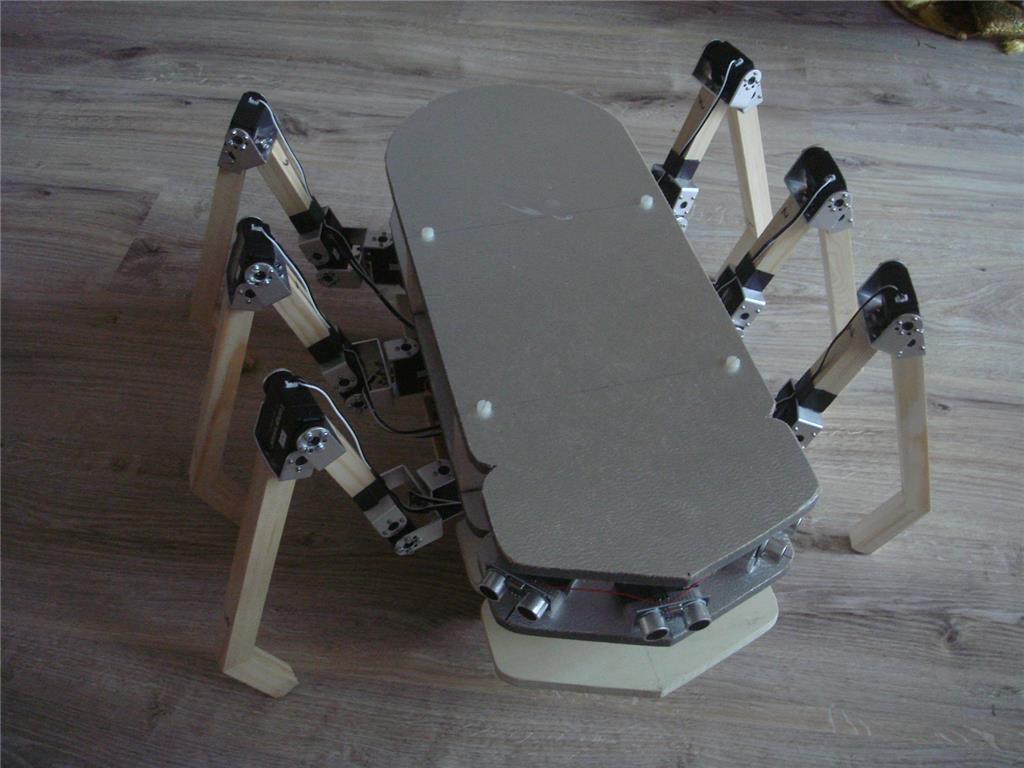
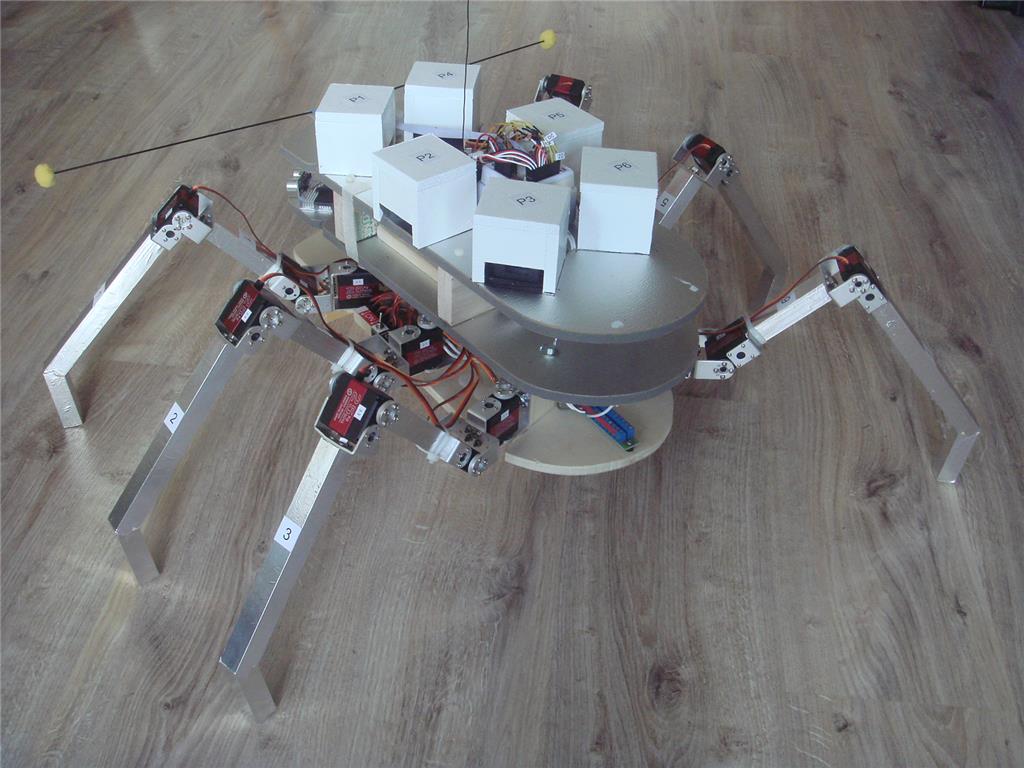
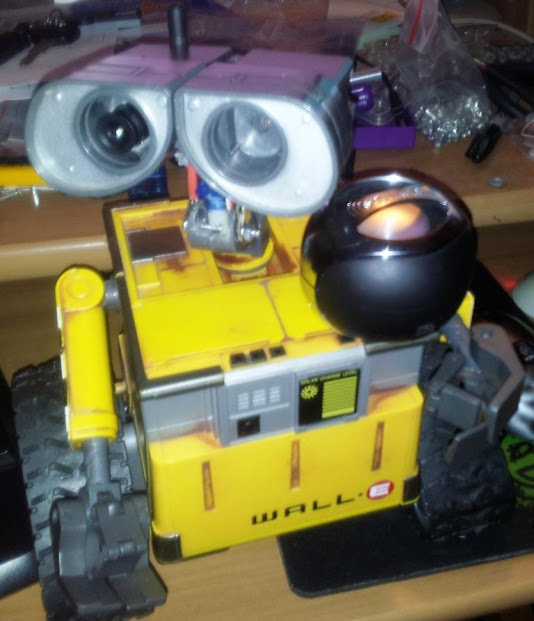
Only the signal pin of each servo is directly connected to the EZ-B. servo Vcc and GND are both fed by these power distributors. Result: During EZ-B initialisation all servos are switched off - to be activated via toggle switches as required. Of course, all servos need to be positioned adequately beforehand. Currently, the hexapod is looking like this (together with his silent friend).


Programming was done in Synthiam BLOCKLY; surprisingly, the final version was completed within two days only !
Upcoming activities: First steps in the garden (Forward direction). Then: Backward, Turns, Sideways.
So long, that’s it for today,
Cheers
Volker
Discover more robots
Thefoolmonty's Joc's Ucontrol Wall-E
Igor's Robot Guard

Hi DJ,
sorry to say, but there are no filters around.
It is just mother nature that cares for the separation of these spectral ranges (VIS + NIR vs. Mid-IR).
In fact it is one of the advantages of such an approach that no filters at all are required.
Hi guys,
the large insect is about receiving its heat-sensitive sensors for later locating the charging station for its battery, once strolling around in the garden.
A hot black body source (T appr. 100C) will be installed at this station (size of a flat iron) so that the hexapod will be able to home in from any point; just picking up the heading to this target and start following this thermal signal.
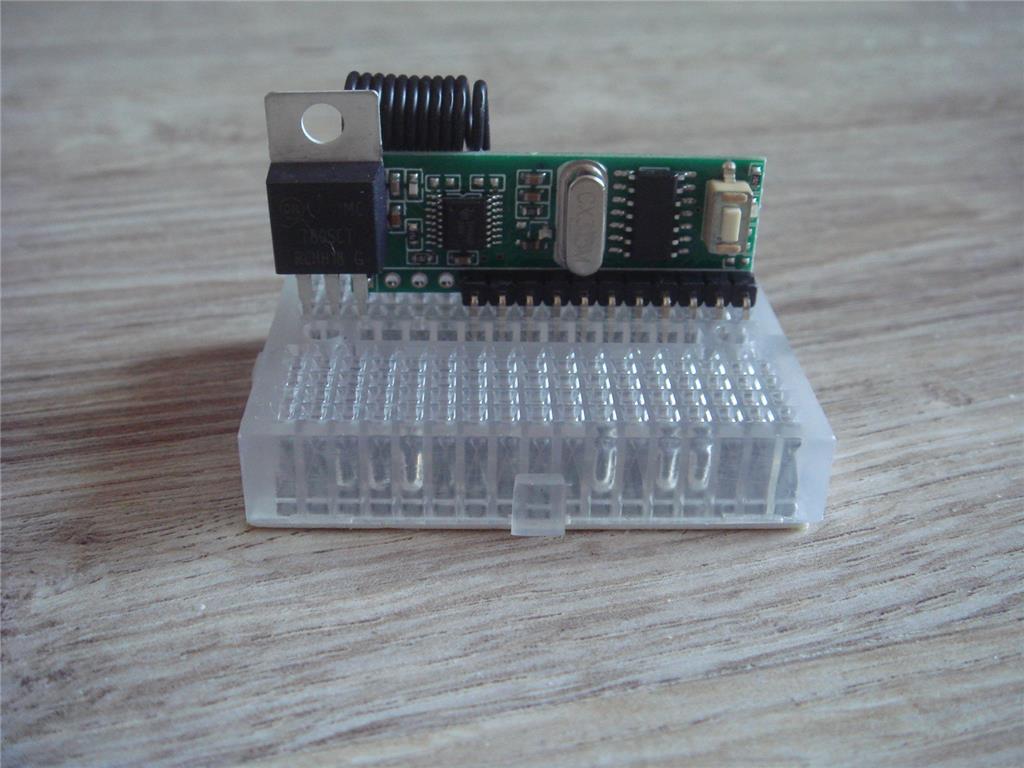
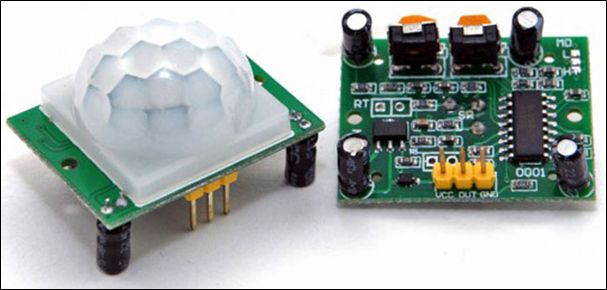
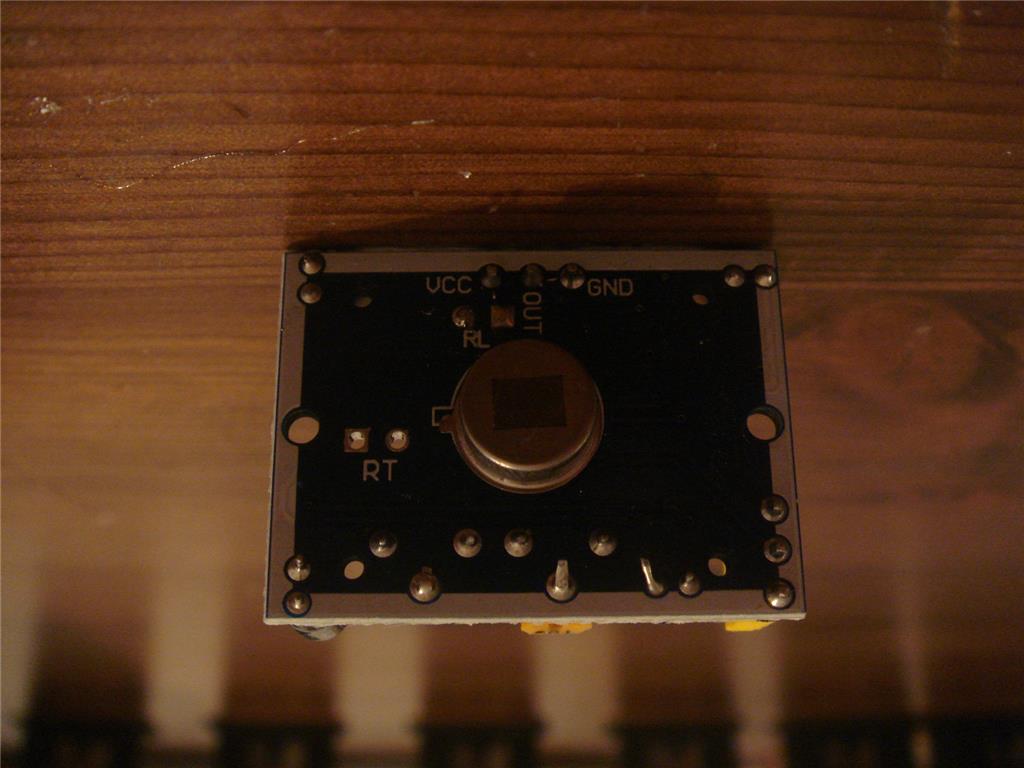
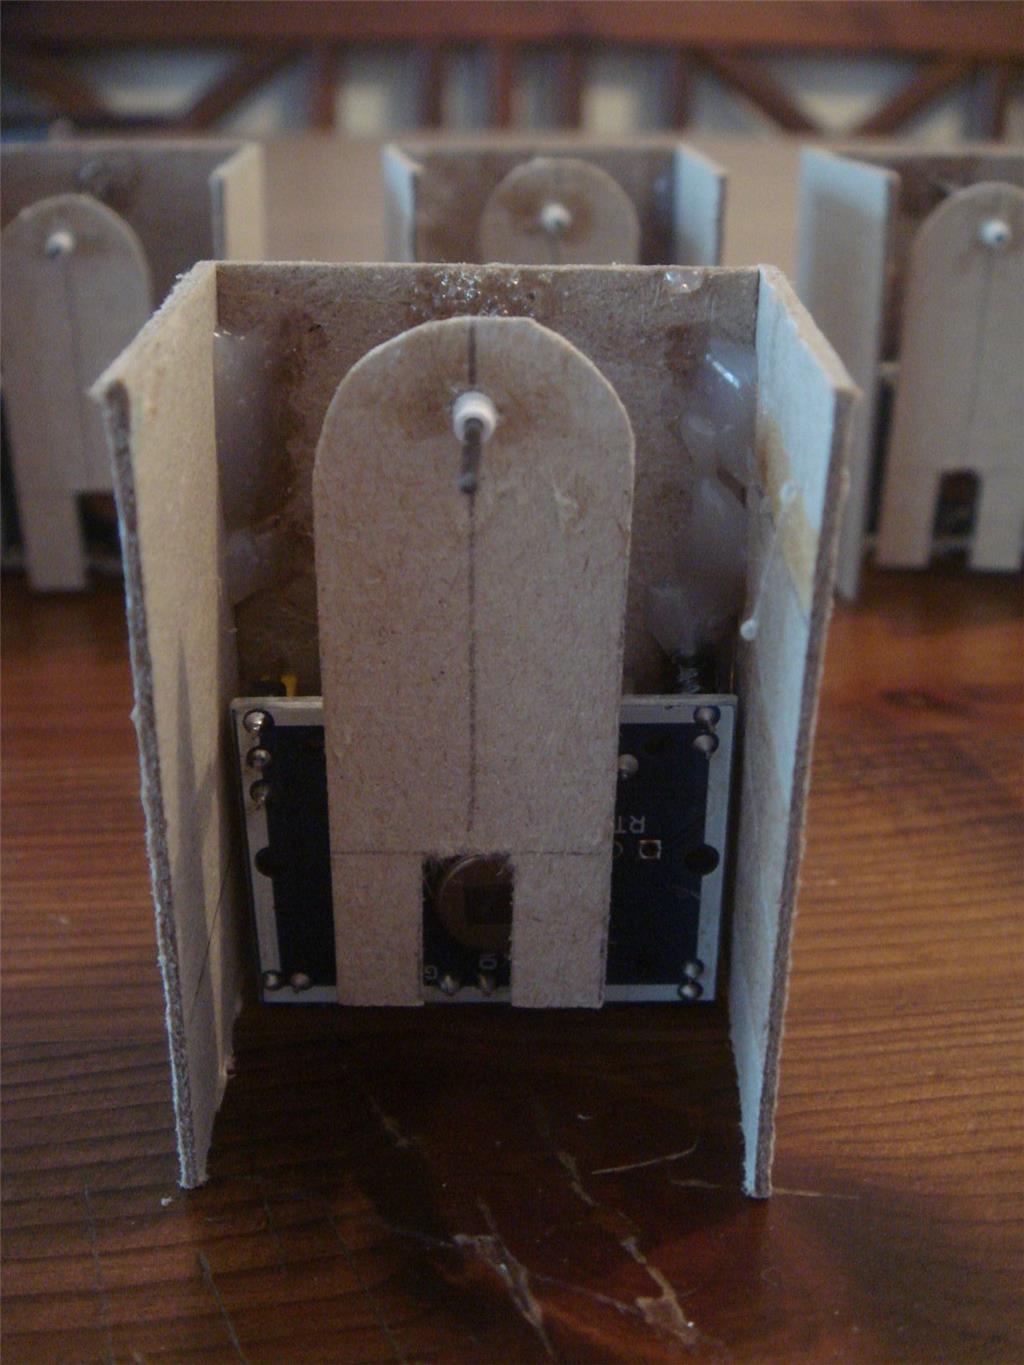
As mentioned in a previous contribution, HC-SR501 boards, comprising a small PIR sensor element, will be used. These are normally delivered with a wide-angle lens that needs to be removed for the current usage.

HC-SR501 board with PIR sensor - wide-field lens removedSix of these sensors - mounted at the upper deck - are covering the complete 360 azimuth around the insect.
Unfortunately, operation of these PIR sensors is jointed with a major disadvantage: They only react on changes of thermal signatures, meaning that they are only generating a single HI output pulse if a warm object is entering or leaving their field of view (fov), respectively. Pulse duration is adjustable within a few seconds.
If such a warm object would quietly stay within their fov, no further HI pulses would be generated (no intrinsic re-triggering).
Required: Modulated thermal signal.
Potential solutions: - Modulation of the warm transmitter (black body) itself is not possible due to its high thermal inertia. - Modulation of the thermal signal at the receiver is quite easy: A small cardboard pendulum with a central aperture is mounted immediately in front of the sensor aperture.
Due to the hexapod’s rumbling motions, this pendulum will swing; periodically covering the sensor aperture.

Sensor in housing with pendulum in front (sensor yet not well centred)By this neat mechanical device, the received black body’s thermal signal is amplitude-modulated: ON-OFF-ON-OFF-ON-OFF .., meaning that the HC-SR501 sensor is periodically re-triggered; thus generating a continuous HI signal as long as the black body will stay within its fov.
Basic requirement: Pendulum periodicity needs to be shorter than a single sensor HI pulse.
The following figure is illustrating the principle of this pendulum (here simulated by tilting the sensor housings):

Left: Pendulum at maximum left deflection (sensor blocked), Center: Pendulum at centre (sensor free), Right: Pendulum at maximum right deflection (sensor blocked).Problem solved !
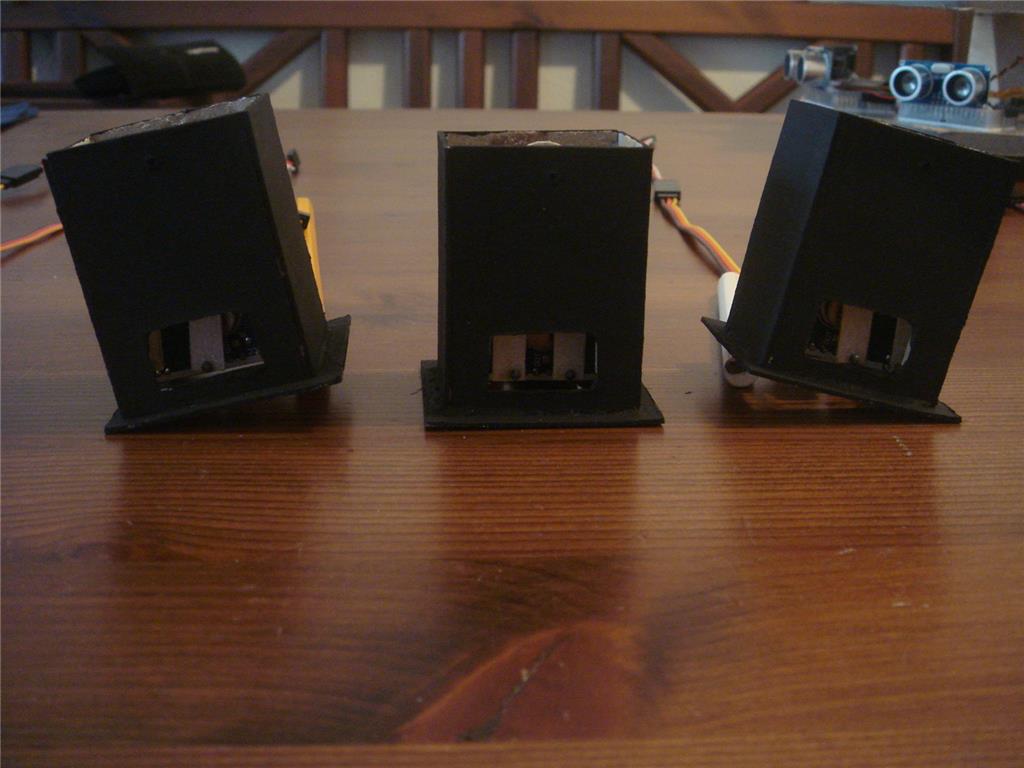
The little sensor units with their pendulums are mechanically sensitive and do require sturdy bodies (figure below). A white coat will ensure that their interior will stay cool (thermal sensors inside !), even during hexapod operation in bright sunlight.

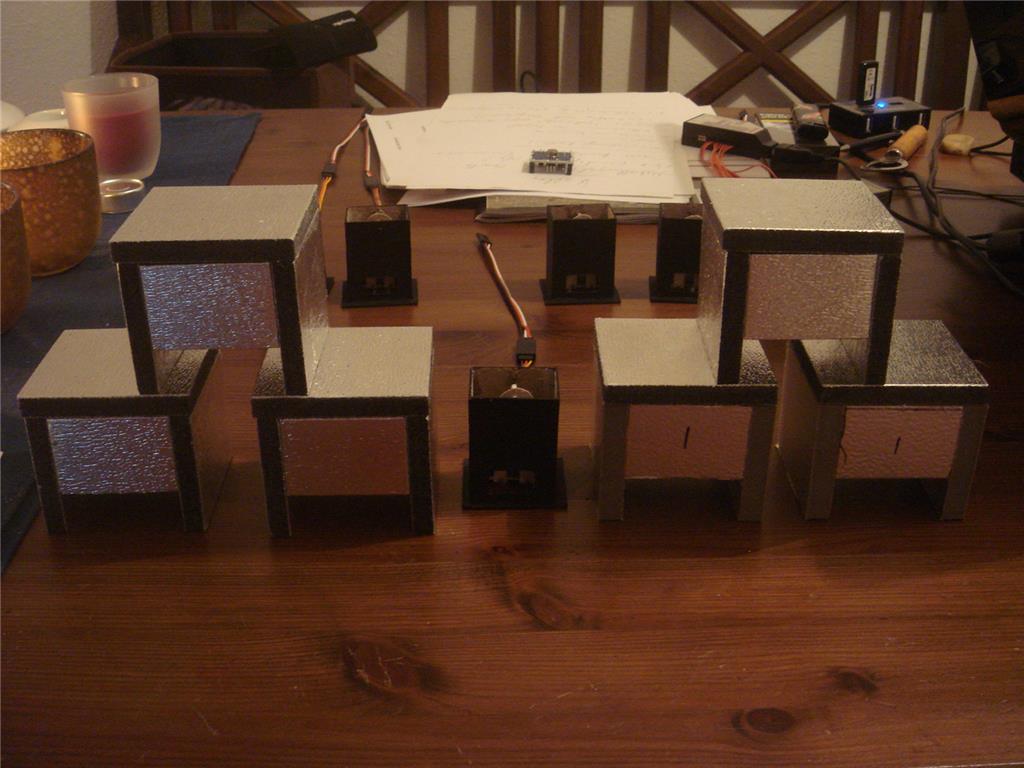
Six sturdy sensor bodies (white coat still to be applied)In order to minimise payload mass, these bodies as well as the insect's mid deck and upper deck had been made from 10 mm sandwich foam plates (both sides covered with 0,2 mm aluminum.
Next steps need to concentrate on suitable Blockly software routines so that the hexapod will reliably pick up the heading towards the black body (charging station) to commence homing in towards the charging station.
So, that’s it for today
cheers
Volker
Wow!! I’m thoroughly impressed. Can’t wait to see it in action! Thanks for sharing the details. I find your build interesting
Hi DJ,
do you see a change that camera commands in Blockly could also be indexed ?
The "large insect" is currently undergoing a kind of "metamorphosis" towards an autonomous instrument carrier.
I am currently thinking about an onboard digging device in the rear for autonomous capturing of soil samples that had been identified as "interesting" by the front camera.
A second camera (mounted in the rear) would be very useful for monitoring these sampling activities.
Thanks for a brief comment !
Cheers
Volker
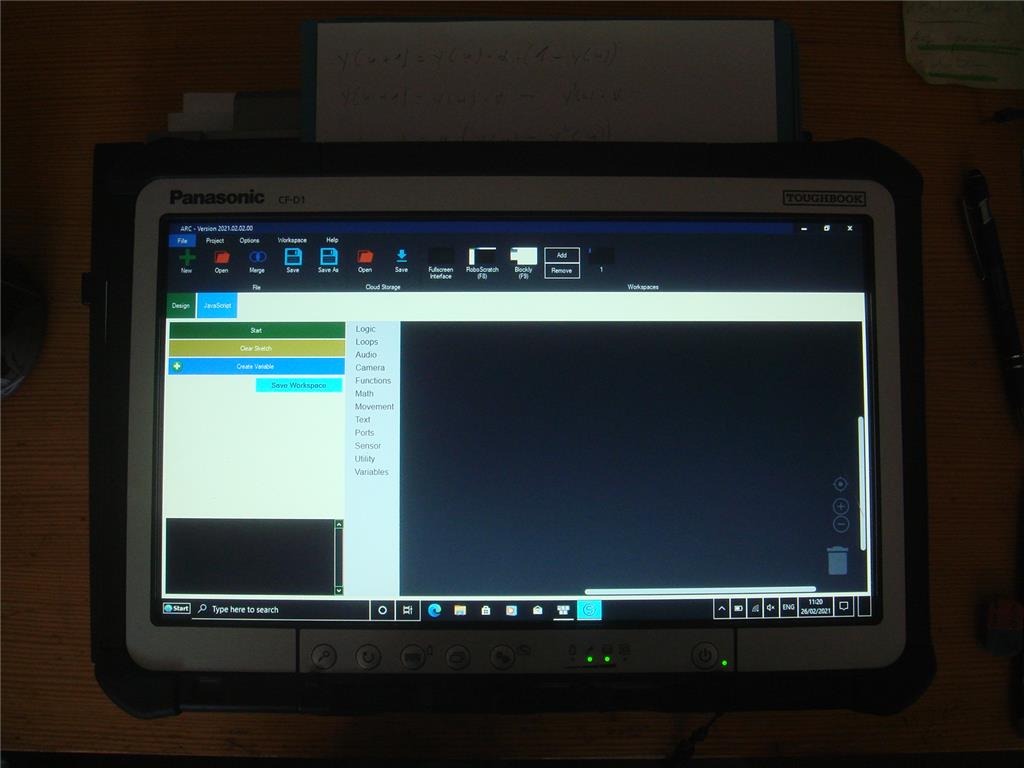
Hi DJ,
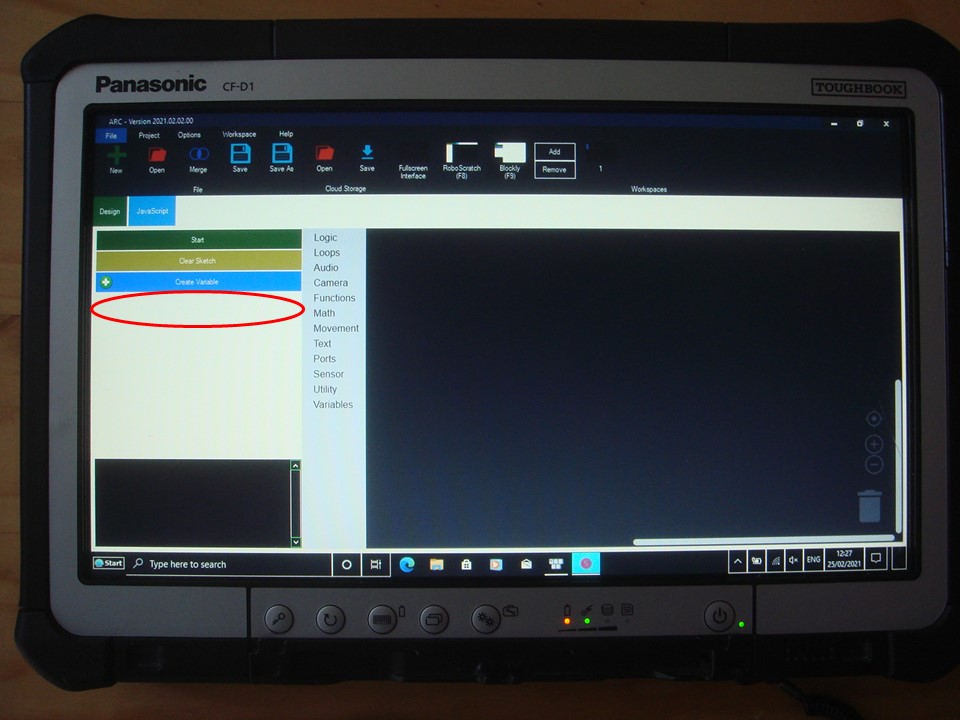
just installed ARC 2021.02.02.00 on another PC (Panasonic Toughbook) and noticed that an important BLOCKLY feature is missing:
The file managment line "Load Workspace Save Worspace",
normally located between the lines "Create Variable" and "Camera Preview".
OS of this device is WIN10 Pro.
On my other PCs (desktops and laptops), everything is OK.
Any idea, why I cannot handle BLOCKLY files on that machine ?
Many thanks in advance !
Cheers
Volker
Ensure you're viewing the Blockly interface and here are the load and save workspace buttons..
Unless by chance you are viewing scripts of a robot skill, in which case there is no "workspace" in robot skills.. Robot skills may be imported using the Merge option which allows selecting skills from other projects to merge.
Hi,
of course I had selected the correct window; I am working with Blockly for many months now.
My fault: I had forgotten to add a figure, showing what I meant.
here is this Blockly window without load and save workspace buttons:
It seems that also the camera preview window in the lower left is not being loaded (compared with your example).
I will now remove ARC via Windows system tool and will re-install it; maybe this will help.
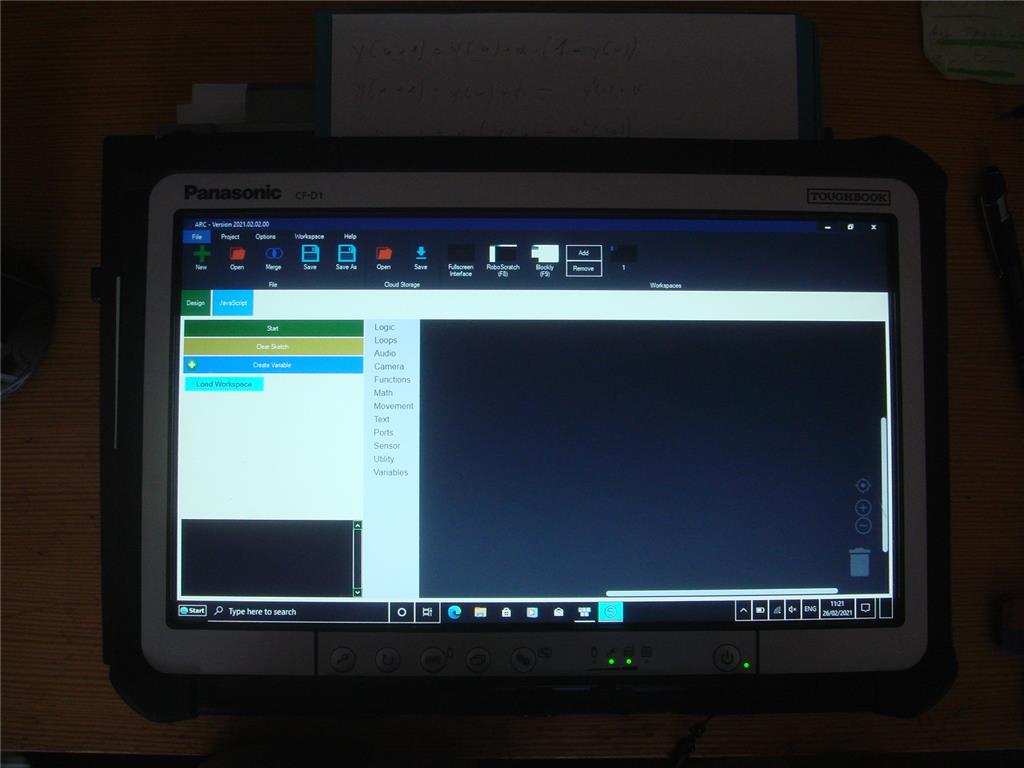
After ARC re-installation: 50 % success - this PC (Panasonic Toughbook) is operated by touchscreen and pen.
Hitting the potential location for one of the BLOCKLY save or load buttons with the pen, one of them will appear (see below).
A bit strange behaviour, but this is OK for me, since these functions are now available.
However, the section with the Camera Preview (normally immediately below these save and load buttons) is still missing