
Asked
— Edited
Hello,
i have a problem with my inmoov.
I add a "talking servo" i adjust the servo - everything is fine i have only one problem:
After a sentence the inmoov leave is mouth open. Nevermind how long or short the sentence is... the mouth is in the end still open.
I cant find any option to say after a sentence got to this servo postion.
Thanx for help.
Boris

@Boris.
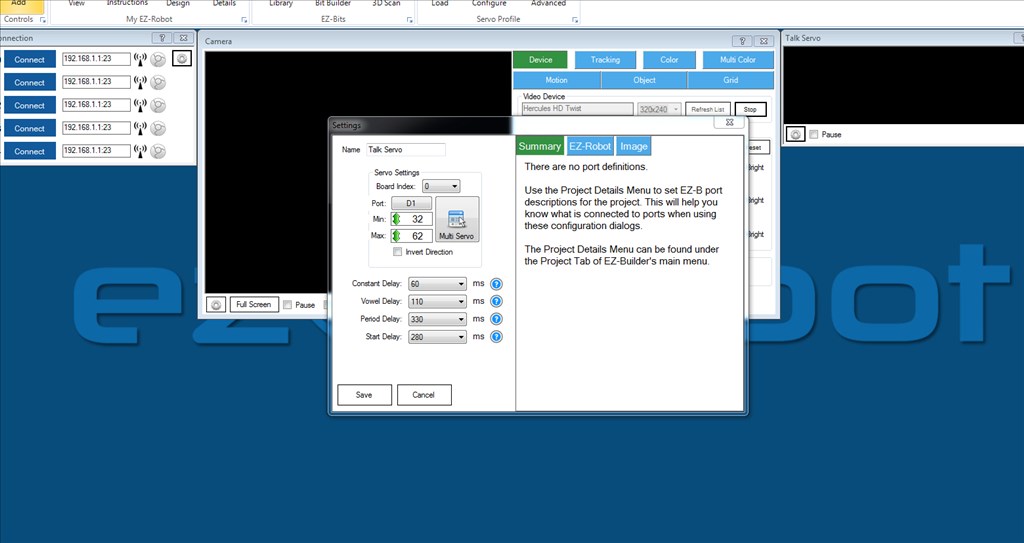
Does the mouth move in sync correctly when the words are spoken (word spoken, mouth open, nothing said, mouth closed)? One suggestion is to click on the "Invert Direction" box under the "Min" "Max" servo positions and see if this helps. Give it a try and report back here to let us know how it helped.
Hi Steve!
i change the servo from a hitec to a toward pro servo and now my Inmoov is closing his moth after the sentence.
I don't think it was the servo, but in the end it works!
Thanxx Steve for your fast help!
Boris
No problem. Glad you got it sorted out, but strange how a different servo made the difference. I wonder if one servo is digital and the other was analog, although I wouldn't have thought that would make a difference. At least it's working properly now.
Hello,
back again (me and an old problem)
I slowly finish my Inmoov Head and i have the same problem with the Talking.
Now i use a nice new Hitec Servo, but the same. After a sentence the mouth stays open.
Ok i check the invert function, but funny - there is no reaction of the mouth!
So is the invert Function of the talking servo not working?
Boris
you can set your Jaw servo to close after each time he speaks....
This is how I do mine
You need some form of punctuation: https://www.edufind.com/english-grammar/punctuation/
Hi DJ, Hi Richard,
But the funny thing is, with the same settings the other servo close the mouth.
But why the invert function don't work?
Really no reaction with marked invert option. With unmarked full working mout but at the end still open.
Invert would open when it's supposed to be closed and vice versa. You need punctuation for proper grammar.