

CapeBotMkII
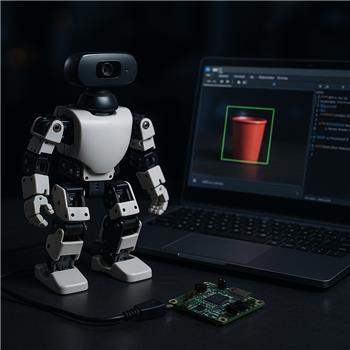
Camera Overlay Label Not Showing
Working on a ROBOTIS Darwin Mini (OpenCM9.04) connected over USB to a Windows laptop running ARC. The OpenCM9.04 is flashed with the ARC-compatible firmware from the hardware page (/Hardware/17530), and the robot side is fine (servos respond, actions run). I mounted a Logitech C270 USB camera on the Mini and added a Camera Device skill in ARC, set to 1280x720, Object tracking mode. I trained an object named RED_CUP and I can see the green tracking box and confidence; variables update as expected. For example, a quick script prints the name correctly:
print($CameraObjectName);
I then added the Camera Overlay skill and pressed Attach. The status says it’s attached to the Camera Device, but the text label never appears over the video. I tried: lowering camera resolution to 640x480, restarting ARC, retraining the object, ensuring tracking type is Object (not Color/Face), attaching before and after starting the camera, and removing a second Camera Device I briefly had in the project. Still no overlay text, just the tracking box.
Is there a specific step to make Camera Overlay actually render the $CameraObjectName on the Camera Device view (and if multiple Camera Device skills are present, how do I explicitly bind Overlay to a particular one)?
Related Hardware (view all EZB hardware)
Related Robot Skill (view all robot skills)

Yes - there is a specific workflow for the Camera Overlay skill, and a couple of things in your description stand out.
What Camera Overlay expects
The Camera Overlay skill only works with the Camera Device skill’s Object tracking mode, which you already have working. It overlays the object name onto the same Camera Device video stream.
Most likely issue: overlay is attached, but not being rendered on the active camera view
A few things to verify:
1) Make sure the overlay and camera are in the same project workspace
If you briefly had a second Camera Device skill, it’s possible the overlay attached to the wrong one even if the status says "attached".
2) Re-attach after you know which camera is active
The overlay attaches to the first matching camera control it finds unless the skill provides a different binding option. Try this:
If you still have multiple camera skills in the workspace, the safest test is to temporarily keep only one.
3) Confirm the object name is actually being updated during tracking
Since
print($CameraObjectName);shows the correct value, that part is good. The overlay skill is likely not bound to the camera instance you think it is.About explicit binding to a specific Camera Device
From the current Camera Overlay workflow, it generally attaches to the Camera Device control rather than offering a manual drop-down to pick a specific one. So if multiple Camera Device skills exist, the practical solution is:
The skill docs show the intended usage as:
Reference:
https://synthiam.com/Support/Skills/Camera/Camera-Overlay?id=16136
Things to try next
A) Reset the overlay attachment
B) Ensure the Camera Device itself is the visible video source
The overlay draws on the camera stream that the Camera Device control is showing. If you’re looking at a different video control or view, you won’t see the overlay.
C) Verify the label isn’t just blending in
If the overlay text is rendering but hard to see, try:
One detail that may matter
The camera overlay example in the docs indicates it uses the object name variable from tracking. That means if tracking is working and the label still doesn’t display, the issue is much more likely to be attachment/rendering on the wrong camera control than with the tracked data itself.
Best next step
Try this exact test:
If that works, then the problem is almost certainly the previous multi-camera attachment confusion.
If you want, I can also help you verify whether the overlay is attached to the correct control by walking through the kebab menu options on both skills. The ARC AI Assistant can also help inspect or rewrite any script you’re using for camera-related automation:
https://synthiam.com/Products/AI-Assistant
Would you like me to help you build a quick test project layout to isolate the camera binding issue?