
Jlucben
Steps
- Introduction : Discover Synthetic Intelligence Network Bot development framework
- Step 1 : Install Synthetic Intelligence Network software
- Step 2 : Create a SIML project and install SIML example files
- Step 3 : Install , configure and use the Synbot Plugin in EZ Builder
- Step 4 : Manage the dialog with the Bot
- Step 5 : Working with Synbot SIML variables
- Step 6 : Working with SIML Events
- Step 7 : Accessing in SIML to EZ Builder variables and EZ Builder Command
- Step 7 bis : Working with Bot Emotions
- Step 7 Ter: Bot Save Directory and Learning Models
- Step 8 : Advanced Plugin Configuration options
- Step 9 : Adding new SIML Tags to the language
- Step 10 : New SIML Tags added in the Plugin - Wikipedia Search , Translate , Twitter , Mail , .......
- Step 11 : Pattern Reductions
- Step 12 : SIML Tips and Tricks
- Step 13 : EZ Robot Commands SIML Framework
- EZ Robot Commands SIML Framework - Configuration
- EZ Robot Commands SIML Framework - Configuration - Managing movement speed and duration
- EZ Robot Commands SIML Framework - Configuration - Verb
- EZ Robot Commands SIML Framework - Configuration - Complement and Attribute
- EZ Robot Commands SIML Framework - Configuration - Position
- EZ Robot Commands SIML Framework - Configuration - Authorized Combination
- EZ Robot Commands SIML Framework - Configuration - Free Attribute
- EZ Robot Command SIML Framework - Configuring the Bot Response Message
- EZ Robot Commands SIML Framework - New command creation step to step
- Plugin and Framework Roadmaps
Step 3 : Install , configure and use the Synbot Plugin in EZ Builder
Download and install the Synbot plugin in EZ Builder. www.ez-robot.com/EZ-Builder/Plugins/Category/Artificial-Intelligence
Open in EZ Cloud Appstore the Project JD for SynBot
Add the plugin to your EZ Builder Project ( Project - Add - Plugins - Synbot Plugin)
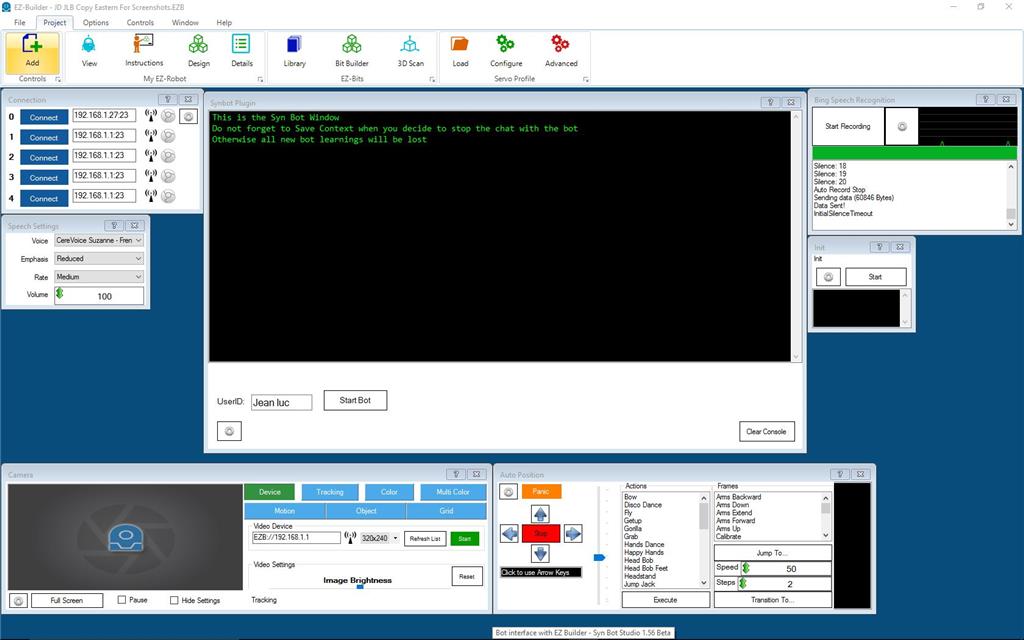
You can start a Bot dialog session with a specific userid. As we will see later , contextual informations can be saved for each userid and will be restored whenever we start a new session for this userid.
But before starting the first bot session we need to go to the plugin configuration form.
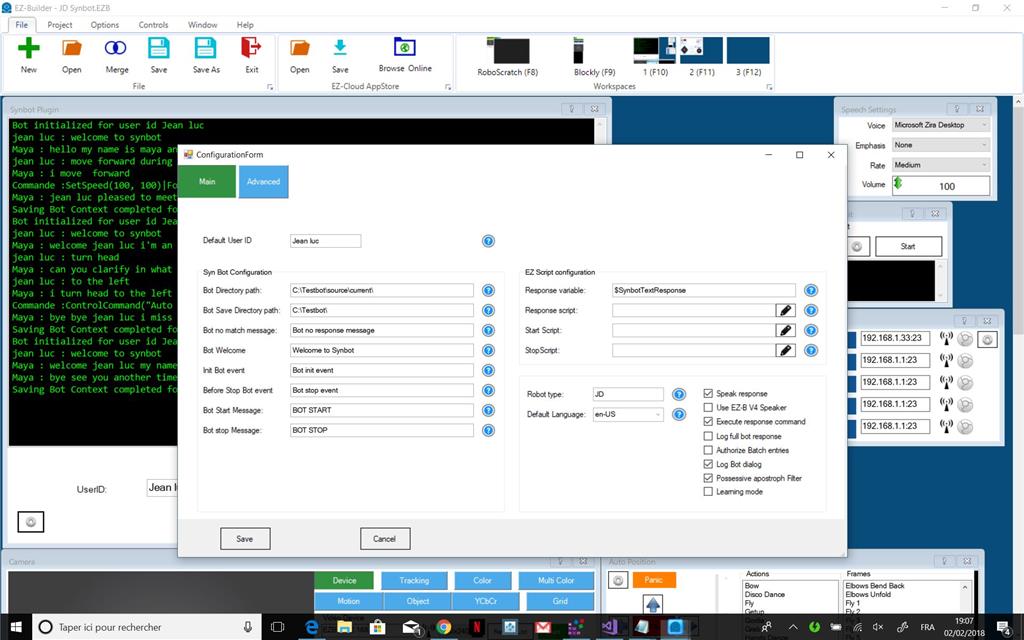
Select the Bot Directory Path - your SIML Project Folder Select a Bot save Directory Path - where will be saved contextual informations global for the Bot and for each userid
Select your default language in the ComboBox You can also define a Default UserID which will be used when no userid is input at the Bot session start. Once OK , Save your configuration options (Save Button)
Other configuration parameters will be explained later.
