
Steps
- Overview
- Download ARC
- Install Visual Studio
- Create Project
- Example Project Overview
- Add Some Buttons
- Publish Skill To Technology Store
- More Information
- Troubleshooting
- UI Components
- Example: EZB Manager
- Example: Saving/Loading Configuration
- Example: Moving Robot
- Example: Move Servos
- Example: Theme Renderer
- Example: ControlCommand() Binding
- Example: Camera Control
- Example: Camera Custom Tracking Type
- Example: Global Script Variables
- Example: EZ-Script/Blockly Edit Control
- Example: EZ-Script Executor
- Example: Custom EZ-Script Function
- Example: Custom Movement Panel
- Example: Output Audio from EZ-B
- Example: Dependencies, Files and Sub Folders
- Example: Finding Other Behavior Controls
- Plugin Compliance
UI Components
The ARC Skill Framework is very powerful because it is entirely open. That means you can access every component and resource within the ARC.exe application or EZ_B.DLL library. There are hundreds of custom .Net user UI components exposed in the ARC application to assist with your robot skill plugin. Including joysticks, buttons, camera canvases, and more.
Theming All skill components will be themed using the ARC standard theme renderer. This happens automatically, so the control colors, look and feel will be adjusted accordingly. There is an Example in another tutorial step regarding themes and the available commands to interact with the theme engine.
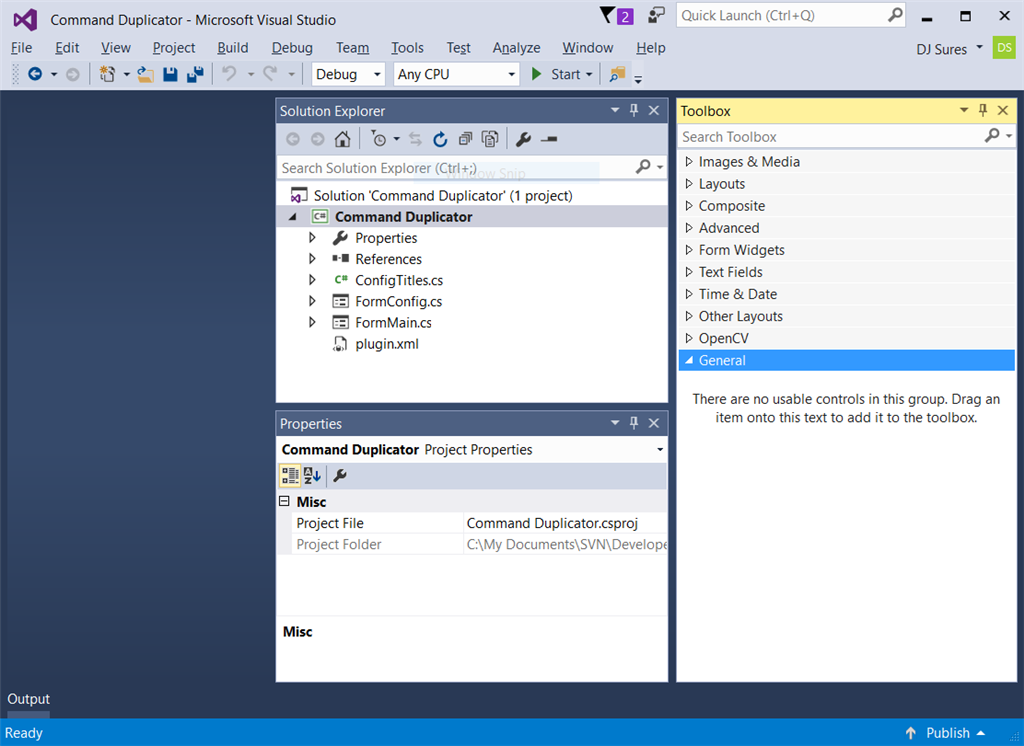
The Visual Studio IDE has a Tool Box, which is used for designer mode when customizing a form. The toolbox can have custom controls added to it. Below is a screenshot of a default toolbox.
Create New Toolbox Tab To keep the new ARC component controls organized, we will create a new category in the toolbox. This is done by scrolling to the bottom of the toolbox list and RIGHT CLICK -> ADD TAB
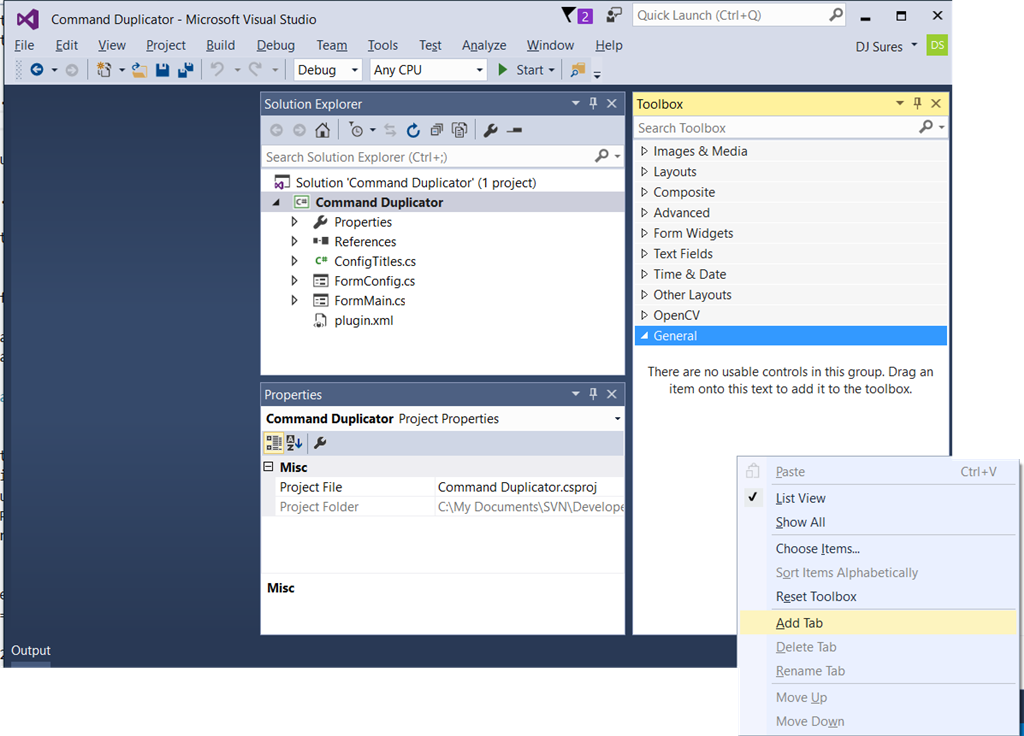
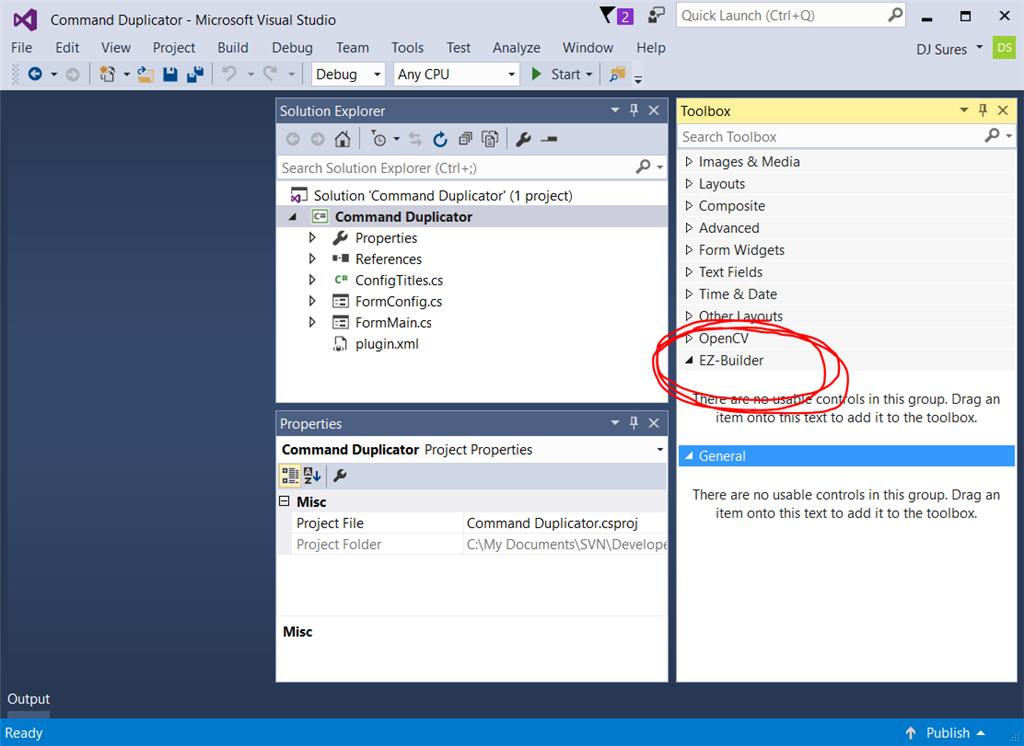
The new tab will be named ARC.
Add Controls To ARC Tab Now we will right click on the ARC tab and select CHOOSE ITEMS
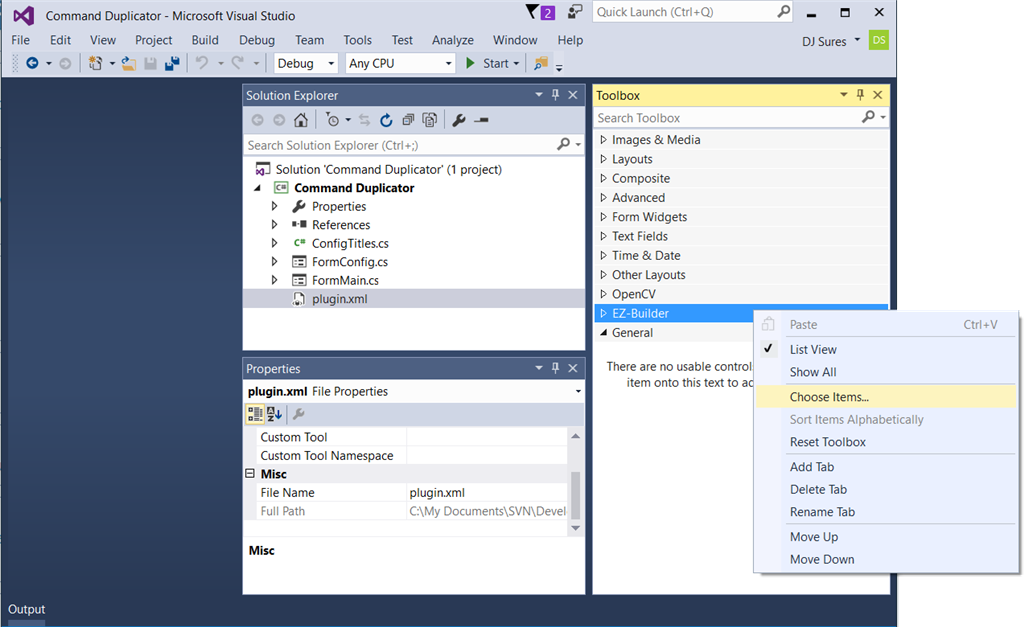
A Choose Items Dialog box will be displayed. It may take a few moments for the dialog to load while it scans and organizes the existing controls within the toolbox. Press the BROWSE button.
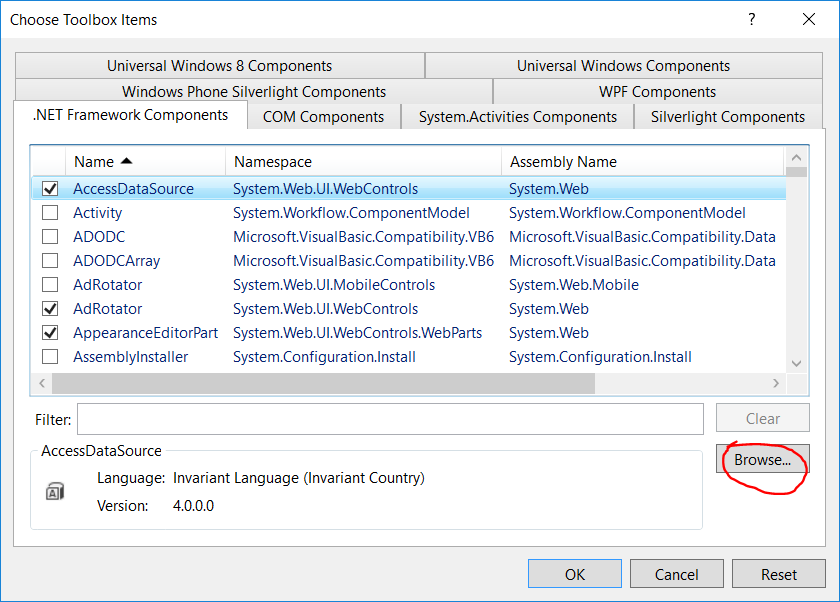
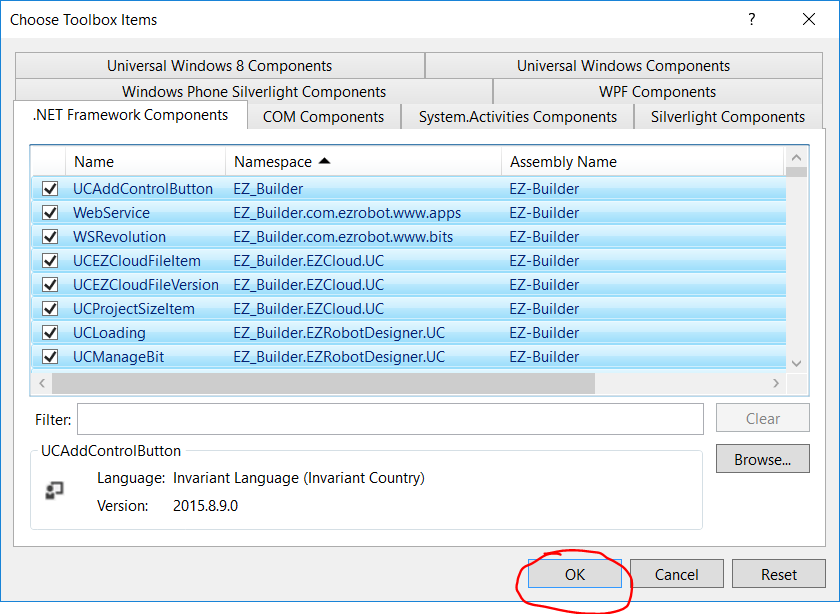
Now locate and select the ARC.exe application in C:\Program Files (x86)\Synthiam Inc\ARC. All controls of ARC will now be selected for the toolbox. Press OK
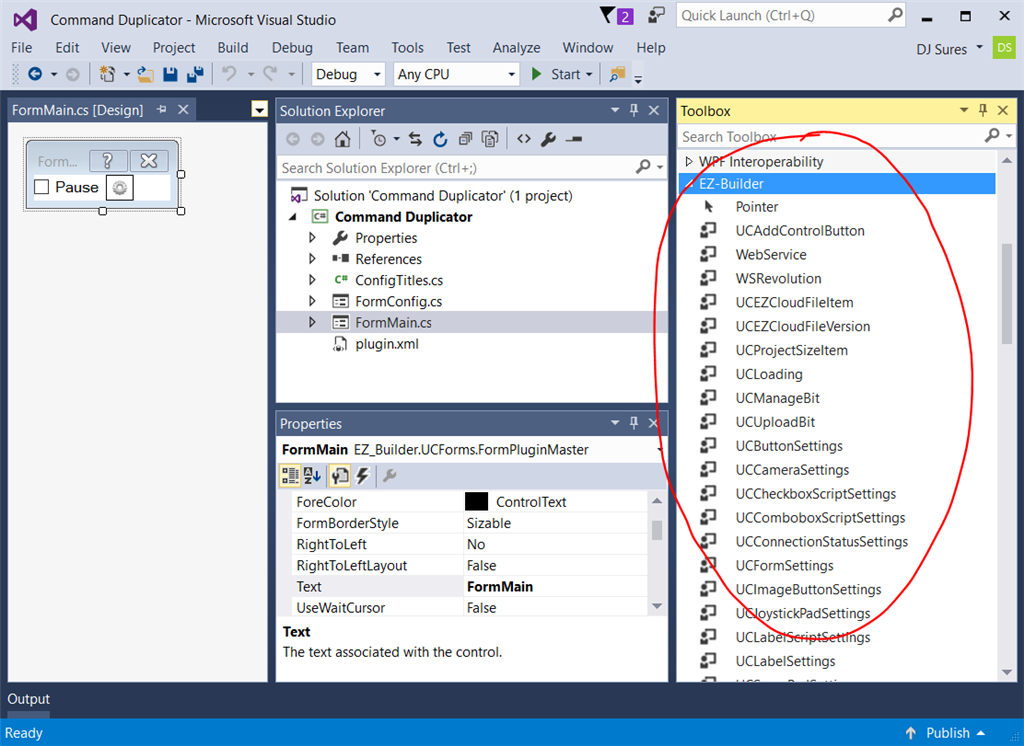
When editing/creating a Windows Form, the ARC tab in the toolbox will now have many new controls that you can begin using. Have fun!

Thanks for the quick response.
This what happens when you are working on robotics when its way past your bed time.
You miss the obvious
No problem - i get it
Sorry but can I ask you something why I didn't see the ARC library when I added visual studio even though I set up the C ++. DLL library and there's another way to execute it and send / receive console in out but I don't know how to do it with EZ_builder?Please follow the tutorial. It’s impossible to know why you’re plug-in isn’t showing up without asking you if you followed each step of the tutorial . Reviewing your screenshots, it doesn’t appear as if any of the tutorial steps have been followed.
Hi i fixed it. thanks
Hello, I am trying the tutorial to get the robot to speak. I am using Visual studio. Currently, the sound is output from the pc instead of the robot. Is there a code I can attach so that the sound comes from the robot speakers instead of the pc?
Look in this tutorial for the step labeled "output audio from ezb". It’s lower down in the list. There’s instruction examples for either playing audio (ie mp3) or text to speech.
Error: the referenced component" EZ_builder,EZ_B" could not be found, DJ Sure i hope you can help me !

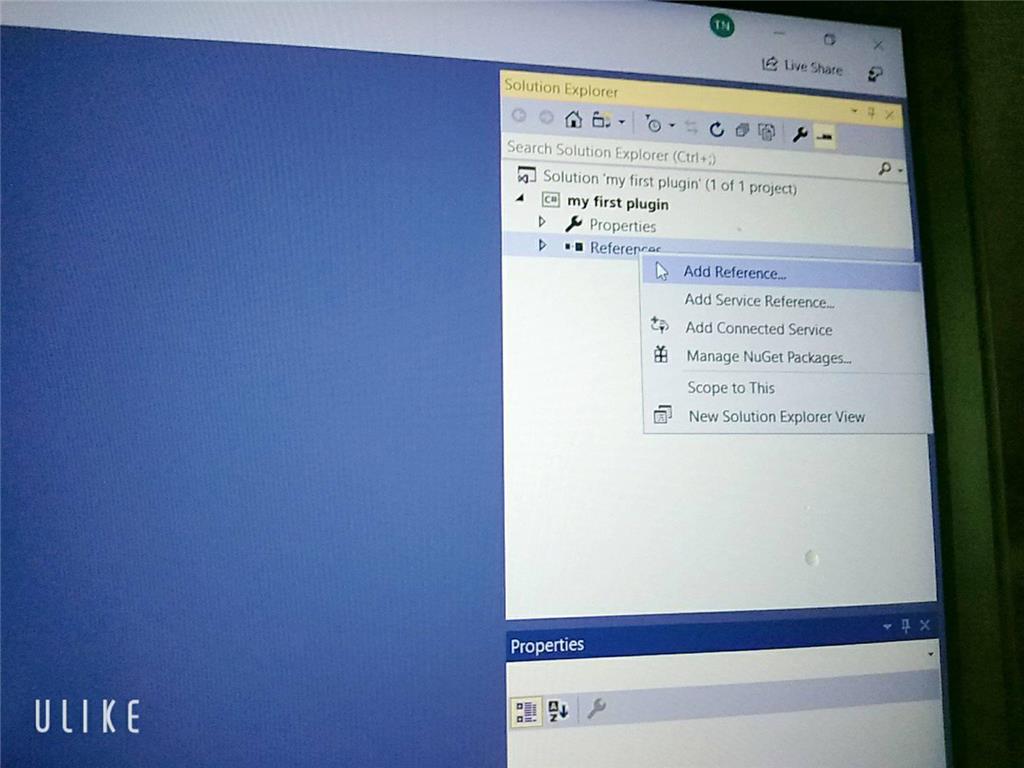
Joinny, you have to add the referencing by following the instructions in this tutorial. They are outlined with step by step to easily follow. Click add references, and browse to the appropriate files as directed in the tutorial. I can’t write anything clearer in response. The step to add references is incredibly clear but you’re skipping it.