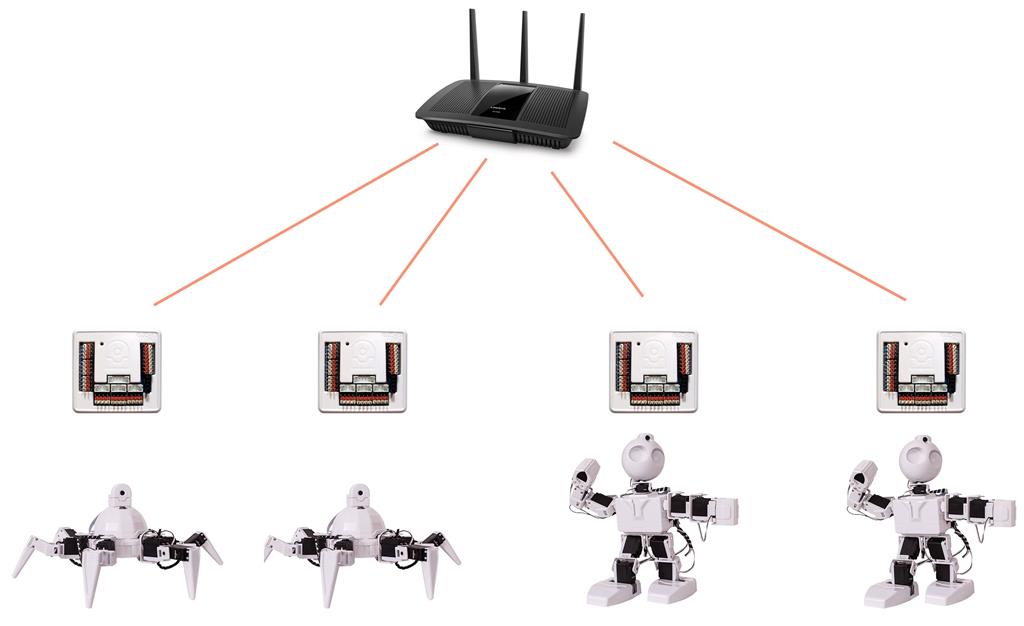
How to control more than one robot in a single ARC project. This tutorial uses Revolution robots that depend on the Auto Position control, but the similar approach can be used for any robot styles.
Configure EZ-B's
This tutorial will help you achieve something similar to how ez-robot created this video...
*Note: This tutorial uses the EZ-B v4.x/2 (Comm 2). Although the process can be achieved with the earlier Comm 1, there will be differences. It is recommended to upgrade to the EZ-B v4/2 Comm Upgrade or replace entirely with a EZ-B v4/2 Wi-Fi Robot Controller to utilize these advanced features.
WiFi Mode The EZ-B of each robot is most likely in default AP mode. That means "Access Point", which you already have learned in the EZ-B Tutorials of the learn section. The AP mode limits the connection between PC and single EZ-B, only. In this step, each EZ-B will need to be configured to connect to a WiFi router in Client Mode.
In this example, we will use 2 Six's and 2 JD's...
Web Config What you will need is a configured WiFi router. Keep note of the WiFi SSID Network name and the password. These two pieces of information will be entered into each EZ-B's web configuration tool.
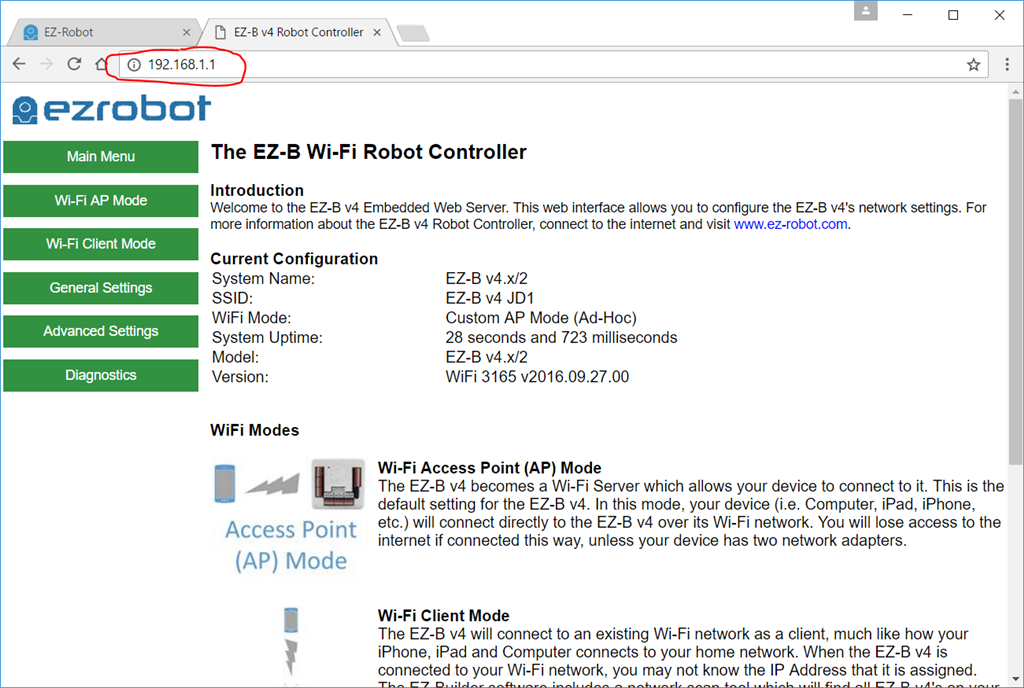
Step 1 Connect to the first robot's EZ-B WiFi network. Visit the default configuration in your web browser: https://192.168.1.1
Step 2 We are going to give this EZ-B a specific System Name, which will be helpful to identify what robot it is during the Client Scan Mode later on in this tutorial. Press the General Settings menu option
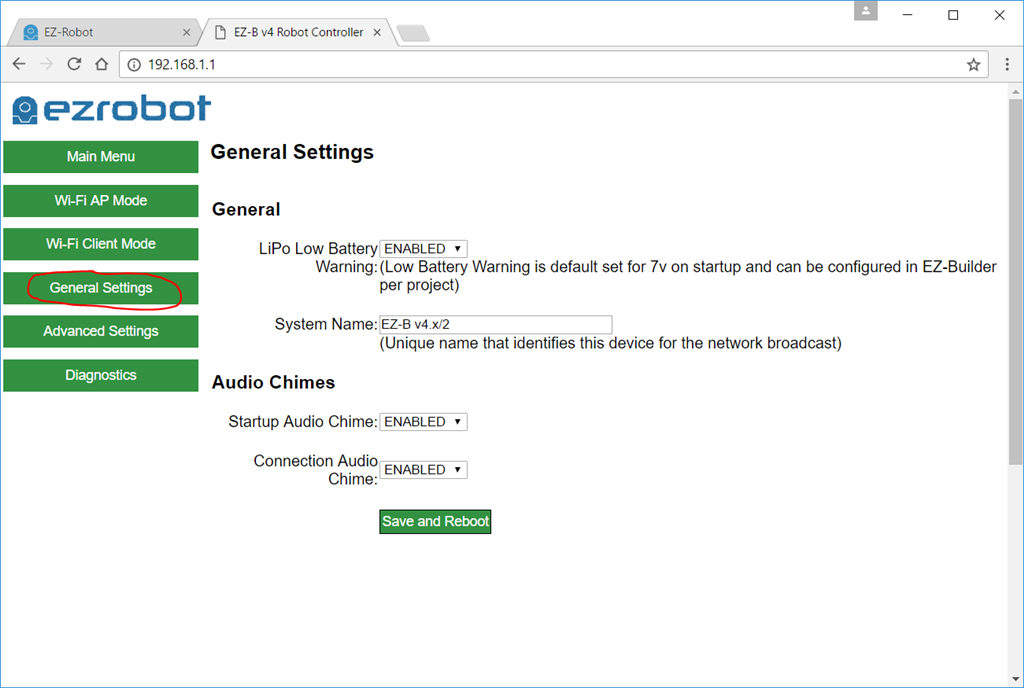
Step 3 Give this robot a specific System Name that defines what robot it is. In this case, I'm assigning this robot the System Name of Six Robot 1. This name will be broadcasted and used during the Client Scan Mode within ARC later in this tutorial. Press SAVE AND REBOOT

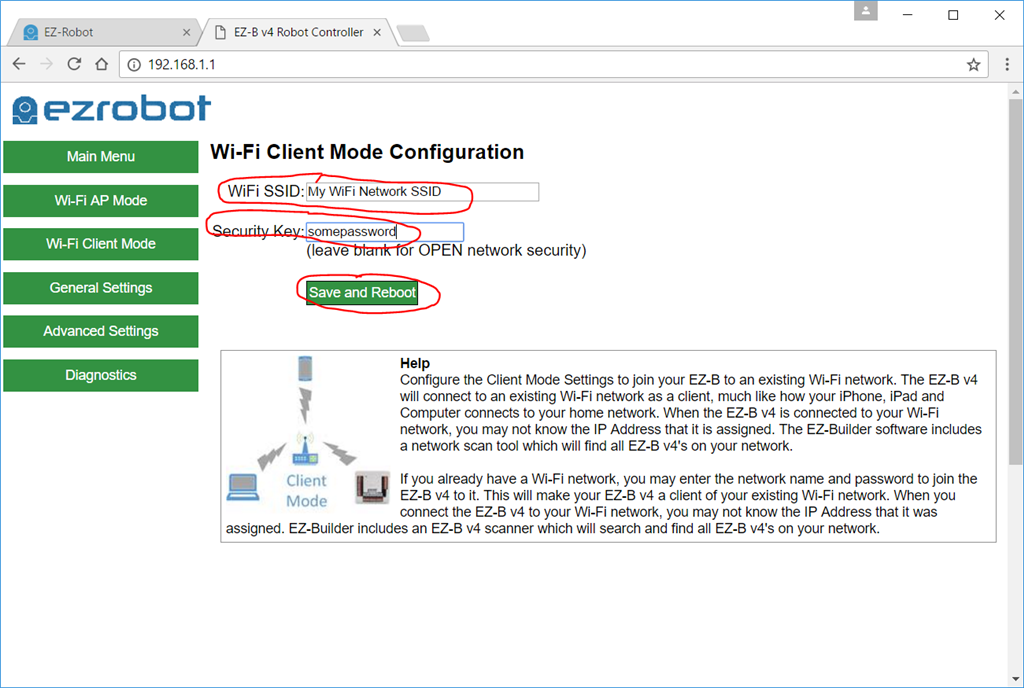
Step 4 The EZ-B will have rebooted. You may need to reconnect to the WiFi, although in most cases it happens so quickly that your PC will still maintain a connection. Either way, we wish to now visit the Wi-Fi Client Mode menu item.
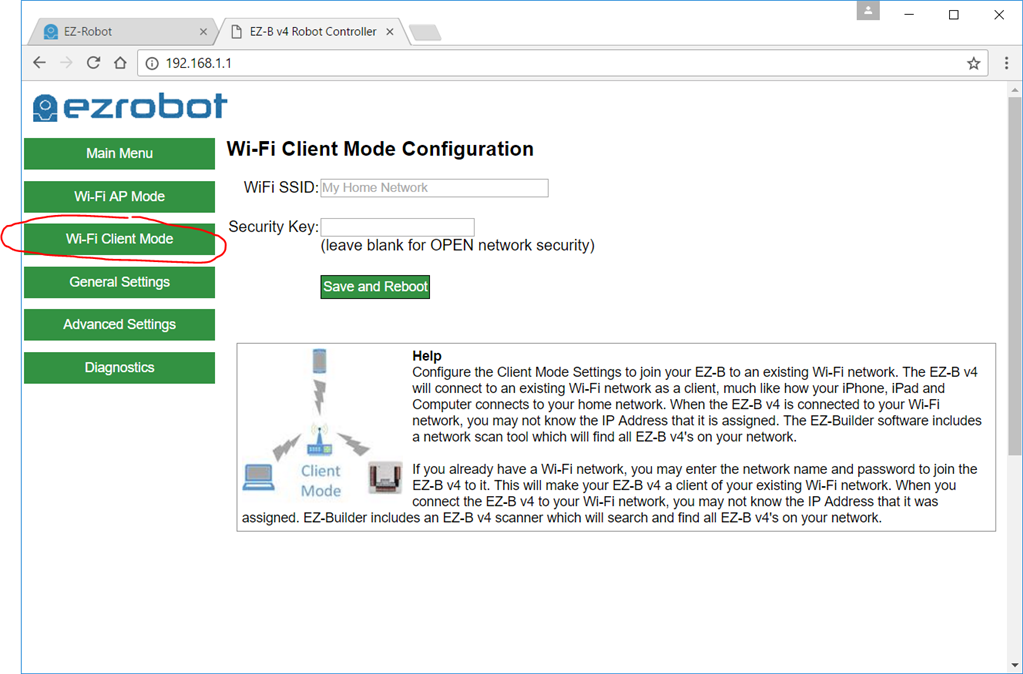
Step 5
Enter the name of your router's WiFi network SSID and its password. Save the settings. The EZ-B will reboot and connect to the WiFi router SSID with the credentials entered. The EZ-B will speak and verbally let you know if it was able to connect. If the EZ-B gives a verbal error message, then manually pressing the RESET button on the EZ-B will be necessary and repeating these steps, but entering the correct SSID and Password of your router next time .
.
Almost There! Now that you have each robot connected to the WiFi network, you can move to the next step of this tutorial.
