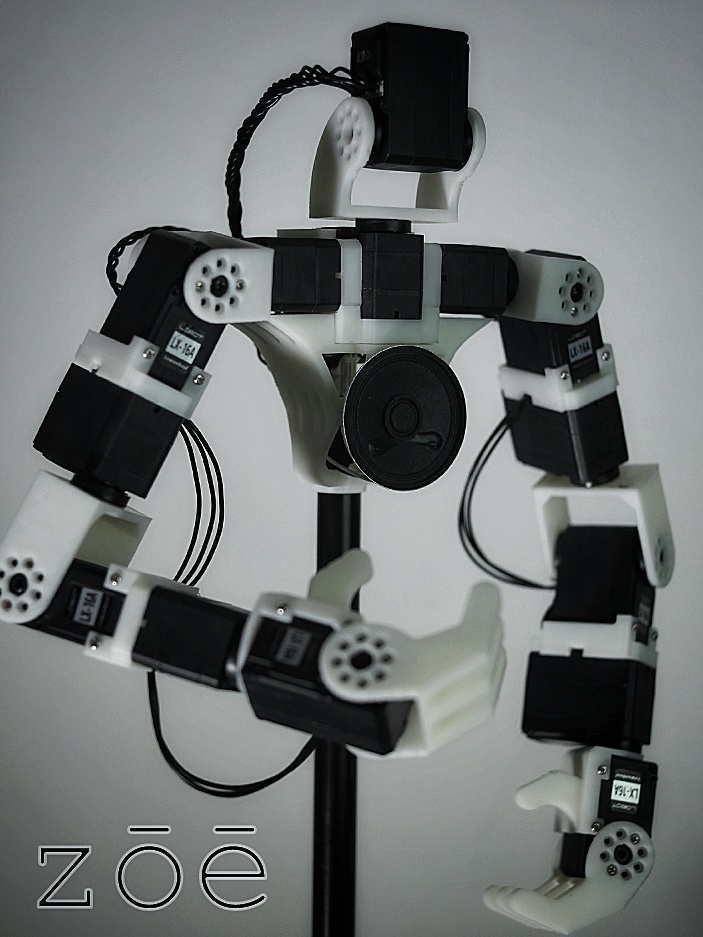
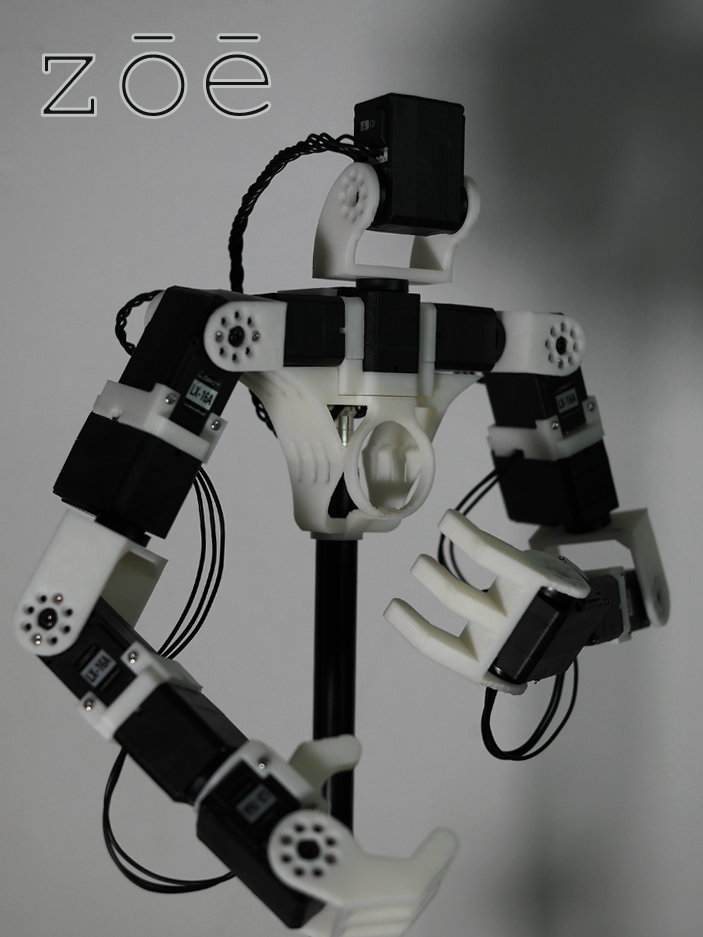
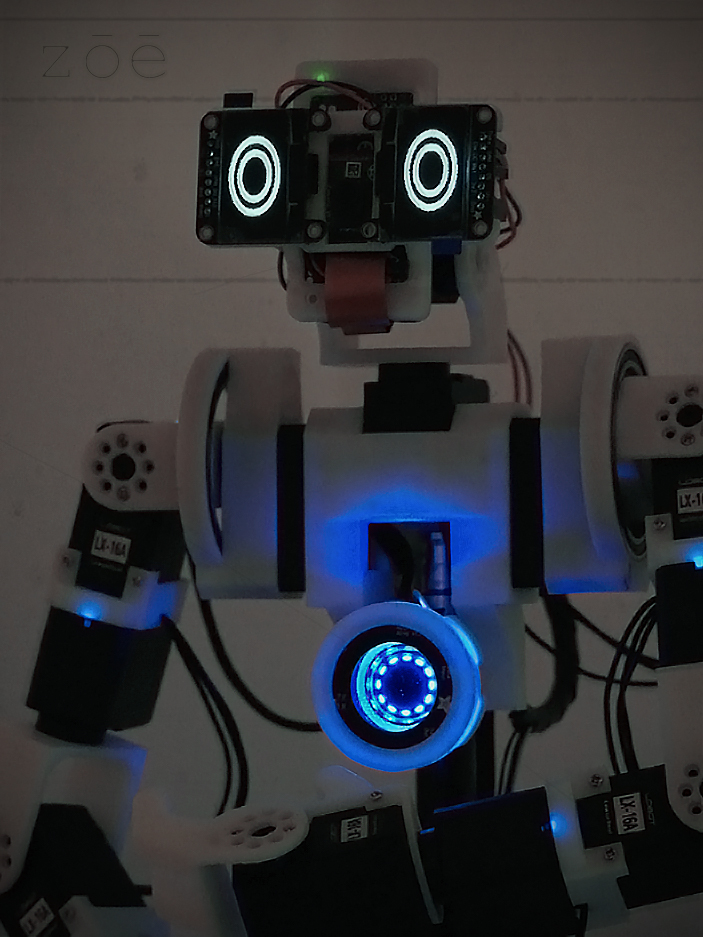
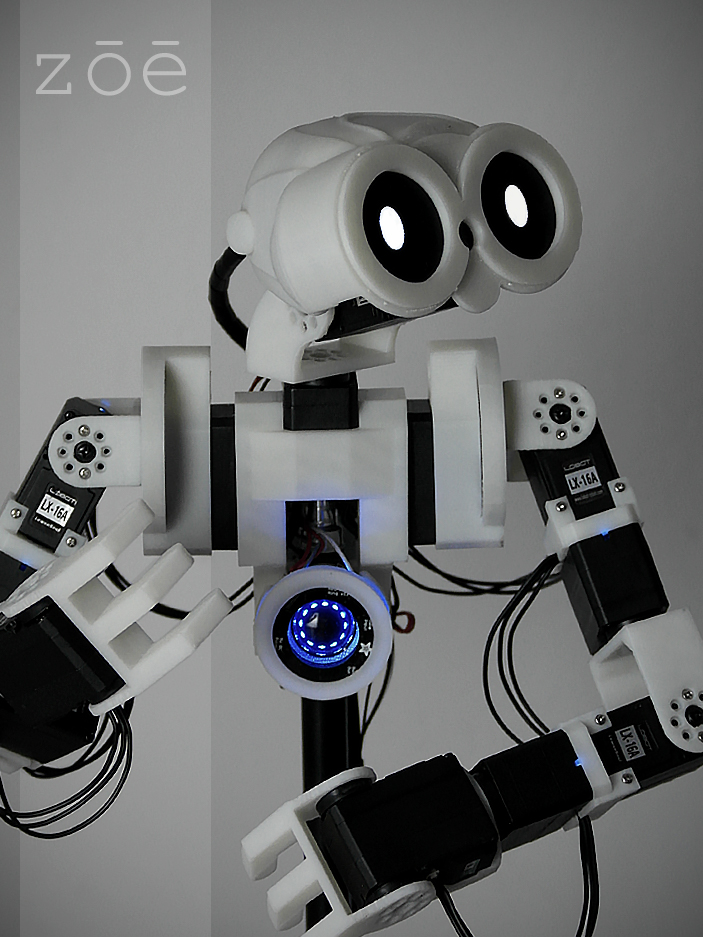
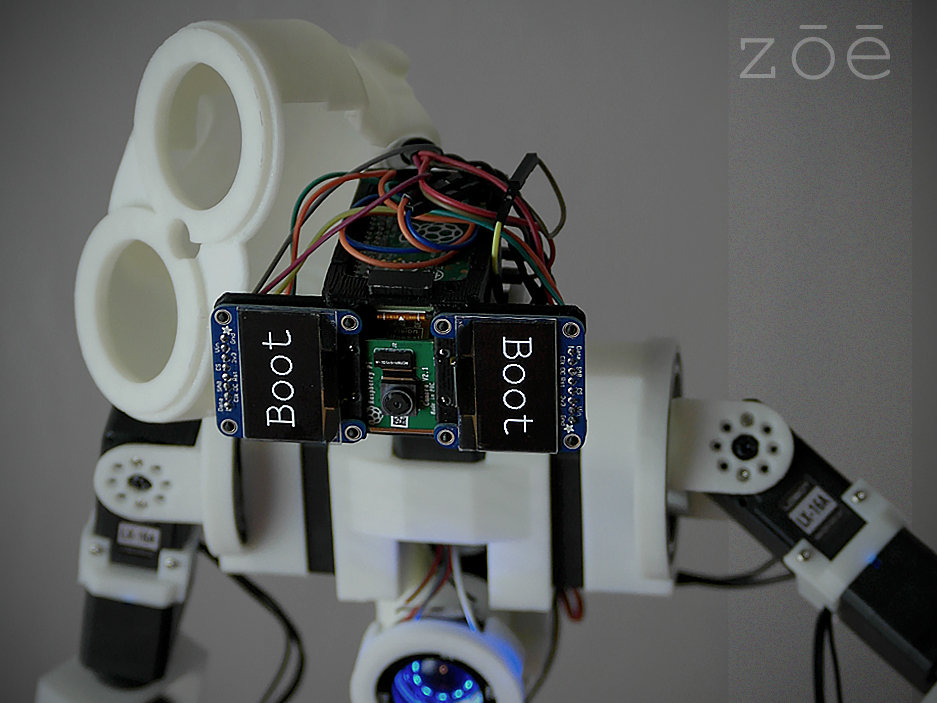
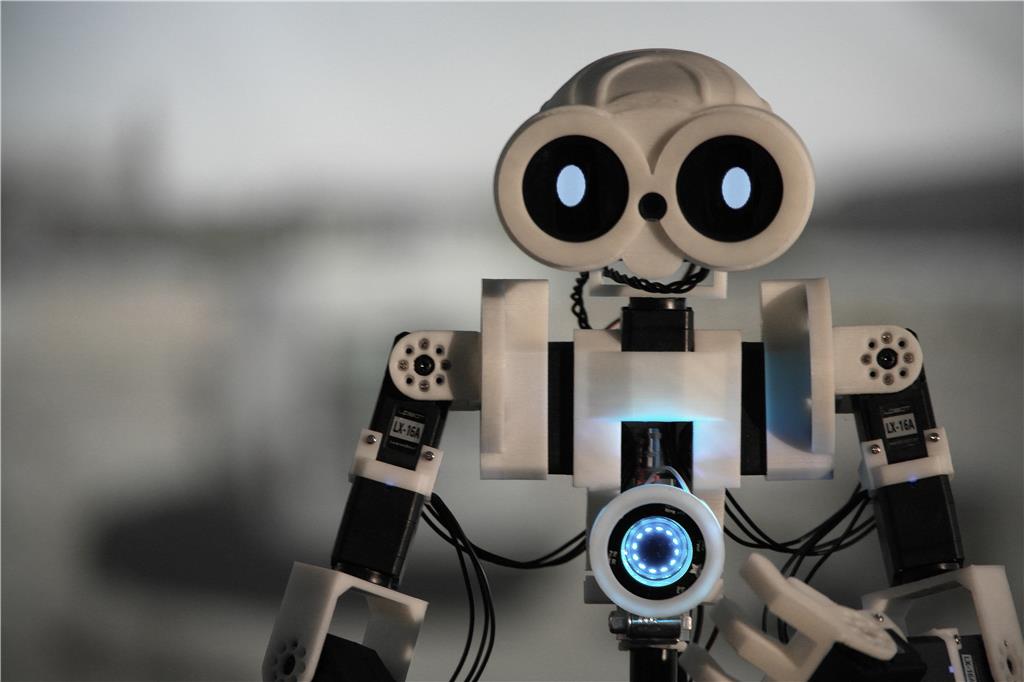
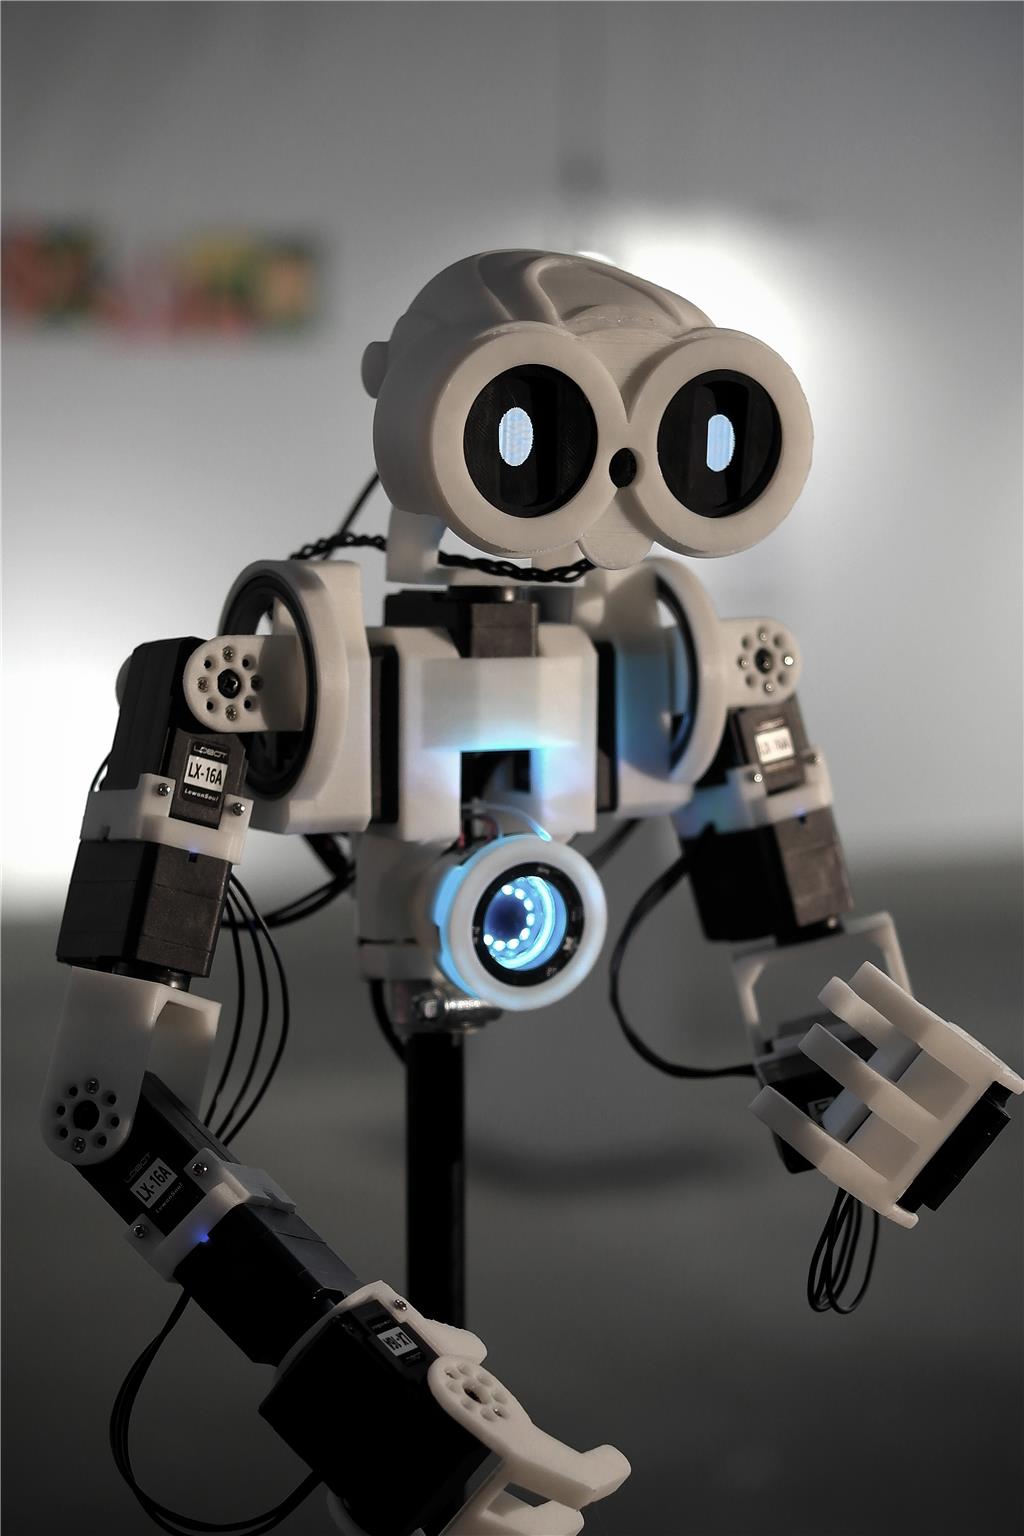
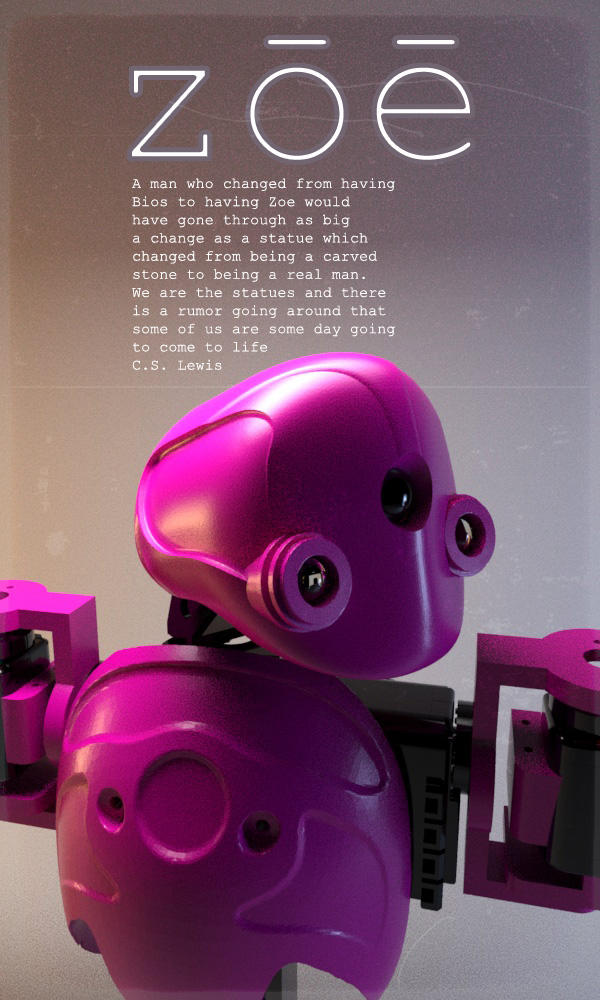
ZOE : a machine that resembles a living creature in being capable of moving independently

Mickey666Maus

Germany
robot video thumbnail

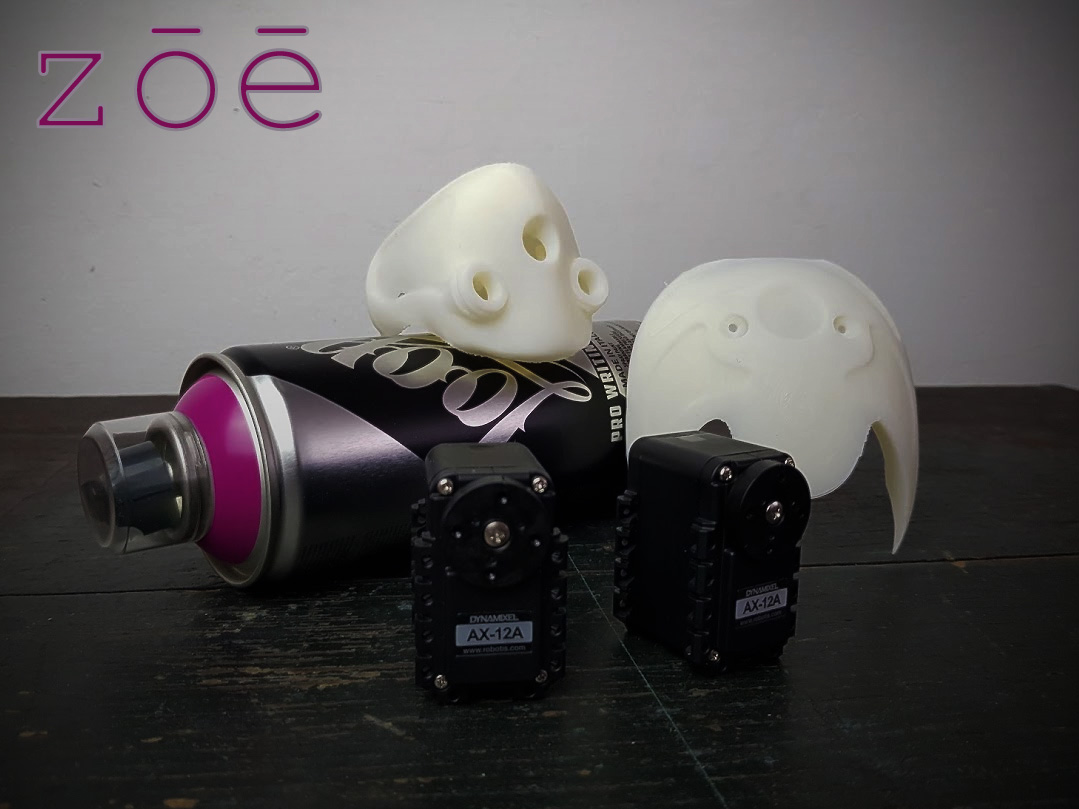
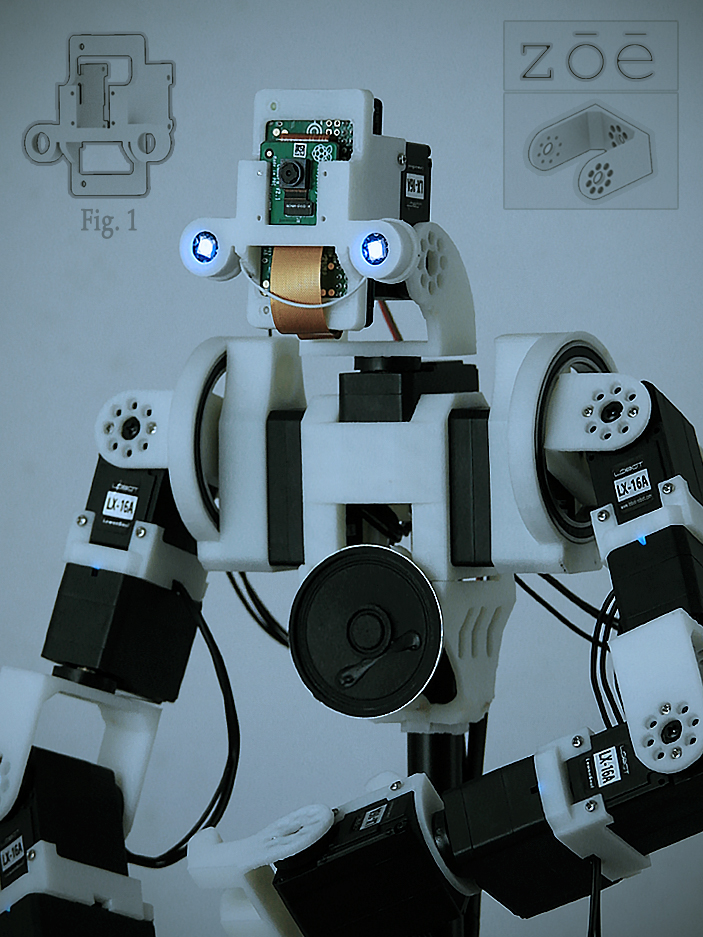
Since my robot is running on a Raspberry Pi, which is now supported by ARC, I decided to evolve my current project K[8] into a new one called ZOE... First steps will creating a new servo setup which supports Dynamixel Servos,  and a new Conceptual design!!

User-inserted image

By — Last update

ARC Pro

Upgrade to ARC Pro

Unleash your robot's full potential with the cutting-edge features and intuitive programming offered by Synthiam ARC Pro.

PRO
USA
#1  

Cool! Looking forward to this!

#2  

Great looking robot will it have legs, or tracks or wheels?

#3  

I have been running thru some issues printing, because my new filament spools did not match to my filament holder... So I had to print a new holder, which was a nice little side project!:) While I was at it, I also setup OctoPi, which is a good tool that acts like Pronterface,  but also offers cool features like live webcam stream and timelapse features for various cameras!

https://octoprint.org/download/

I will this thread updated on my build progress...

@nallycat My robot sits on top of a filament spool next to my monitor, its kind of  desktop bound ... I was thinking to mount it on a tripod like you guys do it with your InMoovs, because where would it go anyways right?:D I might explore movement options at some point in the future out of curiosity though.

#5  

After sorting out some issues with my printer, I can go on to vapor smoothing and painting my prints...:)

PRO
Canada
#6  

Sweet! Looking great so far @Mickey666Maus!

Keep the pics coming, looking forward to seeing Zoe come to life!

#7   — Edited

@Mickey666Maus Zoe is looking Good  is this the second one, I like the Rose color on Zoe number one, wait that is the color of synthiam.     what does Zoe have for arms and hands or grippers.

#8   — Edited

@Jeremie I will be away for two weeks starting Tuesday. When I am back I will continue to keep posting on this one!!!:)

@nallycat The first picture was just a 3D image...only the idea of how I want the robot to look!! Now that I have printed the parts I can start building it!! I am happy you like the first picture better, because that is the way I want to go!!:)  I will build Grippers that look like hands!! And will try to put Zoe together when I am back from my trip!!

#9  

So finally I could make some time to continue with my new project... I tested the Dynamixel AX-12A and theLewanSoul LX16-A servos and decided to go for for LX 16-A...

I was kind of counterbalancing the ideas of having a well known brand which is fabricating consistent products, and is very known ( so there is a good forum and you will always find help for stuff that you cannot figure out by yourself )... And the cheaper product, which has not been around for that long and seems to be a bit like the cheap replica of the first one mentioned.

The thing that made me go for the LX 16-A was on one hand the price, which is one third of the Dynamixel, but mainly it was the ease of use...
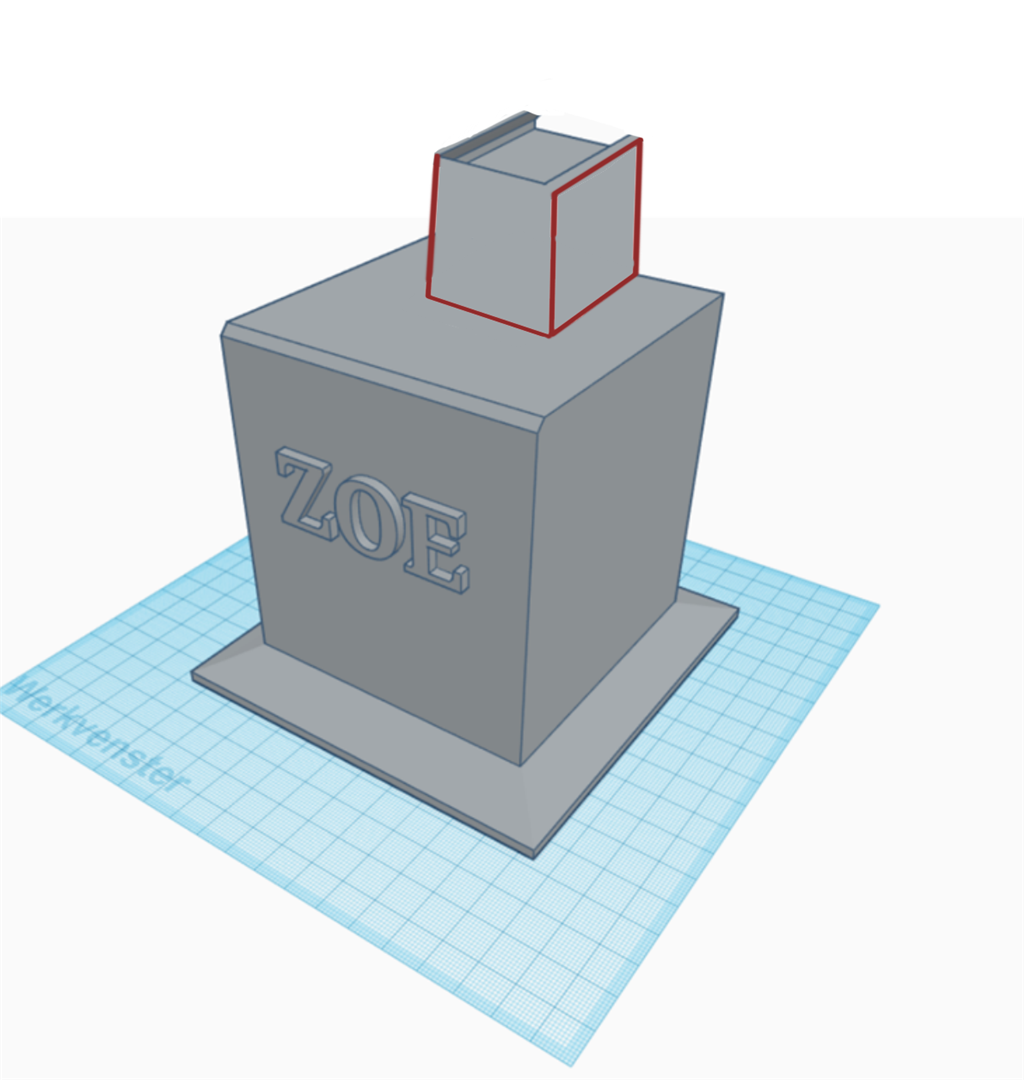
I tried a lot to get the Dynamixel servo going, but driving it directly from my Raspberry Pi was not working for me!

But for the LX 16-A, I found a good library on Github, which works perfect, and can be used without any tweaking to control those servos with my Raspi!  https://github.com/maximkulkin/lewansoul-lx16a

Also these servos are doing great with ARC so I do not loose any functionality of the ARC software!!

So I got down to design and print some parts, and am getting ready to move on with my robot!!:)

#10   — Edited

Hmmmm I cannot upload pictures...that is weird!!

It always gives me a comment already posted message...
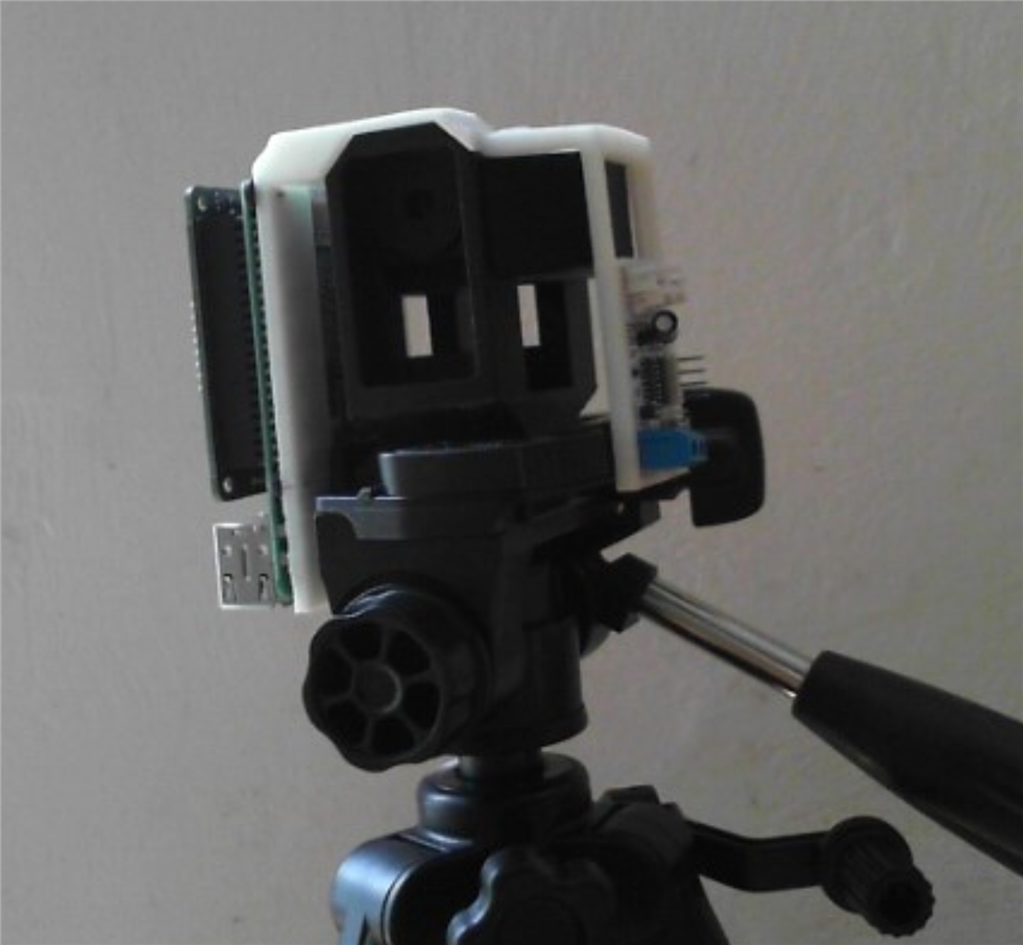
edit

Now I got it to work...it seems like I had to post text and/or wait before I press the Submit Changes button? Strange...it would be nice if someone could look into this!:)

#11   — Edited

User-inserted image

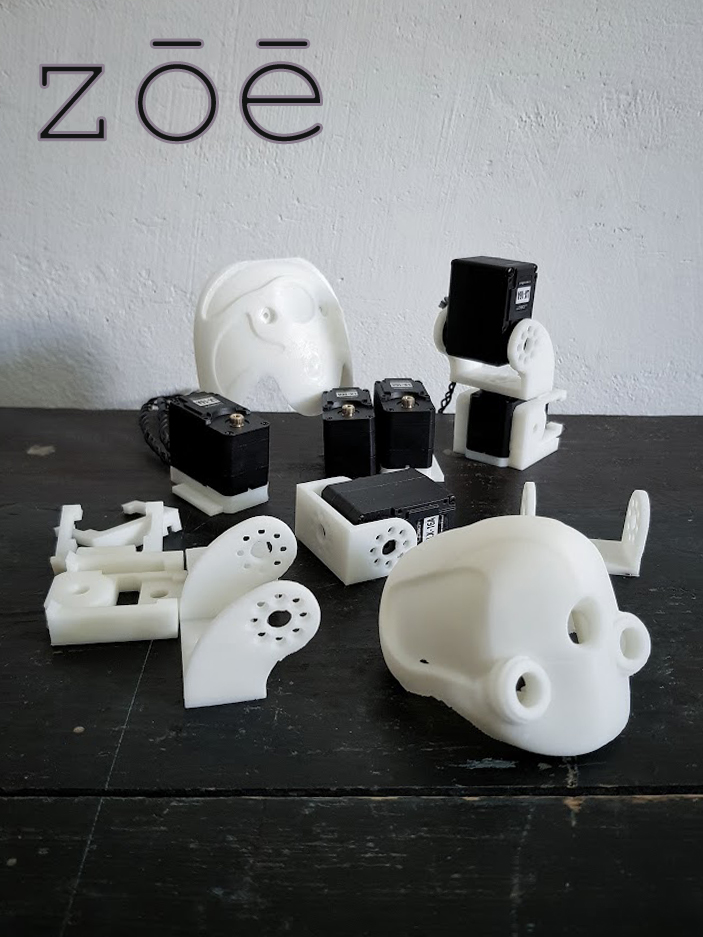
These are the parts that I managed to print so far, I hope I can make time to build the missing ones soon!:):)

#12   — Edited

User-inserted image

Still not done building all the joints, but I will be able to make some movement tests with this rig already!!

And now comes the sad chapter of salvaging the parts from my former robot project!!:( I will try to keep at least the servo functionality, some boards will have to go though...
#14   — Edited

User-inserted image

Finished most of the parts for the upper body, I mounted the robot on a tripod this time...rather than on a spool of filament, like I did previously!!

#15  

User-inserted image

This setup seems to be a little unstable though, I might try to find a more sturdy tri pod...but I am happy how the cable management worked out!

Next step is to remodel the head, to fit a Raspberry Pi Zero...that is what happens if you are rushing a conceptual design before gathering all the parts!!:D

PRO
Synthiam
#16  

That’s pretty wild looking. What is the base of the pole holding the body?
#17  

It is just a tripod...so maybe I need a more sturdy tripod or some other kind of base! I guess those Inmoov robots are also sitting on a tripod right?

How did you get the one in your office stabilized and not tripping over when lifting an arm?:)

PRO
Canada
#18   — Edited

Our inMoov has a couple bases, one is a heavy wheel chair base with a heavy 12V battery and the other is a toilet flangexD mounted to a piece of wood that can be clamped to a solid table. *Edit added a picture

User-inserted image

#19  

Screwing the whole thing to some heavy base was also something I considered!! But the tripod is kind of nice, because it makes the robot very portable...:)

Thanks for the pic, nice setup!!:D

#20   — Edited

Hey, I am having another question here, I was looking at a lot of robot builds and the setup is most of times kind of the same as I build it...

But now that I started to do some motion tests, I realized how much weight there is on those shoulder servos. Its the weight combined with the angle, that worries me a bit!

Would you keep the design as it is, or should I add some stress relive to those shoulder joints?

I was thinking of building something kind of like a big ball-bearing, maybe using soft air bullets... The diameter would be the same as the shoulder hinge, and could help stabilizing this particularly heavy loaded joint?

Or maybe even buying a crossed roller bearing could be an option, since it can handle the load in axial and radial direction?

#21  

User-inserted image

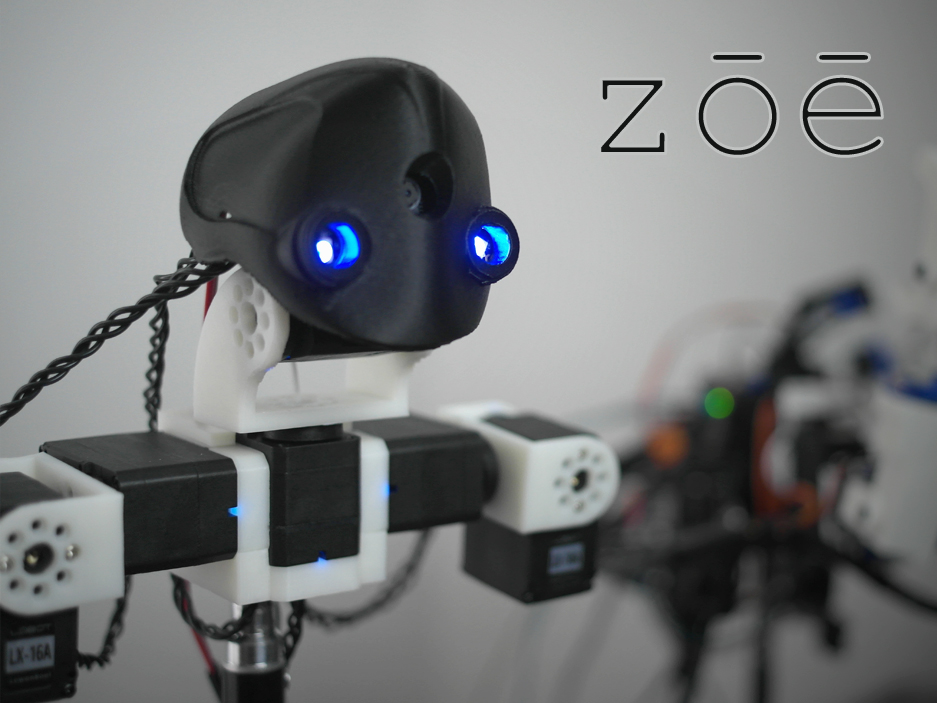
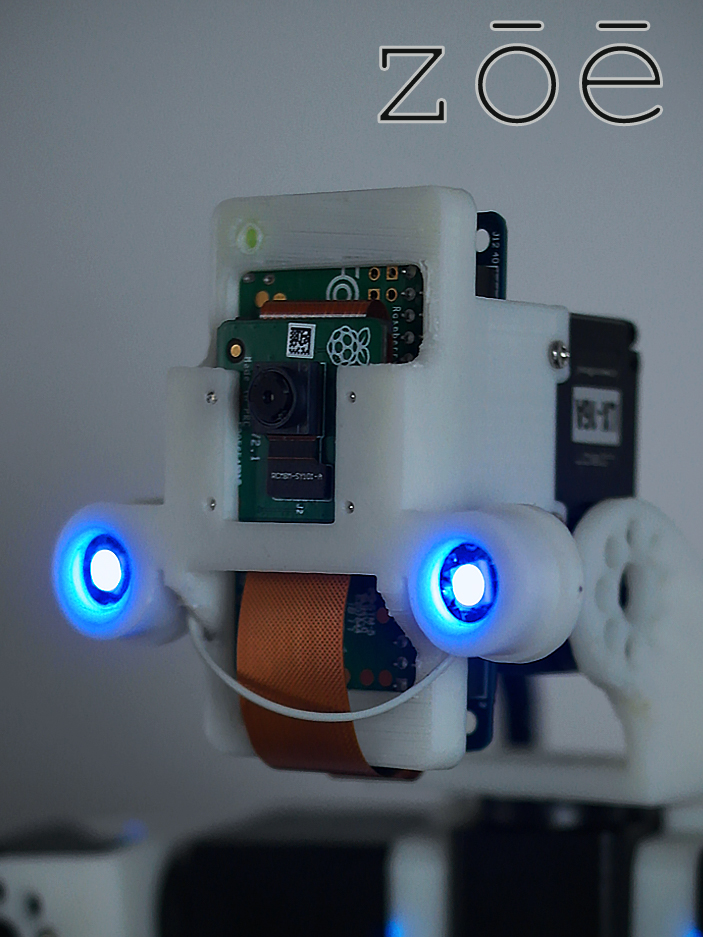
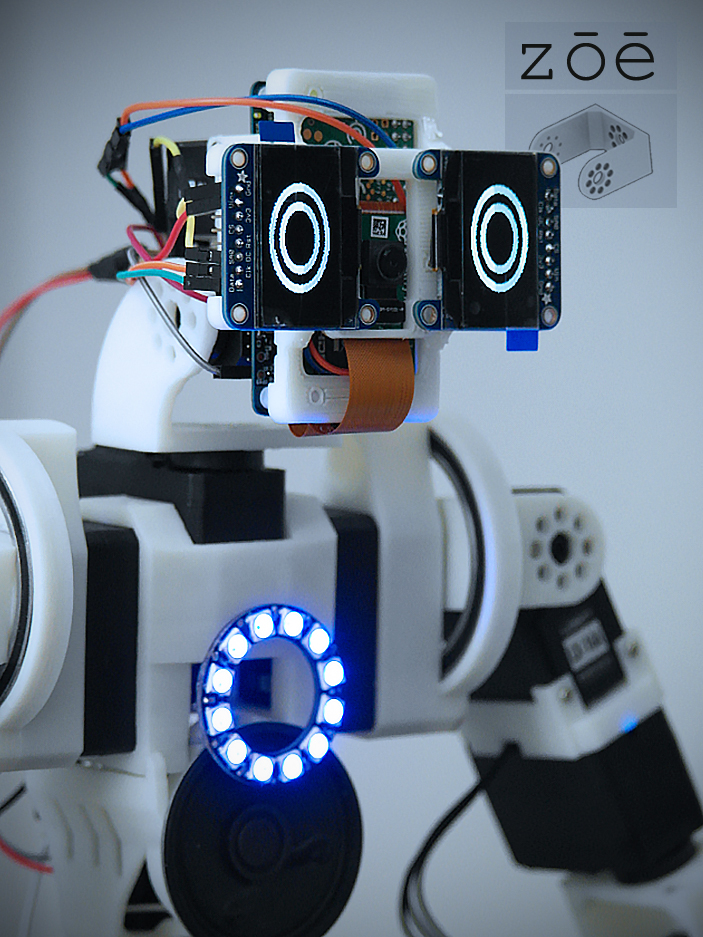
So finally I got all the electronics needed attached to the head servo! For now there are, two Neopixel, and a Rasperry Pi Zero plus camera. The Rasperry Pi Zero also has the AIY Vision Bonnet, for offline object classification and emotion recognition...

#22  

Very cool work! Hope to see ZOE moving about soon.

PRO
Belgium
#23  

reinforments is always a good thing.your desing is stunning.

#24  

Hey Mickey, That's a really nice looking design. Artistic and functional. Great job so far.

#25  

User-inserted image

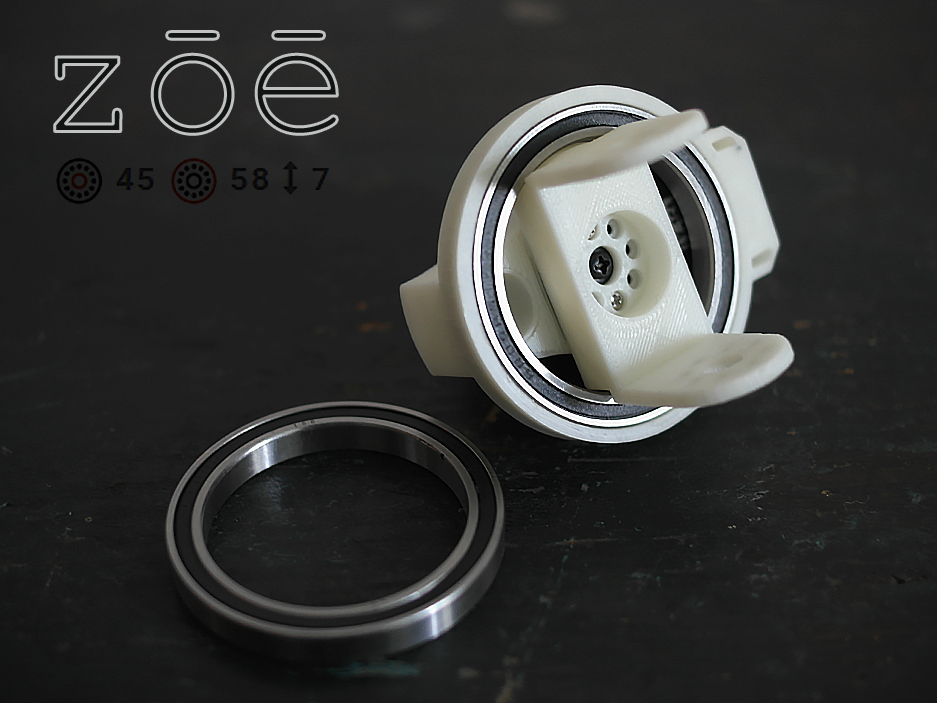
Thanks guys... I was getting a bit bonkers and added 58mm bearings to stabilize my shoulder servos!! I will make some movement tests soon, lets see if I can feel a difference!! I might use some smaller bearings for the elbow joints though!!:)

#26  

User-inserted image

So now the new shoulder fittings are done, also the new reinforced torso area will hopefully help to stabilize movement! Since I am deviating from my first concept anyways, I will rework the head to fit two oleds... Should be fun!!:)

#27  

User-inserted image

I am making some tests for OledEyes and a NeoPixel ring... I will try to come up with a nice head design, lets see where this takes the whole project!:)

United Kingdom
#28  

I love the Oled for the eyes, looks very effective.

Where did you get them from, are they expensive?

PRO
Synthiam
#29  

Wow - this is coming along so well!! Really impressed dude!

#30  

@cem Thanks, I like the look of the oleds too...they are from Adafruit and come in different flavours. Mostly around 20 bucks, so not a bargain, but kind of OK, considering how it changes the robots look and personality! Next thing on my list is to come up with expressions for the eyes, which should be a fun thing to do, I will post my ideas as soon as I got them ready!

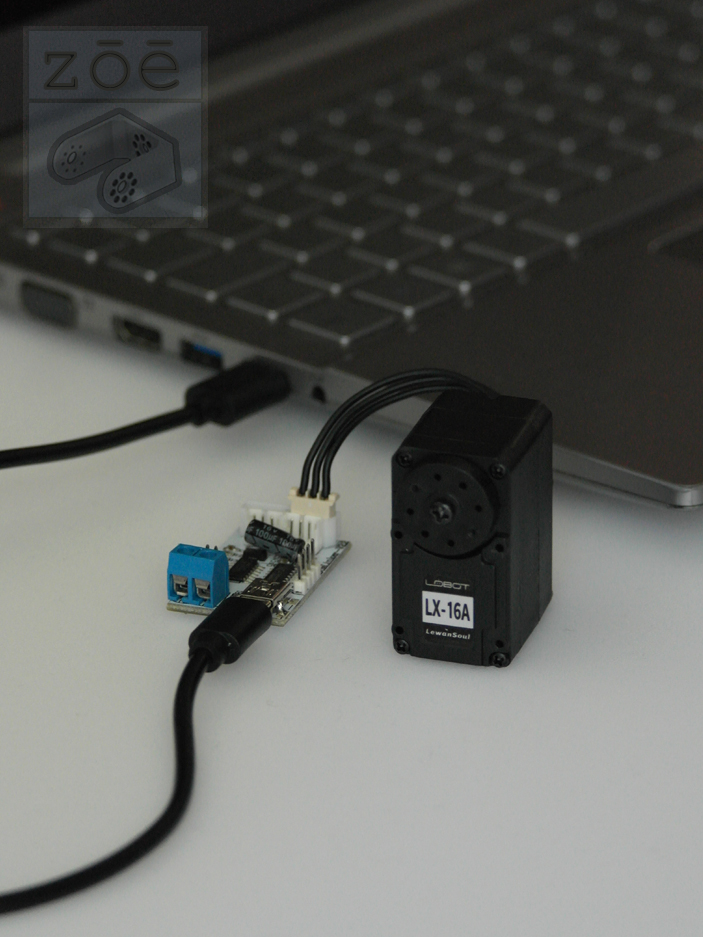
@ DJSures I am stoked you like the new design! It deviates a lot from my original concept, as I keep adding more hardware, but its kind of nice to see the project unfolding as I go...I will make a new head design soon to bring ZOE to life!!:) Btw, I would like to ask you for help on something, but only if this is not too much trouble...I am connecting my servos with a hub from LewanSoul. The LewanSoul BusLinker is a TTL/USB Debug Board, which supplies power to the servos and connects via USB... So at the moment I am using Python on Windows/Raspian to drive my servos, it would be very cool to have a plugin that connects from ARC the same way. Then switching between my Python scripts and ARC projects would be easy as cake! No need for re-wiring, just plug and play!:) If its too much trouble for you to do this, maybe you could share the source code of the plugin and I will try to figure it out myself? Would be a very handy thing to have for ARC integration!:D

#31  

User-inserted image

This is how my setup works, it would be very cool if I can use it the same way with ARC, so it would eliminate the need to re-wire if I switch between projects!:)

#33  

Thanks, I just checked at the LewanSoul plugin page..So I guess the Dynamixel plugin works the same its been a while since I used it! I will see if I can figure out whats going on...:)

PRO
Synthiam
#34   — Edited

Oooops - I misunderstood. Here's the link to the LewanSoul smart servo control that has the source code: https://synthiam.com/Products/Manual/LewanSoul-Servo-15987

I might be able to lend a hand...

  • Does the usb controller use the regular smart servo protocol?

  • And does it detect as a COM port serial device on the PC?

  • Why wouldn't you use the EZ-B or IoTiny or Arduino with them?

#35  

Hey, I am using this library to drive my servos...

https://github.com/maximkulkin/lewansoul-lx16a

There is not much to that board, just an integrated circuit and a voltage regulator, if I remember it correctly. I will check once more once I am home!

All you need is to specify the COM port and send the servos protocol.

It is a lot easier to use than an Arduino, because you do not need to run any Firmware...you can directly connect by sending the Protocol! Also you are having the hub with the right connections and you can get the servos powered!

Its kind of like those Dynamixel Power Hubs...very convenient!!:)

#36  

If it is not too much to ask, I would be very happy if you could help me with a plugin...this would be a very hard task for me, if I could even manage to get it done!!

#37   — Edited

I checked the board, its got one USB to serial chip.. CH340 The other one seems to be the following integrated circuit... 74hc126d

#39  

It works!!! Now ZOE can have ARC integration even easier than ever!!!:D

I just installed the EZBPi server to ZOEs new head design...so this will be the fresh brain to operate my project!! I am still having a bit of trouble with my Pi Camera, but I will update ARC and the EZBPi Server and try again!:)

Very happy to see ARC being tightly connected to my robots new design!!!

PRO
Synthiam
#40  

There’s an update (hopefully next week) to fix tbt pi camera performance. We have a few things to do before that but it’ll be ready to go soon.

Also, for mono version of ARC is getting an update from beta.

#41  

Great news...looking forward to the update!! And with the Raspberry Pi 4 the ARC on Mono will be getting a huge leap in performance too!!:)

#42  

User-inserted image

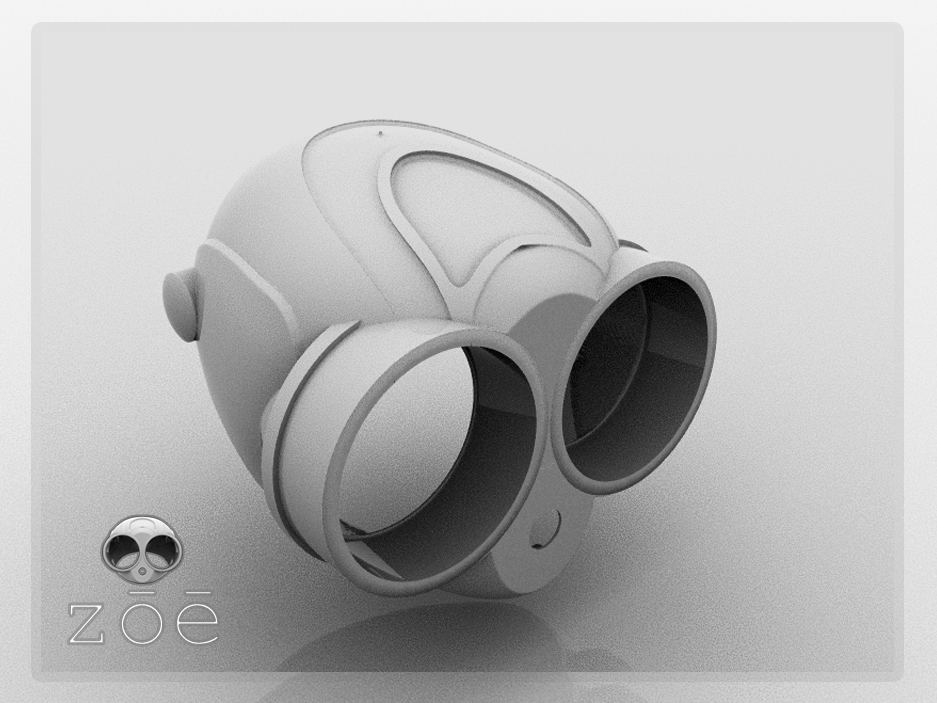
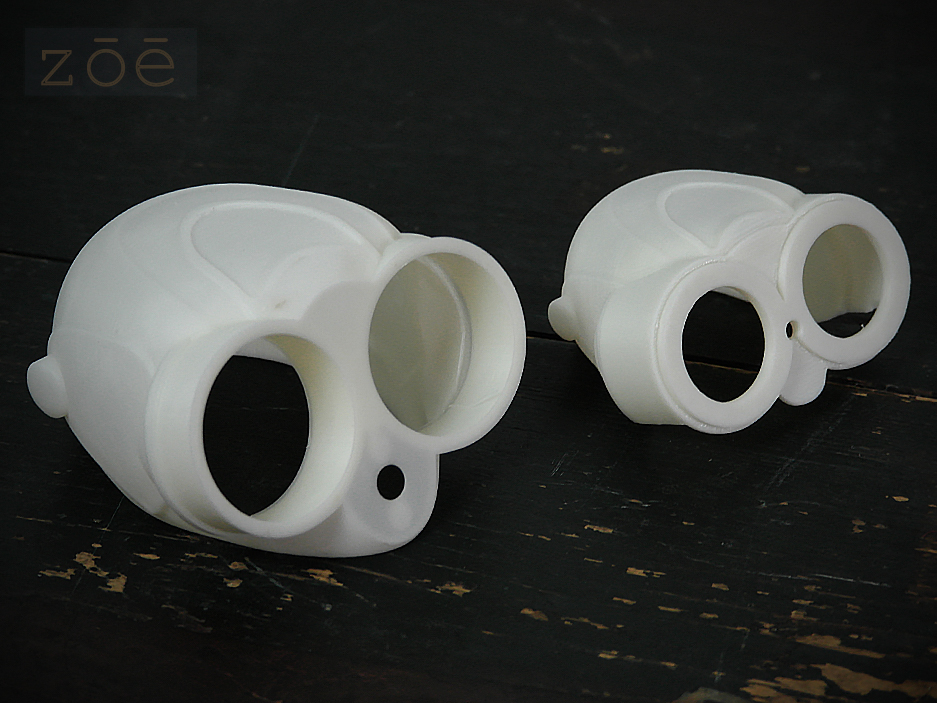
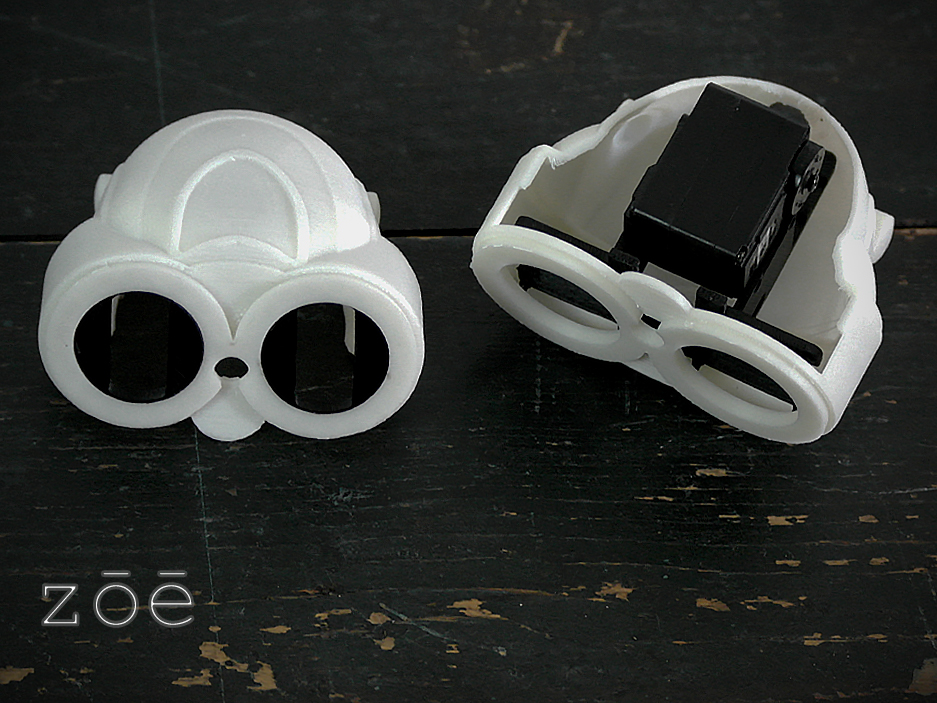
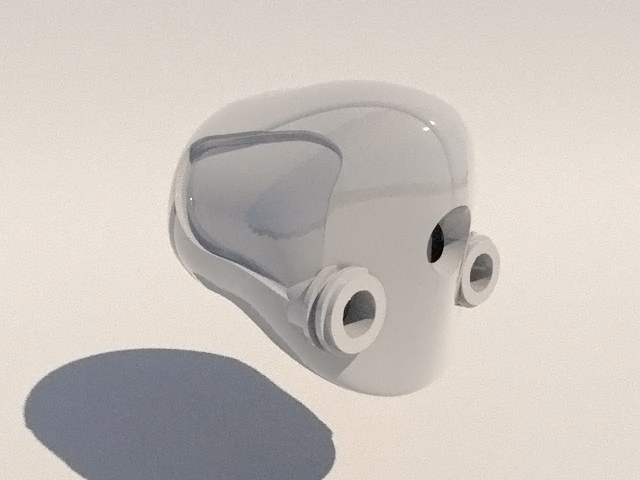
So I tried to come up with a new head design, which fits the oleds... I already printed it, but given how much effort I put in the first place to keep things compact and organized, the head is cartoonishly oversized!!

I might tweak it or give it another try...but for the fun of it I will assemble the print I guess, so you guys can see how it looks like!!:D

#43  

Actually I love the look of this head. I see no reason a robot cant have a part of his body that's over sized or oddly shaped. Remember Marvin the depressed robot from Hitchhiker's Guide To The Galaxy?

#44  

Thanks a lot for the feedback!! I am happy you like my design!!:) It was a bit difficult to keep it to proper dimensions, the oleds are shaped weirdly...

Now that Zoe looks a bit like an owl or a small monkey, I hope it will help adding some personality to a bunch of servos!!

I will redesign the head a little bit to safe some space here and there, but keep the basics of my first iteration!

Marvin is GREAT!!! What a persona, right?:)

PRO
Synthiam
#45  

How's the new ezbpi server firmware working for you with the camera performance?

#46  

@DJSures I had a few things going on this weekend, so I was a bit delayed in testing the new firmware, but this morning I had the chance to do so!! I am very impressed by how smooth the camera stream runs even on my Raspberry Pi Zero which sits in ZOE's head!! This is great, once I assembled the new parts I will try and put together a demo to show the capabilities of the new EZBPi server!:)

#47  

User-inserted image

So there was a bit of delay building the head... I had a damaged boot partition on my Raspbian, which taught me another lesson of ALWAYS BACKUP!!!  But eventually fsck saved me from a rainy day...:D

When I did some movement test I realized, 3d printed threads are no use when there is force applied... So I had to remodel the torso for better stability.

Also the new speaker and the NeoPixel needed to be attached to the body.

There is still a bit to go, but I hope I can soon print my new head and do some EZBPi server demo... The new improved camera performance and the LX16A being directly connected via COM is a great improvement for ZOE when running ARC!:)

I hope I can show some performance tests soon...

#48  

User-inserted image

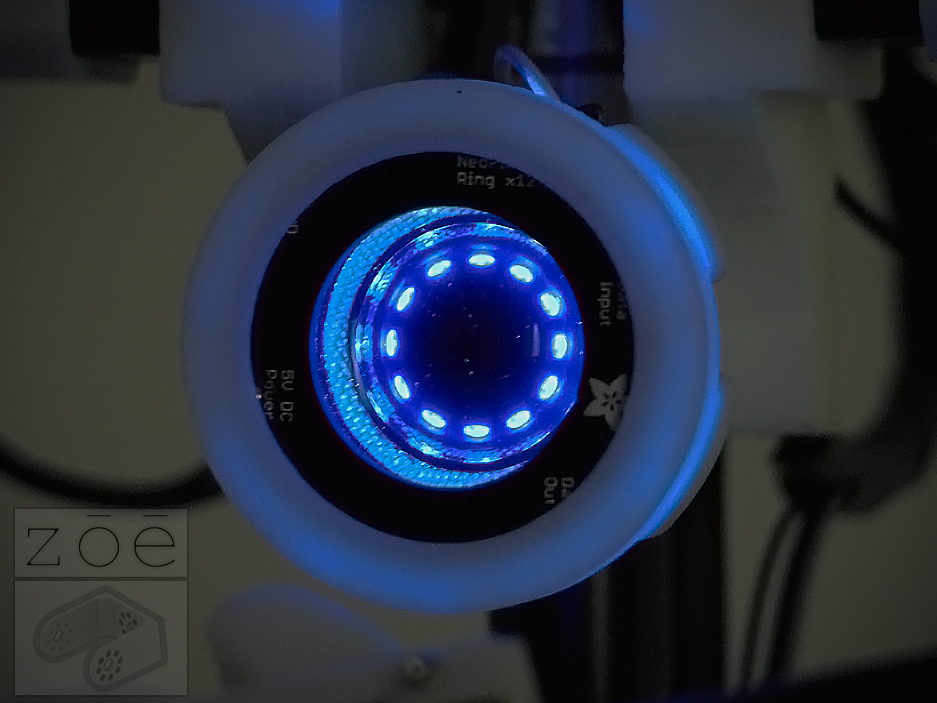
I am really mesmerized by the reflection of those NeoPixels on the speaker... I guess eventually I should use them for a head design, where they will be the robots eyes!!:D

Just something that crossed my mind for future projects...

#49  

User-inserted image

I am getting closer to the final head design..., I managed to reduce the head size by roughly 40% while keeping a lot of the features that I liked about the first design, which was way to big for what I had in mind in the first place!!:)

PRO
Canada
#50  

Looking great, nice work reducing the head size!

PRO
Belgium
#51  

your printing skills are very good.

#52  

Thanks, guys!!!:)

There will be still a bit of tweaking some details, but I am happy to be making progress...

#53  

Hey, so I hooked ZOE up to ARC and everything works quiet well! Only I realized that I am not able to flip the Raspberry Pi's camera, I get the following error message...

Error Camera.SetCaptureImage: AForge.Imaging.UnsupportedImageFormatException: Source pixel format is not supported by the filter. bei AForge.Imaging.Filters.BaseTransformationFilter.CheckSourceFormat(PixelFormat pixelFormat) bei AForge.Imaging.Filters.BaseTransformationFilter.Apply(BitmapData imageData) bei AForge.Imaging.Filters.BaseTransformationFilter.Apply(Bitmap image) bei EZ_B.Camera.x5wORRJh49(Object )

#54  

User-inserted image

I had to increase the size of Zoes head slightly. There was a bit of the electronics sticking out and I was trying to build a chin area to cover it, but this was changing the whole look in a way that was not really what I had in mind while building. So I went for remodeling the chassis holding the electronics from a vertical setup to a horizontal one... now the head has a little more volume, but this will also allow space to fit another micro controller if needed!:)

#55  

User-inserted image

All the electronics are fitting nicely into the modified head... Next thing will be modeling a torso area!

But since all the moving parts are done, I might also export the robot to Unity, so I can start testing movements. I am also considering Oculus Quest integration...any thoughts on this?:)

PRO
USA
#56  

Nice! I like the head.

#57  

Good to hear that you like the new head design...took me a while to fit all the electronics!!  But now I am happy that everything is in place and I can move on!!:D

PRO
USA
#59  

Can’t wait to see your set up and motions thru unity!

#60  

User-inserted image

Hey guys, I am experiencing my Pi Zero to be very unstable, it browns out a lot... so I measured the Voltage at the power pins which is 4.98V, and it is hooked up th my 20A Power Supply! But I am using these type of jumper cables...so I am wondering if the diameter might not be enough to provide power to the Pi Zero and the Vision Bonnet?

#61  

Actually, now that I took those cables out to measure the Voltage, everything seems to be working fine!! One of those jumper wires that provide power to the Pi, might have gotten loose and cause the Pi to reset... I am keeping my fingers crossed!!:D

#62  

A quick update on my progress with the Oculus Quest... I still need to tweak my setup a bit, sometimes the positions are getting a bit messed up. But hopefully I will be able to control ZOE, using the hands and the head tracking!

I am having a lot of fun, lets see what I can get done here...:)

PRO
USA
#63  

......there you go! that's working out nicely. Love to see Zoe moving in real time to that set up. Do you have that set up yet? Are you running into anything with the arms like gimble lock? Or they behaving correctly?

#64  

I guess it might be something like that...I will have to check the BioIk setup, did you keep working with it?

But it should be sorted out soon, so I can move on to live movement!

Those serial bus servos should be working very well for this, but as always...there will be quiet a bit of fine tuning I guess!!

I will keep you posted on my progress!!:)

PRO
USA
#65   — Edited

No, I have not messed around with BioIK since my last test. I'm thinking about hiring out a programmer to make a custom control for ARC using OPENGL to built out a animation program with built in IK. It basically would be a self contained arena where you can import FBX project files, record, playback and edit animation sequences in block form, and eventually have support for live mocap input. We have pieces and parts of this but I want to move it all into one powerful control. But we have to wait for DJ to finish his rebuild of the program, encase some things have big changes!

#66   — Edited

I am very curious about your setup!! You said in a previous post, you are about to show something big!!

I guess, my setup will take a bit of time and some tinkering, but it should work!!

But it does require costly hardware and I am fully aware that there are a lot of people out there, not considering this for an option!!

So bear with my for the ride, and excuse me for putting all this external hardware to the playground...after all I guess I am just a tech geek!!:)

#67  

This is the followup for my previous clip... It showed how the virtual robot is being moved inside of the Oculus Quests environment, but the interesting thing was to transfer these movements to my robot in real time!

It took a while to set all those servos up correctly, good to have a printer when your robot is ripping itself apart!!  But after a few broken joints, the setup is working!!:D

There is still a lot to tweak, maybe my mapping function needs fine tuning,  I will have to add grabbing and will have to import a live video stream...

But I am happy that at least the basics are already working, and wanted to share my progress!!:)

PRO
Belgium
#68  

so stunning.zoe lookin awesome.

#69  

I agree with Nomad,  Zoe is lookin amazing.

#71  

Thanks guys....it will be even more fun when I got the head moving and those hands will be able to pick up stuff!!

I am still having a few issues, and was fearing ZOE would knock her head of, so I will play safe on that one!!! Also a camera is essential, the Quest has a build in camera... but I did not know that it will kick you out from the app, if your are using it for an extended period of time.

But I am having a blast here and will keep you guys updated, thanks for the positive feedback!!:)

#73   — Edited

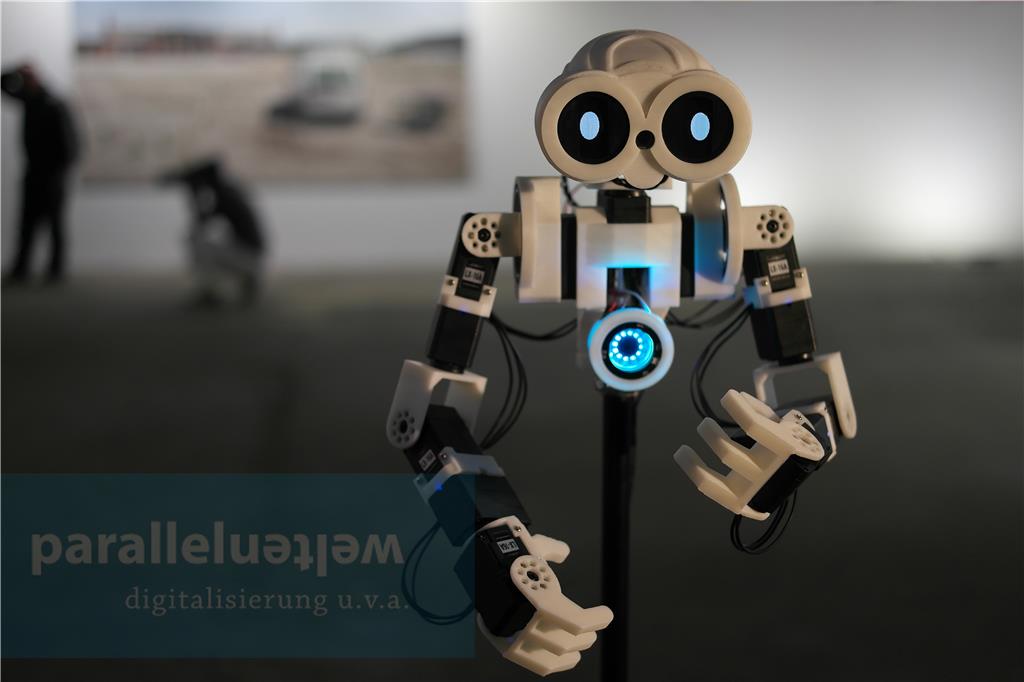
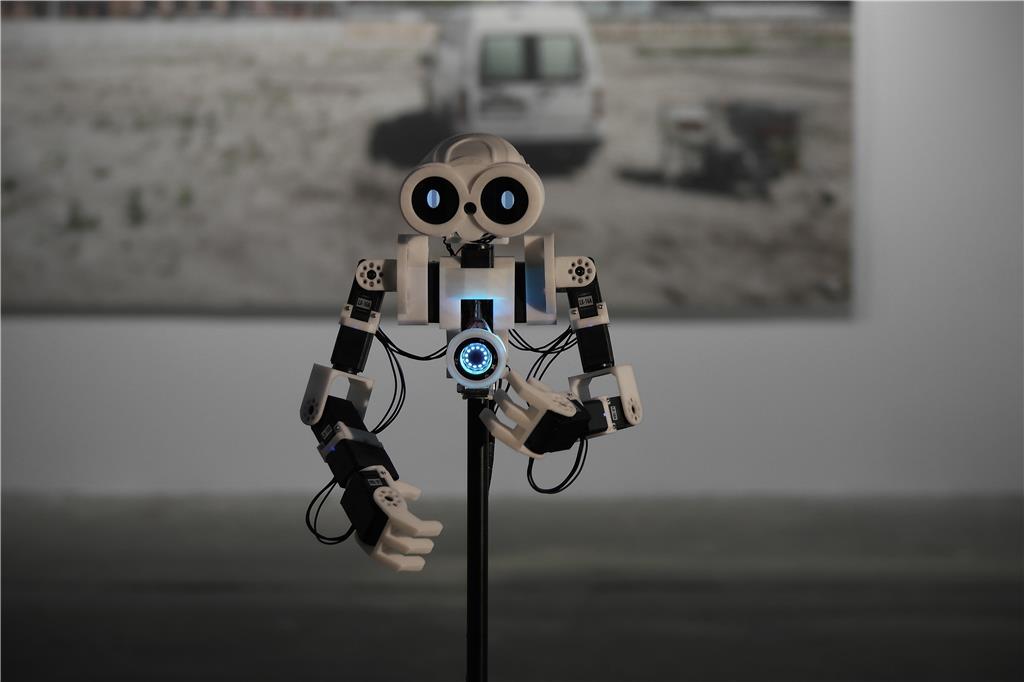
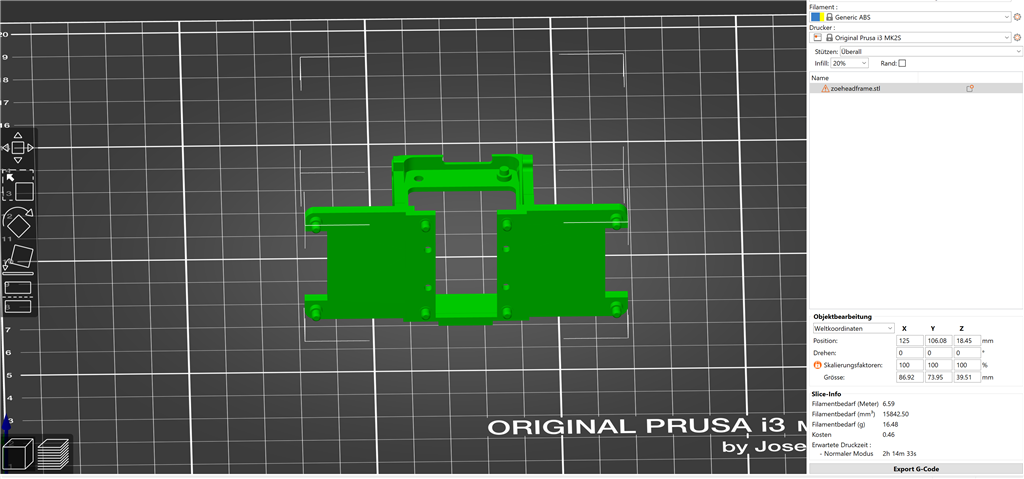
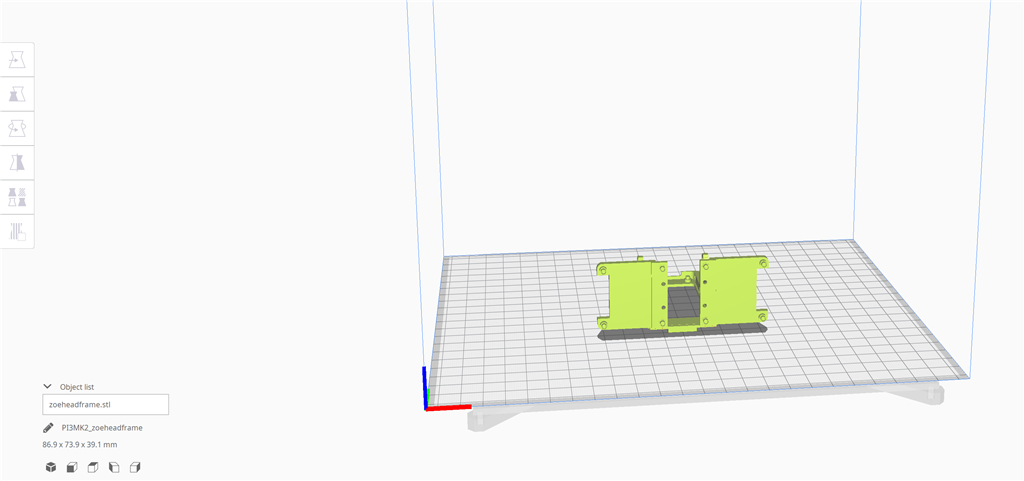
Some pictures take at today's exhibition, where I participated with ZOE!

http://parallelwelten.info/programm/

edit For anyone interested, the site is http, so you would have to manually paste it to your browser!!:)

PRO
Belgium
#74  

hi mickey

the link doesn work for me.

#75  

Dont worry, its just the programm of the exhibition...and its in German!!:D

Symthiam does not allow links without https certificate, which is totally cool! But if you want to visit the site, you need to copy and paste!

PRO
Canada
#76  

Zoe is looking awesome! I like the mini ARC reactor you added, very stylish:)

#77  

Thanks a lot...I added some more functionality, for the grippers and eyes. I will try to make a short clip and show how it works! And I might continue to add a tilt and swivel to the torso!

It was fun to show my robot in public...first time for ZOE to leave the house!!:)

#78  

A little update on gripper functionality and Oled  control... I still need to tweak the setting of the Oculus Quests control over ZOE a bit, I nearly ripped her to pieces the other day! But that's more or less just an issue of how the Quest is dealing with the user leaving the guardian space! Using the passthrough camera is also not optimal for controlling the robot, it kind of works, but distortion is still strong. Even after the update!!

But things are evolving, so lets see how far I can push it!!:)

PRO
Belgium
#79  

that is very cute.love the movements with hands and head same time.

#80  

Hey guys...have not had much time for robot building lately, but at least I finally got to build a simple website for the project!

zoe.build.log

Hope you guys like it!!:)

#81  

Finally got to do some Robot Sunday again...and made a little clip on what I was doing, hope you guys like it!!:)

#82  

@Mickey666Maus    You made the clip on Sunday that is impressive. I love what you have accomplished with Zoe.  and Zoe.build.log is also quite impressive.  Love your work.  Thanks

#83  

Ya great bot dude! I always like to take sunday off and just do nothing. I also just like to work on 1 system at a time and then leave the rest for next day. reason for that is because I sometimes get frustrated if I work on something too long. Same with video games in the past ,I would toss the controller into a wall if I can't get past a level. I have had to buy several new PS3 controllers,LOL! I do really enjoy the whole EZB experience though, Such a huge learning curve,actually has improved my memory significantly,I don't forget my many passwords anymore on the net! Seriously,the EZB system has so many controls in ARC software,hard to ever get bored and always learning something new every day.

#84  

Oops, I guess it should officially be called the Synthiam ARC system and ARC software? EZB controller is still EZB.

#85  

Very cool work, nice movements.

#86  

Hey guys, glad you liked it...it was actually a very long session, because I had to modifiy the code and setup Teachable Machine. After I staged my lighting and filmed everything, cutting the clip also took me a while!

I do have more things in mind, hope I will find the time to get it done, and keep the forum posted!:)

#87  

So while being grounded, I did some more tests on Teachable Machine... I had some false positives when rearranging the figures, guess I was to noisy!!:D

But all in all, it worked quiet well...just wanted to share the progress, easy to integrate with ARC and fun to play with!!

PRO
USA
#88  

Awesome! Looking good. Yes crazy times a lot of time to build robots and record!

#89  

Yes, these are crazy times...but lets make the best of it!! Stay safe and healthy!!

#90  

How do you get Unity to work with a real robot? My robot Dave wants Unity and VR controls.

#91  

Hey, I am also still working on it...there is a ton of possibilities!!

But there is no template, that is ready to use. So if you are having a VR device, maybe start with a simple scene just to understand how the whole setup works...I can take you from there!

Just remember that in order to do this, you need the robots .stl files!!:)

#92  

So having some time to spend, I decided to dive a bit deeper into VR...not yet directly related to robotics, but I am already planning use a Mixed Reality Scenario like this one in the future for ZOE!!

Its also a fun way to spend my time, since my flight was canceled...so I am having a VR vacation instead!!:D

#93   — Edited

Such a cute island you have. Sadly I still have to go to work everyday. Second shift gets 2 paid weeks off. I have been having a blast with VR in Unity. I would love to control my robots with my Rift S. I made my own 3d printed robot Dave, so I do have the STL files. I also have Dave in Unity running and jumping and having fun.

#94   — Edited

Hey, all of this sounds very good...it should be fairly easy to set up your robot! It might take a little time to tweak it all, so maybe just hit me up using the Contact Form on ZOEs website?

Then we can get things going, while not spamming the thread with all those finicky details...:)

zoe.build.log

#95  

@Mickey666Maus  You would not be spamming this thread, finicky details are what we need, there is little action on Synthiam lately and this would be a pleasant addition, You think that more members are stuck at home would have at least more things to talk about, but that is not the case.  I will be starting my robot projects all over again, as soon as ARC leaves Bata.  looking for a 3d Printer robot  project to fill the time.  no one is willing to  give up their .STL files.

#96  

If anyone is interested in building a ZOE, I could make a Github repo with all the .stl files... Just remember that I am using those Lewansoul LX16-A servos, you might want to check if they are available! You would need 14 servos for the build...

Also the head is using the AIY Vision Kit from Google, but the robot does not loose much functionality when you'll just use a Raspberry Pi Zero...

Just let me know guys!!:)

#97  

@Mickey666Maus   Thanks for the offer, have to check out the lewansoul LX16-a servos.  I think I have a few Lewansoul servos not sure what type they are, I will have to have a look.

#98  

Sure, just let me know and I will set you up with your ZOE asap...:D

#99   — Edited

User-inserted image

Hey, since we are all stuck at home... I figured, if anyone would like to print ZOE, I should make the files available!!

Thingiverse seems to be having issues... So the files are hosted on Prusa, which is anyways the preferable DIY site!

Meet ZOE

I uploaded all the files for the head and torso assembly, and will update during the week!!:)

Whoever is up for the challenge lets put ZOE up for Exosphere!!

#100  

@Mickey666Maus  Thanks for making the files available to print.  I was wondering if you have the head with the small eyes still available.  If not don't worry .

#101   — Edited

@nallycat I would love to see some remixes of my old concepts!:) Are you talking about the early version like the one in post #4, or the later developed frame in post #21?

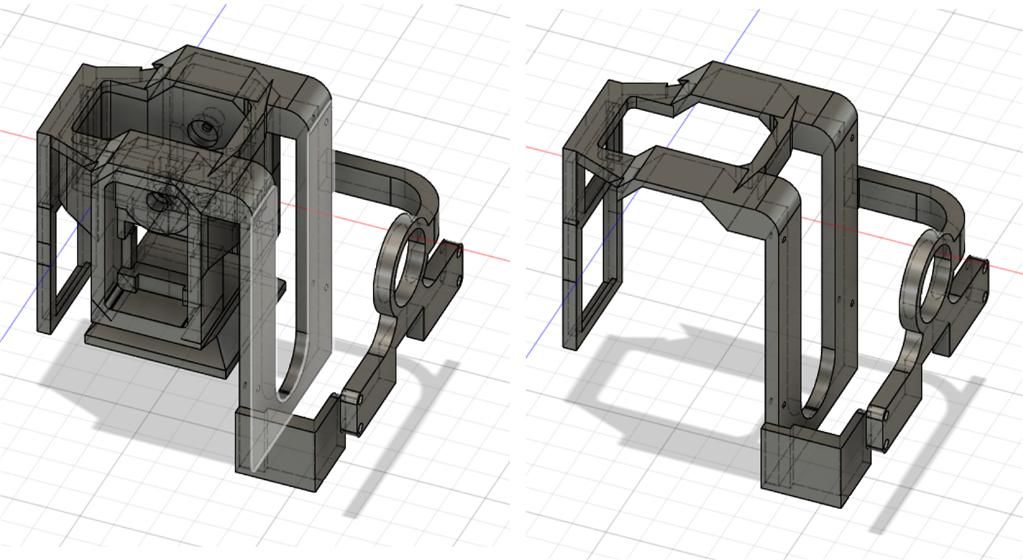
The very early version from #4 has no frame to connect the head and servo. I did build some structure for the Pi Camera and two screw holes... So if you would like to see how far I got, and make your own frame, I would be very curious to see your approach!

The frame from post #21 is a fully functional design, which has two single Neo Pixels for eyes. I also hosts the AIY Vision kit and a Pi camera... It will give ZOE a technical more robotic look, rather than the actual design which is a bit more cute and appealing. ZOE should be a socially interactive robot, so the new design will hopefully encourage engagement!:)

PRO
Synthiam
#102   — Edited

I might print one now that I’ve finished with Perry’s eye robot. Except I’ll modify the parts to use ezrobot hdd servos because the I’m not a fan of the weakness of the lewansoul servos.

I’ll also delete the pi and google aiy, because they don’t do much. And replace with a latte panda and arc. The time I spent with aiy was extremely disappointing - which is why there’s no example use cases of anyone doing anything with it. Except having a pen become a bassoon... Ill use the cognitive vision because it actually works (lol) and can add pandoraBot with bing speech to have conversations with.

Oh I just had another idea. I’ve been such a fan of the iRobot roomba as a base lately. Mostly because it can self dock for charging - but I’m gonna put a stand and attach it. Oh that’ll be real good. With a tray and cup holder so he can deliver stuff with exosphere. Ya this will be awesome - gonna give him a good life:)

it’ll be neat to create a bunch of Auto Position frames and a bit of servo recording to make animations using two wiimotes. That’s been very successful for me to do a bunch of stuff.

glad you’re releasing it because I can make it do some great stuff! Thanks! Keep up the great designs:)

#103  

@Mickey666Maus  I was leaning more to the early version #4   I like the cute look and it would be a more socially interactive robot.:D

#104  

This is such a generous offer Mickey. Awesome design. I wish I had a 3D printer and knew how to use it. I'd do this for sure.

I know this is off topic of the OP but speaking of iRobot and self charging, Has anyone found a way to make that little robot dock better then it does? Most of the time mine try to dock but just swings back and forth trying to hook up. Then it gets tired of that dance an goes back out for a stroll. I think part of the problem is the charging base moves around when the robot is on top of it trying to find home.

PRO
Synthiam
#105  

Clean your roomba. And make sure the connector pads on the bottom are clean. And the connectors on the charger. I have 3 roombas that always docked when i get home. If they don't dock, i clean the pads and the roomba sensors and the charger sensors.

#106  

I had to glue the charging dock to a thin metal plate so my roomba could dock easier. It drives onto the plate and docks.

#107   — Edited

If you have an old 400 series Roomba they pretty much sucked at docking. Hit or miss as it were.... I have a few 400 series but I also have a couple of Roomba 650's and they pretty much have no issues finding and docking to their home base...

#108   — Edited

@nallycat Supercool that you are fan of my early head concept, its available at Thingiverse now... I put it separate, not to be confused with the updated head design! Let me know if you are running into any issues!

Download Model

I am looking forward to see your remix!!!:D

User-inserted image

#109  

@DJSures I am super stocked that you will print a ZOE, and I like the idea of having EZ-Robot HDD servos added. While you are at it you should also remodel the head frame to host the EZ-B IoTiny and the EZ - B Camera, I already checked and realized that there is enough space to do so!

Good thing about a powerful software like ARC is, that it supports all kinds of hardware...

Also I like the idea of the Latte Panda, the LattePanda Alpha has really good specs!!

It will be great to see your improved remix of ZOE!!:)

PRO
Belgium
#111  

hey mickey

thank you for uploading the files.do you have a link from zoe's eyes?

#112  

Sure, I got them from Adafruit...

In addition you will need the AIY Vision Kit to build the head, but you can also just use a Raspberry Pi Zero and the Pi Camera... Let me know if you need more info on anything! I will update the assembly instructions soon!:)

ZOE Eyes

PRO
Synthiam
#113  

Thanks mickey - i'm starting it this upcoming week:)

#114  

Hi Mickey  The early head download is not working at this time.. Is it because you just listed it?

#115  

Thingiverse is sadly going down the drain...really bad to see such a good website falling apart!! I reuploaded on Prusa!!:) Zoe Early Head

PRO
USA
#116   — Edited

Great robot, thanks for all the videos, pictures...

It seems to me the JD robot can do some of this with the Microsoft Kinect,

I will try that, thanks

EzAng

#117  

Thanks Mickey I got the File, off of Prusa

#118  

@EzAng Never forget, a robot without a brain is nothing more than a bunch of servos...but we are having the power of ARC for breathing life into our creation! Now with Exoshpere the possibilities are endless!!

@nallycat Glad everything worked out now, share your progress on the remix!!:)

PRO
USA
#119   — Edited

Good morning Mickey, nice yo hear from you.

I consider myself a newbie here, just learning as much as possible.

You always have great teaching lessons here, please keep it up, thanks.

side note, I have a friend here that teaches German at the Mercedes car plant.

Have any robot German conversation for him to decipher?  :-)

thanks again,

If you get a chance, test my robot on exosphere.

EzAng

PRO
Belgium
#120  

hi mickey666maus

does the horn holes are desame as the horns from HDD servo's,

User-inserted image

PRO
USA
#121  

I am ready Nomad for you to test exosphere now

EzAng

PRO
USA
#122  

Nomad, what 3d printer are you using?

EzAng

PRO
Belgium
#123   — Edited

its an creality ender-3 build plate 22 cmx22cmx25 high. self build pakket.low cost 170 euro

#124  

Hey guys, unfortunately at the moment ZOE is only using LOBOT LX-16A servos they cost less than 20$/20 on Amazon... Those LX16-A servos are very easy to use with ARC, I chose them because cable management is very easy with Serial Bus Servos!

But you could also wait, because next week, @DJSures will remodel the parts, so you can also use EZ-Robot HDD servos!:)

PRO
USA
#125  

Mickey, want to try Exosphere with my robot?

EzAng

PRO
Belgium
#126  

hey mikey

i just printed the head.i can adjust averything els.

PRO
USA
#127  

Nomad, I going to get a 3d printer, thanks EzAng

PRO
Belgium
#128  

dont forget to order a glas bed too.and a uhu stick

PRO
USA
#129  

glas bed too.and a uhu stick  ??

PRO
Belgium
#130  

the uhu stick is for getting the print to stick on the build plate ( glas ) and better finich,

glas bed

PRO
USA
#131  

ok I will look into it, thanks

EzAng

#132  

Hey Nomad, how did the print come out...I am happy it worked for you!!:)

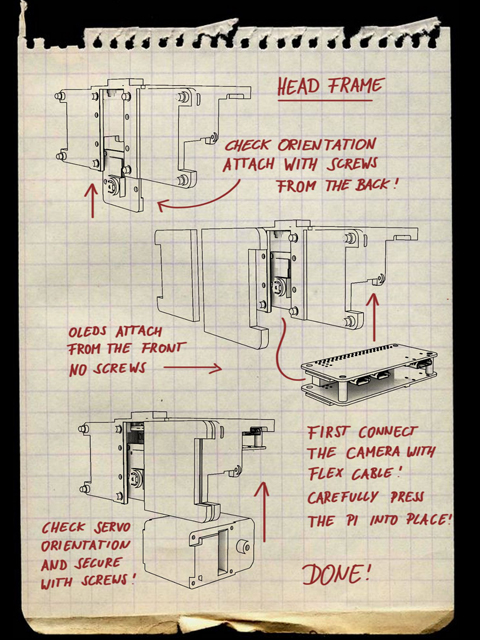
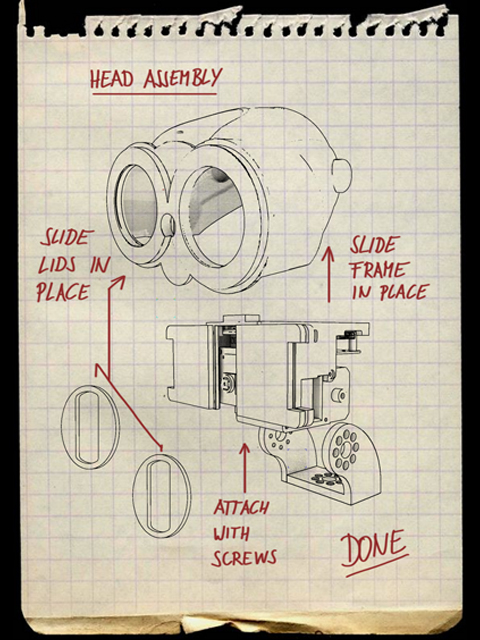
I made some instructions for the Head Frame, which holds the Oleds, Camera and Pi... Just to show the basic assembly!

Feel free to modify the design for ARC HDD Servos, looking forward to see your build!!

#133   — Edited

User-inserted image

Let me know if you are running into any issues!!:)

PRO
Belgium
#134  

mickey

still printing the head.will last till tomorrow .17 houres lol

#135  

Hi Mickey  I have printed the neck parts I designed up and down right and left and I am printing the Original head slightly enlarged, as I am not using your suggestive eyes I will be using a mouth. The head has about 3 hours to go.  I still have to design the mouth Mechanics, still  just an idea. thanks again for giving us your files. this makes being trapped at home much more interesting.

#136  

Sweet!! So good to hear you guys are having fun!! I am really looking forward to see your ideas!!!

May the filament be with you!!:D

PRO
Belgium
#137  

an army off zoe bots is comming on the horizon.xD

PRO
USA
#139  

Mickey, how is the Creality 3D Printer CR-10S Pro V2 with BL Touch Auto-Level, Touch Screen, Large Build Volume 3D Printer 300mmx300mmx400mm with Capricorn PTFE ?

EzAng

PRO
USA
#140  

Mickey, Nomad how is the Creality 3D Printer CR-10S Pro V2 with BL Touch Auto-Level, Touch Screen, Large Build Volume 3D Printer 300mmx300mmx400mm with Capricorn PTFE ?

EzAng

PRO
Belgium
#141  

EzAng

i dont have a clue what the diff is.but start smal and work your way up. there alot off stuff to learn.bed leveling only can be a pain. i think even a auto bed leveling needs be checked.

PRO
USA
#142  

I only have enough  and room to buy one, can't buy 2 or 3 like I see a lot of people do

EzAng

PRO
Belgium
#143  

same here.but we are abusing mickey's topic:( here. i live in one room in the atick.:( haha

PRO
USA
#144  

my robot stuff is taking over my house also, lol

EzAng

PRO
Belgium
#145  

same here ,stuff and boxes robots avery where.:D

PRO
Belgium
#149  

hi mickey

amazon dont chip to belgium.these are from bangood are they useble?

servo's lx

#150  

Hey Nomad, yes they are good...I ordered from Bangood myself!!:)

Only thing is that it takes a long time to arrive!!

PRO
Belgium
#151  

hi mickey

great .chipping about 3 weeks,i know.these are about same as the lewansoul i gess.

#152  

These are exactly the servos that I am using... You need a total of 14 servos to build ZOE!:)

PRO
Belgium
#153  

i am printing zoe 's body and hands nowxDalmost done.

PRO
USA
#154  

Great going Nomad

EzAng

PRO
Belgium
#155  

hey EaZang

here's another tip.build a kinda cast arround your printer. to keep the head inside.specially when using ABS . mine needs some glas doors or somethin.

User-inserted image

i use the monoprize mini v2 for small parts.

PRO
USA
#156   — Edited

I will make a not of this, thanks

What does that do?

EzAng

#157  

@EzAng    I think Nomad is telling you about adding an enclosure around your printer,  if you are printing ABS or Nylon and a few others these filaments cannot cool too fast as they will start to warp and could release from the print bed.  no drafts are allowed.  and you should allow the enclosure to heat a bit before printing also.

PRO
Belgium
#158  

for excample it keeps the wind outside if you have a window open some where. you wanna keep all the heat that your machiene makes inside for makin good prints.

PRO
USA
#159   — Edited

Thanks guys, I need all the tips I can get, lol

EzAng

PRO
USA
#160  

nallycat, are you familiar with ROS?

EzAng

#161  

@EzAng  I have done some research into ROS  and this Robot operating system is a programming language, that can take quite a while to learn and become efficient.  As I am a robotist not a programmer I do not have the time to start learning ROS.  but who knows it my be usefull to learn.

PRO
USA
#162  

Looks like Nomads printing is goin well,

EzAng

PRO
Belgium
#163  

zoe says look into my eyesxD and i will hypnotize you,haha lol

User-inserted image

PRO
USA
#164  

What kind of servos, electronics are you going to use?

EZang

PRO
Belgium
#165  

the ones mickey recoment.see link in post #149

i also found this looks same servo's very cheap.

lewansoul servo's

PRO
USA
#166   — Edited

What board are you connecting the servo too?

Mickey uses raspberry board, and python I believe

Iotiny or EzB4 are better, what will you use/

LattePanda running Arc  is good

Wonder where Mr. ptp is in all this?

EzAng

PRO
Belgium
#167  

for me iff possible ,the ezbv4 but i dont have a clue.:(

PRO
USA
#168  

use the ezbv4  so you can get it to talk and all the rest

EzAng

PRO
Belgium
#169  

i think zoe's eyes needs some diff controller.

PRO
USA
#170  

use RGB's maybe ?

PRO
Belgium
#171  

the eyes are bigger then rgb.

PRO
USA
#172  

Use a ring of RGBs

PRO
Belgium
#173  

see post #129 zoe's eyes.i think its best to follow the project. i hope i can learn alot.

PRO
Belgium
#174  

:) OH zoe's body reddy.tomorrow printing the brackets.

User-inserted image

#175  

@EzAng The head of ZOE is using the Raspberry Pi Zero, check the supported hardware... ARC can talk to the Raspberry Pi Zero and make use of the camera! ARC can make use of lots of different hardware, that is the great power of ARC!!:)

The Eyes are controlled by Python...please check the latest version of ARC, it is also supporting Python!

Lewan Soul servos are supported by ARC!!

Every single piece of hardware I am using can be controlled with ARC!

If you want to use the Iotiny or EzB4 it is not problem, it all works!! Just read the instructions DJ Sures provided here at the forum!!:)

#176  

@Nomad6R Great to see the progress!! Your prints are looking awesome!! So sad that those servos have such a long shipping, but I will help you to set up the Oleds and connect everything. Just let me know if you need any help!!:)

PRO
Belgium
#178  

hey mickey

i dont mind if the shipping takes some time.what do you think off the link in post#165 ? thank you very much for offering to help.i will need it.

#179  

And make sure you will also order this product together with the servos...you can get it from Aliexpress or Amazon!! It is really important to drive the servos!!!!!!!

https://www.amazon.de/LewanSoul-BusLinker-Debug-Board-LX-16A/dp/B073WRLJB2

It is much cheaper from China of course

https://www.aliexpress.com/i/4000786628654.html?spm=2114.12057483.0.0.4b346b4abT2pWY

I would actually recommend to buy a bunch of servos plus the board...its the best price you can get!

https://www.aliexpress.com/i/32966631680.html?spm=2114.12057483.0.0.bf486abeBJfpTD

PRO
Belgium
#180  

cool the tri pod has same name zoe.i know there is a car with brand renauld  zoe.

User-inserted image

#181  

If you buy the bundle you will get five servos plus the two boards for less than 100$...:)

PRO
Belgium
#182  

so i need 3 kits then.

#183  

You could get three kits if you wanted to...but I guess 1 kit and the rest of those servos just as servos would be fine, because you only need one board! But its up to you!! I got a whole bunch of those servos!:)

PRO
Belgium
#184  

i send them a mail and ask for 1 set and 10 extra servo's. for the eyes i need only this part x2 or set, correct? zoe eyes

PRO
Belgium
#186  

okay.to be able to use the eyes i need ?any pics about connecting the eyes?

PRO
USA
#187  

@Mickey666Maus: Thanks for sharing your design. I've started the building process. I'm not good hacking designs so I'll follow your last design (OLED eyes).

Oleds: I've use the adafruit 128x64 is well supported both the oled driver API and high level libraries. There are 2 options I2C and SPI. I recommend SPI connection (faster) and I recommend adding a mini-controller to handle animations, and storing the bitmaps, and the low level computation. I've tried a few this is the one i recommend: https://www.adafruit.com/product/3800

Quote:

ATSAMD51 32-bit Cortex M4 core running at 120 MHz Floating point support with Cortex M4 DSP instructions 512 KB flash, 192 KB RAM 2 MB SPI FLASH chip
Has a lot of memory to handle the drawing buffers and has a 2MB SPI flash can be used to store animation frames.

I've a old ROS project where i used OLEDS. I wrote a lot of firmware code and a ROS node, I'll resurrect the project and I'll adapt the firmware to allow an integration with ARC, maybe I can make a hybrid version linux & windows /ARC.

I'll share the progress later.

PRO
USA
#188   — Edited

ptp, I was asking about you, saying when were you going to show up here, lol, and here you are.

Nomad, nallycat said (PETG )use Weldon 3 ? what for?

are there fumes?

EzAng

#189  

@EzAng   PETG  by itself is completely odourless it is food safe and can be put into a dishwasher, it is heat resistant.  if you need to join 2 printed pieces you use Weldon 3 it is a solvent joining method as PETG is an acrylic they use Weldon 3 to join sides on acrylic fish tanks and  you can guess how strong that has to be.  Weldon 3 is a solvent very thin and has a solvent smell like acetone but disipates when dry. you brush on both sides of parts to be joined and hold together you do not use much, too much will soften PETG and make it muchy.   ABS uses acetone to join printed parts, same process. hope this helps you    you should know ABS has a very strong smell when printing. I think you must not breath to much of these fumes. that is why I print mainly PETG.  the solid color like white black are the best the transparent colors I find are way to fllexible.

PRO
USA
#190   — Edited

nallycat which brand of PETG? I bought white...

Are there fumes while it is printing? need ventilation?

use hair spray?

Thanks nallycat

PRO
Belgium
#191  

Ezang

no ventilation,remember keep the heat inside. here a link for the hairspray. there are hardly no fumes. hairspray

there are also other producks for sticking the part on the bed.

3dlac

and then you have the UHU sitcks withs i use.

#192  

Hey Nomad, until the servos arrive you can have fun with the head of ZOE! Let me know when you are getting the Oleds and your Pi Zero, and I will help you wiring...

Also @ptp is recommending an additional board for more speed and ARC integration, I will look into this so we can use it with ZOE in the future!:)

PRO
Belgium
#194  

mickey

sound great.it will take atleast 3 to 4 weeks before i have them.

PRO
Belgium
#195  

mickey

the zoe eyes i have them ordered.i have 3 .

i made a zoe stand where you can slide in the body from the back.

User-inserted image

User-inserted image

#196  

SO COOL!!!:D

Maybe you can put the power supply inside...super nice!!

PRO
Belgium
#197  

i can open it on the back side indeed ,good idea.

PRO
Belgium
#198  

oops i forgot.the power supply is a batt from ez robot?MaH1300

PRO
USA
#199   — Edited

Good morn all,

3 questions:

1 - One last time, using PETG, heat the  bed up to_________________________ Fahrenheit

2 - I bought a creality glass bed, any insight instructions?

3 - Do I us hairspray with PETG?

thanks EzAng

PRO
Belgium
#200  

hoi Ezang

the temp is written on avery box from filament,see above post. read the manuel from your printer and look for video's on youtube how to ad a glas.i think you need bigger clips to hold the glas inplace. you can use hairspray or 3lac or uhu.

you will need to test whats is best for you.

PRO
USA
#201  

ok , thanks what are you doing today?

EzAng

#203  

Hey Nomad...the EZ-Robot Battery you are using has 7.4V correct? It will be perfect for the servos! But DO NOT POWER the Raspberry Pi Zero from the battery, it will destroy the board! You will need to buy a voltage regulator, or just use a second power supply, you can use the charger and cable from your phone! This will work, no problem!!:)

PRO
Belgium
#204  

howmuch do the charger needs to be?also do you have a link from the bearings?thank you

User-inserted image

#205  

@EzAng    I had to convert this from celcius as I live in Canada   So The Bed Temp is 149 deg Fahrenhite and I always use 475 deg Fahrenhite for the Extruder I use these no matter what the box says.  I print on glass and I use Aussie Mega hairspray not all hairsprays work.  spray on the glass 2 coats while the glass is off the printer .I use 2 springclips to hold the glass on the print bed.  the printed part should release when the bed is cold.  if I am printing more pieces I have several pieces of glass so I can keep printing, while the last print cools.  You clean the glass under hot soapy water, also a light spray of hairspray alows you to continue printing on the glass several times before it needs to be washed.

PRO
USA
#206  

nallycat ,

thanks again buddy,

just go in my PETG,  maybe printer on Monday

I have been doing ROS, Linux - keeps me busy

Be well,

EzAng

#207  
PRO
Belgium
#208  

i go for original parts.tomorrow last parts to print ,the brackets.:D so that leaves to by a raspberry pi zero.

#211  

Also the bearing is not needed for the design, it is just a stress relief for the arms...adds a little stability.

I can also buy them and send them to you, if you like? Or maybe Nomad can do this, because he is ordering anyways?:)

#212  

PTP Can't say for sure but I usually get all my bearings from Fastenal. If they don't have what I need they can order them. Worth a shot.

#213  

Oh...eBay looks very good, I should have checked before posting!!:D

PRO
USA
#214  

Not an US supplier...

User-inserted image

I would love to have the item before mid summer:)

PRO
Belgium
#215  

mickey i have ordered two.it cant hurt.also the charger is on ebay. what kind off raspberry pi do you use?

#216  

ptp

I just called a bearing company here in Ohio and they have 1. I asked how long to order another he said 3 days. Then I asked the price ... lol ... $40.00 each... lol.

WOW ...

PRO
USA
#217  

User-inserted image

Ted, Thanks for the tip, Fastenal they are good, I recall got something from them a few years ago, but looking to the above picture I don't like their website:) is not "pocket" friendly...

PRO
USA
#218  

I use Bearings Inc and McMaster Carr often. The later has downloadable cad files for nearly every part in their catalog...which is massive. I sometimes source parts from them and simply load in the part in my 3d design software as I wait for the part to arrive. Mind you both places will sell to the individuals, but they are industrial and some items have industrial prices.

Bearings inc 

McMaster-Carr

PRO
USA
#219  

Will, Thanks both are good tips... I'm checking both:

User-inserted image

the price is going up:) ... I start looking for ordinary ball bearings, i found automotive quality, now is "food-grade" maybe the next one is Mars approved:)

PRO
USA
#221  

Will, Thanks it seems a nice market place.

I found an US supplier:

User-inserted image

same model number: 6809-2RS , same dimensions, off-course is not approved for space exploration:).

Sorry to spam the thread with Ball Bearings, I hope can be useful for others.

Still open for more suggestions...:)

#222  

OMG we are officially certified for space exploration now!!:D

#223  

Oh, happy dancing hugaroos...its just being food safe!! But anyways!! We will go where no man has ever gone before!!:D

PRO
USA
#224  

Nomad, DJ got a exosphere for you to do

EzAng

PRO
USA
#225  

Noma d where are you?

PRO
USA
#226  

come back and try it mickey

#227   — Edited

@EzAng.... Time zones EzAng, there are 24 of them... It is 2:13am in Germany at the time of this post.... Maybe they went to bed?

#228  

Hey Nomad, maybe you should modifiy the stand for ZOE a little bit befor printing, because the body will be a little lower that the level of your base! It will also work your way, but I will be building a new body soon which also holds the speaker and Neo Pixel, so maybe it would be nice to have some room available...kind of like this!

User-inserted image

#229  

Because the body will surpass your floor level...its kinda like this!!

User-inserted image

PRO
Belgium
#230  

hey mickey

good idea i can make an extra block as in your picture.

PRO
Belgium
#231  

what about this idea?lots off spare room.little smaller then the lower block.

User-inserted image

#232  

Sure, looks good...I am making a test print to make sure everything works out fine, then I will send you the new part so you can check if it works with your design!! It looks like this...

User-inserted image

PRO
Belgium
#233  

is that the new part for in the head? i got the raspberry pi zero ordered. how much needs the charger send out,howmany volts?

#234  

5V you can also use the charger from you phone!:)

On the left picture you see the torso with the new part and on the right you can see the new part... This ist just for your information, so you can see how you will have to build the base!:)

The new part will hold some electronic components, like speaker neopixel an a Raspberry Pi3 or 4... But you don need this, you can also use your Laptop, or some people like the Latte Panda!

PRO
USA
#235  

anyone around to try my robot on exosphere?

EzAng

PRO
Belgium
#236  

hi mickey

witsh board do i need? red or blue?

User-inserted image

thanks M

PRO
USA
#237  

RED is one you want

PRO
Belgium
#238  

hi ptp

thanks red one will be.

PRO
Belgium
#239  

ptp/mickey

does zoe use a camera? if yes link pls .i have finally ordered averything:). if anyone is interested building zoe.here a link for the servo's. servo's lx zoe

PRO
Belgium
#241  

great got one ordered.tomorow i have the adafruit says the chippi,g.:)

PRO
Belgium
#242  

the mailman has dropped a pakkage.:D do i need to solder the pins?

User-inserted image

PRO
Belgium
#243  

hi mickey

are these sizes correct? i have 1.5 mm too long with original stl.

User-inserted image

#244   — Edited

Hey Nomad, supercool that you got the Oleds... So the thing is, maybe we need to ask @ptp how we should wire the Oleds? He is inventing a new software....

So do you want to a) Make the soldering the old way? ( I can show you how ) b) Wait for @ptp to tell us how to do it?

For the new way the @ptp will be inventing we need this micro controller... https://www.adafruit.com/product/3800

I will also modify the frame that it will hold this board!:)

#245  

The size looks correct, maybe you can just print it and see if the Oleds will fit? If you are running into any issues, let me know...:)

PRO
Belgium
#246  

there where no wires in the box only pins.its very smal:( for soldering. i bouth one extra just incase.great if you can show how to do. ok i by the board.

PRO
Belgium
#247  

the original was 1.5mm higher and weidt didn fit.ok i print new one. do i solder wires on the adafruit or pins?

PRO
USA
#248  

@Nomad6r, @Mickey66Maus: What an Adventure..... both courageous and crazy:) , getting out of the EZ(Easy) comfort zone....

I don't want to spam Zoe's build thread with specific details.

I'll create another thread to explain the OLED wiring,  controller and the application. I'm adapting an old project/idea to make it easy to use through ARC. I've plans to integrate with EZ-Robot controller. The idea is not to be dependent on the Raspberry to control the Oleds.

PRO
Belgium
#249  

@PTP

you sure have a point about the crazy stuffxD haha. ez robot controller would be fabulous if we can use that. lookin forwart to your topic.

thank you

#250  

Quote:

the original was 1.5mm higher and weidt didn fit.ok i print new one.
What do you mean? Which original?

PRO
Belgium
#251  

the stl original from the zoe head frame is 1.5 mm higher and 1.5 mm weider. as you can see the frame is 1.5 mm too high and to weid.

User-inserted image

i have seen this before with other parts.i gess the cura or TC is not so accurate.

#252  

This is very strange...can tell me which slicer software you are using, so I can confirm I am getting the same result?

PRO
Belgium
#253  

i am using cura 4.5.0 there is another strange fenomen with cura.when starting up cura,all works fine, except the copie&paste funtions stopped working.you have to reboot to start working again.

#255  

Check in Windows so I can see we are having the same numbers...

Which printer are you using?

#257  

As you can see...Prusa Slicer and also Windows are giving other results!

Maybe you will have to check your Cura settings?

PRO
Belgium
#258  

i have a ceality ender-3 printer.

#261  

Are these the measurement you are getting if you put the model into Cura?

PRO
Belgium
#262  

ok i got it.mine was 1.5 mm bigger.i print a new one.

thank for checking

PRO
Belgium
#263  

the zoe tower . with funny eyes.

User-inserted image

#264  

Supercool!!!:D

I downloaded the 3D model from the website, just like you did...and put the model into Cura! Could you let me know if you are having the same measurements now?

Maybe you scaled the model by accident?

PRO
Belgium
#265  

sure i take the bodem first.

PRO
Belgium
#266  

the bottem block is 120x124x106.8 MM

the top block is 80.0x83.0x85.7 MM

PRO
Belgium
#267  

oops i think i didn understand you the first time. all is ok now.i allreddy printing. the head frame.

PRO
Belgium
#268  

mailman is back.today i got these 2  boards. very tiny .

User-inserted image

tonight or tomorrow i will have the aduino zero.

#269  

Hey Nomad, I also ordered the board, I will modify the head frame so the board will fit in... Maybe we need a micro USB cable too?

Lets see the instructions that @ptp will post, then I will start building the new head frame!:)

Did your print turn out good, are the Oleds fitting?:D

PRO
Belgium
#270  

"are the oleds fitting " no the frame will no work,still no sucses. i have cura 6.4.1 latest version.i dont have a clue why it dont work. also the tower didn work.i think i have a chost in my machien:(.

#271  

@Normad6R   Are you saying the print failed or are you caying the printer itself is not working?  are you connected to a computer and are printing using a USB cable from computer to 3d printer or are you printing from SD cards.

PRO
Belgium
#272  

hi nallycat

not connected to pc.using the sd card. the tower didn work cause i didn knew how to change filament while printing. and the nozzle bumped into the part.i have figured this out and try back tomorow printing. the head frame doesn work alway diff messurement.a diff of 1 mm to 1.5 mm, but mickey is gonna design a new part .

thanks for askin

#273  

@Nomad 6R   You are welcome.  I never have that much luck if I have to change filament while printing, most of the time it makes a defect on the print.  so I make sure I have enough for that print job.   running a 3d printer has a steep learning curve.

PRO
Belgium
#274  

it seems very easy to do.when printing there appears a page on the printer called TUNE. you have to stay on that page. so 1 press tune,2 see below says change filameny click on that, it will puch out the remaning filament.3 puch in new filament untill it comes out the nozzle. 4 click start printing.

PRO
Belgium
#275  

my first zero board has arrived.what can i do now with this board?

User-inserted image

#276  

Hey Nomad, this will go into the head of ZOE, also you can attach the camera to this board... You can use this board also like EZB, you can look here on the forum. I can also help you to set it up!

Do you have the camera? Do you have an SD card for the board?:)

PRO
Belgium
#277   — Edited

hi mickey

i dont have the camera yet.i do have an new sd card from 32 GB. i have also an ezbv4 on stand by.i can sure use all help. ( thanks ) i have a nokio adptor output DC 5v 2amps,is this useble?

PRO
USA
#278   — Edited

@Nomad: Watch this tutorial video: https://www.youtube.com/watch?v=TUz2mVtJVsM to understand what you have ahead.

is like taking a bath: Wash, Rinse, Repeat, do it as many times you need to understand. You can post questions on YouTube link too, maybe the video creator or someone else will help with your question.

before you start your setup you will need:

  1. To connect the RASPBERRY PI to a HDMI Monitor  Mini HDMI Plug to Standard HDMI Jack Adapter :  https://www.adafruit.com/product/2819 or something like this: https://www.amazon.com/CableCreation-Mini-HDMI-Female-Adapter-Support/dp/B01HQ2H6OW/

  2. To connect the RASPBERRY PI with Keyboard, Mouse OTG USB: https://www.amazon.com/MakerSpot-Accessories-Charging-Extension-Raspberry/dp/B01JL837X8/

  3. Power Supply you need 5V / 2.5A  https://www.amazon.com/MUZOCT-Supply-Charger-Adapter-Raspberry/dp/B073JDFML5/

  4. SD CARD pre loaded with (NOOBS) https://www.amazon.com/Raspberry-Pi-32GB-Preloaded-NOOBS/dp/B01LXR6EOA/

if you have already a sd card check this video: https://www.youtube.com/watch?v=zJC0JykWnMs

Other stuff required:  PC USB keyboard PC USB  mouse Monitor with HDMI input

You will need to watch carefully, and follow all the steps, if you miss a step start from the begin, until you get your PI working.

Good luck:)

PRO
Belgium
#279  

hi ptp

hmm takin a bath.to me it looks allreddy like a swimmingpool.xD thanks for all the links.bying more stuff will be for next month.

#280  

Hey Nomad, dont stress..take your time, learn the new hardware and dont worry!

You can ask for help anytime, or we Skype...no problem!

Looks complicated now, but its easy!!

#281   — Edited

Hey Nomad, I will try to make a new frame for IOTiny and EZ Camera..

Then you can take more time to learn the new hardware?

Let me know!:)

PRO
Belgium
#282  

hi mickey

great thanks mickey.i have an ezbv set up for trying to move the servo's. but that will in 14 days when they arrive.

#283   — Edited

You can also use the servos directly from your PC!!

I can make a frame for IOTiny if you want, and later you can use EZBPi on your new board!

Try to put the EZBPi on your new board, but if you get stressed out...let me know!!

PRO
Belgium
#284  

great mickey.i start when i have all the parts.at this moment i sleep alot. have an infection in my stomach and esophagus.i have to take 16 pills a day, for 10 days.:( bummer .ptp made a good list to start.camera will be here, in a few days.

PRO
Belgium
#285  

hi mickey&ptp

i have the sd card with the noobs:D .question,can i use my pc screen&mous for the rasberry pi ? all other parts are ordered .i also have an adaptor 5 v 3 amp.

#286  

Cool!!!:D

So, yes you can...but it might be a bit difficult! The Raspberry Pi is actually a PC by itself, and normaly you would use its HDMI and Mouse plus keyboard connected to its Micro USB port.

But you can also remote control it like this!

#287  

Also, one question...do you have the IOTiny? Do you want me to make a frame for ZOEs head?

Or do you want to try with the Pi Zero?

I can also prepare everything for you and send the SD card with everything in a letter to Belgium, no problem!:D

PRO
Belgium
#288  

i have a IOTiny. i wanted to try bolt ,cause iotiny has audio.

#289  

@Mickey666Maus

I didn't know that I could remote into my Pi that way and see the desktop? Only SSH remote through the terminal? Really good to know. Thanks for posting this.

PRO
Belgium
#290  

hi herr Ball

are you going to try the remote control for your pi?

#291  

Yes I do not use my raspberry pi with ARC. I only use it with some of my other electronic projects.

PRO
Belgium
#292  

hey mickey

is there a way to test the camera?mine is little damage. it came like this in the mail.

User-inserted image

User-inserted image

User-inserted image

#293  

Oh, that's bad...I hope it still works!!

How far are you with setting up your Raspberry Pi Zero? A good test would be to try with ARC...this week my sister is in town, but we can Skype next week?

If you got Raspian on your Pi, you can put EZBPi and try the camera, let me know!!:)

PRO
Belgium
#294  

skype would be awesome if you have the time.

sofar i have only the sd card reddy and the cam/power adaptor. this week come more parts.

#295   — Edited

Do you know how to use Teamviewer?

This week I am busy, but next week is fine!:)

PRO
Belgium
#296  

any time is good.i still need to wait for parts about 14 days. no i dont use team vieuwer.

User-inserted image

PRO
Belgium
#300  

hey mickey

patrick.dierckx19

PRO
USA
#301  

Trying my first print on my new - CR-10S Pro V2 3D Printer

We will see  :-)

EzAng

PRO
Belgium
#302  

hi ezang

goodluck and have fun printing.

#303  

@EzAng  congrats, the journey has just begun.

PRO
USA
#304   — Edited

any pointers?

I using : The Bed Temp is 149 deg Fahrenheit and I always use 475 deg Fahrenheit for the Extruder  - 65 / 135 c

I print on glass hairsprays

EzAng

PRO
Belgium
#305  

there are test prints on the sd card from your printer. use one for printing.

PRO
USA
#306  

I did not do that, I will start again  :-)

EzAng

PRO
Belgium
#307  

Also see that all settings are stored in your printer.like x,y,z  nozzle some 220 heat bed some 50  heat check your leveling off the bed’

#308  

@EzAng  When you purchase filament, not all brands are good when you find one brand you like stick with it.  I tend to use the highest temp listed on the box for the hotend and the bed.  if you will be using glass on the bed scuff it with some sandpaper.  and I like hairspray, take the glass off the bed when spraying.  Make your first print two test cubes,  check if you have a good print and see if there is stringing between the cube if there is some use your retraction setting  I use about 3mm. retraction.   if your print is warping or releasing from the bed make sure you start the first layers closer to the print bed but not to close. if the extruder is making a clicking noise you are to close.  print slower for your first several prints and then gradually increase the speed and see what your 3d printer can handle.    3d printing takes a very long time, live with it,  if you have issues don't hesitate to ask.

PRO
USA
#309   — Edited

Thank again,

I am using the PETG   heating up at 65 / 135 c I stopped my first print, ended up , there was stringing - looked like the extruder was too high of the print job, or is that just me -  trail and error I guess

How do I fill this in?

User-inserted image

EzAng

PRO
Belgium
#310  

ezang

look for video's on youtube about your printer settings. here's a first start ,unboxin,calibration and all you need the first time.

first print

PRO
USA
#311  

Thanks Nomad, I watched the video, I need to level better,

EzAng

PRO
Belgium
#312   — Edited

hello ezang

bed leveling is the most importent to even get a good print. watsh many video's and learn yourre machiene step by step. i always use a raft (jeremie touch me thatxD) then you can see upfront, when a print has a very good chance to succseed.

#313  

@EzAng   your Hot end temp is to low   it should be around 245 deg cel  try the 2 test cubes and see if there are strings between the two cubes it may require a much larger retraction setting around 8mm.  I never use a raft but I have been using my machine for a long time once you set the first layer on the bed right you will not need one. but for success now use a raft.  testing the machine and seeing what it needs is very important.

PRO
USA
#314   — Edited

great info thanks, I will try all of this

looking at my PETG filament - it says nozzle temp 230 - 250 C  and bed temp  60 - 80 C

EzAng

PRO
Belgium
#315   — Edited

ptp

i got all parts,sd card with noobs on it.the pi boots up but error message pops up. it seems that something is missing.also keyboard&mous dont work.i do see the arrow off the mous in the screen. i gess here starts the crazyness.xDany idea forgot the picture

User-inserted image

thanks

PRO
Belgium
#316   — Edited

WOOHOO found it .its downloading now.

User-inserted image

all works.

PRO
Belgium
#317  

hi mickey

zoe chest in colors german flag.black servo's&brackets/red/yellow

User-inserted image

#318  

Supercool!! Gret to see your progress!! Its really nice that you are remodeling the design and adding your own flavor to it!! Keep it up!!:D

#320  

Hi Mickey666Maus! Thanks for showing this. I'm loving these eyes!! It really gives it personality!

PRO
USA
#321  

Yeah these are fun! Very cool!

#322  

Since not everyone has a VR headset and it is also nice for visualization, I build a controller app that can be used with a gamepad or keyboard... It links to ARC via a Flask web server. You can also send data from your Python App directly by using pyvjoy or just sending Vector3 data to make your robot move!!:)