Untitled Hoverboard Project

fxrtst

USA
robot video thumbnail

User-inserted image

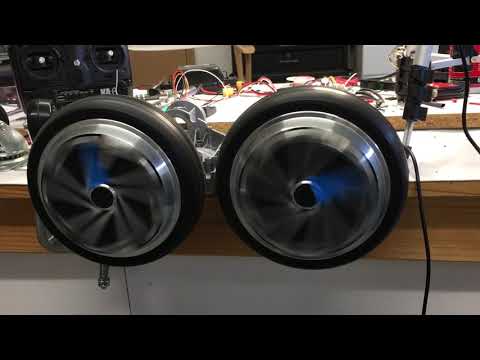
As promised I've started a separate thread on this. I had mentioned over at my Alan thread that I was thinking about using hoverboard motors for a rolling base for the full bodies of Alan and Alena. These motors are super cheap at about $25 a piece on ebay. They are 3 phase just like the 3 phase hobby motors for cars and planes. So there should be driver support for them.....well yes and kinda no.

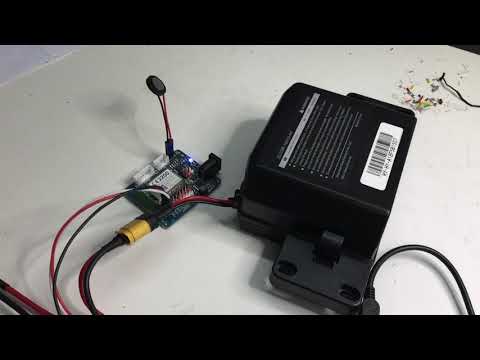
I have been watching a motor controller called the ODrive. Its all open source (hardware and software) and its a dual motor driver. I posted a video of these motors on a grocery cart driving around using hoverboard motors. So I bought an Odrive. I ended up buying a whole hoverboard so I could use the charger, battery and some of the connectors. This one came from Frys and cost $100. Its good upto 265 pounds.

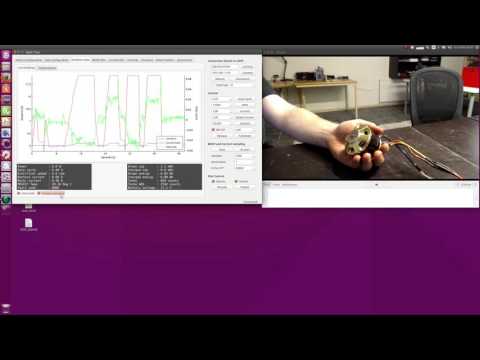
Well now the bad. The ODrive is still a work in progress and not too intuitive. But they have a good write up on how to set them up with the hall effects encoders. All went well until I tried to save out to the board. Over and over again i could not get it to work right. I posted on the forums and got no reply back as to what the issue could be. So after days I began looking for another solution.

I found a great source in china that is making opensource stuff for skate boards. The got 2 single motor drivers. Each one has a standard servo connector and i can use two of them for mixed mode (tank mode). Each board costs $85. So its a bit more than the ODrive ($150 with shipping for the 48 volt ver.)

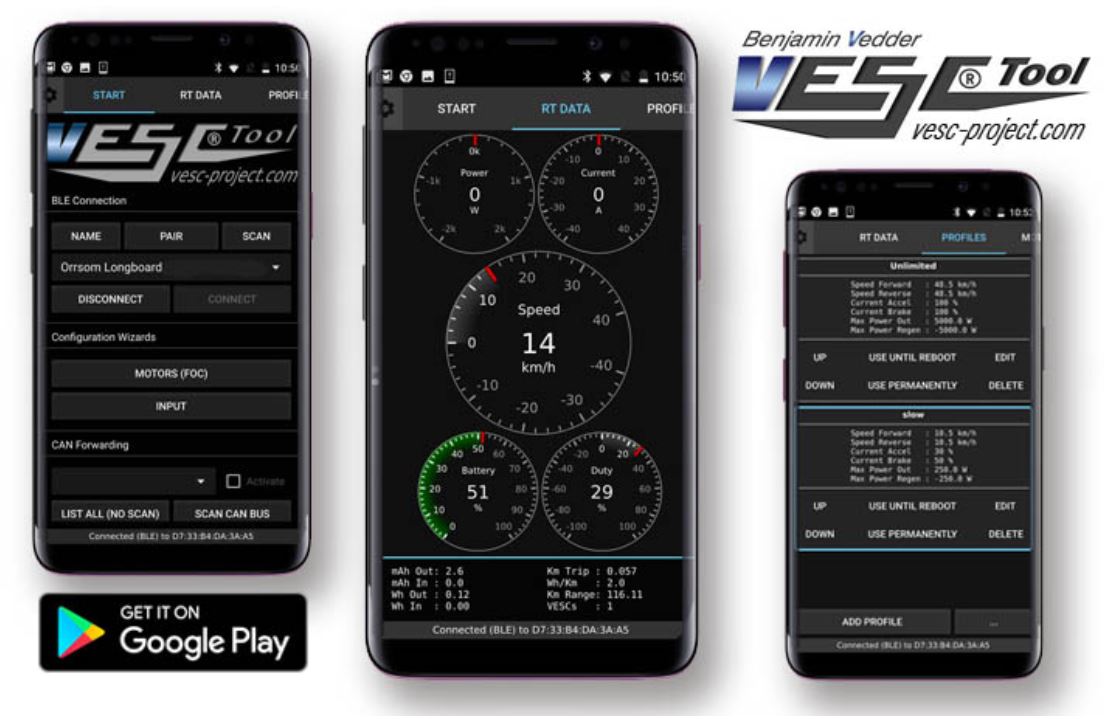
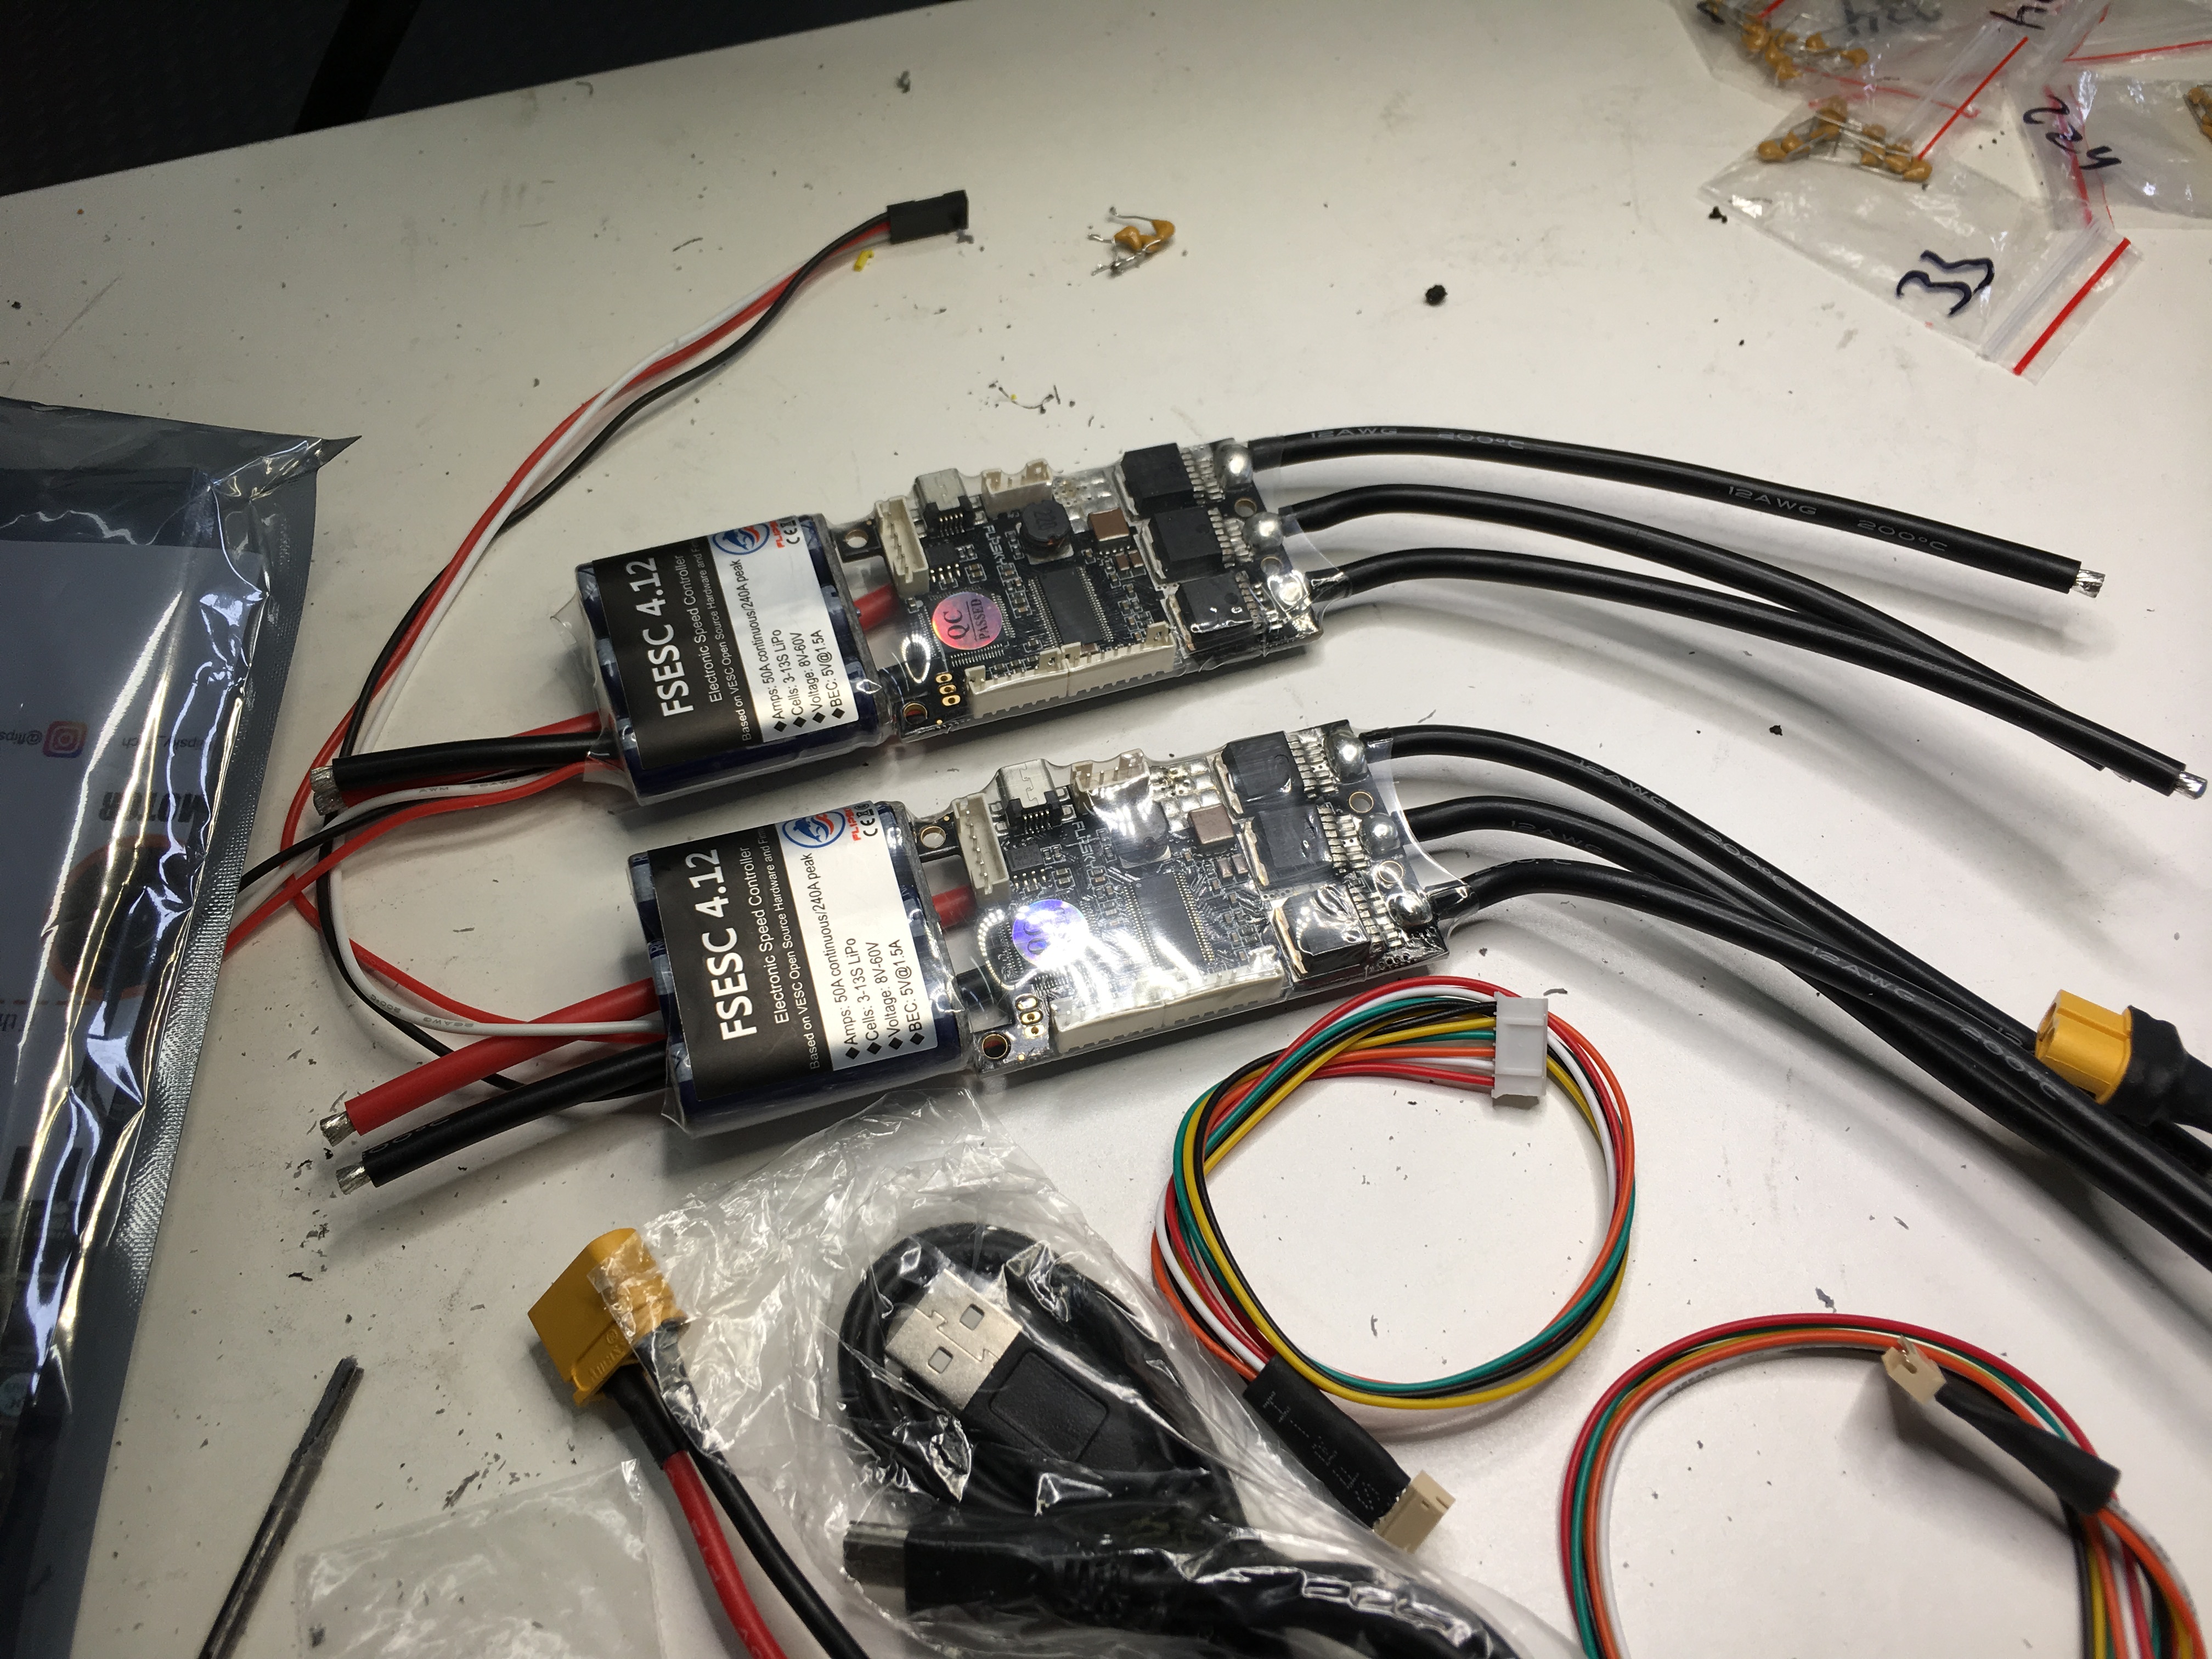
The name of the board is the FSESC 4.12 50A Based on VESC 4.12 from Flipsky ESC.  And can be found here: Flipsky ESC

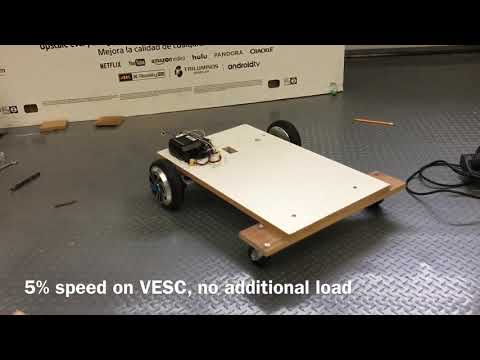
This controller can be completely programmed with their really great software..automatically figures out all the poles for the phases. Set up the frequency for the pwm and even have shut offs for voltage mins etc. They have a good youtube channel with vids on how to set up everything.

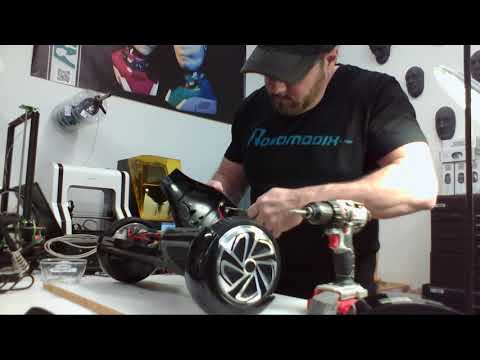
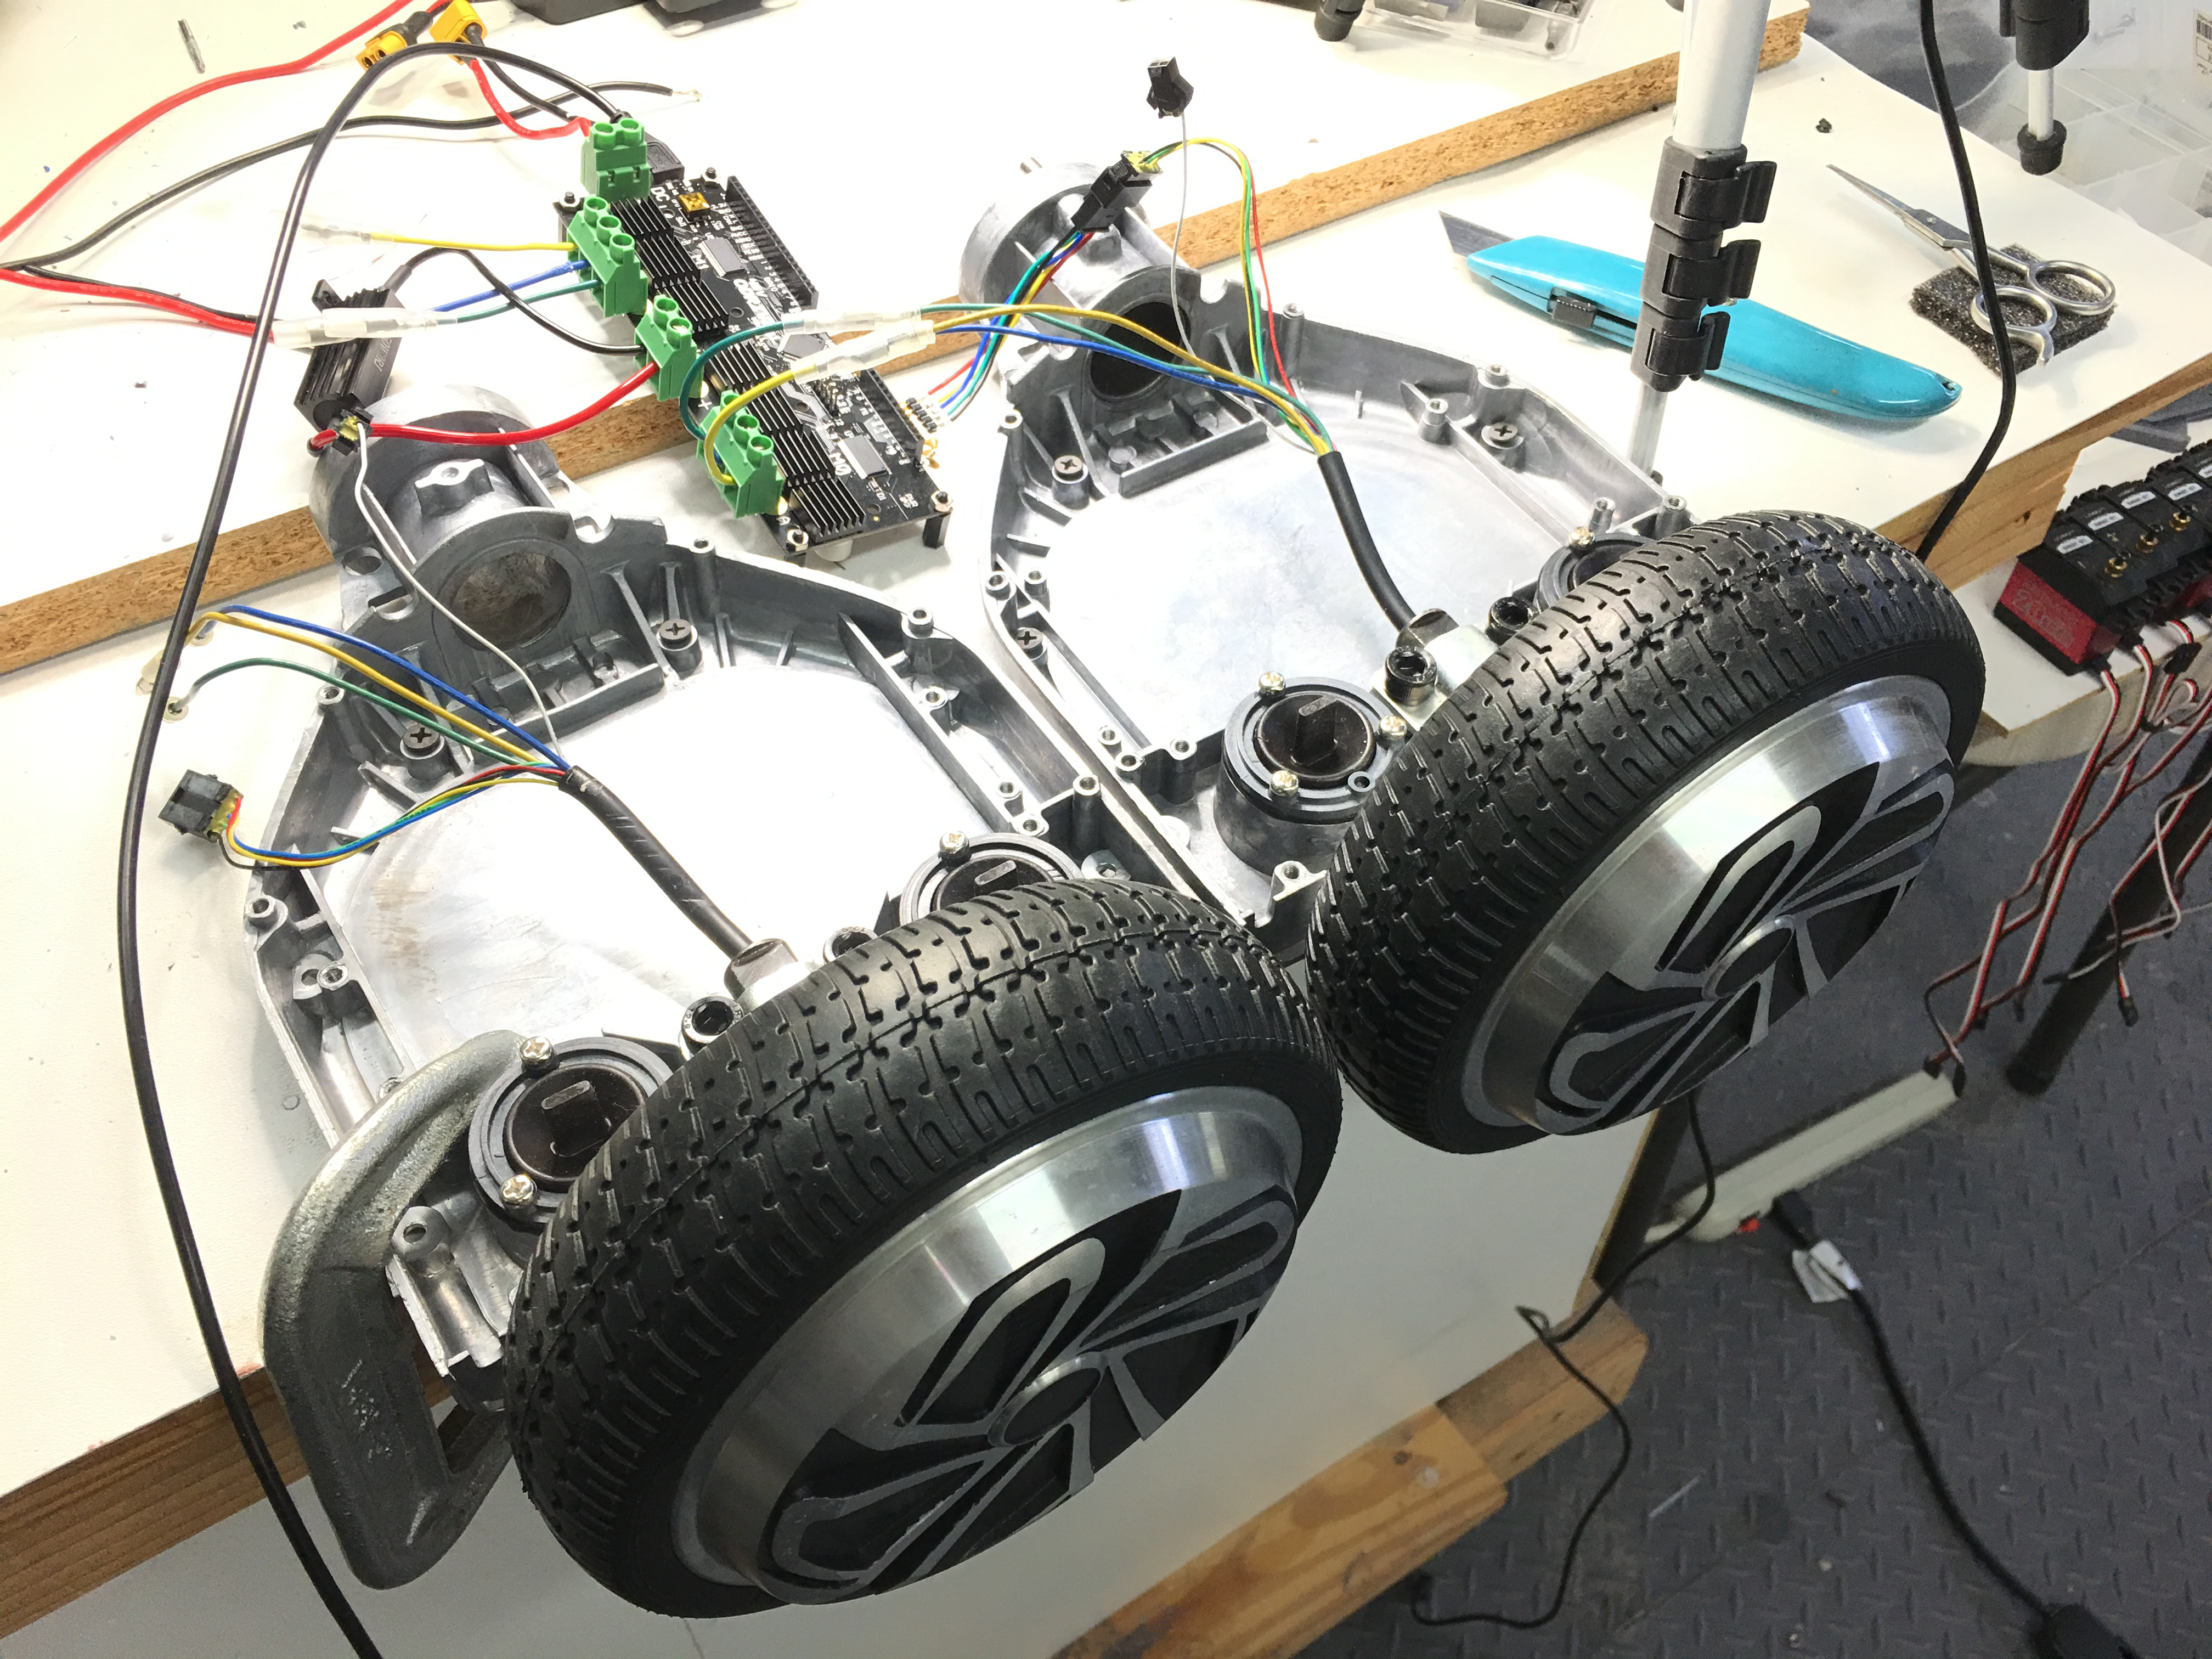
I have the video of the break down of the hoverboard done. As soon as I get these control boards I will be doing tests with the ezb to control them. Then I'll put together a final video and post here.

By — Last update

ARC Pro

Upgrade to ARC Pro

Harnessing the power of ARC Pro, your robot can be more than just a simple automated machine.

PRO
Synthiam
#1  

Oh man!!!! I’m so jealous you’re doing this robot hack. I’ve had my eye on something like this for a while but time has been a rare luxury these days :D

in the meantime, I’ll continue living vicariously through you!

PRO
USA
#2  

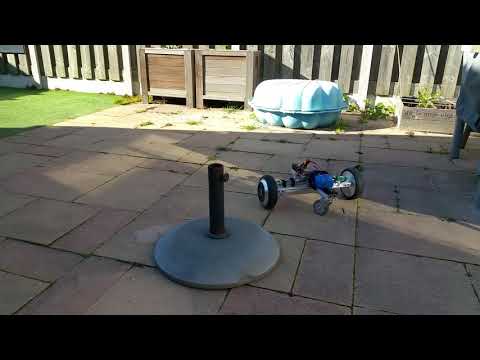
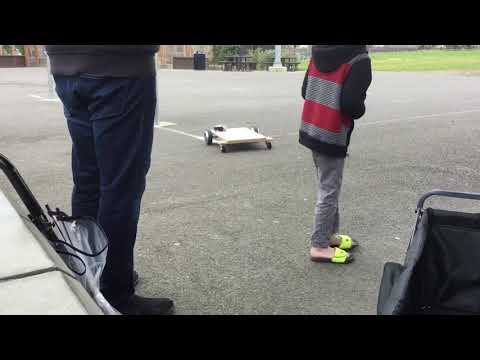
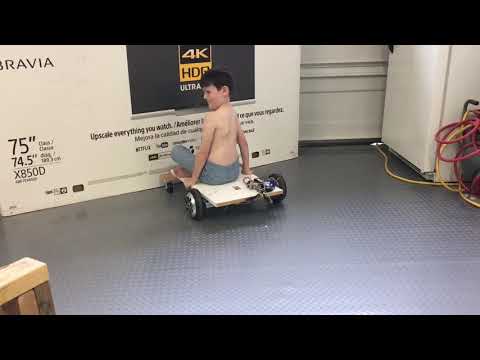
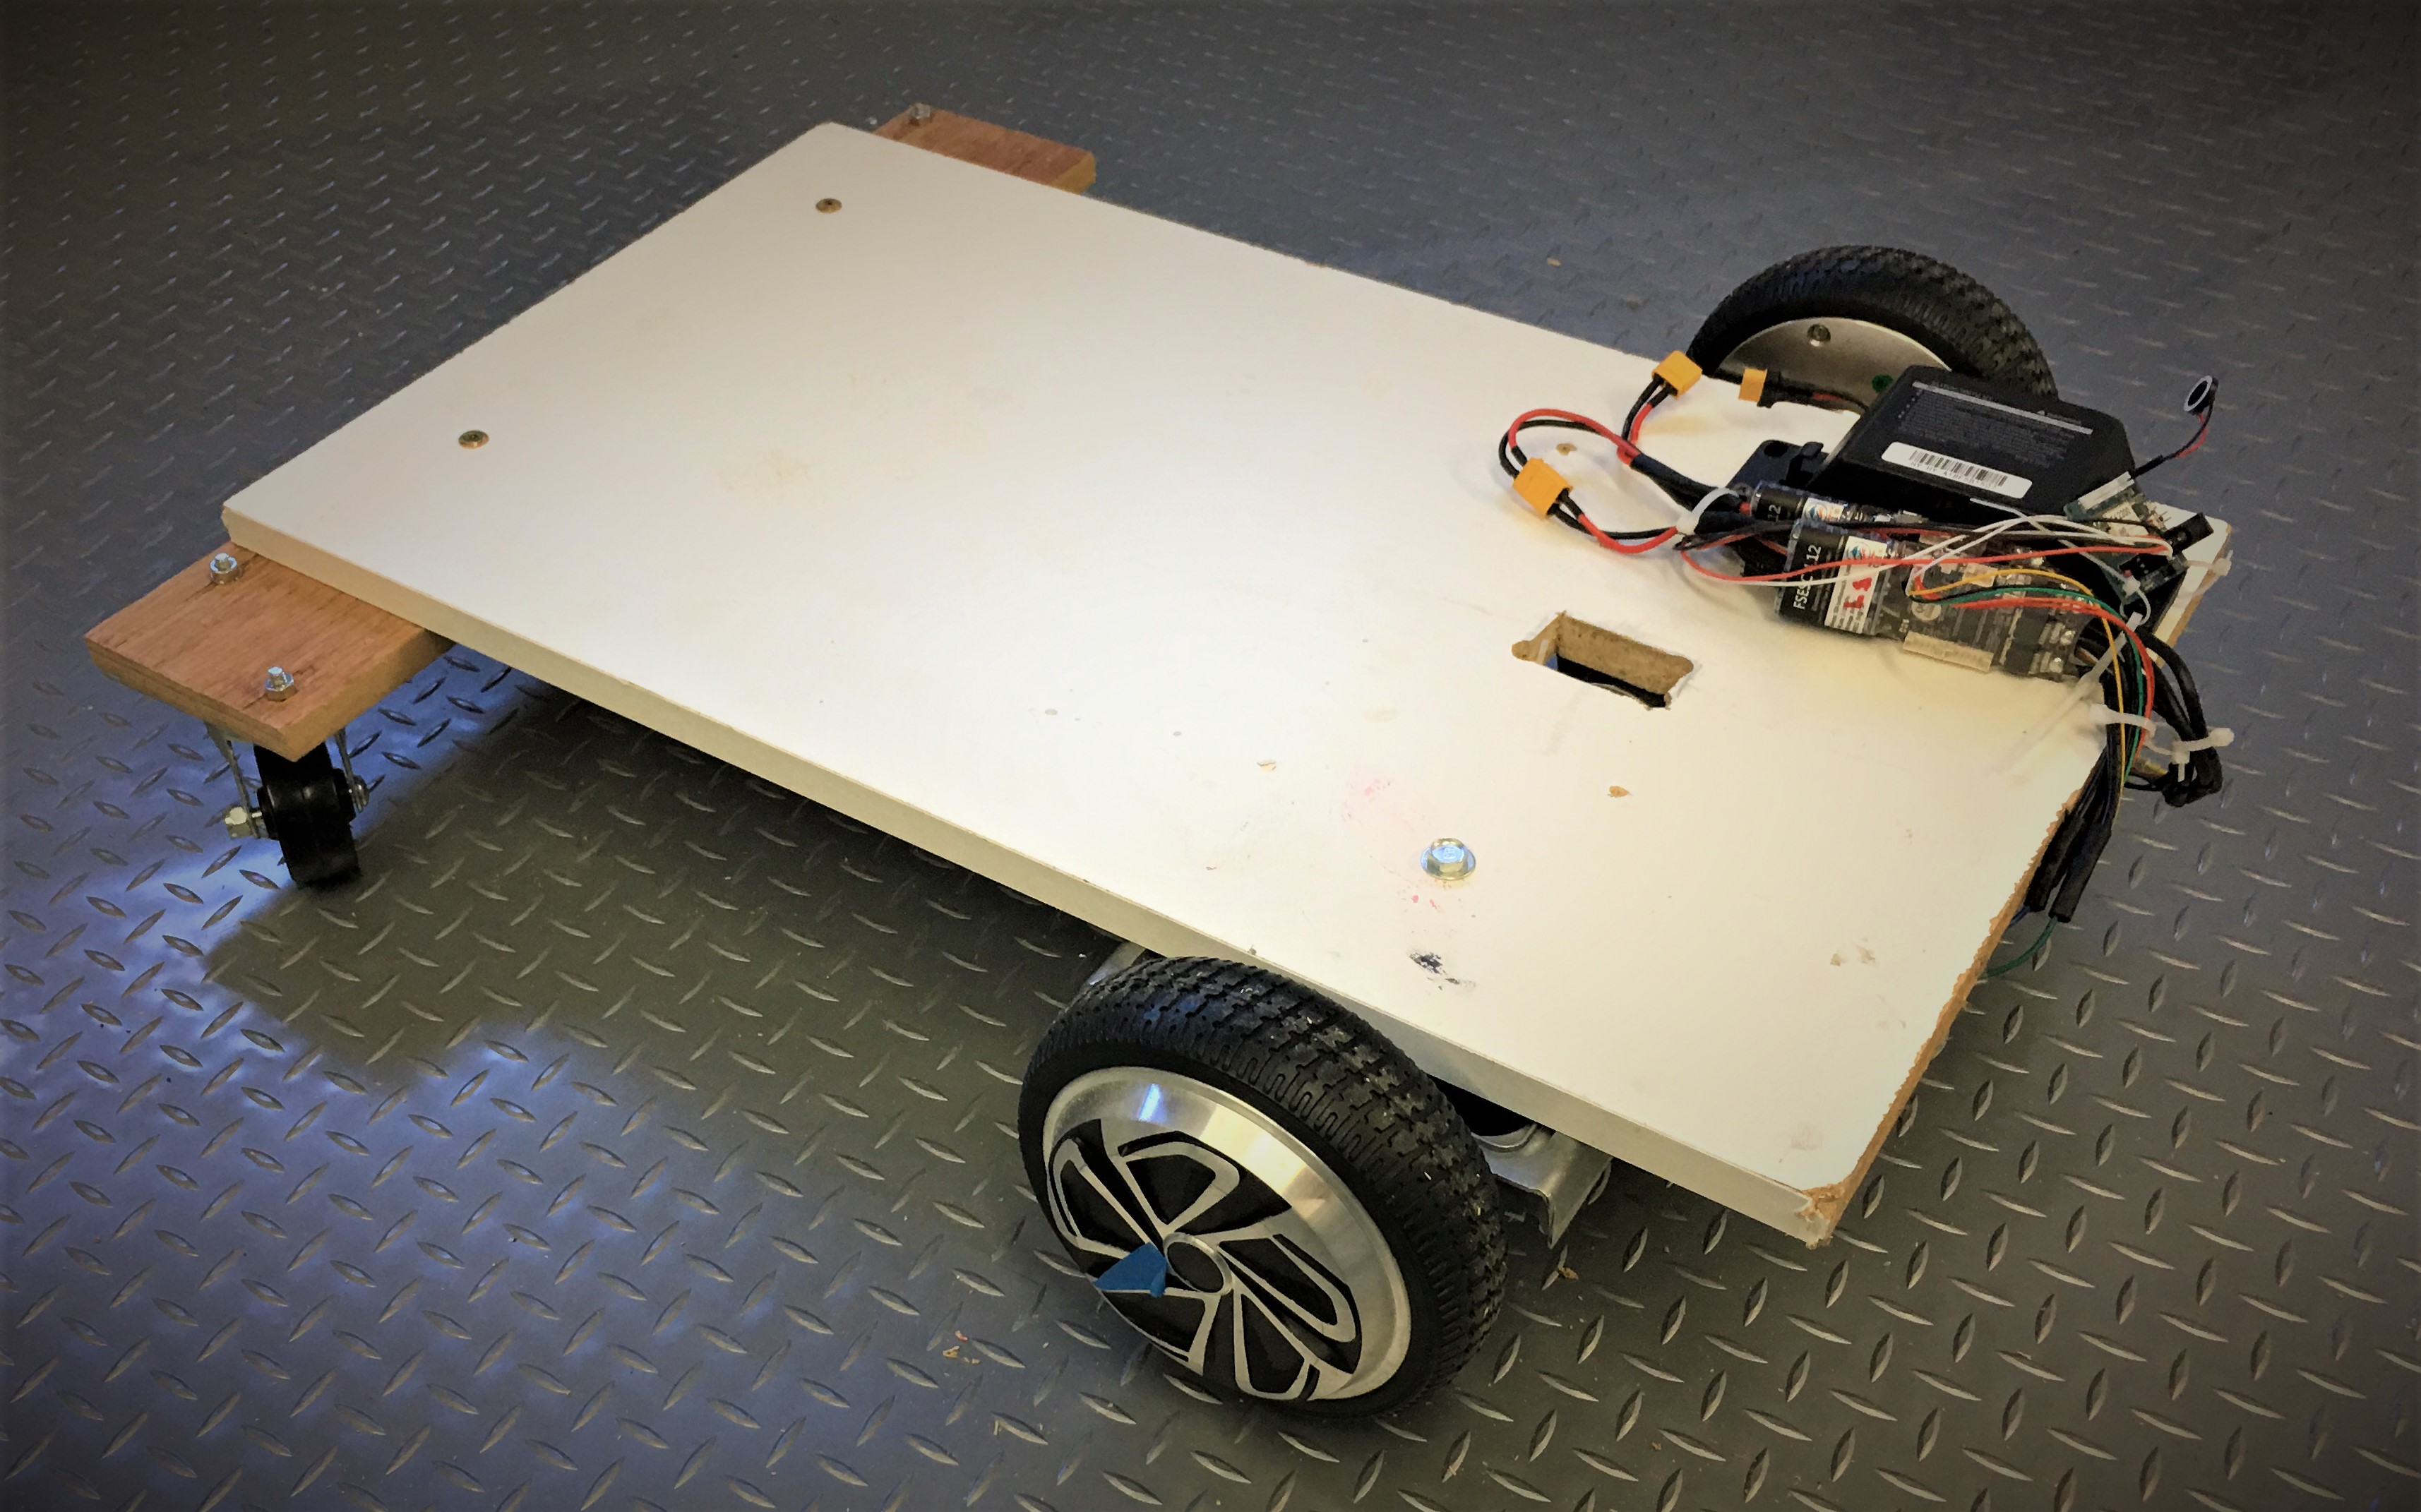
You think its legal to strap your kid to this as a go cart and drive him (with a helmet of course :)) as fast as i can down the road controlling from my Iphone.....lets find out!

#3   — Edited

Hi Will, Brave kids with a fast go cart controlled by Dad ? Sounds Great ! Normal to me... Thanks for starting the new thread. Are the motors normally 48v? I thought 12v. The controllers sound interesting. I am looking forward to your progress. As soon as my work projects let up, I hope to begin with the base unit also.

Will, we have no Fry's near me here on the East Coast. Could you tell me what the Manufacturer name of the hover board you got is? This way I will be able to share my ideas for the base using the same components.

PRO
USA
#4   — Edited

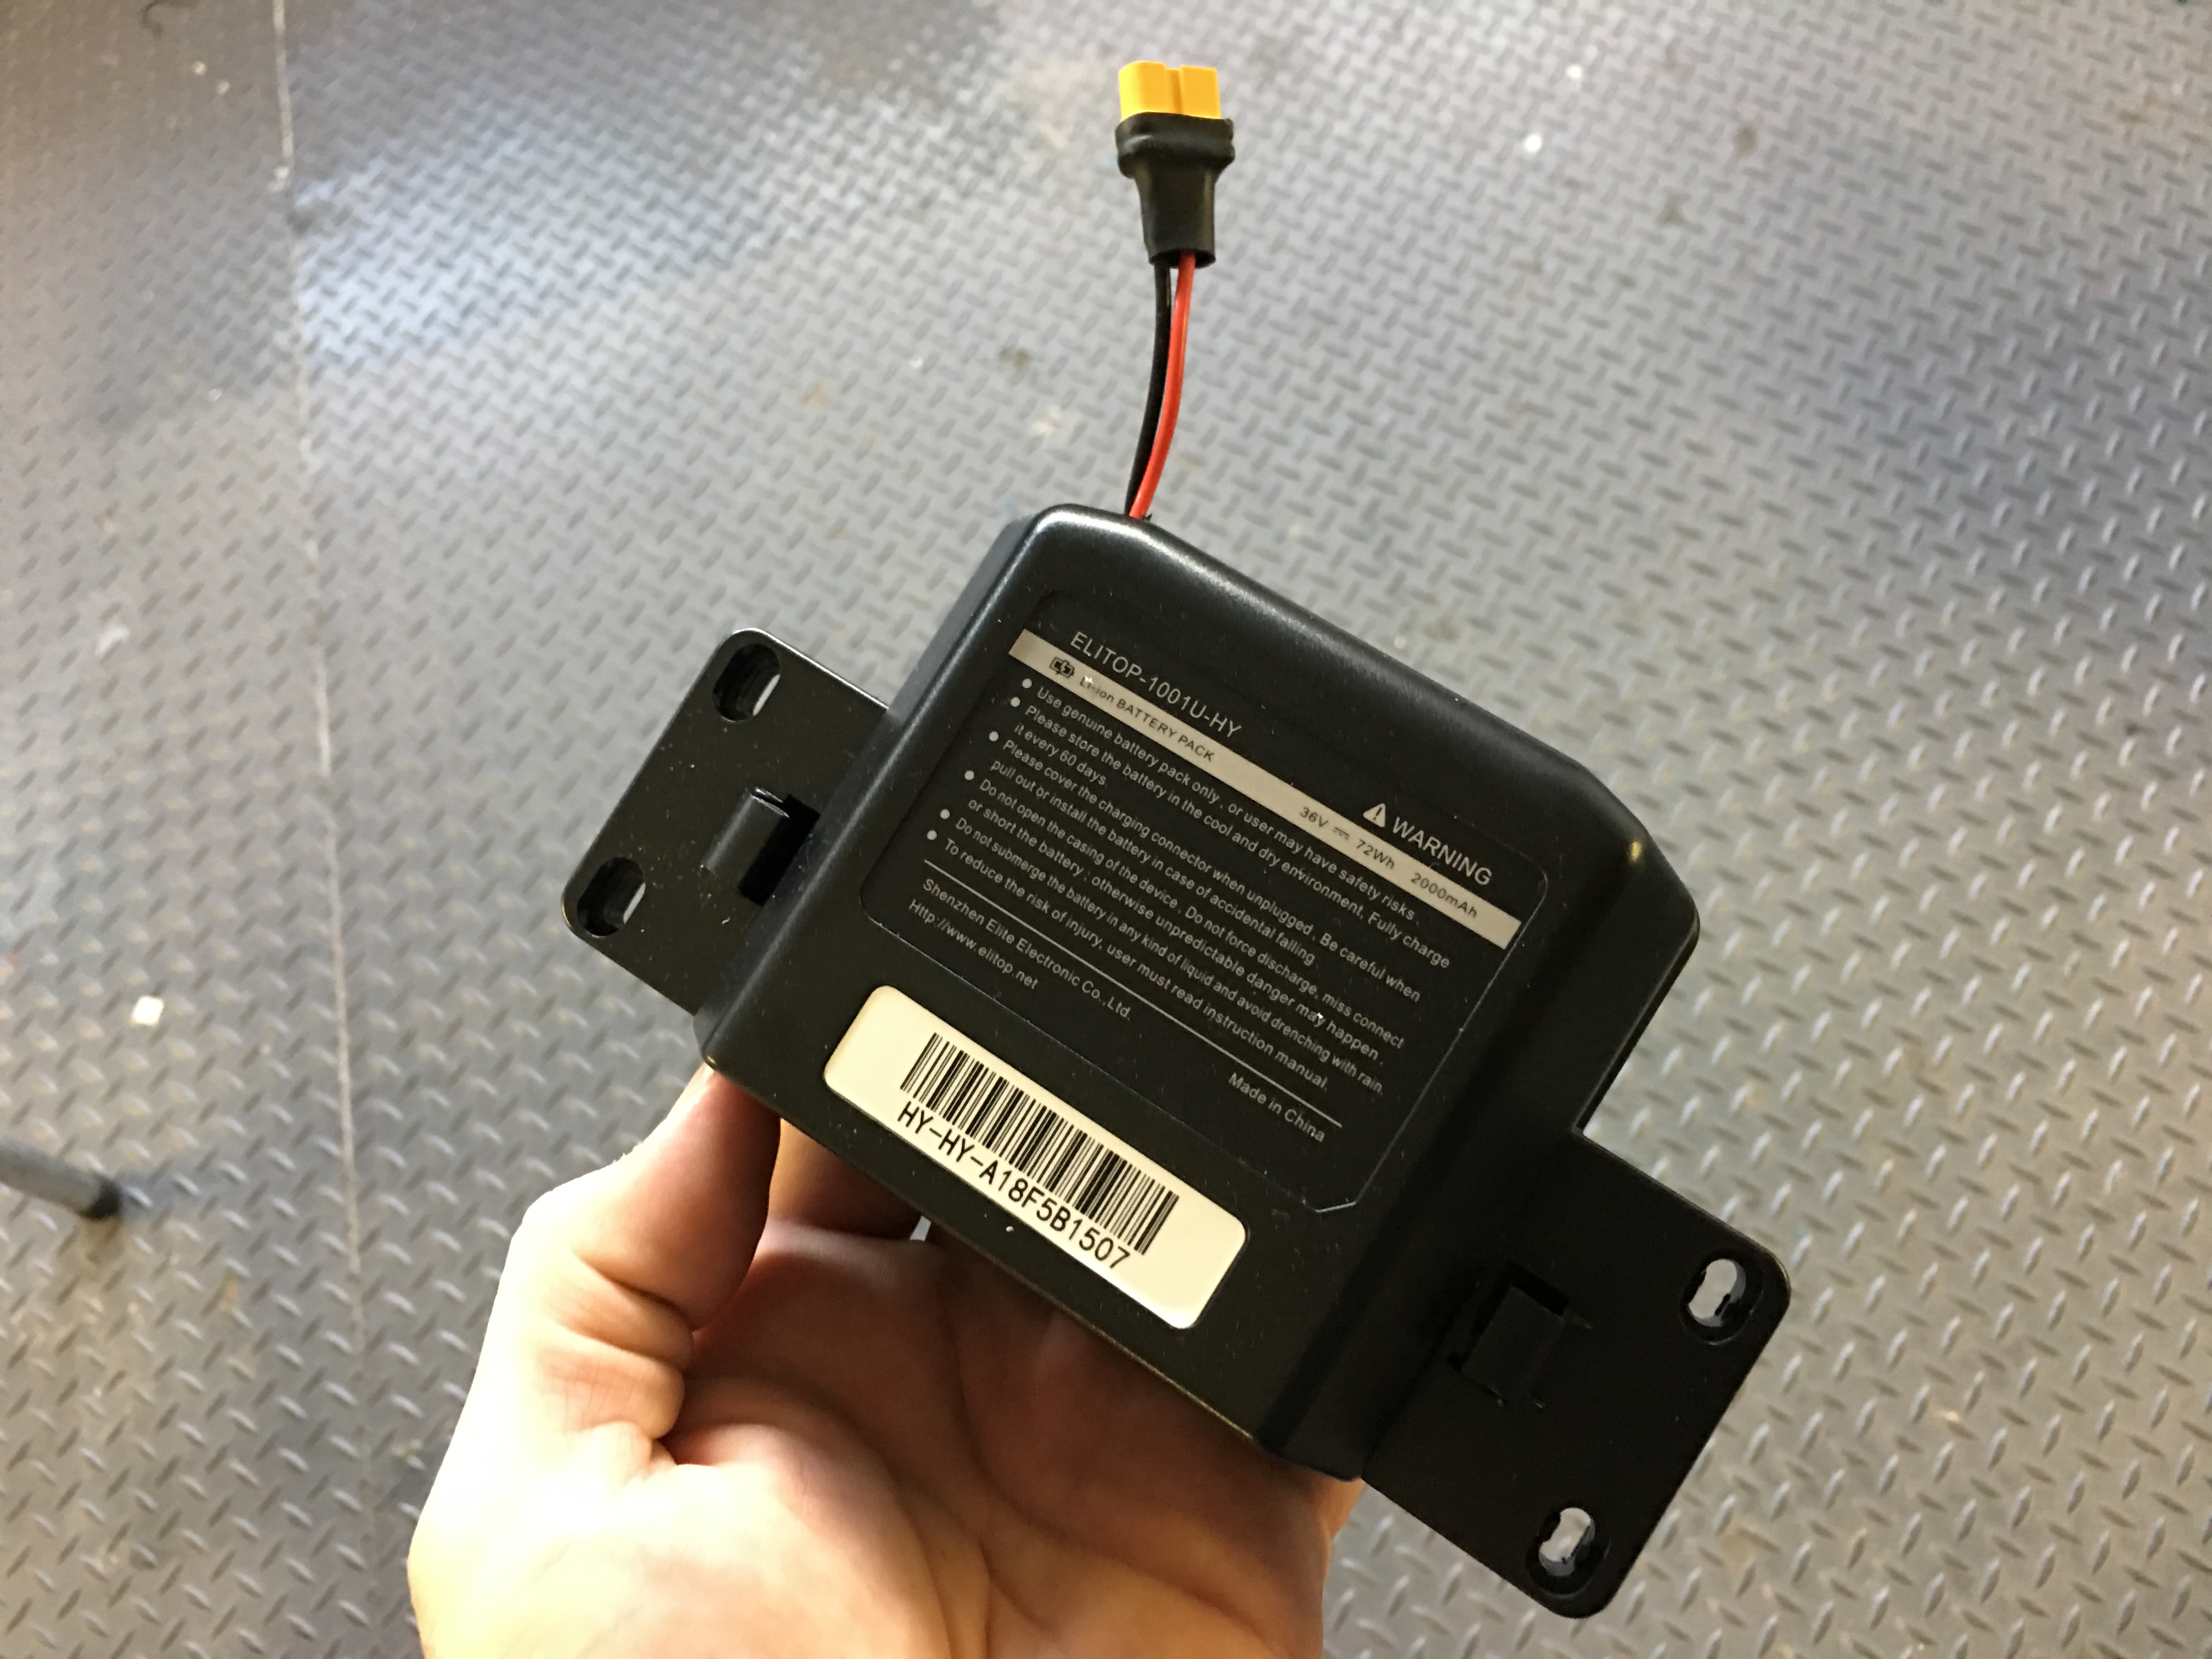
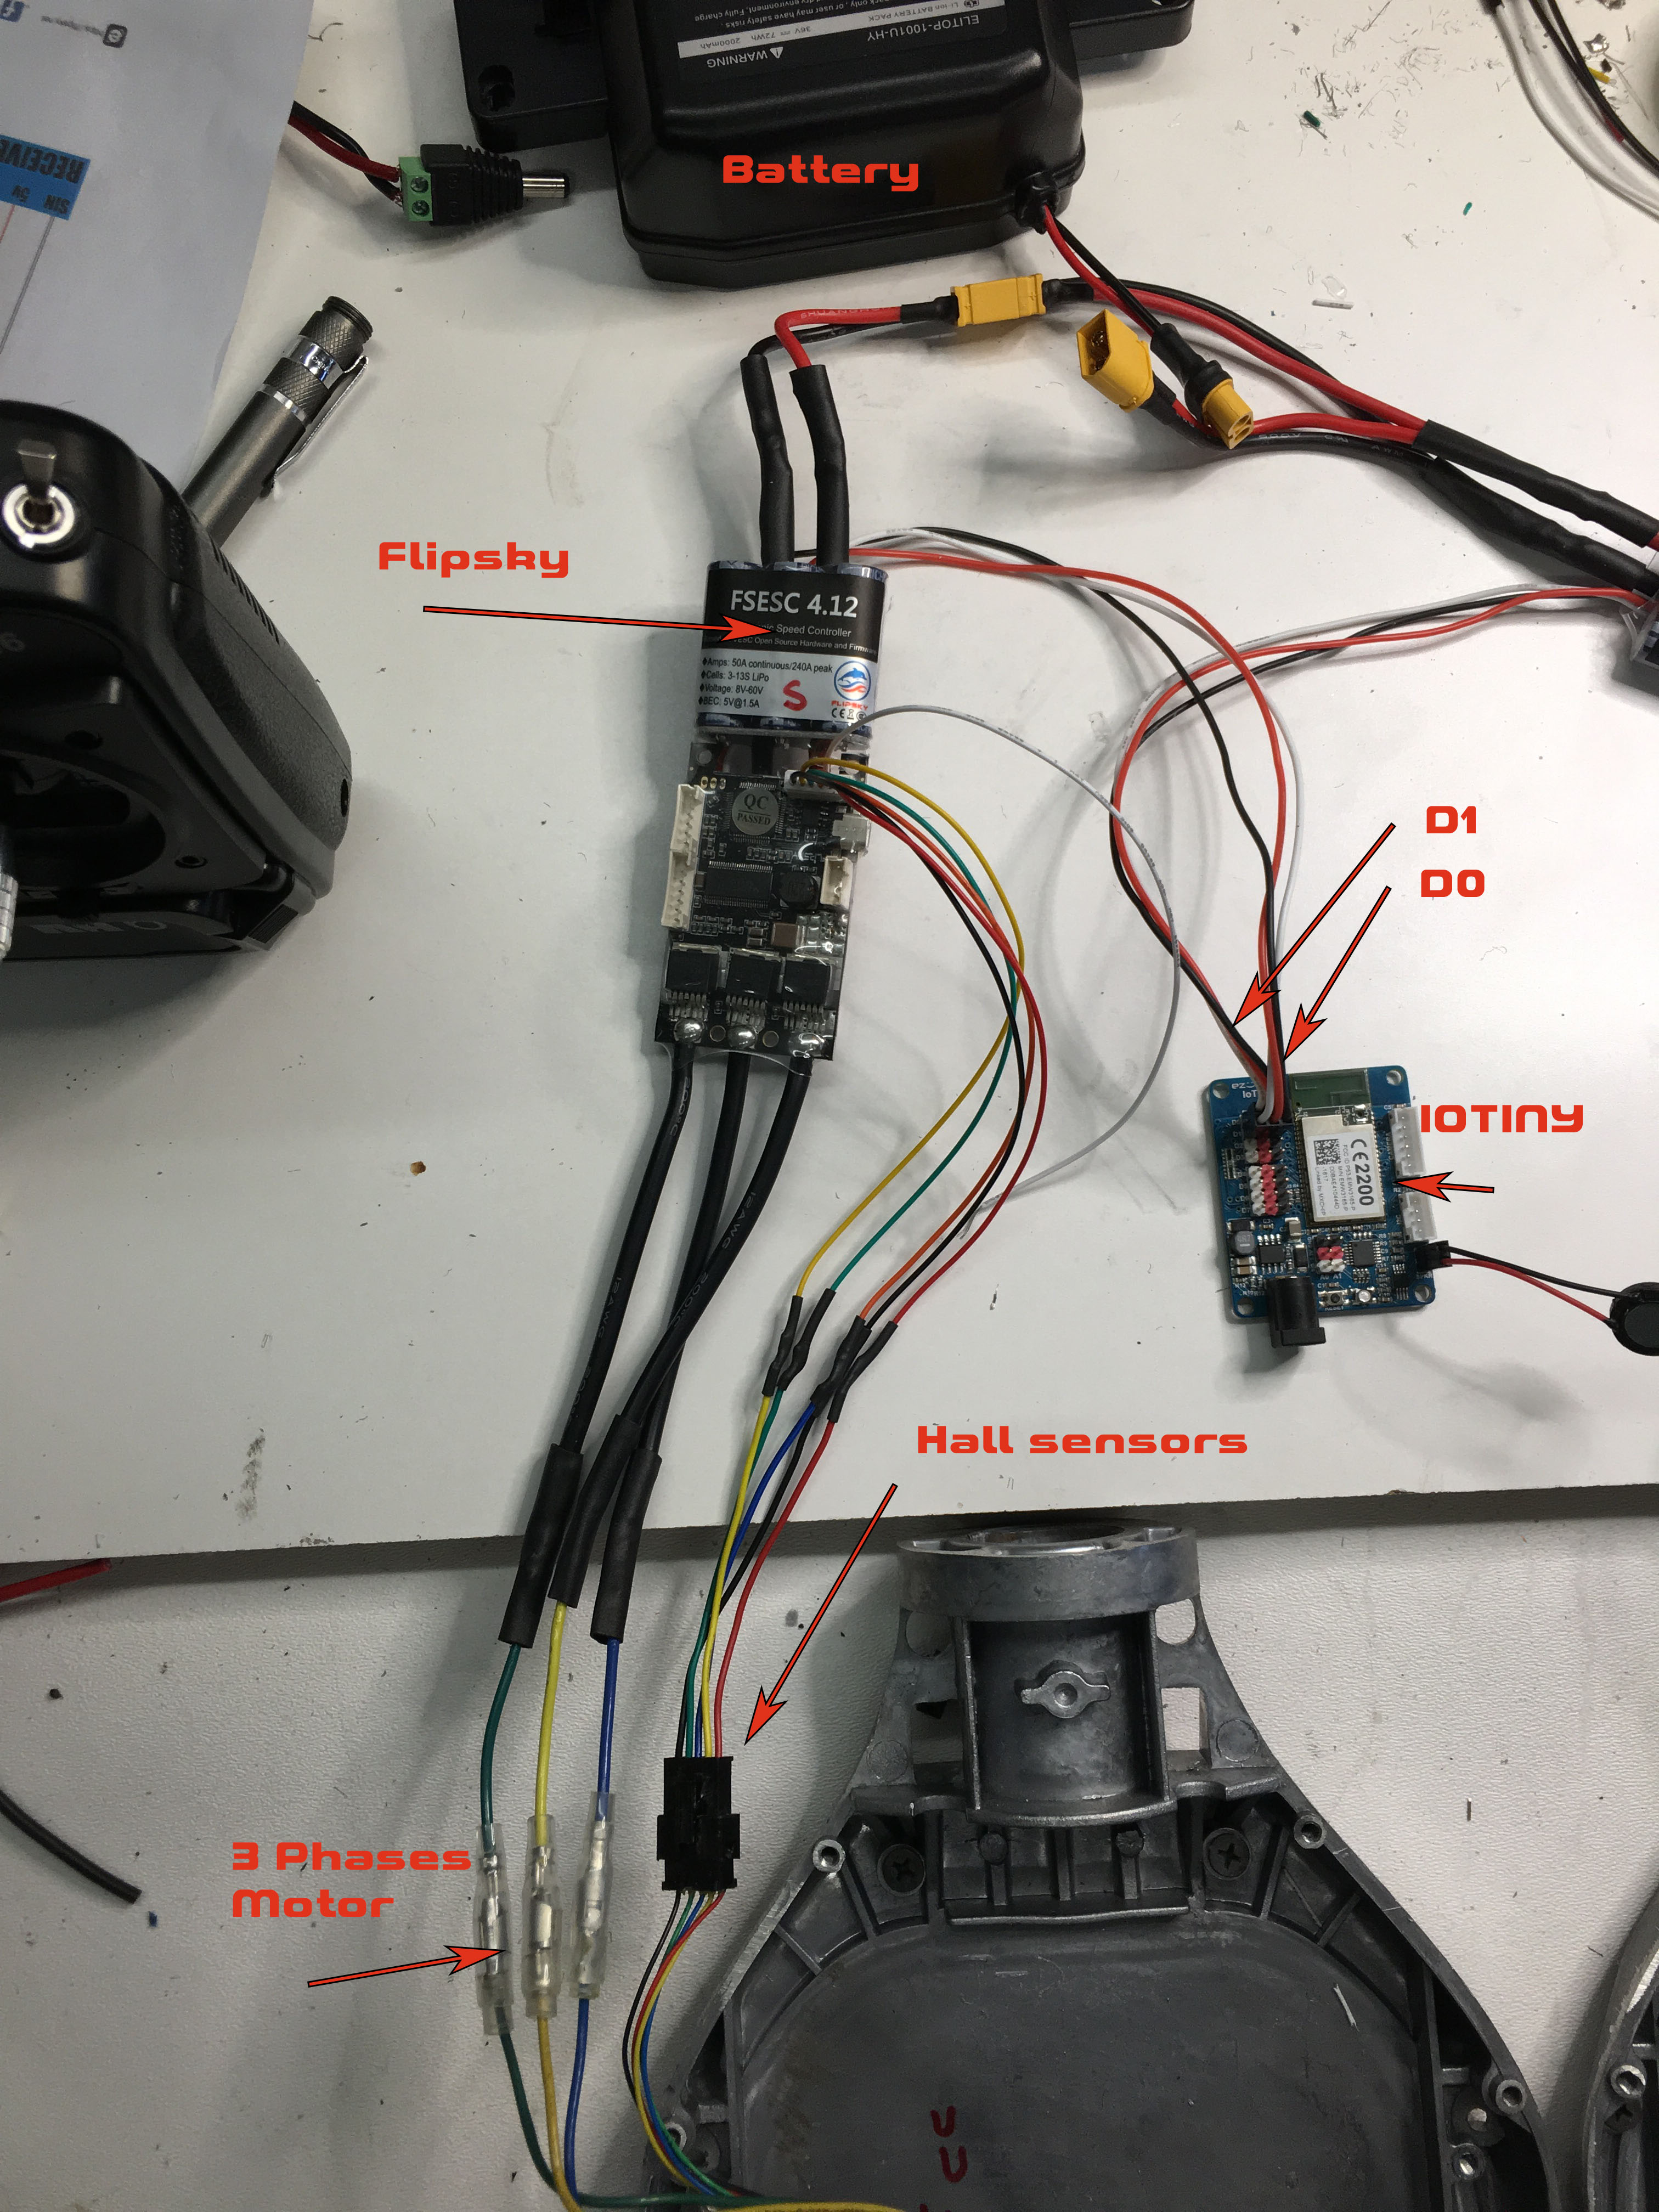
@Andy The motors are actually 36 volts. The controller I got from Odrive was rate at 48v...meaning i could use motors up to 48 volts. . The voltage is higher than 12 volts because those hoverboards carry 200 pounds, 7 miles an hour for 6-12 miles! Its incredible when you think about it. I can hold the lipo battery pack in one hand! The Flipsky controller allows you to use motors from 8v-60 volts upto 50 amps per channel.

User-inserted image

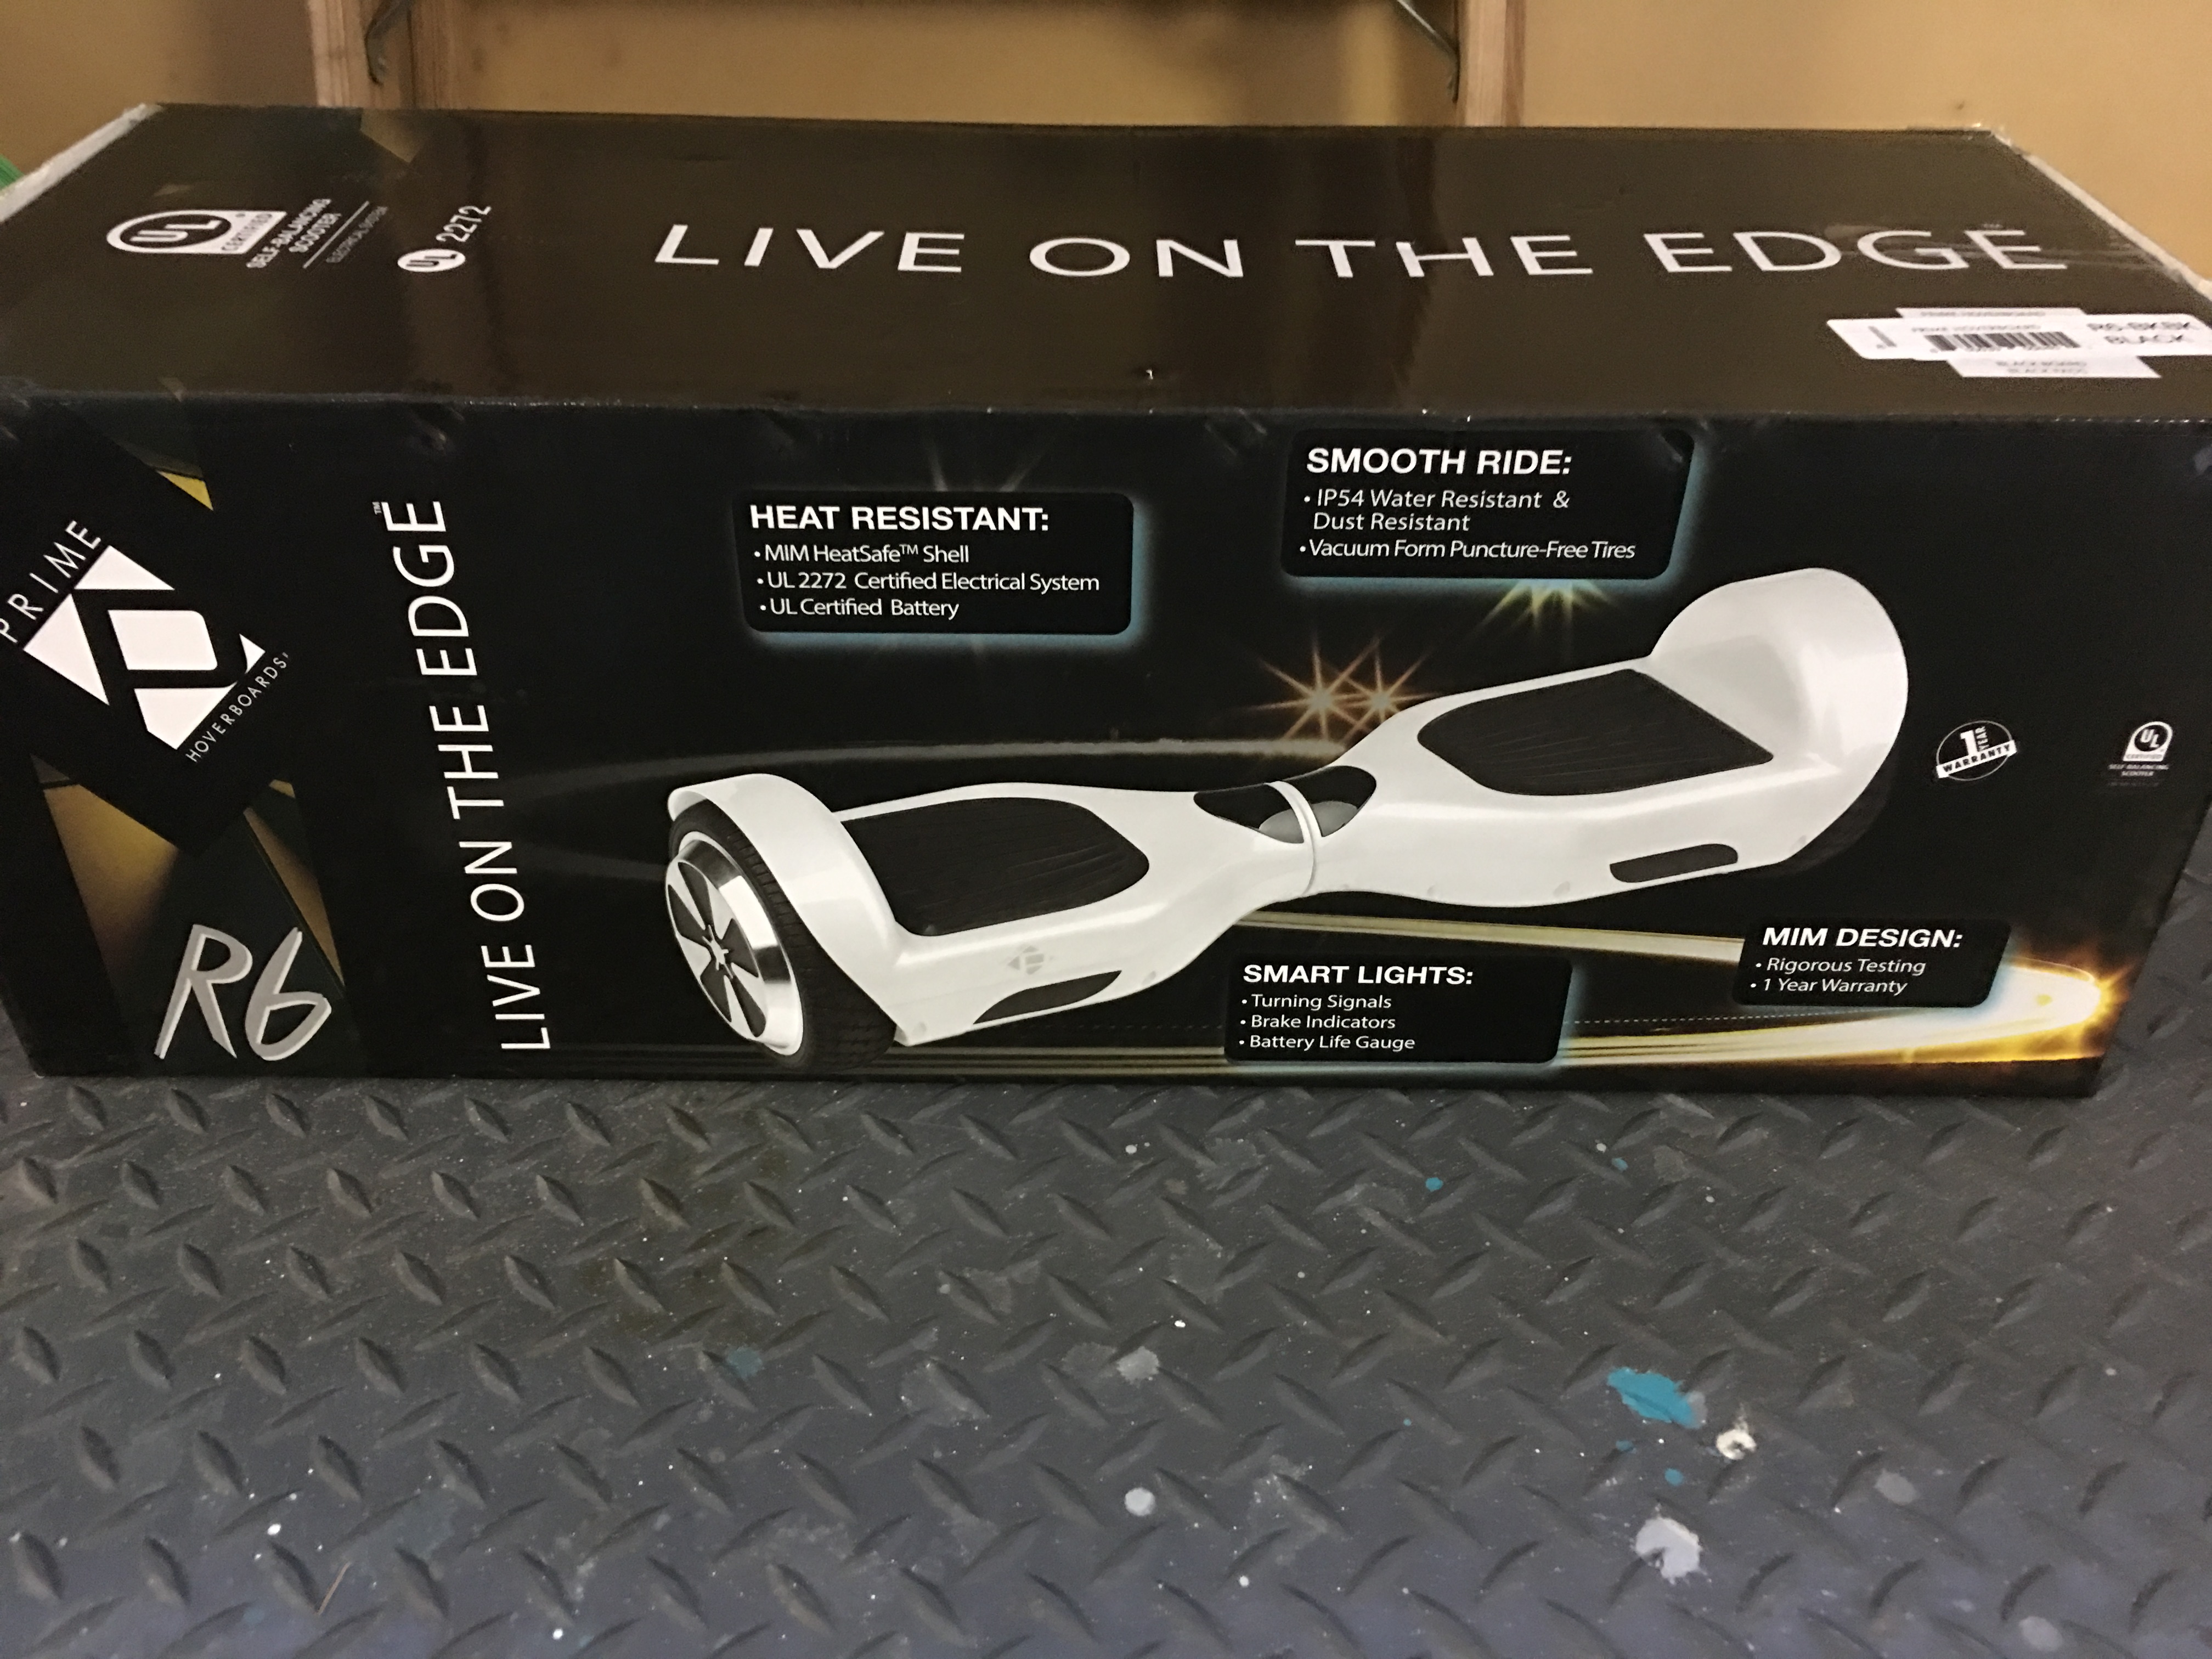
I'm using a hoverboard called the Prime R6. Its some generic hoverboard...but i got it because it was on sale and it can carry 265, which is about 40 pounds more than most. The manufacturer has it on sale for $144 reg $349. But you might be able to find a better deal elsewhere like I did.

User-inserted image

#5  

Thanks for the info Will. I haven't done my homework on the motors,  battery or esc. I am hoping for some free time soon to start reading up and ordering. I think I have seen the hoverboard locally and will check it out. My end goal is to build a base with navigation (hopefully based on the unit DJ will release soon).

PRO
USA
#6  

...yes we are thinking along the same lines. In fact this should be a good demo for InMoov, and any robots that require a basic mobile base to build upon.

Hopefully with the hall effects encoders there can be some good positioning. My biggest fear is not being able to control both motors equally. Meaning if one motor moves slightly faster than the other it will not drive straight. So there will be some challenges ahead!

#7  

To carry 265 pound loads and travel many many miles was the plus of what I saw too but then got put off at the extra costs and complications as this is new ground for using in a robot but glad you are doing it,lets see how it can be done!

#8   — Edited

Speed matching vs slippage is always an issue on something like this. The sensitivity of DJ's Nav system should compensate. Update timing can also help. I know the top speed will be relatively low so the heading refresh should be able to adjust. I also need to refresh my brain about PID loops? They may help with this? Ptp may know.

PRO
USA
#9  

The Open source software i will be using to control and program these controllers is called : VESC-Project.com

I've downloaded the software and Its very very thorough and covers so many options.  There is a set up wizard which i will use to program them with and then I will dig deeper to adjust settings manually.

I've already found a fix for my problem about controlling both motors and keeping them straight. There are two wires that connect both controllers called CAN. One becomes the master at ID 0 and the other becomes the slave at ID 1. You program both but the master delivers the signal so they stay in sync when travelling straight. The hall effects encoders will assure that...now bolting them straight to the board may be more of a challenge xD

#10  

Good news. I thought there should be a way to do it. I would think you can also put in an offset. ( just in case you are a bit off in the alignment.) If not shims work well. LOL

I just clicked submit and have a hoverboard on the way to Connecticut. I paid a bit more but it's on its way.

PRO
USA
#11  

Awesome! I'm hoping to have the control boards from China any day. Most people say they got them with in a week.

#12   — Edited

I have to read up on the controllers. They sound like a perfect fit for this project. I will be ordering them maybe tomorrow.

Did you plan on a 4 wheel platform? More stable than 3. My goal was to mount my 2 batteries on the base. One will now be the one included with the hover board. Still, I need weight to offset the head, torso and arms.

PRO
USA
#13  

Yeah for this test I am going to just bolt them to plywood and add two 360 castors on the back.

Yeah you definitely going to need some counter balance. In the end I will be using some sealed larger batteries for Alan and I hope their weight in the base will help offset the motion at the top! You can spread the wheel base out but still gotta get it through the doors!

#14  

A car battery should work. Sealed lead acid? I am planning on bolting the wheels to aluminum angle then bolting the angle to a steel base plate ( more weight,)( final design) . The aluminum angle will allow me to adjust the tracking alignment. ( No shims LOL).  I haven't decided on casters or omni casters? The design needs to develop. Prototype will be what ever I can find. A robot about 5 ft tall is my goal, maybe.

PRO
USA
#15   — Edited

Yeah I was going to go with SLA marine batteries.

Here is the screen from the VESC program. This screen is the set up for PPM...you can see the mapping over Can Bus for two different controllers acting as one... also includes traction control and difference...ie as in one wheel slipping under load or on slick surface then working to get going at the same speed to go straight.  Powerful hardware and software.

User-inserted image

#16  

Very impressive! I will have to get my work work done and really look at this. Real time data will be very helpful if we end up with heavy bases. Ramping too. Deceleration will also be needed. Wow, and i am just looking at this screen shot!

PRO
USA
#17   — Edited

Since we are using it for robots and not racing skate boards I'm going to set these up as FOC. They are super quiet and a bit slower than the BLDC mode. But you get instant full current to move your load from a dead stand still to moving with out taking too long. The trade off is speed, but thats not what we are trying to achieve.

I also am excited about ramping. You can ease in and out of your speed. There is also braking which is important if your robot finds itself on a hill. And reverse. Alot of these controllers do not reverse, because right now they are just set up for skateboards and you really only go one direction. But this has reverse. You can set a separate reverse speed as well.

FOC: FOC is a different method of spinning up the motors. It was originally developed for high-performance motor applications that are required to operate smoothly over the full speed range, generate full torque at zero speed, and have high dynamic performance including fast acceleration and deceleration.

#18   — Edited

So if i understand you correctly, it can hold at zero speed? Example on a grade or hill.?  Can it Segway?

PRO
USA
#19   — Edited

You sure can...rock solid...you can also decline or incline at a set speed.....at the expense of battery consumption:)

PRO
USA
#20  

....and if thats not enough...they have an app for android phones to monitor in real time....

User-inserted image

#21  

Looks like Alan may stand on his own some day with only 2 wheels.

I promise, i will stop now and leave you alone to play. It's after 6 here and i will finish up work soon.

Looks like boards go on order tomorrow. Poor credit card this month, especially if Dj comes through with the rest of the parts we need.

PRO
USA
#22  

...hahahaha yeah my wallet is smoking....

PRO
USA
#23  

...interesting....with position control...you can turn these into massive servos!

#24   — Edited

Good Morning All. Everything's on order ! Hopefully all will  arrive in a week and at the same time.

You are saying these can work as servos?

Can you imagine the massive shoulder and elbow servos using these? Instant full torque without gearboxes. Once I get the new hover board, I may buy a replacement motor to see if it can be hacked.

PRO
USA
#25   — Edited

Cool....you can follow along with my trials and tribulations!

You can use nearly any type brushless motor with these controllers. Skateboard, hobby style like this 320KV Turnigy Multistar and you can use standard DC motors too. Below is one of those motors in a 3d printed gear housing.

Here is an old video from the author from 2015, where he is playing with the implementation of position control and a skate board motor. Here he uses a encoder to turn the motor 1:1. Jump forward to 8:00 to see him move the motor.

#26   — Edited

I have an old 3D printer stepper which i assume could become a reasonable servo. I have a pot which i could use for the feedback, or will it need to use a digital encoder like the one on a blown display i have.

PRO
USA
#27  

Not sure on that. I'll have to do some digging.

#28  

Hi Will, i checked out the tool setup. Very straight forward. When we use it in tank mode i assume we isolate the drives so the CAN function is not used. I also assume we set the drives up the same as we would continuous servos. This should end up a big Roll or Adventure Bot. Right? Slippage then is not a concern. We end up hoping the nav system will trim as we go. I had planned originally to use an Adventure Bot to test the Nav system. What are your thoughts?

#29  

A quick update on the base design. It may end up a 5 wheel design. What's your thoughts?

PRO
USA
#30  

I think I'm going to set this up with the continuous servo in the ARC. Then I can control it with the iphone and the mobile interface. The default for the continuous servo acts a mixed mode (Tank mode). If you use the left and right controls the wheels rotate opposite directions. I will have to test when I get everything.

5 wheels might work to stabilize your platform.

#31  

LOL...... It sounds like you really are going to strap in your son and drive it down the street.

PRO
USA
#32  

....he's informed me we might have to use a crash test dummy first.... his oversized teddy bear, Brownie. xD

#33  

Did you try riding that board yourself before you took it apart? I see where people are trying to learn it but keep falling off on youtube.xD

PRO
USA
#34  

Not a chance with possibility of wrecking these million dollar hands ;)

#35  

I hear you, I would not even want to try with my 2 dollar hands LOL!

PRO
USA
#36  

Lol......................!

#37  

Hi Will, Hoverboard came in but NG. Battery was bad. Got returned. Another one on order.

Do you know a Waldo Mason? He has some nice work.

Have you gotten the boards yet? Ron

PRO
USA
#38  

Ahh thats too bad that the battery was bad. No I have not gotten my boards yet. DHL says they are here Friday, but I won't get to testing with them until Tuesday of next week.

I do know of Waldo, but not met him personally. He does alot of body work...dead bodies etc. Very good artist from UK.

#39   — Edited

Lol . Yes creepy.

I have begun digging around for the material for the base. I was wondering if suspension should be considered even though it will be indoors. It will be a bit heavy and I don't want it rocking and bouncing over rugs, thresholds, tile etc.. What's your thoughts?

Maybe suspension on the upper torso?

PRO
USA
#40   — Edited

Yes I think some form of suspension is a must. There are a few people on our lost in space robot replica site that have their robots moving. And all that vibration moves all the way through the body and the robot is about 7 foot tall. Seems like a good thing to pre plan out.

PRO
USA
#41   — Edited

User-inserted imageWell Christmas came early. The controllers from China just got here. Hopefully I can get the wheels rolling before the weekend! Whoo Hoo!

PRO
USA
#42   — Edited

Well I have scratched the surface. I've managed to get the wheel a rolling, but I think I might have to work more on tuning the motor. There are alot of bells and whistles in the VESC program. There is enough in the wizard to get you going but then you are kinda on your own as the manual is still in progress.

First thoughts. The signal going in to the Flipsky from the IOTiny might not have the resolution that the controller is looking for. The resolution goes into the 4th decimal value. The more resolution the finer the control. Using the mobile joystick has a very small sweet spot to control speed, but mostly goes from full stop to full on in either forward or reverse. In the video you can see I can find that little area..sorta. There is a wizard for the input as well, with alot of choices...so another area to test other settings.

Also motor sounds a little loud and I suspect this have something to do with how the wizard detects and sets up the motor. I think there maybe an area where you can manually add the poles.

I have something going on this weekend until Tuesday. Then I can keep testing. Until then enjoy this first test.

Much more detailed video coming...this is just to prove its working.

Items: Flipsky controller Hoverboard motors EZ Robots IOTiny Synthiam with mobile interface and joystick controlling in continuous servo mode. VESC  36V battery

Video shows 36V Battery connected to Flipsky and IOTiny connected to PWM with onboard 5 volt regulator (had to disable my battery is low). The hall sensors is connected to the Flipsky as well as the 3 phase connections. Controller is in "current mode", so there is no braking engaged. There is another mode where you can add braking at the cost of no reverse. 

#43  

Interesting first test. Looks promising. I am sure you played with the original control used in the hoverboard. Does the speed and smoothness seem basically the same as with the vesc?  I'm looking forward to receiving my parts so I can play too.

PRO
USA
#44  

Yes my daughter has one. They are mostly silent and she can move cm at a time on it.

I dont feel like I am getting those types of movements yet. The motor seems a big crunchy on lower RPM. I do know that the phases have been set up correctly. And the Hall effects sensors are working.

After working with the ODrive, I learned a lot obout the importance of poles. In their software there is a place to put the magnets number in, in this case it’s 30 magnets, you divide that by two to get your poles. But in VESC there is not a way to add in this value when using the wizard. So I gotta figure out how to do it manually.

#45  

Yeah, it sounds like you're right. The pole settings could be part of the issue. I also wonder if the wave form of the power sent to the motor is choppy due to the current mode setting. Putting it in Regen will be an interesting test.  Be Well, catch you next week.

PRO
USA
#46  

All great suggestions. Looking forward to testing on Tuesday. I forgot there are three wave forms to choose from.... time to start pushing buttons!

#47  

I am still waiting for my toys. I need to play too. LOL ! The Brake or Regen mode has no reverse but by using a relay two phase wires can be swapped to change direction. I haven't played with the software yet. Hope to get some time to read up and check out videos.

Also still thinking about suspension. I wonder if an air bag with coil over shock absorbers from an rc buggy would work?

PRO
USA
#48  

OK Back at it today...found several sources for the info we are looking for including a xml file with some numbers to try in VESC. Here is a video with what can be achievable with VESC and hoverboard motors. This speed was reduced to only 40%. So i think it spreads the PWM over just that 40% giving the ability for smaller incremental moves.

#49  

Looks great! Much like what we want. Good top speed for a robot.

My new hoverboard is here. Tested out well and took a full charge. Cost was $ 109 with free shipping. Capacity 200+ pounds and a 4 amp hour battery. I will start the teardown soon. Next, waiting for Vesc.  My test unit will be similar in design to that in the video. I hope we get an update on the EZ nav system soon too.

#50  

The morph drive video looks like what we are after. Does it look like he ended up using the extra encoders? I am curious as to weather or not you could cut the speed range down even more? Can't wait for my boards.

United Kingdom
#51  

Will, Looks good, and been following your posting on this as I'm looking for something similar build for my InMoov.  I'm tried of pushing it around on a chair castor wheeled base with a chrome pole up its backside!!  :)

I can't remember, but did you buy a complete hover board and strip out the motors, rather than buy individual hover board motors? Was it cheaper to buy the complete hover board?

Chris.

PRO
USA
#52  

@andy I'm not sure if the extra encoders were used or not on the morph drive. You have the freedom to use encoders, or hall effects or sensorless on your motors, so Its up to you. I want to get the motors running smooth, quiet and low rpm with torque first. Then if i can nail that down should be able to customize to any project.

@cem Yes I bought a whole hoverboard, because it has everything you need, battery/motors/charger/connectors. I will put up my tear down video on youtube in a day or two. I was going to wait until I had it all going...but prolly should do over several videos.

PRO
USA
#53   — Edited

Progress! I think I changed too many parameters at once, but I started from scratch and re ran the wizards. This time I chose sensorless and chose duty cycle. I get full torque forward and reverse at low and high rpm. It also has mechanical breaking. I used an RC transmitter and ARC and both work perfect.

Only issue now is the bird chirpy high squeal. Not sure if that’s duty cycle or phases are still off?!

edit: found the issue. I had changed motor type to BLDC from FOC. FOC is so much quieter.

#54  

So if I remember correctly you can set a speed limit, up and down ramps and brake power. Am I correct? Does the motor shutter when first started at a very slow speed? (Due to sensor less mode). Do we need or want to use the hall sensors for the Nav system if not needed for motor control.

#55  

Watching a second time I did see a shutter on starting.

PRO
USA
#56   — Edited

I managed to inch my way along. The whistling is gone now as I set the phases again. Each time it sounds better. The hall sensors are now working.  And I have the other wheel working. I think the jerking movement is caused by not having wide enough dead band at stop. If it’s too narrow it wants to float in there. I’ve found speed control and ramps. Easy to adjust.

I have a new issue that wheels will get lost in their signal and jerk crazy, but only sometimes. If I reset and use the signal positions with the rc controller it doesn’t seem to happen.

Here is a video of both working in mixed mode ( tank mode) at different speeds using the built in joystick in mobile interface.  Still jerky between direction changes but pretty sure it’s that dead band size. ( this is at 50% speed setting).

I need to know the exact max (180) min (1) and stop (90) in hertz frequency for the EZB anyone know? And what is the range for the wi-fi?

PRO
USA
#58   — Edited

Well i made a quick garbage bot with stuff laying around in the garage. "I shall call you shelf bot" ;). Basically a shelf from a cabinet and mounted some castors for test. More tuning needed for sure but wanted to get a vehicle for tuning and testing. Took a whole 30 minutes to assemble....problem now...forgot to charge the battery..so must wait for a few hours to charge..I'll post up a video later when its moving.

User-inserted image

PRO
USA
#59  

As Promised the video of the break down of the hoverboard.

PRO
USA
#60   — Edited

...ok so what ya get when you combine the following...a camera in one hand....a joystick pad on mobile interface in the other...beer and a mad demon robot?

I'll tell you...near disaster !!xD  Impossible to run all those things together in my brain!!! My garage fridge got a dent in it!

I have this thing dialed in perfect...just need a safer speed. This is still at 50% I think 2% would be safe for a robot in your house (maybe less than 1%?). Remember that most robots are going to be controlled with PID so you can control speed and direction with sensors etc. This is just connected to a virtual joystick in Synthiam.

#61   — Edited

way to go Richard Petty.  you lost it on the last lap xD

#62   — Edited

I heard that deep breath.... Surprised you huh? Just a bit fast. I'm still waiting for Vesc. Soon I hope.

United Kingdom
#63   — Edited

Will, Thanks for the video on the Hoverboard break down!

Its certainly has some speed on this, I know you said you can dial down the speed to about 1% or 2% for indoors, but I think it’s way over the top, for what I’m planning to do with my InMoov. It would be such a waste of power and cost. I think I need to look at a more low keyed setup and a lot cheaper option??

BUT I’m very jealous!!!!

PRO
USA
#64  

I'm going to take it to the nearby school and run it full tilt just to see what it can do at 50% speed. Then I will reprogram the speed to be more robotic. I've got some ideas about what to do with this hoverboard set up :)

#65  

You son or Teddy riding it.? LOL

Looks good! We both knew initally it would be too fast but it will be reliable. For the full setup I think it will be a good value. Motors, battery, controllers and charger for about $ 300 I think isn't bad. I am anxious to see the speed test then the dialed down test. The "morph" test video should be about the speed we will probably use and it seemed smooth. The battery life should end up super great.

PRO
USA
#66  

Definitely not putting a human (or teddie) on it at this speed! Its raining outside, so waiting for a break to go give it a whirl.

Yeah I spent about $300 total, not including the ODrive (which I will use for another project). With other options you have to spend extra on batteries, charger, gear boxes or belts and pulleys to change ratios etc. Seems like the price could get outta control.

I should have no problem reproducing the speed to that of the morph video. As the load increases in weight then the amount of current to get that to move would go up...so figuring out that sweet spot would take some experimentation once you have your robot built and on the platform. Great thing is the UI is so intuitive and easy to use that making adjustments is quick and easy.

#67   — Edited

Do you think all hoverboard motors are,10 pole? Or do I also have to pull mine apart ? I hope my boards arrive early next week. I will be building a similar base as yours for testing. I will use a rc receiver for the initial tests, unless you advise using a tiny.

By the way: did you ever find out what the extra wire on the eBay motors you have was used for?

#68  

Hi Andy, I have used a small magnet run along the perimeter of a similar motor to count magnet poles without taking apart the motor. You can feel the attraction of the magnet pole as as you run the magnet around.

#69  

Thanks @ Perry_S. Clever! I didn't think of that.

PRO
USA
#70  

No not all motors are the same. But sometimes you can find the specs of the motor online. But they are prolly between 28-30 magnets. They are different watts some are 150-350w. So find out as much as you can. As i removed mine (not easy) i lost the silicone seal that makes it water resistant. Prolly ok for a house robot, not for a grass cutter or  dog walker :).

Perry has a great idea there, except these stators are covered by the rubber wheel..maybe you could come at it from the top with a small magnet?

PRO
USA
#71  

Well that didn't go as planned, but ended up being fun! After school program was going on......so we ended up with a group of kids!. They loved it and wanted it to chase them! Never really got to test full speed as I did not want to run anyone over. I still struggle to control it with mobile interface on my phone as i think the icons are too small..so next test  will be from my 12 inch ipad.

#72  

Hoverboard is in pieces. Trying to salvage lights and I think a Blu tooth unit. I think I have the correct voltages to run them. Otherwise I can enjoy watching the magic smoke show. I will be cutting up the zinc base to let me modify and use the wheel mounts. I am too lazy to make new ones yet. Looking forward to getting my vesc, soon I hope.

PRO
USA
#73   — Edited

Good progress! I'm going to reprogram mine today for the slow robot movement. I'll shoot a video of that.

I kept the zinc frame for the wheels as well..until i build a proper frame for it and have some aluminum wheel mounts built.

My Flipsky's came in about 2 weeks. I opted for the DHL shipping, but it comes to the US as China postal service first, then arrived in LA and picked up by DHL seems like some kinda way to save them money.

One thing I will say. Its the first time I have had such great support from a company in China. My shipping was not updating, so I contacted them via their facebook page with my order number and they shot back a facebook message right away with china postal tracking to see where my package was.

PRO
USA
#74   — Edited

I managed to test the Flipskys via VESC at a reduced speed. I've set the max speed to 5%. It is absolutely silent when running. Motors do not jerk around and have a smooth start up. As I stated before as you increase the load you would have to adjust this percentage to make up for the mass of your robot. Mine weighs in at about 45 pounds (wood /wheels/ battery). Later in the video I added some additional weight (about 15 pounds wood), with no apparent affect).

I'm still having troubles with getting the mobile controls to work with VESC correctly. When I turn for example, one wheel should turn opposite the other wheel. I can do that sometimes...other times no. So in the video you see that at the beginning it was doing the opposite direction, but was unable to reproduce it when on the ground.

I would use an RC controller to test with, but none of mine have a mixed mode (differential mode/tank mode), so each stick would just control a side (L or R) so controlling direction would be a challenge.

Another configuration for a robot with these motors would be both motors moving together (forward/backwards) with a another wheel controlling turning.

#75  

How is it with a laptop and running ARC,? Same issues ?

#76   — Edited

I don't understand why it won't work right. Unless it is because of the mobile app, which doesn't make sense either.

Dumb question, do the boards need to be grounded together for some reason ?

PRO
USA
#77   — Edited

Tried laptop in this video. Same issues. Boards are connected via the battery and IOTiny via ground, so all sharing grounds.

It works great with an RC controller very snappy and stops as soon as i let off the controls. The ARC has about a second or more before the controls respond. My thoughts are on the frequency. I have to set up the controller in VESC and it uses the input from the EZB as its control frequency. It will detect neutral, full forward and full back. During the set up you look at the numbers and input those values. The EZB is very finicky on giving out its position with this software. It seems difficult to obtain the correct values. Maybe because my finger is on a track pad and not getting into those correct positions?

Like i said most people are not going to use their robot like this ..(driving around with RC control), but instead use PID or some other way to tell the  robot where to go or things to avoid as in the case of the lidar, etc.

But...if i knew the exact frequency for the IOTiny and EZB I might be able to just input those and get a better response.  (I.E max, neu, min full spectrum)

PRO
USA
#78  

If I have time I will shoot a video of both the screen of ARC and a PIP of the wheels with IOTiny and another one with the RC controller so you can see the difference. I might also try the EZB 4/2 instead of IOTiny but don't think the frequencies would be different?!

PRO
USA
#79  

I did look closely at my video and I get correct forward/reverse on the turn at :23 secs in video. But again its not consistent....in other parts of video one wheel just stops and the other rotates and turns it.

#80  

Gotcha. This becomes a conversation of using a Raspberry Pi, arduino, IO Tiny, etc. Vs the Vesc. I will think about this. Also PID loops can require a lot of playing with too. I hope I get my toys soon.

#81   — Edited

Will, didn't I see a scope on your bench once ? I would be interested in knowing the waveform of the output ports to the Vesc. Maybe by slaving D0 to D2 and D1 to D3,  then look at the waveforms of D2 and D3 to see if they are correct for the output to the Vesc. Does the movement of the joystick in the phone or laptop give the proper digital output signal in a consistent manner and time frame.

#82  

I need to finish up some work then I will get an I O Tiny and look at the  output pwm signal.

Jeremie. If you read this can you offer some info?

PRO
USA
#83  

Here is a video showing real time update in VESC with ARC joystick. You can see the immediate update in VESC but the motor doesn't respond right away and sometimes seems to stop all together. The green LEDs on the Flipskys show signal from ARC but response sluggish, like upto a second or more after ive moved the joystick. And then there is the mixed mode issue.

#84   — Edited

But when you use a receiver there is no lag.? Or hang?

I was wondering, if you slave the output and put a servo on the slaved output to confirm the Io tiny works normal. It I weird that the signal hangs.  Does it do it if you load an Adventure Bot basic program and use the pad to run it? Just wondering if the joystick function is hanging?

PRO
USA
#85  

Correct no lag with receiver. Good idea on the slave servo idea...i will test today.

PRO
USA
#86   — Edited

This video is pretty self explanatory. First part is the RC Controller working in the band no problem. The second part is showing how much effort you have to apply to get the frequency to activate the motors...it works fine with an attached slave servo....i did find there is like a sweet spot at 1 oclock and 7 oclock forward and backwards on the joystick to get the  wheels to move. And interestingly once you get it working it works within all the ranges until you let off the joy stick then you must find those spots to get it to work again. Again servo works in any position. You can also see toward the end that the wheel moves after i let off the joystick for about 1/2 sec.

PRO
USA
#87   — Edited

Update. Changed the stop value in the control for the joystick from .10 to .01 and it helped some with getting the wheels to move. Still not acting like the RC controller tho. Also mapped the keyboard arrow keys and they are snappy and fast to respond like the RC controls.

Also I increased the speed to 10% for testing and it takes nearly a full 2 seconds for wheels to get signal to stop after i release the joystick on the mobile app. So the Flipskys are not in love with IOTiny.

User-inserted image

#88  

I was wondering if the issue is the use of the joystick. I wonder if just a straight Movement Panel reacts the same?. I also wonder if the Adventure Bot basic would react differently? Instead of the two planes of axis from the joystick (x, plus or minus and y, plus or minus) you only have a single plane (the x axis, plus or minus). What do you think?

PRO
USA
#89  

I've not looked into the adventure bot controls. I'll give it a spin. It seems to be more than the joystick since the servo slave was working fine with the control but the Flipsky's just not liking the signal from the IOTiny. But I'll try the download scene and see if i can get it to work better.

#90  

Sorry I am throwing these ideas at you but I have no toys to play with yet.

PRO
USA
#91  

Hahah no problem. I’m running out of ideas.

I tried the Adventure bot and it’s slightly better. I changed the stop position value down to .01 and got even better results. But there are moments where it stops responding altogether. Then I have to release the joystick and try again. I found forward to be ok but reverse was hard to find . I also tried out the forward and reverse icons in the mobile interface ( full speed forward) with no movement at all.

#92   — Edited

I did do a detailed investigation last Christmas of these Hover board motors used for everything from power skate board mods and robots but then many people were running into complicated problems so I gave up on the idea as I almost bought the Hover motors and then reading about all the complications and difficulty,I cancelled my Ebay order since, I would have had to spend too much extra money to get it working but I am routing for you to see how it can be done with out the problems.;) Edit---The video you have does look like you got it on the right track if you can iron out any bugs!

PRO
USA
#93  

Robo rad....Yeah I have it working pretty good. Just need try controlling by other means at the moment to make sure that I'm able to send a signal and get a response without the delays on moving and the delay on stop.

#95  

My boards are due today. Got to finish up a job then play time.

PRO
USA
#96   — Edited

I'm in the midst of spring break with family. Might be a bit before I can get back to it. Looking forward to your results. I started looking over a ton of forum threads..not too much on the hoverboards motors but I did find someone having the delay issue..he was having a 2 second delay from stop until the robot stopped. So might be a firmware fix? I'd like to send a video to Benjamin, the guy who wrote VESC.

PRO
USA
#97   — Edited

Andy Roid How is your build going? Any movement yet? I'll be back to it on Monday after kids go back to school.

#98  

On the road for the weekend. Back Monday. I will begin testing then. I want to scope output of a receiver vs IoTiny to see if signals are different. I don't understand why an rc receiver output works fine and an IO Tiny doesn't? If it was a firmware issues why would you have good results with the rc receiver? I still think it is an input signal related issue. Catch you Monday.

PRO
USA
#99  

I'm going to swap out the IOTINY for the EZB 4/2 Tomorrow and see if I notice any change. I don't have a arduino to test with.

I'm also reading that there is a safety out of range feature built into VESC, where the motors are not responsive if the the frequency goes out of range.

PRO
Synthiam
#100  

It’s because you need to enable the use stop position in the continuous rotation movement panel.

Everytime the ezb stops sending a pwm, the receiver has to relearn the signal range.

Your receiver must know the signal range - OR - specify the signal range using the continuous rotation Movement Panel direction values.

Read the ezrobot tutorial on how a servo works to understand how a servo works with pwm. And why stopping pwm for a not smart receiver has that effect.

PRO
USA
#101   — Edited

....everyday is a learning experience. Works perfect! Thanks for this solution AND the explanation. Stops on a dime...!!!!! A tear came to my eye...lol

PRO
USA
#102  

@Will, Nice project! I got curious ...  Q1) Why aren't you using the odrive controller ? Q2) Do you know the wheel encoder resolution ?

PRO
USA
#103   — Edited

My son Liam's first ride on the hoverboard robot at 20% speed, thanks to DJs quick suggestion on the fix for the problem:)

PRO
USA
#104   — Edited

Pedro! Thanks for the kudos. Its a  fun project. My problem with the ODrive was that I could not get the config to save on the ODrive. Without the Configs storing, I could not control the motors. So after a long time of messing with it and posting on the forum, I got no reply, I decided to go with the Flipskys and they are fantastic for controlling these motors and VESC is very robust, automatic set up program for 3 phase brush-less motors.

The wheel encoder count is 8192.

PRO
USA
#105   — Edited

Tomorrow I will edit the video on:

  1. finishing the wiring
  2. installing and setting up VESC 3)connecting to the Flipsky’s using VESC
  3. setting up the motors and finding the phases order
  4. saving the settings to the Flipsky's
  5. mapping the input signal from the IOTiny and saving to the flipsky
  6. connecting the IOTiny
  7. creating a mobile app with a joystick to control the wheels 9)creating a platform to test on!
#106   — Edited

Good morning All. Liam is braver than I thought. Looks like you kept your word about strapping on your son and driving him around, even if not at full speed ! Well done Liam ! It sounds like I missed all the fun. I guess you fixed the control issue.  I be starting my base tomorrow. Back to work later today. I look forward to your videos. OOPS ... I just realized I didn't look back far enoughin the posts for all the answers.

#107  

Love that last video with your son,awesome job !:D

PRO
USA
#108   — Edited

Thanks guys...we have a booster seat we are going to add to the whole thing. Should be fun.

I'm finishing up the video for the above 9 items and will post later today. (its a longer video about 9 min)

#109  

I look forward to Liam's feat of bravery....  and the videos.

PRO
USA
#110   — Edited

Video is finished. Its one video with 2 parts. Unfortunately, something was wrong on the recording of the wiring so I only have one camera angle that was blurry. But if anyone has questions on that set up beyond whats in the video, let me know, I'd be happy to answer those.

I didn't voice over which can be more explanatory, but after i watched the video several times i think all the info is there in lower thirds.

#111  

Thanks for the videos. Life needs have stalled my project a bit, but I plan to complete the test platform wiring and build the wood base with caster platform this weekend. While wiring I was thankful the original hoverboard control boards identified the hall sensor wire colors which allowed me to correctly connect them to the plug. I made an assumption the white one is the "tp" wire. My goal is to add a camera to the platform which will let me end up with a big Adventure Bot. I will load the bare adventure bot program and test using that.

PRO
USA
#112   — Edited

Yeah the Hall sensors wiring was confusing. In the end I just matched up the same color wires but they were not the same order on the connectors. I also had white and it is indeed the temperature read wire. In the end when I ran the auto setup the Hall sensors were read in correctly. So I assumed I connected it ok. (only wire change was i had to match blue and orange together)

#113  

Most wires were the same color. The only odd color was an orange which went to the blue. I hope all works. Inital testing maybe tomorrow.

PRO
USA
#114  

That’s exactly like mine orange to blue.

#115   — Edited

Got busy again but here is a picture of my test unit. Next step is set up motors.User-inserted image

">

PRO
USA
#116  

Great job! Looking forward to your tests!!

#117  

Wana race ? Just you and me !  Lol

PRO
USA
#118  

You are on! Let’s do this. First person to make fire wins! Or umm looses?!

PRO
USA
#120  

No I didn’t get mail are you using the aol account?

#121   — Edited

No, I used your robot business email. I misplaced the aol.

( getahead)

PRO
USA
#122  

...Got it.........

#123  

I noticed you have no feed to the IOTiny. When I tested my wiring the Tiny powered up thru the signal wiring from the Vesc. I am concerned about the 5vdc requirement to run additional inputs outputs or the camera. I assume I need to build a 5 vdc supply with a capacity available to run the add-ons. Do you agree? I didn't want to depend on the Vesc. My plan is to use the Tiny for any Nav system I build.   Any ideas ?

PRO
USA
#124   — Edited

Yeah I ran it off the vesc for my go cart project, but if you want to power the Tiny with full voltage like 7.4volts for other accessories like hobby servos etc you could use another battery or find a BEC that could drop the voltage from 36 v to 7.4v like the Castle BEC Pro. It’s pricey at $40 but I swear by them. Great products. You could then just use the signal and ground from the VESC’s.

#125  

I had originally planned to use a 17 ah 12 volt battery to run the whole robot power and a second battery of the same capacity for the drive motors. Since I have the 36 volt battery for the drive I am all set with the drive needs. Maybe I will buy 1 battery and 2 of the BEC, 1 for 7.4 volt and 1 for 5 volt for everything else. Do you remember the current ratings ?

PRO
USA
#126  

You could get the Bec Pro ( rated 50v 20 amps I believe) and they sell smaller ones much cheaper you could use to drop down the voltage even further ( below 7.4v). They have a programmer  you connect to your computer via usb and you can program the BEC voltage drop to anything you like.

#127  

Thanks, I'll check it out.

Work has become busy, so no setup or tests yet. I hope I get to play before I have to leave for Arizona.

PRO
USA
#128  

Ahh good ole real life getting in the way of robotics...

#129  

Yeah... Antonn is real mad at me.. I can tell because he won't even talk to me.

#130  

Hooray. .... All is running and running well. Just as Will said, a piece of cake.. I lowered my Duty Cycle to 5% so I can mess in my basement office without "denting stuff". LOL   I can't play anymore 'cause work is calling but fun will be had when I get back from my trip.

Thanks Will.

PRO
USA
#131  

Congrats! Glad I was able to help!

#132  

By the way, Can I borrow Liam if he gets out this way?

PRO
USA
#133   — Edited

He sure should be an expert by then...I have the car seat bolted to the hoverboard now. So as soon as it stops raining (next 8 days :/ ) we plan to take it out on its first maiden voyage, helmet on..and some kinda duct tape seat belt system xD

#134   — Edited

I will be interesting how the additional weight effects the performance. I wish Liam good luck too.

#135  

I just realized, if you point him in an easterly direction he would get here sooner or later.

PRO
USA
#136  

hehehe true!

Yeah I'm fully expecting to have to change the % to something in the 25% to 30% range with the added weight of rider and chair.

#137   — Edited

Making a hoverboard is a very difficult task. You have done a great project.

#138  

Fxrtst is the ACE of robotics. He continues to amaze.

#139  

@fxrtst also deserves a lot of thanks, for always sharing his projects and adventures with all of us.

#140  

@fxrtst,

do you know If the hover board will work with a sabertooth 2x25To control each wheel/motor?I know the max voltage is 33.6 V for the saber tooth, there’s other motors out there that would work but they only hold 60 pounds and I would like to have a lot higher Weight limit for the robot.Also I believe the hover board has an encoder built-in which would help with controlling the movements of the robot in the distance Interns traveled.

Thanks in advance,merne

PRO
USA
#141  

I don’t know much about the saber tooth. But I can tell you that hoverboard motors are run on 3 phase. So you need 3 phase controllers. The controllers I have in videos on YouTube use a 3phase controller that are used in skateboards.

there are many advantages to using the software to program them like continual consistent speed up and down hills, and to increase speed to get the mass to move at consistent speeds and even break regeneration for the battery.

PRO
Canada
#143  

Looks like we might have some spam here, as video thumbnail maker doesn't really relate to hacking hoverboards

Unknown Country
#144   — Edited

Thanks for sharing this detailed update on your hoverboard motor project! It's fascinating to see the innovative use of these affordable motors and your exploration of different motor controllers. The ODrive and its open-source nature sound promising, although it's unfortunate that you encountered some challenges with saving configurations. Your perseverance is commendable.

Considering the issues with the ODrive, the FSESC 4.12 50A seems like a solid alternative. The fact that it's programmable and comes with user-friendly software is a big plus. I'm curious to know how your tests with the ezb to control them go and how the overall project progresses. Are you leaning towards using the FSESC 4.12 50A for your hoverboard motor setup? Looking forward to the final video!