Robotic Claw Inspired By Doombot.

Dunning-Kruger

Canada
robot video thumbnail

In an earlier thread Doombot had mentioned he may put a ping sensor on his robotic claw to sense and pick up objects automatically... Well, I had a moment of inspiration so I thought I would try and knock up something... So check it out... a simple prototype of my version of object detecting robotic claw...

By — Last update

ARC Pro

Upgrade to ARC Pro

Discover the limitless potential of robot programming with Synthiam ARC Pro – where innovation and creativity meet seamlessly.

#1  

Need to rebuild your youtube video, right now it's marked private

#4  

Hey Richard thanks for the vid! :) and its kinda "crab-like" with the ping sensor eyes

#5  

Thanks for the mention bud! However it's not an original idea of mine. I blame the roomba beerbot for the inspiration! Mine is located underneath the claw though, so it is out of sight....

#6  

Thanks guys... I agree the ping is either too big or in the wrong place... Going to tinker more and see if I can't make it a more elegant design...

#7  

Nice video. I like the idea of putting an IR sensor in place of the ping sensor also. I also would suggest maybe usiing pressure sensors in the claws to aid in determiningamout of claw pressure on the softer obects.

#8  

Pressure switch is a good idea... I am working to integrate this (and more) into my current project.... I will update as I progress... thanks for the comments....

PRO
United Kingdom
#9  

Below is the 3 fingered hand of the EZ:1 robot, note the micro (digital) optical ranger in the center, this triggers when anyone puts an object in front of the hand.

This version senses anything that comes in within 100mm of the hand, they are made by Sharp and are quite low cost at around 5 bucks each.

User-inserted image

Canada
#10  

This is a really good idea, with great progress so far. Clawed robots always struggle with knowing how and when they have actually grabbed the item they were designed to grab. Excited to see how your design progresses:)

#12  

Richard R , Claw actions looking good. Triggers respond well. What hardware are you using on shoulder and claw? Very smooth. I like the aluminum framework. What kind of IRobot platform is it built on? Looks like a tall robot. I think the sneak preview turned into a great build. Thanks for sharing. Steve S

#13  

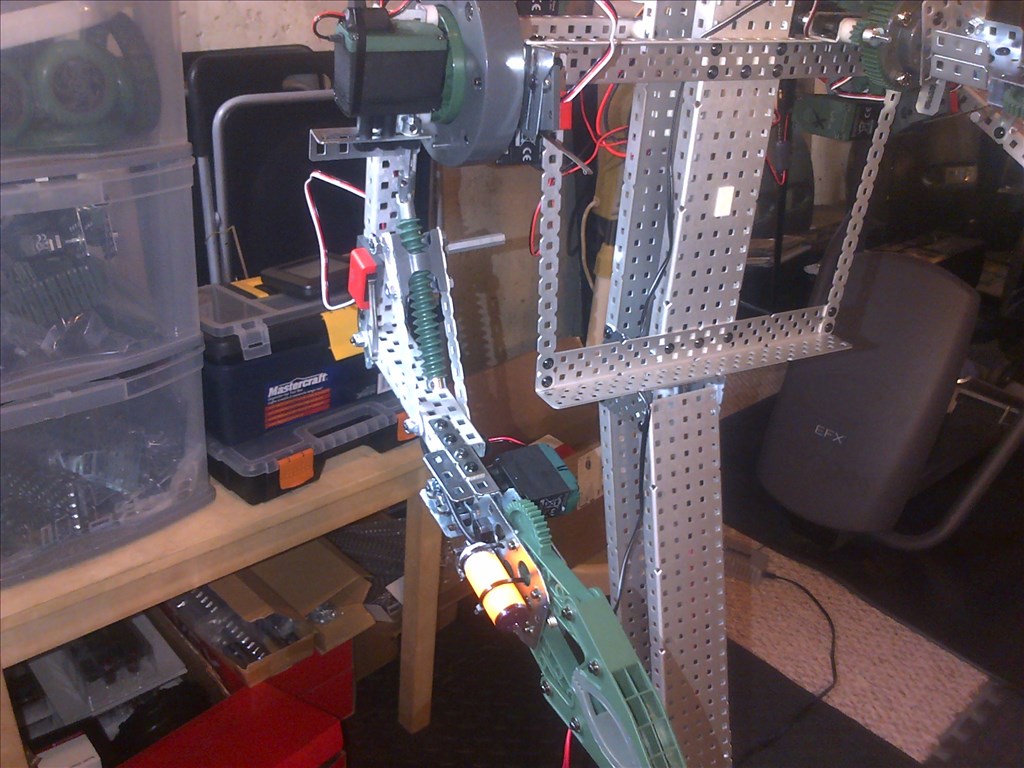
Thanks Steve... sadly and even with the aluminum it was too heavy for the create base so I had to switch to a Zagros robot base I had. Still a work in progress and a crap load more programming is still needed. The shoulders are vex turntables with two vex 393 motors per shoulder. The arms are strong enough to easily lift a full bottle of beer without any idle back drive after lift. I am now using IR detectors in the claws to trigger closing when objects are near... I might work on an elbow joint if I can figure out how to do it without adding too much weight to the arm. Needs a animated head now too, any suggestions?:D

#15  

Thanks Tony, it does help... I am going to grab some today...:)

PRO
United Kingdom
#16  

@Richard, I modify the Sharp Rangers tiny PCB so the red LED is visible from the front and I wire in the "enable pin" (blue wire) to a 4pin header connector, here is a photo of the mods.

User-inserted image

#17  

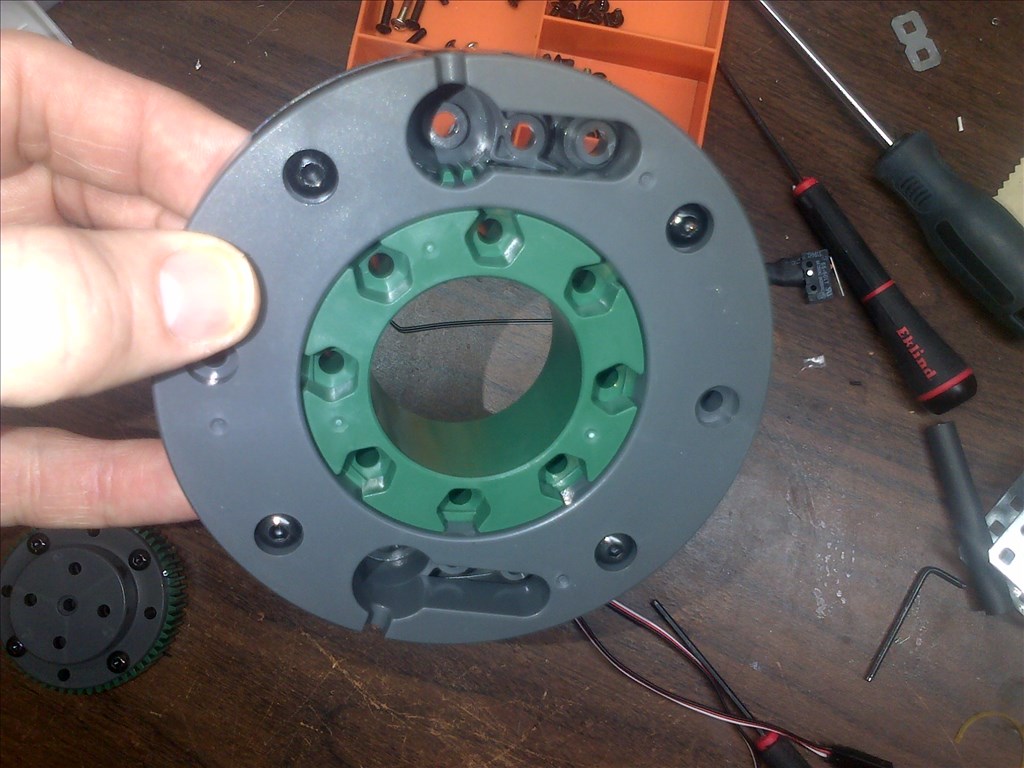
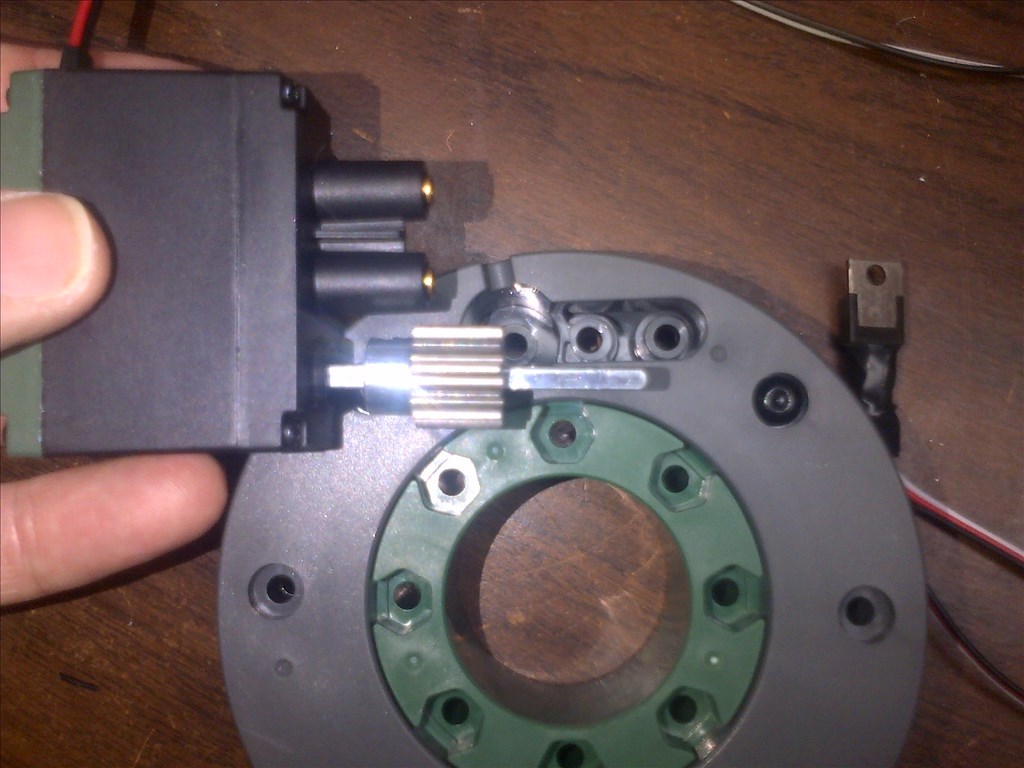
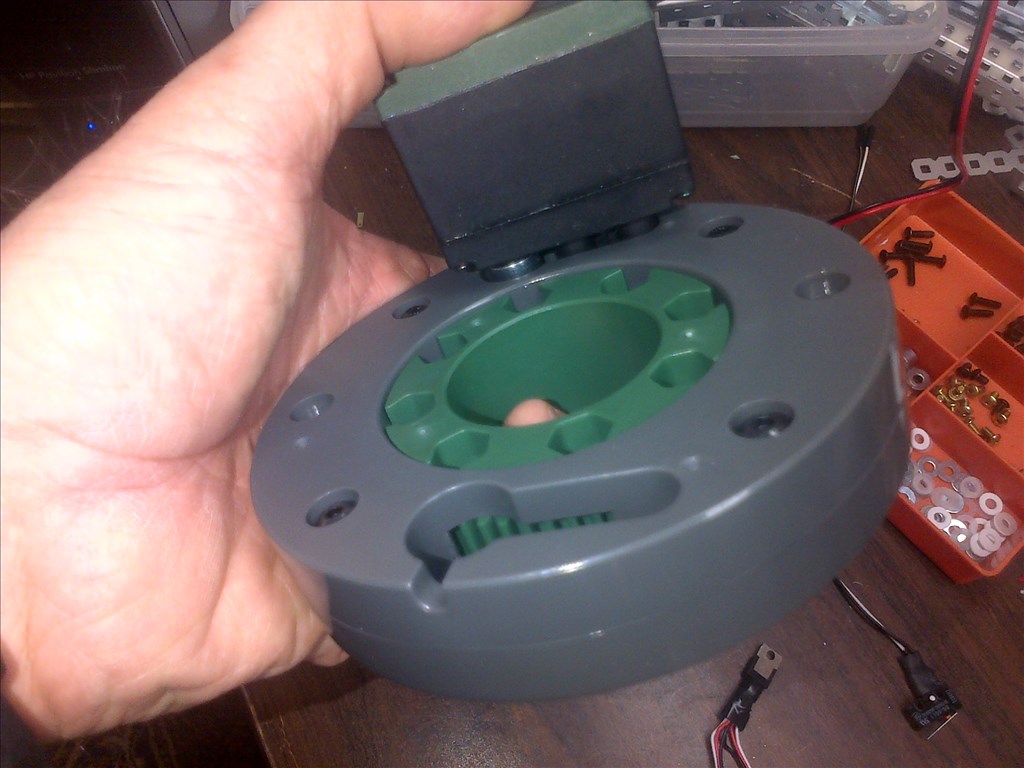
@Richard , Those Vex Turntables are cool and look like they may help a lot of builders easily make movable joints. They sat they are made for high load but I wonder just how high. What kind of servo are you using to move them? Looks like the servo needs some type of gear attached that sticks down into the turntable to mesh with the internal gears?

@Tony , Your amazing. You find all the cool toys. :) These sensors only tell when an object is within it's gaze not how far away it is. How do you let the robot know when the object is actually within the hands grasp area?

#18  

I am using vex 393 motors (two per shoulder) and limit switches to prevent over rotation. The arm can lift 3lbs easily at 75% power (haven't tried heavier yet). I am using a sabertooth 2x5 motor controller to run the motors...I am now working in a elbow joint using a single motor and a jack screw assembly... Albeit slow, the elbow joint with a single vex269 motor can also easily curl a 3lbs weight... What geared dc motors lack in precision (compared to servos) they make up for in power.... Besides, with limit switches and coding I am doing a pretty good job of precision movements.... pics and more videos are coming...

Thanks for your comments Richard

PRO
United Kingdom
#19  

@Dave, these object detection sensors flag the main controller when an object comes into range of its view. with the GP2Y0D810 the range is 100mm (4 inch) and with the GP2Y0D805 the range is 50mm (2 inch). There output is normally high and driven low when an object comes into range, so you just need to connect it to one of the EZ-B port lines. I use the 100mm type which senses outside of the fingers (they have to be slightly open) so a signal on this port line shows that something has been placed in front of the hand.

PRO
United Kingdom
#20  

@Anthony, For my EZ robots I use QTC (Quantum Tunnelling Composite) pills for touch/pressure sensing.

www.rapidonline.com/Education/QTC-Pills-each-06-1298?sourceRefKey=EmIZWpHyh

Its a pretty amazing material, the finger sensor can sense the slightest touch/pressure to full compression (power grip). I make the sensor by sandwiching the pill between two thin conductor plates with soldered micro connect wires then I heat shrink the whole thing. They are then installed under rubber finger pads with the micro connect wires going down the hollow fingers, they then need to be connected to the an EZ-B analogue port via a potential divider (resistors).

More details here on QTC robot applications

www.peratech.com/mit.html

Tony

United Kingdom
#22  

Connect to an ADC port via a potential divider (look at my LiPo monitor circuit for details for a divider). When the pressure increases, which causes the resistance to increase/decrease (depending on how the part works) the voltage on the signal of the ADC port will change due to the divider circuit. This can then be read in a script with GetADC() and the value used to determine the pressure.

The pressure value can then be used to enable/disable ports, run controls or other scripts, pretty much anything.

If you search the forum for someone asking about using an LDR the method I eventually explained is very similar but rather than light altering the value pressure does.

#23  

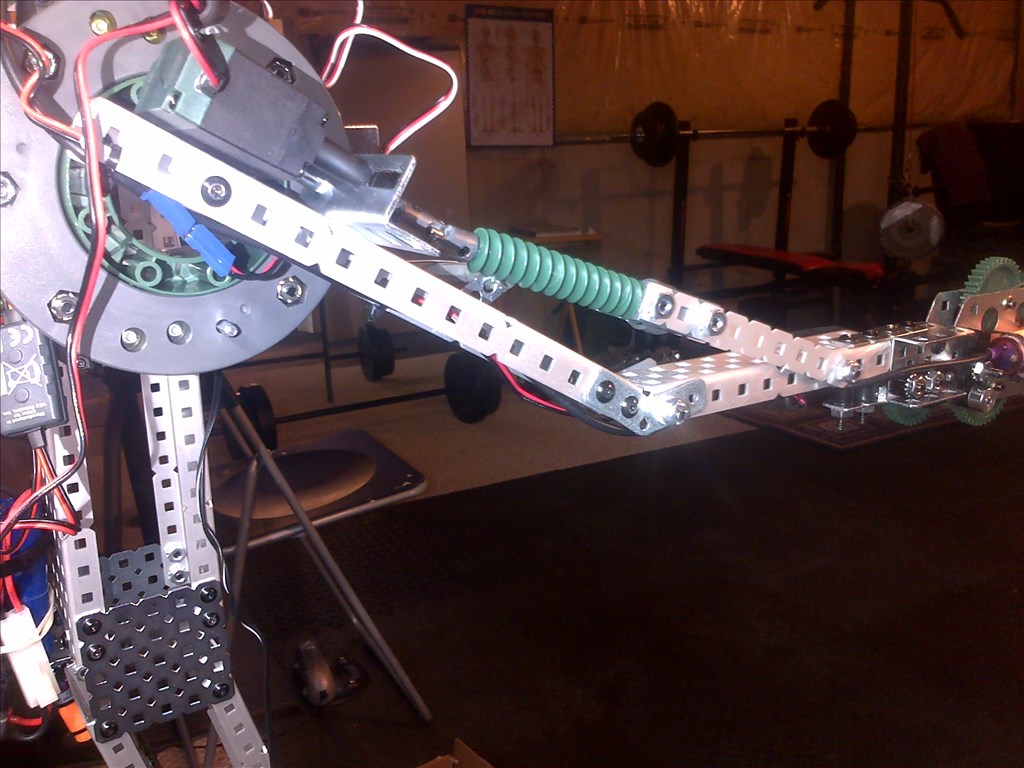
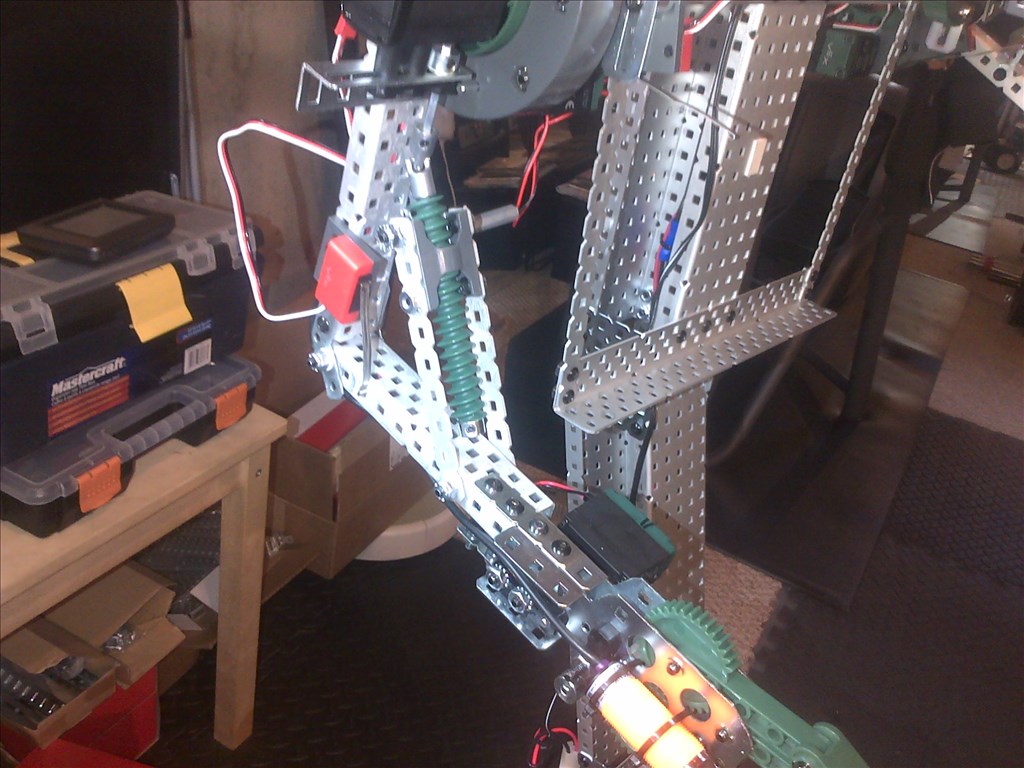
Pics of the Vex turntable for the shoulder joint... and my bots jack screw elbow joint...

User-inserted image

User-inserted image

User-inserted image

User-inserted image

User-inserted image

User-inserted image

User-inserted image

#24  

Richard R, Thanks for sharing your very interesting build. I enjoy your straight forward approach and comments! Steve S

PRO
United Kingdom
#25  

@Richard, thats a very nice robot build that you are doing! I see that you can have 2 motors on the turntable is that how you increased the torque on the arms?

Tony

#26  

Hey, Tony... yep the two Vex 393 motors are working in parallel to double motor torque... There is only so much you can do with vex with generic parts... Sure you can hacksaw parts and such, but eventually one has to start making custom pieces... For now though, I am enjoying the engineering part and the programming as well... By the way, those mini sharp IR detectors work like a charm and has made my grippers that much more less bulky... Thanks again...

#27  

Awesome design with using that Vex stuff. I just looked into the VEX website, pretty cool stuff, great way to build a nice large robot. I'd like to get one of their classroom kits,seems it has tons of parts.

#28  

@Richard, I just received my Vex Gear set today. Looks like it will work in my B9 arm construction someplace, somehow. It's a quality part. I just now figured out what extra parts I need to make this work with one of their motors and ordered them. They don't really do a good job of informing the customer what is needed to mate up any of their parts like motors, sprockets and gears. You would think that everything being build exclusivity for their set that they would lay it out a little better. I've noticed that this is the case now-a-days for a lot of companies. They seem to assume that it's obvious to everyone how everything works and what is needed. eyeroll

How quiet are these Vex motors when working under load? What voltage are you running them at? All I can find on the web site is that the stats are recorded at 7.2 volts. I image that that is the recommended voltage but as I've found that DC motors can be run at many various voltages both above and below what's rated.

#29  

Yes, the parts are very good quality for sure. And yes, its hard to find info on what part is needed in addition to something else. I started with the clawbot kit, so I got a good sense of what was needed with what and then just built from there. The motors are about the same noise (I wouldn't consider them to be noisy at all) level as any other geared motor and put out way more power/torque than you would expect from their small size. And finally they are 7.2v motors, but I have not tried to use any greater voltages on them, though.

#30  

@Anthony... pretty much going to leave him bare metal. One of the up coming challenges will be adding a head. Most likely will use conventional servos and LEDs to add animation.... Right now not sure how to go about making or even what materials to use in construction of his head.... Thanks for you comments guys....

South Africa
#31  

I really like the claw Evan without the sensor where did you buy it from

#32  

@Richard R Love your build because it reminds me of my Meccano kit days! (back in the previous century) Take your time on the head that's were everyone focus will be and a large source of personality! :)

#33  

@Mohamed.. if you're talking about my claw (as opposed to Tony's who skilfully made his) it's from my Vex kits.. @Glen.... me too, that's why I like Vex so much... loved mechano as a kid.... Vex has great integration with motors and servos which makes it perfect for use with the EZB

South Africa
#34  

Do you have a link to the kit