


** More pics added 08/01/12 **
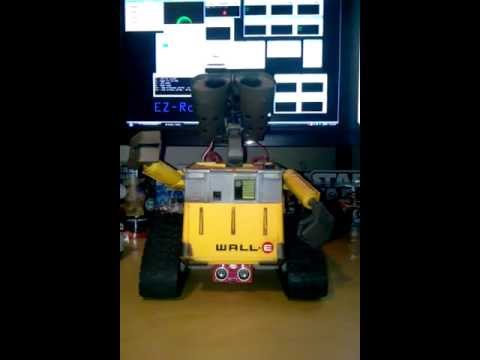
I spent the most of Saturday working on my Wall-E.
I did the typical carve out the bottom and added the servos.
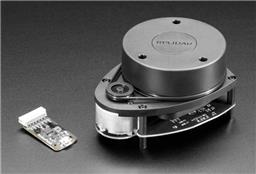
Mounted the sonar.
For the arms I carved out slots for the mini servos. Screwed on the round servo horns. Then ground down the arm joints flat. Crazy glued them direct onto the servo horns.
I figured it's going to be a permanent install so I'm not too worried. I can always snap off and re-do if needed. The Mini servos seem to have enough juice to do the basic up/down.
I'll be adding a MP3 module with amp shortly.
The head seems to be the difficult part. Still working on a game plan for that.
Didn't take a whole lot of pictures but will take some more when I tear him down again.

08/01/12
As Requested, some close up pics of my version of head mount. I still need to fill, finish sand and touch up the paint.
Wall-E at rest. I like the natural head tilt. Because his head is only attached on one side this causes the head to droop.

Here is the neck. I did some extensive sanding down. This allows for clearance of the up/down movement. Glued a piece of styrene on top and shaped in. In the center is a 4-40 nut for the mounting screw.

Just another angle.

Here is the re-cycled Wall-E part mounted to the servo. servo horn is screwed on and crazy glued to prevent movement.

Another angle.

Servo fits perfectly in the eye. Hot glued. Only had to expand the existing opening slightly to accept the servo a head.

There ya be.
Discover more robots
Linux's New Desktop For Modification To Installation In To...
Joseph4760's Project X-Men

Thanks a lot of , I am choosing how to connect head, your way seems more elegant. Petr
Ya, it worked out pretty slick. I'll pull him apart and snap a few detail pics.
Pics posted on Pg. 1. Hope it helps.
Great thanks a lot of. Petr
Lumpy, ever get those details shots around the eyes and the head tilt? Would love to see how you pulled that off. Starting that part on my Wall-E.
Thanks.
Check out post # 1 been up for awhile.
Ah. Sorry. By the way it read, I thought there was more coming. No prob. Looks very cool. I'm struggling a bit with getting the head all apart. Any guidance on dealing with the center main pin? Or is it simply a matter of "remove every screw"?
It's a remove every screw type of deal. Remove all the screws from one side of the eye first. Crack her open and it will all make more sense.