
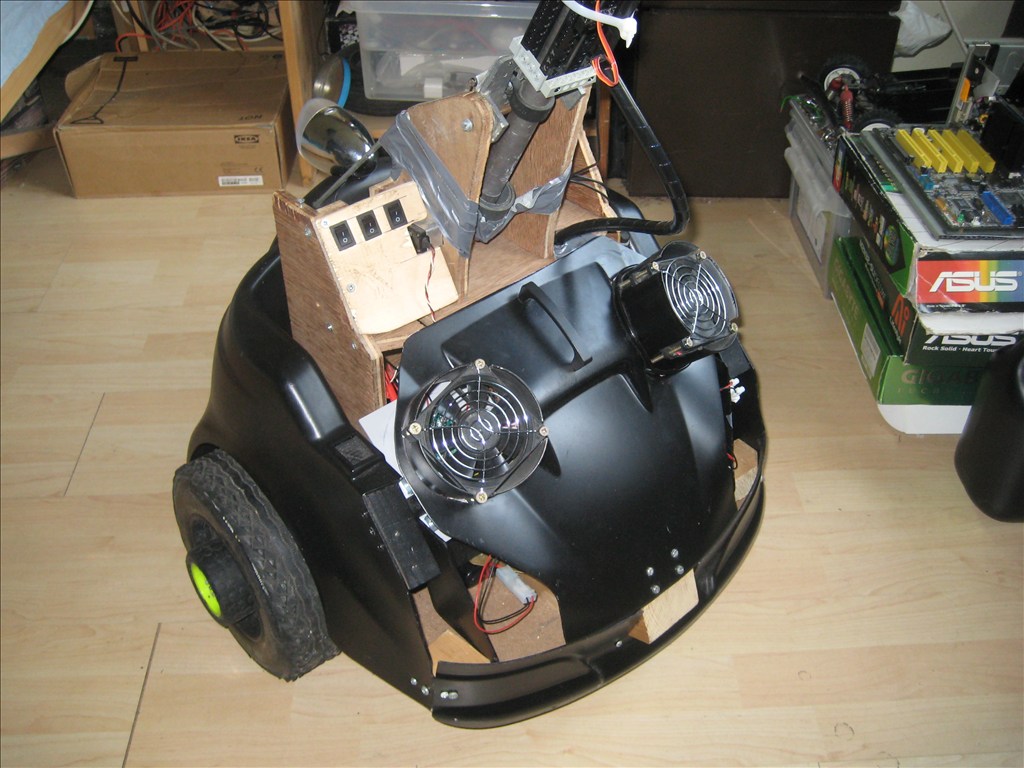
The base is made from a discarded toy car. One of those for a toddler to sit and drive in, with its own motor and battery. Cut in half, using the rear axle. Here was the initial idea, pink as i found it:
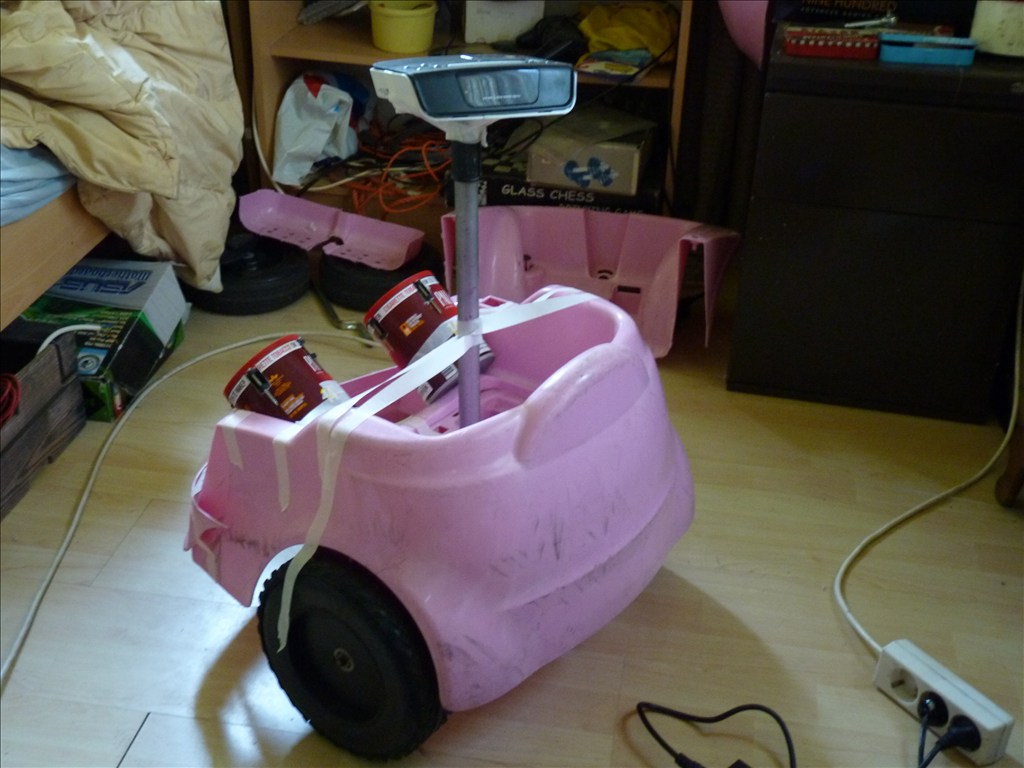
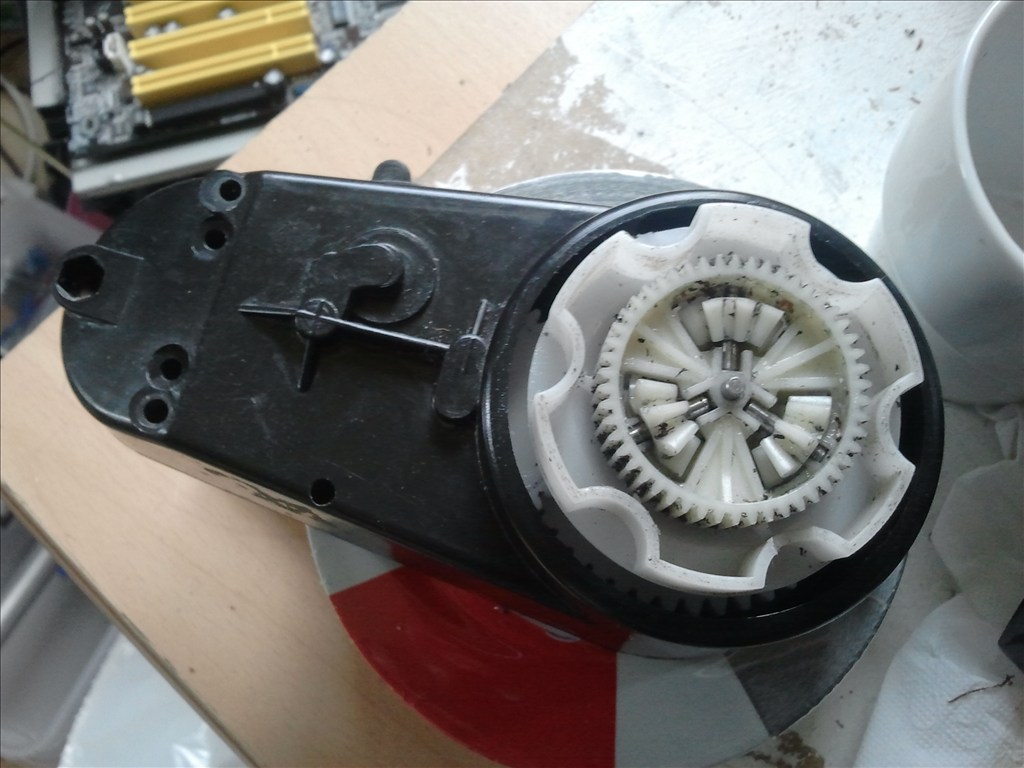
Adjusted the transmission to include a differential.
The steering wheel on a bearing, uses a servo to steer.

I am building this robot with whatever scrap parts and materials i can find, so i had to make do with this. But i will be upgrading to one motor for each wheel at some point for sure. For now i want to start focusing on programming, so i'm satisfied as it drives and steers.
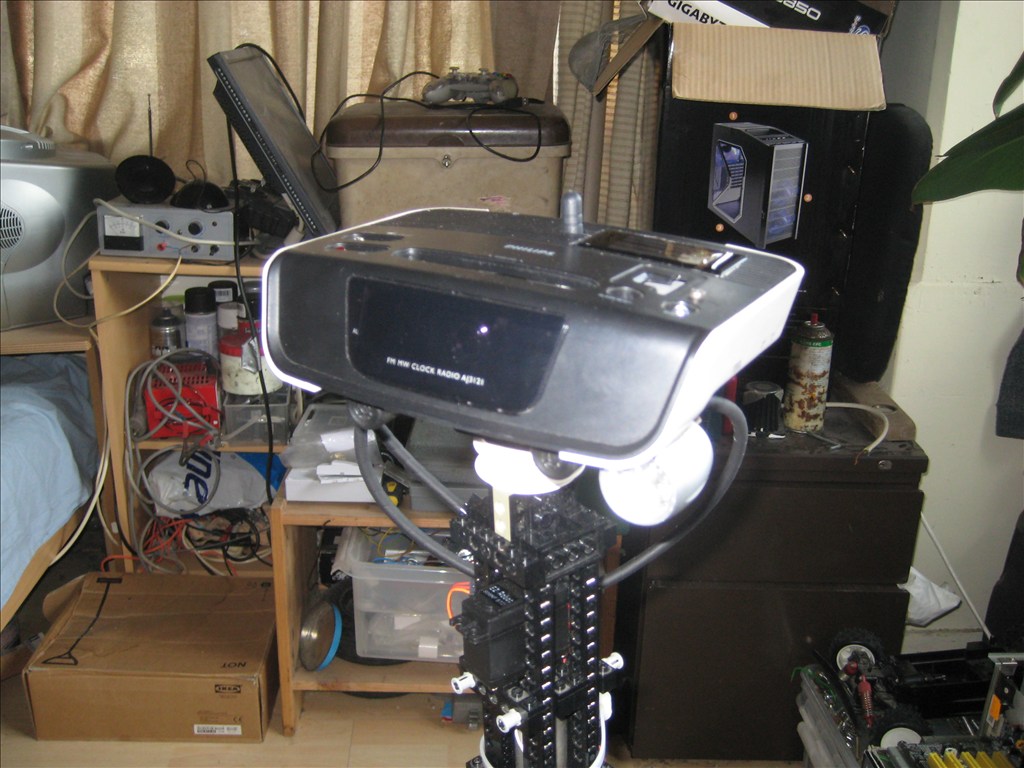
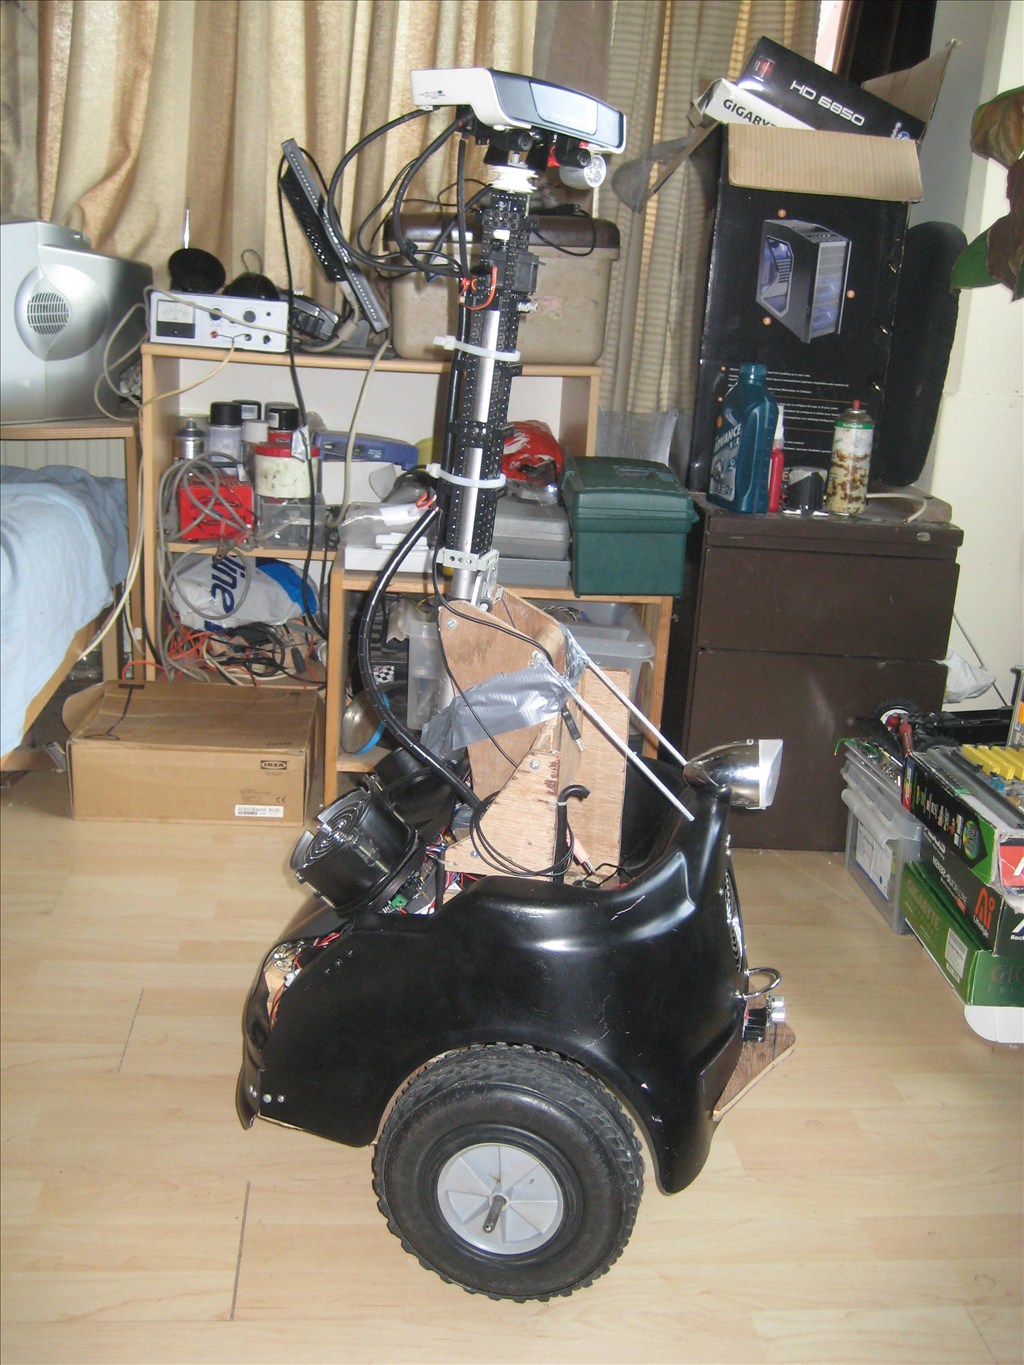
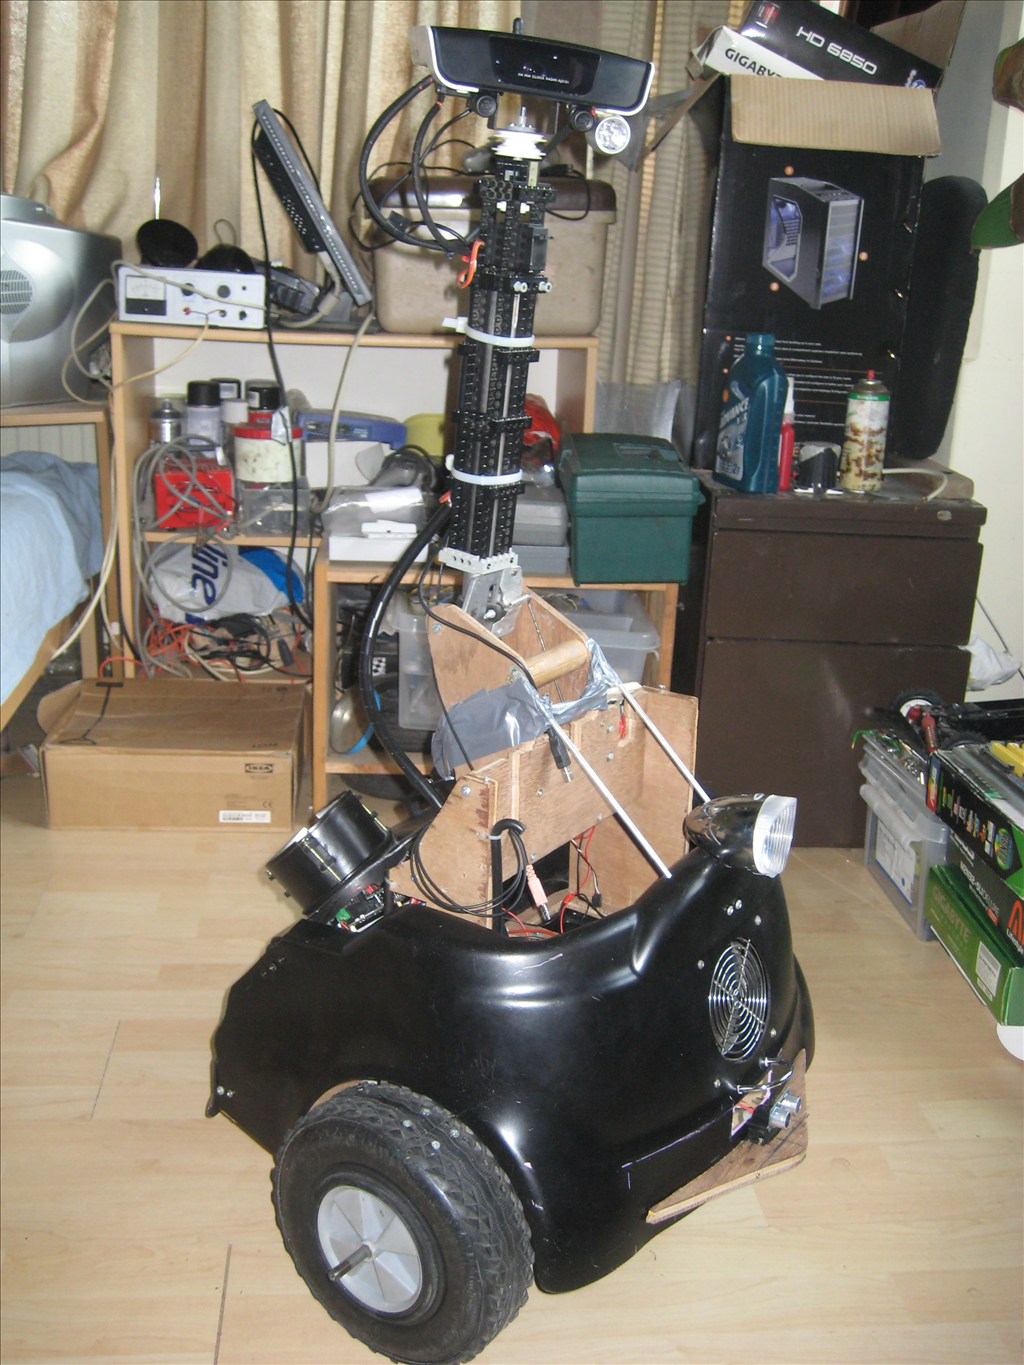
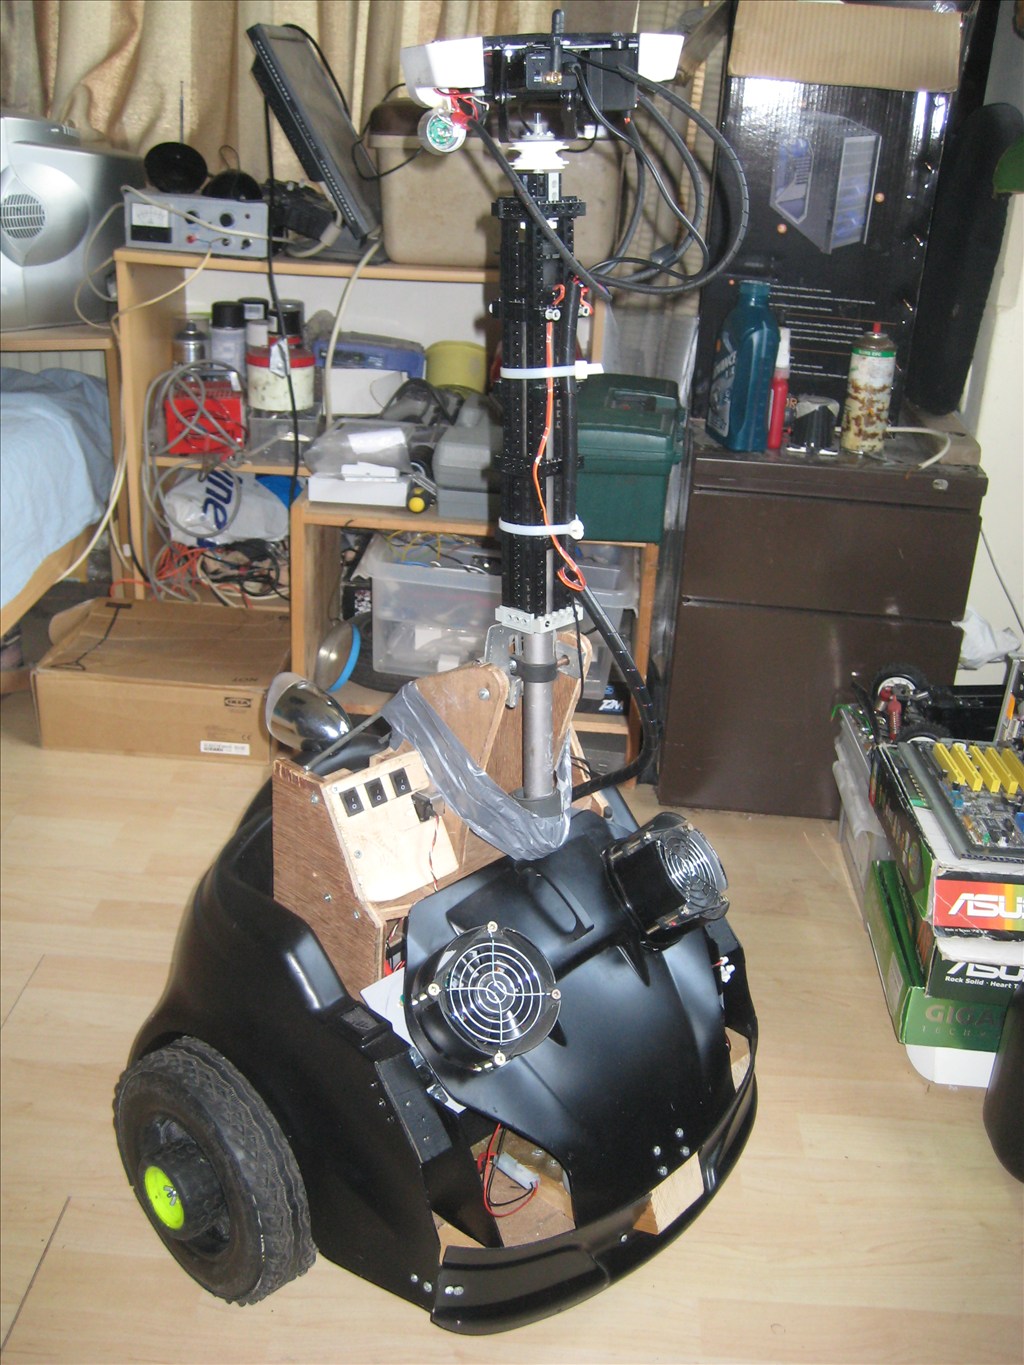
The head has got the camera, mic and some leds.
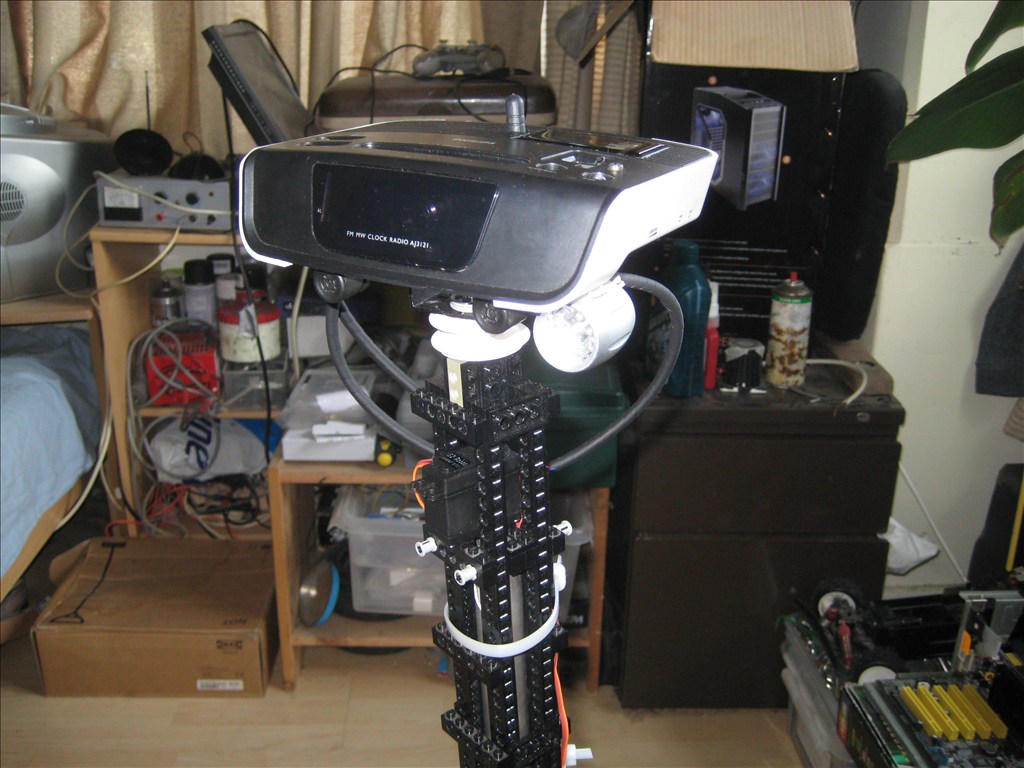
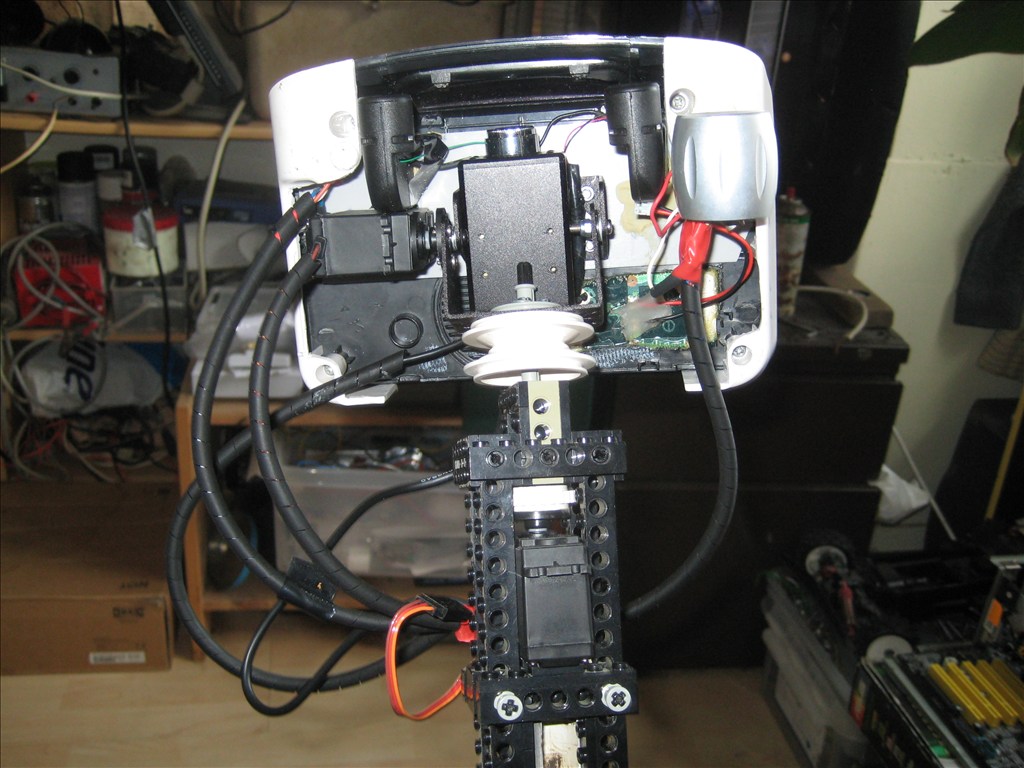
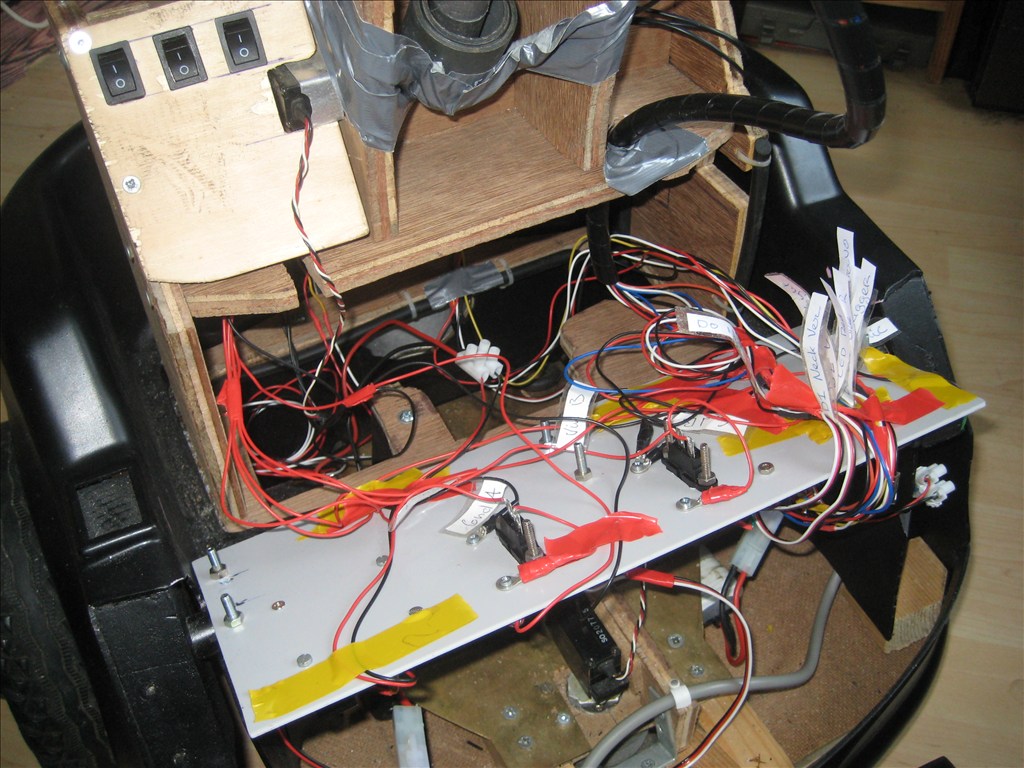
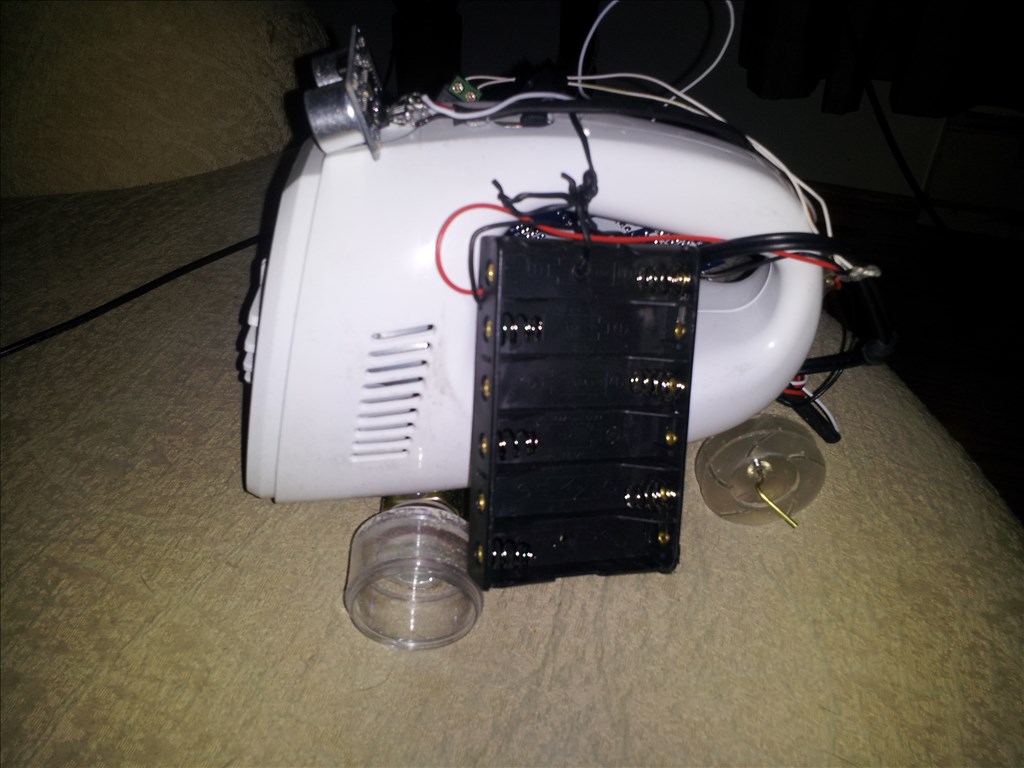
On the back are pc-fans, it opens to show the ez-b and h-bridge.
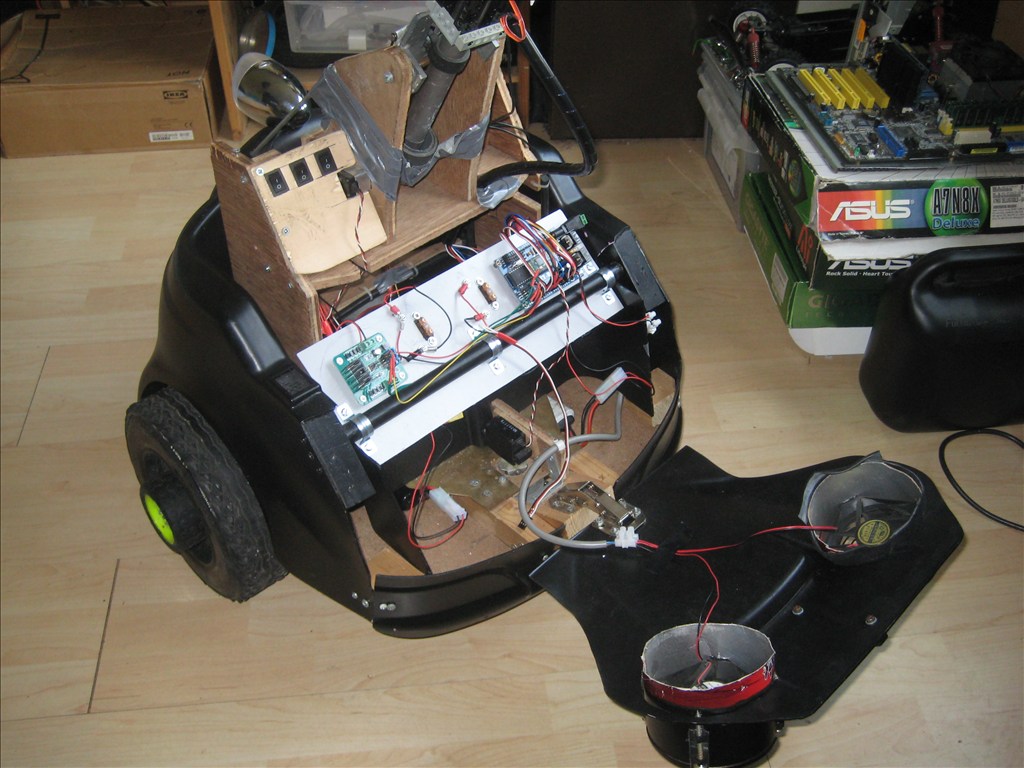
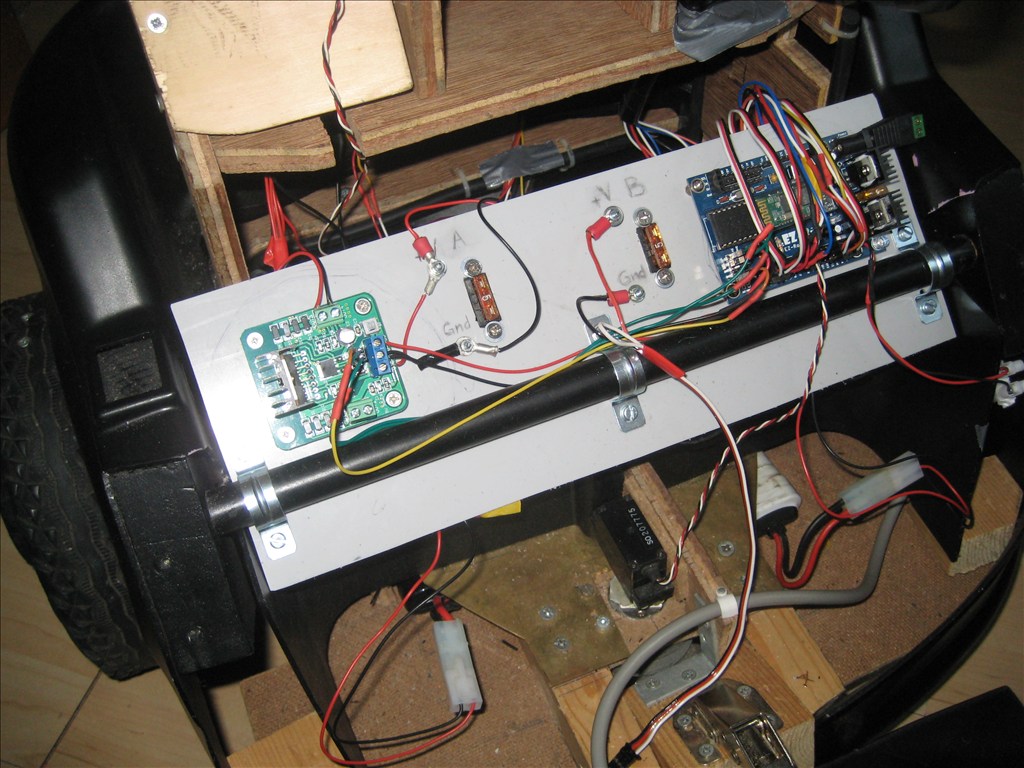
spaghetti
This will remain a work in progress for a long time no doubt. Anything could change and many things will. Everything still needs finishing. But the essential basics are there now. The motor and steering works, the neck servo's, distance sensor and camera all connected. Now i want to make this work autonomously and delve into programming.
I have a couple of questions too:
The pc-fans run fine when i connect them to any of the +5V ports. But the digital ports seem to have less power: i cant get them to turn with PWM or even just turn them on or off. Can the ez-b turn these fans on and of, or do i need a relais or something?
The headlight i can pwm, but i want to use the 7 to 8 Volt from the battery/Vin. Same question as with the fans.
I would like to read the battery power via the analog ports, using a voltage divider. First: Say i use two identical resistances, cutting voltage to half, but if the battery is charging at over 10V, what would happen? Bad? or will it just read maximum or something. Second: How to choose the resistance value, even after you know what fraction to use? Third: will this actually drain the battery? can you turn the analog port off or..?
There are some posts here about automatic self charging. Can you simply charge the batteries while they are being used? Is it simply a matter of connecting plus and minus to the charger when the ez-b is running?
some of the LEDs seem to peak at 45% pwm, just curious.
Discover more robots
Derrick's First Bot
DJ's The Real Wall-E

I love this robot and the re-use of parts. Nice looking design too. For switching the fans and lights off and on I would use a TIP120 transistor and it can get power directly from battery if you want. The transistor just switches ground from the signal of the DIO port.
Proficiat Boon !
Zeer indrukwekkend, maar zoals je al opmerkte, dit is een werk dat nooit af geraakt. Ik heb nog mijn allereerste (grote) robot uit 1995 en telkens weer wordt die ge-upgraded. Succes en doe zo verder.
Greetz, PhG
Your robot is fantastico!, Support the use of recycled materials for building or domestic, and I like the access to the electrical connections and cables marked with the label, that's a good idea. I use based voltage regulator LM317, one for each voltage need as 5V, 6V, 7V. There are also several open threads about reading battery voltage.
https://www.ebay.com/itm/LED-Battery-level-voltage-monitor-meter-indicator-Alkaline-Nicad-NiMh-LiPo-L-/200709081697?pt=UK_ConsumerElectronics_Batteries_SM&hash=item2ebb318a61
maybe this is something you wane look at? the company has several different versions and also for different battery types.
I'm sure you can hack them one or the other way to fit your needs.
ik zit er zelf al wel eens aan te denken om een electrische rolstoel of een van die kinder auto op te pikken.
ziet er goed uit.
Ray
Good use of old toys, Lego, servos and EZ-B. I had about 5 old Power Wheels cars years ago for robot parts. Each car had 2 drive motors. I wanted to use 3 of the cars to build a 6 wheel drive rover type robot that used a GPS to navigate outside. Sadly I moved and didn't have the room to take them with me. Apartments are not the best places for robot builders. I need a home with a garage and a yard. Hope to see some videos of your robot.
Awesome robot!
Once I finish high school, I'm planning to go to the TU Delft like you did. Here are the answers to your questions:
Like Bret already pointed out, you should use a transistor or a mosfet. Rich has a great tutorial for doing so.
Same as Q1. Use a transistor/mosfet.
A voltage of over 5V will damage the EZ-B board. For calculating the resistor values, use a voltage divider calculator. If your resistors are a high value, say 10k or higher, it will barely drain the battery. Just use ohm's law (I=V/R). When using two 10K resistors, it will only use 0.5mA at 10v or 0.4mA at 8v.
It depends on the battery type and charging circuit. When using Li-ion or Li-poly batteries, you can simultaneously charge and use them with one of these chargers.
This might be due to the LED type, you should check the datasheet for the Voltage/Lumen graph.
I hope this answers all of your questions, oh and welcome to the EZ-Robot community!
Niek is correct. Please follow the Tutorial section of this website to learn about the Do's and Don't of the EZ-B. It will not take very long to follow the tutorial (less than an hour). Do not connect motors and high current devices directly to the EZ-B Digital Pins. We put a lot of effort into the Tutorials and have thousands of people follow it - we'd like you to follow it too
Thanks a lot guys!