

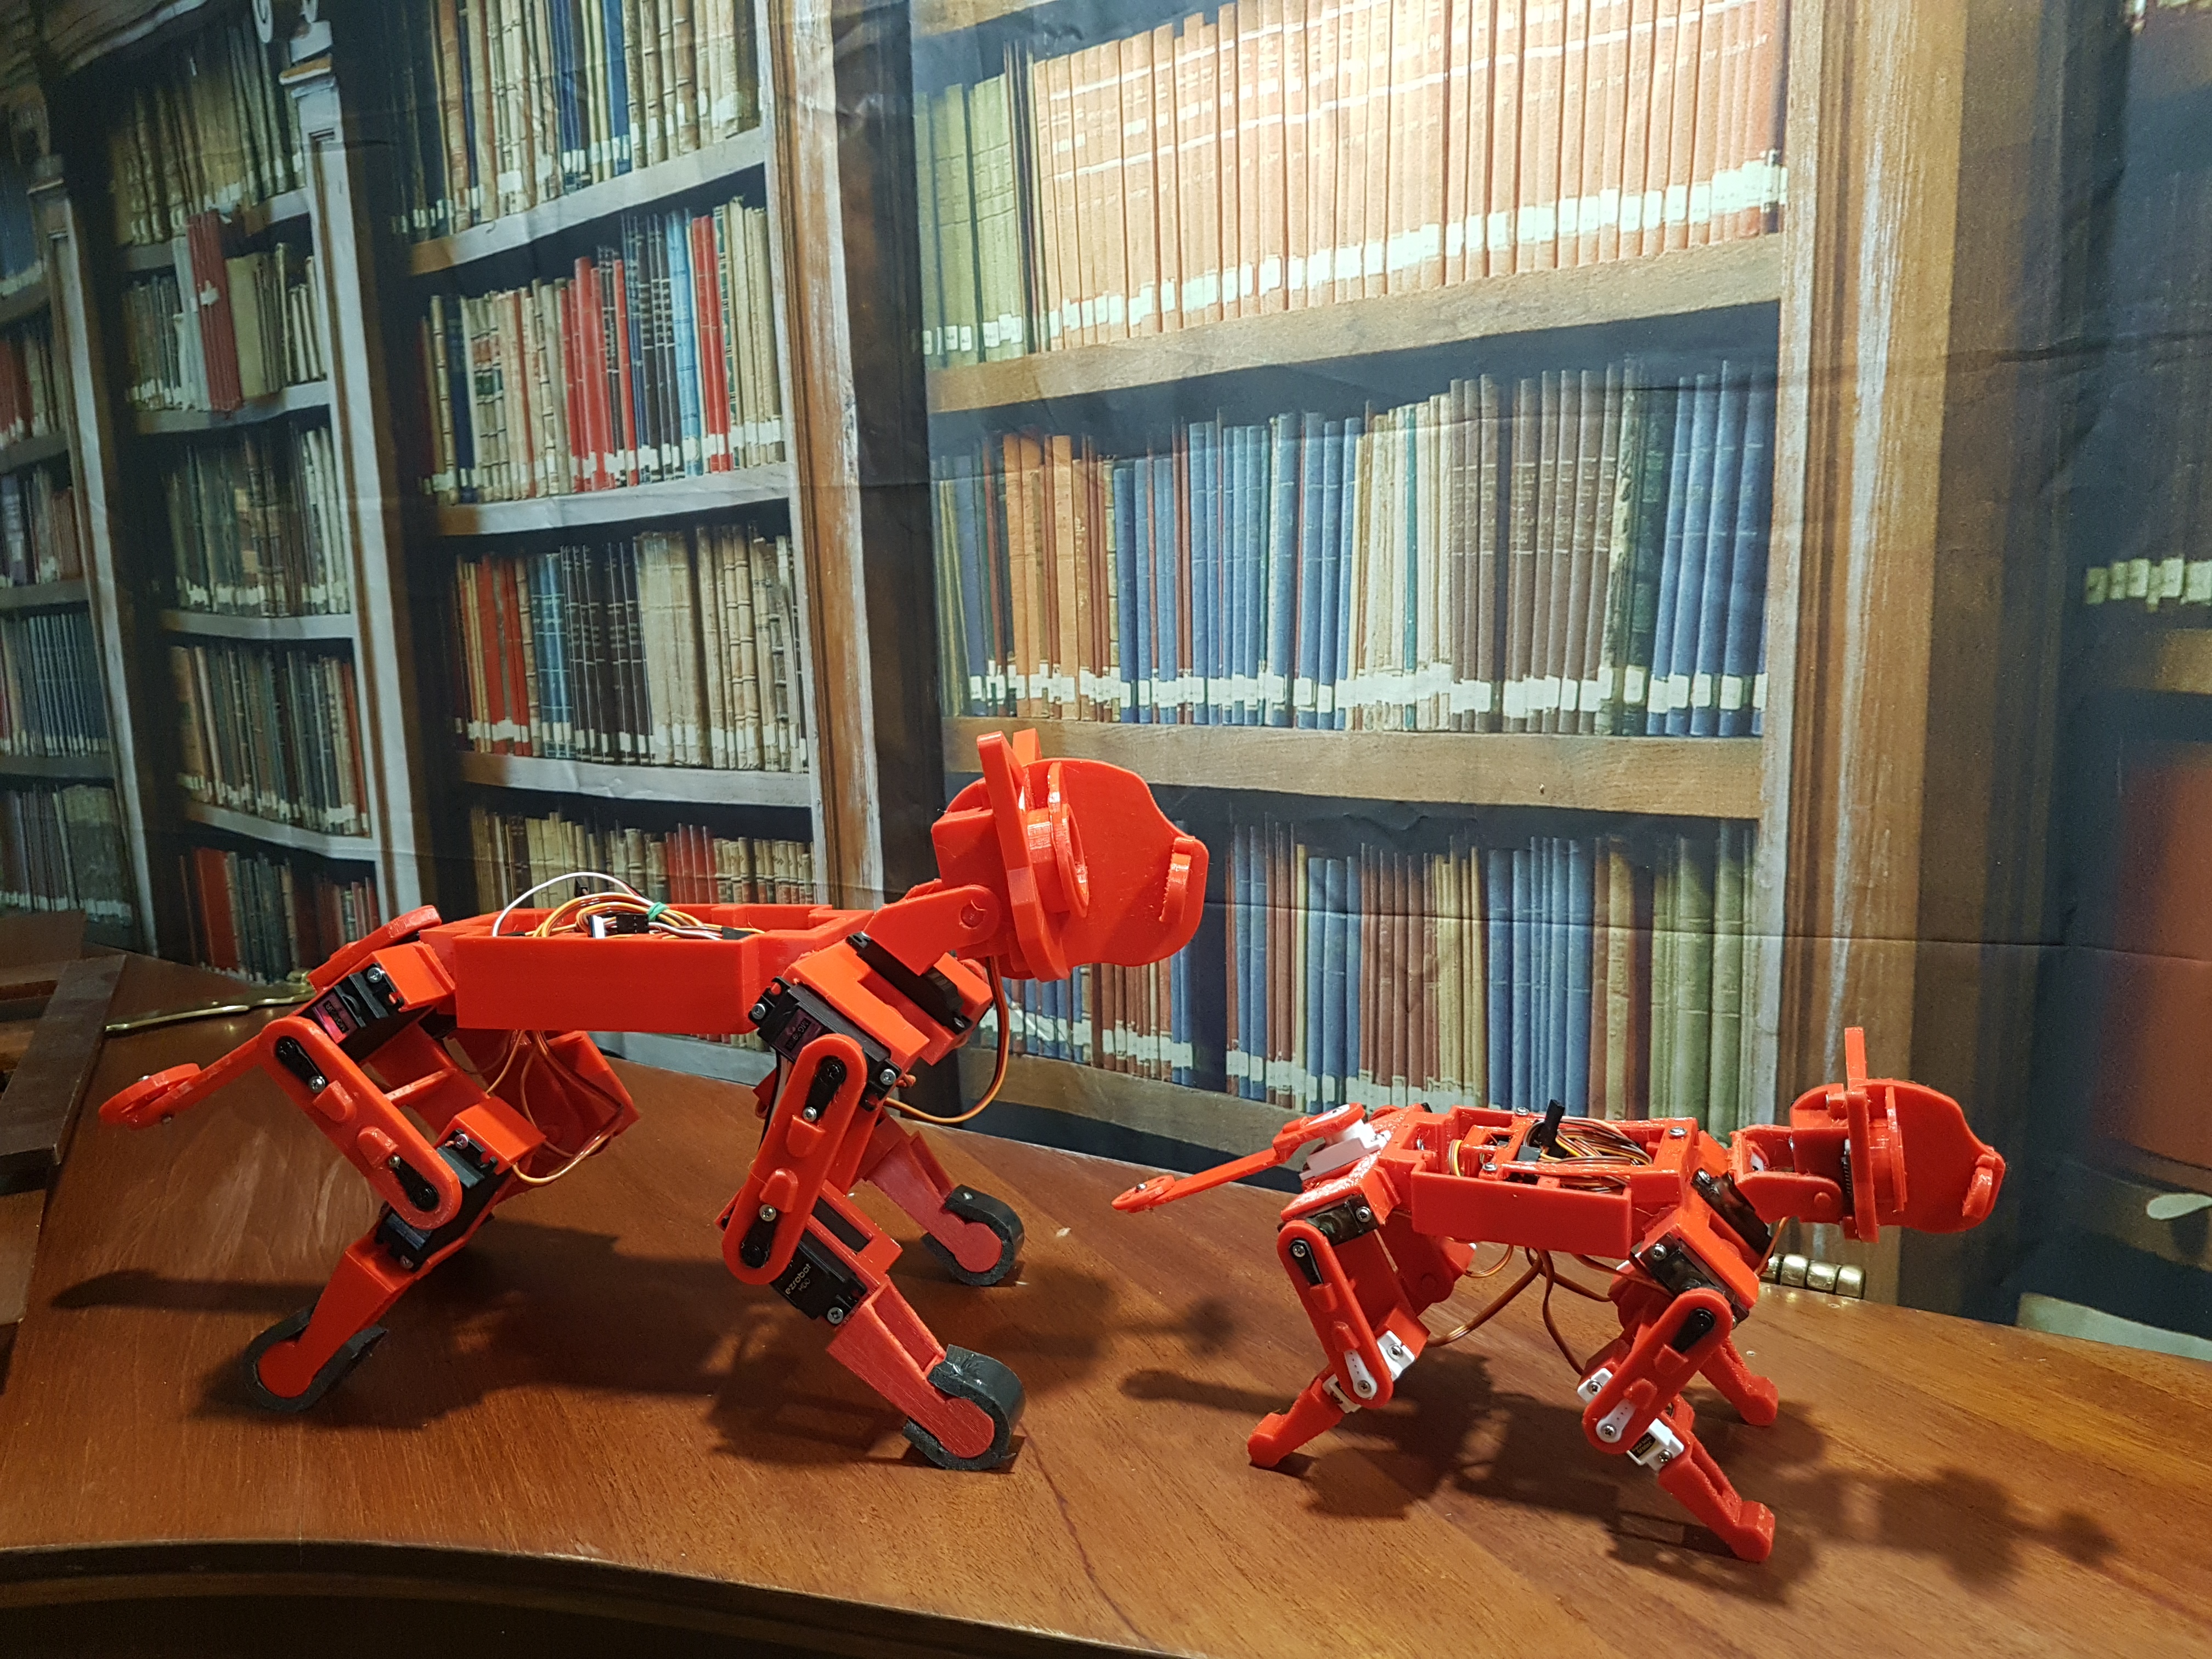
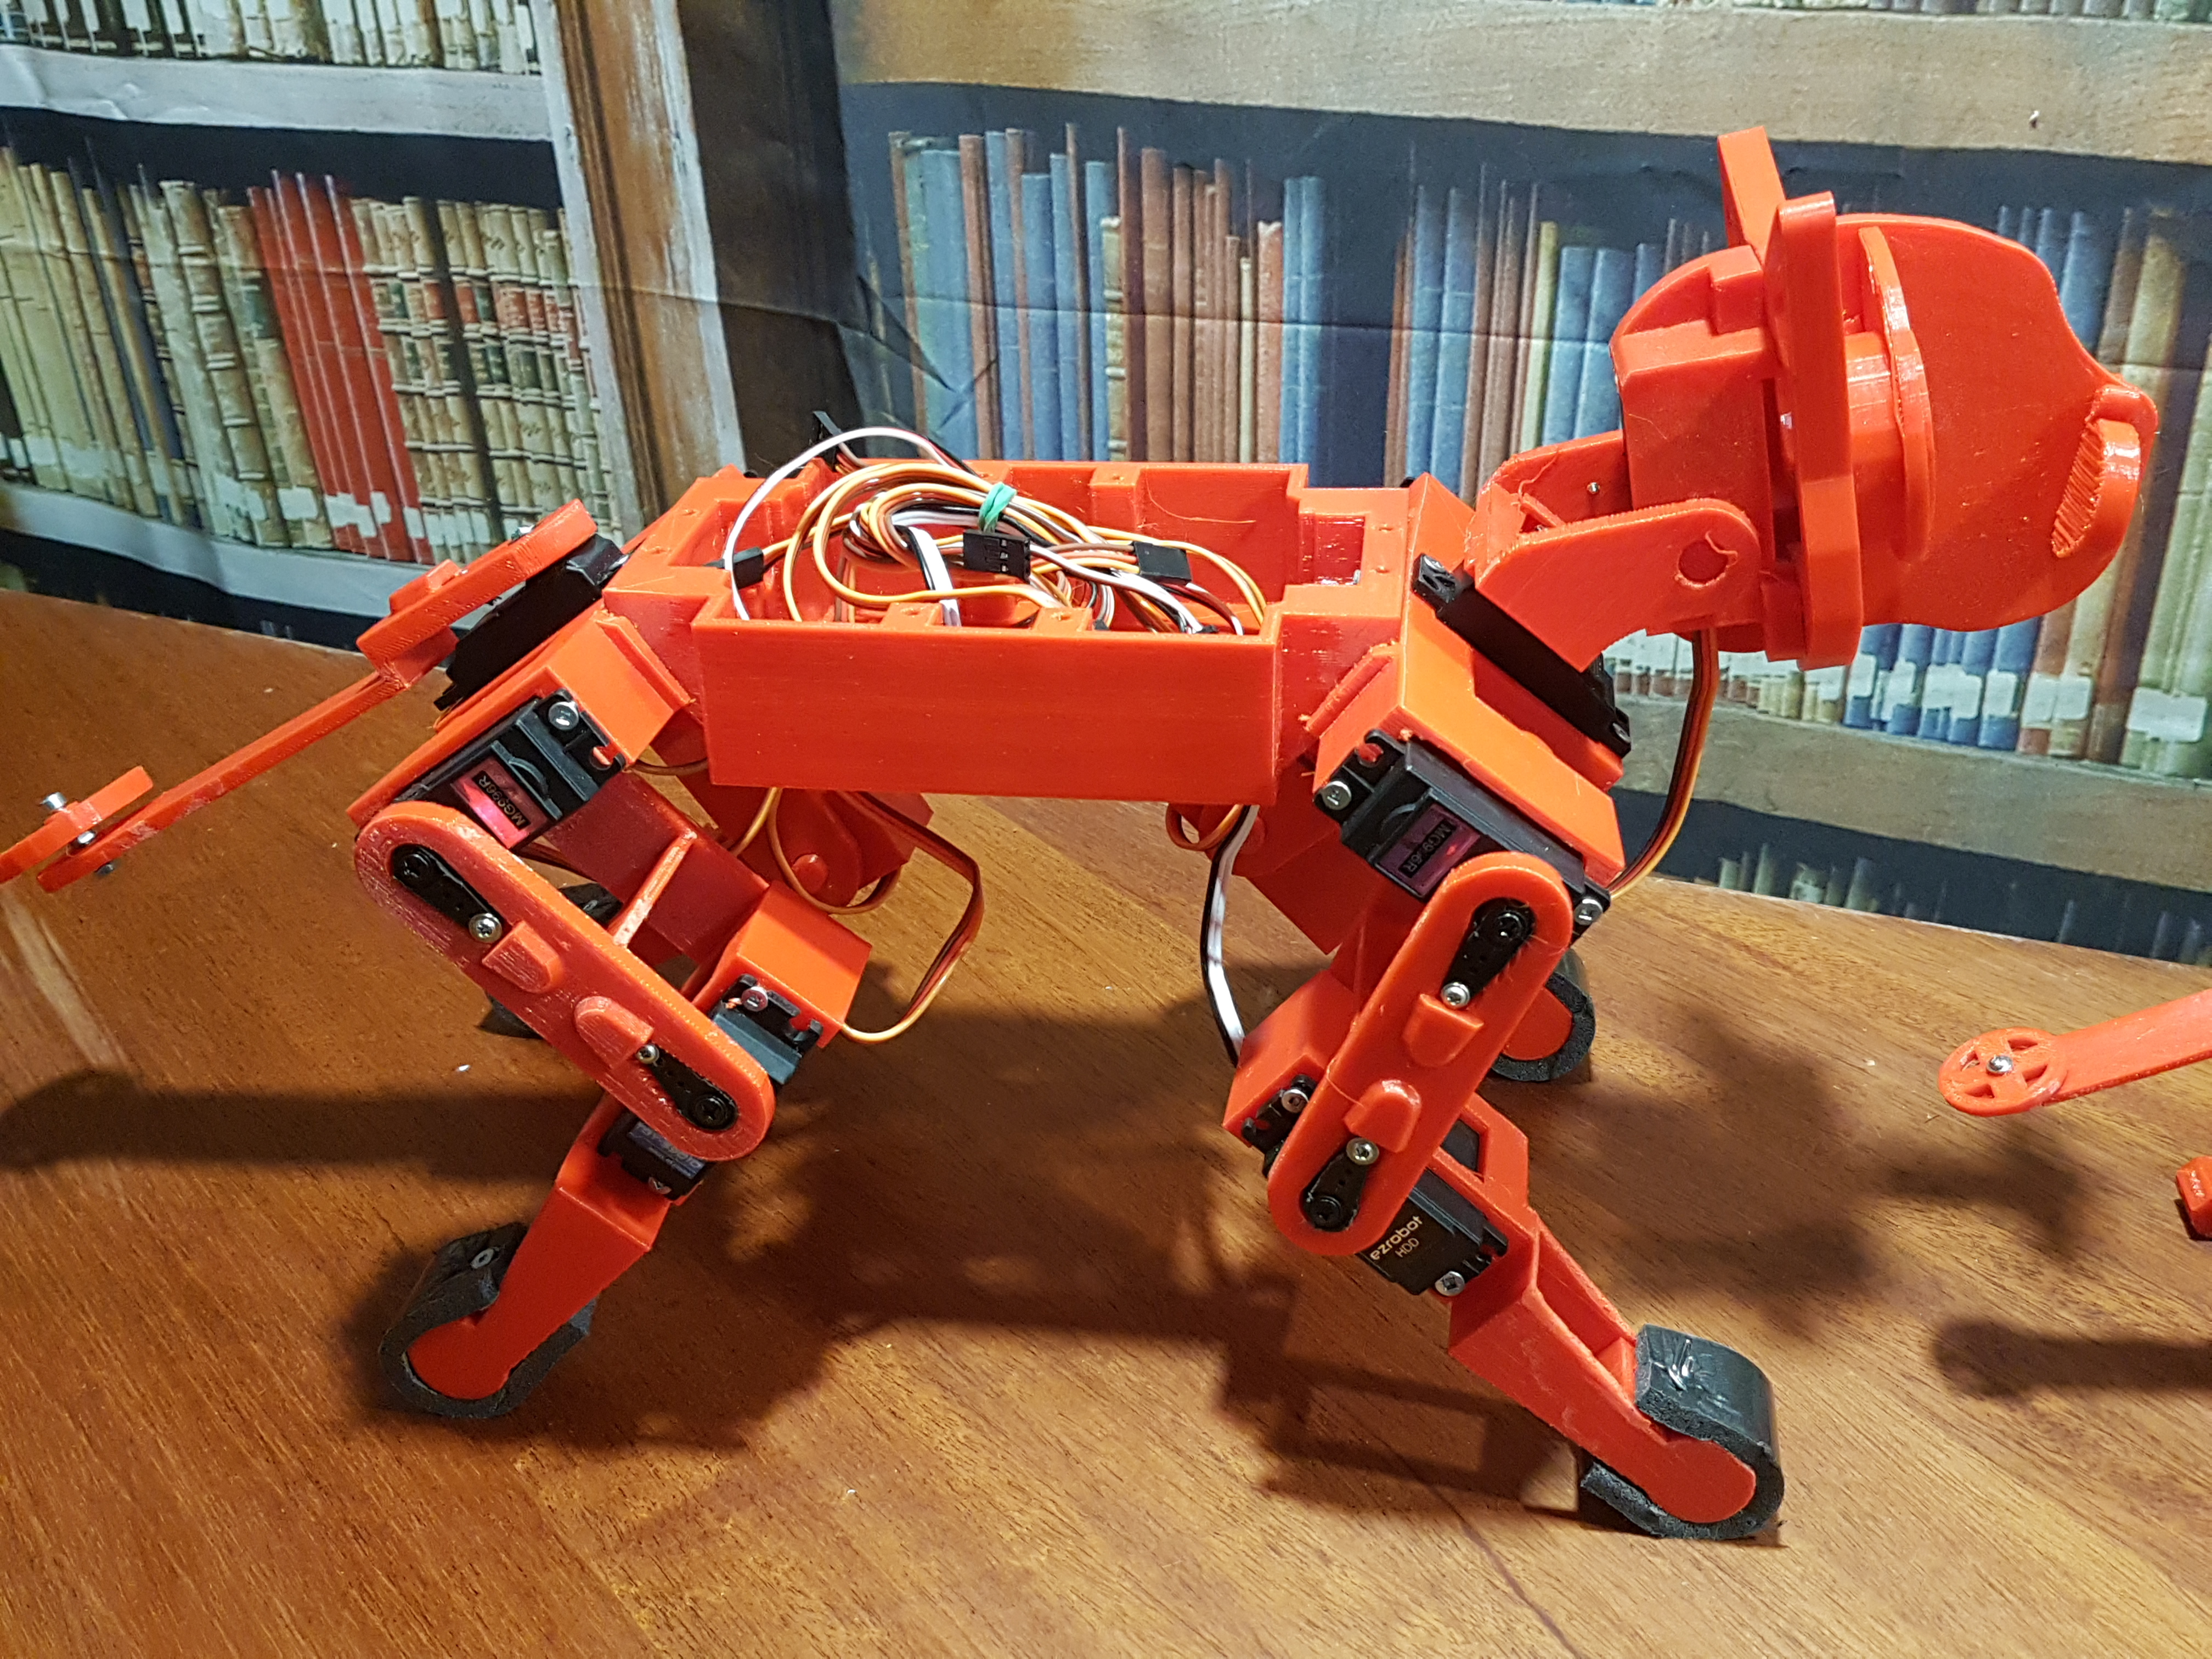
Hi After I posted the pictures of my Robot NallyCat a 3d printed version of opencat. I am still waiting for the Controller Card to arrive from China. I was in need of a project, My Android head Buddy is waiting for parts but it is finished except for programming, I will show Buddy to you in a couple of days and I had mentioned that I was thinking of making A Large open cat version using full sized servos. so I could install a camera, sensors, etc. Sooo, here is a couple of pictures of Big NallyCat which took a little longer to print then open cat. I had a Spool of Red and that is why the Cats are red. the Filament I use and the only type of filament I use is PET-g because PET-g is so strong there is very little infill 15% and I don't use much support if at all, these are tests prints of a concept, I have never had PET-g filament warp or come loose from the print bed and the parts are easily removed when the bed is cold. Have a look and if you have questions, I am always here lurking . I see a lot of Inmoov owners like myself were interested in open cat, but they wanted a large one, I know we like Larger Robots.
Discover more robots
DJ's Teddy Ruxpin Robot V1
Joesox's CARL

@3dGuy I use 123 design and usually scale the stl. files in Simplify3d which I use to print. to design models from scratch I think you need a Cad program of some kind. Gael used Blender to create Inmoov. to me Blender has a steep learning curve. there are others but I do not want to take the time to learn one.
You did a great job making the model fit the larger servos. If you upload the files to thingiverse I am sure many people would love to make this cat. Hope to see your cat running around soon.
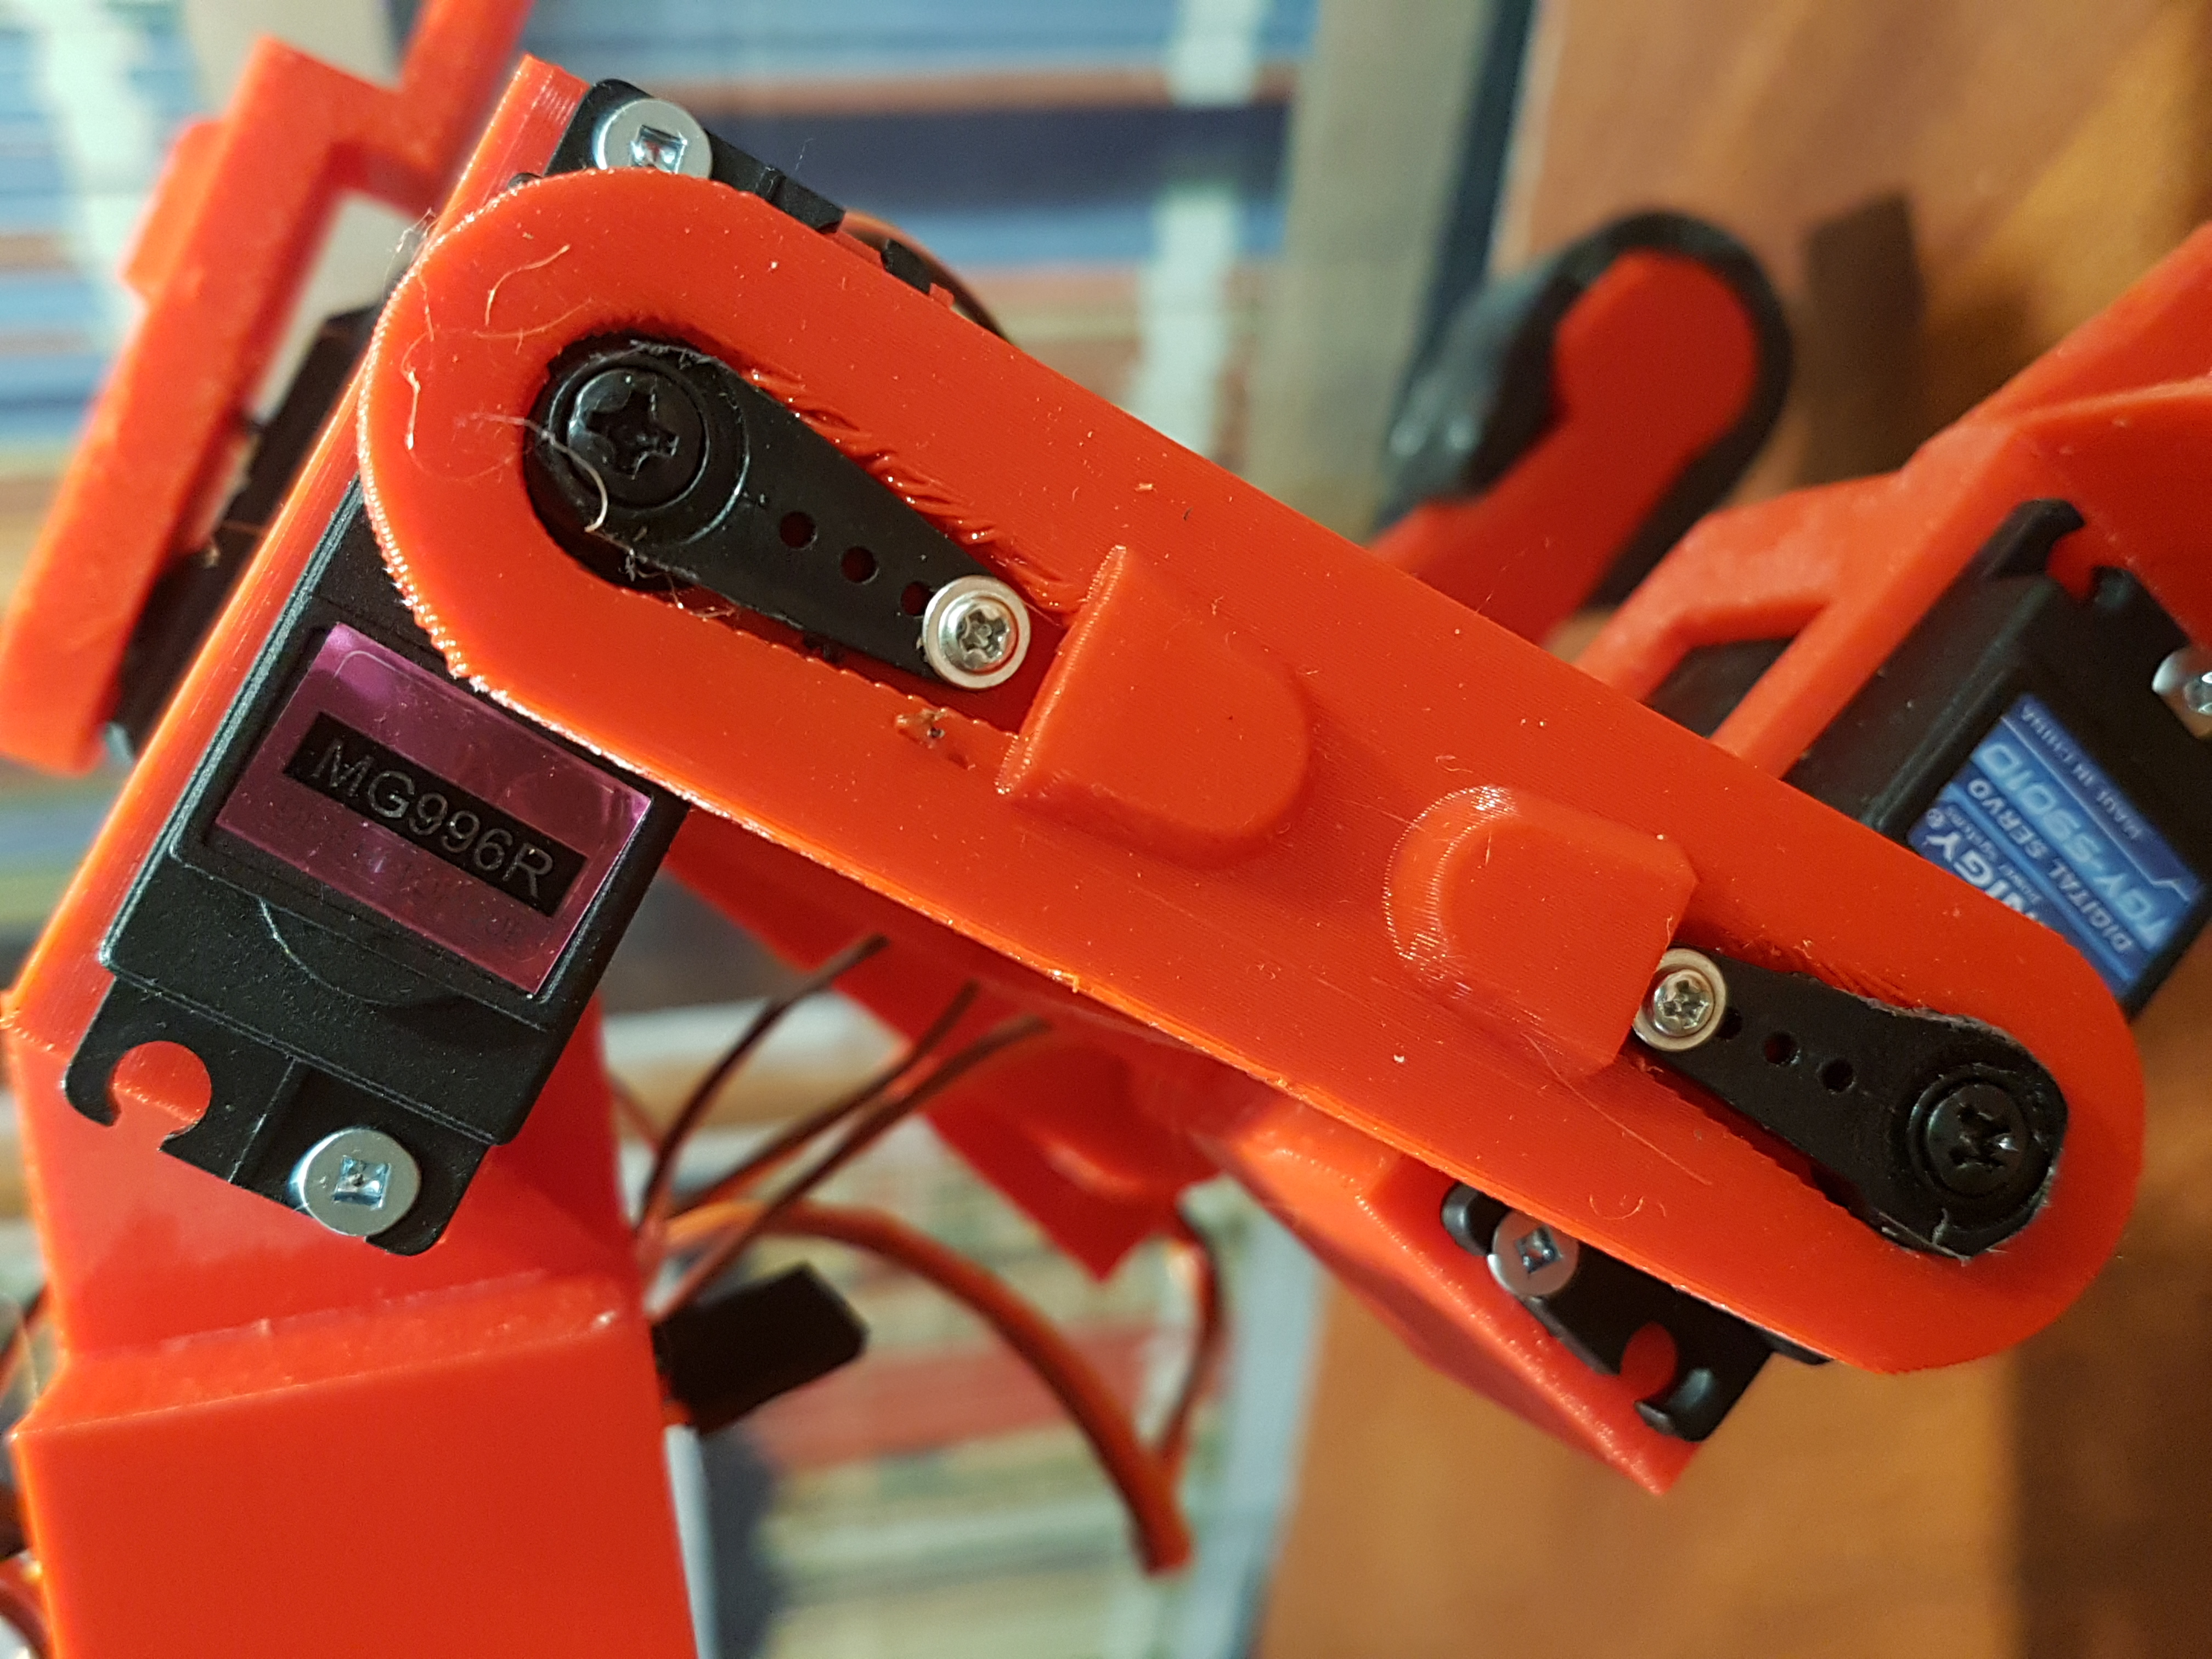
here are the files and the amount to enlarge the parts, just one note if you do try to make this robot, it is a test of concept and it is still not complete so do not become angry with me if you have a failure. I will try to help and you can contribute your ideas to me also, especially with the arduino and programming, not my fortay. we can make this a Synthiam community project.. This picture shows tibia part, note I do not use support when printing so the top edge has excessive material but it is easily cleaned up, I did not clean the parts up. also the servo horns on full size servos are not as large compared to small servos so they are a little short, note I used a servo screw to secure the ends, this works fine and is no big deal as it is secure. I use wood screws to hold the servos in, the servos on the body shown in the picture fit very tight and you may have to use a dremel tool to remove just a small amount to make them fit. some I did and some I din't have to ease the socket this varies with servos. I use Pet-g filament, printed on a glass bed with hair spray I use Aussie brand as the other popular brands are not easy to find in Canada. Infill is 15% bed temp is 80 deg and extruder is 245 deg. the parts "cat servo- shaft" are made in 2 sizes 66% increase for 4 units and 75% for 4 units. Down load the files from Thingiverse.com search for OpenCat no space between open and Cat open your Print program and enlarge the parts. I use simplify3d. which is the best I have ever used. cat-body.stl enlarge 66% In simplify3d that would be changed from 100% @ to 166% Etc. Etc. for all parts cat-body-board-holder.stl I have not printed yet as this will fit the board used cat-body-front-end.stl enlarge 66% cat-eyes.stl I have not printed yet as I have to fit a camera cat-femur.stl enlarge 75% cat-head.stl enlarge 65% cat-servo-shaft.stl enlarge 4 of these to 66% and enlarge 4 more at 75% cat-tail.stl enlarge 65% cat-tibia.stl enlarge 45%
Thanks Bruce, I totally understand about proof of concept’ Its a great starting point.
Unfortunately I have my 3D printer ( Flashforge Dreamer ) dual head assembly stripped down at the moment, due to a couple of faults. so it will be a little while before I can start playing around with prints.
My 3d printers are in good shape so I will be printing the cat out for testing with an IO Tiny and I am working on a robotic dragon using an EZ Robot V4. Both will have a moving head with a camera inside.
@mcsdaver I also have an IO Tiny and was going to use it BUT the IO Tiny does not have enough servo ports. I also think that the success of this design is the use of the MPU-605 circuit board as it is what makes a quadruped robot stable when walking. I do not have enough knowledge for doing this but maybe DJ could give us a suggestion on how to use the MPU-605 with an IO Tiny, or a EZ Robot V4 I will be using an arduino board and if anyone has a suggestion on what Camera to use with it, please tell me what I should buy. I like the dragon Idea, I think that would look cool.
I forgot the head needs 2 servos and another for the tail. I will be using V4 for both robots then. EZ Robot can use a gyro, so that is not a problem.
Hi nallycat, i am finishing the last 3d parts of the cat. All parts fit perfect. @DJ, regarding the MPU-6050. I bought a standard MPU-6050 and i would like to know if EZB V4 could handle the processing speed needet to balance the robot or would it be necessary to use an arduino? How would one balance a robot in synthiam.