
jstarne1
USA
Asked
— Edited
I ordered a Solidoodle 2 Pro which arrived today. I also ordered with that 2 rolls of filament. It should be 4 total pounds of material to start with.

Pretty cool and a very good job at being a newby at 3d printing, I am like so close to buying a 3d printer :-} I hope everything goes well for your business :-} I might be getting a hold of you for a few things :-}
@josh, Some rolls worked fine from start to finish. I recently put in a new roll that is jamming the Extruder up. Also, it is not printing very well at all. I believe it was a bad roll. But, with my experience with other rolls, they work just fine. It took me a little while to get the way of operating it. You print out about 50-75 items, then you must maintain it. Also, it takes a rub of alcohol every single time. 95% alcohol or denatured. I am using a heated bed with ABS filament. It seems to be a stronger plastic. I don't think that the moisture is going to affect you if you open the roll and use it in a decent amount of time. If you open it and let it set open on the shelf for a couple of years, it will certainly have problems. I haven't had luck with PLA. I just tried it for a little while. Everyone says that I will love it. We will see.
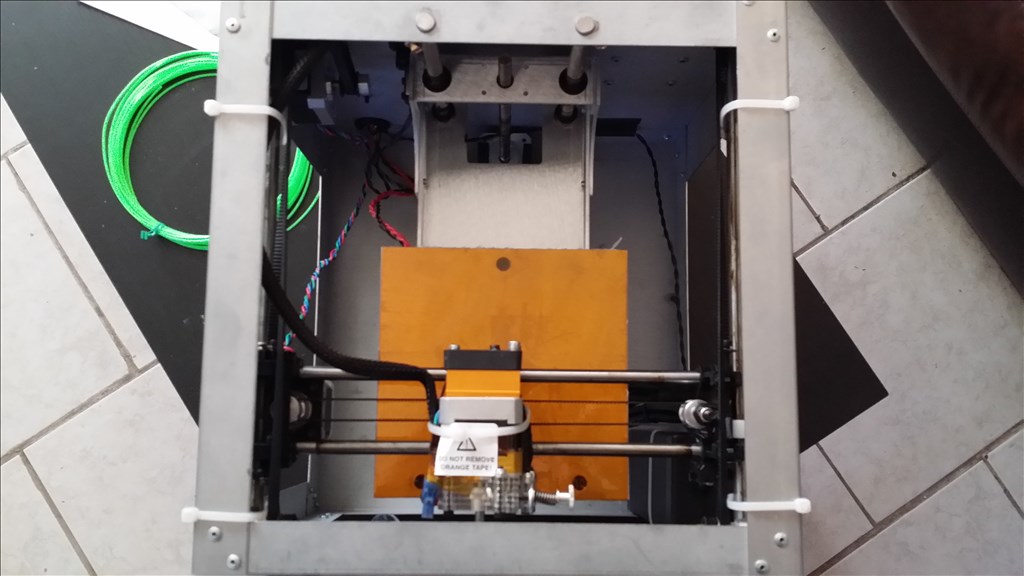
@josh, what is your bed size? mine is 6X9.
I read in another thread that his bed is 6x6x6.
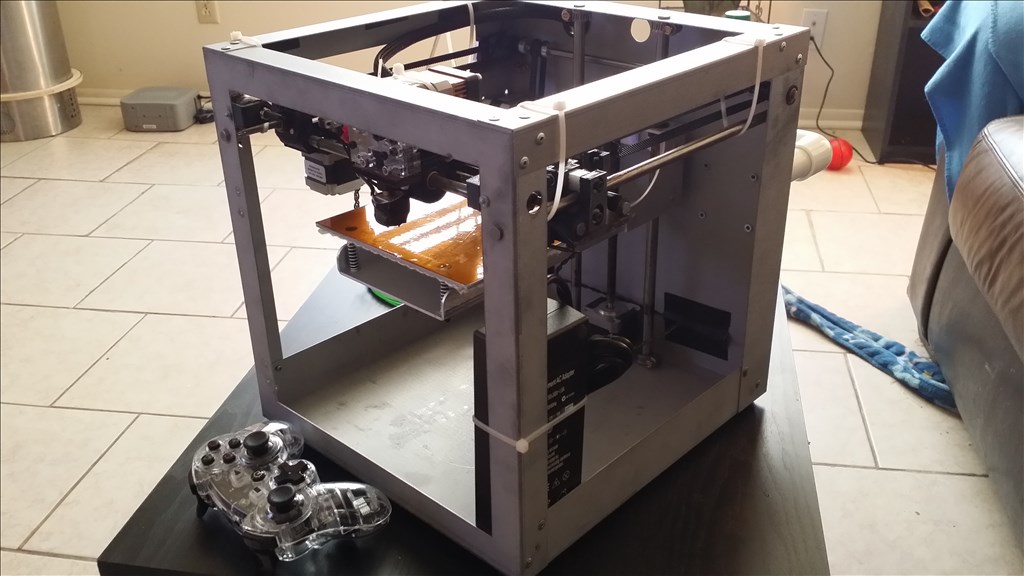
$500 3D Printer
Yes 6x6x6 but I believe I found a way it can print to over 7 inches with a larger build plate. The Repetier Software is open source so make changes to the settings and code are possible.
Anyways I has to make adjustments to the Z axis stop and initial print height. I also reduced initial print speed by 50 percent. I do want to print some accessories as practice Today I made my first .1mm resolution print. It is a filament feeder cone. I used a 2 layer raft and 3 mm skirt. The raft and skirt combo mean delamination of the edges are not likely to effect the print.
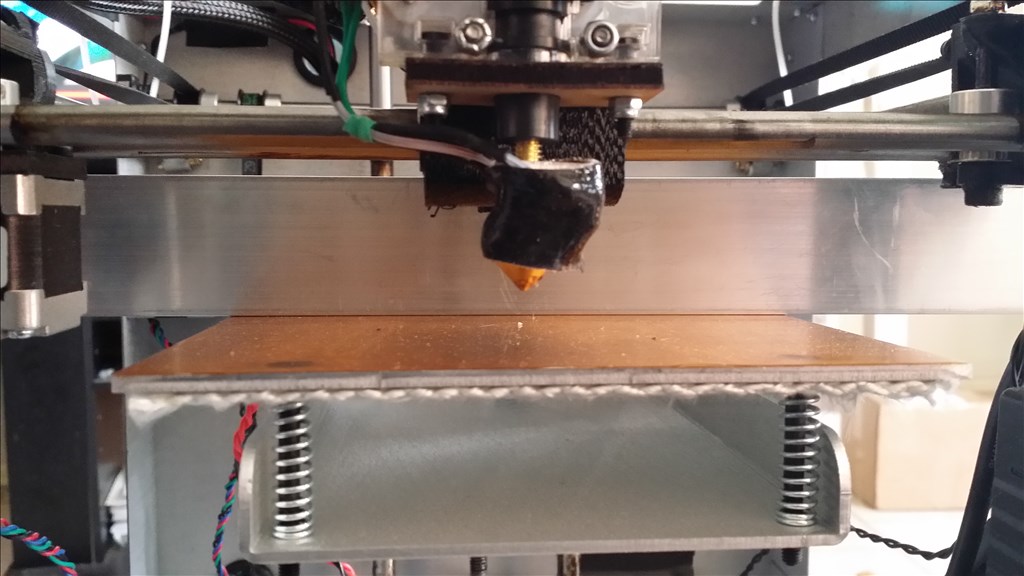
This is a test print I did a few times to get the filament to stick yet also squish evenly.Once the print was done I decided to try acetone on the print. I just dipped it in a cotton ball and dabbed it on. I believe I will make a acetone vapor station from a crock pot with a lid. Here is the part after just being wiped with it. You can see the slicked over gloss it makes. I believe this will result in a more stable part as well to protect against layer delamination.
Looks like a great part. The one thing I can say is that the first 5 to 10 minutes of a print are the most important and it's 90 percent likely that if a print will have a problem it will happen then.
thanks for sharing this Josh
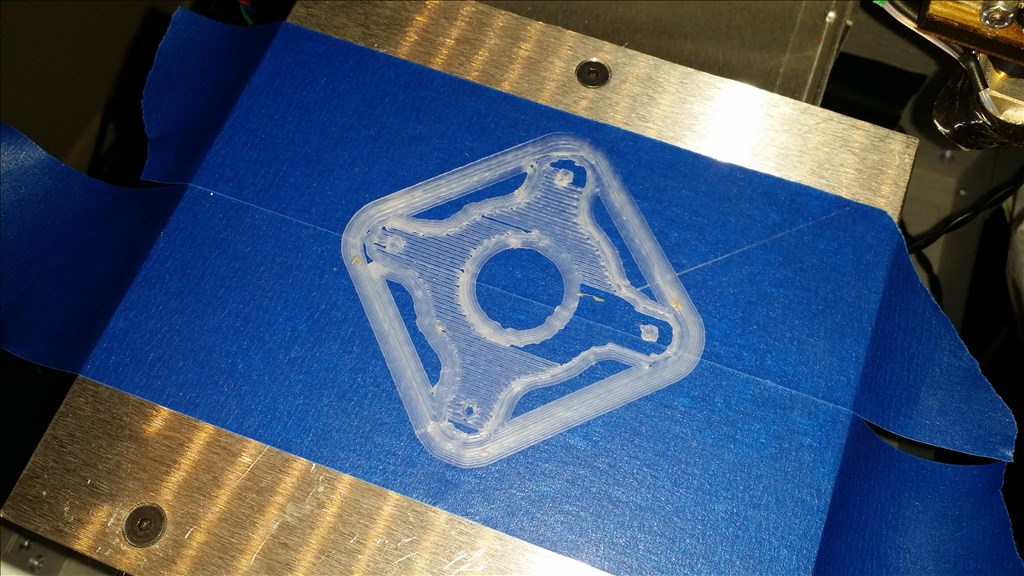
You can still see the lines in this .1mm print. I have found two things that will improve this. A backlash nut for the Z axis and replacement carriage ends that have two sets of bushings instead of one. This should take it from being a acceptable print to a crystal clear print. Apparently these two mods/improvements are common for most consumer 3d printers. Even the makerbot replicator has the option for the same mods.
Next though I believe I will do the extruder fan and tunnel add on.
So something I learned is that the environment inside the printer is very important. It's odd that this is not given as part of a tip before printing. I took Djs advice on using a garbage bag over the printer and turned on the heated bed about 20 min before starting to print. The bed warms the air and all the components up inside and then while printing I left the bag on to shield from vents blowing air in my workspace. It worked excellent! In the efforts to have something for practical I believe I will build a cabinet of some sort with a door or something. Without the bag the print material shrinks unevenly and causes the part edges to curl up or to come unstuck from the bed.
Ok so after my first .1mm print I decided to try a .3 mm which is standard with support material. I apologize as I forgot to take a picture before I pulled the support materials off. Since we will be putting together bipeds and such it is beneficial to have a couple dozen servo blanks laying around just for assembly purposes. I will check the measurements and if everything is good I will do repeat prints.
I have learned that printing with a raft increases adhesion to the build plate and acts as a buffer between and warps from the print bed and the part. There are many projects where supports are needed to keep the part perfect and this is all don't with software.
This instructions on this part were to scale to 105 percent but since I can only use decimals I used 1.05 scale.