Asked — Edited

Adventures Of Botchy

I thought I would start a new page. I would like to completely delete the old stuff. I will have pictures soon. They are already taken. I have had my struggles, so i named her Botchy instead of Sunshine.
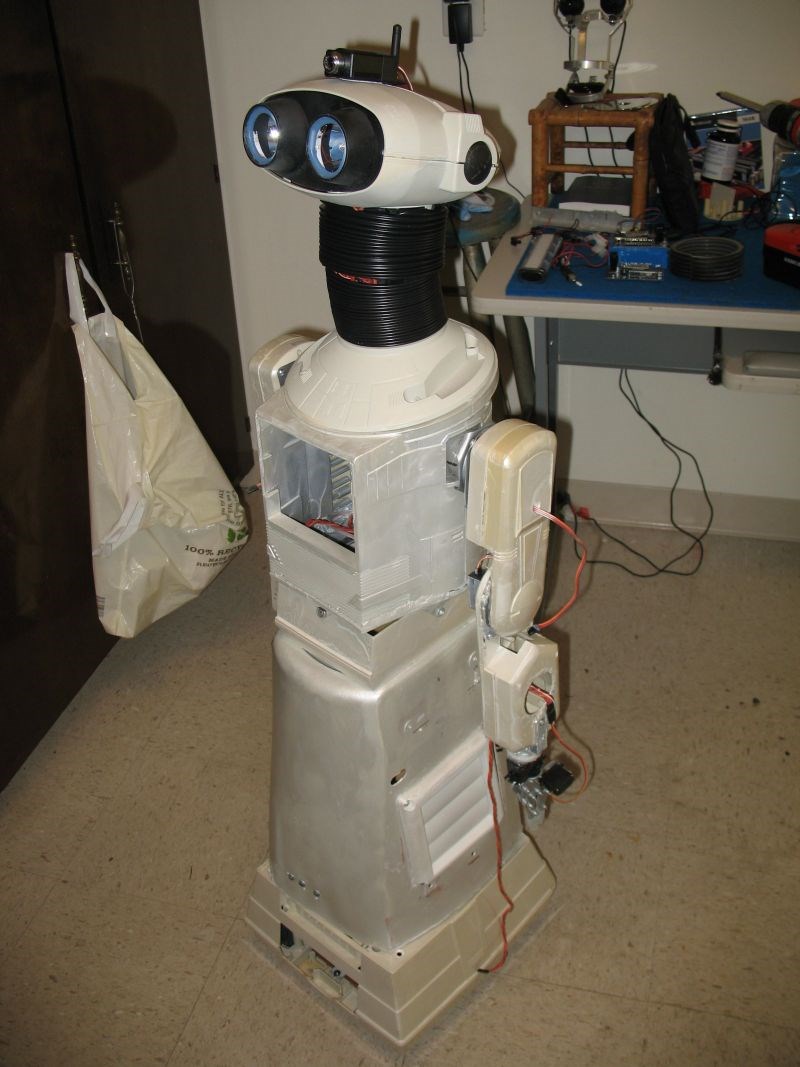
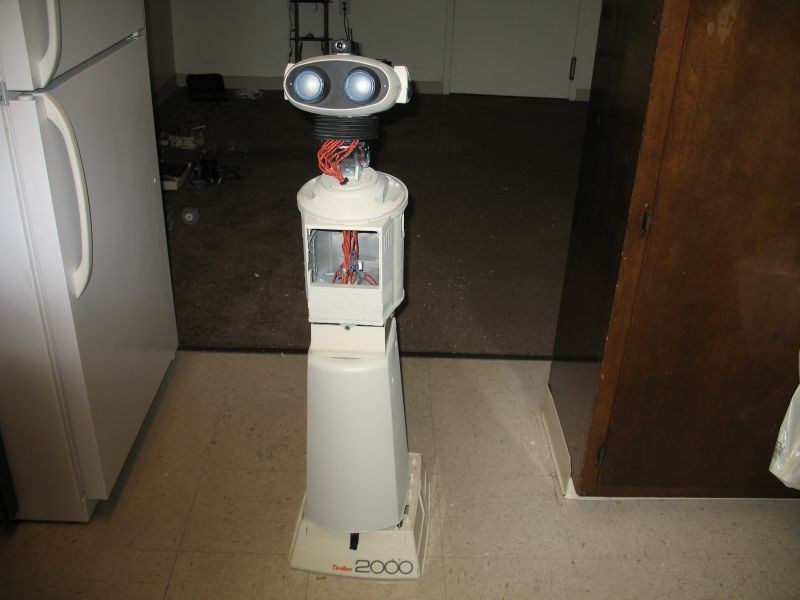
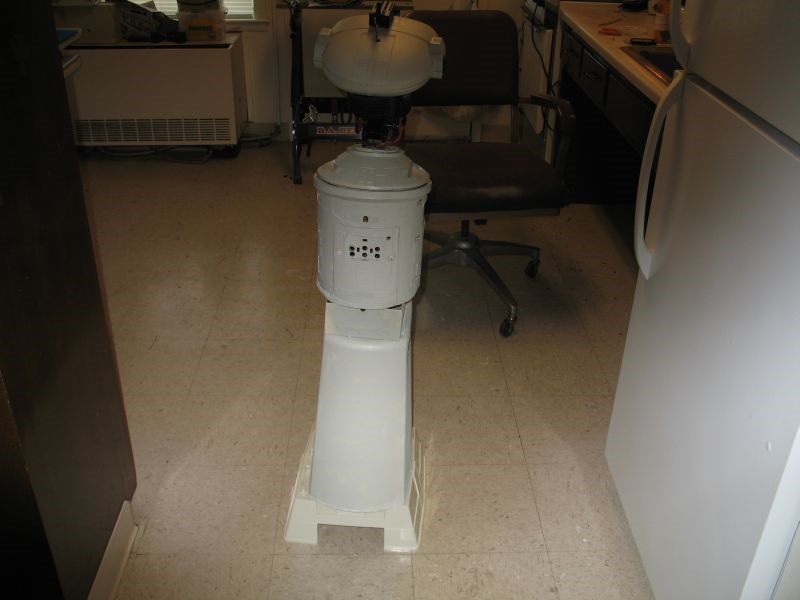
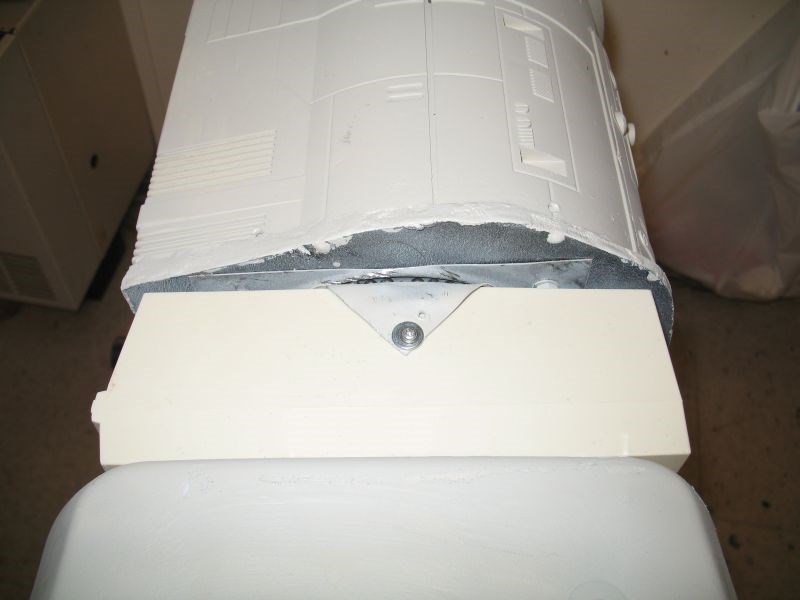
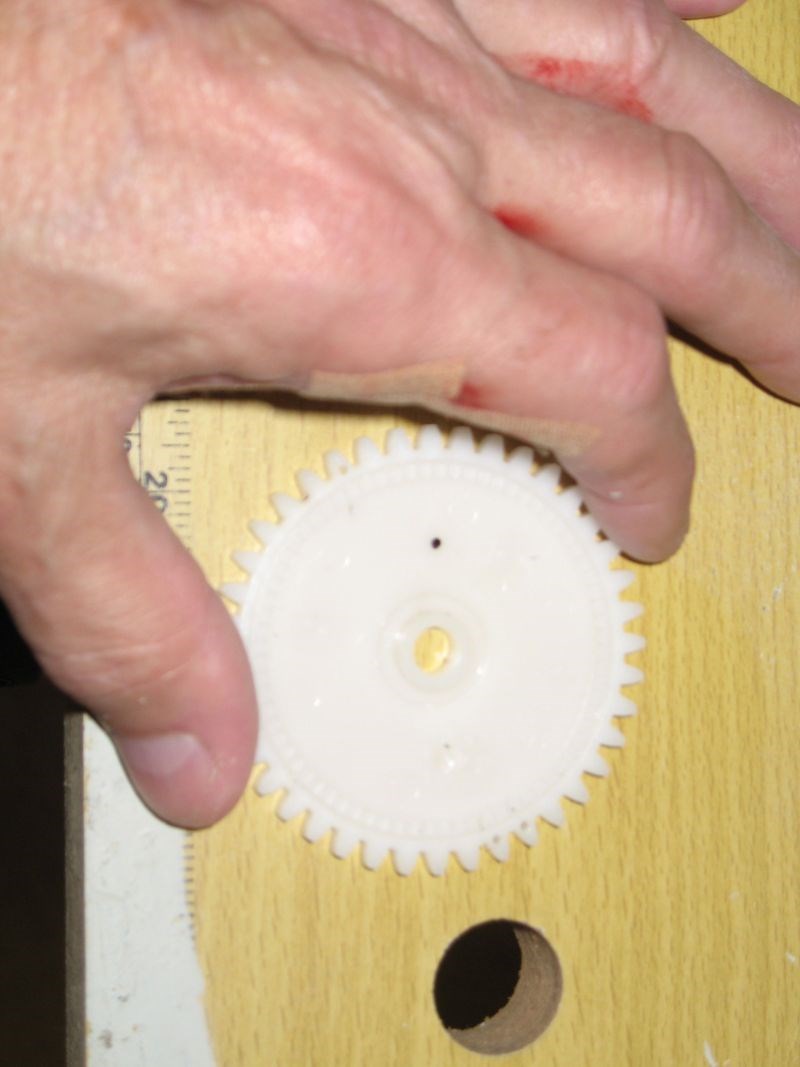
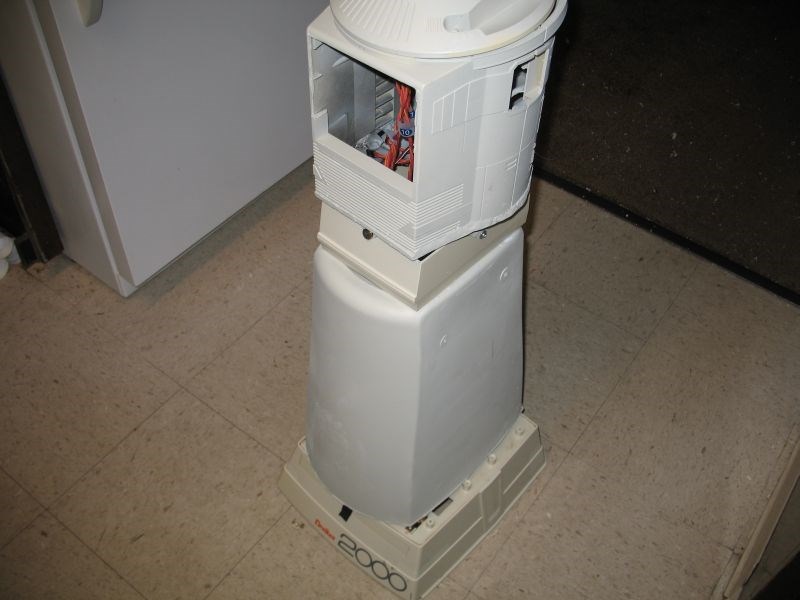
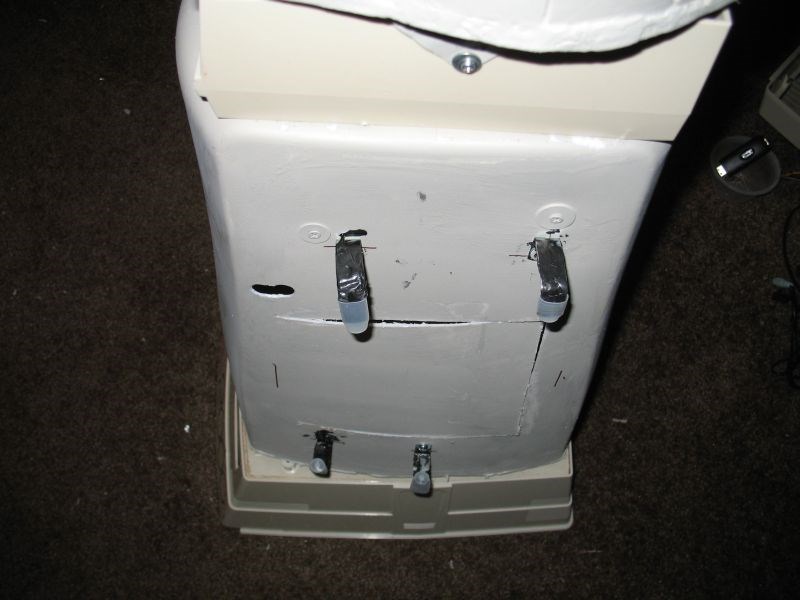
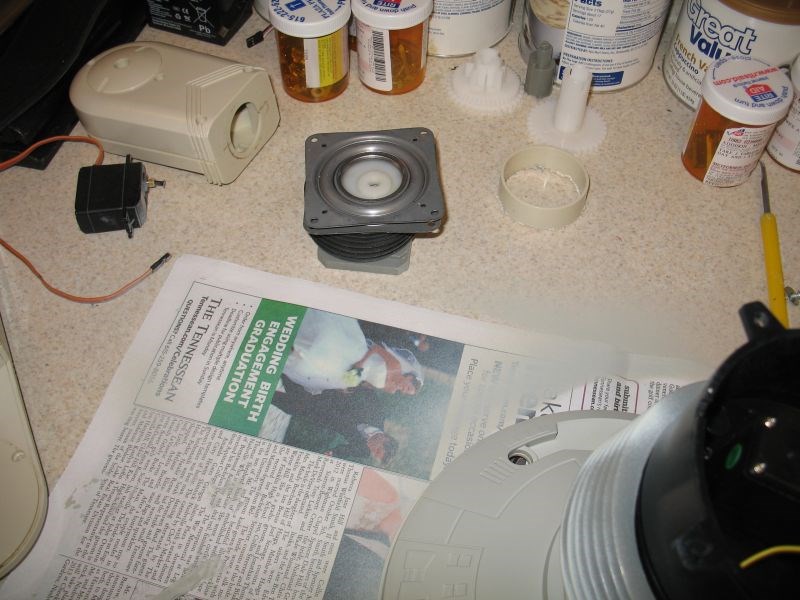
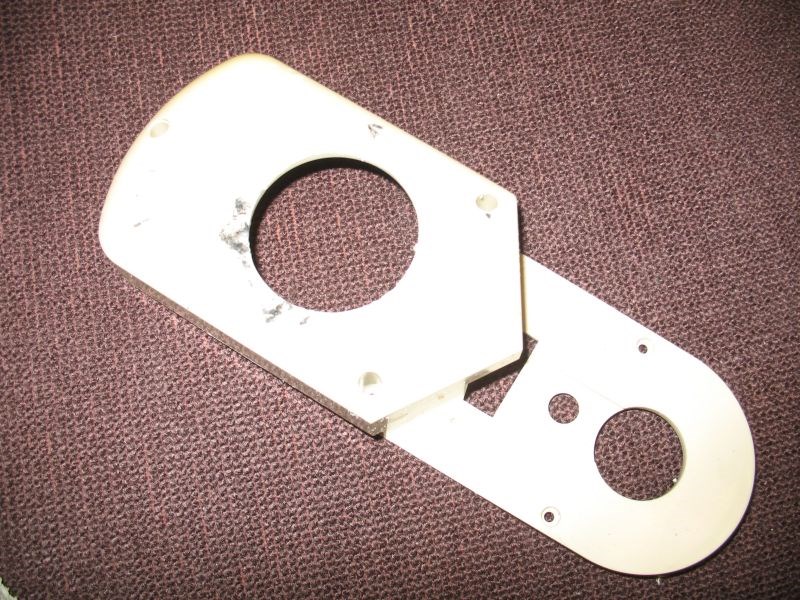
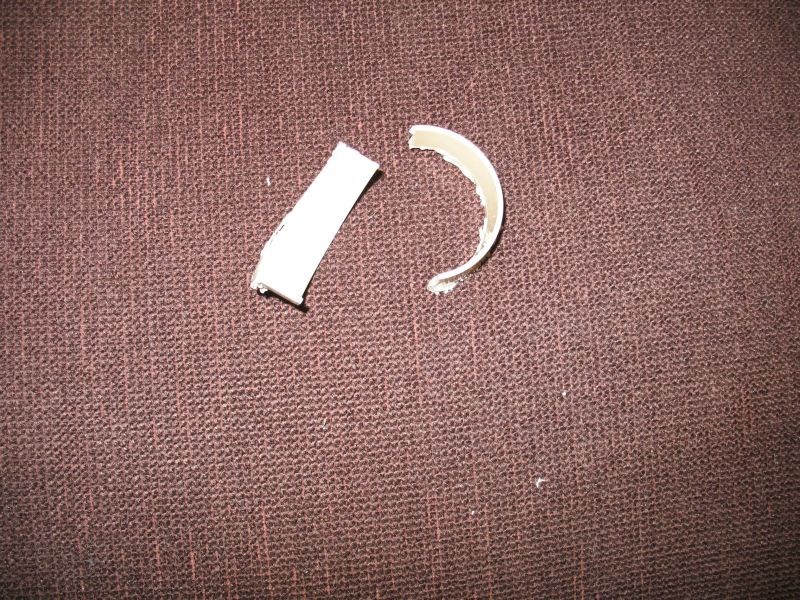
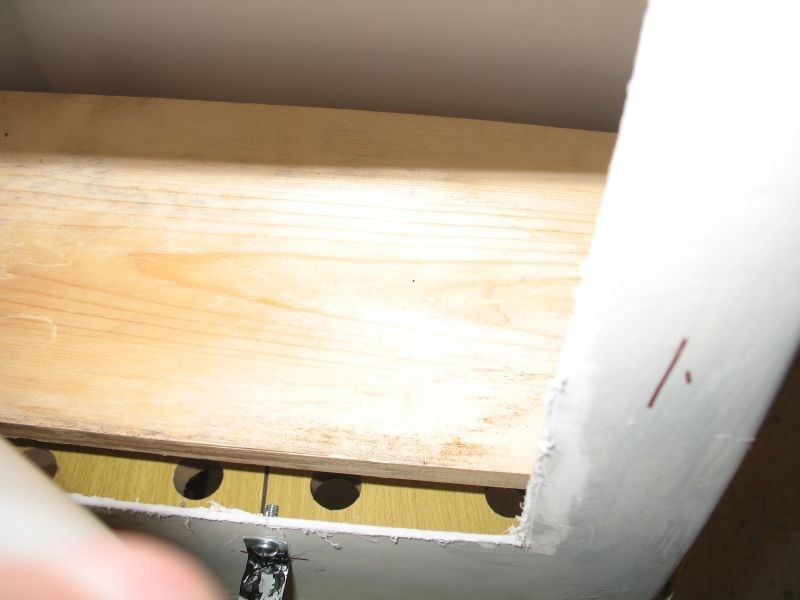
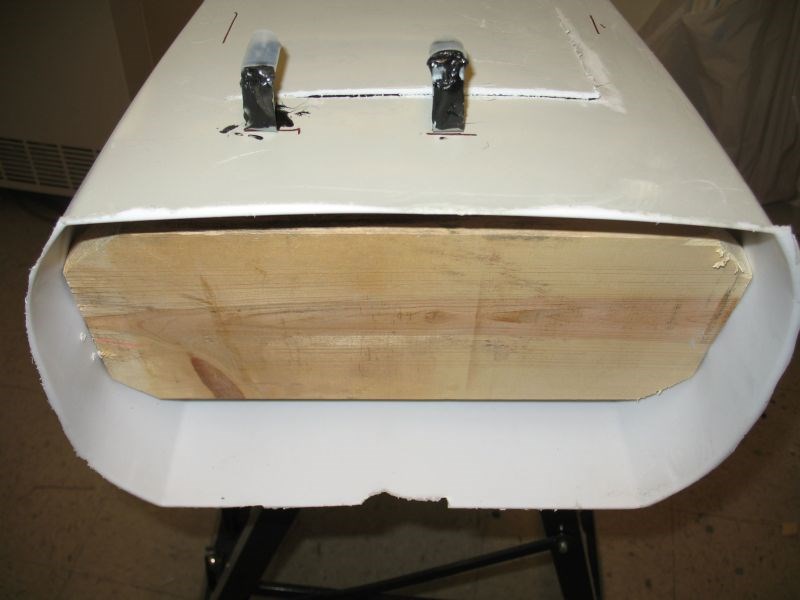
Here are some pix:

Thanks for your support!

:D User-inserted image

User-inserted image

User-inserted image

User-inserted image

User-inserted image

User-inserted image

User-inserted image

User-inserted image

User-inserted image

User-inserted image

User-inserted image

User-inserted image

User-inserted image

User-inserted image

User-inserted image

User-inserted image

User-inserted image

User-inserted image

User-inserted image

User-inserted image

User-inserted image

User-inserted image

User-inserted image

User-inserted image

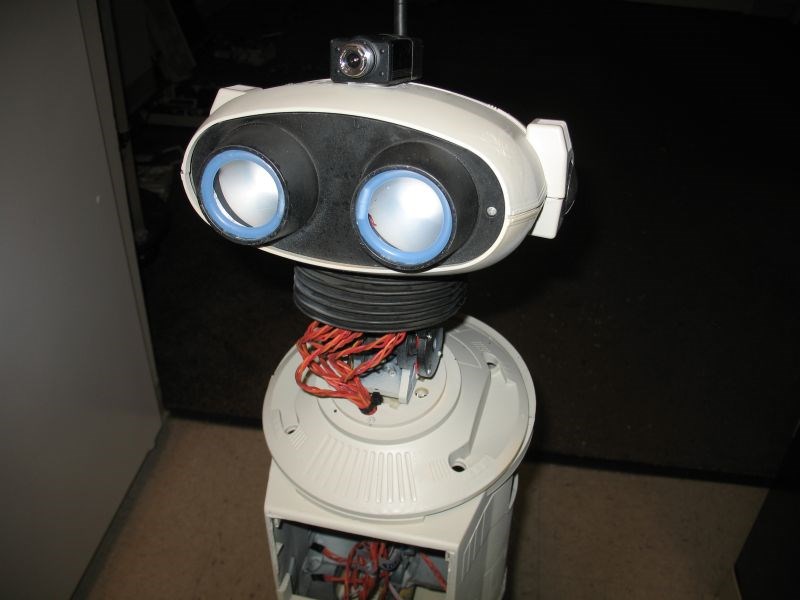
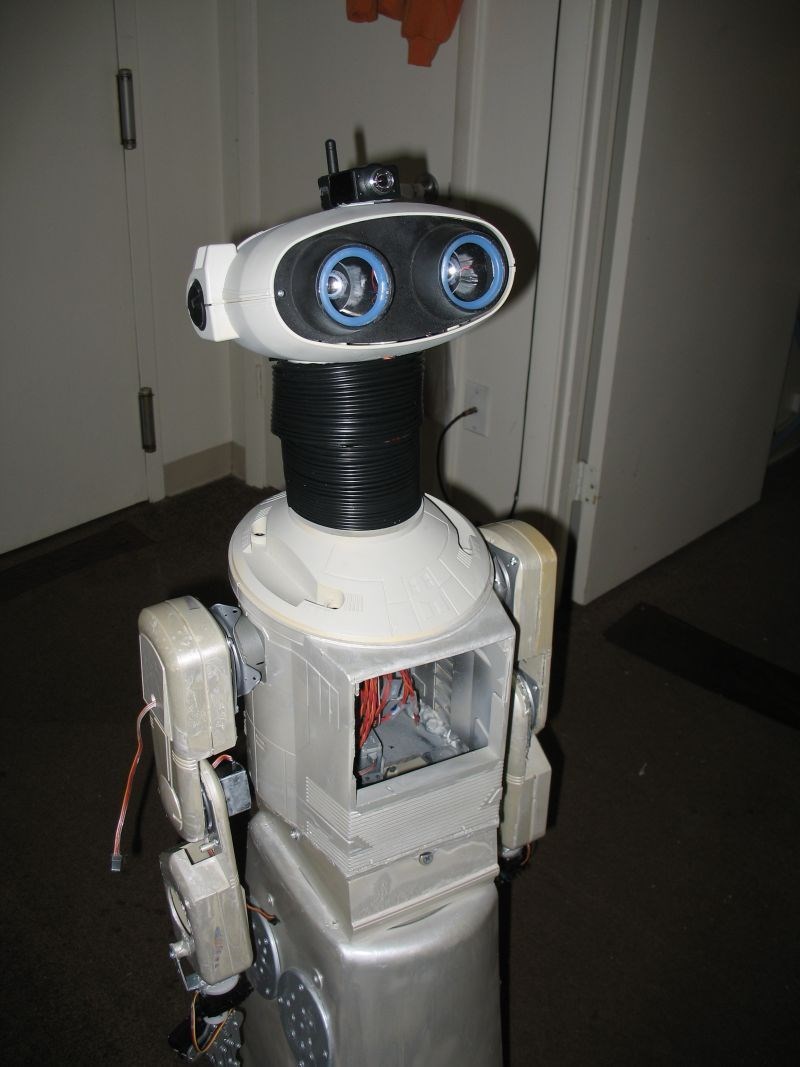
That is what I have so far.


ARC Pro

Upgrade to ARC Pro

Experience the transformation – subscribe to Synthiam ARC Pro and watch your robot evolve into a marvel of innovation and intelligence.

#1  

Your Sunshine seems a bit tall! hopefully it has sufficiant bottom weight!:) ......Botchy? NAH! You have put a lot of work into Sunshine and once it has been painted and detailed the sun will appear bright! Also remember the story of the ugly duckling! :) ....Maybe Patches ?

#2  

Movie Maker, I agree with Irobot 58. I like your original project name. There is nothing wrong with improvements. You have put a great effort in building your new robot! I give you credit for your great work and effort. Hang in there and make any necessary changes you want. Steve s

#4  

Good job Mel , you can tell it's coming along!

#5  

I agree with all. Great job Mel. I'm glad you're pressing ahead.

#6  

Well, thank you. I was thinking it wasn't very good.

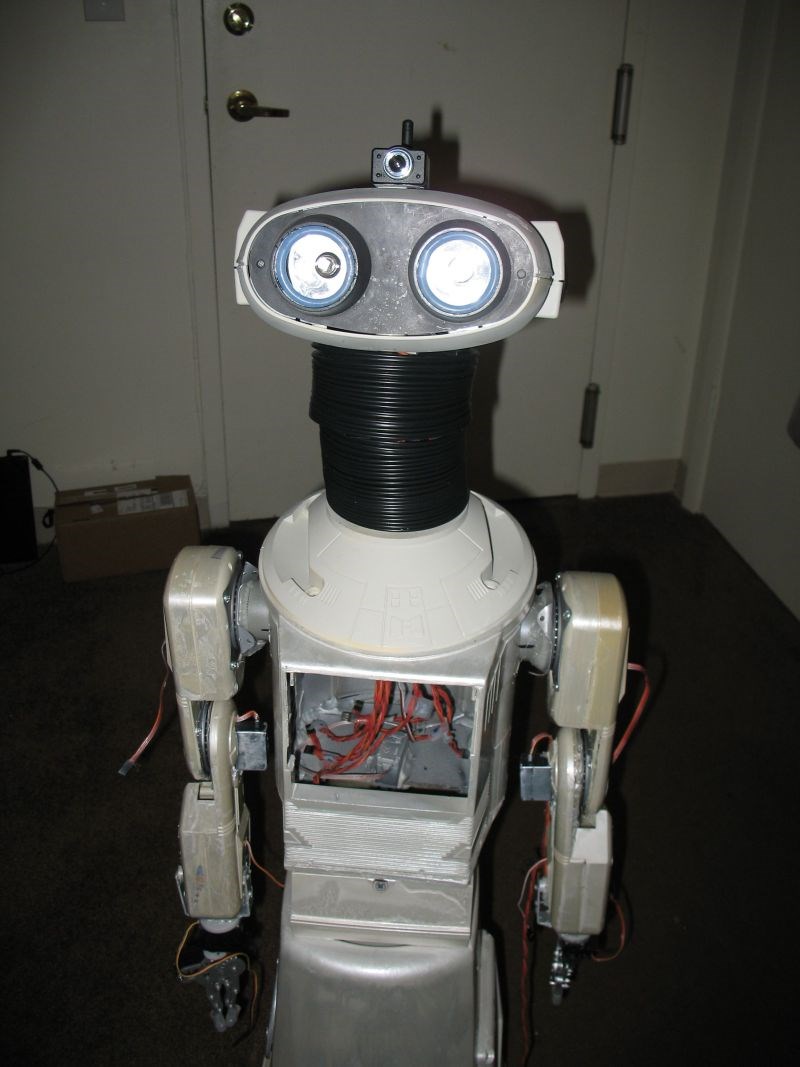
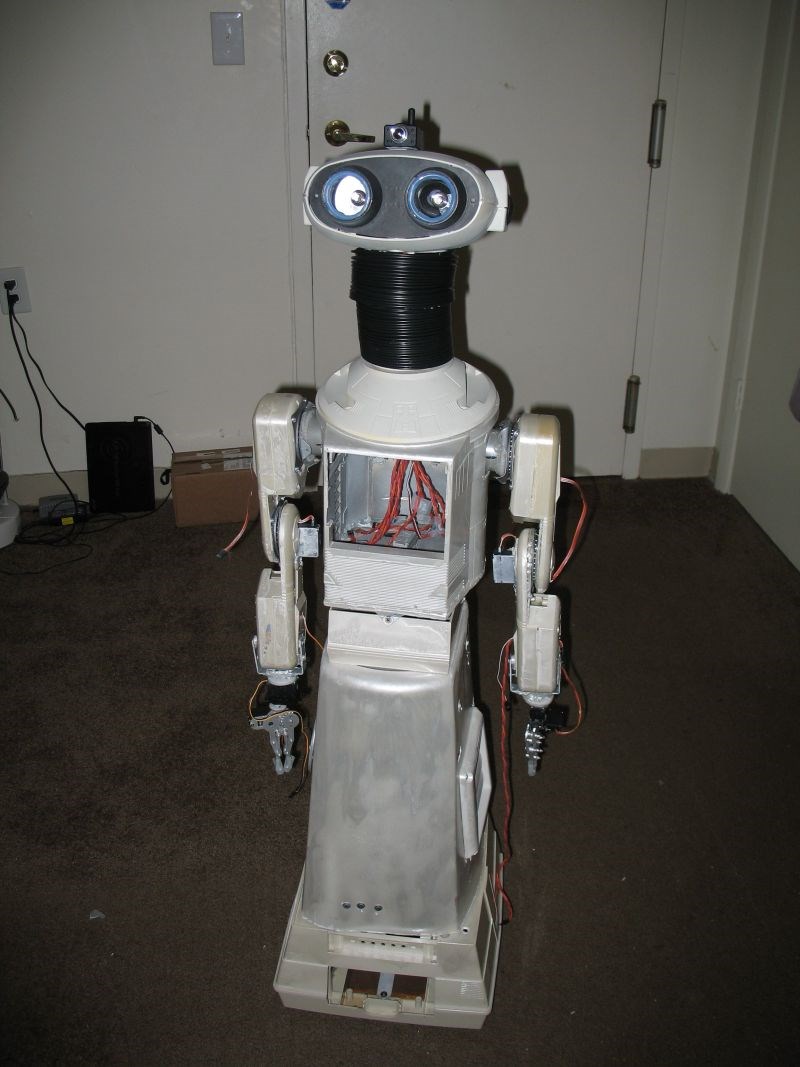
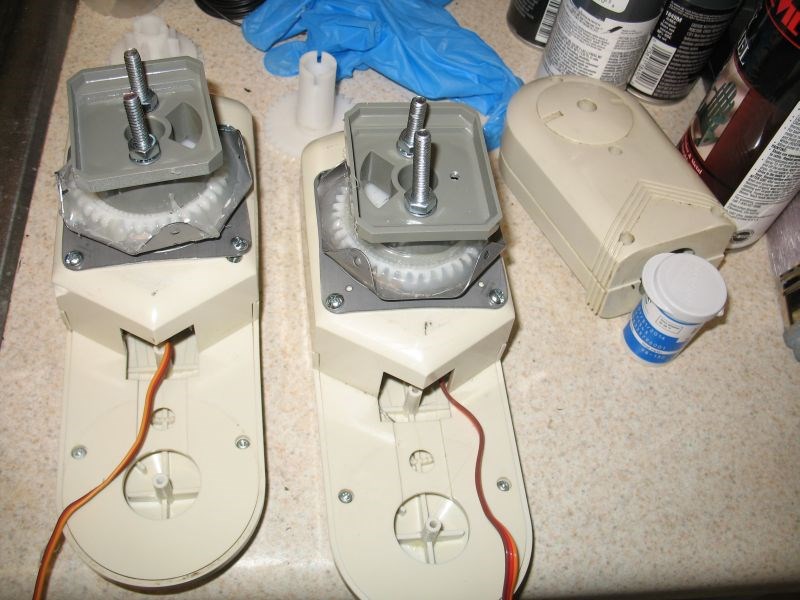
I do want to say "HAPPY DAY!" I got my second omni in and I am happy about that. I called it Botchy because I botcher her up. But, I just finished painting her again and she looks good in white! The problem is (temporarily) that I painted a lot of the black items that should've been black white. But, I will go back and hopefully do something with that.

Also, I made an important discovery. After spending almost $100 on paint, I found out that $4 Krylon Paint at Walmart will stick to plastic, will cover all, and will dry in about 15 minutes. Instead of a dozen cans of 3oz. paint, ONE simple can of Walmart paint for $4 was all it took to give her a complete and total paint job. Like I said I will have to go back and touch her up a bit, but I am now more optimistic about the whole thing. My wife bought me 3 cans, so I have enough for touch up and a spare can for later.

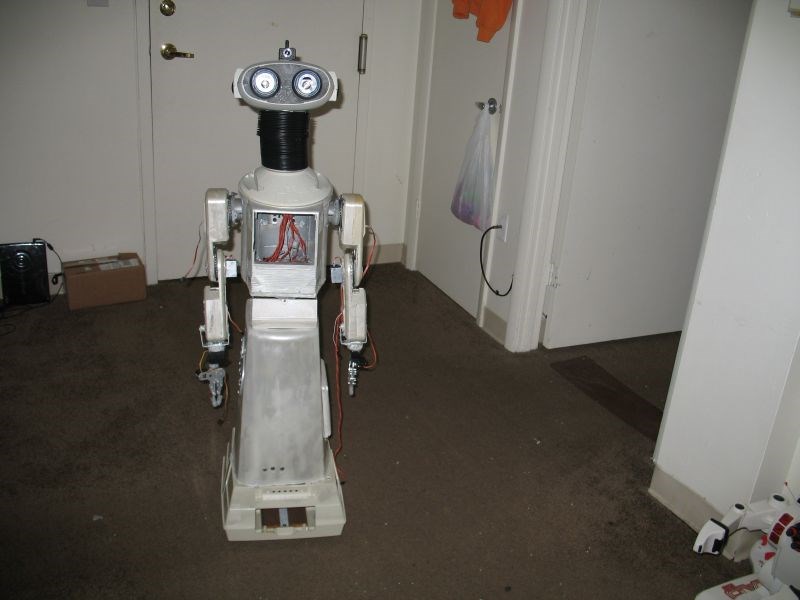
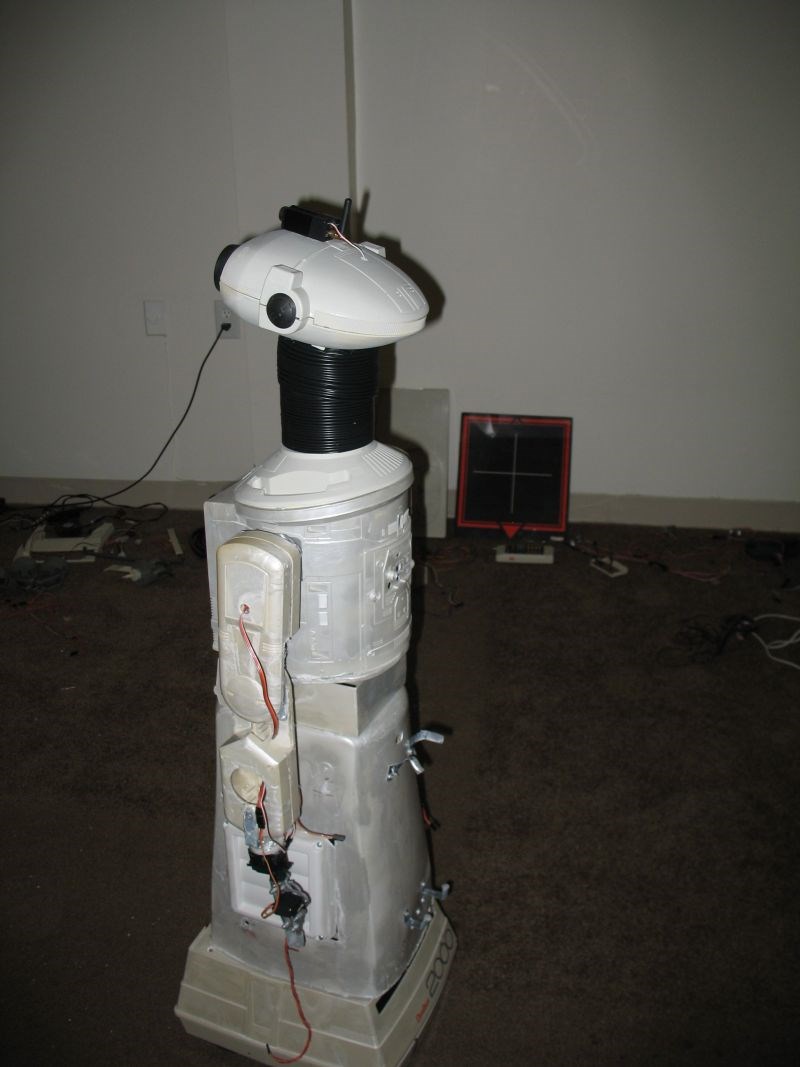
I am almost there. I have to wire her. I know HOW to do this, but I can't see very well, so that will be a hassle. But, I am so happy I am to this point.

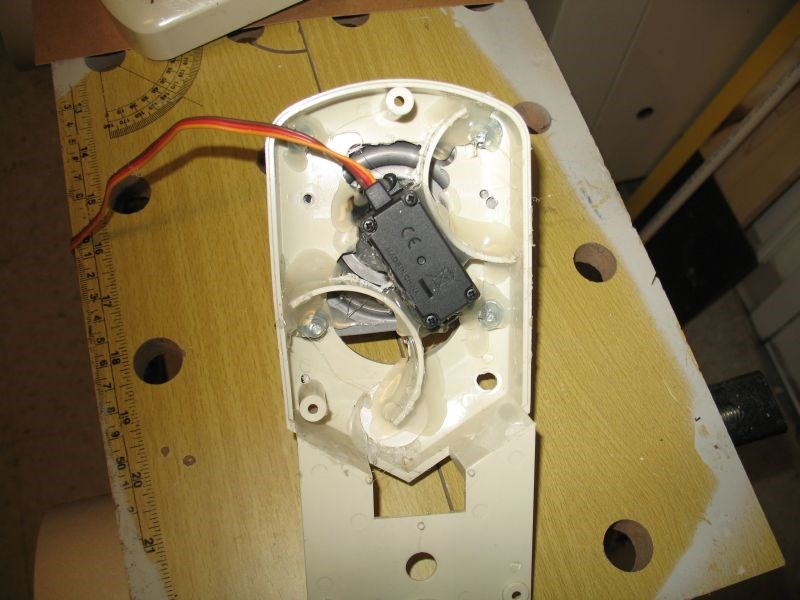
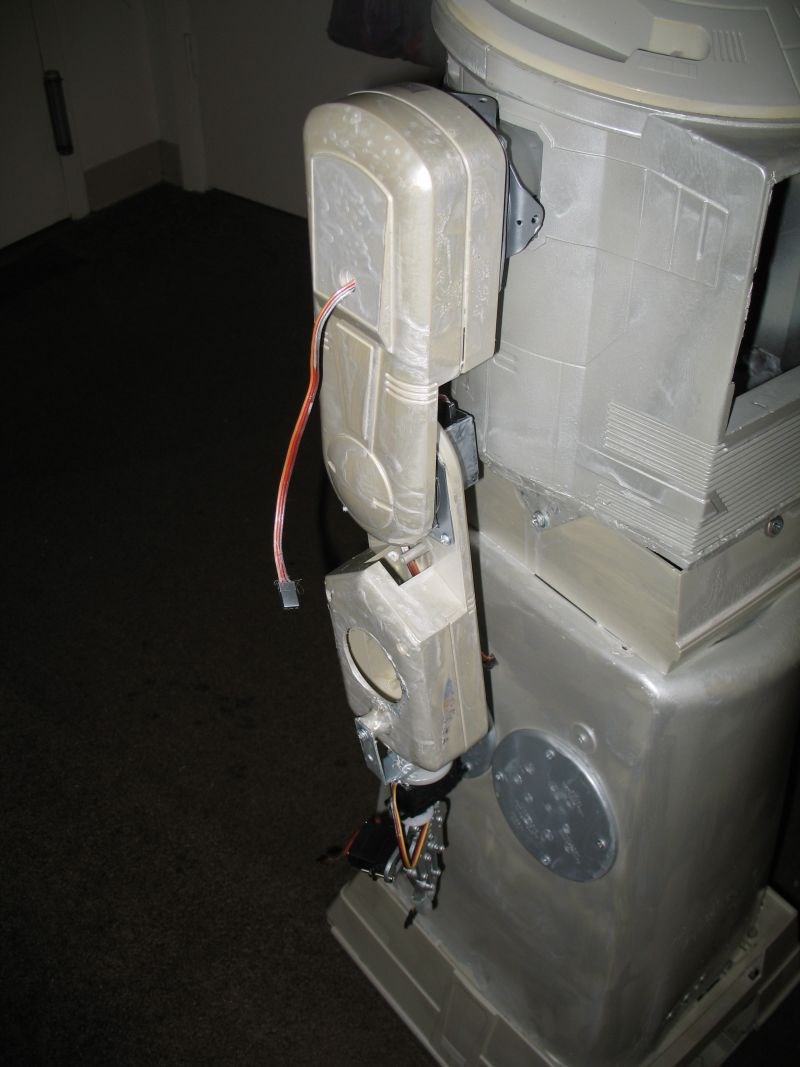
@aameralis, about the neck. I wanted her to be as tall as possible. So, I made her that way on purpose. also, believe it or not, I have a cable for the camara, LeftUpper, RightUpper,LeftLower,RightLower,Lefteye,Righteye,HorzPan,Verttilt, and that is lots of cables going through there. That gave me a hard time. I could have just went with on/off one port of left and right eye leds tied together like I did in the past, but I wanted to copy off of Loki. I like the way it works. But, it was hard because the size of the eyes were not large enough for the led strips.

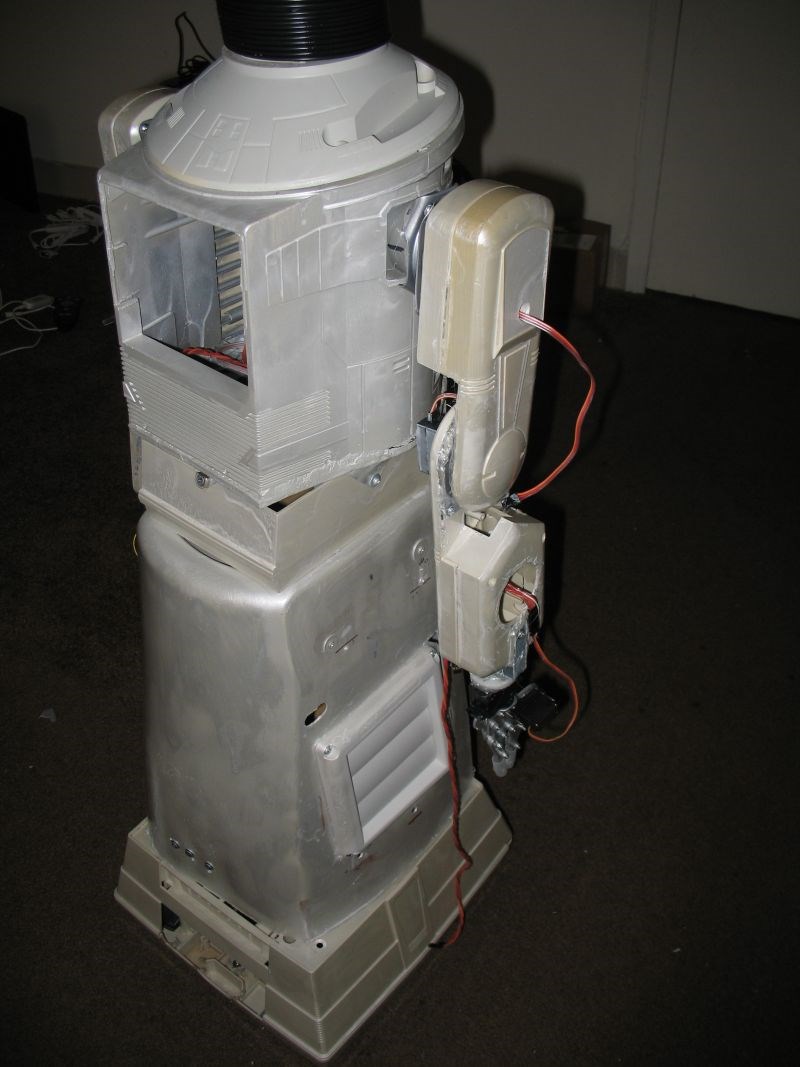
Also, on the neck, If I change her at all, I would have to completely re-do her setup. I am not saying that I won't do that, because I am a very opened mine type of guy. I just have to think about it and possibly raise the funds.

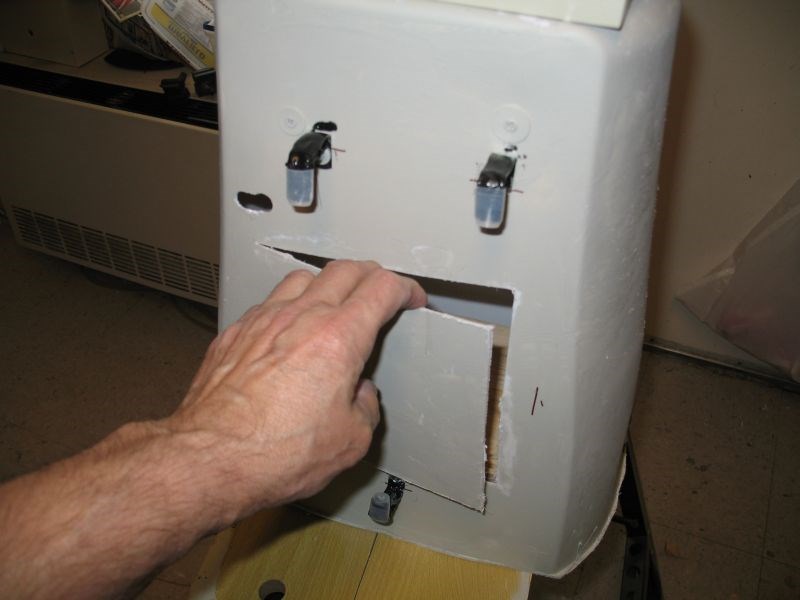
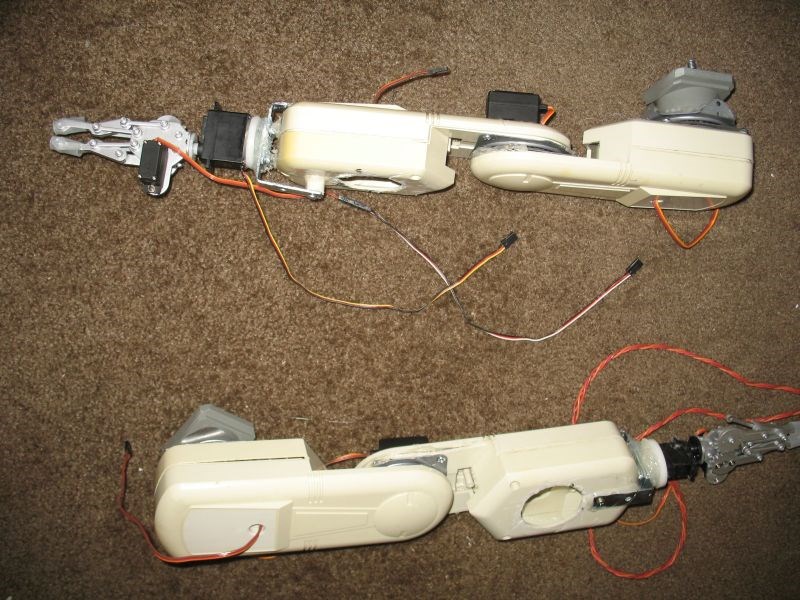
Also, the shoulders are sealed so i don't know where to ENTER the wires for the arms. I have four each of those. I was thinking under the arm pit maybe. What do you guys think?

@Roboti58, I might change the name back to Sunshine if she comes out better. Because she is a tribute to my wonderful wife of 20 years. But, if she doesn't come out right, she will be just another project.

@all of you. I feel like Dorothy on the wizard of oz and I just woke up and all my friends are here. I can't tell you how much your support means to me. I literally threw a turtlebot away in the Dumpster because I could not figure it out. But, I have since become familiar with ROS. It just takes a long time. When I have friend encouraging me, there is NOTHING I cannot do.

Thanks!

Germany
#7  

hey, if you would be willing to sell that homebase-cardboard and send it to germany, pls let me know (sorry, saw it on one of your photos-along with the remote control) mike

#8  

Mike, it will cost you a TON of money in shipping. What is your financial state? If you are well off, I will take whatever you see fit. If you are poor, I will give it to you. You will need to pay the postage.

Germany
#9  

haha, hi moviemaker, you would have to send it to my student residence in frankfurt, germany.;) how much would shipping be via snail mail (i know usps doesnt have that anymore, but I am sure shipping inside a flat envelope or two peices of cardboard for outside should be good enough).

#10  

It's a work in progress MovieMaker, a robot is never finish, you have found many challenge and solve them so I am a little envious. The exterior can and will be upgrade, I am sure you will found way to improve, aameralis as alreeady offer help for one of the esthetical glitch so, GOOD WORK MovieMaker, you can be proud !

#11  

@Mike. So , you are a student? That sortof answered that. I have no idea how much shipping would be. Send me your complete info, name,address,email address.

Mine is

@Andre99, thanks for the go ahead!

#13  

Botchy (sunshine one day) looks much better in White.

User-inserted image

User-inserted image

#14  

You see MovieMaker it's already much better, if I may suggest you can amphasis the details with an other color, black or gold ? I made a very quick test to show you, hope you will not be angry.

User-inserted image

#15  

No, that is a good idea. I have a pretty Blue with Metal flakes. I plan to possibly trim it with.

Thanks for the tip!

:)

#16  

@MovieMaker> The robot is looking great! Looking forward to seeing videos. Have you mapped out what sensors you are going to use and their placement?

I've got two Omni 2000's now waiting for me to botify. Got to get Questor a little farther along first though.

#17  

@rgordon. I think if I had the time and money I could do a much better job on future items now that I have done these things. I am almost ashamed of this robot. But, considering that I cannot see very well at all since my last eye operations and I am using only a sander and a drill to do this with, all things considering, I guess it turned out ok. I haven't started placing the sensors. I used to put a million sensors (not literally) on each robot. But, when you have more than one, it seems to slowthings down. So, we will see. It needs PIR, IR, and Ultrasonic sensors. I am sort of tackling one thing at a time. I will update as things progress. :)

#18  

You are doing fine. Once you get him moving around you'll love him!

#19  

Thank You, my friend. I am really not satisfied with the neck. I had a horizontal pan/tilt that I got somewhere. So far, I have tried it upside down and right sideup. It leaves me nowhere to pass my cables through. I am going to think on this and see if I can come up with a better neck mechanism. Then I have to get it shorter a little bit. It is an ongoing process. I can't wait to get it to the part where I am both operating and programming it. That is my favorite part.

:D

#20  

On my project I use on lazy suzan to turn left/right at the base and in the head I use an other servo for the tilt... Sorry it's not very clear and I can't take picture... My lazy is 4'' and I have 3'' with nothing in the center so I have plenty of space for the wiring.

If you can figure the lazy suzan and a little 4'' diameter tubing fixed on it, at the top of the tubing ( 1'' ) you have the head and the tilting mechanism.

#21  

I can't actually see in my head what you are saying. I can figure the lazy susan and the 4" diameter hose turning with it, but that is as far as I understand. sorry.

#22  

It's me who is sorry, I still have so much to learn to be able to write correctly in english. I will try again, unstead of having a big assembly to make two movement of the head I use the lazy suzan for the left/right, on top of the lazy I put the neck, in the head I have the other servo to move the head up/down. Everything is disassemble now so I can't show you pictures...

#23  

Andre,

I am proud of you because you know TWO languages. I only know one.

#24  

Hello MovieMaker, I intend to work on my robot this week-end so if I can just find the plastic I need I will post some pictures so you will see my robot neck. You said your lazy suzan is not hollow ? At http://www.leevalley.com they have some at good price metal or plastic.

User-inserted image

I am impress by your work because it's beginning to be very good and I am far to achive a result for now.

#25  

Thanks, the lazy susan was hollow before I had to fill it with hotmelt glue.

#26  

Well, Botchy is coming along fine. As soon as I get batteries, I will post pix. I may change her name to Sunshine. I had a shorter neck for a while, but the last time I put her back together, She ended up with a long neck. This all has to do with trying to keep that Flex Hose on there. She is looking much better now.

Anyway, every 1st of the month, she is going to push forward. I have only One more month until I will buy a touchscreen Mimo monitor. That is the last major part of her. I have begged (to my wife), borrowed and Scrounged (I don't steal) all of the other parts. There may be some minor things to purchase if I test her and she winds up needing this and that. But, I have all I can think of in house. All I need is time now. Thanks for your support! Yeh!

:) :D

#27  

Ok, here are some more pix of I guess I will change her name back to Sunshine.

User-inserted image

User-inserted image

User-inserted image

User-inserted image

User-inserted image

User-inserted image

User-inserted image

User-inserted image

User-inserted image

User-inserted image

User-inserted image

#28  

Hey, everyone! Great News! I have ordered the mimo 7" touchscreen monitor. That was the last item that I needed to complete Sunshine. I am also waiting on the buck regulators. But, pretty soon, I will have everything in house. It will take me some time to get everything wired and screwed and glued then . . . ON to programming her. It has been a lot of work, but I am happy so far with Sunshine. She will be my last entry into this field. I will concentrate on programing my four robots that are left from my 15. I plan to have lots of fun with this. Of course many robots ago were my last one. So, we will see.

Thanks for being there for me. I apreciate it.

;)

#29  

Hello everyone, Sunshine is waiting for parts. . . .the main hangup is the Buck voltage regulators. They are moving the factory and they are backlogged. They did tell me that they have shipped. So, maybe today,monday or tuesday I will get the regulators. And, wouldn't you just know it, my wife has many honeydos for me to do. I want to wire Sunshine. The robot, of course. Anyway, it will all turn out.

Thanks for all of your support!

mel

#30  

I just got the mimo monitor in. It is nice. It works fine in the landscape mode. but, I cannot get it to fill up the screen in the portrate mode.

#31  

when I try to install the monitor, it says it has to he a 640X800 or VGA minimun. and the monitor is showing 400X600. Maybe I will try the landscape side of things.

I have it working better,now. Thank You.

I also put the tray by the body of Sunshine. I see now how it might better fit inside. But, I don't want to cut it because I have all my wiring inside with the paint already finished. So, maybe a bracket from the outside with the hole just letting the usb cable through. Let me know what you think.

#32  

I have got everything working on the mimo monitor in the Landscape mode. But, when I change it to portrait mode, it smears the bottom half of the screen. Talk about dificult to change it back to Landscape again. I have been working on this for hours. I am just going to leave it in the Landscape mode. Maybe I can make a swivle to make it set in Landscape outside of the unit. It sticks out a little. But it should work,maybe. I am still waiting on my three buck regulators that should've been here weeks ago.

#33  

I just got through wiring Sunshine. I had it all but finished. But, I wasn't sure about the wiring of the HBridges. So, I put it in a logical manner.

I don't have an on/off switch or the charger hooked up at this time. So, when I hooked up the top EZB, the wrists went grrrr. Very good. I hooked up the bottom EZB and Sunshine took off going forward like a ruptered duck. It was like a bat out of hell.

The bad part about it was she was on a black and Decker workbench and she fell of going to the concrete. It pulled four wires loose from the battery and I noticed that the 12v reg was not working. I had a ground pulledd loose from it. I also had a 5v wire that came a loose.

So, I am going to regroup and start over.

I have made some steps forward , so I made one step backward, I will try again when I have help to pickup the robot and set it were the wheels cannot roll.

#35  

Thanks. I have gotten the robot rewired. It had more like a dozen wires pulled loose. I have her rewired and back down on the floor. I have decided to give her a temporary connection to the base in case I need to get back inside of her again. I have since put in on/off switchs. I haven't did the charger yet. She seems to be ok.

on the monitor, I am going to call the factory today.

Thanks for your support~! :D

#36  

Well, I re-wired everything and double checked it. I still have the charger to wire. But, with all of the switchs in the off position, she is powered down. If I power all of the switchs (3), she will start moving backwards. So, i have got to do something about that. But, I am so tired, I am going to take a break.

I am going further , slowly. But, I will take pix and show them eventually.

Thanks for all of your support!

:D

#37  

Hi Mel , are you still working on your turtle bot? Would you consider parting with it or any part of it?

#39  

Well, I've got Sunshine all together except the monitor in the chest. When I started to test her, only two things work, the Left Eye and the neck pan Right and Left. I don't understand. In all my years of building robots, I always wire them and they work. I have NO idea on what to do next. I double checked all of the wiring as I was wiring it.

:(

#40  

Maybe the fall damaged something you haven't discovered yet?

#41  

That is possible. I am just letting her set until I can get my faculties back. It was such a blow. After I come to my senses, I may have to rewire everthing. But, the problem is, I can not get to everything. If I had to redesign this unit, I woulld build Modules and wire them separate and just hook them together. But, this unit has wires running from the head to toe.

I made a ground bus bar. And a twelve volt terminal strip, And a 7.2 volt terminal strip. I was thinking the batteries were low. But, when I hooked up the charger, it said they were fully charged. I have three twelve volt batteries in there.

I almost always figure these things out. But, I can not see very well what I am doing.

I will just pray for God to help me.

Thanks for your support.

#42  

Oh man Mel, I am sorry! I know how that feels.

#43  

Mel, try not to panic. It's probably something very simple. More then likely a broken wire, loose ground or a connection or switch mis-wired. You've done a lot of changes in the wireing by adding in the switches and then all the wires coming loose then having to reattach them all. You need to triple check all your wireing to see if it's properly connected and proper wire going to the proper place. If you cant follow the wires with your hands and eyes you need to disconnect one at a time and check continuity with a tester. You should probably do that anyway with all suspect wires just in case one came loose or broke. Testing for continuity is the best way to see if power is getting from one place to another or if there are shorts.

Most of my problems come from mis-wireing or bad connections. I dont think you broke your motor from a 3' fall. I know you didnt break all of them. So take a deep breath and get right in your head. Just resign yourself th the fact that you need to slowly recheck everything and it's going to take some time. Who knows, I bet you run across things that are not the problem but need to be fixed also.

Now, Start at the beginning. That's usually where the power starts. Make sure you have proper power to the effected areas. Also make sure all your grounds are properly connected. Pay special attention to the grounds. Then move to the signals and make sure your getting the proper voltages when that port is turned on and off.

One more thing and you may want to do this first; Test for proper power and signals coming out of the EZB and any outside power source (if your useing one) with everything disconnected. If you start getting weird readings or something does not seem right turn off power to the EZB for at least 30 seconds and then reboot it. I've had ports on the EZB lock up when testing them. Look for proper 5vdc on all power pins, Common ground between all the grounded pins and 5vdc on and off when you turn that signal pin on and off in ARC. Once you know your EZB is working properly you can feel confident in your test results as you move through testing the rest of your wireing in the robot.

This is the only way unless you want to use the scatter mathoid (just blindly checking this and that) and hope you get lucky and find something.

Good Luck, Dave Schulpius

#44  

Thanks , Dave. What you said means a lot to me. I have been doing this for over 40 years. I always wire, check, double-check. Then power up and it almost always works the first time. Of course I run into bluetooth problems and such that I have to get going. But, never a problem with the hardware.

So, that is where I started today. My configuration is as follows:

EZB1: in the upper body. It controls the arms and head and waist.

EZB0: in the lower base. It controls the motors, navigation and soundtrack and sensors.

I would have usually wired the batteries in PAR and then go to a regulator, etc.

But, what I did this time is run a ground BUS BAR. All grounds when there. Then, I ran a 12volt terminal strip. It took everything 12vdc.

Then I ran a 12v to 7.2 regulator to another terminal strip.

I was going to run another 12v to 7.2 regulator, but I decided not to.

so, I fed all of the 7.2 from the 7.2 terminal strip.

I also had to run a ground and red wire which was 12volts to the servo server. (you know, I don't know what it is called, but it is supposed to protect you from brownout.

From the servo thingy, I ran the ports to the EZB1.

I have two special testers that I made. One is to test servos and the other LEDs.

I put the LED tester on the wires coming down from the head. Most of them worked. A few did not. On the ones that did not, I put the servo tester. I got a bump out of the servo and that is all I needed to confirm where it was going.

I hooked it all up. Then it fell down. I took the fall for it because it fell on me. so, there should not have been that many gs of force on it.

Anyway, the first time I hooked it up, I could not hook up both ports on the netbook. I could hook one on the desktop and one on the netbook. I wrasseled with that for some time.

OK, here is where I am:

I am using Buck regulators. Out of the three I got in, only one seems to work well. I cannot adjust the voltage on it. so I just left it where it was. One did work and it was for the 7.2. (I was thinking. I may have hooked both sides of the 12volt Bus to the Buck regulator. That would have shorted it out and caused it not to work properly. that is a possiblity.)

All EZBs are getting 7.2 volts. All motors are getting 12volts.

Only a couple of Head wires are working. I need to fix the LowerRight eye D-15 the Upper Right eye D14,the waist D15-19,Upper Left eye D-11,Righteye D-0, and, Right shoulder.

When I give it directions from the direction pad, it goes forward, Backwards (really fast), and it turns Left, but when it is told to turn Right, it just sort of BUMPS in that direction.

The neck pan works fine, but the tilt is DEAD.

Most problems seem to be in the neck and Head which is the hardest for me to work on.

I haven't placed any sensors on it yet. I wanted to get everything else working. It really made me sad, because I have so much money invested in it. But, after a couple of days, I picked my feet up off the ground and I am taking my time working on it.

I have found one data cable connected to the ground on the digital pins. I found one cable not connected at all. So, I guess I will get those two working and it will be a start.

Thank You all so much for your support.

:)

#45  

Chin up Mel. My E2 project took a couple spills last night. Only damage was I striped the inner thread, the one where you would screw an arm or horn into. Gears and everything are fine so it's usable for something else just not a shoulder. I have a new servo coming.

Good luck. My thoughts are with you and Botchy.

#46  

Update** I found the vertical tilt wire. The servo is just to weak to lift the head. I have to completely redo the Head and Neck. I am concerned about the grunt when You turn it to the right. but, I haven't tried it with a script yet.

I will be waiting for parts to arrive.

Thanks for your support.

#47  

Mel, Glad your making progress! Take it slow and make sure everything is hooked up properly. I think once you've got that straightened out and the proper voltage being delivered your going to be OK. I cant help but repeat though that I think you should invest in a digital multi tester and use it to test for proper voltages and continuity. You can find them almost everywhere at affordable prices.

I'm concerned that your servo wont lift the load of your head. How heavy is the head and what type servo are you using? I'd think a standard servo would be OK for you here. Also the laboring sound you hear when the head turns to one side is troubling. Do the rotation and pivot points turn and lift freely? Make sure nothing is binding or sticking in there.

#48  

I have a multimeter and the voltages all measure fine.

I don't hear any sound on the servo, I just feel the magnetic field. If I help it, it works. But, unless I help it, it doesn't work. It is possible my neck is too tight, I mean the flex tubing part.

The Grunt I hear is when I try to turn to the right on the base. It goes forward,backward,left. But, when I tell it to go to the right it just grunts a little and goes to the right but only for a half of a second.

Thanks, Guys for your support.

:)

#49  

Sunshine's left shoulder works, sort of. But, the Right Shoulder is just not strong enough to go very far at all. I thought it was the battery needing to be charged, so I charged them up to full capacity. Same thing. I have three 12dc batteries in PAR. The left won't lift them unless you enter a large or small number and it will go straight there, but then fall back down. It shows no magnetic flux. They both don't really work good.

The elbos are working fine, it seems.

I can't understand it, except I was going to buy 220kg of force, but this servo at only 9kg was supposed to work fine. It worked for you, but it hasn't worked for me. I must be doing something wrong. The lazy susans make the joint very, very easy to move. So, is it gravity?

I don't know. Weird.

I think I know what is going on. I hear the servo making its regular noise. But, the arm goes up a little and then falls down. I think the horn has broken loose from the servo. It is not the servo that is bad, it is where it connects to the horn. The left side has flux and shows resistance when you try to move it. The right arm moves with no flux or resistance. Yep! I don't know how hard it will be, but THAT is what's going on. This is my absolutely last robot to build. Once I get it working (hopefully some day), I will just concentrate on programing it only.

#50  

Maybe some of your servos or stripped inside the casing? That all I can think of but, be advised, I'm no expert by any means. I'm barley a novice. ;)

#51  

Have you tried taking the servos in question out of the robot and testing them with nothing attached to them? What happened when you try to move them manually with no power by spinning the spindle? Could the teeth in the horn be stripped and not grabbing the teeth on the spindle?

#52  

Thanks, guys.
I also believe it is the teeth inside the horn that is stripped. It probably happened in the fall. I have to do some honeydos today and Sunday, so I won't have an update. The way I have it secured is very hard to get off. But, when I put it back, I will put it back right. This was my first attempt. The second and third attempts came out better because I understood what was to be done. I have always said if you need something done and give it to me, after I do a hundred of them the 101st one is going to come out perfect.

:)

#53  

OK, I pulled the arm off and I am getting ready to test it.

I tested it and when I rotate the gear/lazysusan part I hear the gears in the servo working. IF I go past the point where it is not supposed to go, it turns freely. same in the other direction. So, I also checked the servo screw and it was tight. My guess is a bad servo and or horn.

Ok, I tested it , and it was the horn. All I have is plastic horns. And when I hot melt glue them they melt, I guess. But, I plan to put another on with goop or something like that. Then, it won't melt.

#54  

I have a cheap walmart glue gun with a high and low temp. After several disasters, I primarily use the low setting now. I can't remember the price but I'm sure it was under $20.

#55  

You can also get metal horns pretty cheap on Ebay too.

#56  

Hey Mel, on my MIni-B9 I used an epoxy to mount my servo horn. It has held up fantastic!

#57  

Ok, thanks, Bret! It was said to use a metal horn, but I just don't have any metal horns. I ordered quite a large selection of beautiful horns. When they got to me, they won't fit on a standard servo, there are too big. But, even they were not metal. I did try the epoxy equivalent (Goop). We will see how it works. I have to let it dry overnight. It will be probably MONDAY before I can check it.

#58  

When buying horns for the servos bought from the old EZ Robots store always buy ones that fit Futaba (Standard Spline (25T) servos. It's a direct match.

Here's a set of Super Duty plastic horns that will fit the servos sold by EZ Robots at servo City: www.servocity.com/html/futaba_super-duty_horns.html

Here are some nice hubs that will fit these servos: www.servocity.com/html/standard_hub_horn.html

In fact here's the link to servo City's servo arm and horn page if you want to browse around: www.servocity.com/html/servo_arms___horns.html

I don't see any aluminum control arms that will fit a standard Futaba (Standard Spline (25T) servo at servo City but I bet they are easy to find at other Robot Supply outlets like The Robot Store or even on Amazon or Ebay. As long as you get ones that fit Futaba (Standard Spline (25T) servos you'll be OK.

Now I don't know what EZ Robots will be offering for servos when their store reopens so this info only pertains to the old ones sold before the store shut down.

Also, I don't know why you or anyone would need to glue these horns onto the servo's Spline. Shouldn't the screw hold the horn properly onto the spline? Unless I'm missing something here (and that's completely possible), if you get the proper horn that fits your servo's slpine you shouldn't ever have to glue it to down. If you want a trouble free robot that lasts as long as you are interested in it get the proper parts that fit. ;)

Good luck, Dave

#59  

hey, Dave! those horns look nice. And it is nice to know standard is 25 teeth.

Thanks for the advise. Yes, we screw the little screw after the servo is connected. BUT, we have to glue the horn to something that needs to move. In this case, it is the Lazy susan. No way to screw it, you gotta glue it. it is just the design and the way it is made.

so, I am trying to attach the horn to the gear that is attached to the lazy susan. BUT, I have to consider I cannot attach it directly because to servo cannot reach the horn. So, I have to build it up a tad. SO, I attached a castor from a furniture leg to it and then the horn on top of this. It has to have a hole through it so I can screw in the little black screw to hold the servo. Then I have to attach the servo to the Elbo part of the arm. It is a lot of steps, but, it does work eventually, I hope. At this point, I have spent all my money from my allowance through October 31st. So, any funds that I need for the servo horn (metal) must wait until Nov first when I have funding. so, I have to work with what I have and that is plastic servo horns.

Thanks for your support!

;)

#60  

OK, I understand now and also understand about the lack of funds. Hobbies get expensive.

However there has got to be a better way to attach the servo arm to the Lazy Suzan then glue. Seems like a weak point in the design. I hate weak points. They ALWAYS cause problems somewhere down the line. How small are these Lazy Suzans? Don't they have mounting holes at the edge? You can get control arms that are long enough to reach these holes or make an adaptor that will reach. Even if you cant use these holes why not drill holes just outside of the ball bearing housing area and tap them? That way you could use a shorter control arm (horn). Then you may be able to run a small machine screw in through a hole in the horn from the servo side and into the Lazy Suzan. A little Loctite would hold the screw in place.

I think I saw someone on this forum building these arms like you are and posted a bunch of pics. Can someone point me to that thread? I'd like to see how this is assembled.

Thanks! Dave

#61  

If you must use glue perhaps a plastic turntable would be better. It would be easier to find glue that is able to adhere or "weld" the two parts together. MCMaster-Carr sells a nice little 3" light duty round plastic ball bearing turntable for about $5: www.mcmaster.com/#turntables/=oi8b3q

Here's the specs on it. It comes in black, white and clear: www.mcmaster.com/#cadinlnord/1413t11/=oi8bts

If using metal you need to use the proper glue when attaching to plastic. An epoxy as mentioned before is what you need but the proper kind and one that wont eat through plastic. Here's a good site that will help with choosing the right glue (JB Weld seems to be everyone fav): www.thistothat.com/

Have fun, Dave

#62  

Dave, for pix look at the post on the Omnibot3000. It should be on the first page.

#63  

As it turns out, I had two problems. ONE: the connection on the lazysusan is not exactly centered. This causes the horn to move in an orbital pattern. SECOND, the horn is plastic. I don't know if I will be able to fix this or not. I don't have any heavy duty servo horns and I don't have what I really need - Metal servo horns. My next expected income is expected to be in Jan of next year. So, I am stuck for a while.

Thanks for your support.

#64  

I Now have the ARM put back together. I still used Plastic, but I tried to get rid of the rotational orbit. I tried to make it centered as possible. I haven't tried it on the unit yet.

I am waiting for Papa Tony to print the neck and bezels.

I recently recieved an Early Christmas gift -- An Acer W3. so now I don't have to have that bulky netbook on the robot.

I should be getting this unit in a few days or so.

I rebuilt the Eyes with new rubber and LEDs. I decided to scrap the idea of blinking because it requires too many wires to go threw the neck.

Eyes are Ready Head is Ready Arms are Ready, I think.

Just need the neck completed and the W3 and mimo monitors in place.

Shouldn't be too long.

Thanks for your support!

:D

#65  

Hey, check out how I did it on Gunslinger Bob

I used aluminum bolted to one side of the base, and a free floating servo held firm by ABS plastic on the other side of the bearing. It works fantastic!

User-inserted image

User-inserted image

User-inserted image

User-inserted image

#66  

I see that. That is how I did Sunshine's waist.

Thanks Bret!

:D

#67  

I just got the W3 tablet in.

Everything is Ready for re-Assemble. Just waiting on the neck assembly and Bezel for the tablets.

Should be soon.

Thanks for your Support. ;)

#68  

Well, just to update anyone who cares. . . . Botchy is a pyle of junk in the corner. I have built and rebuilt the arms and they keep messing up. I am not giving up because I owe it to you guys. This was suppose to be my last project and I was naming it after my lovely wife as a tribute to her for being with me the last 20 years. I was going to sit back and just program and not try to handle the physical stuff because I am not able any more. When I was in my 20's, I could do some pretty impressive stuff. And I built robots that amazed people. But, that was very long ago. I am going to stick to the already built robots. I will still try to finish this robot, but, at this point it doesn't look good. I am waiting on parts to come in. The ONLY thing I am satisfied with is the head and eyes.

sorry to dump on you. I just thought you might want to know. I like closure on stuff.

I will update as things change.

tired

#69  

Know the feeling. I have ideas and plans for building robots, gather parts, and then things don't quite work out according to plan. Only nice thing is that the EZ-B environment and community make some of the process just a bit easier. Help and understanding is here in the forum.

#70  

Hello MovieMaker, just to let you know I CARE, I look at your post very frequently and hope the best for your project, I know it's difficult, I have trouble myself finding motivation (and money) to continue. You know, you can let go of the arms for now and just begin the programmation, when your robot do a big bunch of what you want, go forward and add the arms... The important thing is having fun, do not forget that.

#71  

Ya, I know Mel. It sucks when you put a lot into something and it doesn't work out as you planed. Very discouraging. Maybe if you take a break and catch your breath you'll find that second wind and give it another try. Perhaps inspiration will strike one morning after a good nights sleep and you'll pick up a wrench and get it working.

If you stop building I hope you don't stop visiting this forum. It's nice having you around.

United Kingdom
#72  

Hi Mel, please do not give up on building robots, you are an inspiration to all of us! I am also a long term robot builder like yourself my first build was 1979!

On the arms (for the shoulders) would it be of help if I sent you some of the amazing Bosh servo motors with feedback potentiometer? These are very powerful motors and easy to fix, have a look at the latest pictures that I have put on the AIMEC thread. You would need an H bridge (I have a spare double H bridge) that are you are also welcomed to and you could control the shoulder position by monitoring the pot with an Analogue port on the EZ-B. I do not want any payment for these parts as I am happy to be able to help another serious long term robot builder.

Tony

#73  

Guys, thanks so much. I plan to stay on the forum forever. You guys have given me a second breath. I will continue. I have decided to take it all apart and start over. But, the arms are all worn out having been taken apart so many times.

If I had to do it over, I would have followed Matt's build. It was simple. Too late, because I have already broken the pieces inside to the arms for this build. I am NOT blaming Mr. A. he told us in the video not to get in a hurry.

This is the first time that I have built something that did not work. Thanks for Caring. I LOVE you guys!

:D

United Kingdom
#74  

Mel, if you can wait the 2-6 weeks that it might take, I would be happy to send the parcel over ISF (International signed for) surface mail and I will pay the delivery cost. This will be the lowest cost way to send.

Tony

#76  

Mel, Hang in there. There is nothing wrong with re-doing and making improvements. Sometimes my efforts pay off, and sometimes not. Maybe there are things you can simplify on your robot? Days when I don't feel liking building, I enjoy programming new routines, exploring different features on EZB, or just operating my robot. Your improvements will eventually work out. Steve S

#77  

Thanks, Steve. I have Attention Deficit Disorder and it makes me impatient and also hard to carry a thought. I just want to get through with this project so I can move on into programming only. I have been building robots for 41 years. This was the FIRST time that I built something that did not work. No, I am sorry, I had a turtlebot that was built for ROS and I threw it in the dumpster. But, it was built fine, I think. IT was just that I did not understand ROS. So, two times recently doesn't sound too good. Of course, I am talking about in my later 41 years. In the first part, I was burning and blowing up and rebuilding robots. I had a young man's energy.

Right Now, botchy is completely and totally taken appart. The only thing that I have finished is the Eyes. I am going to totally rebuild her. But, I am not sure of the design because the other design did not work very well. But, I will continue to work on her as I can afford to buy new parts. Last night , the dumpster was looking Pretty Good, but it was closed and locked for the evening. So, botchy had her stay of execution. This morning, there was a lot of support coming in that boosted my spirits and I feel like it is going to be "ok".

Thanks for your support! When I start to feel bad and beatin, I will come back here and read these wonderful posts and it will encourage me to go forward.

;)

#78  

Well, I got the eyes made and the head assembled. ;)

#79  

Mel, Thats good, do a little @ a time. Keep it basic, not too fancy. You will make progress. I have always liked your projects and respect you. Thanks Steve s

#80  

Thank You, my friend. I also respect all of you.

;)

#81  

@MovieMaker... We all do this for stress relief, an escape from life... This is fun and an extension of our childhood... Find a way to get back to the fun....

#82  

Thank you, my friend. You are a wise man. :)

#83  

Ok, I have the Head and Eyes rebuilt and I have rebuilt the arms so many times that i have to tape or glue them back together all of the screws are stripped and the connects broken. I rebuilt them each two more times without success. Then I decided before I totally scrapped them, to just skip the lazy susan parts and run them straight. They seem to work. So, instead of having a Lincoln, I will drive a Pinto. Time will tell. i have put on the tray for the mimo monitor and have also installed a holder for the W3 on the back. I have made the neck straight instead of leaning. I have re-done the base. I will have to wire everthing up once the glue and expoy and silcone dry.

Wish me luck. ;)

#84  

Pinto! Didn't they blow up when they got hit from behind (or was that the Pacer)?

Nice progress! I'm glad things are going better for you and your little gal.

#86  

My Cady is turning into a Pinto as well. I'm hoping to end up with at least a Pontiac when I'm done. Keep it up. I think you're closer than than you think. :)

#87  

Thanks for the encouraging word. Things are looking up. I have worked on the base, sensors, and I am now wiring the arms. It should be all back together in another week or so. Will it work? we will see. don't know. But, I think it will. I am planning to upgrade both arms to the Lexi arms. And, Tony(Toymaker) has sent me or will be sending me a powerful servo. so, at this point, I am very optomistic.

;)

#88  

Well, it is official. Botchy is paraplegic. I have removed the arms awaiting new part to come in. I have found that one of the ezb's has been blown and I have to repair it.

Thanks for your support! ;)

#89  

Well, my EZB went out, so I am waiting on another to arrive. Maybe it will arrive before Christmas.

sorry for lack of updates. . . . . . . . .