
Setting Servo Speeds And Initialization Script Tutorial
Step 4. Init scripts using varables.
Some scripts use variables, and some of these scripts need a primer to set the variable to be used. The following example sets a variable to be used with the Mobile Interface Control. This variable allows you to have two uses for one button which is great for saving space on the mobile control, as you only need one button instead of having two. The following example can be used to drive a robot forwards then to stop it from moving, and assumes you have a movement control panel already added to your project.
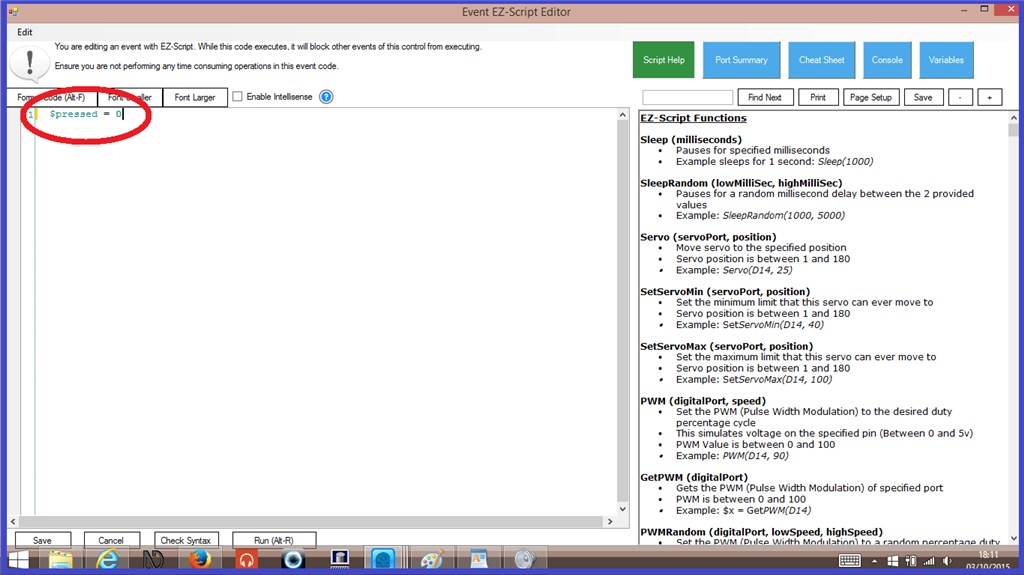
1.) In a "Connection" script, either in the "Connection Control" script editor, or in a connection script in a script manager like was explained in steps 1 and 2, enter the following "Init" script and save it...
$pressed = 0
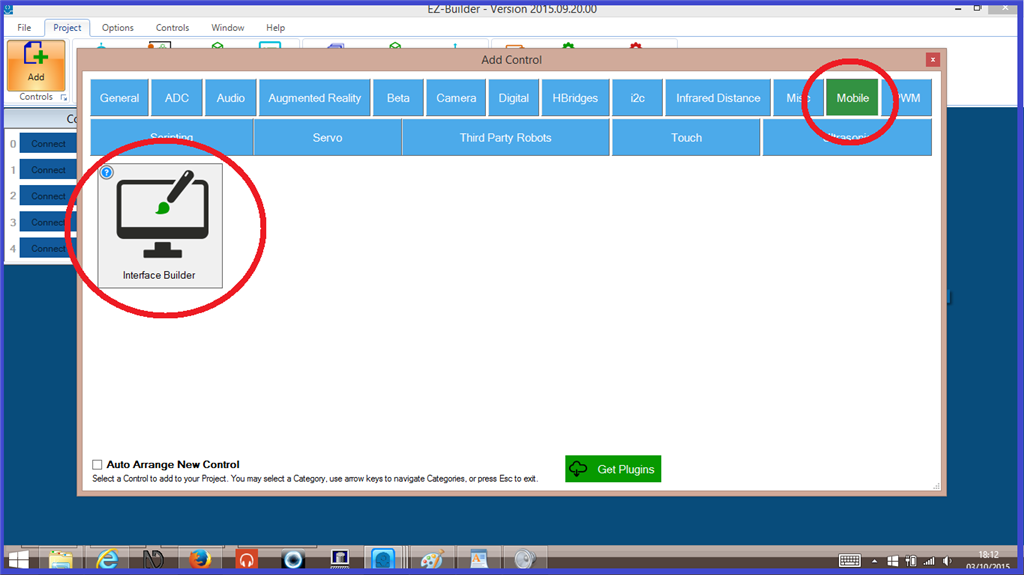
2.) From the ARC menu ribbon, add a "Mobile interface" control by clicking on Project then Add Controls, Mobile, then Interface Builder.
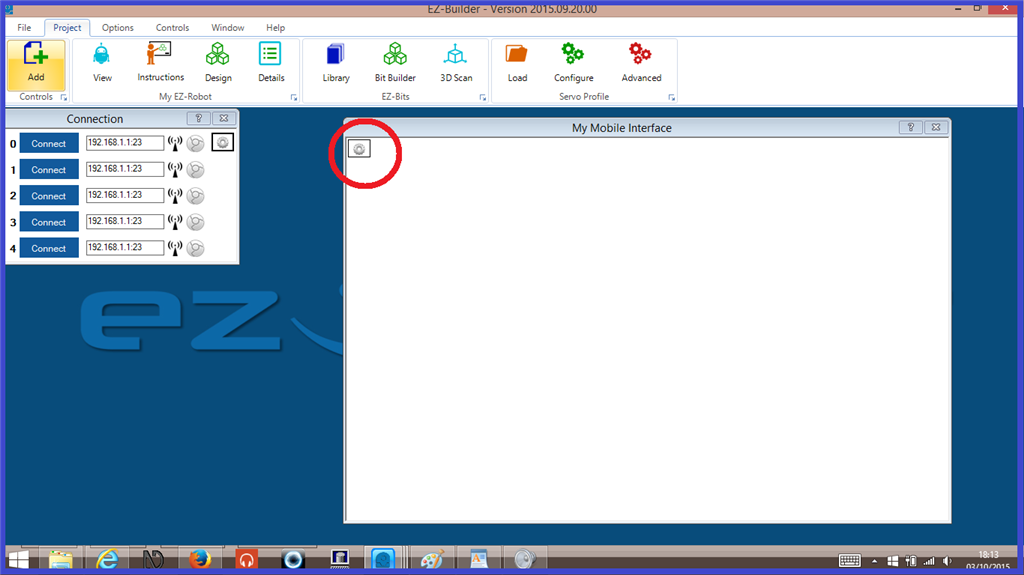
3.) Click on the gear icon on the mobile control to open the configuration menu.
4.) Add a "Forwards" button to the mobile control.
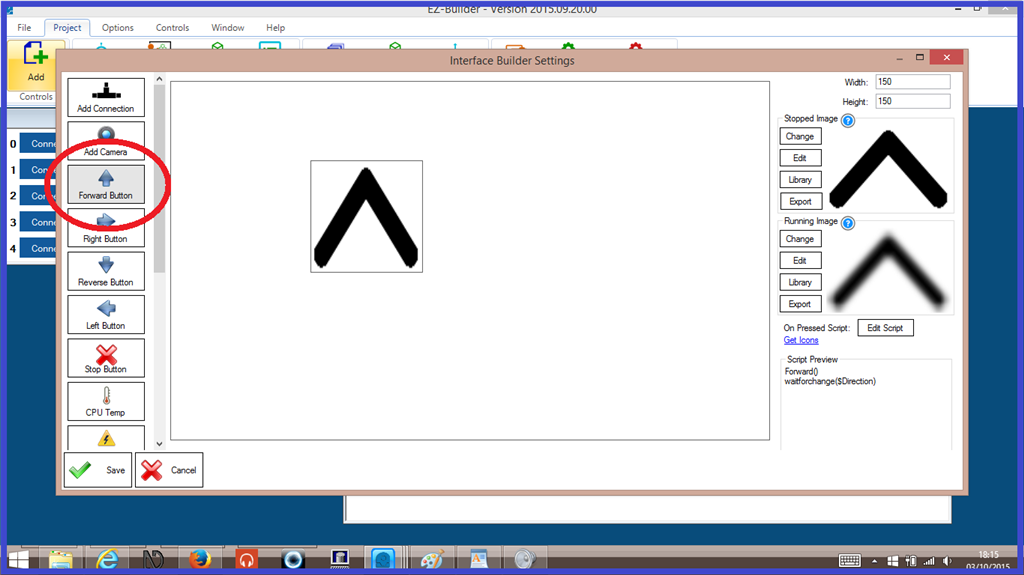
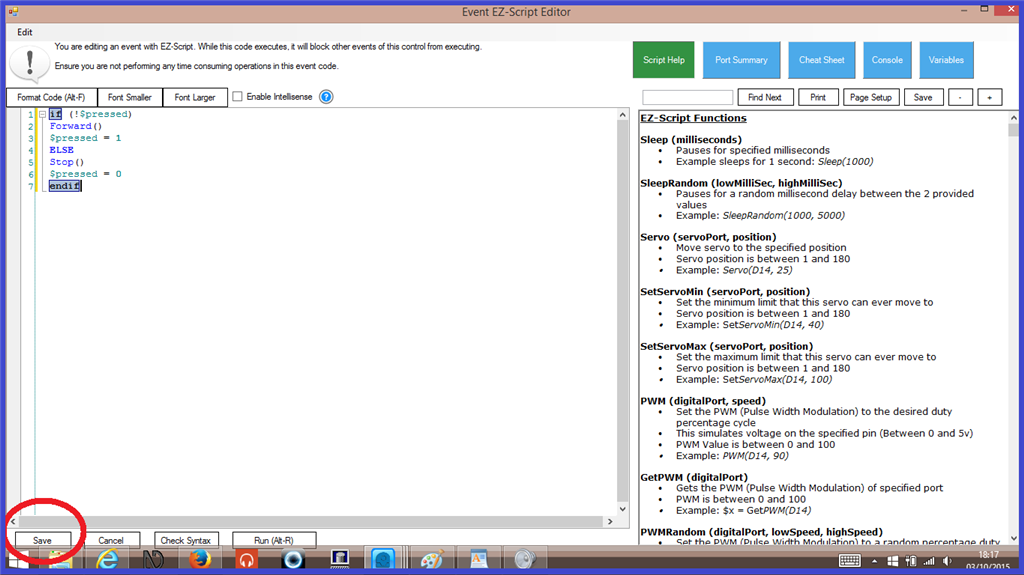
5.) Click on the "Forwards" button, then on the lower right of the mobile control, click on "Edit Script tab...
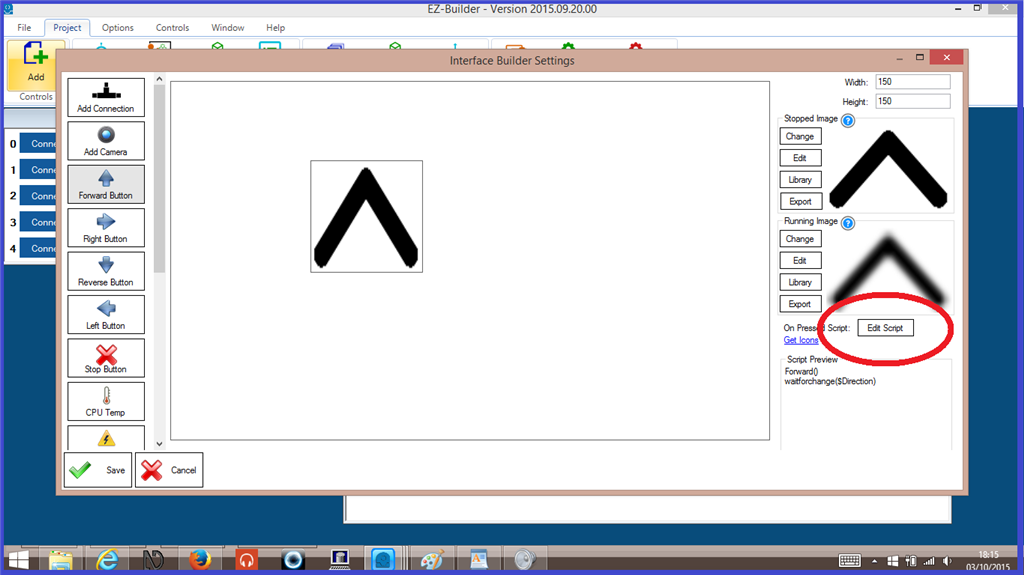
and copy in the following script...
if (!$pressed)
Forward()
$pressed = 1
ELSE
Stop()
$pressed = 0
endif
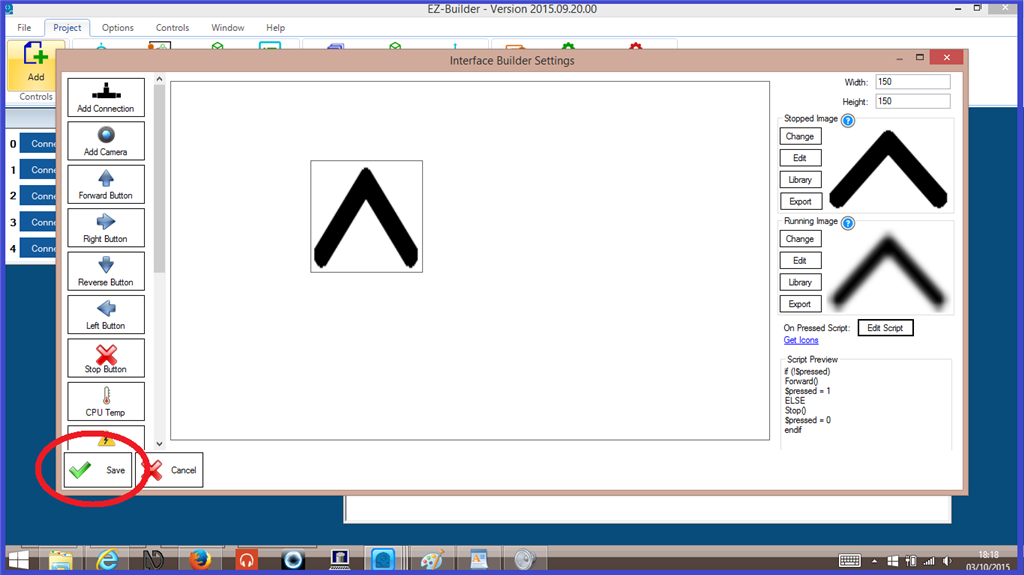
6.) Click "Save" on the script editor, then click "Save" on the mobile control.
7.) Power on your EZ-B and connect it to your EZ Builder project. When the connection is made, the "Init" script will automaticly run and the "!$pressed" varable will be set. When you press the "Forwards" button on your mobile interface control, the motors on your robot should move. When you press the same button again, the motors will stop.

What I have found is that when I set to ServoSpeed(D3,0) , and then add position Servo(D3, 90) and finally ServoSpeed(D3, 4), servo D3 runs as fast as it can to get into startup position. I also found that if I insert ServoSpeed(D3, 4) in the line before Servo(D3, 90) it moves slowly to startup position. The tutorial says not to set final speed until after setting position or you will have a problem. What am I missing?
Sorry for the last comment. It was sent by accident.
I tried to submit it in the tutorial but I got an error message and could't send it.
The tutorial I was reading is above "Setting servo speeds and Initialization Script Tutorial"
I am sending the information here so I don't need another thread.
I am having problems with my initiation script. I have found that when I set ServoSpeed(D3, 0) , and then add position Servo(D3, 90) and finally ServoSpeed(D3, 4), servo D3 runs as fast as it can to get to position given by Servo(D3, 90) startup position. I also found that if I insert ServoSpeed(D3, 4) in the line before Servo(D3, 90) it moves the correct slow speed to Servo(D3, 90) position.
The tutorial says not to set final speed until after setting position or you will have a problem. What am I missing?
I believe what the tutorial is trying to convey is initialization of a servo position. That means the very first time a servo is moved or set into position
a servo doesn’t have a position when power is applied. There’s no way to slowly transition to the initialization position because there is no previous position. so, you must set a position first, which initializes the servo and then set the speed. Once the speed is set, it’ll always have that speed for moving until speed is specified again.
The first initialization of servos will always move quick as they can to the specified position. It’s annoying, but it’s how servos work.
Now, if you’re hardcore and want to get around that issue. You can look up my hack on adding adc position monitoring. That way, you can know the position the servo is in and initialize at that position. Then, set the speed. There would not be any jumping if you did that
heres the plugin which has the video and details: https://synthiam.com/Products/Manual/PWM-Servo-Feedback-ADC-18047
Is there a problem with adding ServoSpeed(D3. 4) code in the line before Servo(D3. 90) line .
If I do this, it doesn’t jerk into D3 position. D3 controls up and down movement of the head of the robot. Without the control the heavy robot head slams int position D3. I am afraid over time I will damage the servo and robot body. This is a five foot Robot called max. He weighs about 70 lbs. t will soon post a picture.
I’m surprised that works, but if it does then yeah go for it. Really if anything does work, keep doing it as the phrase goes, don’t fix it if it ain’t broke
If it is working now, great, just be sure you are testing after first power up and not just running the script after you have already moved the servos before trusting it.
Alan