
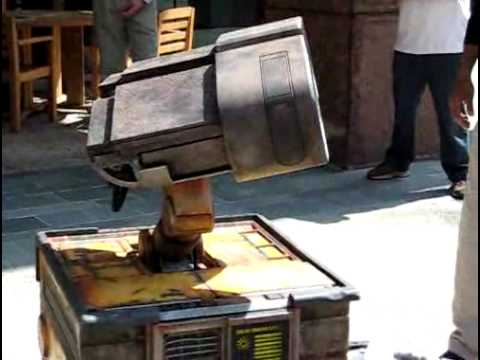


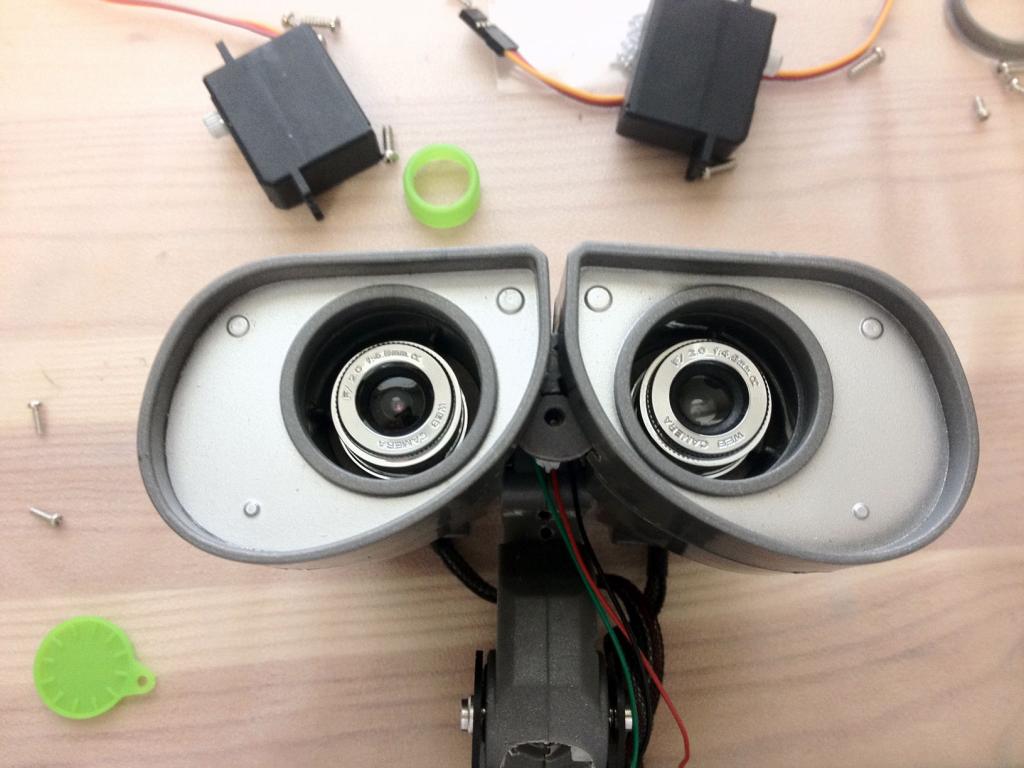


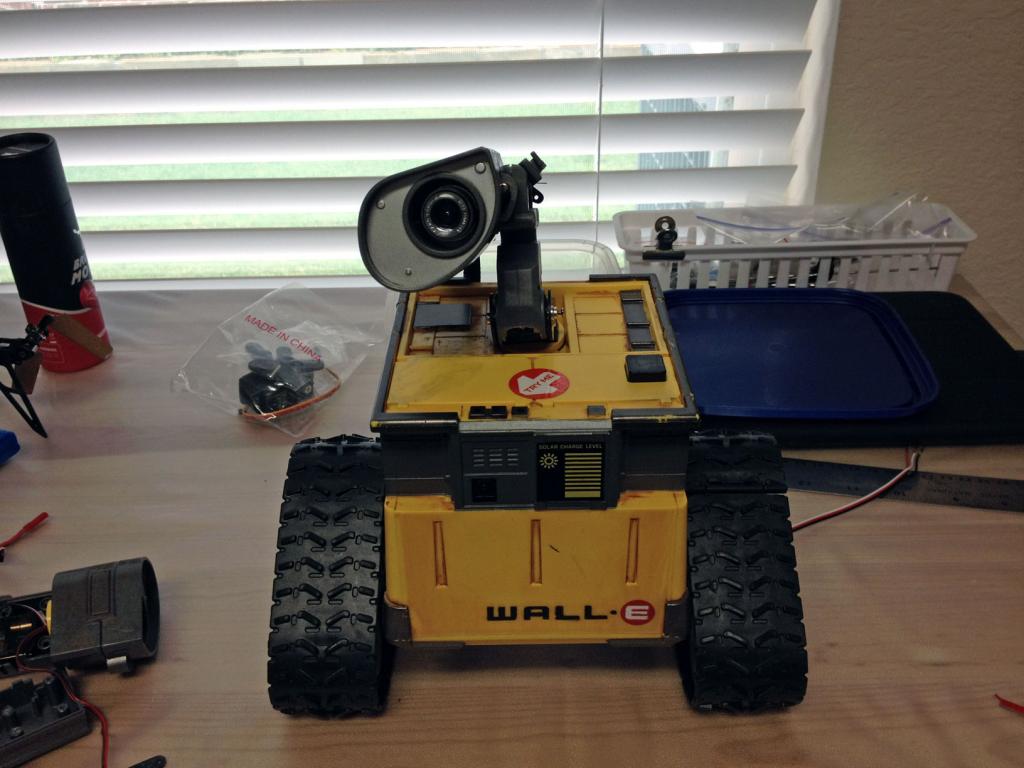
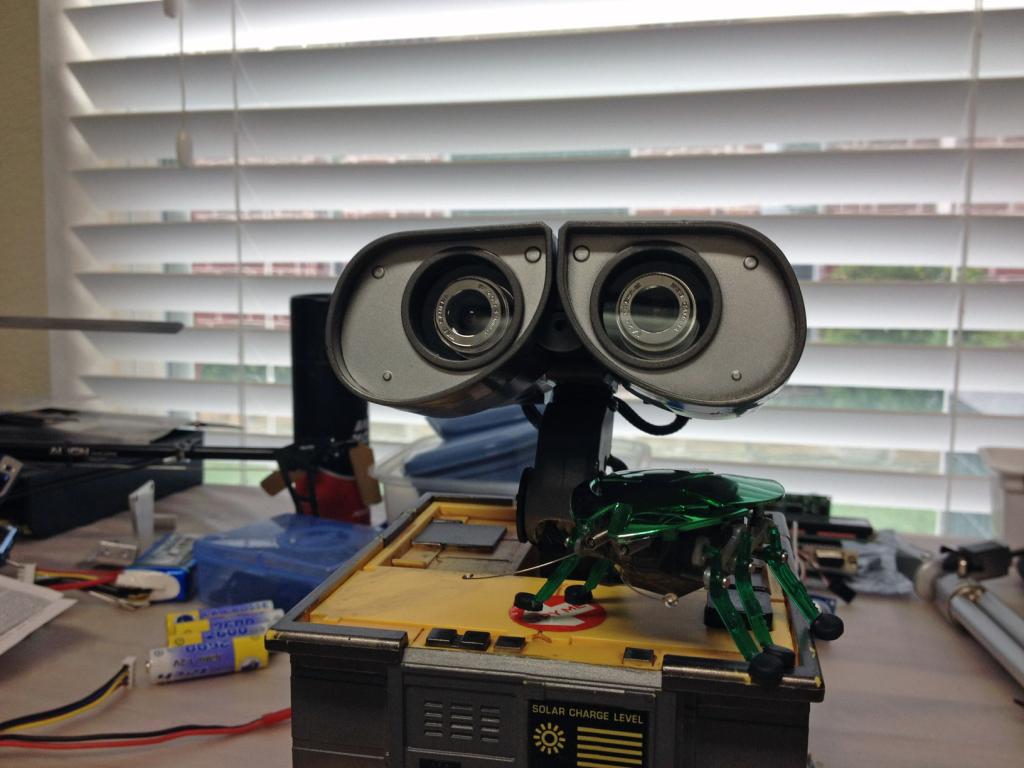

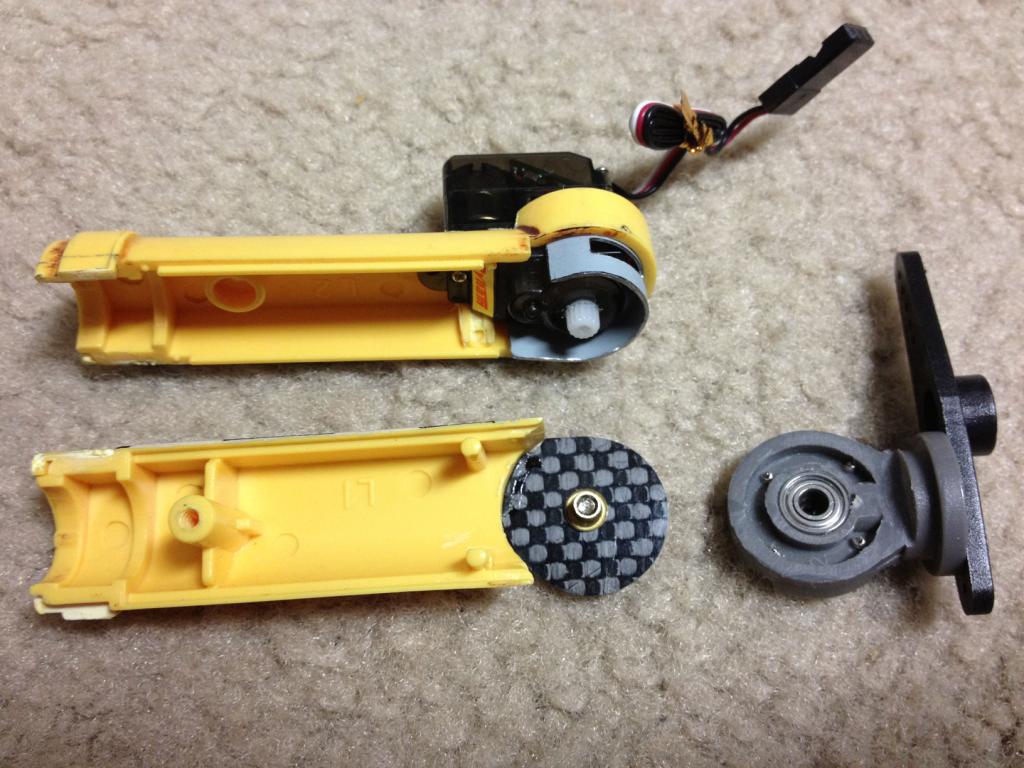
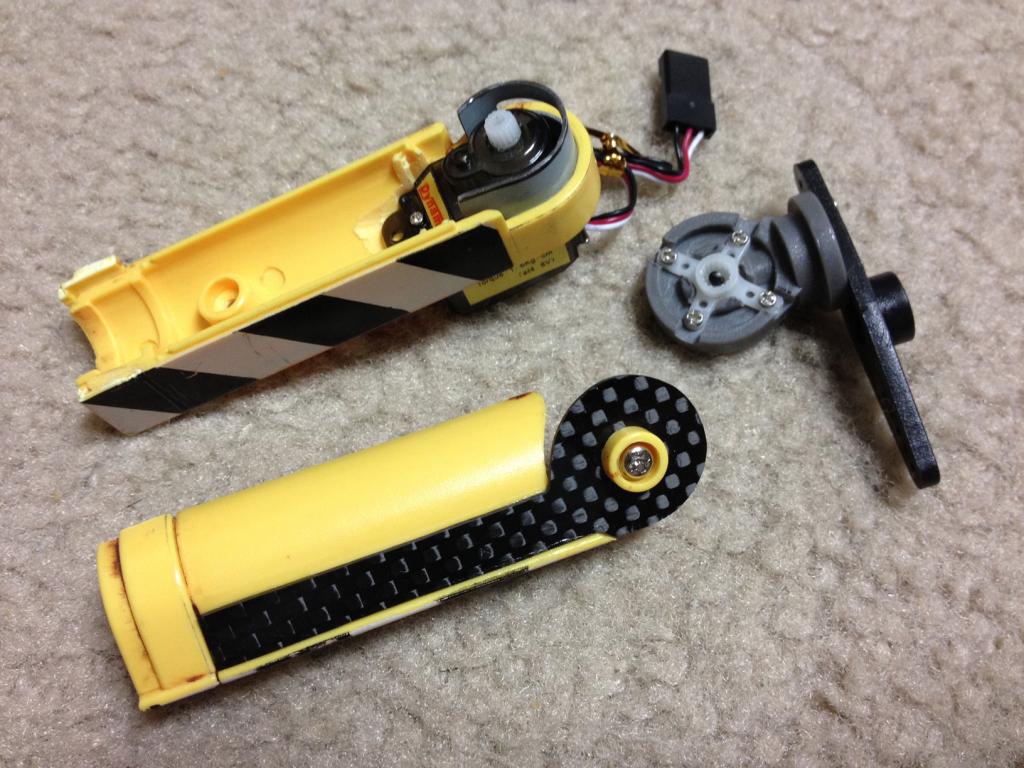
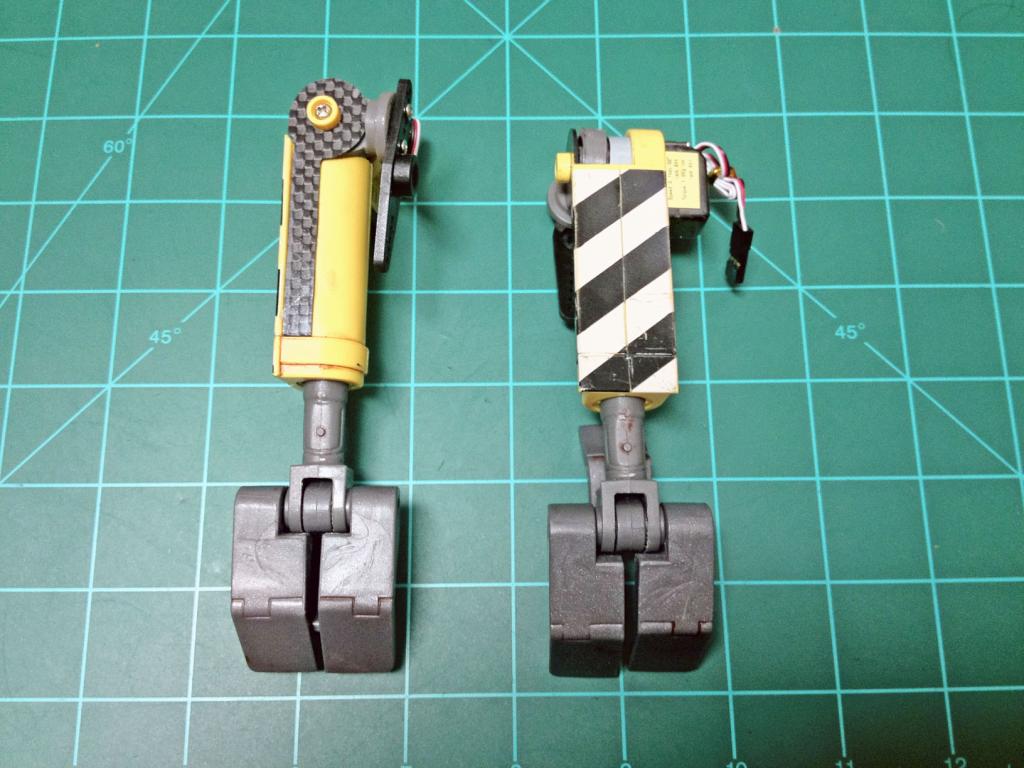
Inspired by DJ Sures and many other Wall-E projects on here, i decided it's time to make my own Wall-E and he will be my first robot build. I wanted him to be as lively as possible. I give credit to Joc's and Glickclik for the geared neck tilt and wheels tilt ideas, i just made it my own using the same concept. I still have yet to fully understand ARC so additional help would be greatly appreciated. Here is what im at so far in the project, some of the parts are hand made from raw Carbon Fiber with only a dremel and i use some parts from a 450 R/C heli as well as bearings in some of the joints.
Done so far:
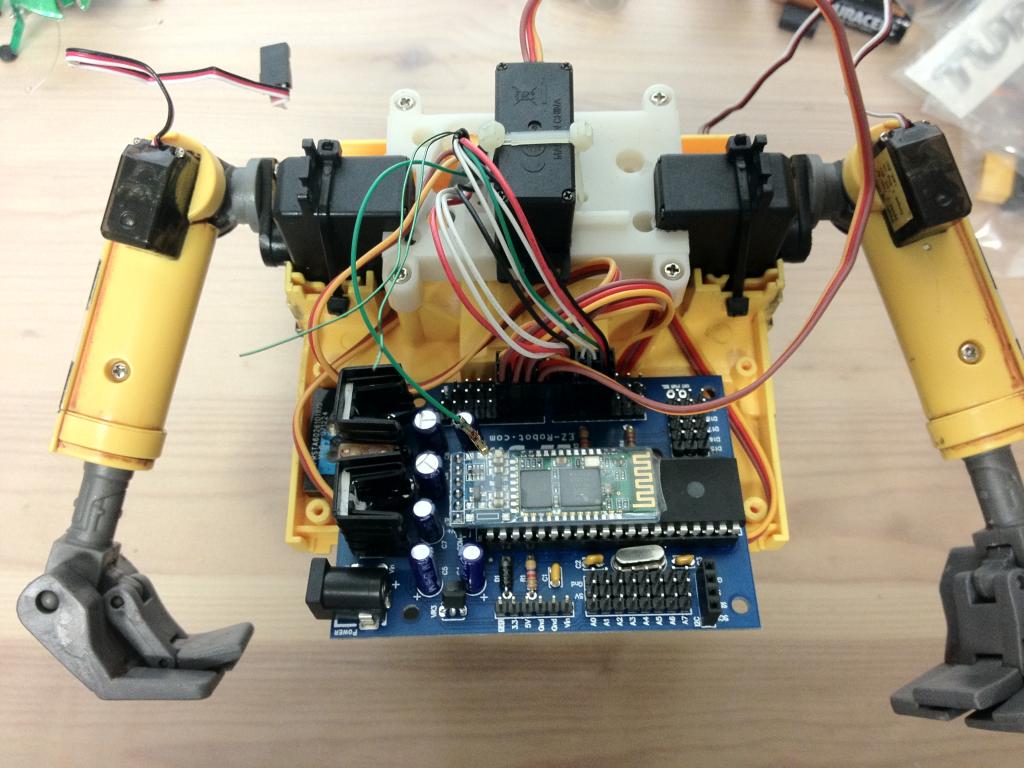
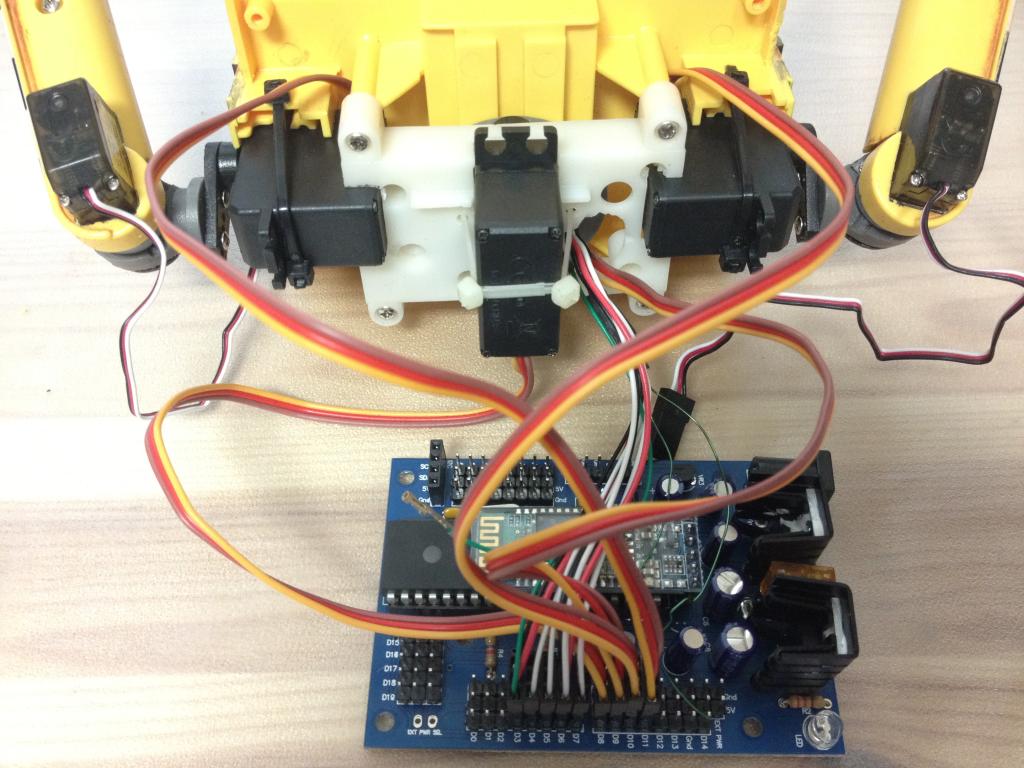
Metal gear high speed modified continuous servos for wheels.
Micro metal gear servos for wheels tilt.
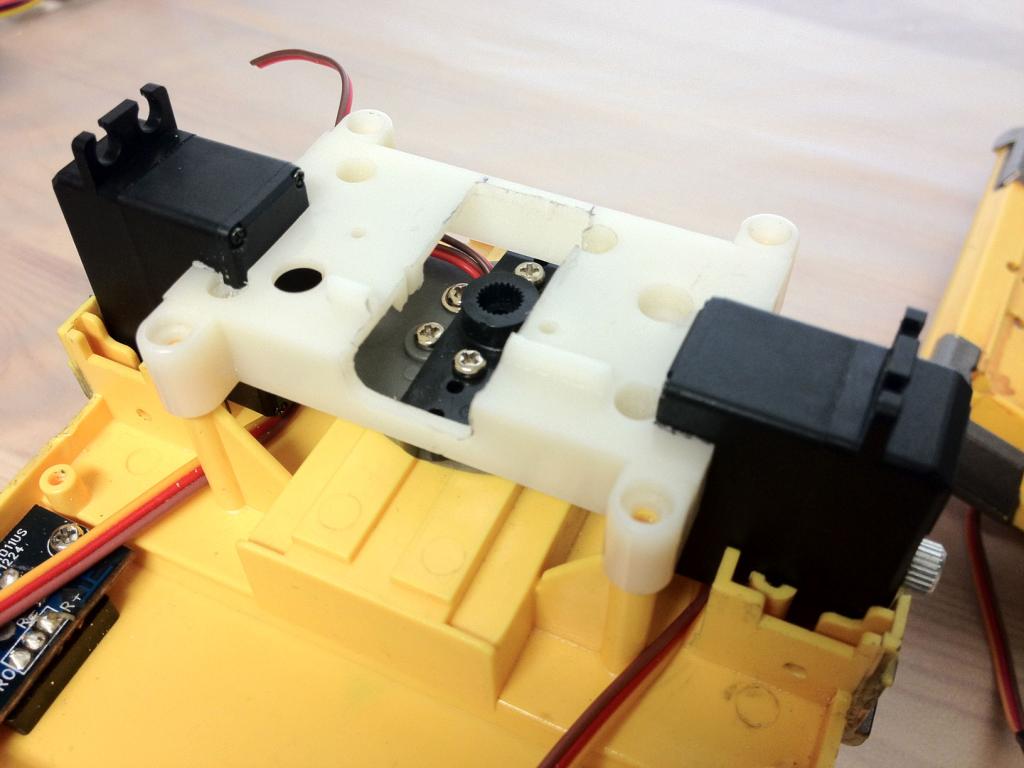
Mini metal gear servos for vertical arms movements.
Micro servos for horizontal arms movement.
Micro metal gear servo for vertical neck tilt.
Mini metal gear servo for horizontal neck movements.
Micro servos for individual eye movement.
Sub-micro servos/mods for eye's lid animation.
Get rid of dummy cables in the head, run all servos/camera wires from head down the same way and use heat shrink/black nylon mesh for realistic look.
Red laser between eyes.
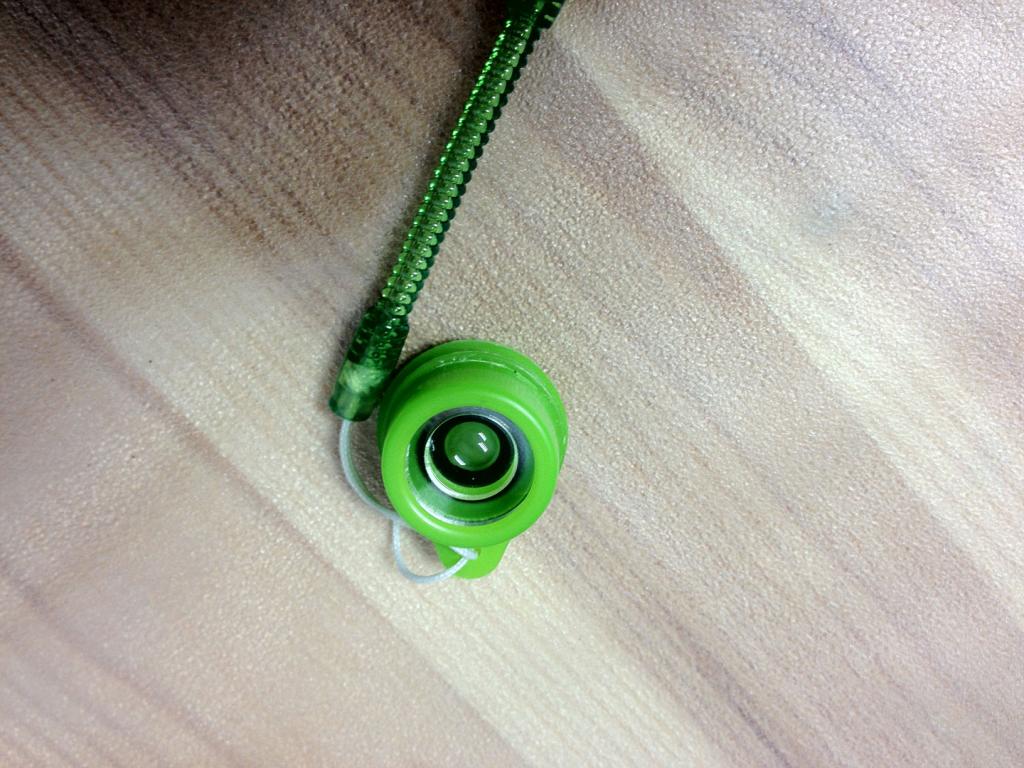
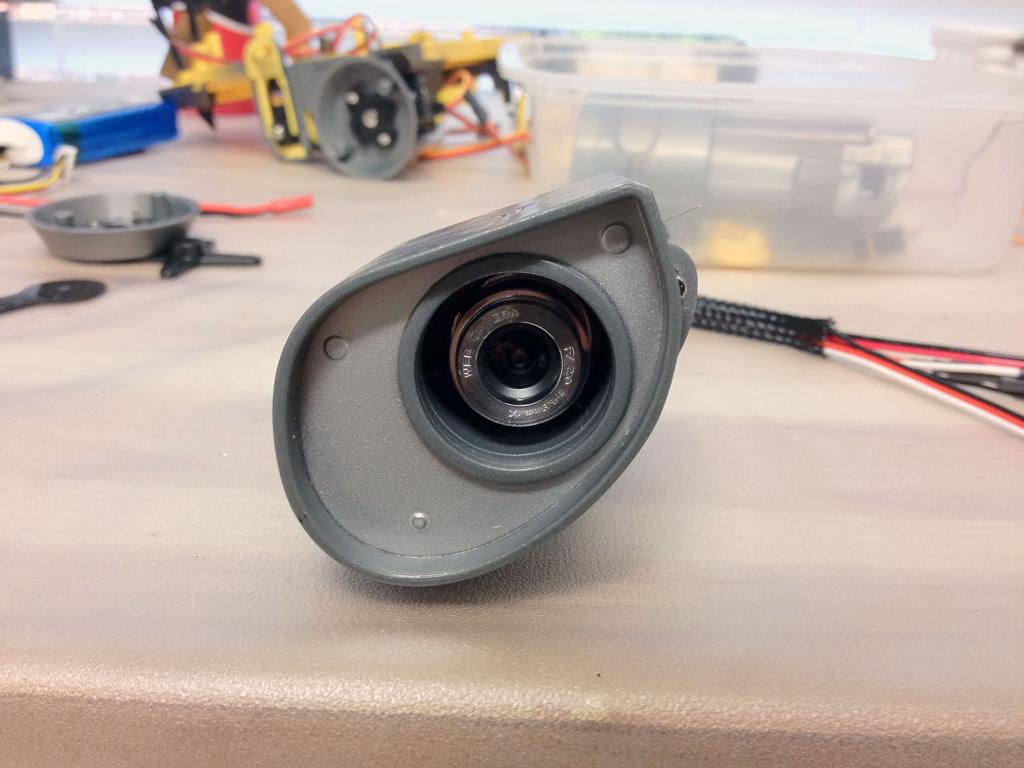
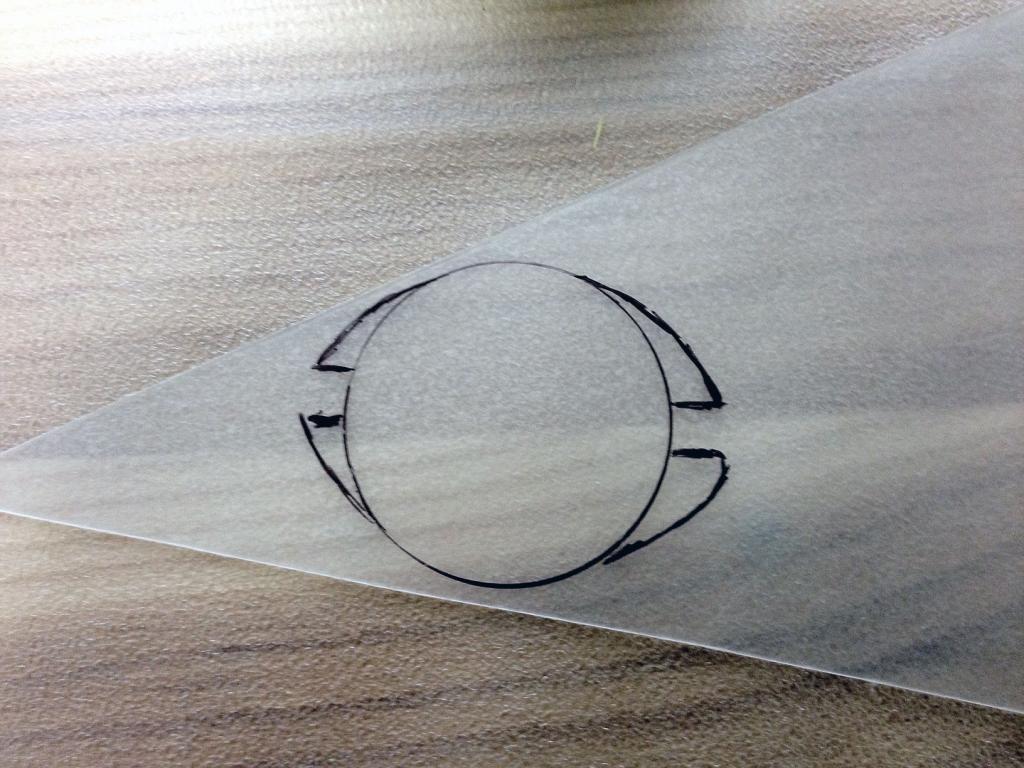
Mock up left eye's lens.
Other things to be added/changed as i go
Yet to be done:
Light up solar panel (most likely, still thinking) Red LED in front in the black spot next to the solar panel (definitely) Make his wrist rotate (don't know yet, still thinking)


Discover more robots

Lumpy's Lumpy's Hasbro R2-D2
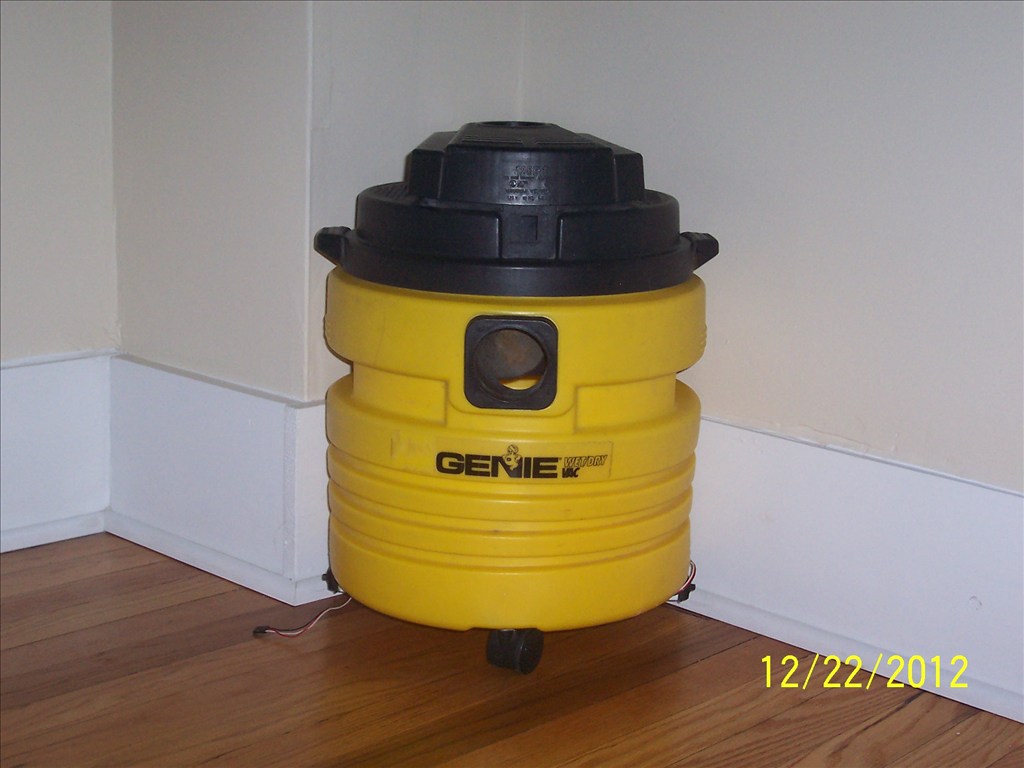
Csa459's Ok Guys Wet And Dry Vac For Robot Start With
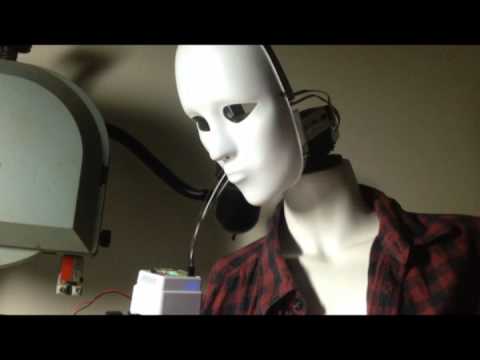

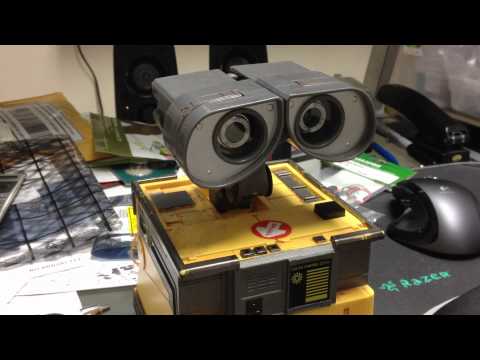
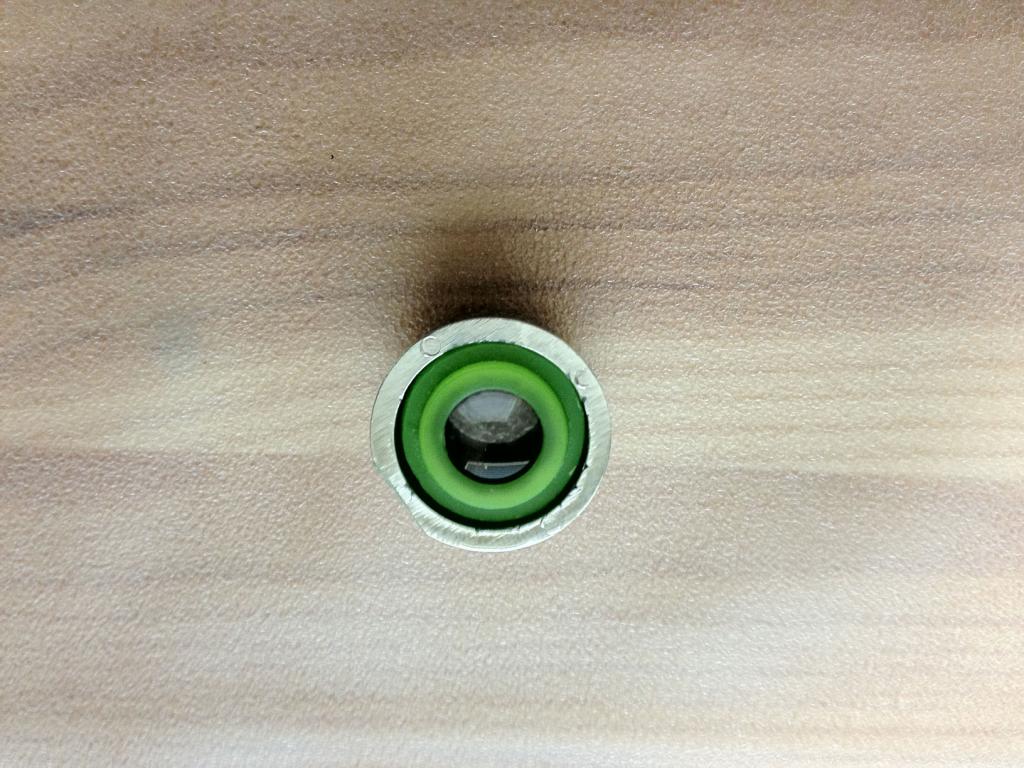
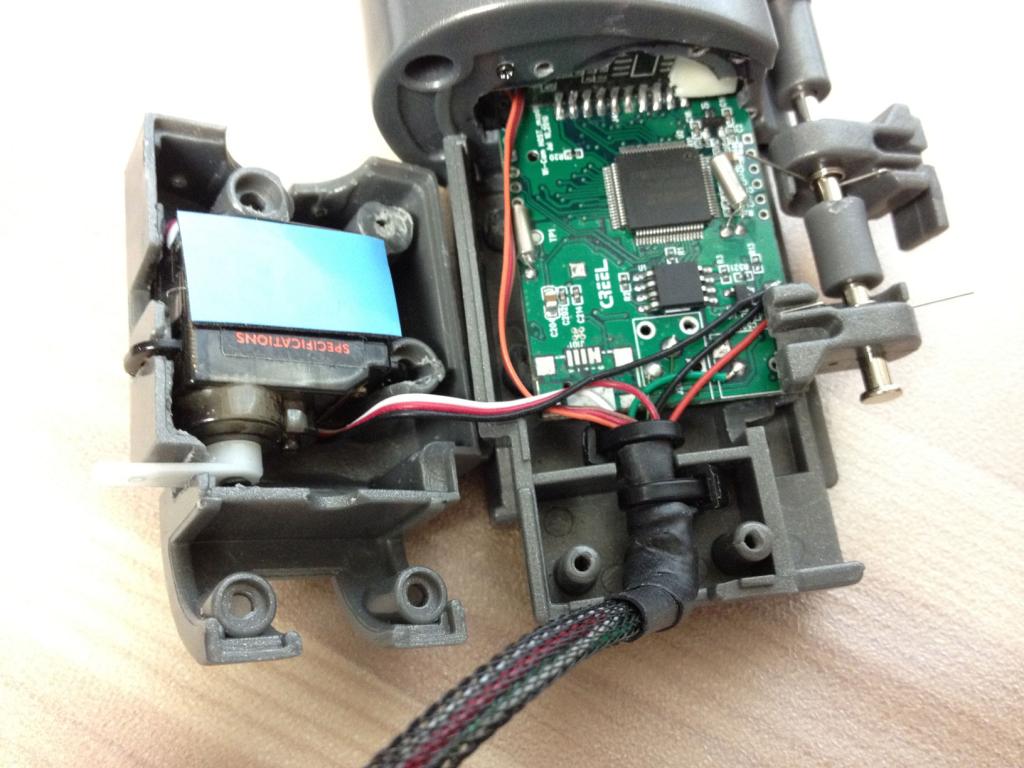
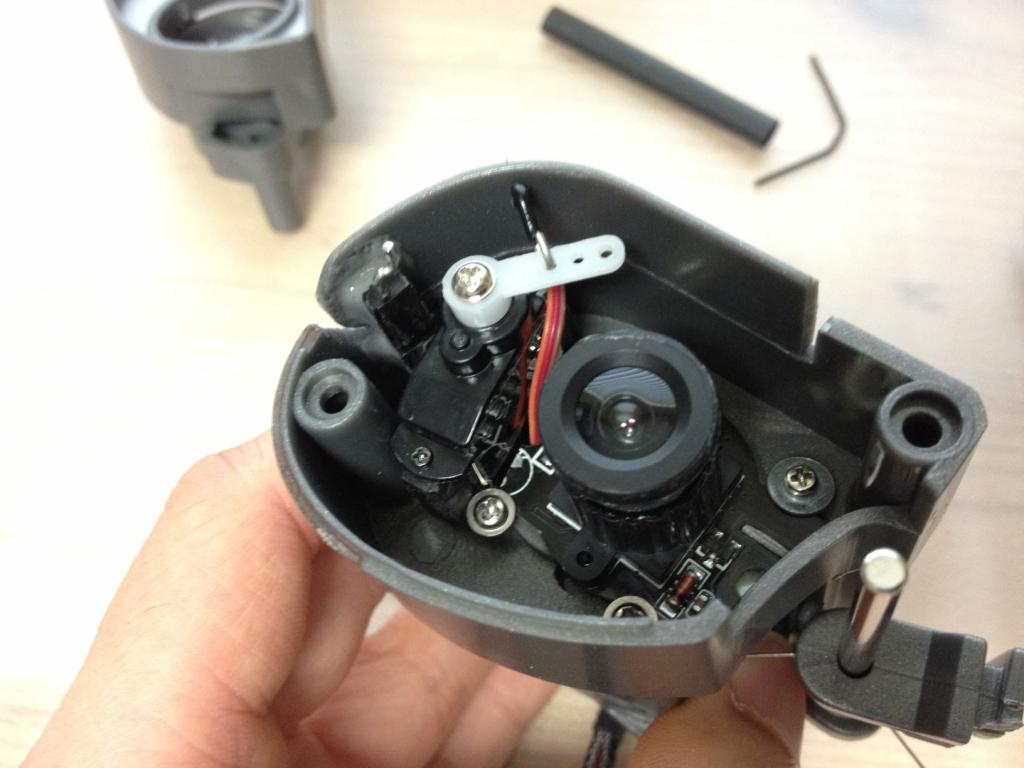
The good news...after staring into the eye of Wall-E for several hours and almost got hypnotized!!! Still have headache left from yesterday! I got the thing to work good!!!
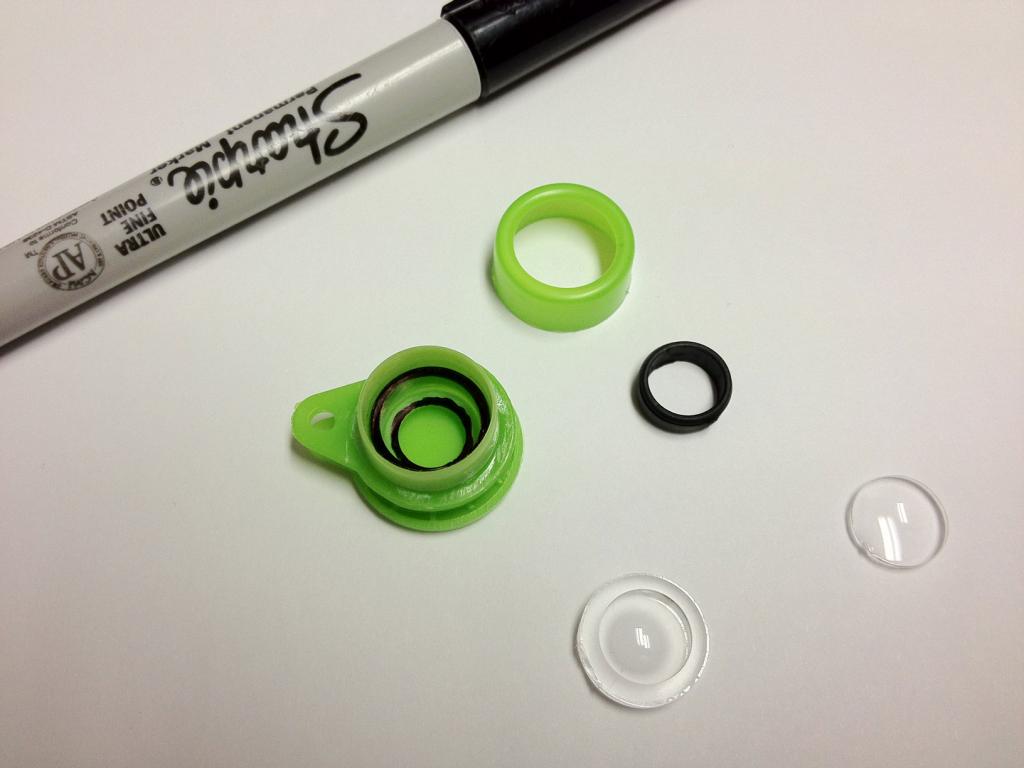
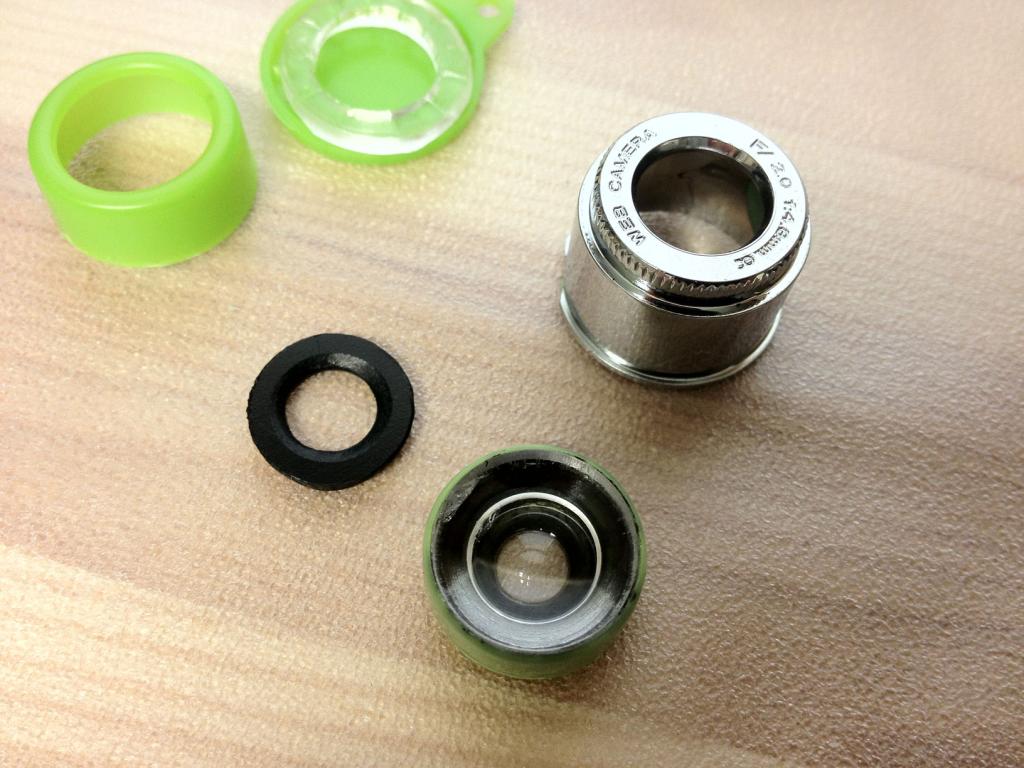
Everything still fit without cutting more of Wall-E lens assembly! But this isn't over, still got the other eye to do and can't make mistake or I have to redo both eye lids to match, crossing my fingers!
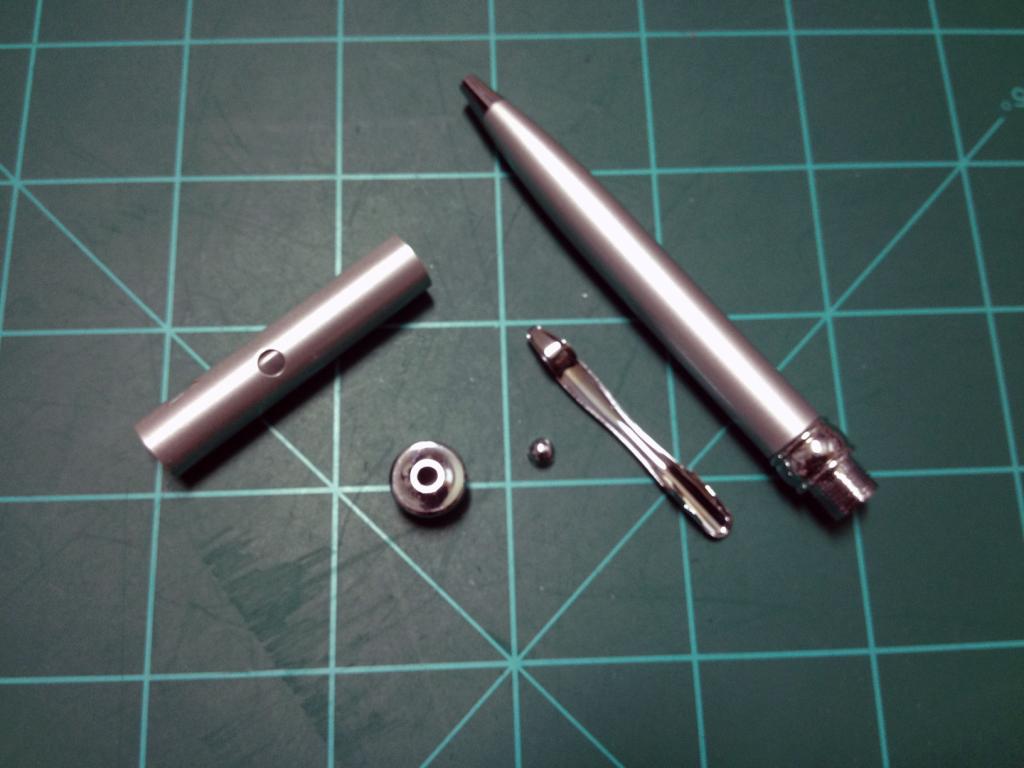
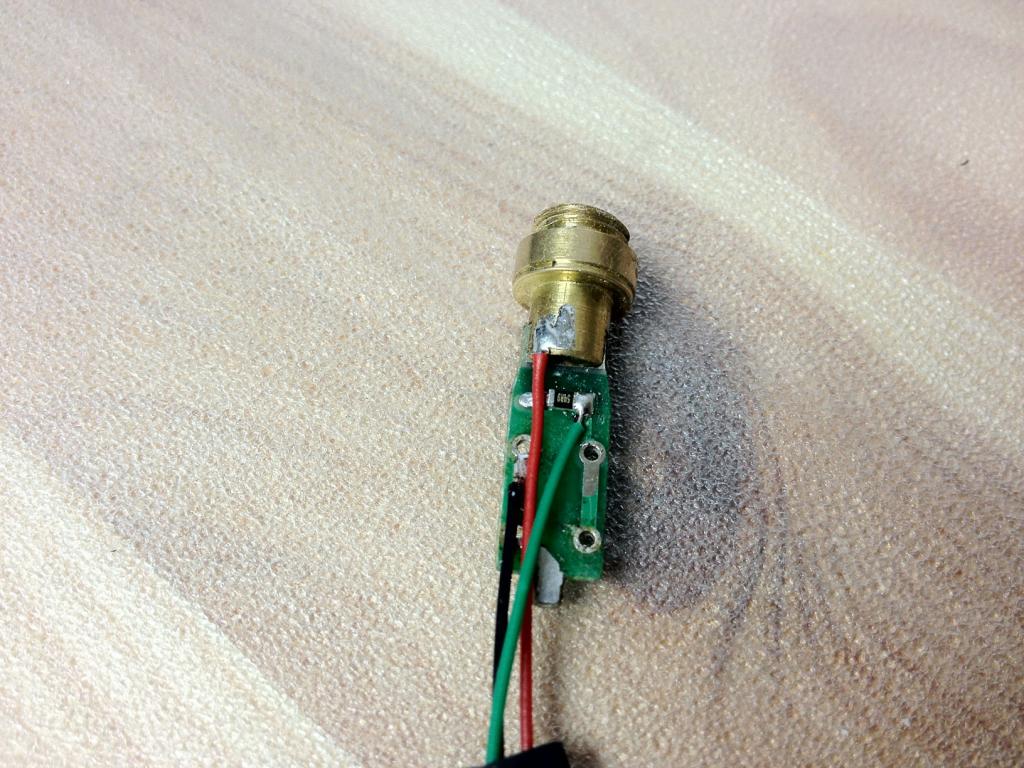
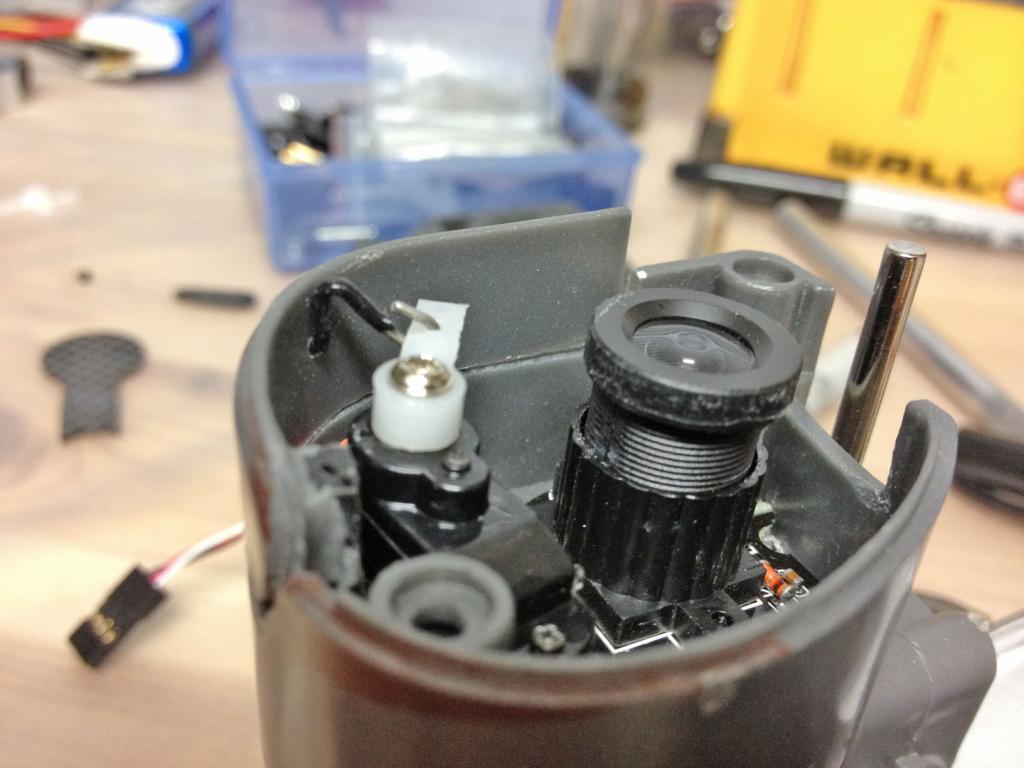
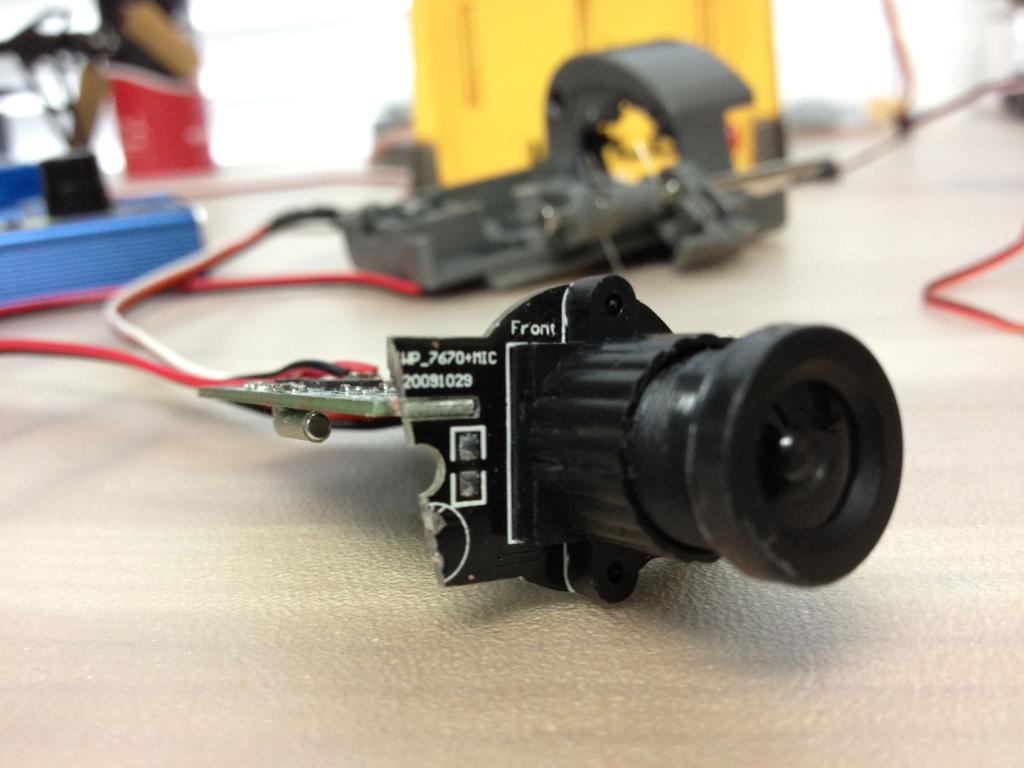
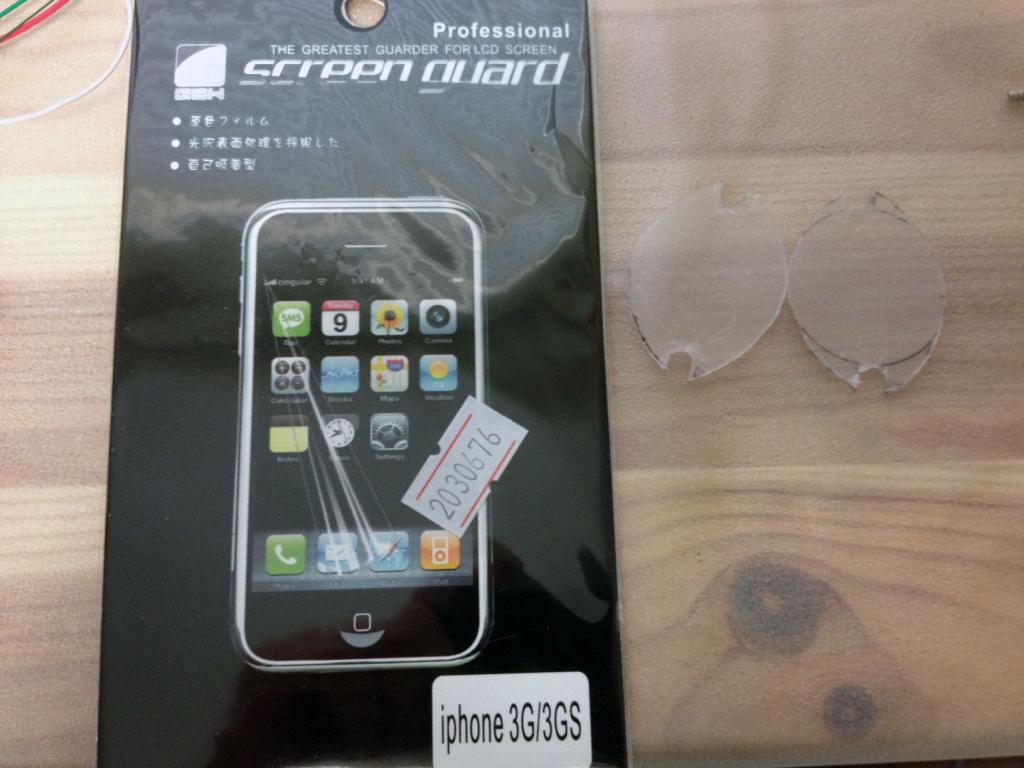
Cutting camera PCB to fit, don't worry it still work
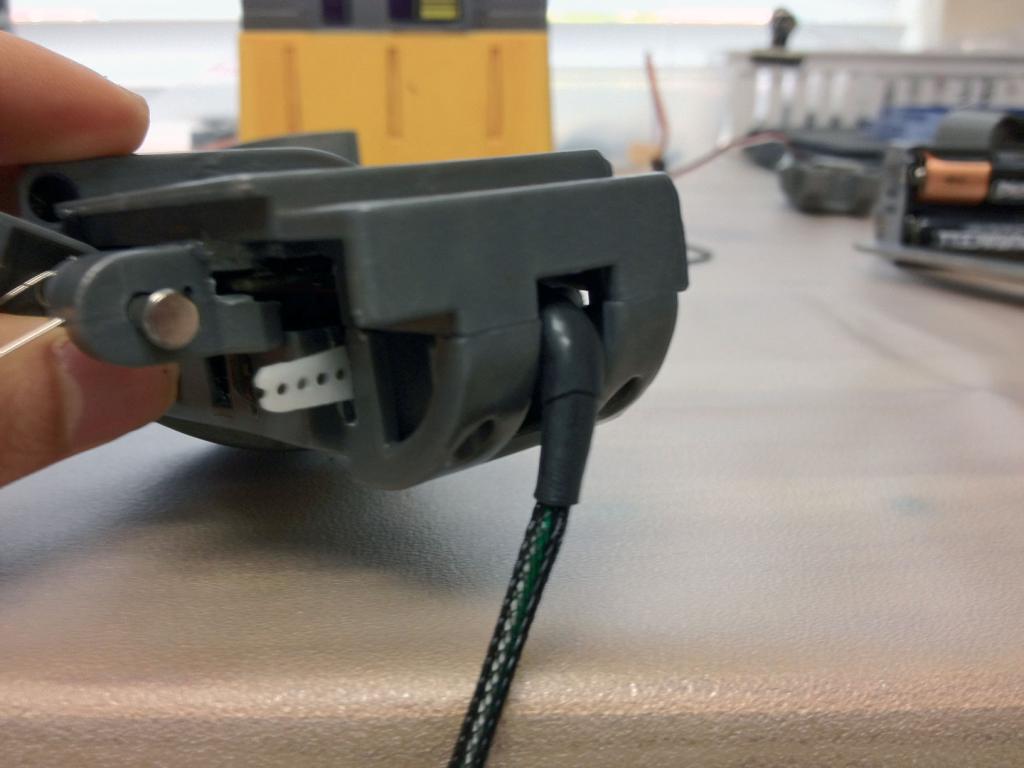
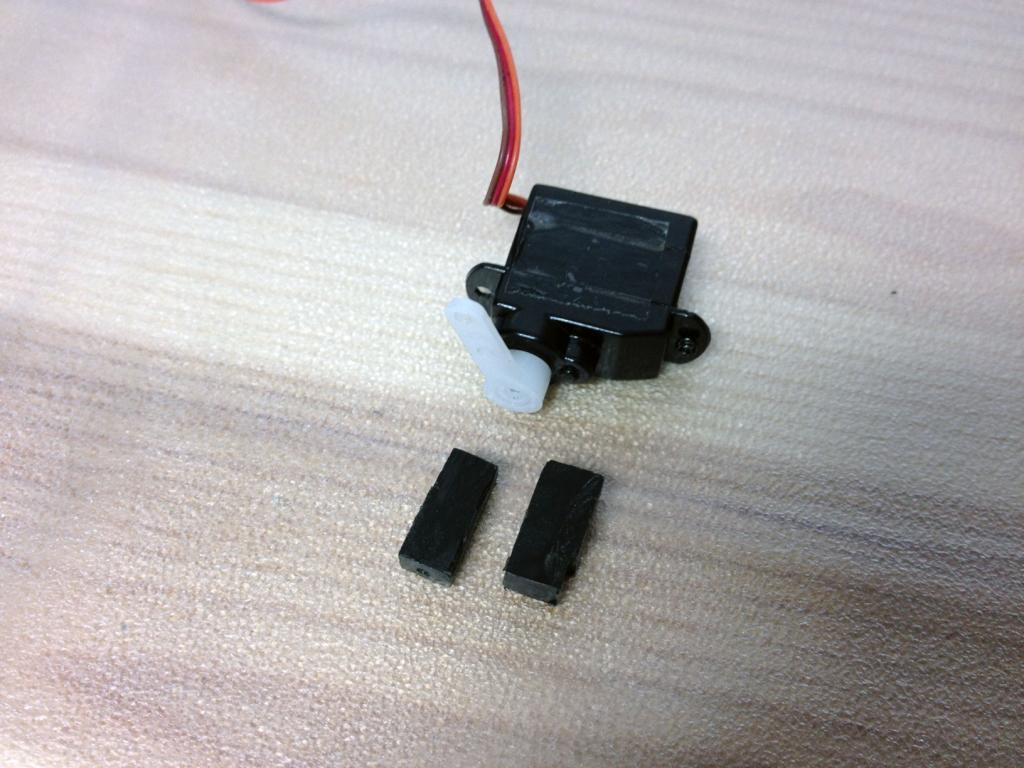
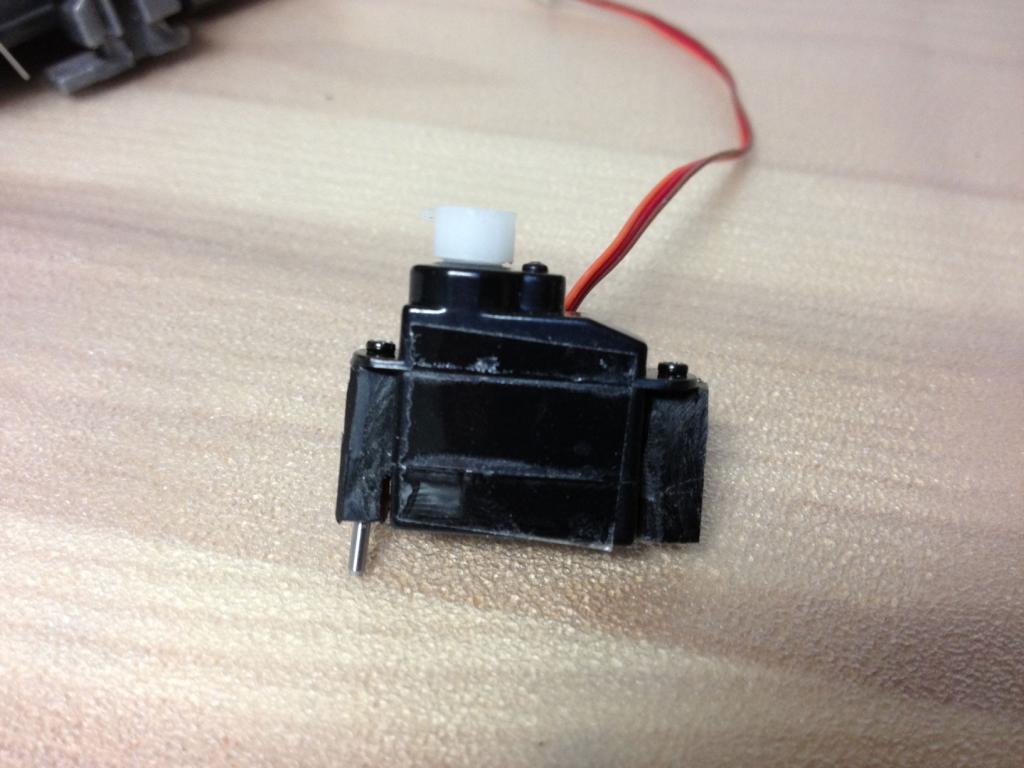
Sub-micro servo and custom mounts cut from delrin block, drilled with hand drill.
All mounted! has one pressed pin on one side because can't get tool in there to screw it in.
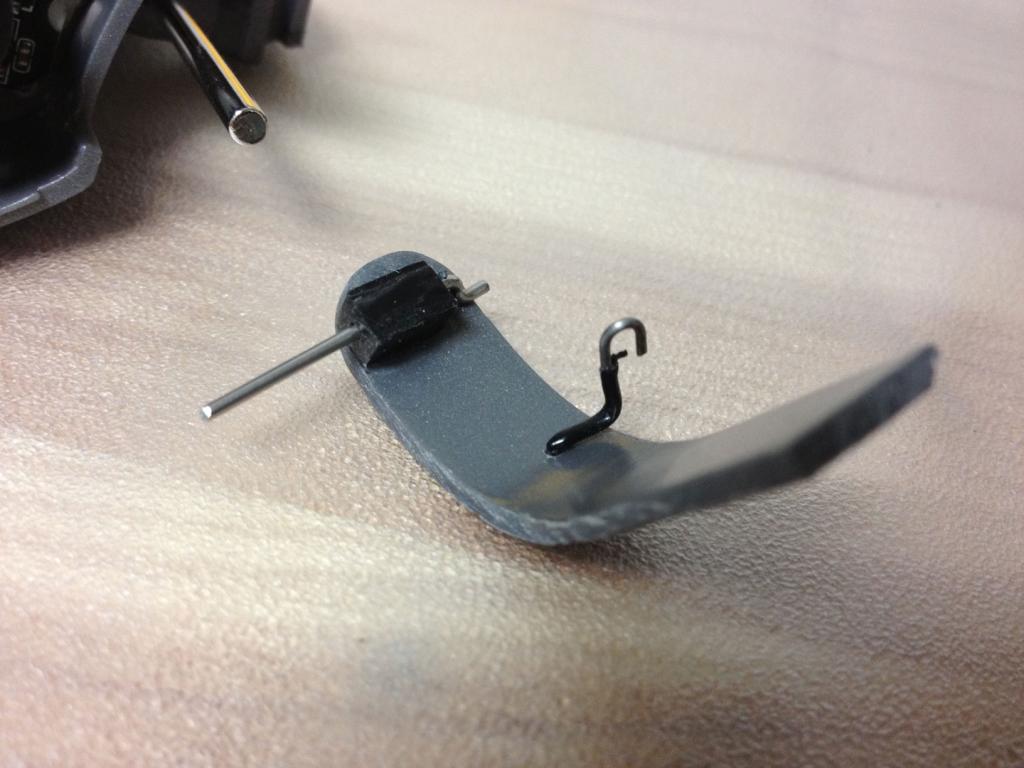
Hinge cut from delrin block and custom servo push rod from paper clip
All mounted
Eye's lid close
Eye's lid open
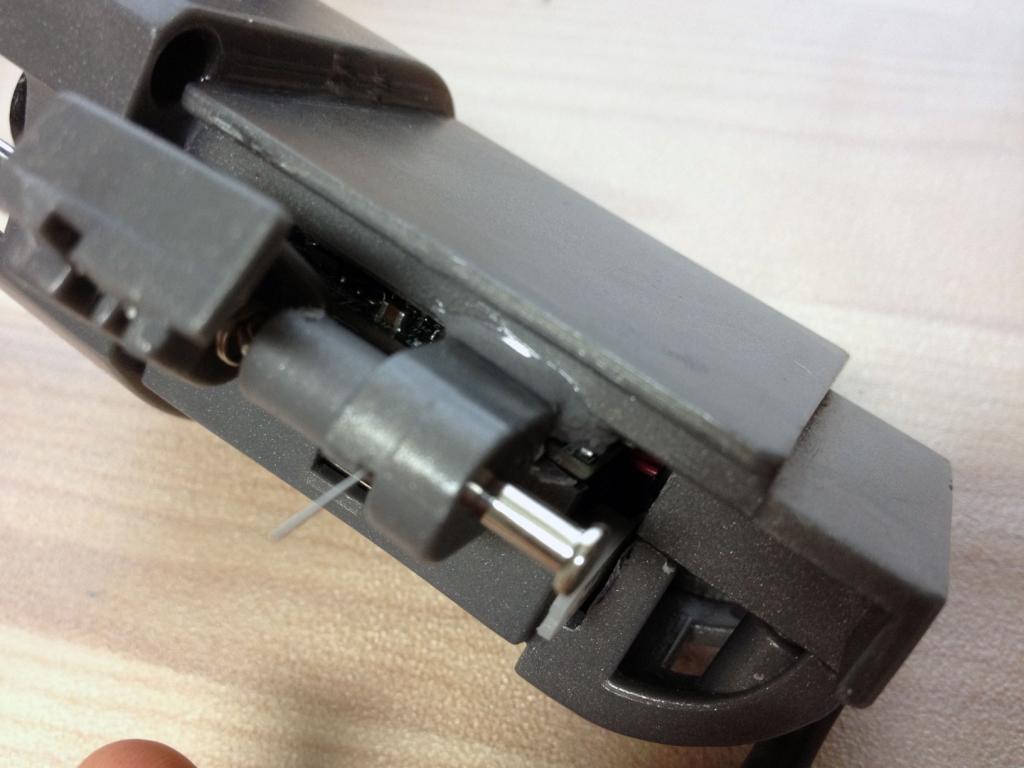
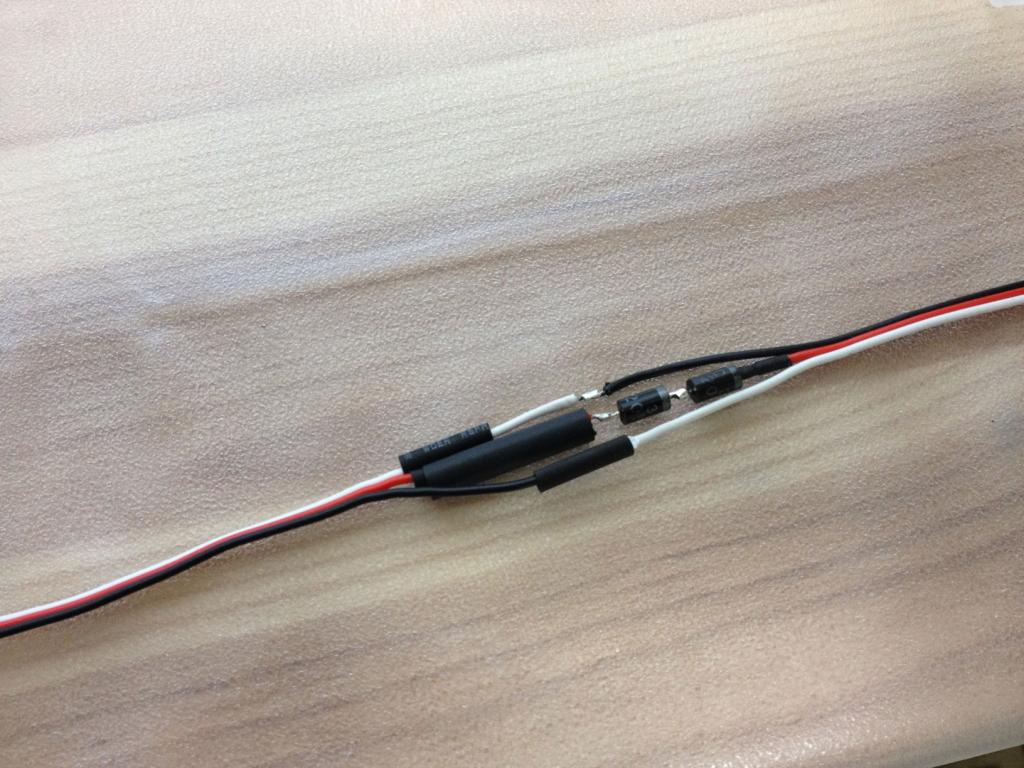
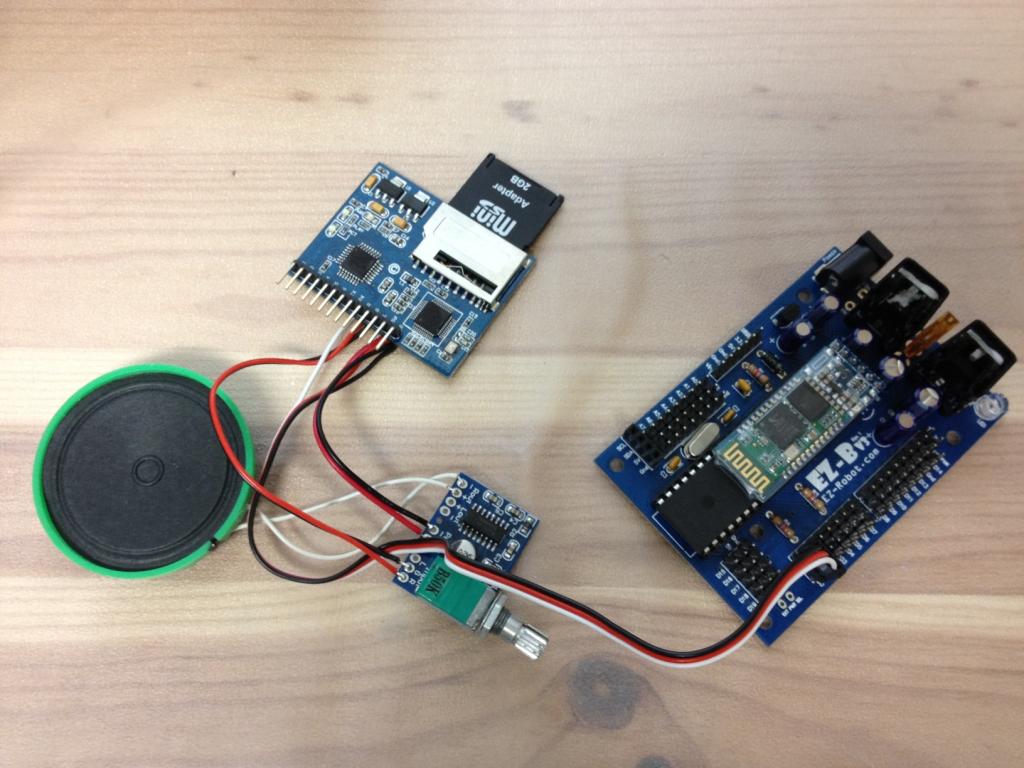
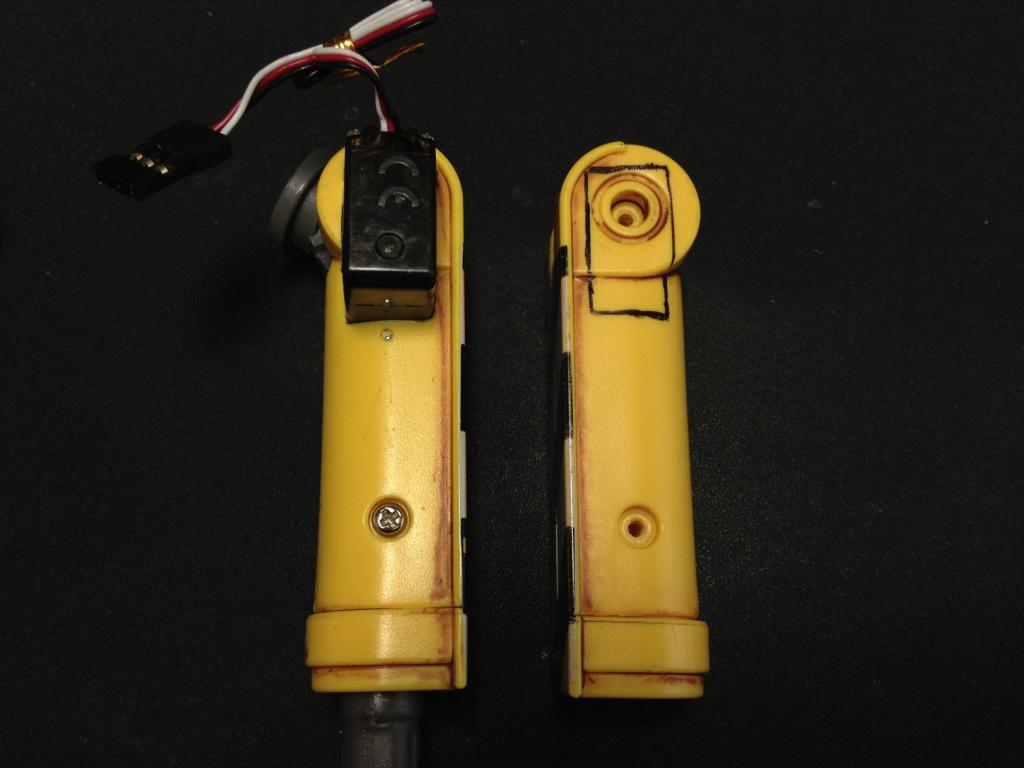
Rewired with common ground and smaller wires, enamel coated copper wires used for extending antenna socket, not sure if has any negative side effect?
Supercool!
@Glickclik...it does just don't go high speed on it, i usually at it at 2-3 at most, higher for thicker plastic, lower for small part, thin plastic. Doing the start stop cutting method helps too! If you leave it there too long it will melt the plastic and the cut will not be clean! and go easy on the pressure too!
@MovieMaker...thanks
I just might hire you to build me a robot.
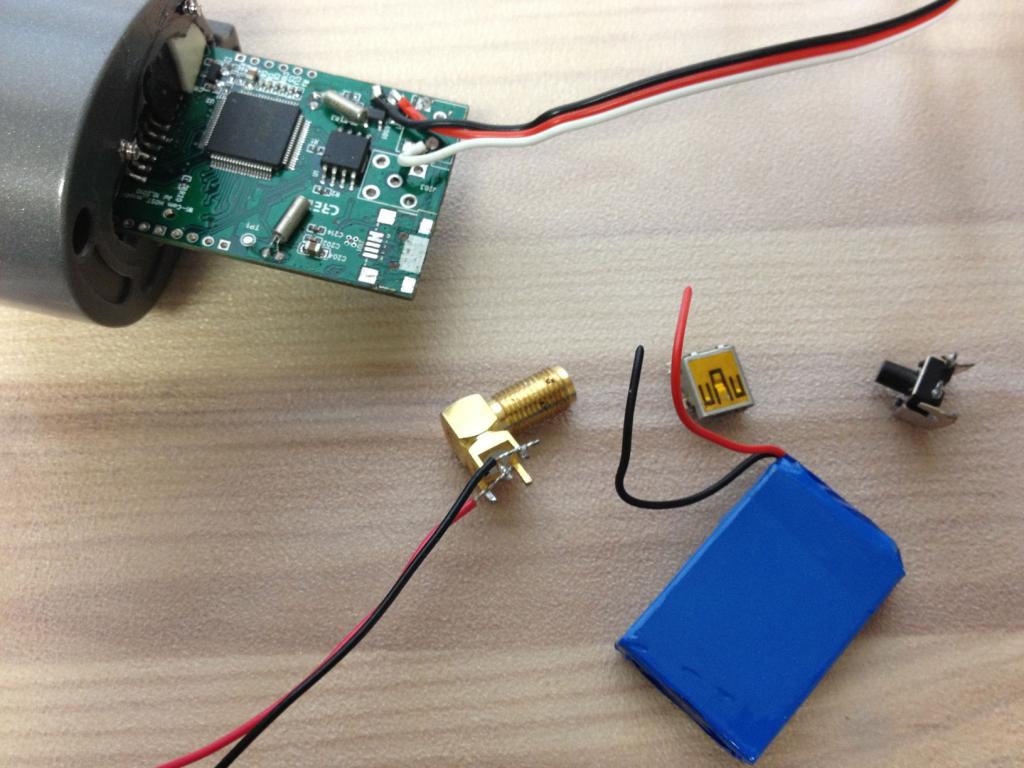
I updated the last picture, forgot to solder wires for antenna.
Glickclik...It will be my honor
Welldone. Another hurdle completed ! Can't wait for the video
How many more servos have you got to fit after the other eye is done?
Thanks John...After finishing the other eye, i think that's all for servos, then i'll need to add sensors, red LED in front, light up solar panel, compass, and if i have any free ports left, i may attempt to do the rotating arm or add another servo right below the eyes for another degree of movement.
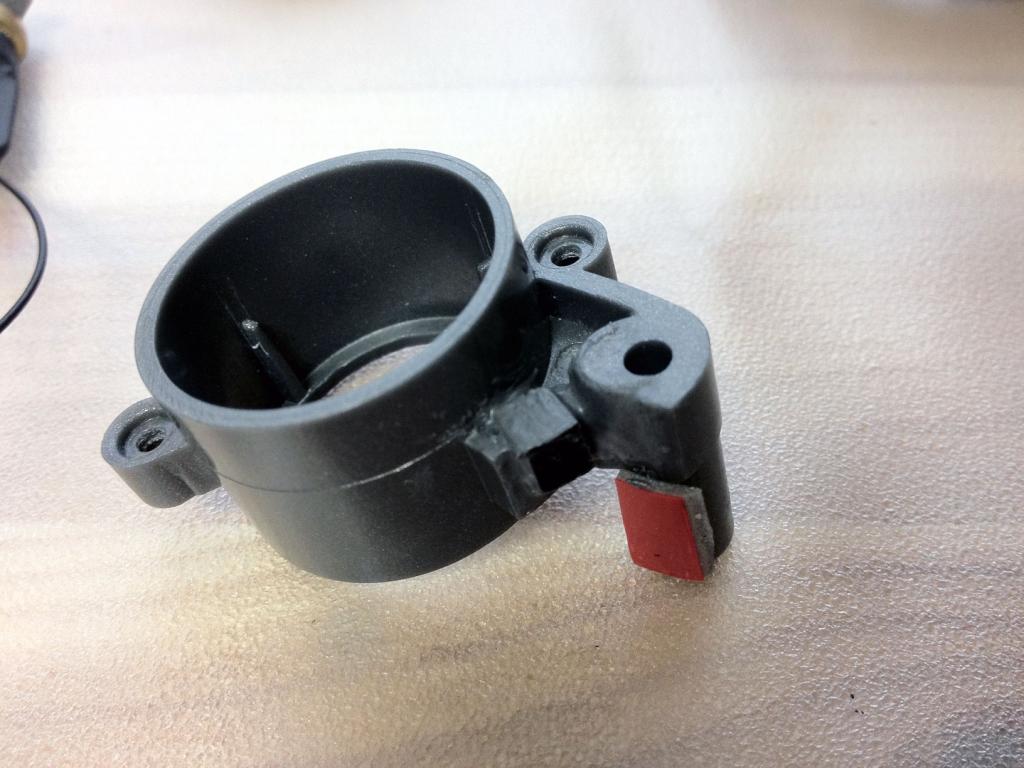
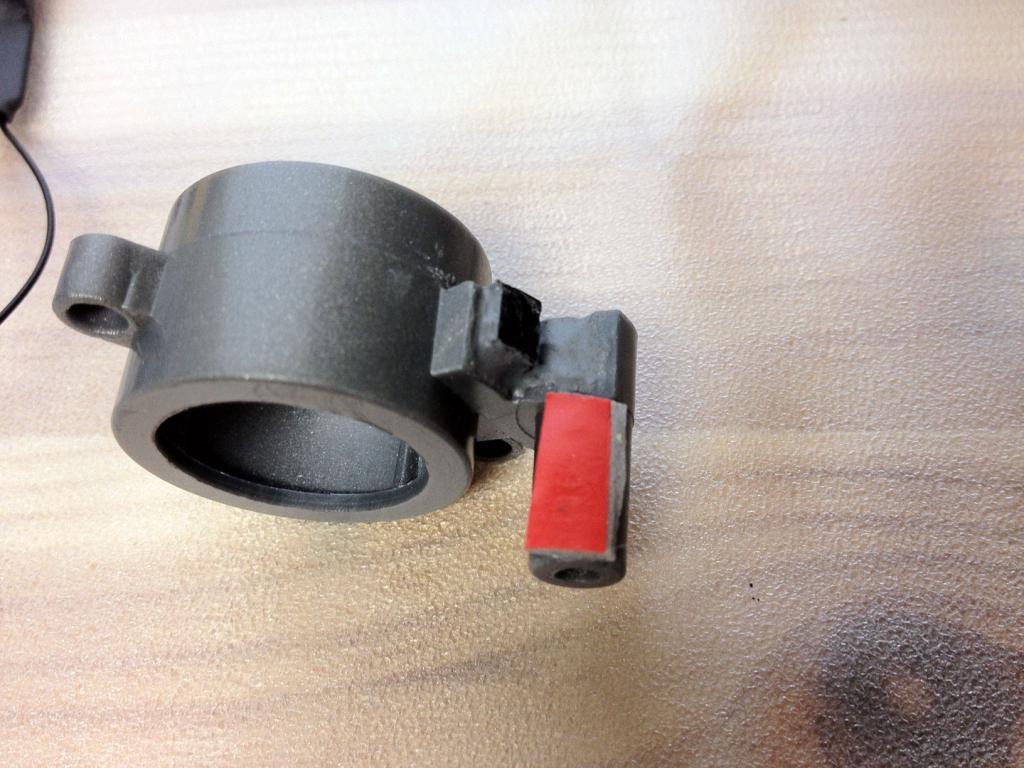
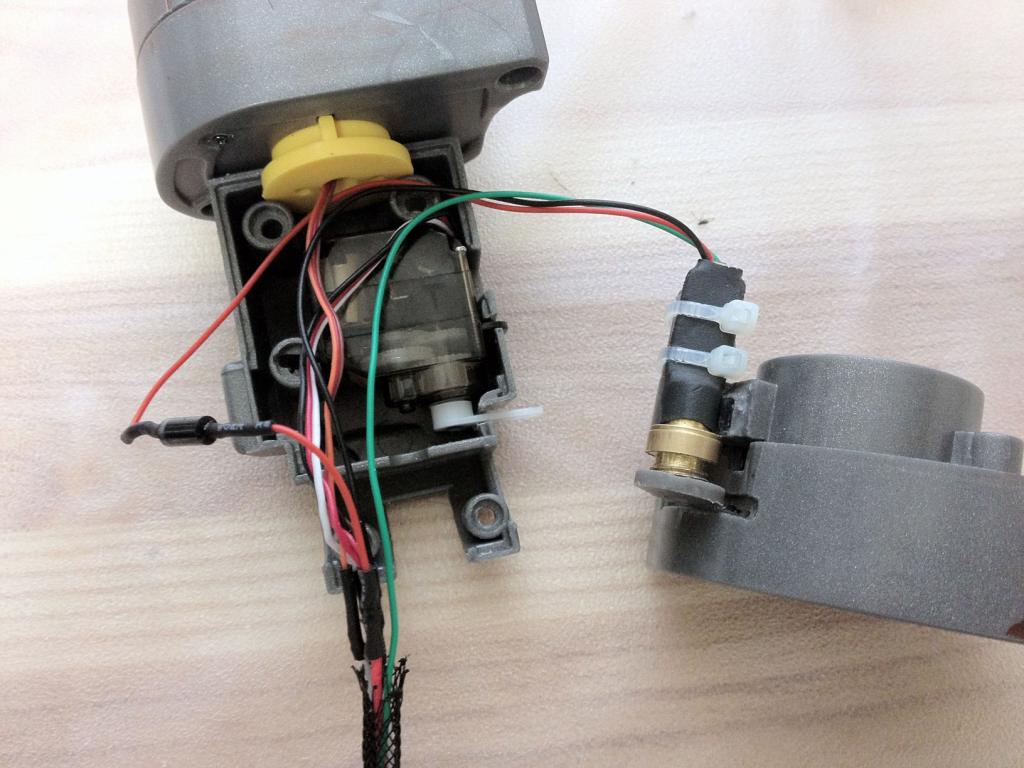
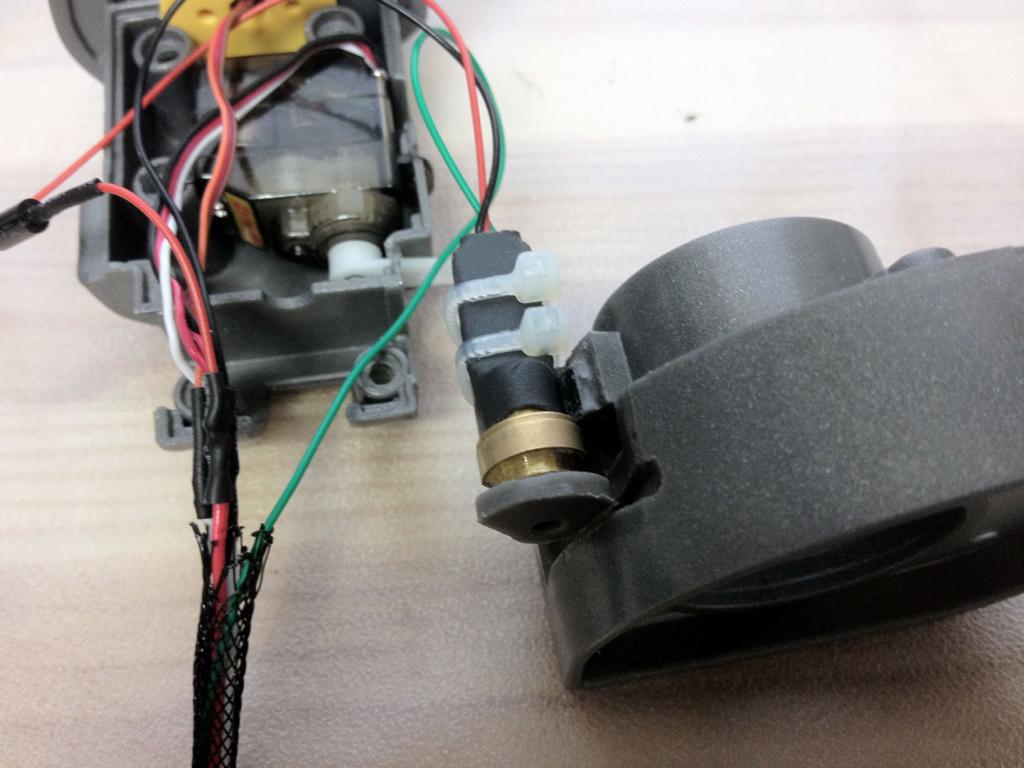
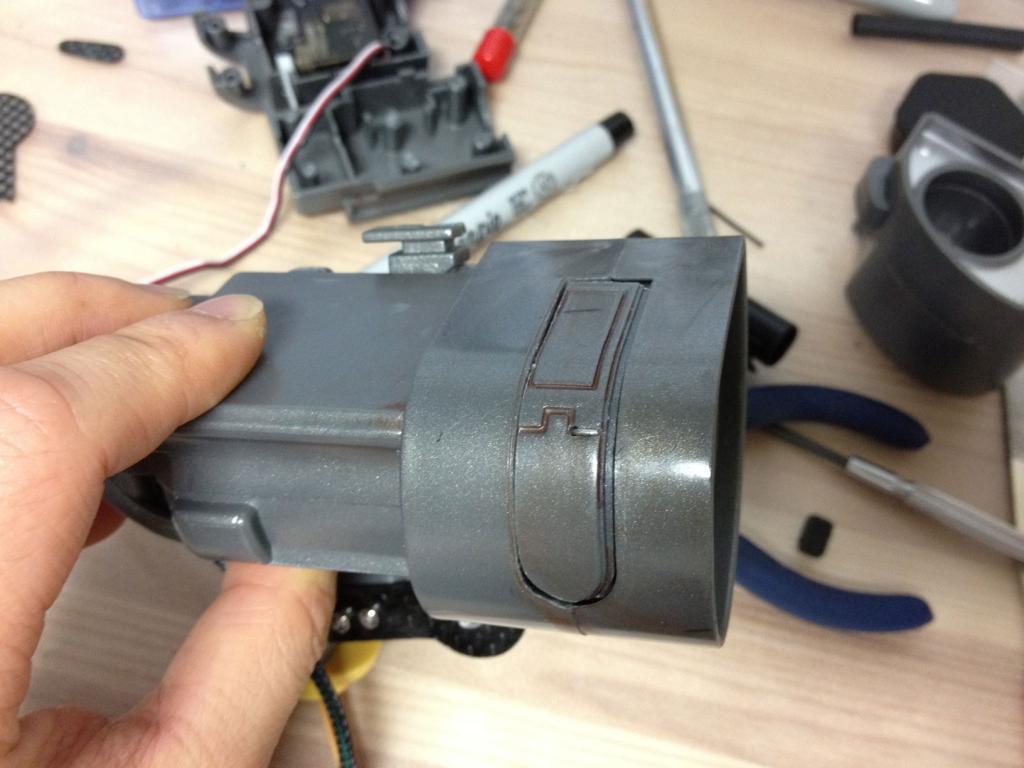
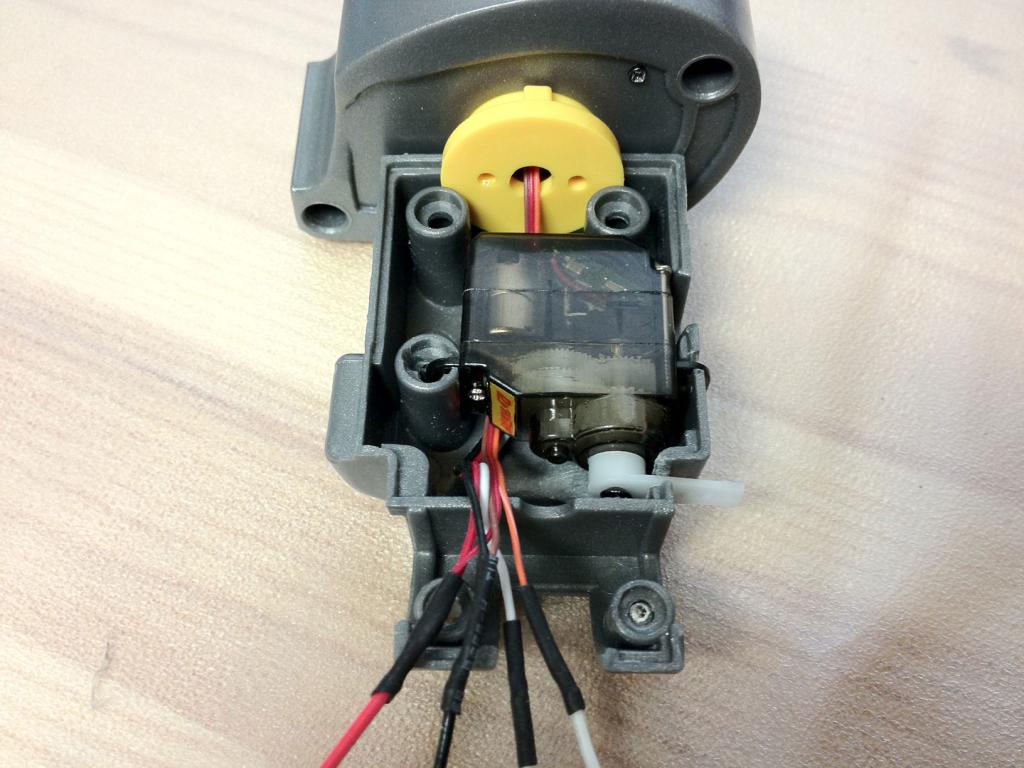
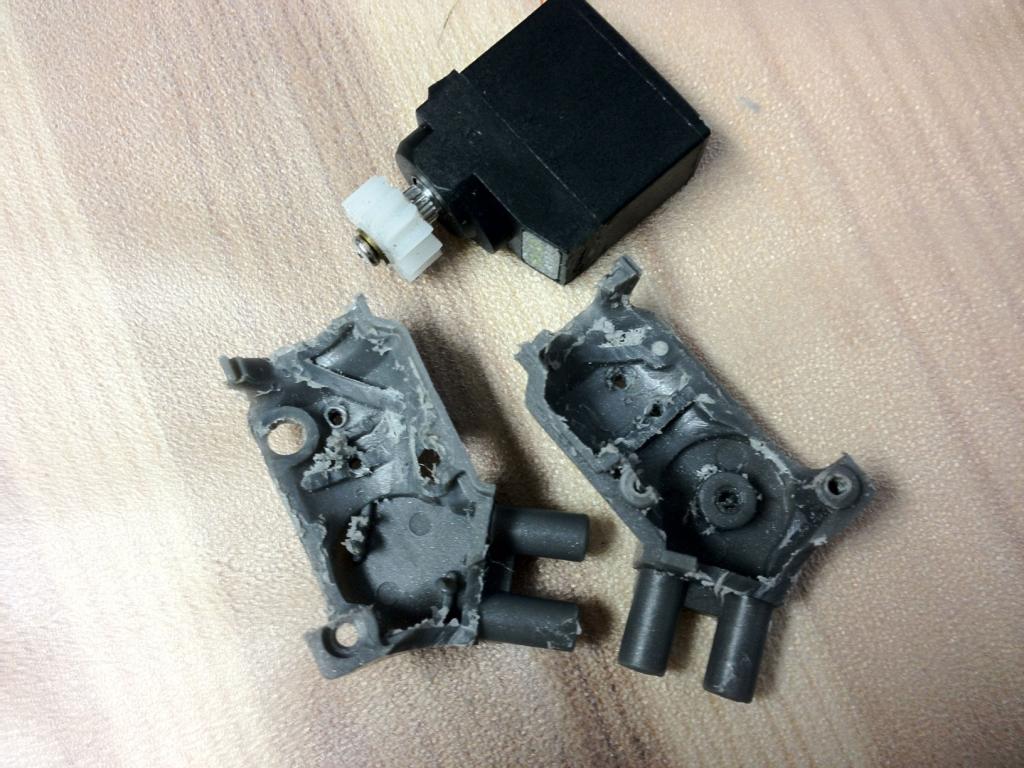
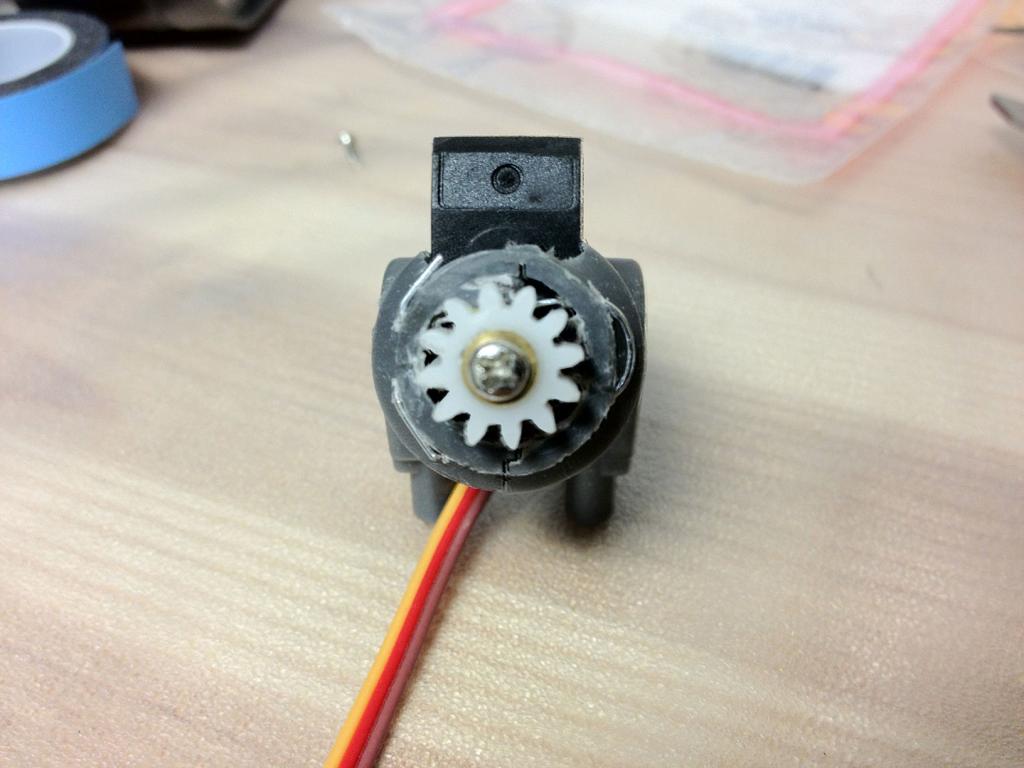
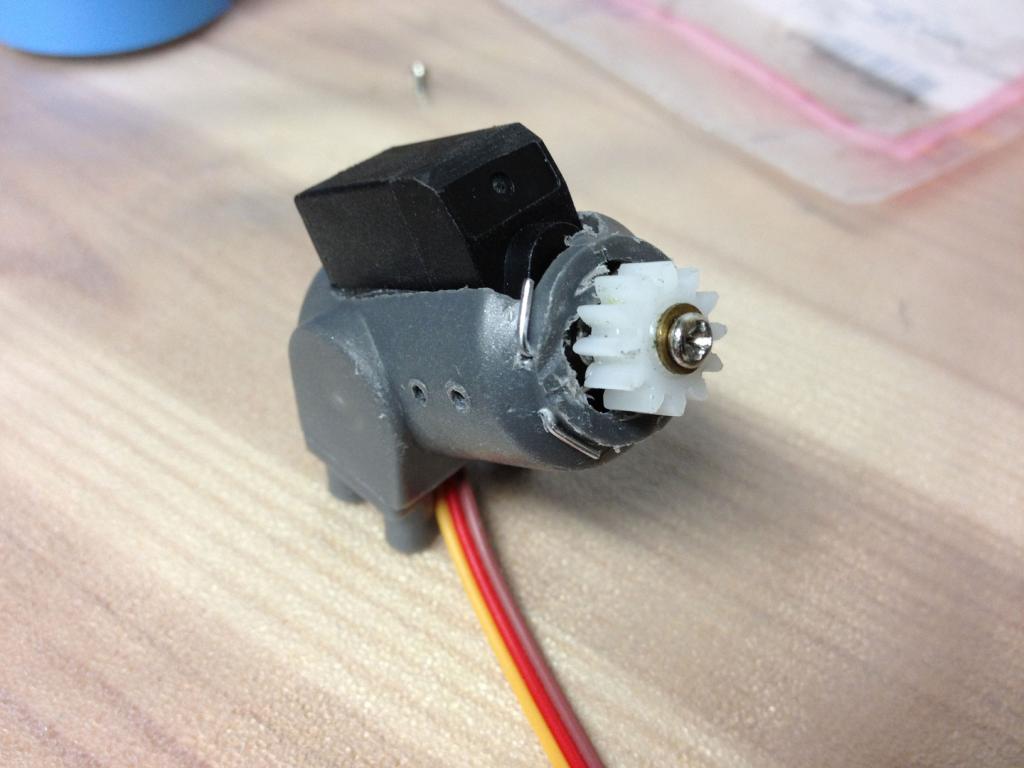
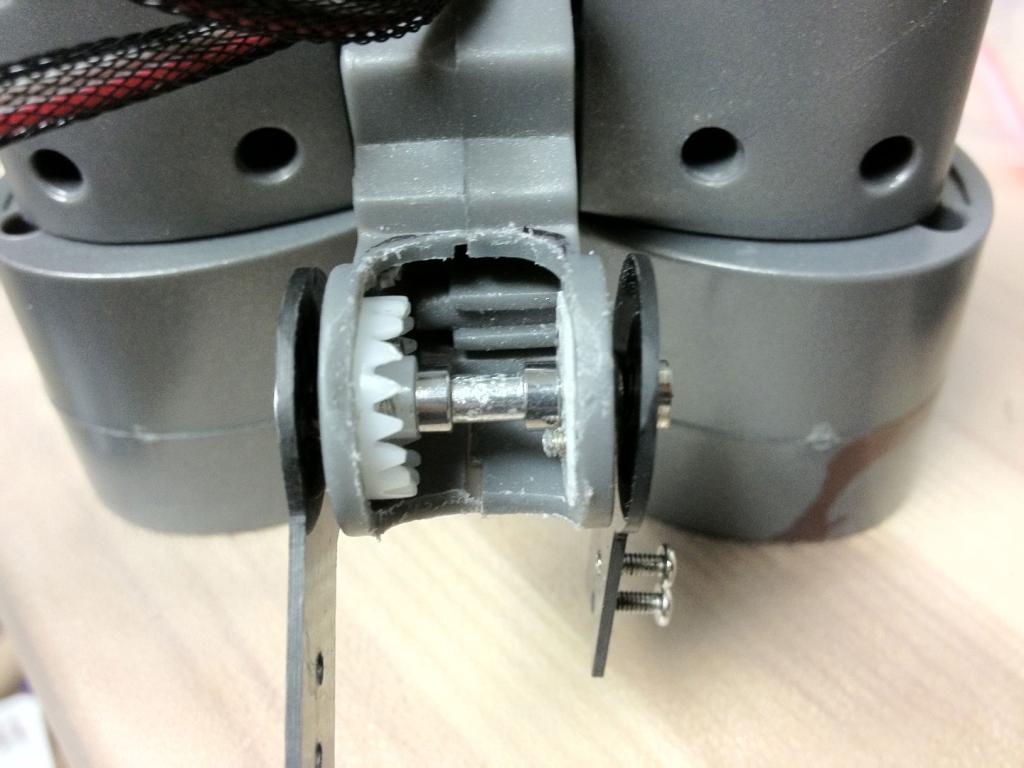
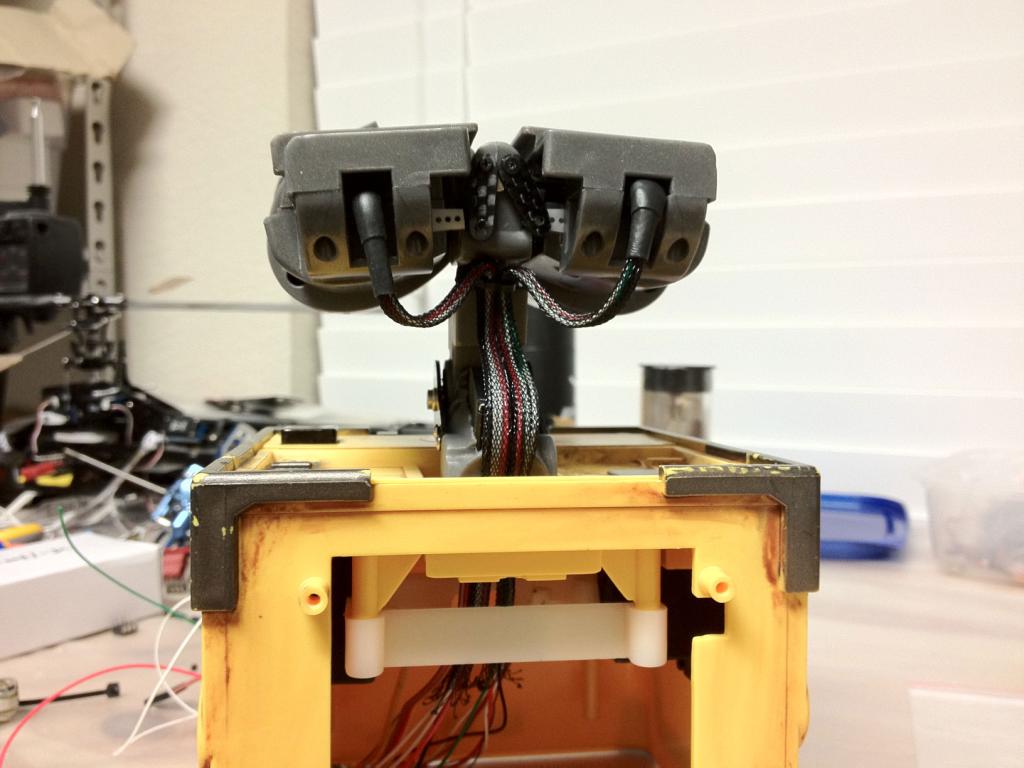
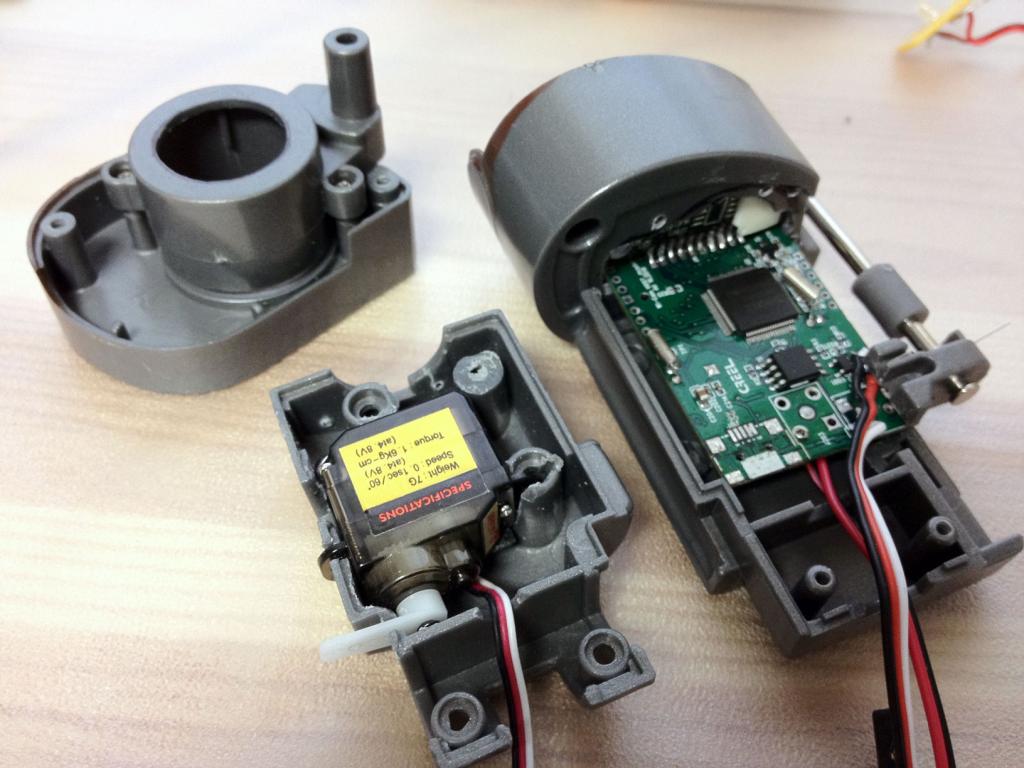
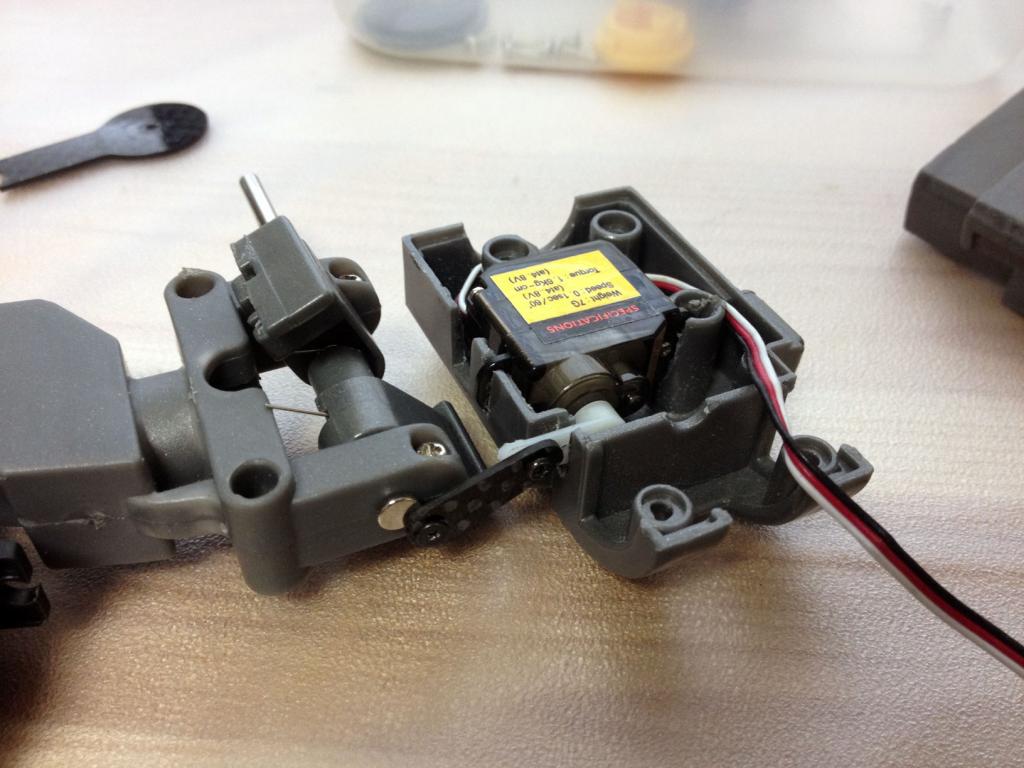
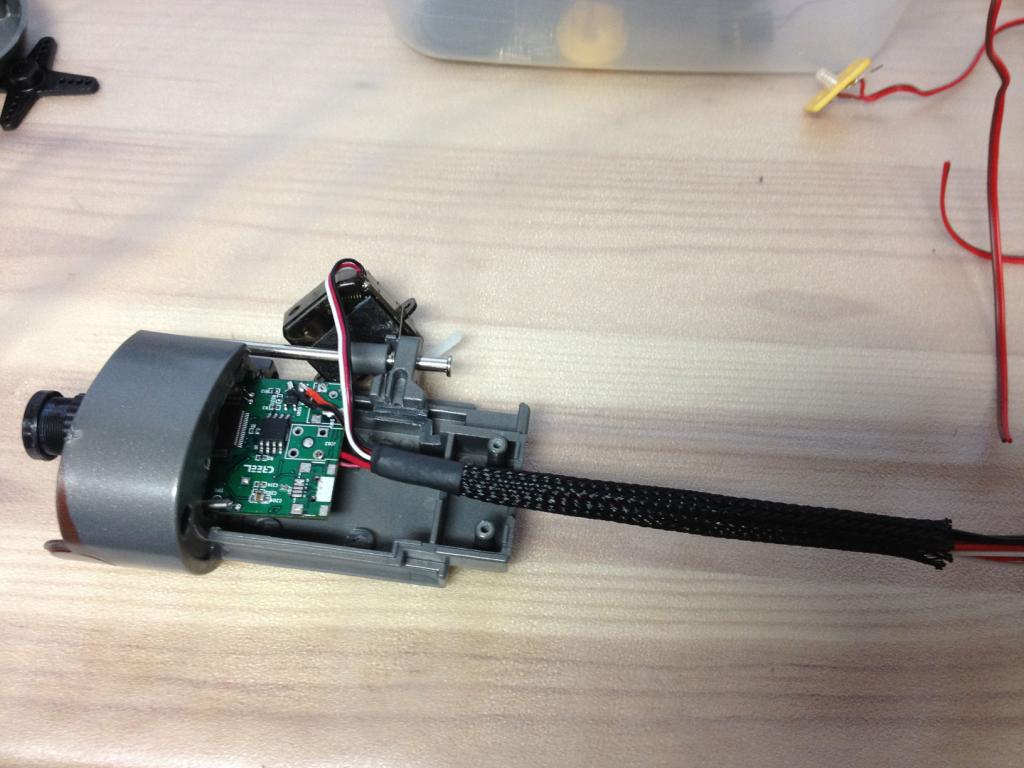
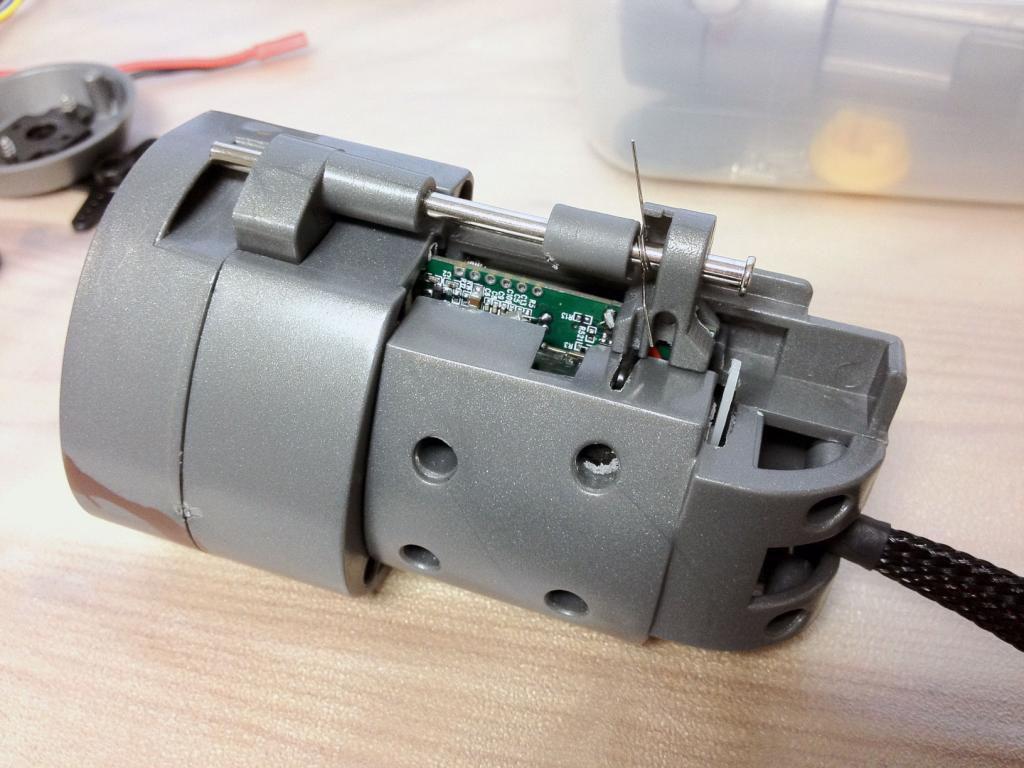
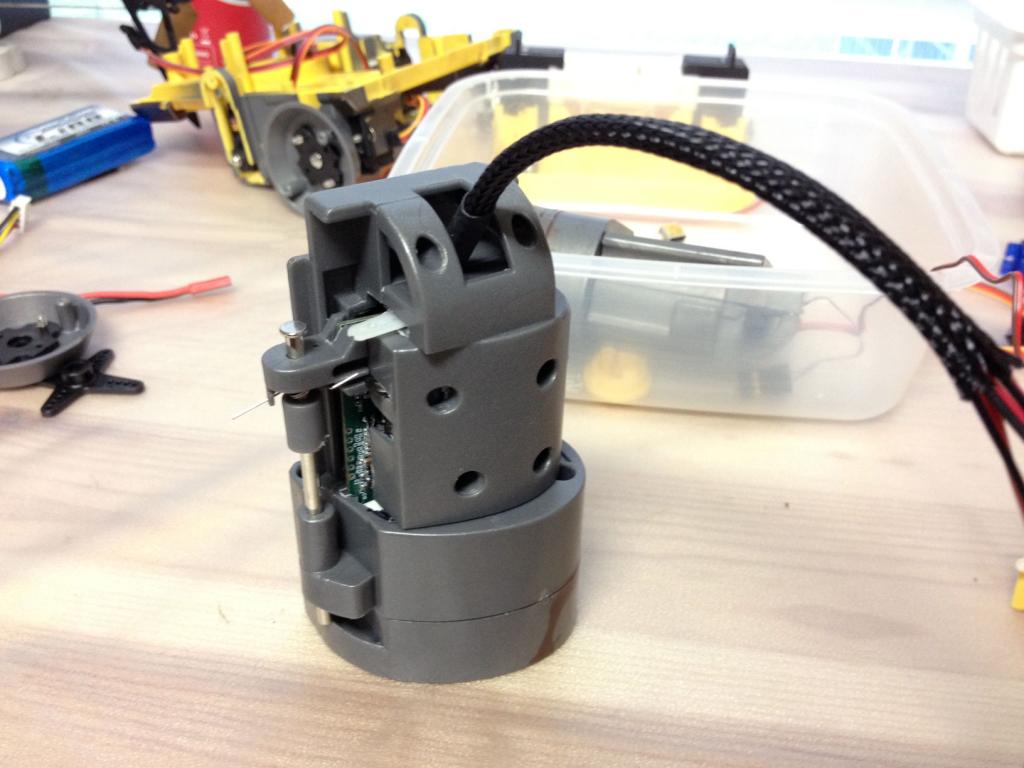
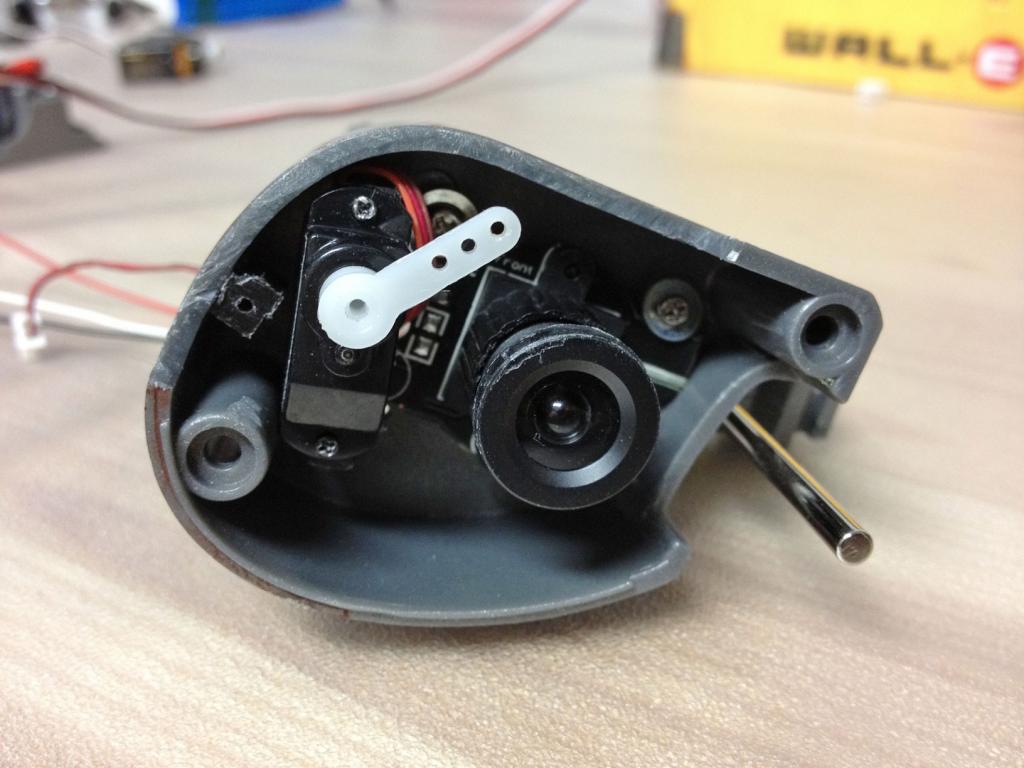
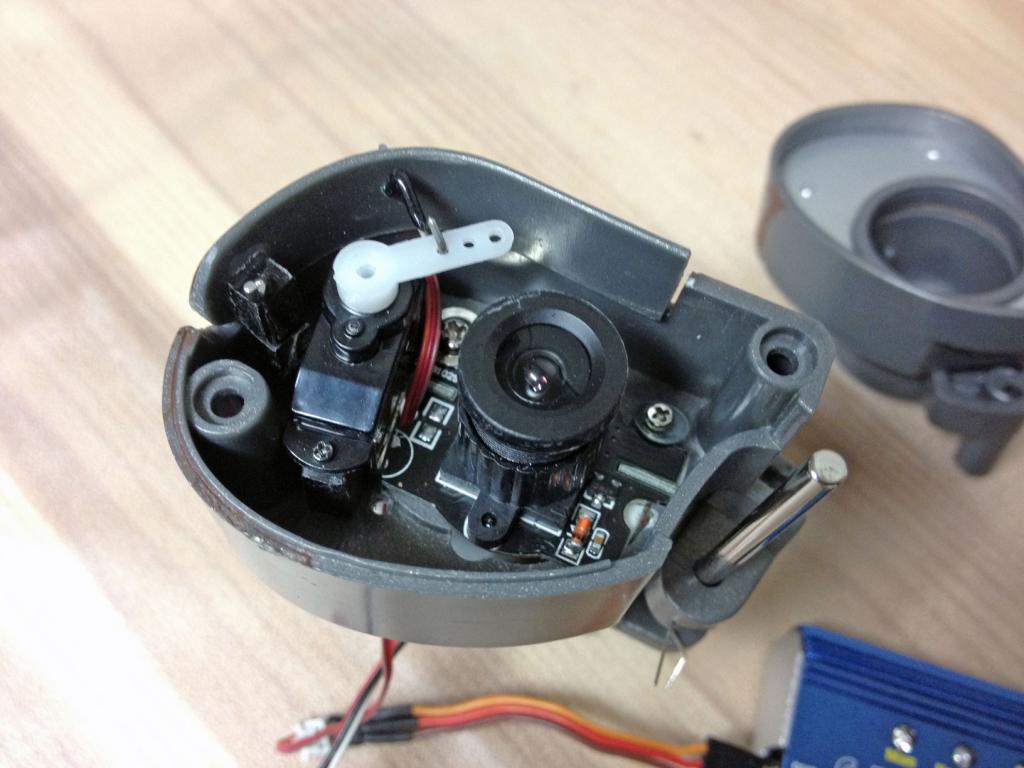
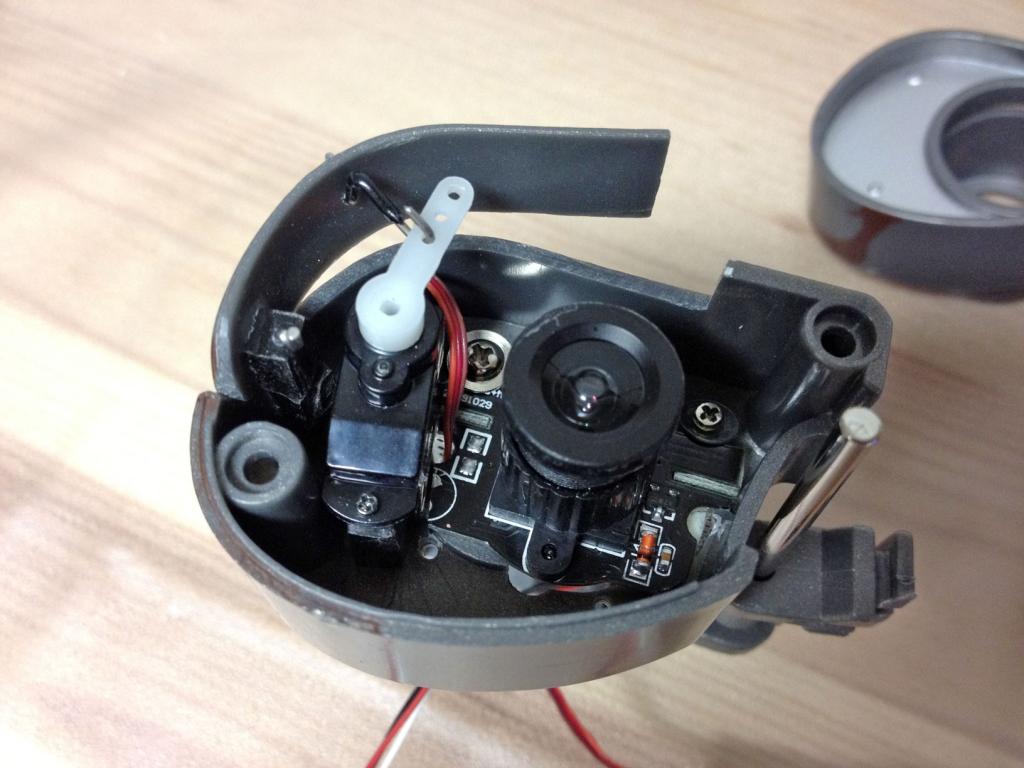
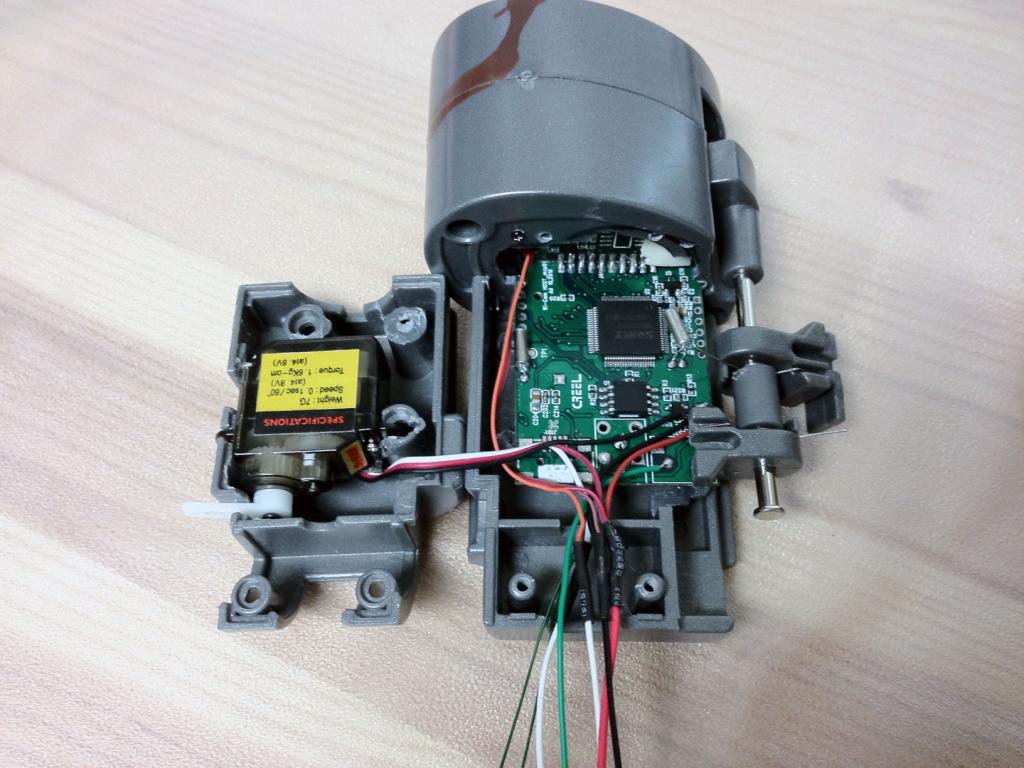
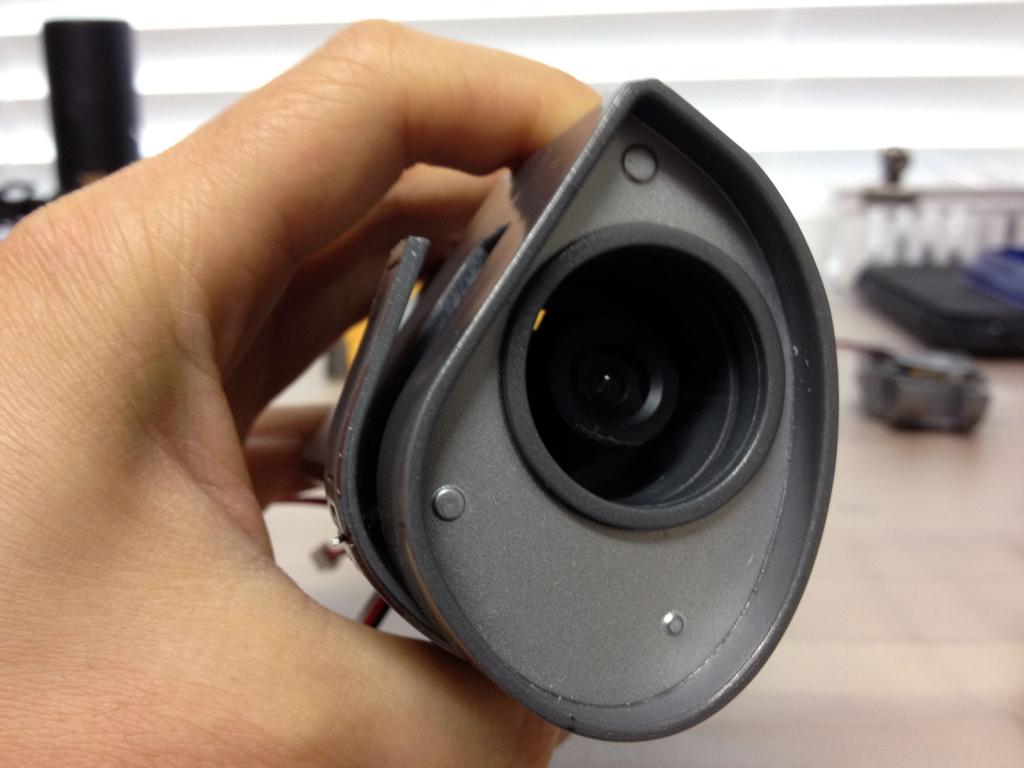
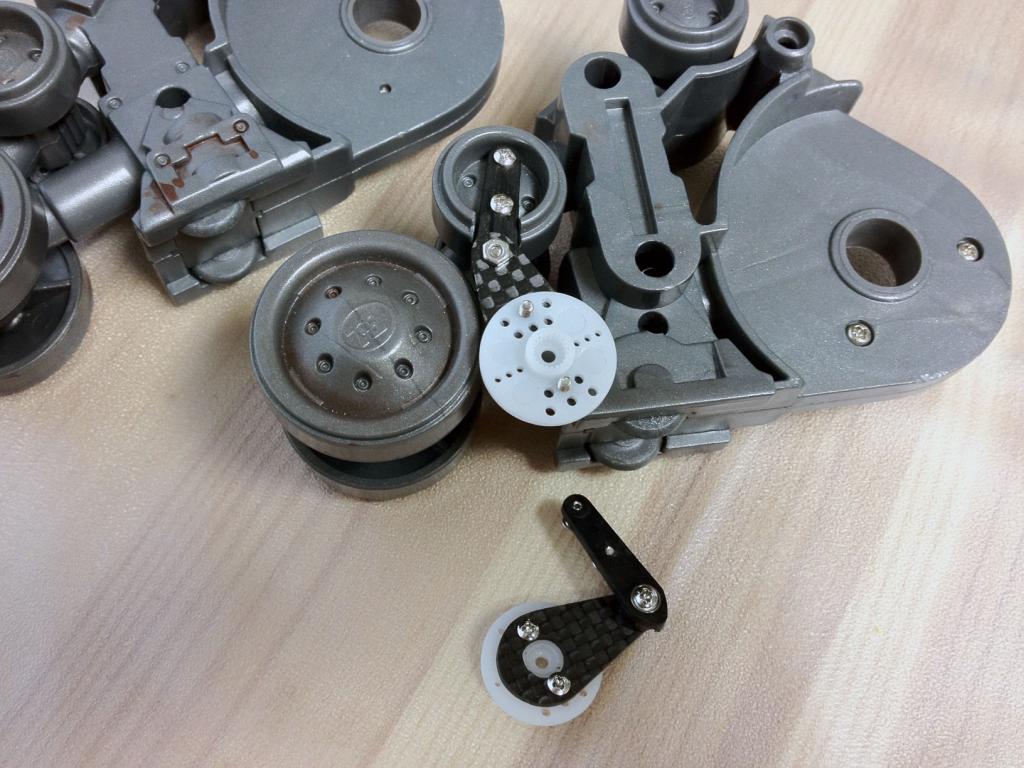
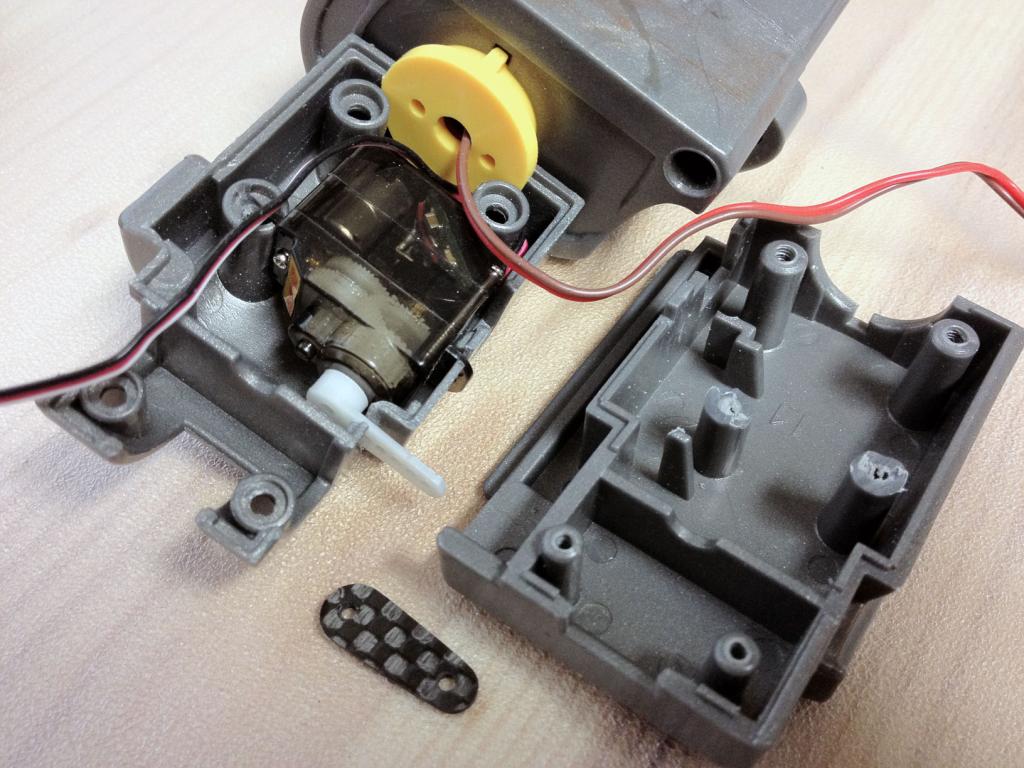
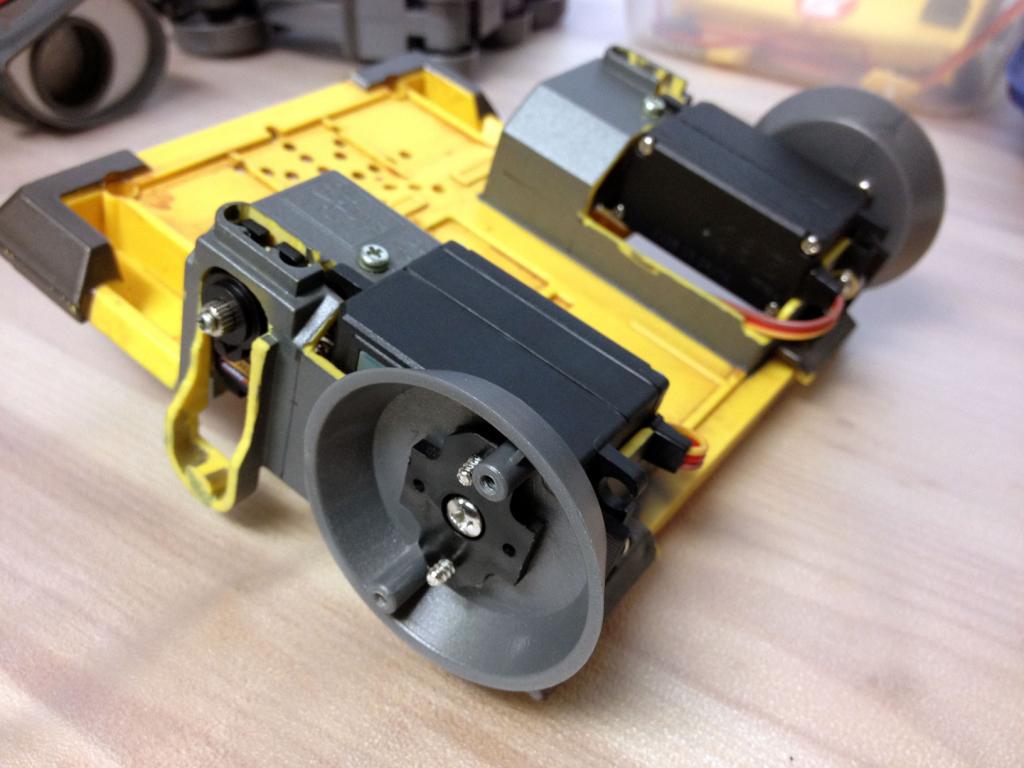
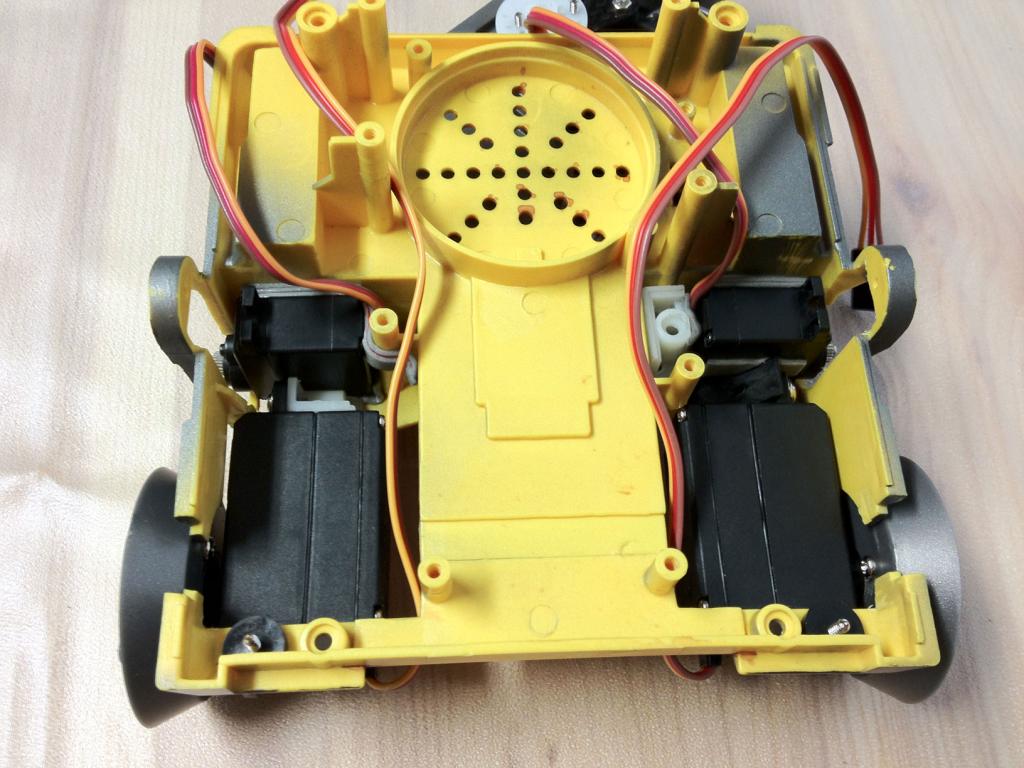
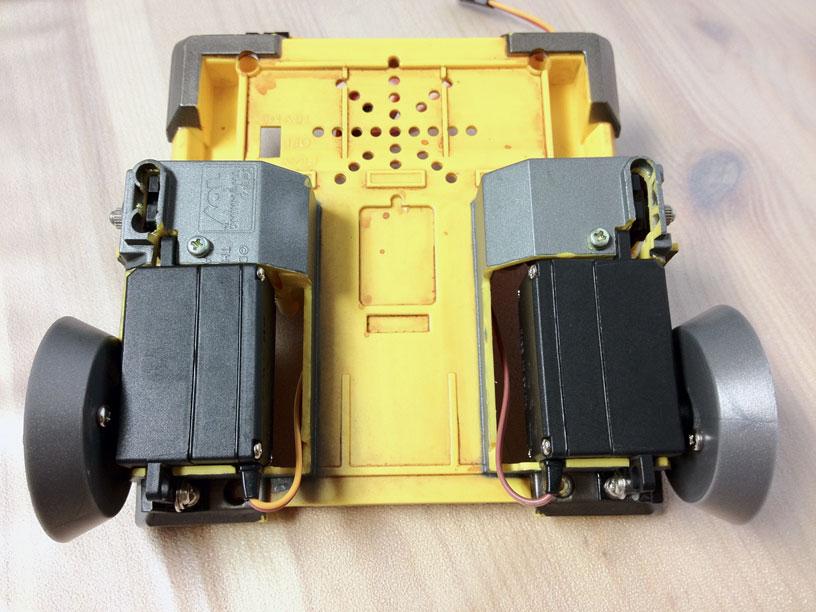
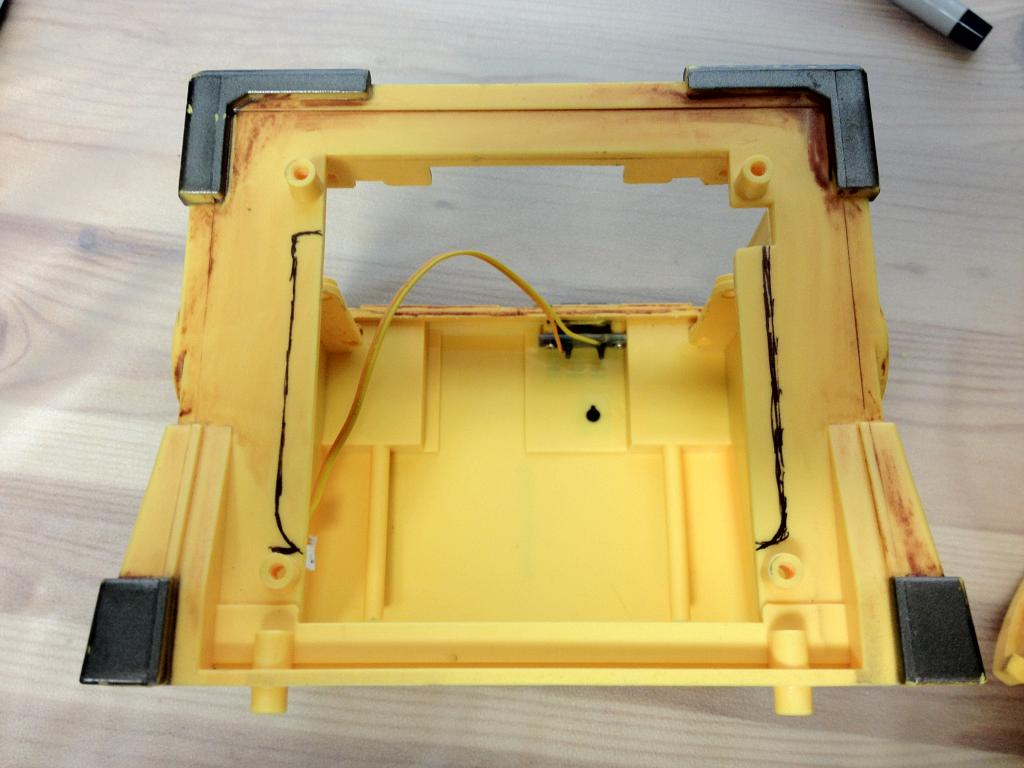
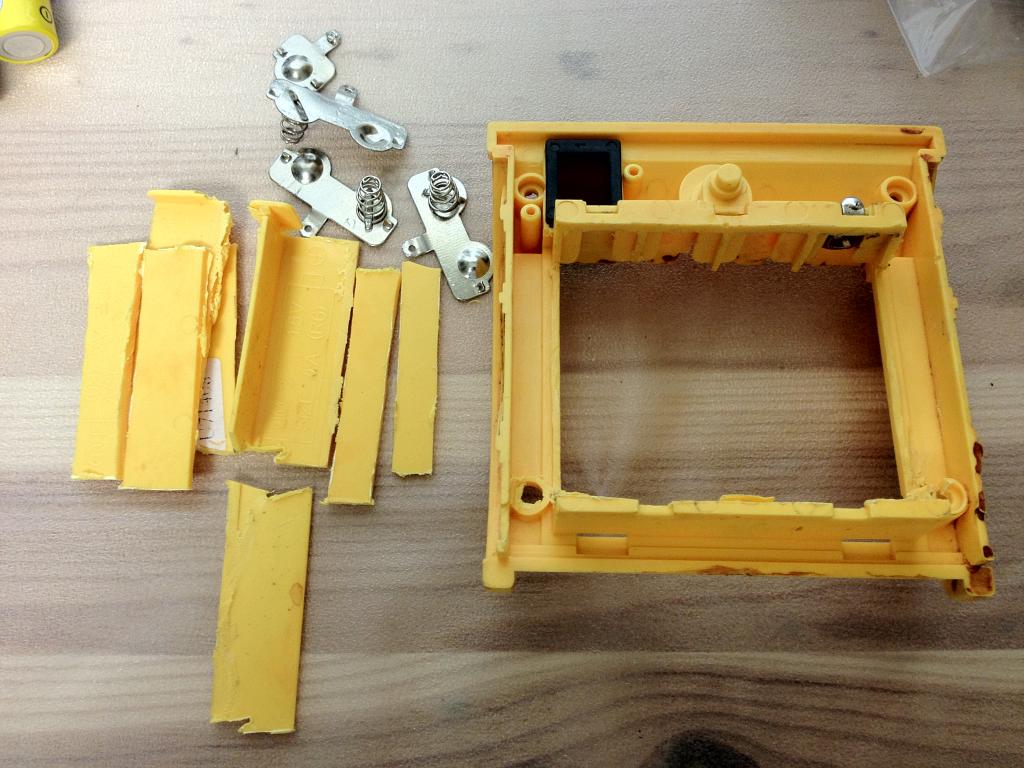
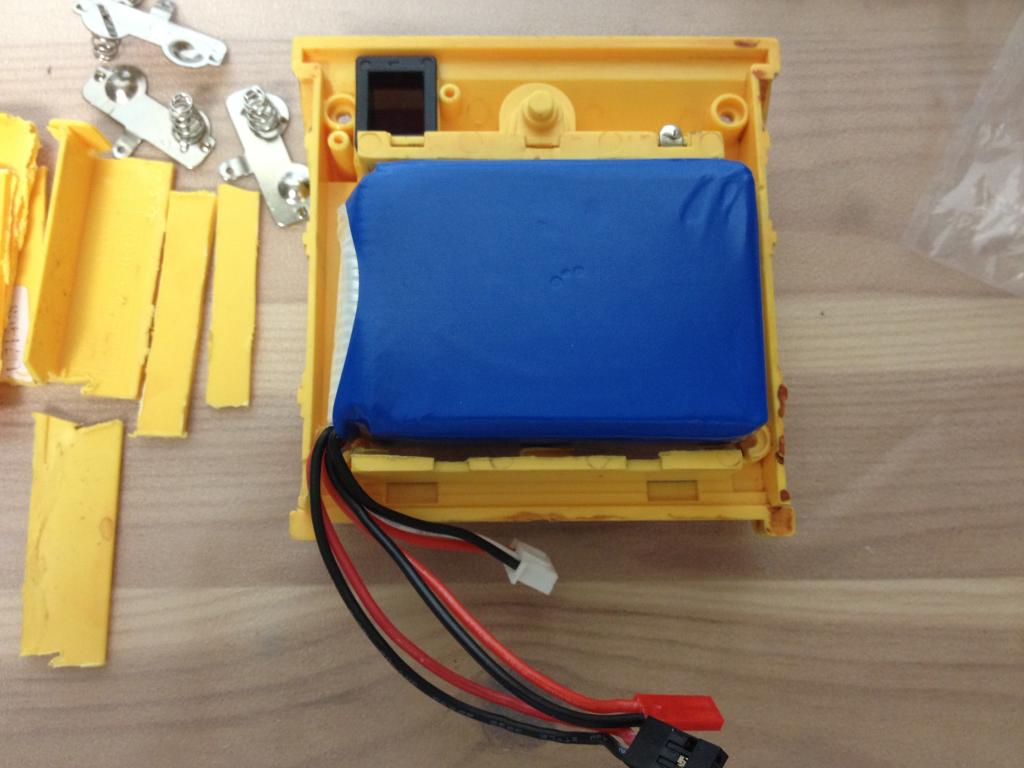
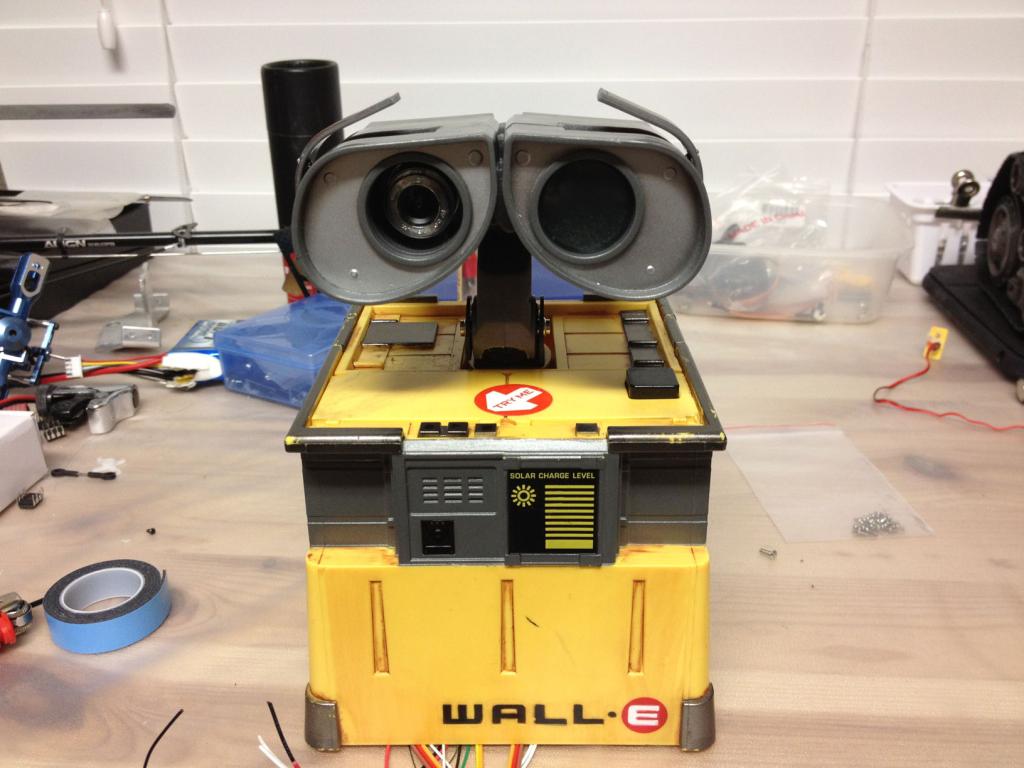
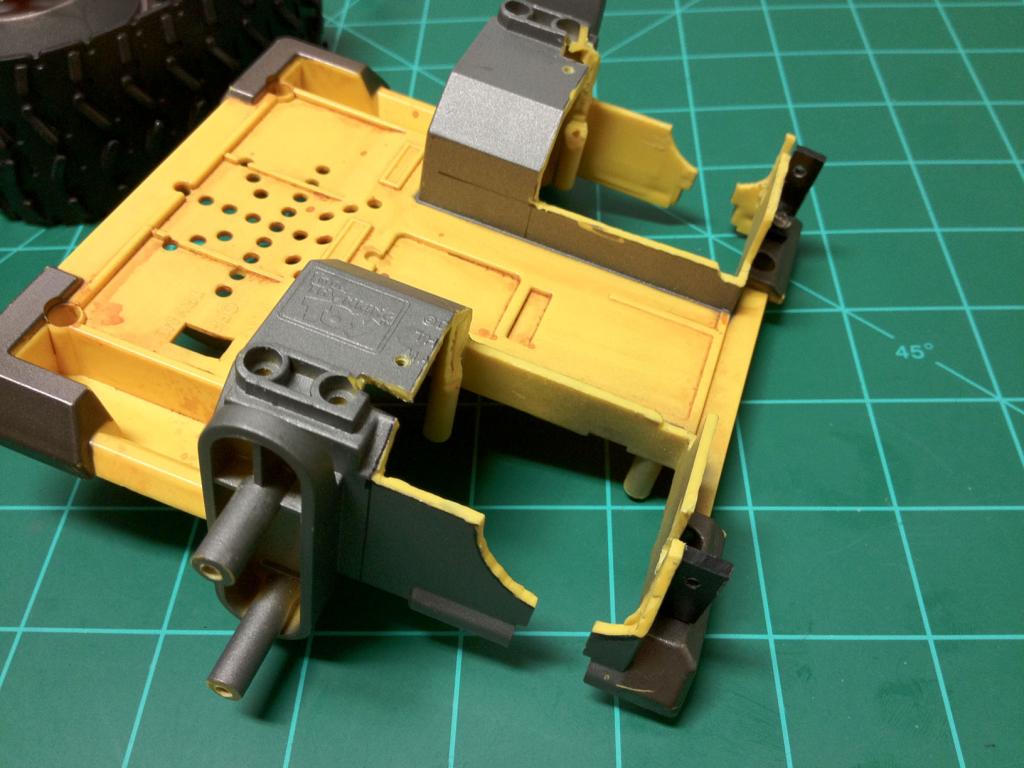
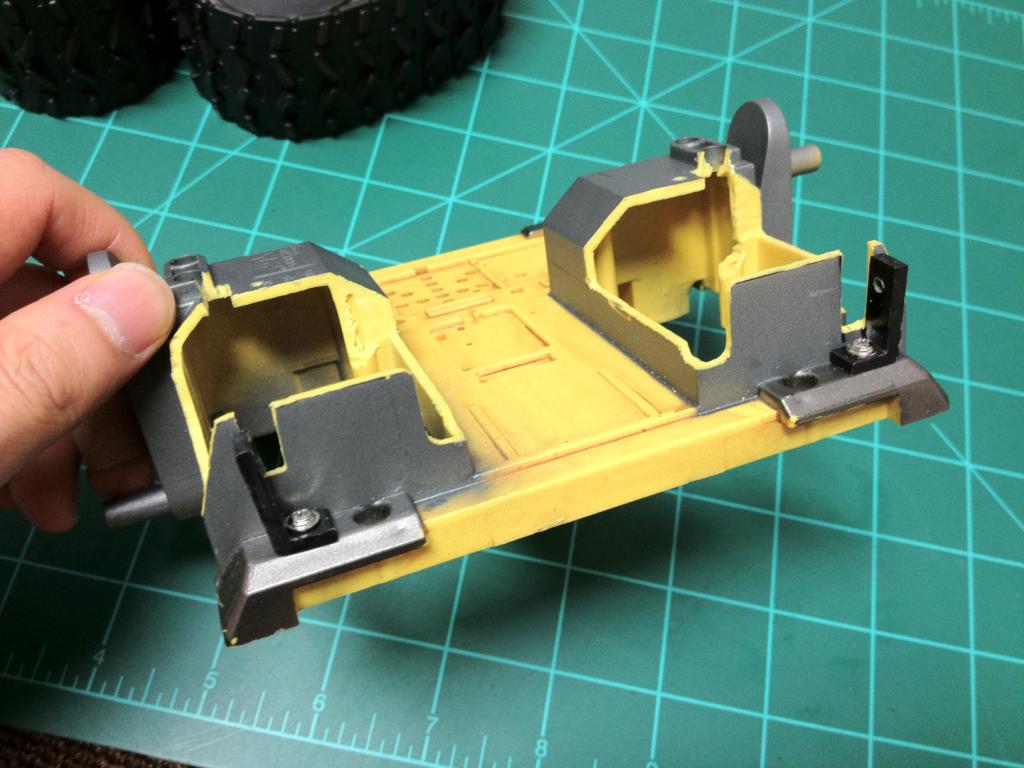
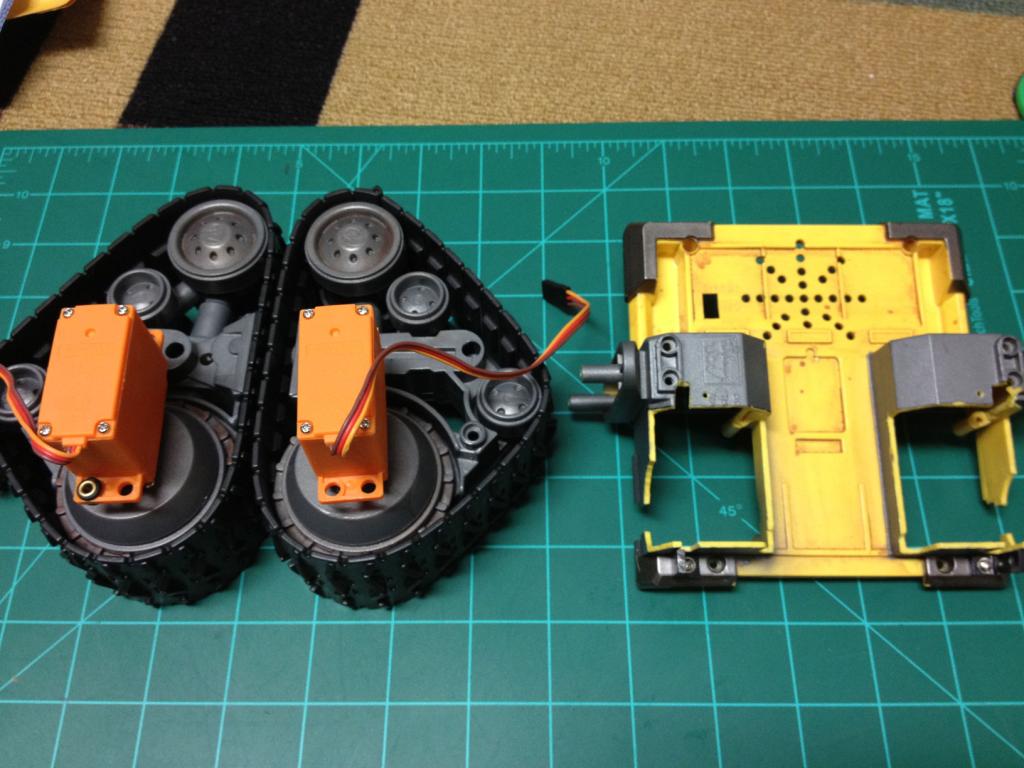
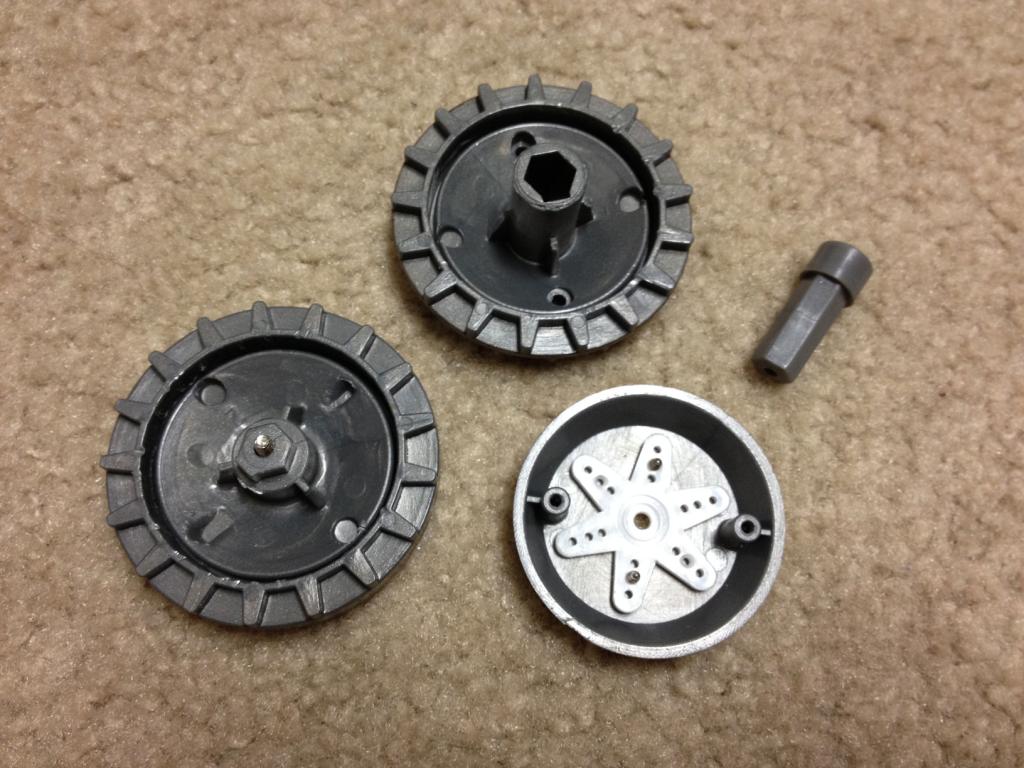
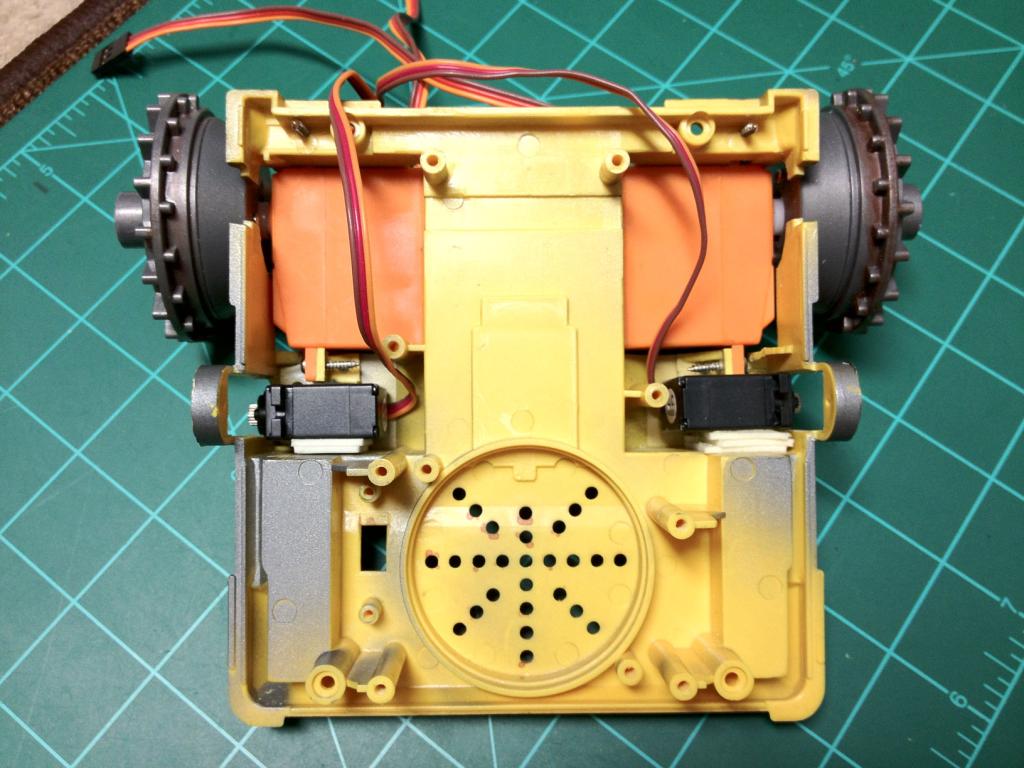
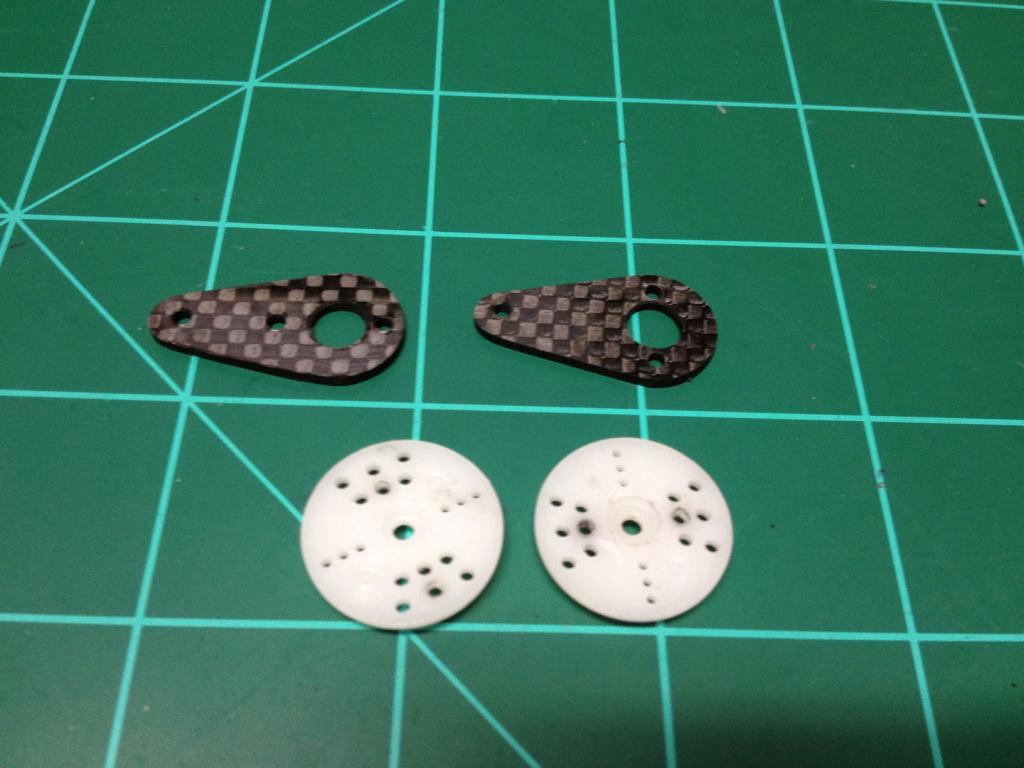
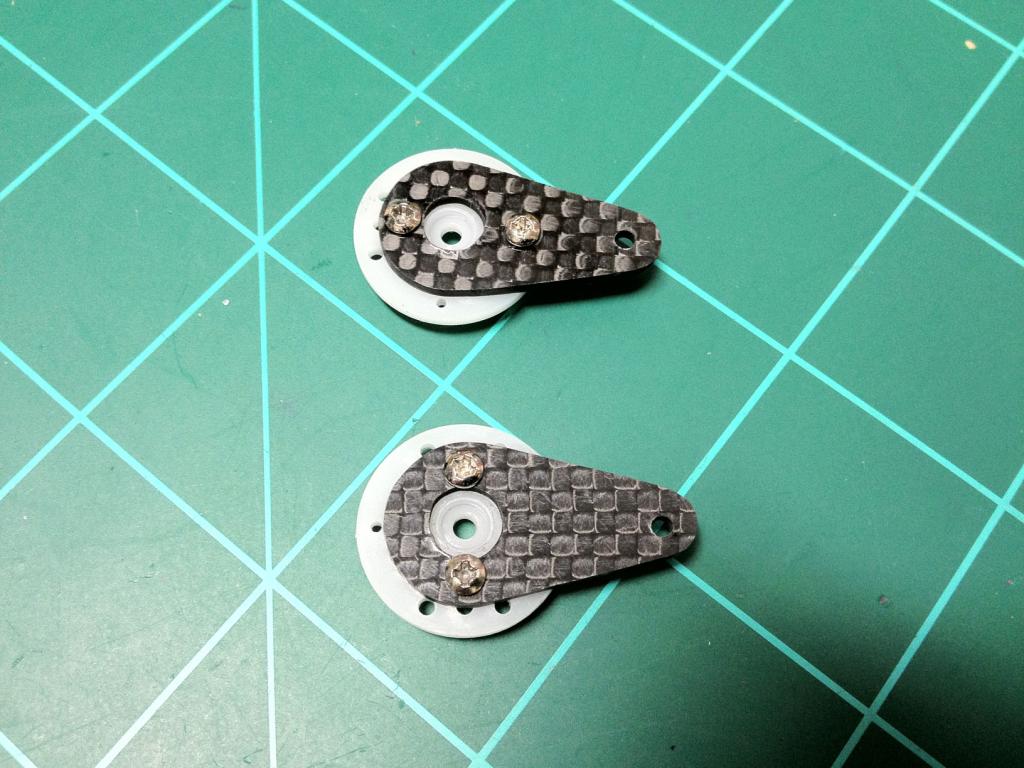
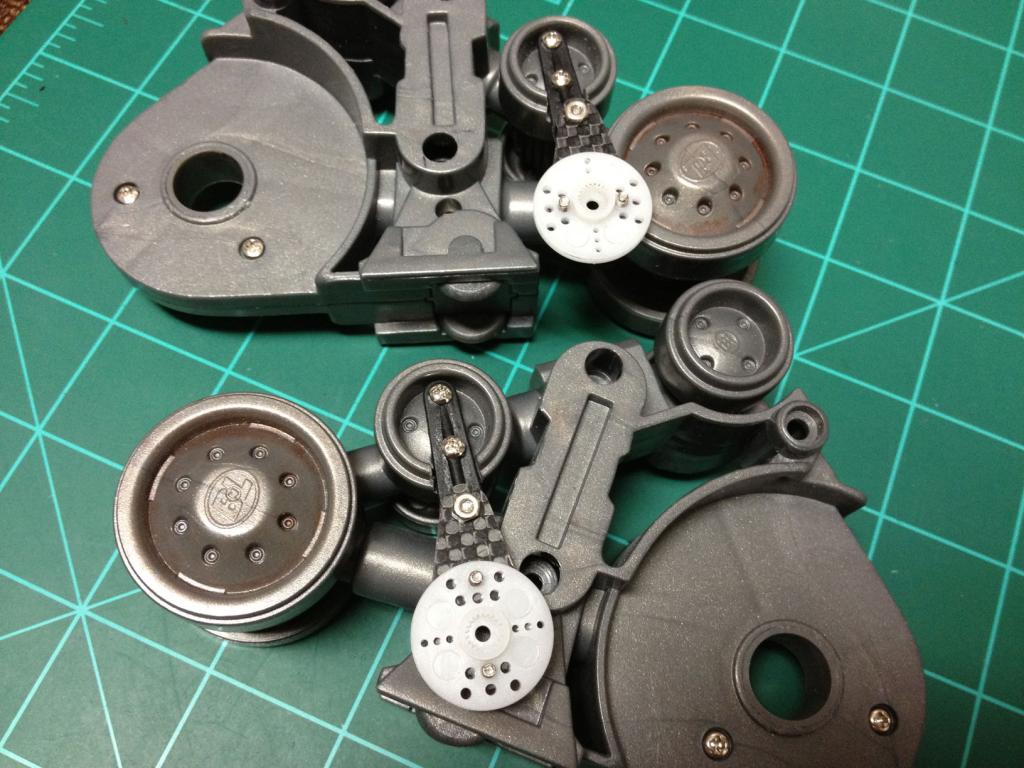
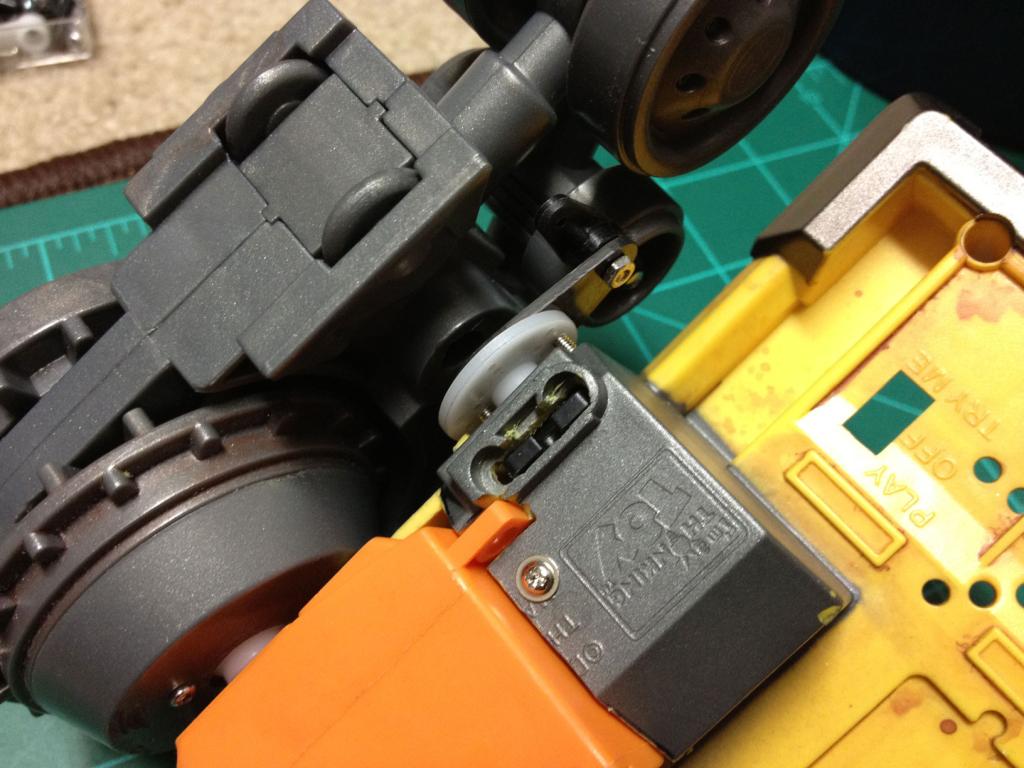
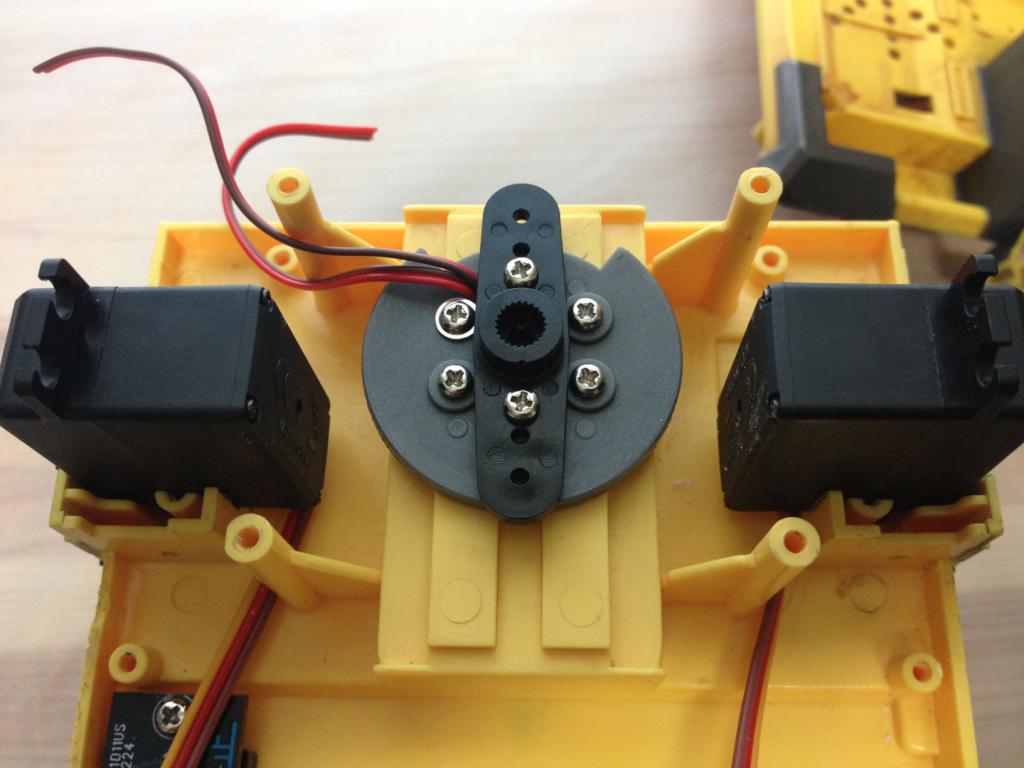
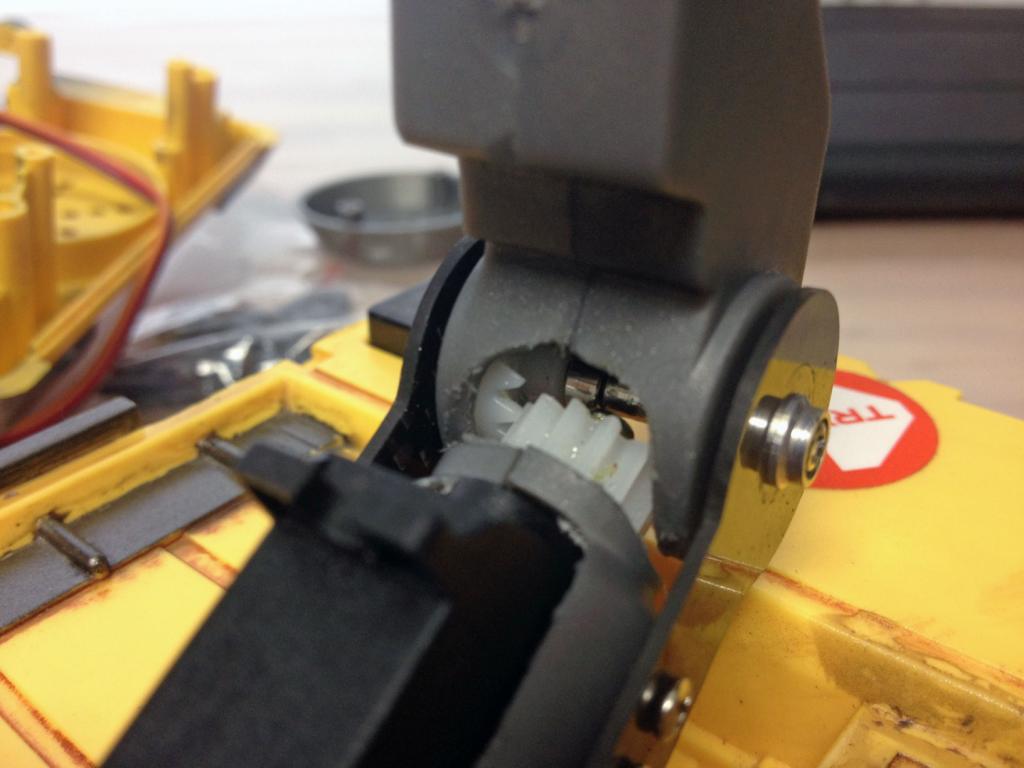
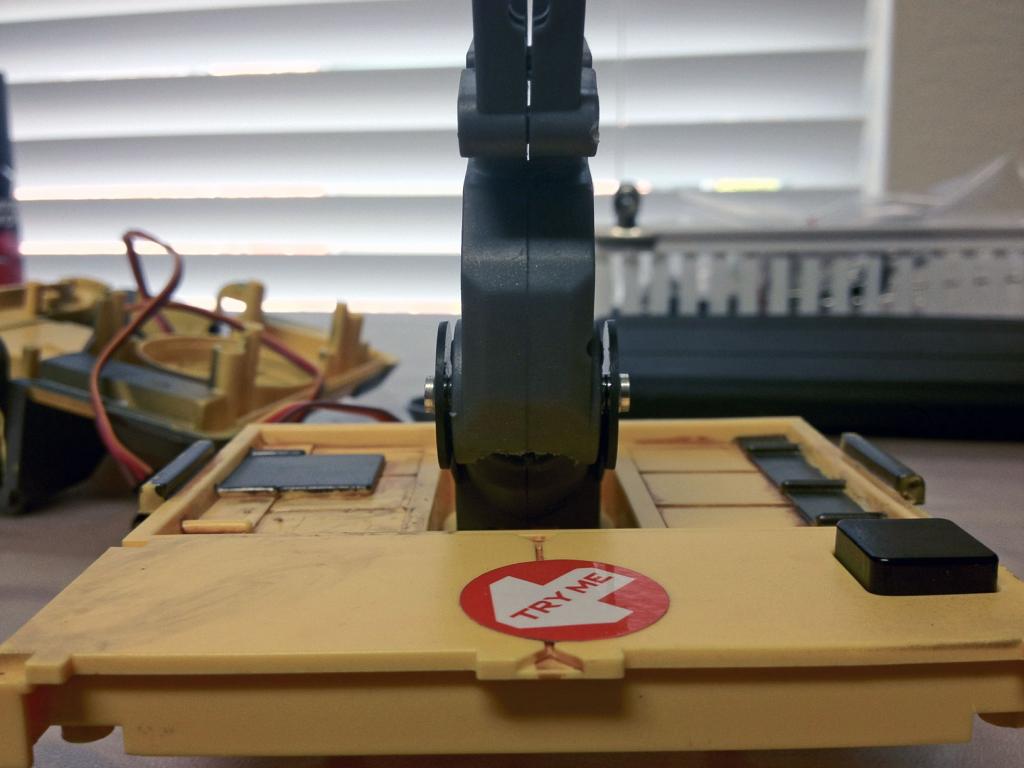
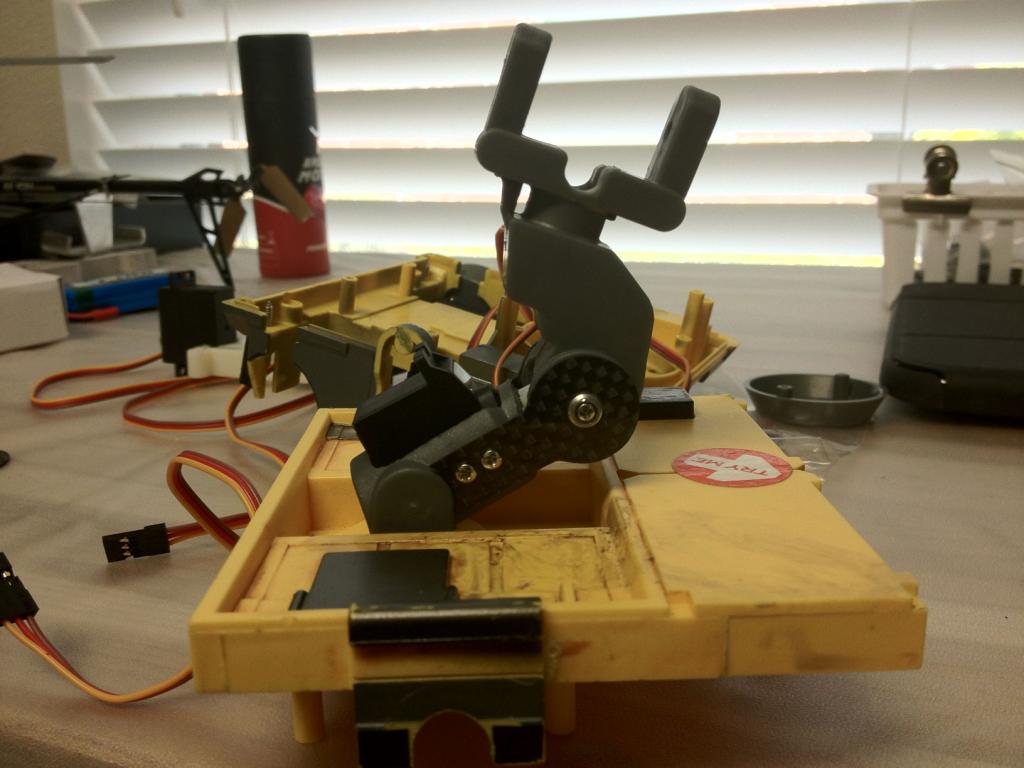
I did some more work on wall-e. I reinforced the hinge for eye's lid with some JB Weld and some other joints, partially finished the other eye, i still got to do a mock up lenses to make both eyes appear to be the same. Then i gotta make a clear lexan cover for each of the eye. While i opened up the neck to make holes for the wires to run down into, i took some pics of the geared tilt part if someone are looking for more details on that part. Then i put him together quickly for a first glance still no arms or wheels yet.