The R7 Droid Project

GotRobbed

USA
robot video thumbnail

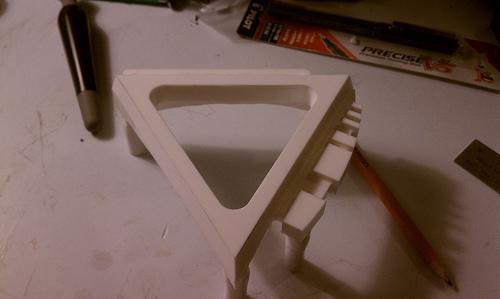
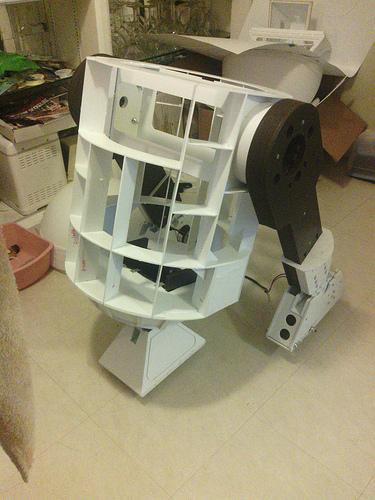
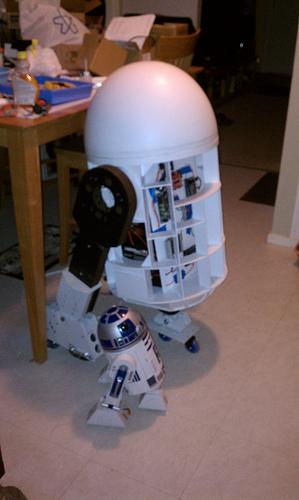
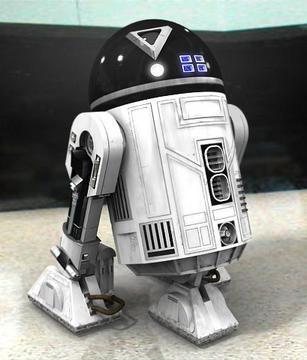
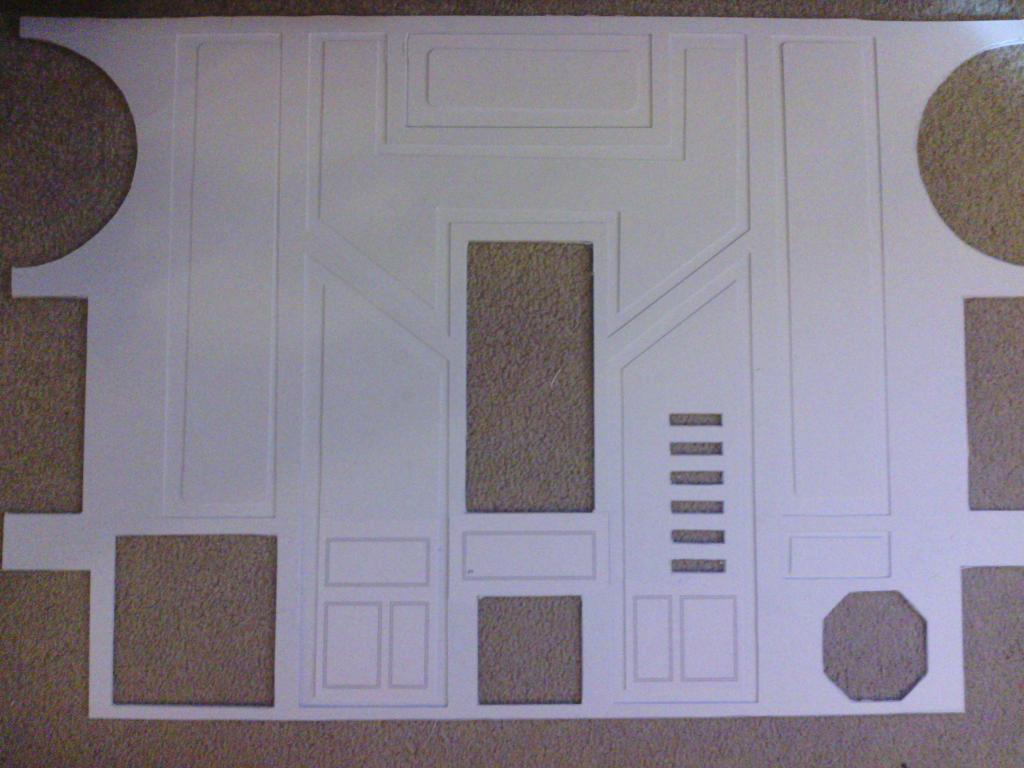
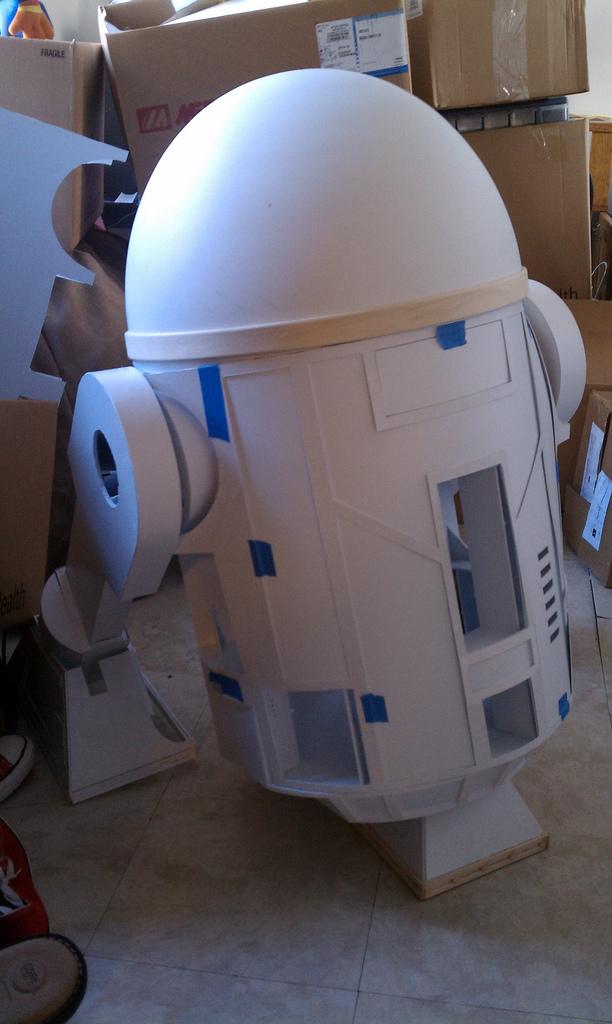
When I say "movie robot" what's the first thing that comes to mind? If you're like most people, you are probably thinking "R2D2!" R2 has become something of a cultural icon, and I was looking for a new hobby. After exploring the EZ-Robot site and tackling my first project, an almost-complete Wall-E. I decided it was time to dive in. After working my way through some of the advanced features that EZ-Robot offers, I began. It seems every day I learn another feature or function from the site, and it has served me well as I've progressed beyond Wall-E. Armed with this new knowledge, I decide to attempt my biggest project yet: a variation of the R2D2 droid, called R7-M1. User-inserted image I began at the beginning of the year with nothing more than the vision in my head. Slowly and surely, I began to collect what I needed. Plans were downloaded, tools were purchased, styrene sheets was ordered. Using the blueprints I had made from the plans, I began to cut the styrene sheets into the feet skin, frame and legs using an Exacto knife. User-inserted image User-inserted image User-inserted image User-inserted image And how is the EZ-B controller being used in my project? I plan use to the growing features of EZ-B, with its own power supply in combination with an Xbox wireless controller to control the droid's sound and movement. User-inserted image User-inserted image

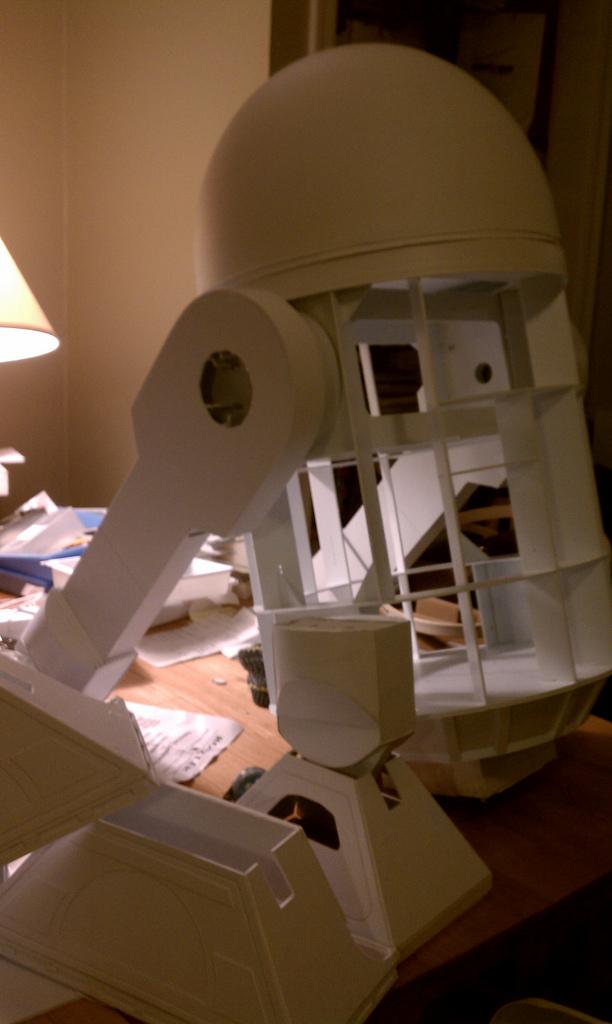
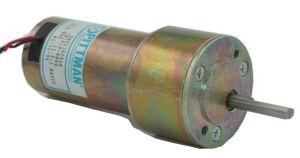
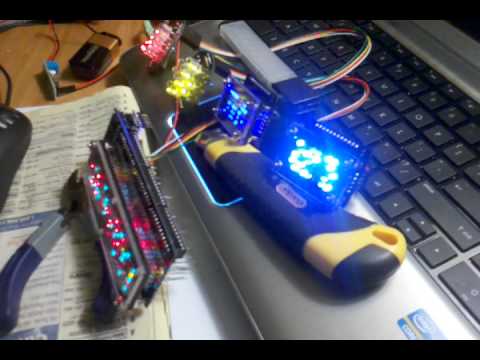
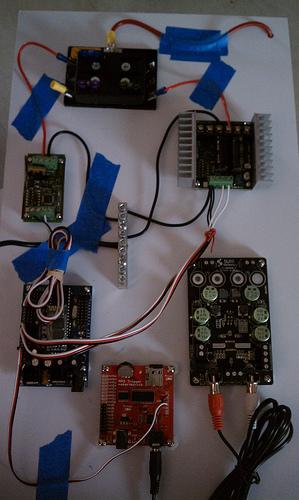
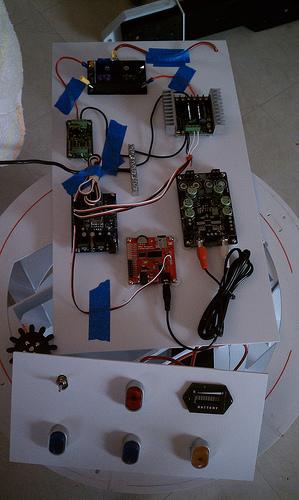
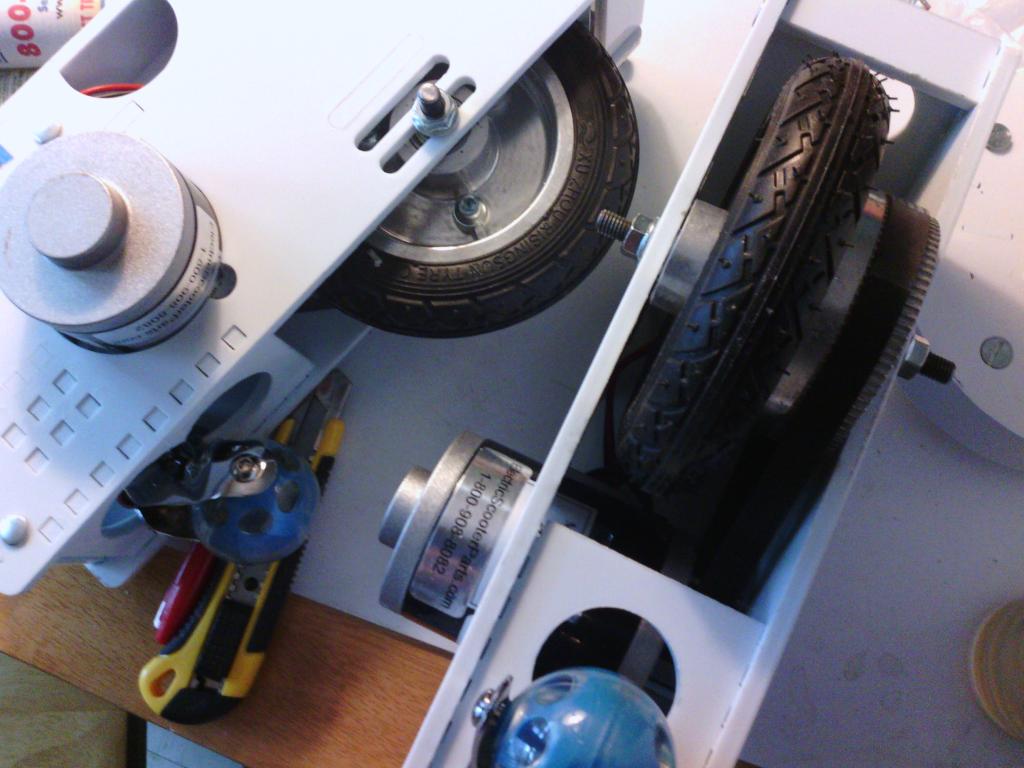
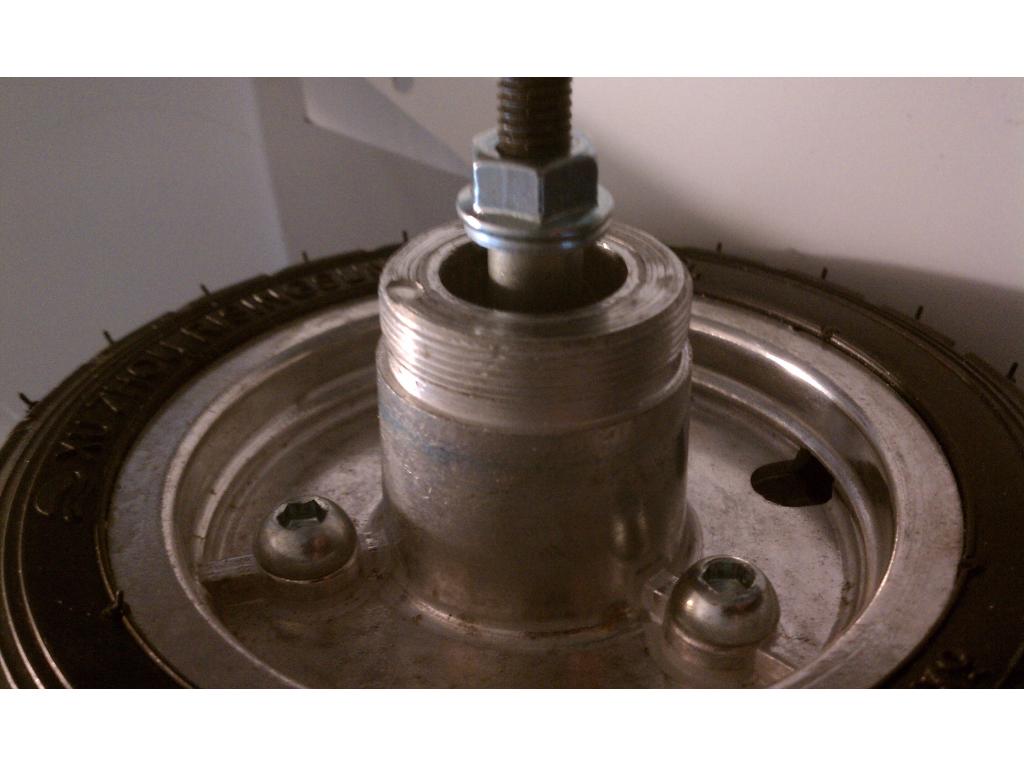
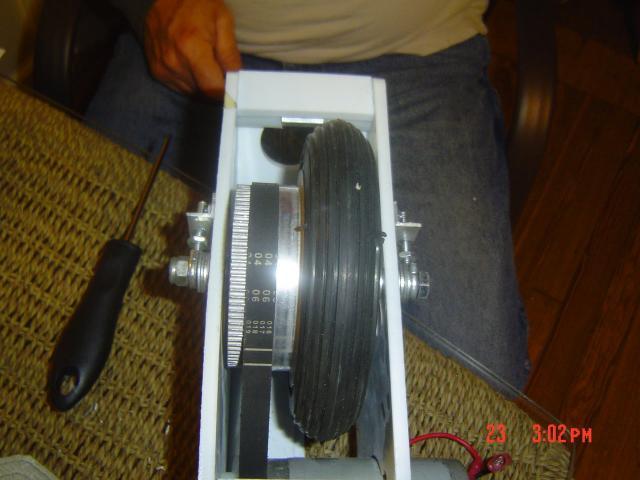
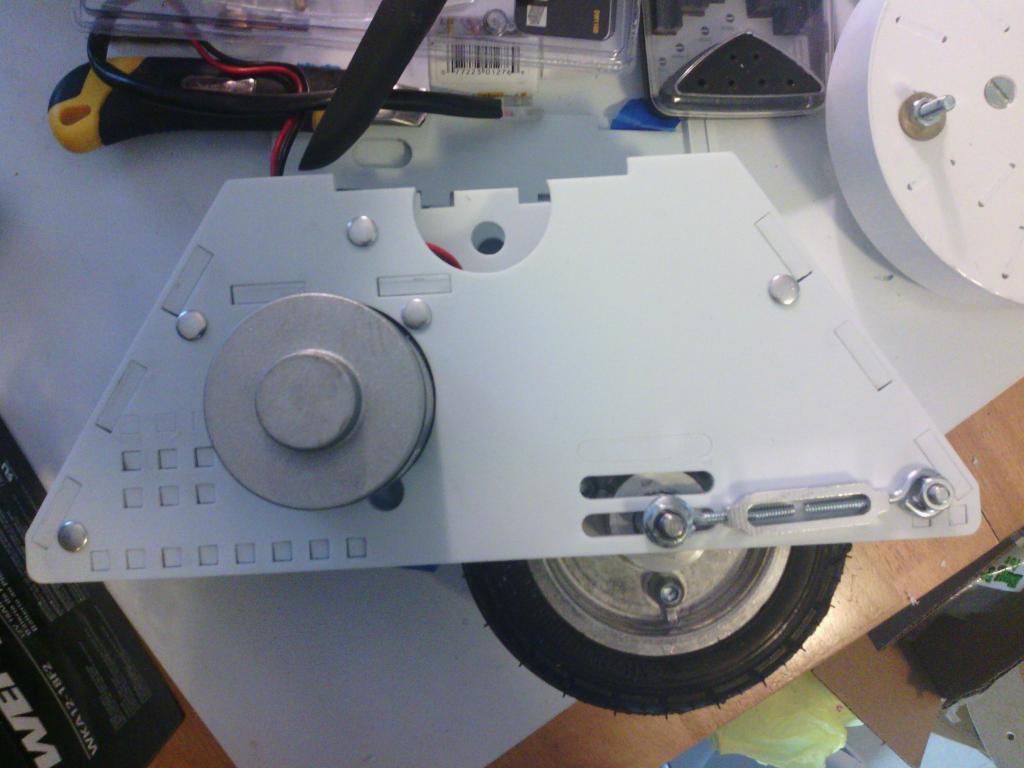
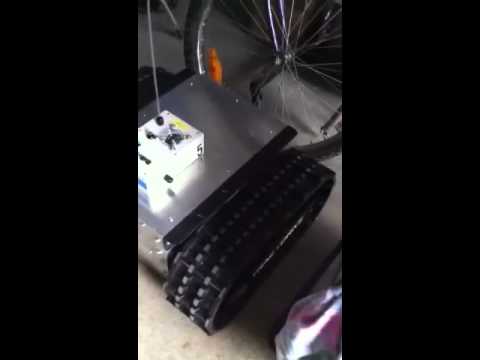
A Syren 10 motor controller, powered by a 12 volt battery, is used to provide movement to the dome/head. Another two 12 volt batteries are powering two scooter motors, which are controlled by a Sabertooth 2x25 motor controller. User-inserted image User-inserted image User-inserted image

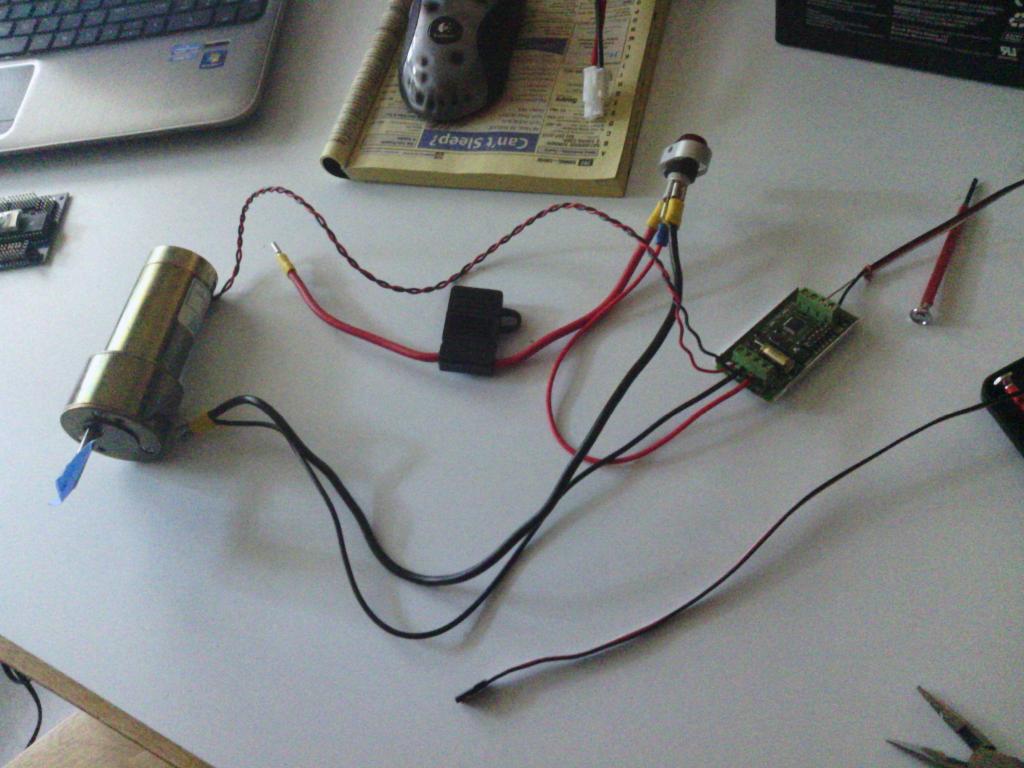
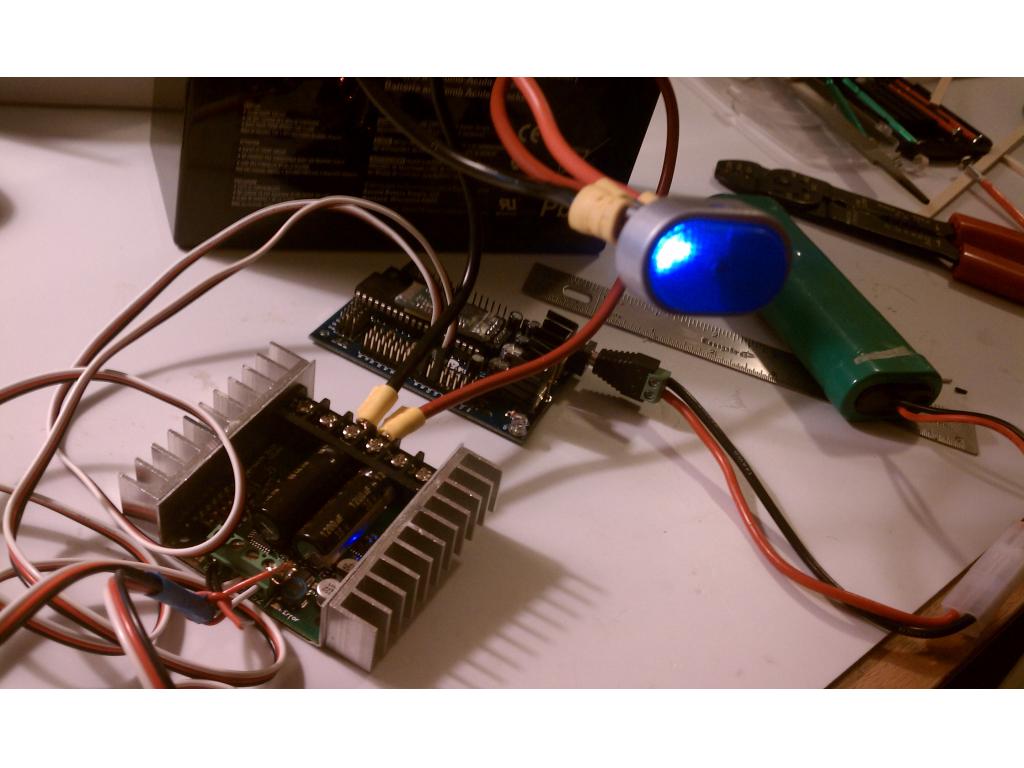
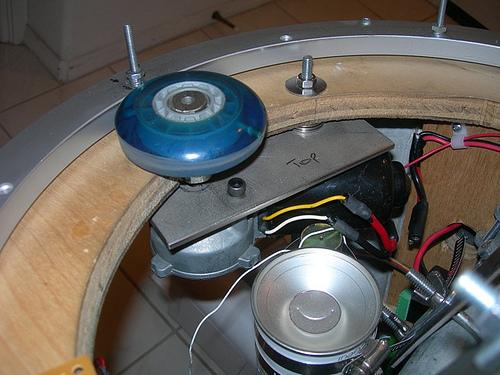
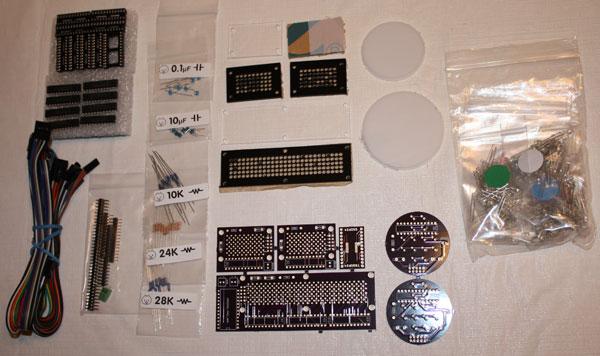
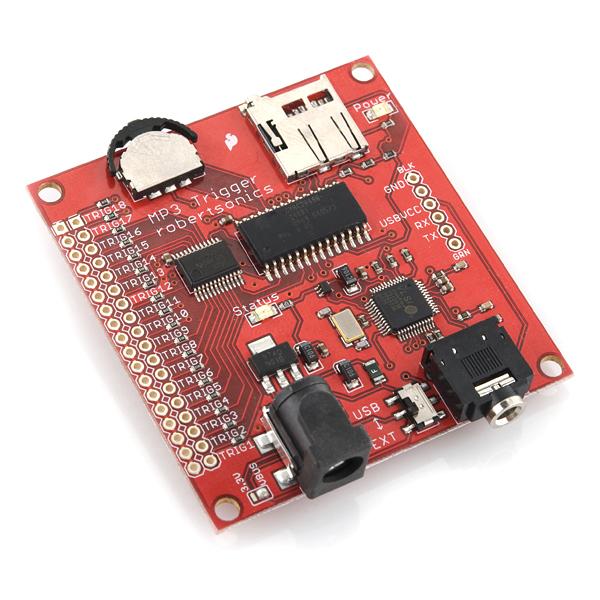
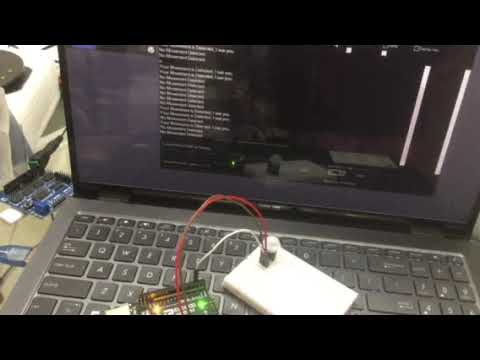
The Ez-B controller is managing the control functions of the MP3 trigger, wireless joystick, Syren10, and Sabertooth2x25 , and also features a personality generator, voice recognition system, random sound and movement, and camera eye tracking. User-inserted image

I'm looking forward to adding even more functions using sensors and other devices. Stay tuned for more to come!

By — Last update

ARC Pro

Upgrade to ARC Pro

Stay on the cutting edge of robotics with ARC Pro, guaranteeing that your robot is always ahead of the game.

#1  

bomb!!!!!!!

dont forget about the hasbro artoo......come on man, i need to steal some of your ideas.

#3  

Currently working on my lighting system, hopefully, I ll have a video out soon

PRO
Synthiam
#5  

Whoa! I just saw this robot! Unreal!

I'm blown away by the stuff that everyone is making these days. Reading posts on this forum is better than any news paper or magazine. So informative and people share how-to and what's next. I love it!

Maybe a monthly news letter featuring all of EZ-Robot robots built in the past month is a good idea. or something like that. Hmm! Because this one sure needs to be promoted too! :D

#6  

for sure!!!!!!!!!!!!!!!! that would boost competition....and produce better bots...so i can steal ideas, haha

#7  

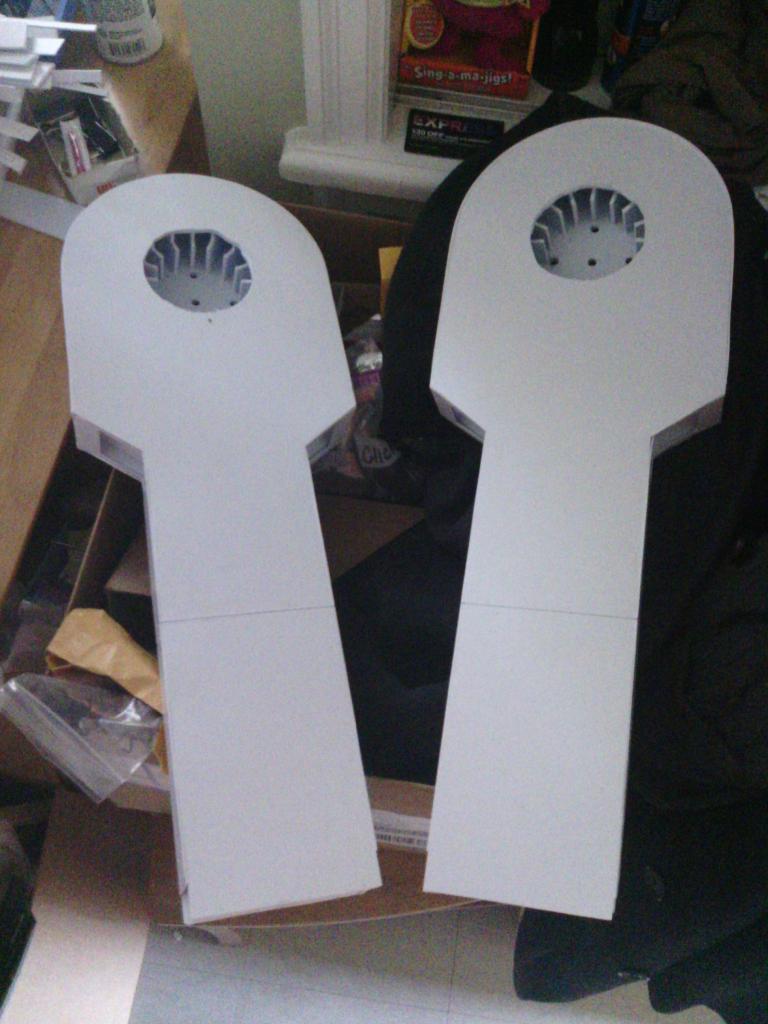
Very cool...I want one! Very good attention to detail. Where did you get the plans? How are you connecting the styrene pieces together? Just glue? Can't wait to see it finished.

#8  

Im using a solvent cement for acrylics called Weld-on 3.....it likes melts the styrene pieces together..

and I got the blueprints off of Yahoo R2builders

#9  

Hey Guys,

This is my "you put it together" lighting system for the dome/head of my R7 Droid, thanks to joymonkey at R2builders for providing this kit.

The kit includes. PCBs for Rear Logic Display, both Front Logic Displays and both PSIs. The logic display boards have mounting holes that match David Shaws logic surrounds. The PSI boards fit standard DWV couplings or Michael Wheelers aluminum PSI Housings. A small extra PCB is included to practice your soldering. .A bag of individually sorted LEDs (flangless 3mm for Logic Displays and 5mm for PSIs and HPs) .Female to female jumper wires (5 pin for chaining the PCBs together, plus 2-pin and 3-pin wires for hookups) .8 LED driver chips (the kit needs 7, I include 1 extra), 8 sockets and 1 wide socket (the wide socket is for mounting an Arduino Pro Mini to the RLD) .Capacitors (0.1uf, 10uf) and resistors (10K, 24K, 28k) with extras of each. .Pin headers and screw terminals. .CNC cut logic bezels (black acrylic), logic screens (non-glare clear acrylic) and PSI diffusers (white lexan)

This is how it came User-inserted image

it was a "pain" in the butt to solder together but here is the R7 Droid's Dome lighting system

#10  

This is an absolutely amazing project GotRobbed! The light kit rocks too!

PRO
Synthiam
#11  

Those lights are sooooooooo daft punk :D

#12  

Yes, Very Nice!

"daft punk", is that Canadian Slang???? lol

#13  

dude!!!! saw them in coachella 2002 (i think)

its coming up....this post made me smile.

#14  

@GotRobbed

Where did you order the drive wheels you are using? Did they cost a lot?

#16  

I thought I would share how I put the drive wheels, scooter motor,and the motor belt all together.......the scooter motor will be connected to the Sabertooth 2x25...

User-inserted image User-inserted image User-inserted image

Hopefully soon, R7 will be walking........they grow up sooo fast..... :(

#17  

sick bra!

how tall is he? looking like 4 footer?

#19  

Hello to all my EZ-Robot friends...... Im sorry that I have been away for a while.

User-inserted image "Golf Season" has started here for me and I was in desperate need to get my driver swing back into gear. Dont worry my friends, I managed to do some building in bewteen playing. So here is what I have manage to put together while golfing:

here, I worked on making the center foot from using some roller blade wheels User-inserted image

I changed the design of the old set of legs I had, to a more sturdier set shown here User-inserted image

I decided to work on my electrical board which consists in using : EZ-B controller, the Sabertooth 2x25, the Syren10, the MP3 Trigger, and the Sure 2x25 amp, a fuse block, some fuses and 14 gauge wire. NOTE: all the components are controlled by the EZ-B Controller using an XBOX wireless controller. User-inserted image User-inserted image

Here, I started to put it all together User-inserted image User-inserted image User-inserted image User-inserted image User-inserted image

and here is a tiny video on what my droid(Stan) can do now, by using the Ez-B controller with an Xbox wireless joystick

Click To Watch Video

More to come soon, Hopefully, I will be adding sensors so it doesnt bump into walls and move around freely without crashing or getting stuck.........

#20  

@GotRobbed,

That is superb man! Your droid moves SO darn smooth! That is awesome!

That looks so cool...very professional!

All most ready to strap your clubs to him and off you go!

v/r

Kevin

#21  

He is absolutely incredible!!!! Can't wait to see more pics and video

#22  

I'm amazed , I am going for.that kind of smooth , that sir is a smooth operator.

#23  

@GotRobbed

That is really a nice job on construction. Looks very professional. I have a few questions when you get time.

  1. How are you mounting / securing the motors?

  2. Where did you get the nice casters? Looks like you changed out the castors for scooter wheels later on for the center foot. Am I right?

  3. Does the ring gear for the dome come from the R2 Builders site? If not, where did that come from? It is so nice! Looks like originally you were using a scooter wheel to turn the dome.

  4. What payload do you expect it can carry using the motors you installed? How much does he weigh now?

Wish I had your talent!

#24  

I think the guy that said SICK really Meant SLICK!

:D

#25  

@GotRobbed,

I really really like the motor beltdrive wheel system you have going there. Are the spherical casters on the legs there for weight distribution or because it looks uber cool or both?

Thanks

Kevin

#26  

Hello all, thanks you for the kind responses on my progress, It is soooo exciting when you see your project up and working from the time you first laid it down on paper to the time you see it move for the first time. To answer some questions: For mounting the motors to the feet, I used this design which I found on yahoo
scooter motor foot , Materials used: Wheels from here but I had to cut some of the hub off because it was a bit too wide User-inserted image The front wheel caster are from http://www.rockler.com/product.cfm?page=21969 and the rear casters are from http://www.rockler.com/product.cfm?page=21974&site=ROCKLER ( the reason I used it for the rear is just in case the droid does a wheelie when it moves) Belt: http://electricscooterparts.com/drivebelts.html Belt Size: 405-3M-12 screws: 1-1/2 inch #8 32 thread machine screw and 2" Threaded Aluminum Post and the screws that came with the motor. User-inserted image User-inserted image

The dome ring I used a Lazy Suzan and an A&A gear set which I did get from another builder. Mounted both with 1/4-20 screws The motor I used are from http://www.skycraftsurplus.com/pittman6to24vdcgearheadmotor.aspx. Put all together it looks like this: User-inserted image User-inserted image.

As for the weight of it now, its probably about close to 40lbs now. when fully finished, Im guessing about 75lbs.

I need to start working on the Dome(head) soon and also start looking for paint. Doing the little extra detail parts are going to be pain but worth itin the long run.

But I am having trouble with the MP3 trigger, I need some help if anyone could provide please. I have speakers hooked up to an amp User-inserted image
amplifier which is hooked up to the MP3 TriggerUser-inserted image then to the Ez-B controller. The problem is that when I insert the 1/8 jack into the input jack of the Mp3 Trigger, I get static noise. How can I get rid of the noise? Im hoping it not the input of the MP3 trigger cause that would mean I need to buy a new one. Any suggestions?

Thanks more to come soon

Ireland
#27  

@Gotrobbed

Check output from Mp3 Trigger with headphones ,that will tell if card is ok

Please read notes on connecting amp to output of mp3 Triggerr http://www.sparkfun.com/datasheets/Widgets/MP3Trigger/vs10XXan_output.pdf

You may have a grounding issue between both cards.As gnd on Mp3 is at 1.25 volt

#28  

hey Bravia, I tryed messing around with the connection. connecting and reconnecting, soldering and resoldering but nothing seems to work. As soon as I insert that 1/8 jack into the MP3 trigger, its like I get feedback and staic right away. I may think it could be a volume issue with the Mp3 trigger and the 2x25W @ 4 Ohm TPA3123 Class-D Audio Amplifier Board. I think the default settings on both are set high and I really dnt know how to lower them.

Canada
#29  

Hello,

I know lots of us picked these up to solve our sound woes with the J.E.D.I controller setups, VMusic2 and amplifiers.

Search E-Bay for :

Pac SNI-1 RCA Ground Loop Filter Isolator

Solved my issues with amps and humming/static noises.

-= Lumpy =-

#30  

You may also need a filter capacitor to ground.

;)

#31  

Great news.... I solved my MP3 Trigger issue.... it turns out, it was a bad Audio Jack.

User-inserted image http://www.sparkfun.com/products/8032

So, I replaced it and yahooo!!, everything is working great!!

So now that was solved, I started working on the Dome Part(the head) of my droid here is a picture of what I have done so far... but ... more to come....

User-inserted image

here is the eye User-inserted image

#32  

I cant wait to see the next update!

#33  

Dang , that's awesome , I wish I had room for a bot like that. We all should meet one day , lol a ezb convention.

#34  

loooong trip for me lol

#35  

Well plan it when your home , or just set up a webcast lol.