

I used an Ohmnilabs Telepresence robot to write some self docking code as an example. I really like their docking mechanism, which uses magnets. Something like this can be easily 3D printed for any robot. The camera i used facing down is a logitech usb camera set at 800x600 resolution. That seemed to detect the glyph very well at the height of 4 feet.
The Robot We have 2 of these robots in the office but they don't get used much due to no support for mobile devices. Means, couldn't use your phone. So, they became perfect candidates to have ARC installed on them! Now they can be controlled by my phone and exosphere - but most importantly, they're under my control muahhaha!! Back on topic, here's details about connecting this robot to ARC: https://synthiam.com/GettingStarted/Build-Robots/Ohmnilabs-Telepresence-Robot-18728
Code The script is really nothing fancy - and there are much more complicated ways of steering the robot. You can also use the camera's object rotation variable to detect the rotation of the glyph, and use that in your math. But, as you know I'm about getting stuff done quick and dirty for proof of concept. Later, if i feel up to it, I'll add additional complexity with incorporating the rotation and use dynamic turning.
Something to note about the camera variables, is that they all have a 2 on the end. This is because I am using 2 cameras and renamed the variables in the configuration for this camera.
Also, I specified the number of objects to be detected to 1 from the default value (which i think is 4). This prevents multiple glyphs or other objects from being detected.
var centerX = 328;
var centerY = 300;
var deadband = 7;

ControlCommand("Camera 2", "CameraGlyphTrackingEnable");

sleep(1000);

if (!getVar("$CameraIsTracking2")) {

  Audio.say("I do not see the dock");

  return;
}

while (getVar("$CameraIsTracking2")) {

   if (getVar("$CameraObjectCenterX2") < centerX - deadband) {

     print("Tun Left");

     Movement.left(30);

     while (getVar("$CameraObjectCenterX2") < centerX - deadband && getVar("$CameraIsTracking2"));
   } else if (getVar("$CameraObjectCenterX2") > centerX + deadband) {

     print("Turn Right");

     Movement.right(30);

     while (getVar("$CameraObjectCenterX2") > centerX + deadband && getVar("$CameraIsTracking2"));
   }

   if (getVar("$CameraObjectCenterY2") > centerY - deadband
         && getVar("$CameraObjectCenterY2") < centerY + deadband
         && getVar("$CameraObjectCenterX2") > centerX - deadband
         && getVar("$CameraObjectCenterX2") < centerX + deadband) {

     Movement.stop();

     print("Charging!");

     Audio.say("The charger is mine");

     return;
  }

  print("Forward");

  Movement.forward(30)

  sleep(250);
}

print("Stopping");

Movement.stop();
Alternative Code
Another way I could have done it is using the camera control's built in dynamic turning and movement tracking. The grid lines could have been isolated to the width of the glyph. Then simply loop and check if the glyph is within a specific Y and X location rather than steering myself. This way would be much much easier to write, but I never thought about it until writing this post
Discover more robots
Pashley's Ez-Bo, My Experimenting Robot
Jdvann's My Dog

Now this is a type of thread I really miss... I should have used glyphs instead of colour tracking...
@DJ... nice video btw. The magnets are so simple but quite effective...
I should have used glyphs instead of colour tracking...
@DJ... nice video btw. The magnets are so simple but quite effective...
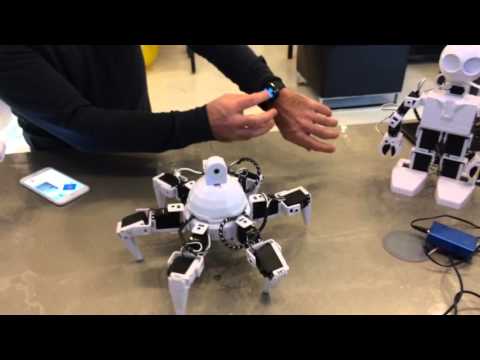
Here is mine from a while back
My auto docking code...
Not trying to jack the thread... just that we need more threads like this....
@DJ Let me know if you want me to re-post this in a separate thread...
Nice - that looks good ... minus EZ-Script blah hahaha
I find sometimes with the version i made that the robot tries to dock on angles. So I'm thinking of using the object rotation variable to align the robot with the glyph better. Just have to do a bit of thinking how to do it. Cause you first have to line up the angle and then drive toward it. So the lining up the angle would be the interesting part
This was a couple of years ago. Still learning javascript but not sure if I will attempt to re-write it anyway ... We'll see... Maybe if you added a EZ-Script to Javascript converter it would be a snap .... Just kidding the Blockly converter is helping me learn nevertheless...
JavaScript vs EZ-script.... A tool is a tool... It depends how one uses the tool that makes the difference.... EZ-Script is as powerful as the person using it...
I had/have the same problem with the robot occasionally trying to dock on an angle.... I had mine back away to about a meter and then re-try. However, this still only fixed the angled docking problem about 50% of the time...
I know I am getting little too complicated but perhaps side glyphs/IR beacons that can only be seen when the robot is approaching the docking station at an angle? If the bot sees the left or right glyph it will know that it is approaching the docking station at an angle instead of straight on...
I'm with RR, I miss this kind of project and thread here on the forum. Thanks for sharing . I love that you are showing and explaining your script written in Javascript. It helps to understand the language . I'm looking forward to seeing more of this thread.
I also am slowly learning Javascript and plan to start rewriting and converting my project scripts. I'll start slow and see if it make any difference for either me or my robot.
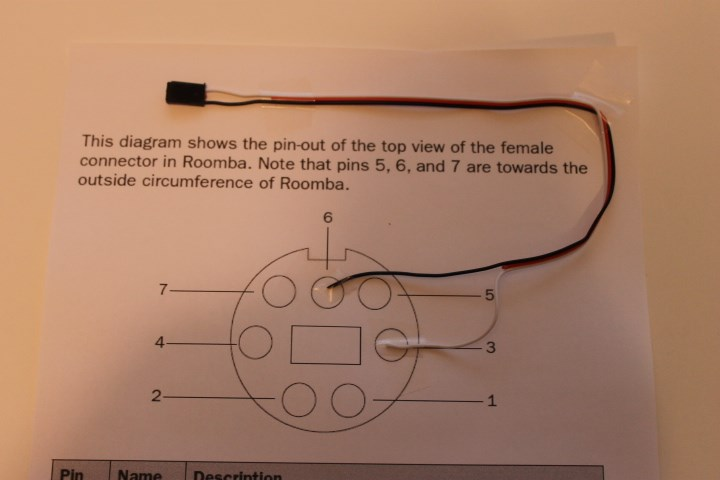
@DJ Sures Hi DJ which logitech usb camera did you use, that was in the "head" there are quit a few models and what camera did you use in the base? I think my Roomba will work I still have to find the video you made on making the plug and which pins to use I have a old mouse for the plug. I I will be using as a test IO Tiny later a EZb v4 when ZOE is done. Thanks
That robot comes with its own cameras. However, I test with logitech cameras often. And in one of my tests, cameras facing down and forward are c270 from logitech - Any camera will do. there is no camera in the base. Only in the head facing down and in the head facing forward.
@DJ Sures Thanks DJ for the quick response. I will wire this up and make this work. I have the ez-robot camera already mounted in the head so I will go with that for now. Thanks again.
Great, it is good to see this kind of navigation. Good Job.