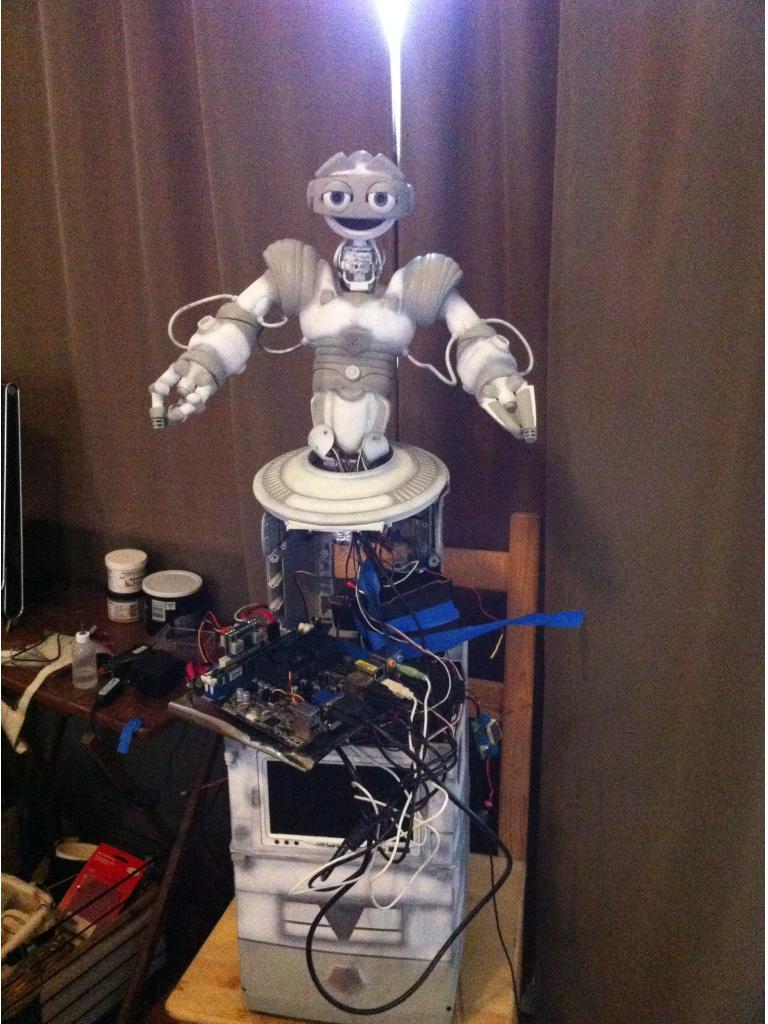
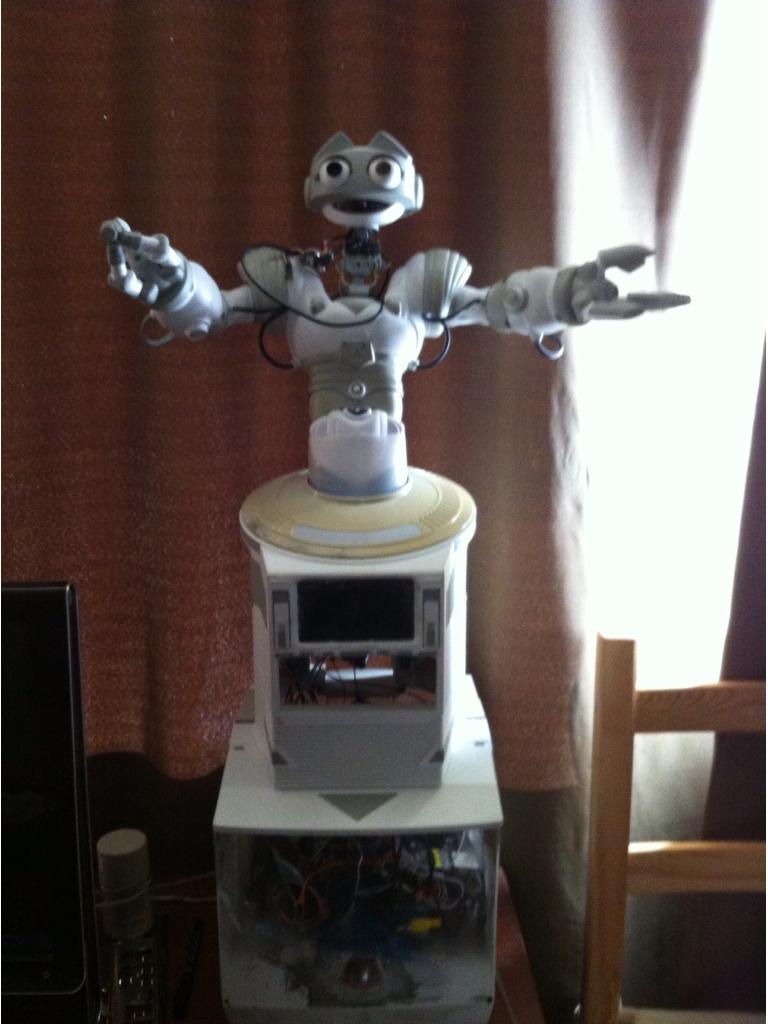
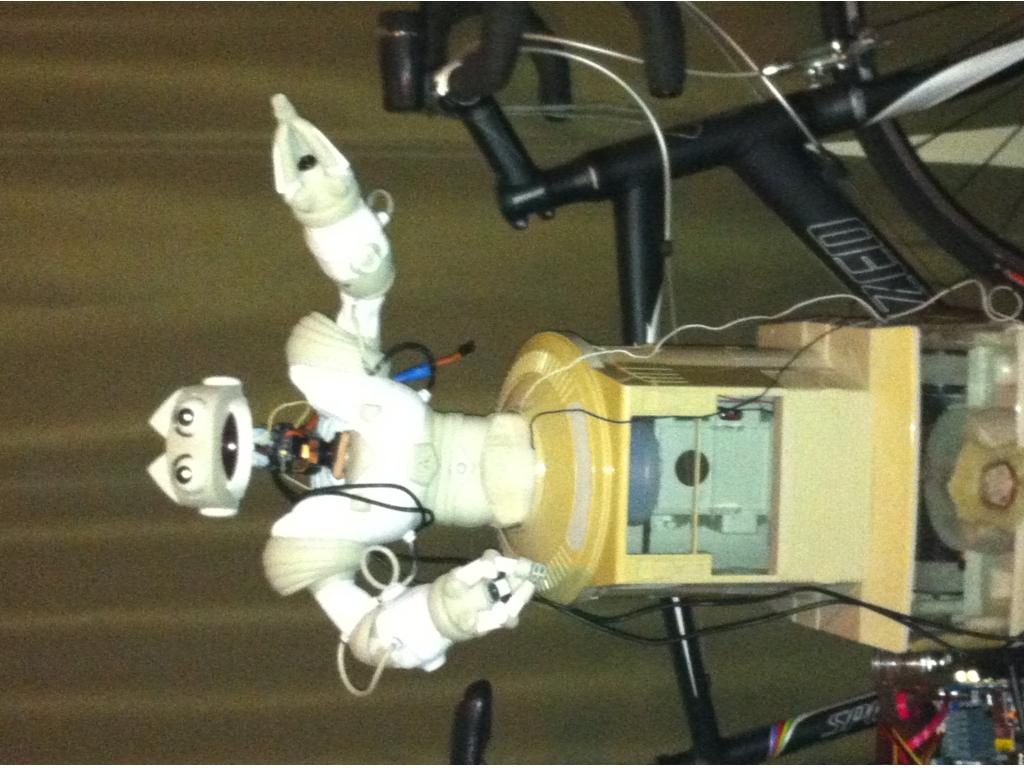
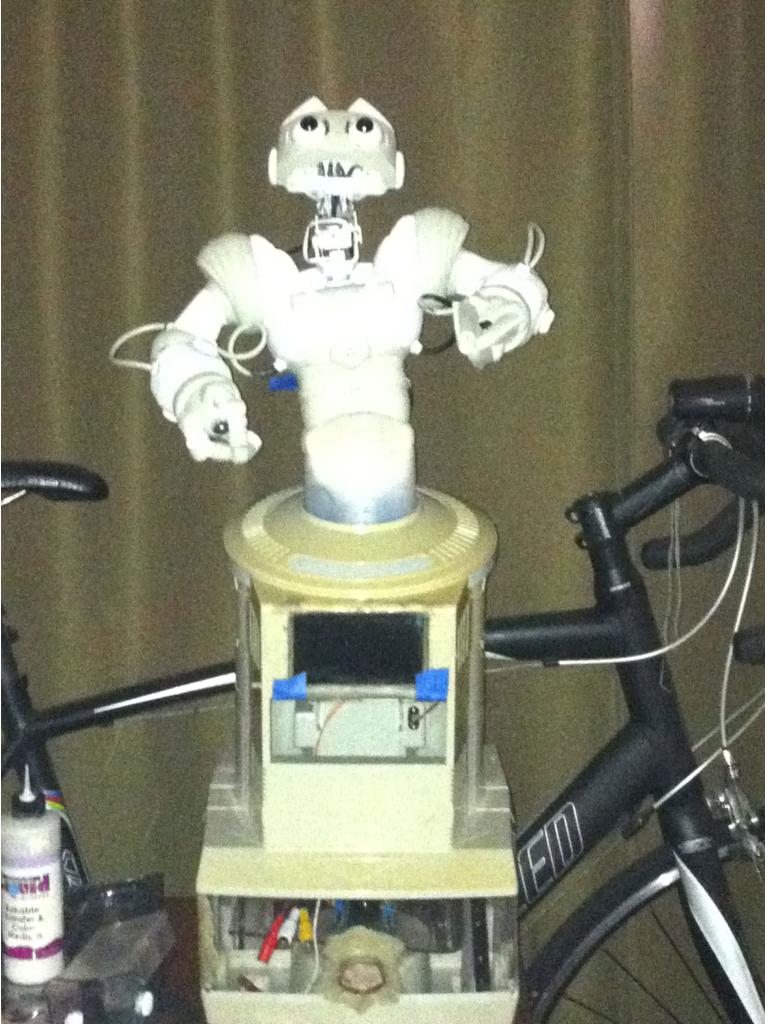
My Frankenbot - Robosapien, Hearoid, Ottobot Head

sfoy

USA

User-inserted image

- IN progress...

I am using a hearoid omni bot base. - The base will house: need some new treads if anyone has any ideas of where to get.

mini itx, http://www.newegg.com/Product/Product.aspx?Item=N82E16813157228 8gb ram, 120gb ssd - had to raise the base 3" to accommodate the mini itx.

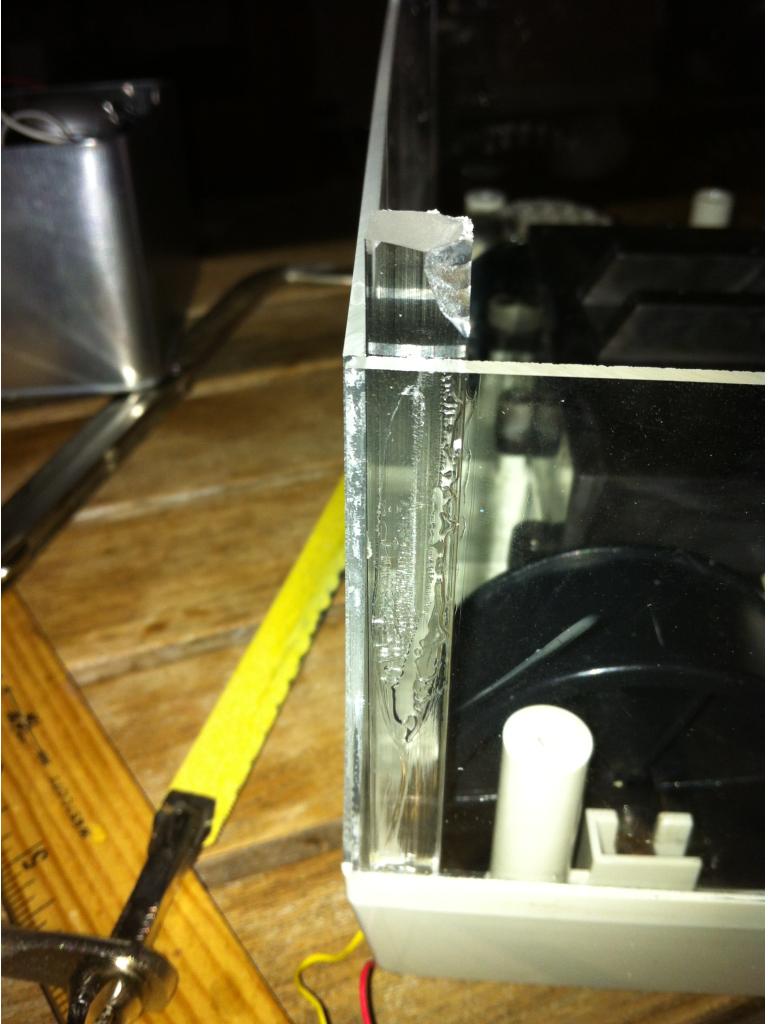
This method, cost me $14.86, without the solvent solution. I had that from a previous display case project. It is kind of expensive like lose to $30. Now to bond them is easy and very strong, but I do recommend that you have help. It is hard to hold it in place and place the solvent along the seam. I went to taps plastic and they have videos online.

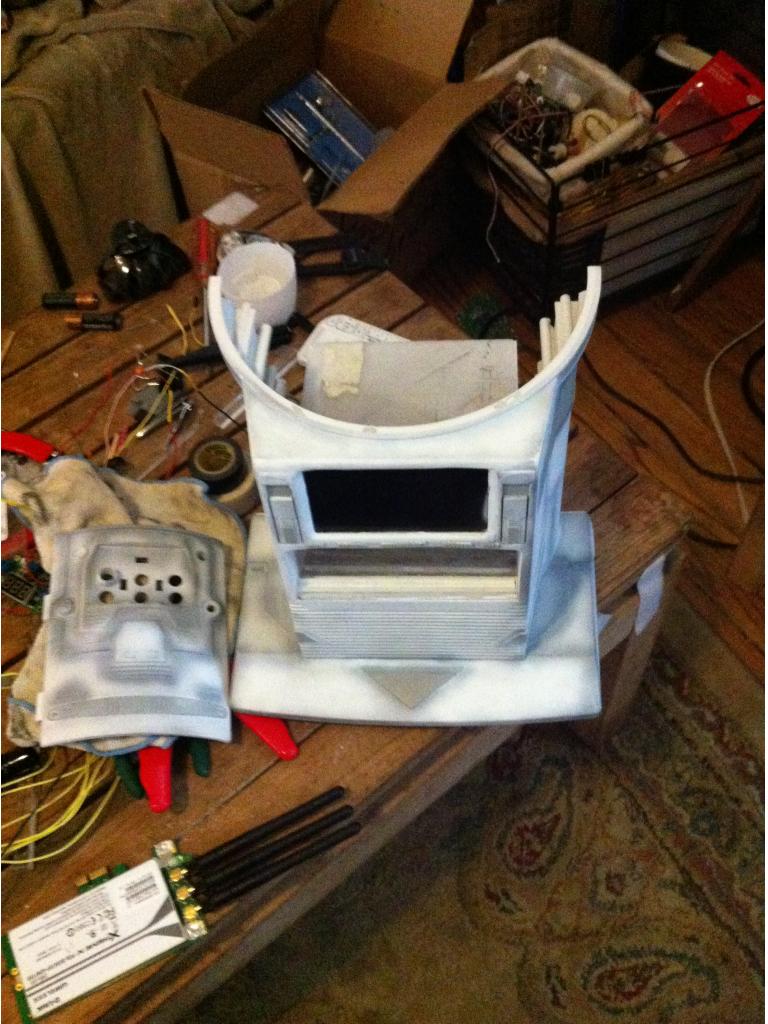
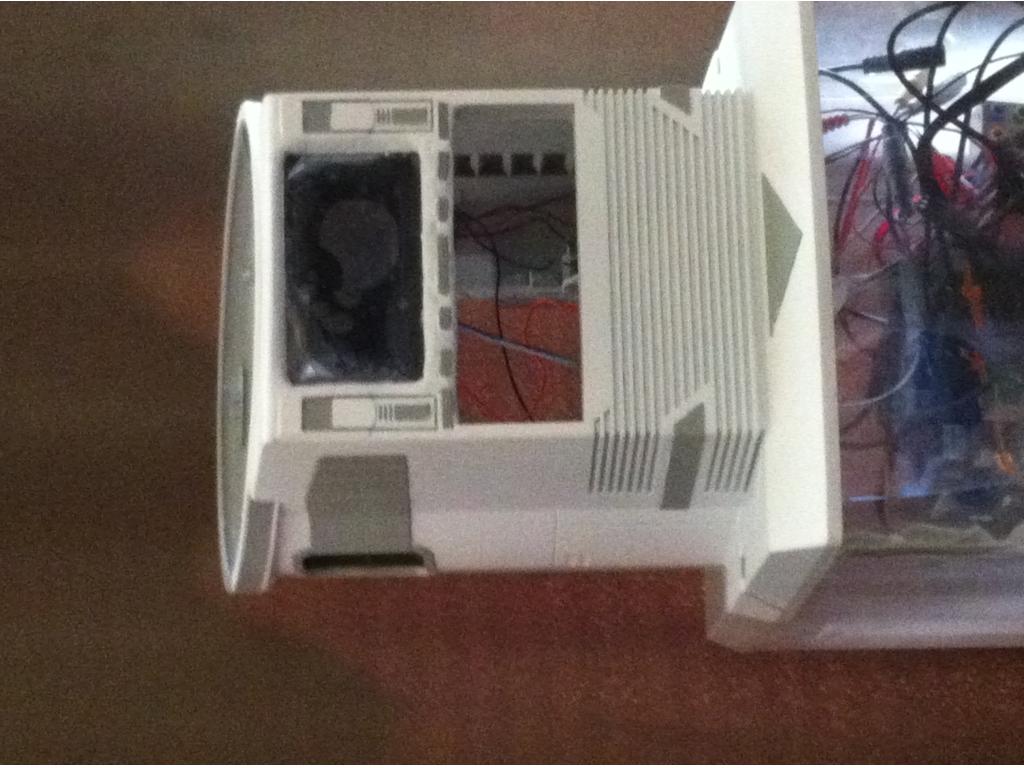
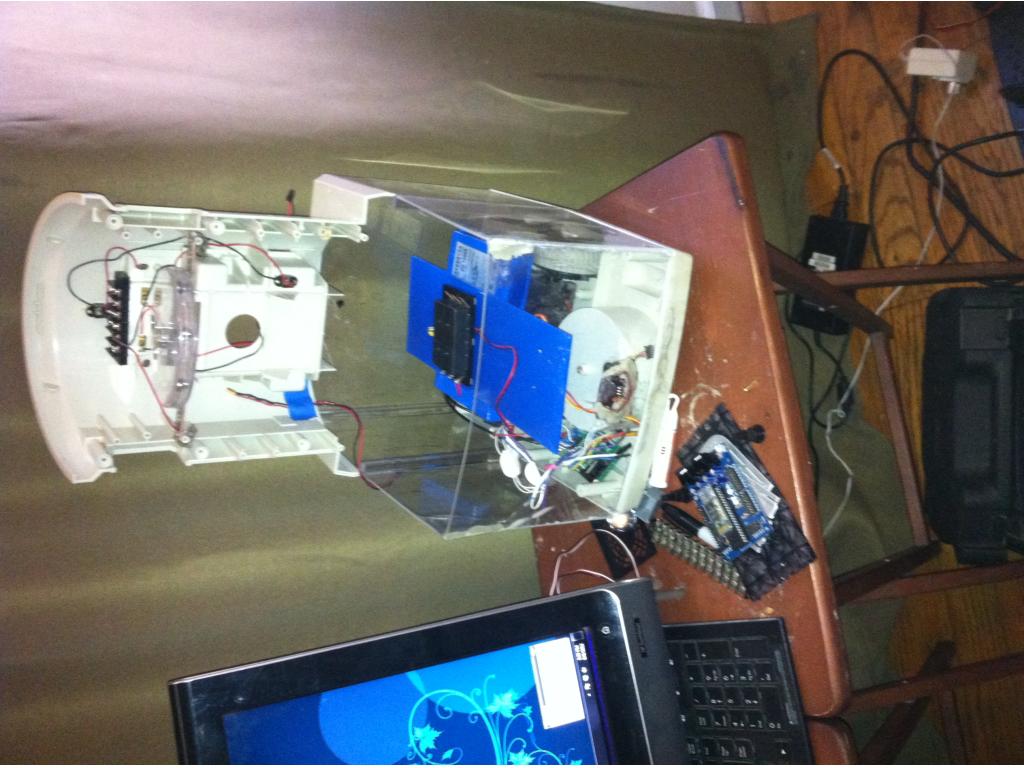
I used acrylic plexi glass, had them cut to size. Did the sides in pieces to go along with the slight curve in the body. Just two pieces. The front needed to be curved a bit so I used a heat gun and got the end hot. (I have a mission style coffee table with slats. Stuck the hot plexi glass in the slat and bent until I got the curve I wanted. I used the acrylic solvent to attach it to the hearoid base, then to each other. I used a " square plexi rod, measured out how big I needed and scored it all the way around with a pvc hand saw then snapped it. Almost perfectly clean every time but some uglies in the process. But inside so I don't really care. I used the solvent to place these inside as support attaching to both base and acrylic pieces. I did this waited about 15 mins then put a cutting board on top with a 39.4lbs statue and moved it a bit, tried to be gentle since it is supposed to cure for at least 24 hrs. I will go in later and fill any gaps with a sculptable epoxy. I plan on painting the base. I did drill out the hole in front for the ir sensor and the light sensor. (Took this from ottobot and will use the little cover for the outside of it. Already molded it in. I also have two little ir object sensors I took that I plan on putting on the from right corners. I need to finish digging that out.

User-inserted image

ez-board, h-bridge all hooked up

batteries (Batteries and power still have not been decided.) I got this power supply per robotmakers suggestion. http://www.amazon.com/gp/product/B003DXV9O2 I understand hooking it to motherboard, ssd, etc. then the three wires that come out to power ground and ignition or switch. But it has this jumper thing that I am not sure about. Advice welcome.

Eventually the torso will be ungraded to a different one once I figure out the whole arm thing but in the meantime I am going to use robosapiens torso and thanks to DJ he made that really easy for me by integrating Robosapien. Woo hoo.

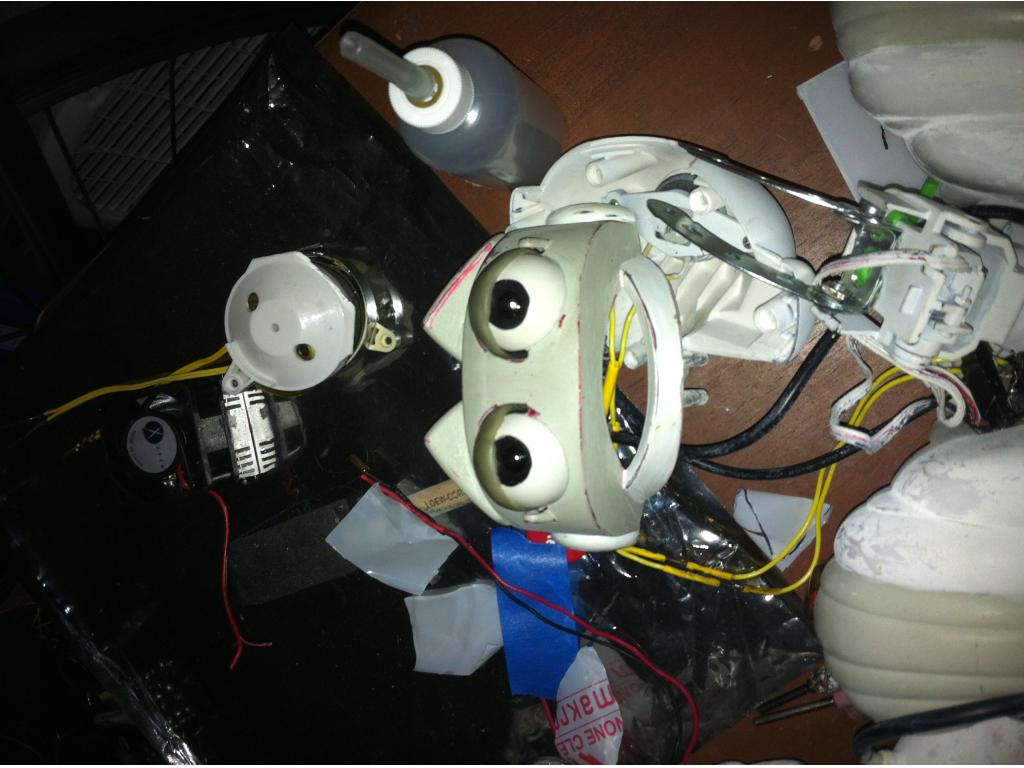
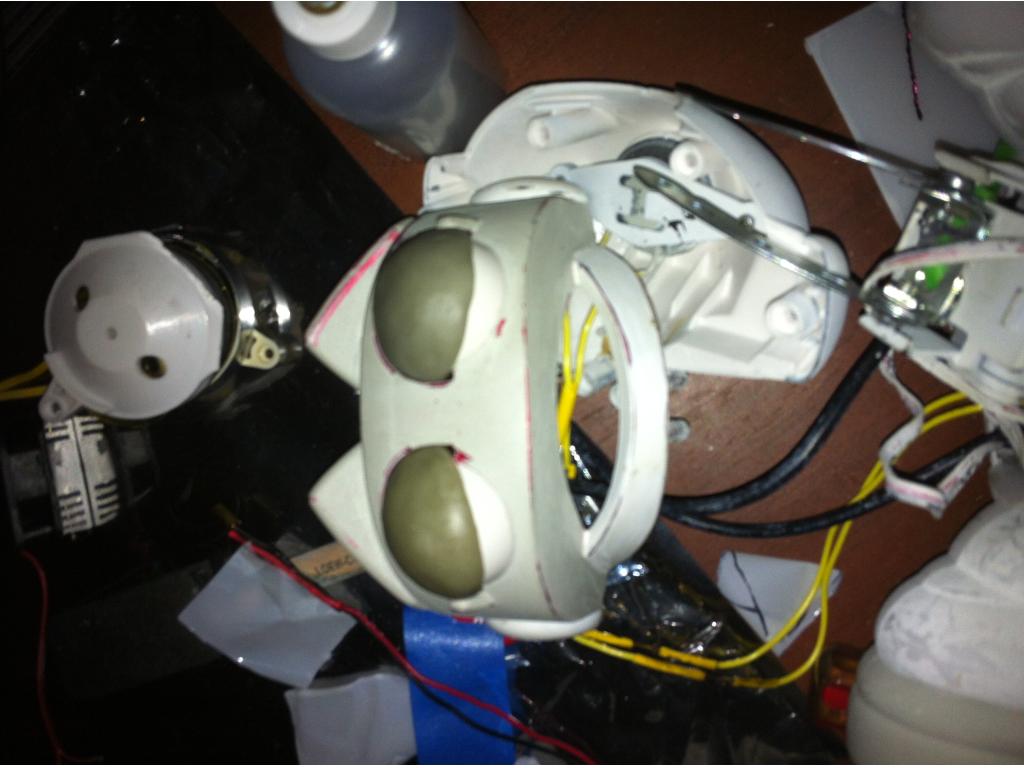
The head from an Ottobot. I poked his eyes out and am putting in two cameras. I have one already and it fits great. Head will probably be too small once I upgrade arms.

I have ordered and waiting for shipment from China. The other camera, pan and tilt brackets with some heavy duty servos with metal gears, and the little screen.
Was thinking of a little keyboard for little things but will remote in when big things need to happen.

He will be grey/white or black/white in the end. Haven't completely decided. Leaning toward a grey/white look though.

Still need to figure out: Lighting Speakers - I have two from robospaiens. Then a third that was already on the hearoid base. Plus a little one in the head of ottobot. I am going to connect that one to robosapien so when he turns on he'll yawn out of the one.

Power is really my next big one. Trying to wait until I am more settled so that I can better judge how much power I will need.

I am thinking of ai software, was recently introduced to that Denise. OMG. I am still drooling. But I also have looked at leaf, more programming than I really want I think. I am no programmer. I also looked at Ultra Hal but lacking in many ways. DJ thinks a EZ-B version of an AI may be in our future but I am way too impatient to wait.

By — Last update

ARC Pro

Upgrade to ARC Pro

Stay on the cutting edge of robotics with ARC Pro, guaranteeing that your robot is always ahead of the game.

#1  

This is such a COOL looking bot, I love it!!! I had an idea for the tires. What about the flat style bungee cord applied with a contact cement to the wheels? Just a thought.

#2  

You did that riser so well I would pay you to do mine! It's really. Great looking , you should paint it but leave a center strip clear. The l298 seems to work well for the omnibots , the peak at 4 amps which is same as the motors. When you make mounts for your board consider mounting it upside down , do the gives you more room , then the topside of a motherboard mount you can use for batteries:):D

User-inserted image

User-inserted image

Seriously though that Plexiglas riser is amazing! I love it.

#3  

@ sfoy - I absolutely love this bot! I had to say it again. What an inspired idea to put robosapien on top. What are you gonna do with the original arm holes? Some cool second set of arms lol?

Australia
#4  

Well, Sfoy, you have really got us all thinking now - absolutely love the combination of bots and with robosapiens upper torso and an ottobot head - wow. I'm interested to see what wheel configuration you choose to get him moving around.

#5  

Bret - That's a good idea for the tires. The base is the omni base and it looks as if the tires were left outside in the sun, a few of them the treads are totally flat and squishy. I did make a mold of one of the tires but it doesn't come out very well. Original arm holes are now speakers, I just got some little covers for them.

Josh - I would do it for you (no charge just parts) but you'd be upset that you shipped it if you saw how easy it was. It is best to have extra hands. My first time working with this stuff I made a custom display case. My dad was in the Navy on the USS Independence and made a model of it for Christmas last year. Needed a bigger display case then I could buy. Good idea about flipping upside down but now sure if that will work with the wifi thingies. You have some huge batteries.

I'd like to get something smaller like this but 12v. batteries What do you think?

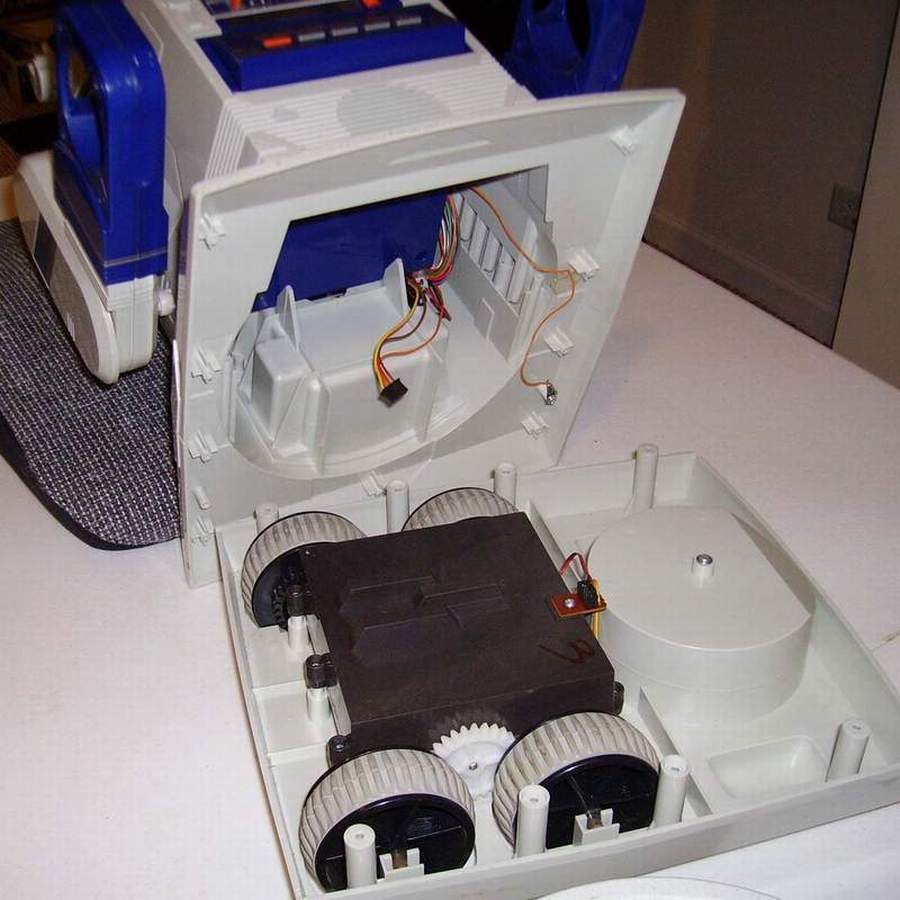
Hazbot this is the body I am using.
User-inserted image

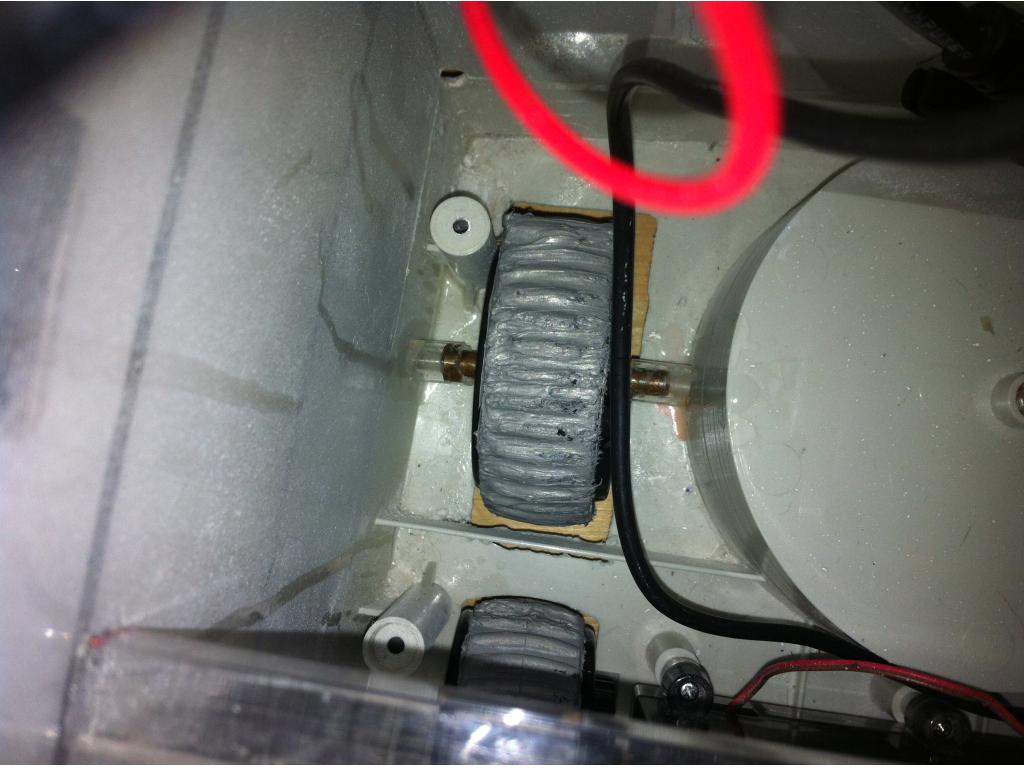
DC motors inside with the gear box.

#7  

How many do you think I would need?

PRO
Synthiam
#8  

Such an interesting combination! It really is frankenbot for sure!

#9  

DJ - He's feeling like a red headed step child right now.

Just wait until it's all painted. It's going to be awesome and you made my project so much easier by integrating Robosapien. My hero...

Now if ez-b had a way to automatic connect when powered on would be sweet.... Hint hint...

PRO
Synthiam
#10  

Haha okay okay... So you'd like to pass the .EZB file on the command line with a parameter to autoconnect? Hmmm, Okay:)

#11  

Well I am adding a mini itx, so he'll have his own computer to go with him and it would be nice to have him just turn on and auto connect instead of having to get in there and connect every time. :o)

#12  

Ahmen , same here Sam! Are you going to use a few ir sensors to get frankin bot to charge. How cool would it be each time he reaches full charge it plays a mp3 of the mad scientist yelling "its alive!" Lol

#13  

Hahahaha... Josh eventually I plan on naming him. Not sure what yet. I think a lot of people could benefit from an auto connect.

Ever see those monsters balls that vibrate in stores around halloween? The ones you hit that bounce around and make noise. I have one that yells help me help me and it's alive. My dog loves it.

Eventually yes, I do plan on creating a charging base. Haven't got that worked out yet.

If you look in the pic that front funking looking area, there is an ir sensor in there and a light sensor. He will have some other object detection sensors.

Australia
#14  

Hi Sam, Your pic looks like a 4 wheel config with a rotating tail wheel (hidden from view). That setup is much better for load and direction control than just having 2 wheels with a tail wheel. Something that size should do the trick as long as you have the battery power for it and it appears your getting all the good info on that.

#15  

Sam, this configuration looks amazing! Will he rotate at the waist too?

#16  

Thank you everyone.

Glick, yes I do want his waist to rotate. I got a lazy Susan. He is balancing on that right now. Thinking of using some servos and levers to get him to do it. Still working it all out.

#17  

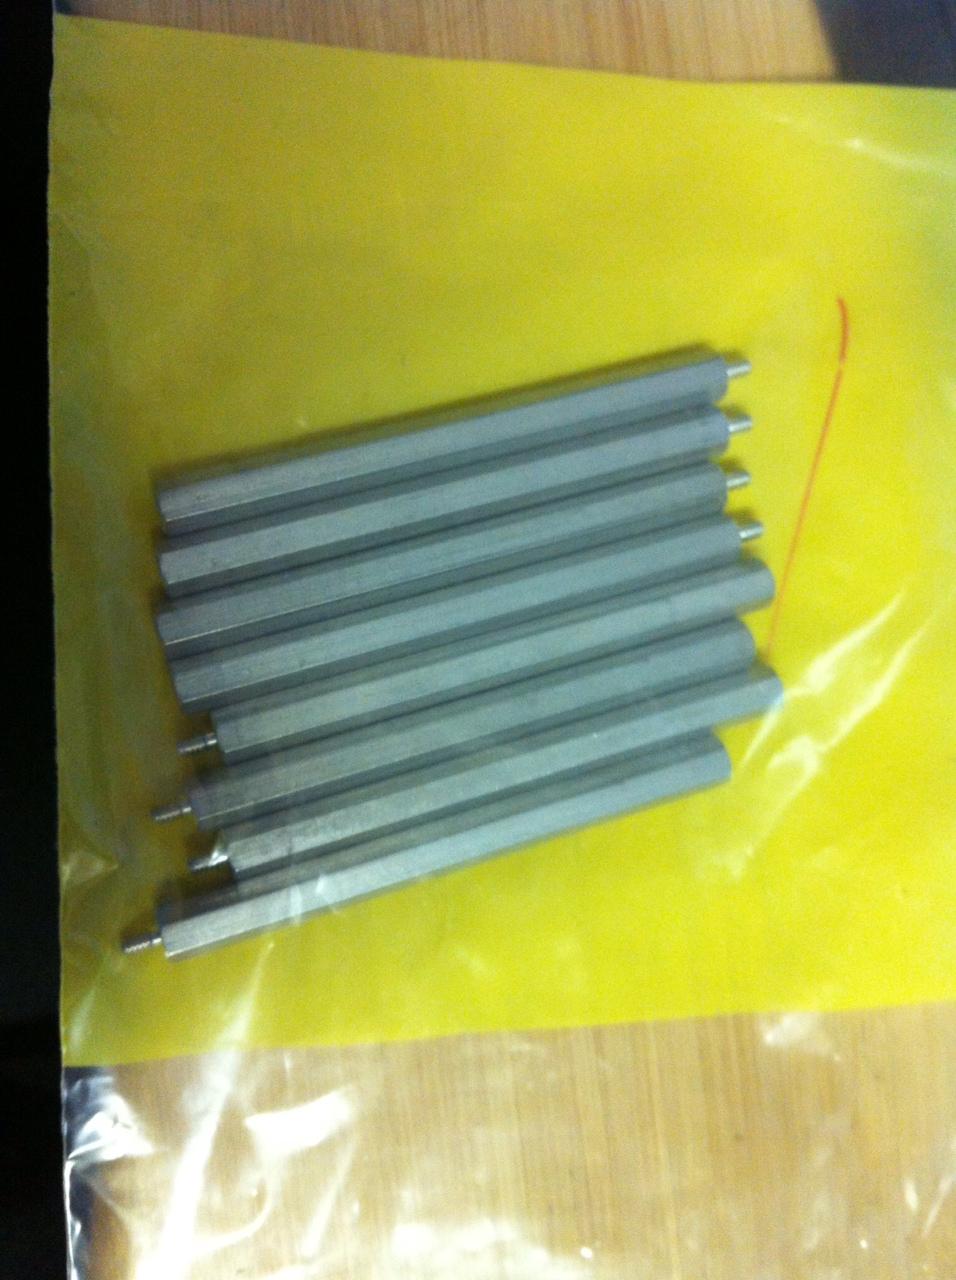
I got my standoffs today. (aluminum)

User-inserted image

These are going to go into the original screw holes to add extra support for the base besides just the acrylic riser.

The other camera, lcd screen and pan and tilt brackets should be coming within the next day or so. They have made it to US already.

Now I still need to figure out how to wire it up to power.

#18  

so, where did you get your standoffs and how much were they?

Thanks,

MovieMaker

#19  

I got them from McMaster-Carr. They were like a $1.80 each.

1 93505A012 Aluminum Male-Female Threaded Hex Standoff, 1/4" Hex, 3" Length, 4-40 Screw Size

I needed 8 for the hearoid omnibot base.

#20  

Josh I got the batteries you recommended. I went to a Batteries Plus and they didn't have anything like it, tried to sell me a huge car battery size one. Then said if I wanted one like the one you showed me it'd be like $400. I was like whoa........ No thank you.

So I ordered.

Got the other camera today. Woo hoo.........

Australia
#21  

It's going to be interesting see how tall your Frankenbot will be. The larger base with rotating waist and narrowing figure at top should give it good stability -

#22  

Well give or take a little depending on the neck etc. I measured him to be about 29".

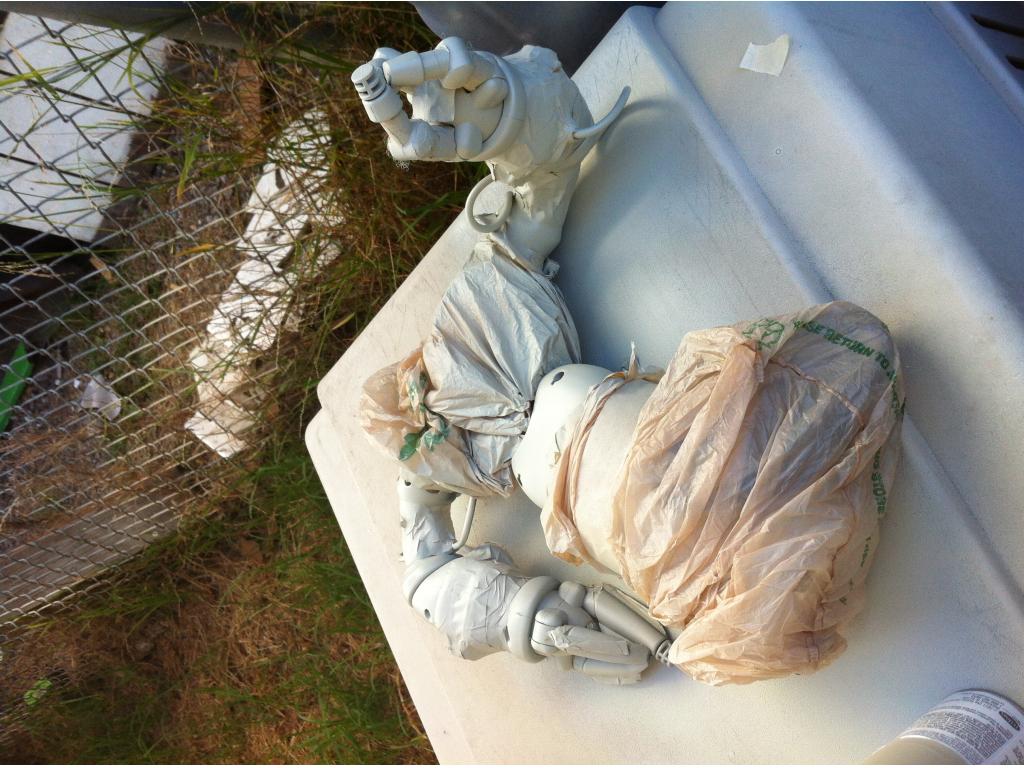
I am painting the head and robosapien body today to see how my color scheme will go.

The base is really stable plus with the batteries going down there, I don't think I'll have to worry about stability like I did with Minion.

#24  

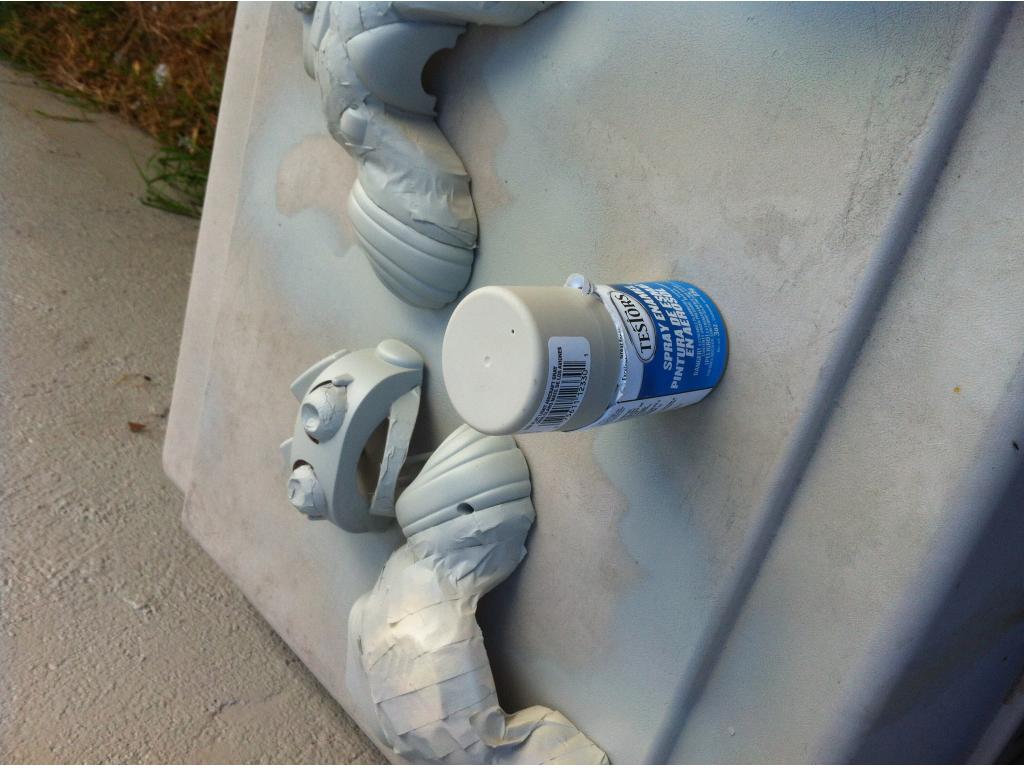
Here's the paint job, I found a flat aircraft grey paint, the rest is gonna be flat white.

User-inserted image

Robosapien was white and black will now be white and grey. he's all taped off right now.

User-inserted image

#25  

How many batteries did you get? What camera do you have on the way? I bet your excited! I'm jealous your bot is already getting paint!

#27  

Josh I got two batteries. Here's the camera I got. I have two now. Super clear.

I am only painting certain parts right now. If you were doing it yourself it'd be a different story.

Thanks Bret.

#28  

@sfoy Super cool robot btw... I am interested to see how your new camera turns out. Have you tried it with EZ-B?

#29  

Cool , let me know how you like them, how.heavy they are and stuff , more than likely after I have him running I will upgrade to.those batteries.

Spain
#30  

sfoy: good job, I like his height, and spray paint easy and convenient. I have wanted to see their progress, congratulations!

#31  

I pretty much spent all day working on him yesterday. I got his pan/tilt brackets with servos, they were analog though. So I had to change them with some digital ones that I already had. Just painted them.

Both cameras are installed and yes I have tried them with EZ-B. Super clear. They are kind of big so I actually took them all apart and just have the insides in his head.

The LCD screen came in today.

I will need to work on power once the batteries come in.

I am thinking I will probably need some sort of power converters. Any suggestions? I know the Robosapien takes 3.3V, the EZ-B 5V. The itx will hook up through the power supply.

I really like how the gray and white turned out. However I need to get a new flat white. I used the Krylon for plastic and it was funky in some areas. The gray model paint was great.

User-inserted image

#32  

Cool , the white and grey combination really works. Just a suggestion here but once you paint your bot , get clear epoxy , like from Wal-Mart. The 5 minute stuff works great. Mix it up in a bown and brush it on. The goal is to cover all the exposed area , at first it may show brush strokes but it will start to gel over like glass. It's protects the paint , practically indestructible and looks great.... Just s suggestion:). I really like it!

#33  

I have thought of something like that but I want a flat look. Any suggestions? I do have to do something. One of my dogs may put his mouth on it. Not really bite just a nibble.

#34  

Yea a matt finish spray paint never lasts gets dirty easier and hard to clean. The only thing I can think of is get flat house paint from a can and mix in about 50 percent epoxy , they do this with garage floors to protect them. If you mix it together it will not be so shiny but the epoxy will make the surface harder and morr resistant to bumps and scrapes.

#35  

I used a clear satin spray paint over B9 and it seems to be holding up quite well. That might be a quick and easy solution - multiple coats. Also, the EZ-B can handle up to 14V and only puts out 5V. I got a really cool voltage regulator from Josh that you can adjust the output to whatever you need. And it has digital read out so you can be precise. That might work for you.

#36  

I got my dudes tilt sensor in today and the step down converter for the robosapien torso...

It's going to be a project filled weekend...

#37  

Got my little dude's monitor molded in today. IR and Light sensor wired up. Tilt sensor.

Can't wait for my batteries to get here. I am getting close to being able to set him all up.

I still need to figure out what I am going to do about his eye lids that I broke. Everything I have tried so far has been kind of poopie.

Anyone using GPS? Any particular one?

#38  

Not me. Pinhead's is on a short leash.:) What kind of monitor is it? Are both eyelids messed up? If not you could try casting another one with a product from smooth-on. or if its too different from right to left try casting another then add sculpting clay where needed and carve plastic where needed then recast it. IDK im just spit-ballin'

#39  

Pictures sam!.I.have zero imagination, I need pictures lol

#40  

User-inserted image

This was last night.

He's got both cameras in, his monitor, had to do some sanding today and touch up around the monitor.

Put connector crimpy things on all my wires. Hoping once I get my power all hooked up I want to be able to do a trial run with everything all plugged in.

T.. I got this
one I cut too much from one in the wrong spot then when molded the other one got a little too hot.(I was being impatient and used my heat gun)

#41  

My batteries arrived today but I wasn't here. I hate going to the post office. I have to go to an annex and it's terrible....

Australia
#42  

Sam, you Frankenbot looks like a greeting robot out of a fantasy sci-fi Movie. Once you get your batteries powering it , you have to give us some video footage.

#43  

It's very cool , I'm sure you will be busy today painting the rest of that hearoid body today:)

#44  

I will take a video once he's mobile.

I am so not ready to paint. Got lots more to do.

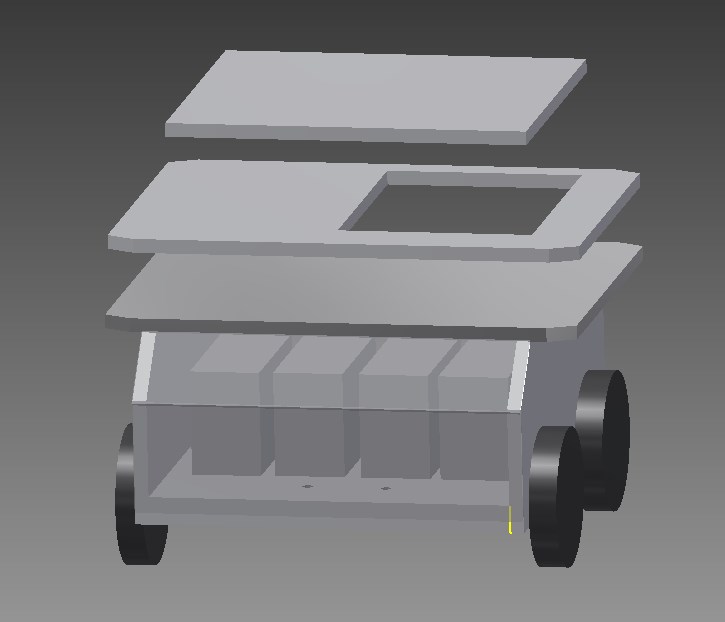
#46  

Thanks Brett.

I still need to figure out how to make his body turn. I got a neck gear thing from Josh. I don't really know how it works so I need to figure that out to see if I can hook the robosapien to it.

It's getting closer and I am excited.

#47  

I love how it's turned out so far. The neck assembly has a small gear that rides on the inside of the top lip of the neck hole of the "shoulders" or whatever you call it lol. Once you see the teeth there you will see what I mean. Electrically its just a motor and a microswitch.

#48  

Hopefully hearoid has those teeth so she can use it. Otherwise you would need to use a servo to make a turn table.

#49  

Ah I didn't spot that. They look so similar.

#50  

No I don't have teeth. It was smooth but I cut it out.

I did get a lazy Susan, to experiment with.

#51  

I use the lazy susan bearing with my B9 for the waste and the head with servos for movement. It works really well.

#52  

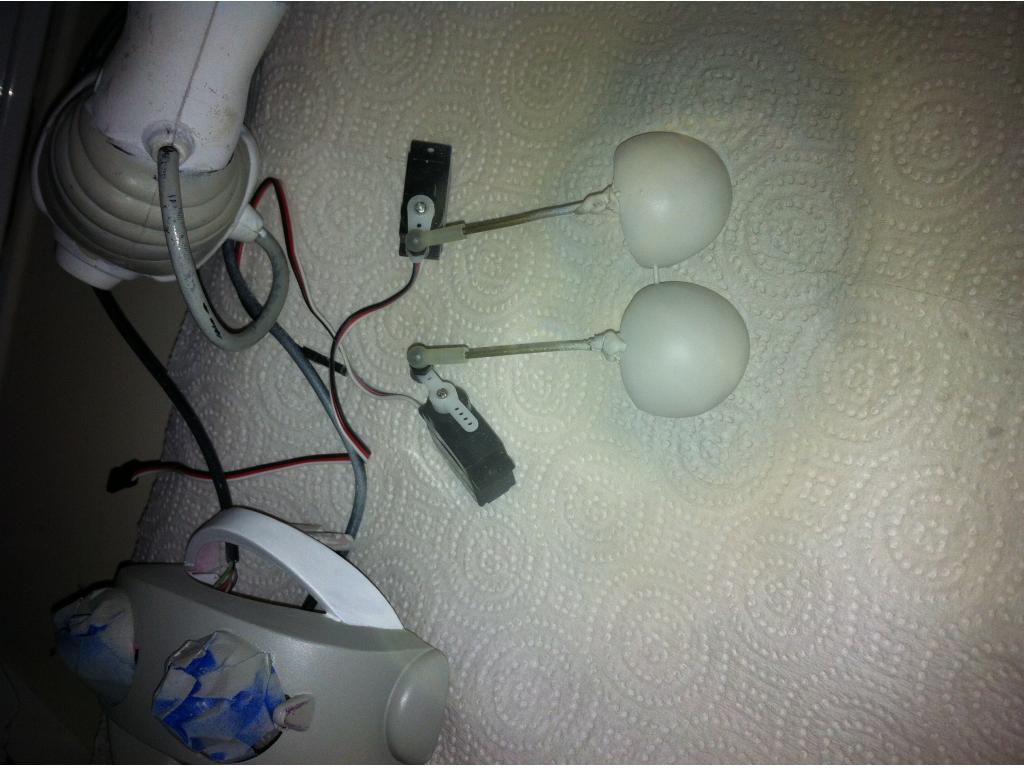
OK I think I finally got the eye lids...

They still haven't been sanded yet.

User-inserted image

User-inserted image

Now I just have to figure out how to hook them up to the servos.

#53  

Ha ha , give it eye shadow ; p. I would use thin wire and run the wire through a tephlon tube down the neck to the servo. Teflon tube and music wire is used in rc all the time.

#54  

Put the servo is base?

I have to little micro servos that will fit in his head.

#56  

How did you make them?

#58  

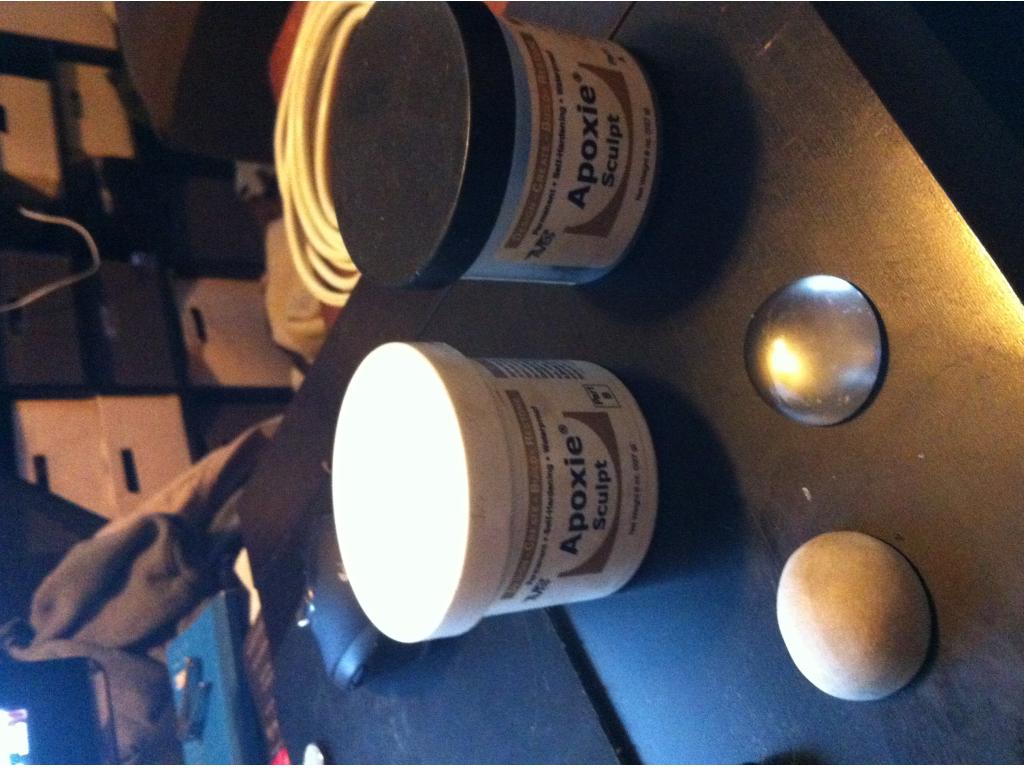
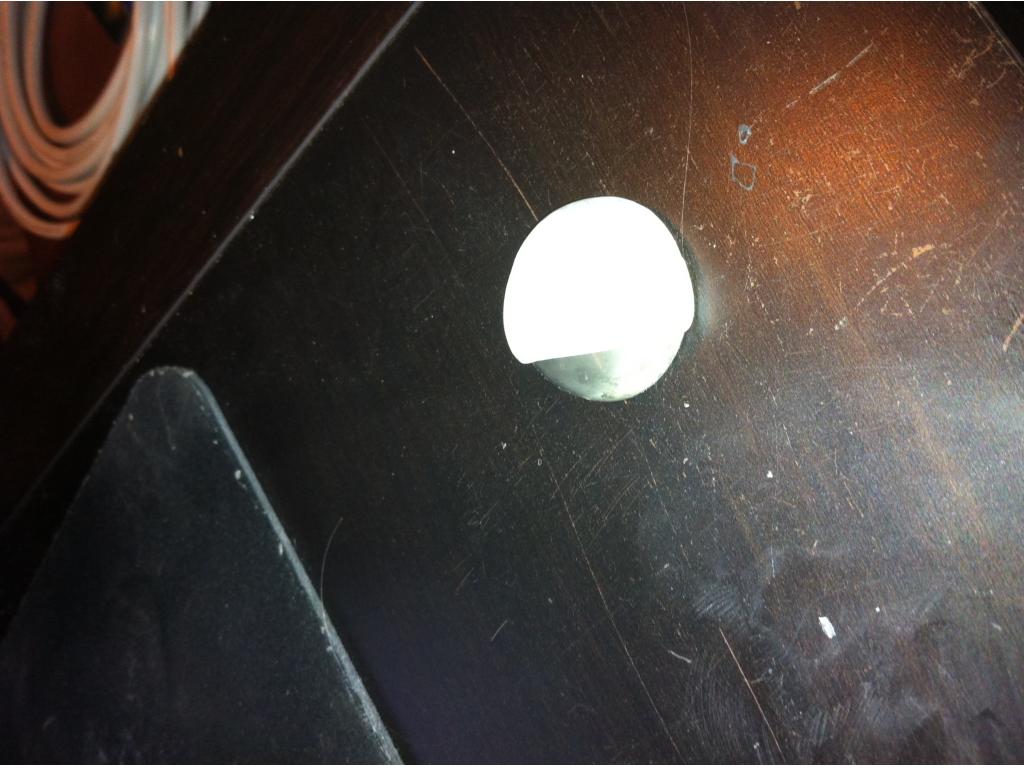
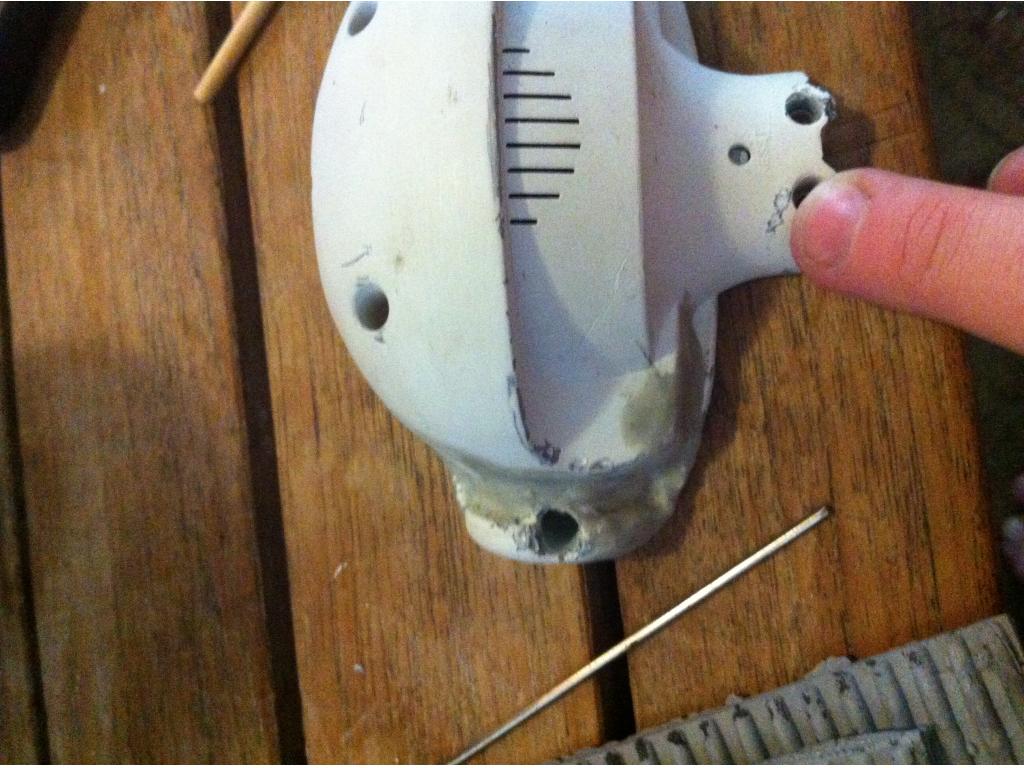
I used a sculptable epoxy and while at taps plastic I found some half circles and balls. I got a few and found one that made the right size.

User-inserted image

User-inserted image

The epoxy is the same thing I used on the corners of the base. It is very hard.

#59  

I may have use for something like that. Is it oy mail order or could I find at a hobby lobby. What is the work time for it?

#60  

You should be able to find at an art supply store.

Australia
#62  

Sam I really think you would do really well in the Movie special FX industry, I especially like the way you don't limit yourself to metal, nuts and bolts..but add all kinds of materials and construction methods. This creation will be awesome when finished.

#63  

Thank you Haz.

#64  

Yep! Sam gets an "A" for Inginuety and Imagination! She's Smart and Creative!

#65  

OMG... my stupid dog ate part of my robot today. I am glad I was planning on painting the hearoid base, cause now I have to fill in the bite marks.

#67  

Yeah I think I can fill it but I am debating on whether or not I will kill him.

He's such a spoiled brat.

#68  

The little guy is jealous of all the attention your bot is getting.:)

#69  

No I got home a little later than usual. He's a little spoiled punk and didn't get out when he wanted so he get's mommy's stuff.

#70  

My dog does that , past 2am she will eat something if I'm not home by then. Your awesome though , you will have to problem blending in those bite marks:)

#71  

Yeah a puncture here, a crack there, a chunk missing. But yes I am sure I will be able to fill it. He's lucky I was already planning on painting it. It was the top piece that would fit around the neck.

Josh, for that hearoid bot that you have. Are you using the treads?

#72  

I'm working on making you treads , I started making mold tonight. Tommorow I will pick up liquid rubber and see if I can make some treads for you.

User-inserted image

User-inserted image

User-inserted image

#73  

You bot is looking cool. Your paint job made the head look like it belongs to that body. With the EZ-B working so well with the Robosapian you have more servo channels saved for other things. Hope you post more pictures soon. Loved your minion robot. They were one of the best parts of the movie.

Belgium
#74  

Nice work ! Show us more !

#75  

@mcsdaver .. Thank you. That was only a test paint job and is not done yet. But I did want him to look like it belonged. I think the robosapien head is really just too small on the original. Definitely could not fit cameras in there.

Thank you PhG.

I have been a little busy lately and my back was kind of bothering me so not too much progress.

Formed the eyelids...

User-inserted image

Still need to make the center pivot point.

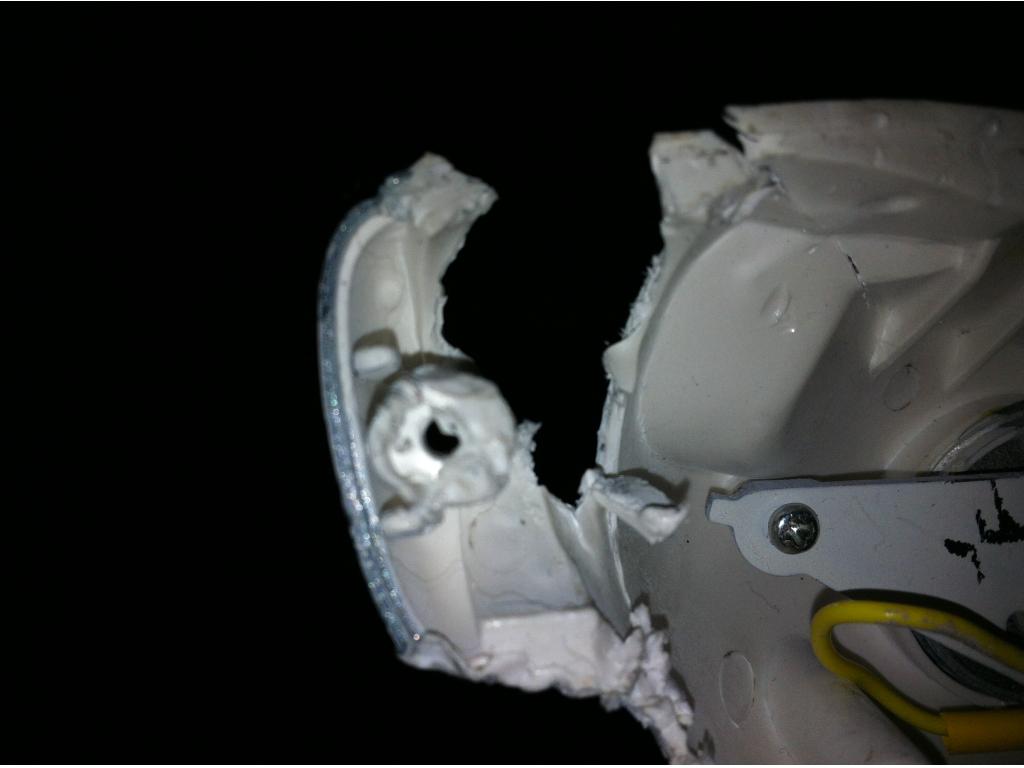
I had a meeting this morning and I was careless and left the back of the head out. My dog got it.

User-inserted image

I did a little patch job on it.

User-inserted image

I am so glad I just got my new epoxy in yesterday.

On the top of the ottobot head he has a round hole. The original bot had a simon says type thing in there. I pulled the robosapien leds that show in the head and the ir up to the top of that and am using the round half circle I used to form the eyes and that will close the hole. I don't have any pics of that and the back of the head needs to dry before I can do any of that. Then it'll look like his brain is lighting up when the leds for the eyes light up. The robosapien eyes light up when he does different things as well as it is supposed to show his mood by which of the 6 lights are on.

My goal for this week is to get the wiring all done. I think I have everything now minus fuses.

I also got my new treads. Thank you Josh. I haven't put them on yet but I did a size check and they are perfect. :o) Will work on that this week too. I haven't decided if I want to attach them to the wheels or if I want to use glue to close the circle and slide them on like the current ones do. I will probably play with the black ones to test that.

Also after doing the 7" riser on Josh's bot I had a little size envy, so I took of my 3" riser and did a 7".

User-inserted image

The blue piece inside is not attached. I was playing with the idea of making a few shelves in there. Haven't decided yet.

#76  

Ha ha , 7 inches is way better than three right!? Now you can mount your motherboard on one side and ezb on the other side of the riser. A mini itx boards is ony 6.5 inches wide:)

#77  

Hey Sam , I removed the dummy wheels and axles off mine because I was putting a vacuum in the front. I noticed your base is a earlier model that just has "slider bumps" on the bottom. I will gladly mail the wheels out with axles and mounts:)

#78  

Oh yeah way better. My mini is 6.7 not sure if I'll do on side or have a few levels

#79  

Fantastic progress! Your bot is coming along nicely. And I agree, that head on the original robosapien is just too small. Makes me think of that scene out of Beetlejuice when he gets his head shrunk lol.

#80  

I had to get my dog a ton of toys so he would leave my stuff alone. Sadly my ex got the dog. I miss my little dog. My next robot has some Robosapien V2 parts. I will post some picks after I get his head built. He is a bit shy.

#81  

My brat has a whole toy bin and a 53" teddy bear. What parts are you using from the V2?

Brett you are so right... Beetle Juice.... :o)

#82  

I bought a broken Robosapien V2 to use his hands, but they are too large for the robot I am building. But his upper body is just the right size. I am making my own head, arms and legs. I am building a humanoid with 6 servos per arm to give him human like flexibility. I already built his arms and part of his legs. He will need 2 EZ-Bs if I want him to ever walk. He may ride in a chair built on top of a RAD robot drive system. Standing he is about 27 inches tall right now.

#83  

Awesome. I can't wait to see that.

#84  

Josh not sure how I missed this.

"Hey Sam , I removed the dummy wheels and axles off mine because I was putting a vacuum in the front. I noticed your base is a earlier model that just has "slider bumps" on the bottom. I will gladly mail the wheels out with axles and mounts"

What are you talking about?

#85  

Yea notice the black.wheels on each corner in the pic...

User-inserted image

#86  

Do you think I need them?

#87  

It's better than that plastic dragging the ground everytime it turns. That's why newer model omnibots have wheels

#88  

I'll take them if you are not going to use them.

I got all my new treads on. Josh they worked out awesome. Thanks for sending that tube of stuff. Never used it before but I see it becoming part of the supply box. I ended up taking some wire to form the circle then I used that stuff to close the gap. They fit perfect.

I played with painting the front of the top. I like the grey and white.

User-inserted image

I started wiring everything up prior to final paint. I want to make sure everything is working. I thought I had it right but I am doing something wrong. Not sure what yet. Didn't have much time to play with it yet.

#89  

I like that color scheme - it is really coming along now.

#91  

Cool color scheme! Glad to hear you liked the new tires, they should last your alot longer than the originals lol

Have a multimeter handy , test each connection you make to unsure positive is pos, neg is neg and test continuity. This will help keep you from popping fuses and not knowing why. Also make sure that you connect your batt through a fuse and each item being powered fused at a lower amperage individually, for example, you could have a 20 amp main fuse from battery and a ten on your computer and 5 for the ezb ect. I just made up numbers but the fusing amount for each item should be as close to what that item should draw as possible. It a circuit draws 3 amps, fuse it for 5, because you probably cannot find a 3 amp fuse anyways.

#92  

Hey! I just got an idea. You could take your riser and make an aquarium out of it. That may sound funny, but it would be the ONLY robot I know of with a built in Aquarium! If not an aquarium, you could do fuel cells to charge the batteries. But, that would be smelly.

#93  

I think weight would be an issue as water is approx 8 pounds per gallon. Not to mention the sloshing around on starts and stops.

#94  

maybe make a tank inside of a tank. so, it looks like it is a lot of water,but it is only around the outer one to two inches. I am saying that right? understand what I am trying to say?

It is a crazy idea,but you have to prime the pump and get the juices going. Some times you get dirty water. If you know what I mean. Just a thought.

#95  

I get what you mean. Cool idea but probably tough with all the seams to make waterproof.

#97  

Yeah I don't know about the aquarium. That would be heavier than I'd like. Even with it being just around the edges. Besides more maintenance than I'd like to deal with. I want it to be easy to transport.

Interesting idea. I used to be really into aquariums, had like 5 different ones. My house was a zoo.

Yeah I plan on getting the multimeter out. Just started playing with it.

#98  

I really like how this bot has evolved. You are doing an amazing job here.

#100  

Thanks guys....

#101  

OK so I got the wiring all done and nothing.

I did a check on the batteries and maybe they we're not the best. Got 2 of these batteries

Supposed to be 12V

1 by itself pushes about 2.76 2 inline together was only like 4

Can anyone recommend a battery? Well probably a few. Looking for lighter weight.

#102  

2.76 volts? Did you charge them overnight first. Lithium ions that are 12v should never read that low. Something like 10 volts should be the lowest. I know you want light weight but 2 12 volt 8.5 ah lead acids weight 12 pounds , 6 pounds per battery.

#103  

Here are my batteries , in the end ill probably have 4 of them which is 34 amp hours of power. These two batteries new cost me 20 dollars and they are name brand , specs say they keep their charge depth 500 cycles , @1000 cycles they have 80 percent capacity. Even used everyday these can last 3 years.

User-inserted image

These are made by.yusa (yamaha USA)

Don't worry about the tiny bit of extra weight , I've tested your base running around at full speed with 45 pounds of weights on the base , the extra 6 pounds for reliable lead acid batteries is worth it trust.me.

#104  

In the torso your using as a mid section can hold two full size batteries side by side and 4 if you stack.the little guys straight up with a little wood spacer inbetween.

User-inserted image

If you don't want to put batteries in the torso you can fit one battery on.each side of the riser you made on a little shelf for each side.

#105  

Yes I did charge them overnight.

Hmmmmm... I am going to try and find those. I don't want the hole torso to be full. There's other stuff that needs to go in there.

#106  

Sam you may be able to get a full replacement or refund on those. Just contact the seller. Many of the vendors in China just hate a negative review. Just explain that your not happy.

#107  

They take returns within a certain amount of time. I have had them over a month, just wasn't ready for them yet. They said I had to pay return shipping which is barely less than what I paid.

#108  

And threaten neg feedback if you need to , worse thing about China venders is thy say "sure well refund you.just ship the product back" then you find out.the return cost is crazy. You absolutely should as for money back , since they sent you two bad packs already:(

#109  

Yeah but it's been awhile and I have already left feedback. It's cool. But hey you said you were thinking of going to these later. I wouldn't....

Those batteries are hard to find out here. I am looking but nothing local.

#110  

You paid with PayPal you have 60 days to.open a dispute. I'll find you a eBay link for batteries , they cost three times as much.local , batteries have big.markups.

#111  

I am not really worried about it. I'll use them for something.

#112  

I found an auction....

Lot of 4

Josh how long do you get from your batteries?

#113  

About 1.5 hours on 2 batteries , I expect 2.5 to 3 hours on 4 batteries.

#114  

That's a great price for those batteries , that's 12.50 per battery shipped. If you look at radioshack price on a offbrand but similar battery they want like 40 bucks a battery. Beware of offbrand junk. It's worth buying the trusted name.I need to buy a few more myself. A couple for jarvis Jr and a couple for Jarvis.

#115  

Definitely batteries are an issue, as I found out trying to get B9 moving around. But thanks to Josh and a couple of others I got it sorted out and he moves great.

#116  

Bret which batteries did you end up using?

#117  

For my B9 with a RAD base I am using a 12V battery that Josh gave me. The drive motors run great off of it and the EZ-B works fine (it can handle up to 14V). I am using a voltage regulator for some of my servos that are powered directly from the battery and not the EZ-B because they like 6V and not the 5V the EZ-B provides. I can check the manufacturer and ah when I get home - or Josh may know that off the top of his head.

I also used a 6V 5ah battery for my omnibot that worked fine with it. I can also get you its make and model when I get home. But I think the 12V battery is the way to go. I use the one battery to power everything.

#118  

The battery I recommend is the same 12v yusa battery

#119  

Great I am bidding on some, if not I found a local place that has them for like $20 ea.

#120  

Hope you get good batteries soon. It will be cool to see a video of your robot in action.

#121  

Yeah I am hoping so too. I am looking forward to getting him all set up.

#122  

I finally got my batteries. Hopefully I can get that all hooked up soon.

Got my new camera here's what he looks like right now.

I have been playing with the paint a bit.

I also took some plastic pieces I had from a model and added them.

User-inserted image

#123  

He looks so awesome.Sam! Jim Henson is going to call you up and buy.him!

#124  

You can fit three of the sla batteries we have side by side in the front of your base for a good run time. Make sure you make a little vent on each side of where you put the batteries so it's safe to charge.them without taking.them out.

#125  

Looking good. He looks like he will be fun. That head and body work great together. Your colors go good together.

#127  

The head works so well with the body. Great decision!

#128  

Josh you are so silly. I was playing with the battery placement a little and I was thinking 2 on the back gear box and one on the front area. I haven't tried to have it move yet.

Thank you all for your nice compliments.

#130  

Really cool looking bot you got there! Can't wait to see him in action.

#131  

I didn't get to play with him as much as I wanted to this weekend but the power hook up process has started.

Tomorrow I will start the installation process of software. THIS is the exciting part.

Everything went smoothly except the Robosapien torso. I used a converter from Sparkfun and it didn't power on. Will have to do some testing on that. 3.3V

#132  

I am following this with great interest Sam. Because of your work I have become inspired to do something with a robosapien too.

#133  

I hope you get him all powered up soon. More pictures would be great. I have a pic of my Robosapian V2 robot body and servo arms robot I am building.

#134  

That head works so well with that body. Will the robot be able to talk? I am using a bluetooth speeker with my robot. All the computer sounds play from the robot. Makes it all so much more real.

#135  

Thanks guys.

Bret what are you planning?

mcsdaver - yes he will be able to talk. At the moment I am planning on using ez-b for movement control. I want it to be able to do a little more and I am not much of a programmer so I have been thinking about that guile3d software.

My ultimate goal is really to have a research assistant.

#136  

Looks like Guile works with Kinect. It would be cool to add to a robot.

#137  

I think you have a great idea with Guile 3d software and a robot. I want my robot to be able to answer questions and do web searches and also be able to wonder around on it's own. Looks like Guile could make it like a real life form and assistant. I am going to look into this software and see what I can do with it.

#138  

A few of the features I really want is face recognition. i want it to look up stuff and read it to me. Email me things.

I am writing a book and I really want it to be able to keep track of characters etc. I think they two would work together. We'll see.

#139  

OK so I figured it out....

The mini itx is officially.... ALIVE! Yay! and installing Windows 7. There was nothing more exciting than seeing that blue screen come up. Set up is preparing.

User-inserted image

He's all apart right now. I want everything hooked up and make sure I don't want to add/change anything before final paint. At that point no more changes.

#140  

Awesome! My plan is to mount the torso like you have on top of a 1/16 scale tank I have. THen mod a little 6-pack cooler that it could tow like a trailer.

#141  

OH that would be awesome.... I can't wait to see that.

Since DJ added robosapien I didn't need this book, if you want it I could send to you.

#142  

Mount a omni torso, or robosapien? There are lots of large tanks on ebay.

#143  

That's great Sam! It's really exciting to get to the point of loading software. After you load win.7 turn off automatic updates. That way it's not randomly rebooting after you make changes or searching for.drivers in the.back ground.

#144  

Built in computer will be great. Looks like your robot will be able to help you out. I never thought of having a robot help me with a writing a book. Cool idea. With the computer on board you could use Kinect for face recognition and hand movements for control as well as voice control.

#145  

Mcsdaver the guile software has face recognition

#146  

I has been slow going. I take a step forward, then I fall down and stub my knee.

Got on board computer running, went to install dropbox and it crashed it. Had to re-install everything. That's done now.

Got a keyboard. This will mainly be for anything I need to do real quick etc. (It has a laser light, tried playing with my dog, he chased it for a moment, then figured out where the light was coming from and went after my keyboard.)

Then in the space under the 1st screen I made a cubby box so that my keyboard will fit in there.

I didn't realize I would need a converter for my screen so when it wouldn't work I panicked got another and then Josh figured it out. :o) So now I have two which ends up being nice. I had to raise the base even more. When I made the last one I was planning on using smaller batteries, there just wasn't enough room. So now it's been lifted a total of 13 inches. The second monitor will be in the upper half of the base.

I am still having problems figuring out exactly how to attach the torso. Also had to get another robosapien. I am not sure what happened. After I took it apart I tested it. Made sure connectors worked, still got power etc. Hooked up to 3.3 v regulator. Now for some reason when I connected it back up nothing. I did check wiring and it was fine but there were a few falls in between. So ordered 3rd robo tonight. I've decided I am not taking it apart until I have figured out how to connect it to the base.

#147  

Your robosapien torso looks relatively light. Have you weighted it? If it's not more that like 3 pound or so you could use a pan and tilt bracket with pololu power HD 240 oz metal gear servos. That's 15 pounds of torque so the waist could turn side to side and tilt forward and back about 20 degrees or so. If you post pics or send me pics of the bottom of robosapien torso and top of your omni torso. Also show in a pic a measuring tape so I see how big it is and maybe I could draw a solution if we can brainstorm up something =)

#148  

Sorry , you had to buy another robot , that really sucks. I been there when roomie blew up the kitchen and roasted one.

#149  

Ok so I weighed him and he is .7 lbs. I tried mounting him on the servo you sent me but it's really not strong enough. So I decided to get some big pvc pipe connectors to play with to help support and guide him on the inside. It's difficult to get him in a good position.

Here I was playing with pipe connector

User-inserted image

This is the bottom portion of the robosapien. There is a cover that goes over this but there's holes on each side.

User-inserted image

Pipes:

User-inserted image

User-inserted image

This is the converter and little cubby I made

User-inserted image

keyboard

User-inserted image

The top of the omni bot is same as yours but the hole is completely cut out.

#150  

Wow I love that keyboard , please link me!..wow

#151  

Go back page where I do update. The word keyboard is a link.

#152  

I hope you figure out a good way to mount the Robosapian torso to your base. The head you are using looks great on that body. I finally made a plastic head for my robot. I am using a Robosapian V2 body and my own robotic arms. I would like for my robot to be able to use Guile also. How do you get Guile to work with the EZ Robot software and hardware?

#153  

Sam, glad to see the progress you have been making. He has gotten HUGE. Oh, BTW, how do you like Denise?

Keep up the good work,

MovieMaker(Mel):D

#154  

Cant wait to see pics once it is painted:)

#155  

mcsdaver I decided to use a bracket that came with my 7" monitor to attach to the bottom of the robosapien, that is then attached to a servo.

I have not purchased the guile software yet. It has taken me a bit longer to get it all working than I expected. I am on my third robosapien torso. I still haven't cut the power cords yet. I am going to try to leave the battery casing in tack and just add an additional wire coming off it. We'll see how that works out.

Mel I have made progress, he has had to get bigger to compensate for all the goodies inside. 3 - 12V batteries that were a lot bigger than I anticipated. The mini itx is not so mini, especially once you start adding wires to it. Plus I added a cubby for my little keyboard/mouse combo.

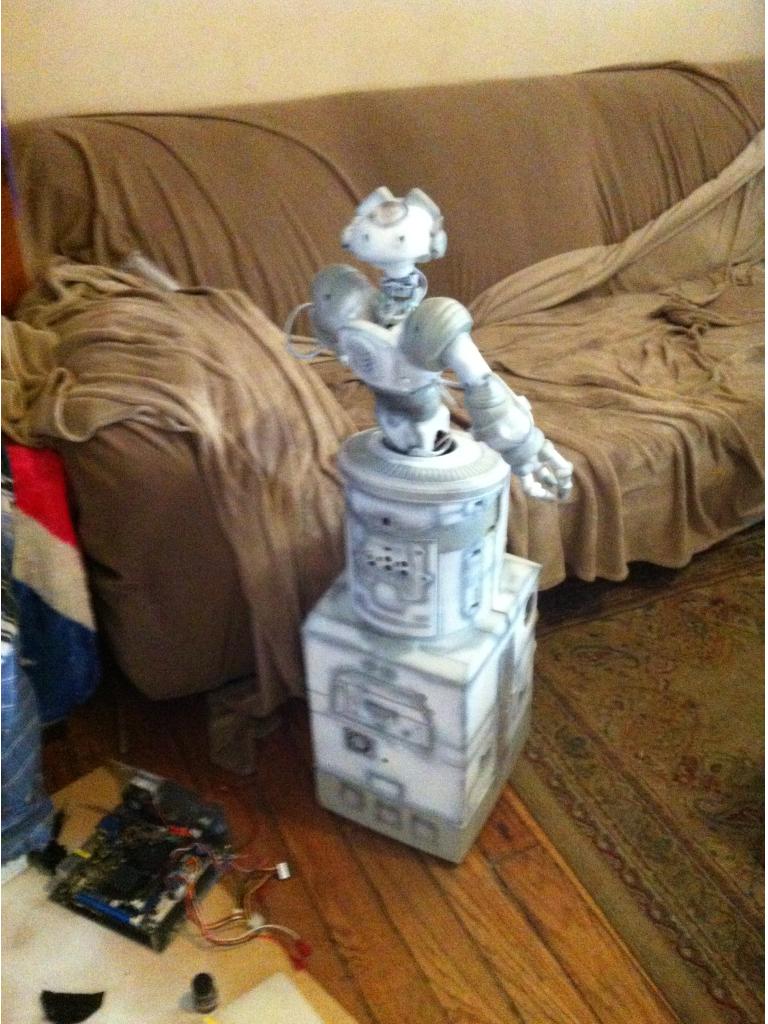
Here's the current state of affairs.

Josh sent me his dummy wheels, so I cut the bottoms and used tubing to secure it to the side in place, I then added epoxy around the joint for support.

User-inserted image

I did want the faux metal painted white then worn effect, with grey highlights...

User-inserted image

User-inserted image

User-inserted image

He's still not quite all the way together but he's getting there. I still need a name. Ideas are welcome.

#157  

I kinda like the idea of Frank, for Frankenbot....

#158  

You can tell this is going to be a cool one for sure!

#159  

I tend to name lots of robots Bob. Not sure why?

#160  

Mcsdaver did you have a imaginary friend named bob as a kid? Lol

#161  

No, never needed one. Just a good name for a robot. lol

#162  

I have decided that my base is too narrow and space confined.

Here's what I have been working on so far.

User-inserted image

I think I am going to use window motors.

I also what the 7" screen to slant back some. I am vertically challenged and I have to bend down to see the screen being flush was poopie. So on the new base the levels actually start going back. I think I'll build this out of cardboard first to see what adjustments I need to make.

#163  

Looks cool. I hope you get it the size you need. Many robots have used window motors for drive. I think over heating would be an issue if your robot was doing a lot of driving, but mild driving should not be a problem. Wheelchair motors work great for robots also.

#164  

Yeah my house is not that big, he's not going far but his A$$ has gotten to heavy.

#165  

Window motors can move him. They handle 200 lb droids.

#166  

Did you ever weight him Sam?

#167  

No. I just know when he moved it was barely and he was wobbling like a drunken sailor.

#168  

I went to Pick -N- Pull to get some window motors. Was told I could get them there for $5. As I was about to pay my admittance fee I luckily asked how much window motors were. He was like $33 or $45 if you want the whole assembly. I happened to look how much I could find new ones on-line. You can get them for about $30 with shipping new. So thankfully I didn't get dirty for nothing.

Instead I ordered these motors

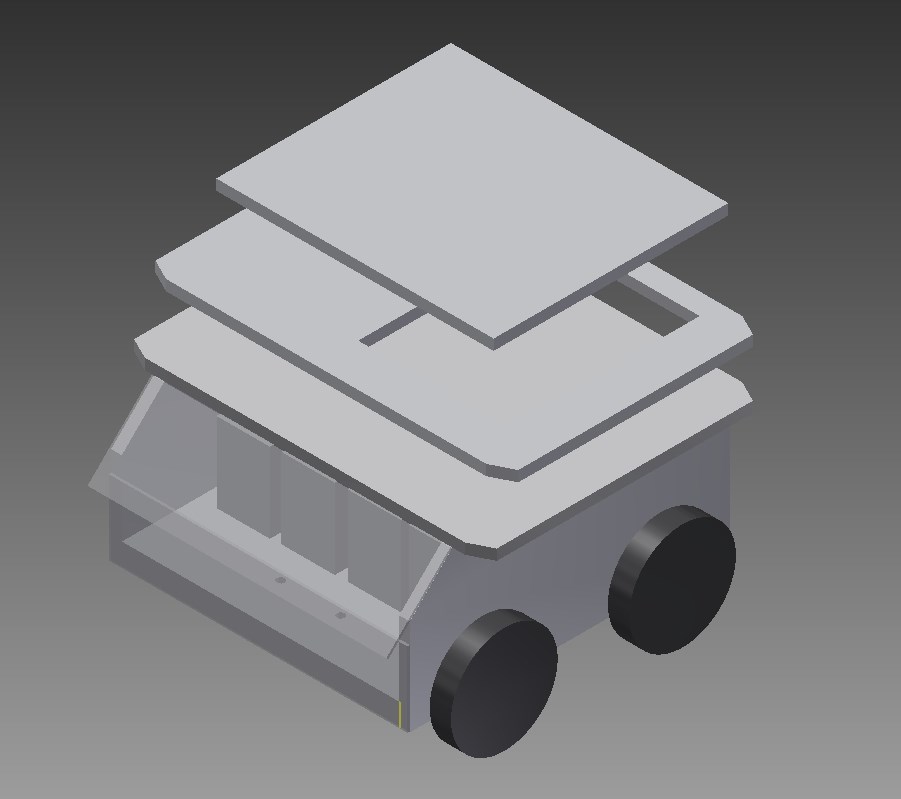
I started building my base out of cardboard to make sure everything fits well. Plus I can finalize where I want all my holes.

The levels actually create the perfect slant for the monitor. Standing up I was easily able to glance down and see it.

#169  

That's fantastic! I can't wait to see your mock up.

#170  

You can get new wiper motors for $17 from monterguts, but the motors you found look pretty good.

Alan

#171  

Alan, monterguts looks like a great resource. I found them for about that price too but then by the time you added shipping most came to about $26. The ones I got were free shipping so it kind of evens out.

So here's the cardboard pieces of the inside frame and that's from the CAD drawing.

User-inserted image

The cardboard doesn't hold much weight though.

Everything seems to fit nice. I do still need to figure out the spacing and get the standoffs for in between each level.

#172  

Looks like you can get it all to fit and with the new motors, driving will work much better.

#173  

It fits much better and there's actually space to work in there. I have 2 sets of speakers that fit too. Unfortunately with just the cardboard putting the motherboard on there, monitor and speakers, it started to cave. But I think it'll be stable this way.

User-inserted image

#174  

This is a very cool bot sfoy. Cant wait to see him/her running around. Hope you post a vid when that happens.

It will be interesting to see how long your motors take to arrive from China. I've been tempted to order parts from over there through Ebay but am to impatient to take the risk of waiting a long time.

Have fun! Dave

#175  

Dave, I order stuff from China all the time. It takes anywhere from a few days to 3 weeks generally to get it. There was one time I ordered something from the east coast and my boyfriend ordered from China. His arrived first.

#176  

Amazing how you can get things from around the world faster sometimes then from across the country.

Have you setteled on a name for your Bot yet?

#177  

Yeah I think the biggest reason is that they ship right away from China and generally they wait a few days before shipping in the US.

No... I have no idea what his name will be. I don't really like Frank. I am hoping that once he gets moving that it'll come to me. If not I will probably hold some contest on my website. Any suggestions?

#178  

Yay! I got my motors. Took 10 days from the day I ordered which isn't bad. I ordered some pills from amazon on the 20th, shipped from KY and got them today as well.

Waiting on these have kind of been holding me up a little. So anyone have any suggestions about dampening vibration? We are using this for a hexacopter.
Moon gel

United Kingdom
#179  

Gel pads (Moongel or similar), Dynamat, Silicone, double sided sticky foam pads or Rubber all work well.

#180  

@sfoy...hooray for the motor arrival now your YTBN bot can move...and that means....a VID!....Its hard to figure out a name for your own creation, sometimes our children are named even before their born and some children are often named months after their born.......and some of us ahem have more then one name under "certain" circumstances:) YTBN...yet to be named...which is the same name I have given to my young sailing friend's new refurbished 24 foot sailboat because he too has yet to figure out a new name..go figure

#181  

Rich I was looking up pics and saw that some people completely covered their servos in dynamat. I didn't really see it on motors. It looked like they more covered the entire area with the stuff. Would it be safe to cover it?

#182  

Thanks irobot. He can't move yet. So far he is just a cad drawing we at least his new base is. I have made it from cardboard but it's really just for spacing.

Now that I have the motors though, I have size the holes and decide where I want them and then get it cut. Yay!

United Kingdom
#183  

Possible high temperatures and cooling are the only reasons why I wouldn't use it on a motor, but that's only really an issue if the motors are being used close to their limits. Or just do it the other way around and cover the mounts or holes so it'll dampen vibrations between motor and mount.

#184  

If your trying to keep motors from making noise you can try a floating mount. Wherever you decide to mount , leave a 1/8 " gap and fill it with RTV Gasket maker silicon. Its a mild adhesive but can peel off when pulled. I've used it to dampen hard drives and servos too. Only put silicon around points of contact so your motor still gets air and try to face any air vents on the motor outward and uncovered.

#185  

That's the stuff you sent me right? The one that the tires were made of?

Germany
#186  

Hi sfoy! Do you have a Hearoid remote you dont need anymore? Regards, Mike

#187  

sfoy :-} Goodmorning :-} So how is this project coming along, I think it's really cool looking :-}

#188  

Sorry I haven't been on here in awhile. I am however, resurrecting my project.

Hello Mike - sorry no, I never had the hearoid remote/or head. I actually got the body from robotmaker.

Hello Stonewolf,

Thank you. I actually stopped working on the project and was semi discouraged for a bit. I liked the look of the robosapien upper body but it was so non-functional. I am a perfectionist and was very unhappy with the end results. I was also having problems with my motherboard and didn't have the heart to take it apart AGAIN.

I really wanted arms and had no idea how to go about making them from scratch. I have been looking for a omnibot 2000 for over a year now and finally got one.

So I have now been inspired and am going to try to replicate the adjutant from Starcraft. She will be liberated from the crane and I will be putting her on my base.

User-inserted image

I am getting new parts today. Very excited about that and am taking Friday off to start the rebuild.

#189  

I thought your project was cool looking already, but I like your new direction. If you want ideas for working robotic arms have a look at my humanoid robot Dave. If you need any custom 3d printed parts, this community has members with 3d printers. Omnibot 2000 makes a great base and the arms have very cool grippers.

#190  

Any new updates? Hope to see what you have made so far.

#191  

Not on this project. Many things happened, body got destroyed so it has been abandoned.

Currently I am slowly working on an omnibot 2000

PRO
Synthiam
#192  

Good to see you’re still rock’n robots!

#193  

Cool, Omnibots and EZ Robots were made for each other!

#194  

Ah DJ it’s hard to stay away! I’ll start a new project soon.

Mcsdaver I just love the omnibot look!

#195  

I love Omnibot robots

User-inserted image

#196  

Wow that looks pretty awesome.

#197  

sfoy, Glad to see you back on the forum.;)

#198  

It tickles me pink that your back to making robots Sam!