

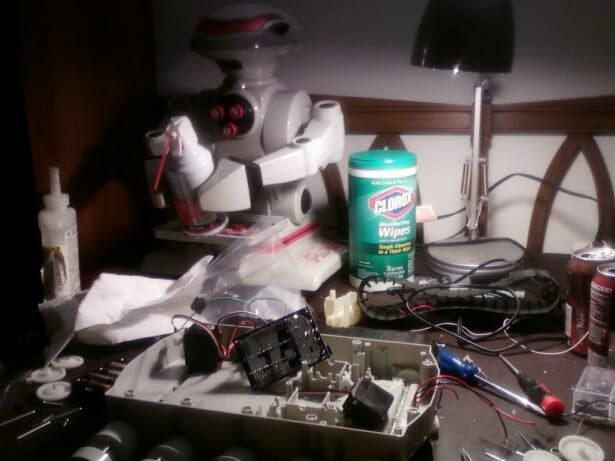
One of the things that I am doing that I'm not sure others are is; once i am satisfactorily done with the creation I'm going to seal him up. I am going to use the power switch that came in the original design for the RAD and use it to power on and off the ezb so I don't have to open it every time i want to turn it on.
I was having trouble with the treading and how i was going to mount the servo's for correct torque and speed. But i think i finally have that figured out.
Let me know what you think, feed back and suggestions are always welcome.
By jamerperson
— Last update
Discover more robots
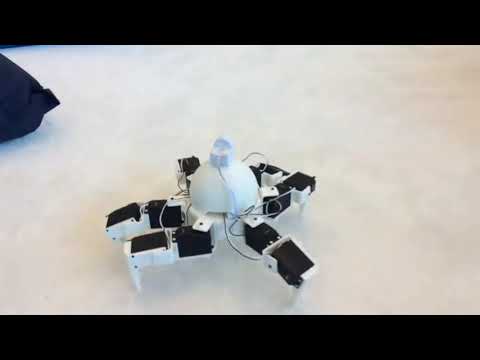
DJ's Super Six Hexapod
Large EZ-Robot hexapod built with 3D-printed STL files, EZ-B v4 controller, heavy-duty CYS S8218 servos, ready for DIY...
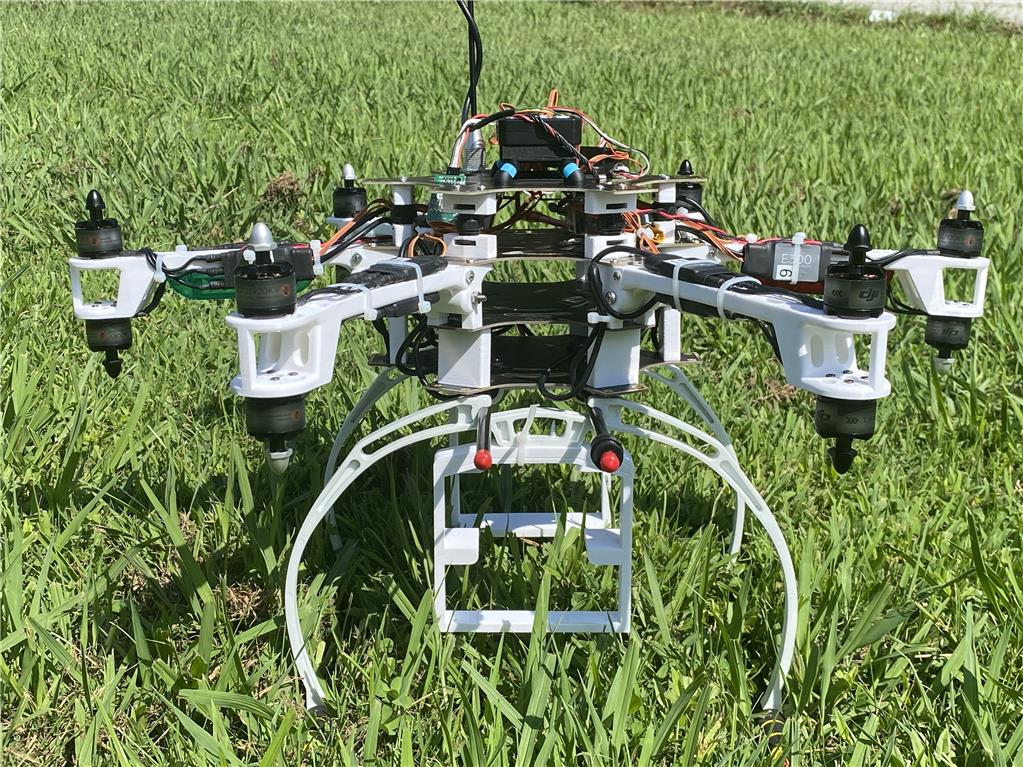
Jstarne1's Sky Anchor ,Gig Wifi Drone
Hex coaxial drone with 12 props and 15 lb thrust, 3D-printed frame to lift a WiFi antenna and camera for extended robot...
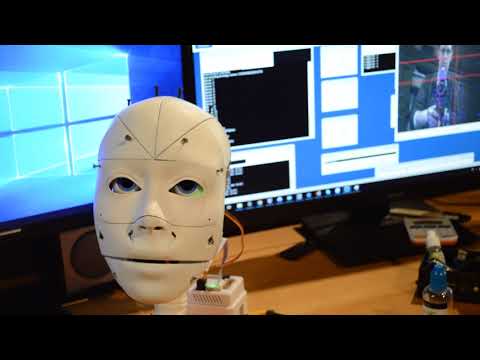
Vertigo's Getting Started On My Inmoov Head
Control an InMoov head with EZ-B and Synthiam ARC: scripted person tracking, pause-and-compensate servo control,...

It's an interesting toy to customize! I had one in the past. Have you thought to mount the collision sensor ping? better if you can do to turn sideways with one side used to detect obstacles. You're going to replace the engine of the arms, with servos? If you use a servo to move the torso, must be very powerful, you could mount a continuous rotation servo modified for gear and connect it to the torso, and control with the modified servo control ARC. Well, that looks good robot to pick up objects with their hands.
Ya, I have been toying whether to mount the ping sensor just under the table and only have the two circles (transmitter and receiver) sticking out while having the rest of the board inside the bot. or if I should do a collision control with a servo. The collision would be more practical although less stock looking. As for the torso, I have a sproket and chain set that will hopefully allow me to move the torso with a less powerful servo. (its the same one radmeck used here ) The head also doesn't look like it moves on its own so that is going to be another challenge, because i would like for it to be able to move side to side.
Well I finished the tread mounting problem and am ready to use hot glue to mount my servos for the base. Ill do it tomorrow, right now i have to head to work.
PS: sorry for the crappy vid quality, my cell phone doesn't take good pictures or video
dude nice work!! That looks like it'll be a pretty wicked robot!!!
How are you enjoying the ez-b?
I was one of the ones who it took almost forever (it seemed) to get their ez-b, I just think it helped build the suspense. The ez-b is working great so far. (I didn't get the arduino shield things but I don't quite think i'll need them for this project)
As for Brad, I am in the midst of soldering the speaker to some servo wires (btw i found just the ends because i have a bunch of wire at my local hobby shop) and soon going to hook up the lighting on the face too. I did hit a little snafoo; I was working on the lights trying to strip the wire and I pulled to hard and one of the bulb element pulled out of the rest of the bulb so i have to think how to fix that.
The arduino sheilds weren't packaged for a lot of the ez-b's over teh past month or two. I had purchased all of the hardware for the v3's but we still haven't received the pins for the arduino shields. I'll send them out to anyone who requests one. I'll post a message and send out emails to everyone soon as it's sorted out
Hey, so I put most of the rest of the robot together and started doing some preliminary testing. All was going well, then the head fell off. The hot glue didn't hold. I took the head off and continued testing the base with the body of brad still on it. After a few minutes one of the drive servos (continuous rotation) also came unglued. Both are easy fixes by themselves. But I kinda would like them to be a little more permanent than 5 min of testing. Does anyone have any hot gluing tips? I'm gluing the drive servos to a level plastic surface while the head doesn't really have a support structure. The head servo is held up by the head and then glued to the side of the neck to stop the servo from rotating instead of the head.
Sorry it's been a while since I have posted. I am currently dealing with the loss of my second grandparent this year.
We are very sorry for your loss. Losing a loved one is never easy.