
CMC206
USA
Asked
— Edited
Need Some Help /Wire Diagram To Go By
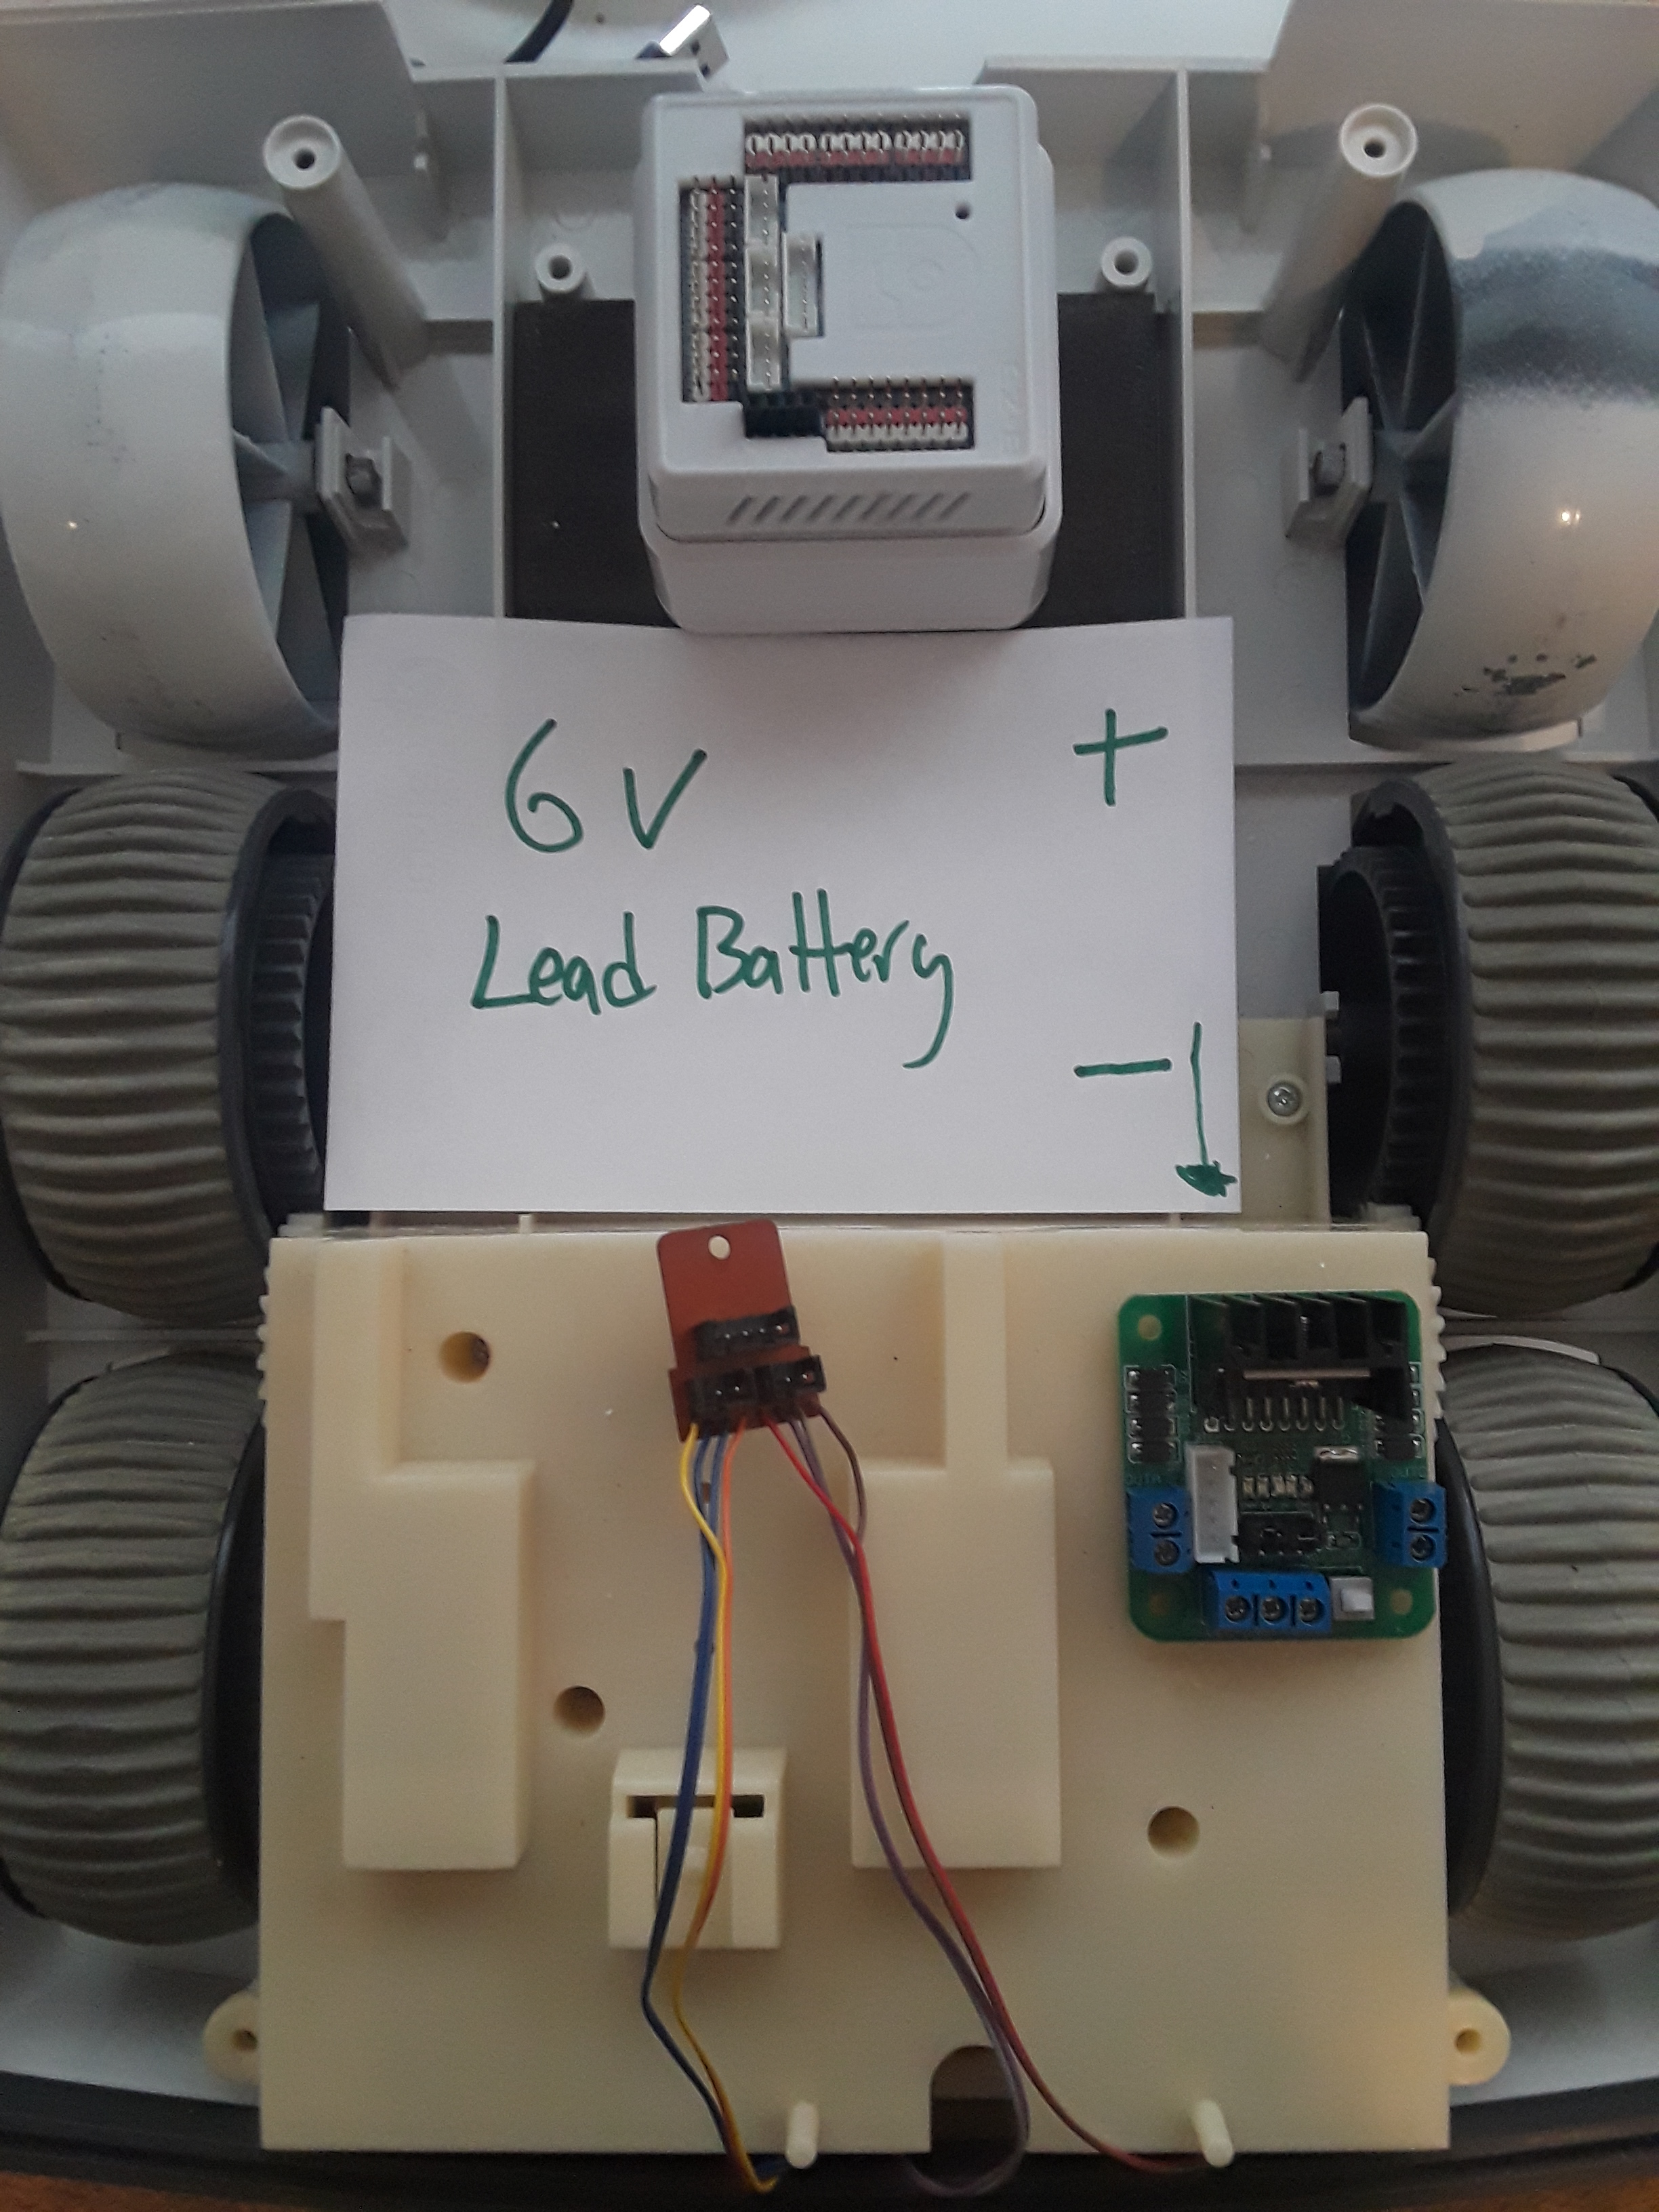
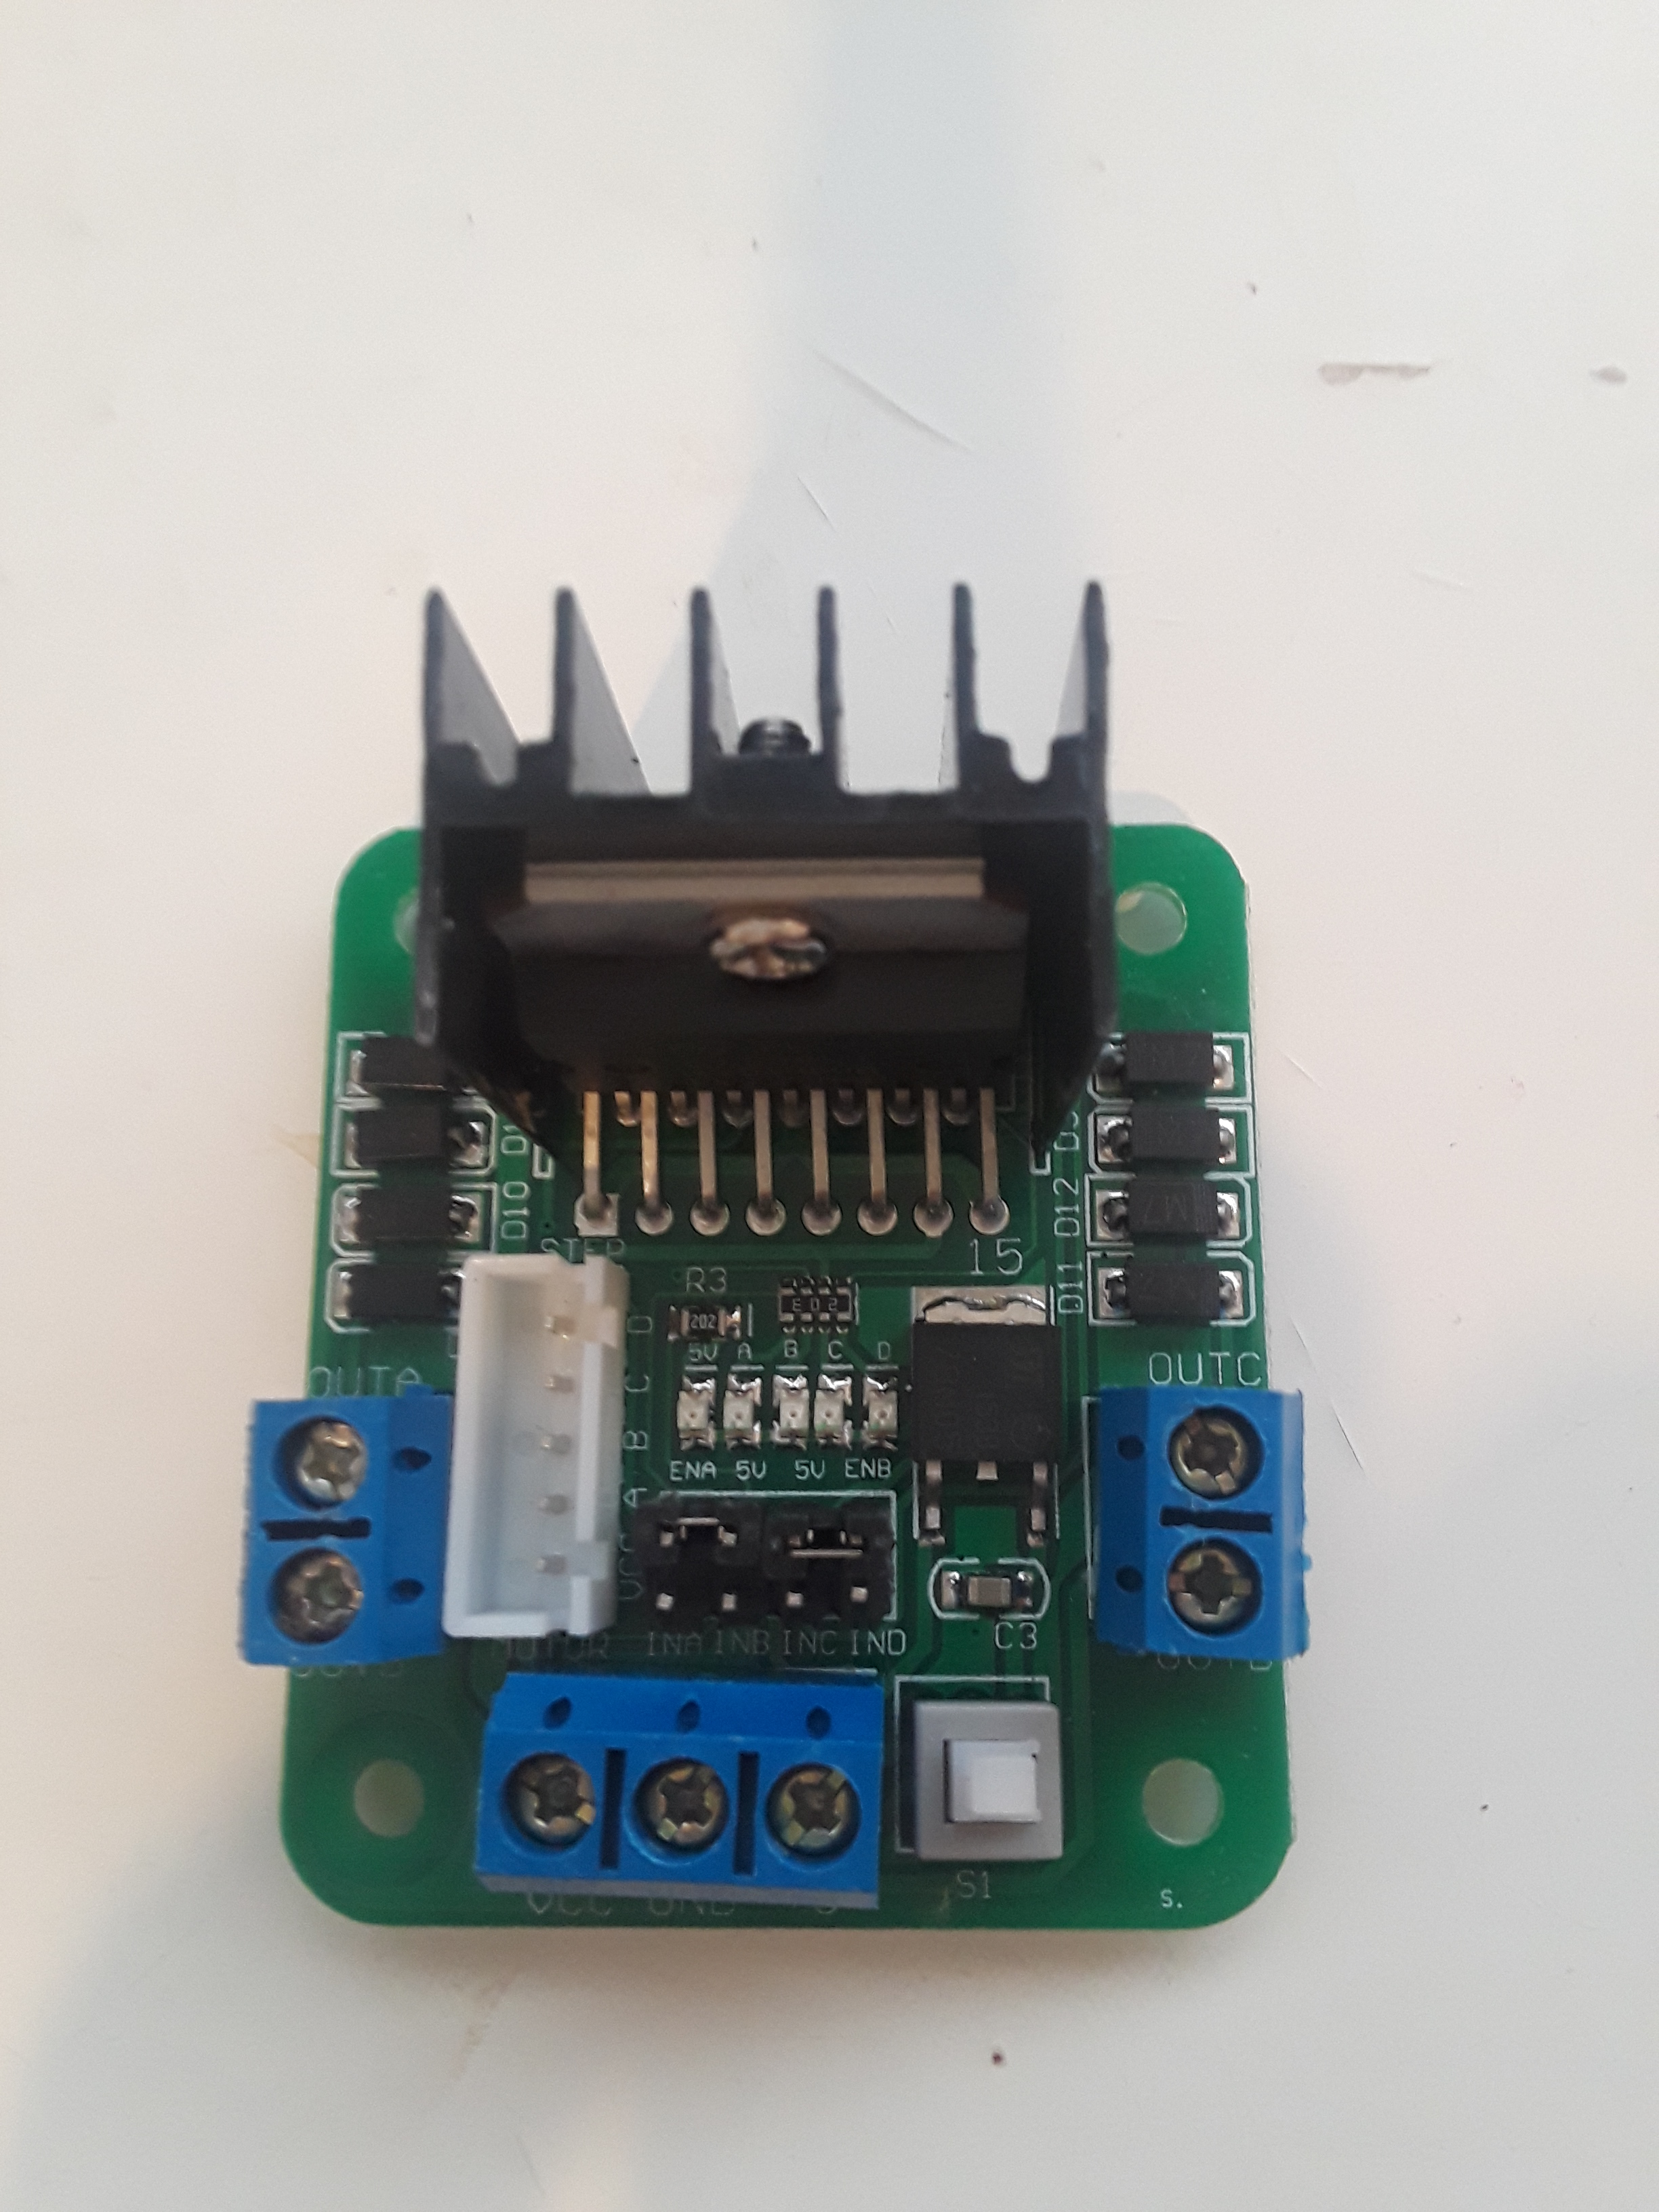
I have taken a couple of years off of this omnibot 2000 build. I kind of get stuck, frustrated and quit. Then every no and then I comeback and look at it again. I have watched a lot of the videos people/bot have recommended and I'm still stuck. Mostly this is because I'm not an electrical engineer...LOL I know how to take things apart and monkey with stuff. I can solder and follow instructions but this project has stalled. My main issue is that the videos go to fast and are not detailed enough for my limited knowledge. So here is where I'm at. How do I wire the hbridge to the ezb and battery and how do I wire the 8 motor wires to the hbridge? Here are a couple pictures to show what I have going. Thanks in advance for any advice.
Related Hardware (view all EZB hardware)

EZ-B V4
by EZ-Robot
EZ-B v4/2 robot controller: dual Cortex ARM, Wi-Fi, audio/video, 24 servo/digital ports, I2C/UART, camera and Synthiam ARC control for custom robots
Wi-Fi / USB
Servos
24
Camera
Audio
UART
3
I2C
ADC
8
Digital
24
Related Robot Skills (view all robot skills)

EZ-B V4 Info
by Synthiam
Displays EZ-B v4 internal temperature and battery voltage, shows built-in battery monitor and LiPo protection settings in Connection Control.
Dual Hbridge
by Synthiam
Two-channel Dual H-Bridge movement panel to control two DC motors (on/off) for forward, reverse, left, right via EZ-B digital ports; no PWM speed.

Hi,
Here is a great website, and video on Hooking up H bridge and other items
https://dronebotworkshop.com/dc-motors-l298n-h-bridge/
https://dronebotworkshop.com/
best of luck
Angelo
Thanks, EZang60. I got the hbridge figured out. Tonight I got the I2C cables, camera extender and jumper cables set so I was able to connect the BlinkM leds to the eyes and mount the camera. I'm waiting for the servo mounts that Xuven suggested and I will get his head right. Baby steps but I'm happy with our progress. Here are some pics of the eyes working. Cheers! CMC
Very good, have a nice week end
I had some difficulty doing the verticle servo so I just opted for the left-right movement only The good news is that I will be able to use the other servo in one of the arms. I was worried that I might burn out a servo or my kid might if we didn't hit an init script before starting. Even then every time I plug in the EZB the servos they all make a move to the right or a 0 position. So I did this repeatedly and that's when I got worried about the vertical servo that might get hung up. I figured that the left to right I won't have to worry.
Which servo mount did you get?
I got the same one as you linked. No worries. Moving on. Head is done and now I'm going to do an arm.