Asked
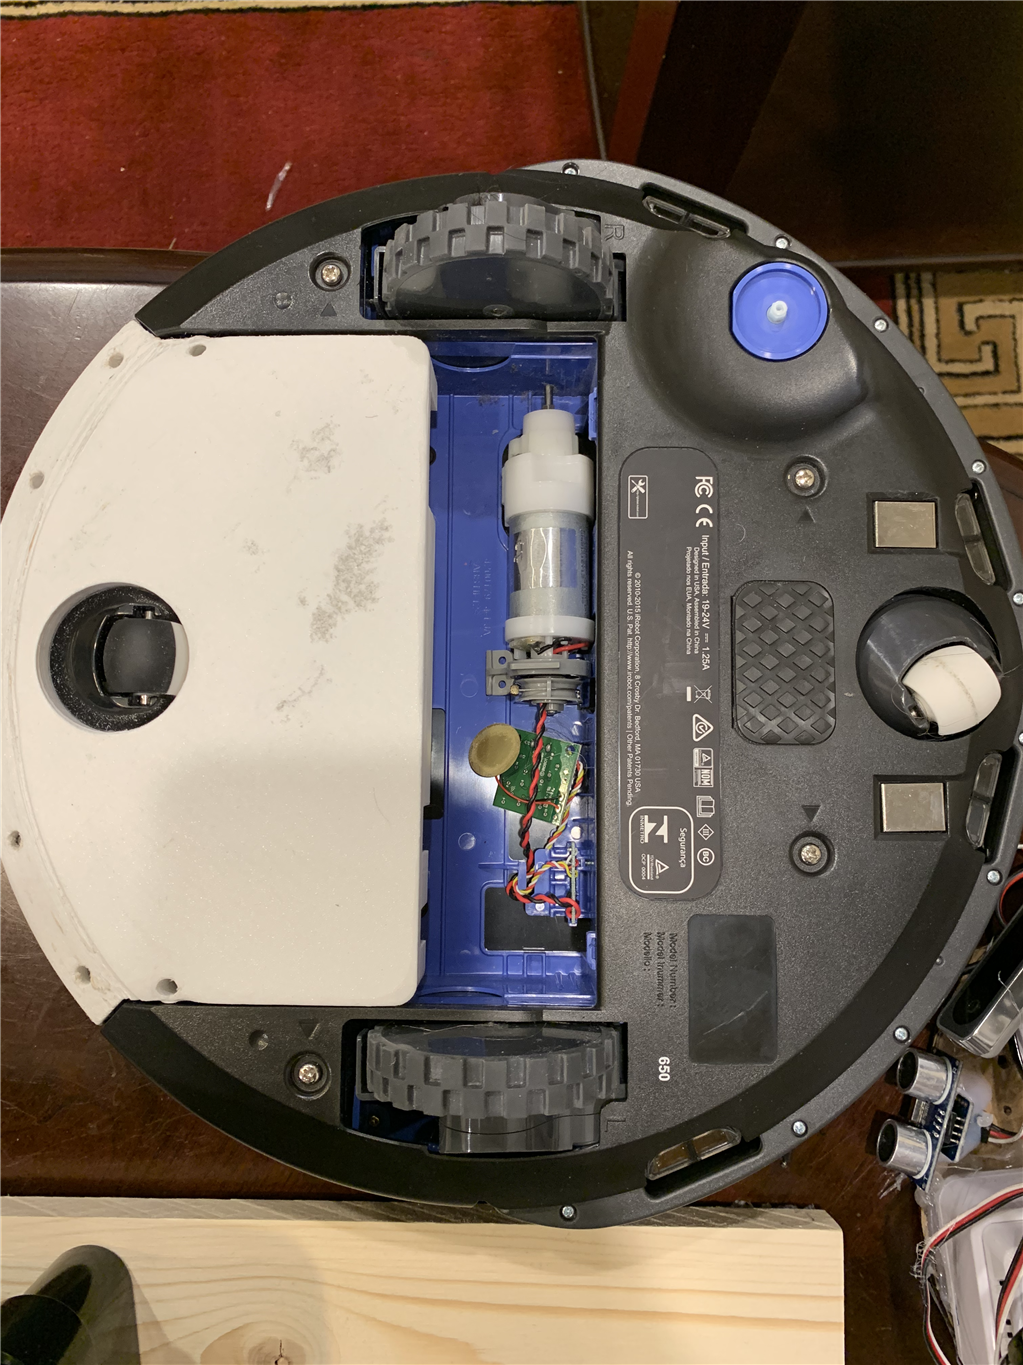
I printed the extra storage container on the roomba but when I went to install it I had to remove the guts of the robot. Now wondering do I just cut it all out (I assume the robot will know as there is a sensor board in the bottom so do I connect it all back in again? There are a bunch of fans motors speaker but I won't be using any of them any more. Does the Roomba Movement Panel still work ok and does it self doc etc after you remove these components or do you need to somehow make the robot think the sensors and actuators are still there and let it go through the motions?
Related Hardware (view all EZB hardware)
Roomba
by iRobot
Convert iRobot Roomba into a smart, fully featured personal robot with the EZ-Robot Complete Kit-movement control and Roomba manual included.
Controller Dependant
Servos
✕
Camera
Audio
UART
✕
I2C
ADC
✕
Digital
✕
Related Robot Skill (view all robot skills)
Irobot Roomba Movement Panel
by iRobot
Control Roomba/Create via ARC: drive, stream sensors, read encoders, configure COM/HW UART, and send pose to NMS for mapping/navigation.
Requires ARC
v22


Not sure about self docking, but we have the motors and stuff removed on our exosphere roomba with no trouble.
might be a good idea to simply unplug the stuff that you’re going to remove as a test first. Everything is connected with plugs on the roomba pcb
I think you will just end up like a create roomba as was sent to me with empty brush bin no motor there.Will still seek dock charger. Funny because I did the opposite, I bought a new roller brush to add on my Create roomba!xD
Nink, just open the bottom lid and unplug the motors. It will auto-dock.
I like the extra castor - that must make a great difference
Nink, I had to remove my 4th wheel on my 1st Gen Create, to get it to dock because it would not tilt back enough during docking. Maybe your unit will work, maybe at a different height? I will have to reinstall it when I put a robot back onto the Create, because it provides much better stability.
proteusy, I don't see a 4th wheel on your unit. Did you add one? Steve S
Yep, you can distribute the load all over the robot and it wont wobble.
Nink, even more space with the brushes and motors removed, maybe print a larger box. I like the extra castor!!
While on the roomba subject does anyone have enough knowledge of the motherboard to know if there there is a way to tag power from it only when the roomba is on? This would allow the roomba scheduling to power on the micro controller, which would boot up and take control via the serial connection. With the brushes removed it wouldn't be a problem that the roomba started first on a short cleaning cycle. It would then be possible to re-schedule the next start (via the serial) before telling the roomba to dock and powering off the controller.
skidroe, i have a cable to the battery soldering points. It has the roomba battery voltage all time.