
Step 6. ADC Example with Smoke Sensor.
This is an example using a smoke detection sensor module and an ADC Graph control, and a script that responds to specific ADC readings.
1.) Connect the smoke sensor module to an analog port on the EZ-B (This example will use "A0"). Then power up the EZ-B.
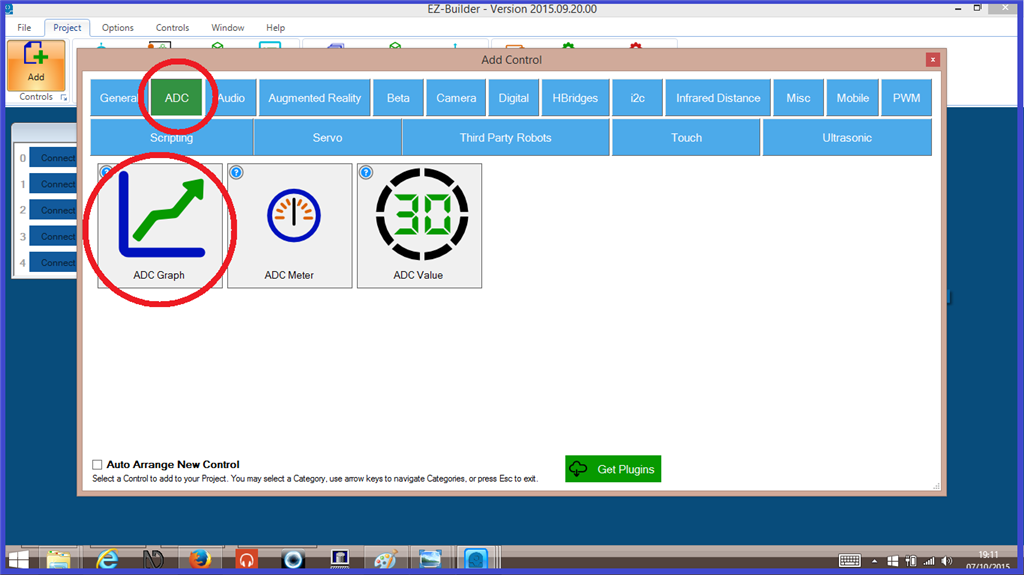
2.) Open EZ-Builder, then from the menu ribbon, click "Project", "Add controls", "ADC", then "ADC Graph" to add this to your project. Do the same, and add an "ADC Value" control as well.
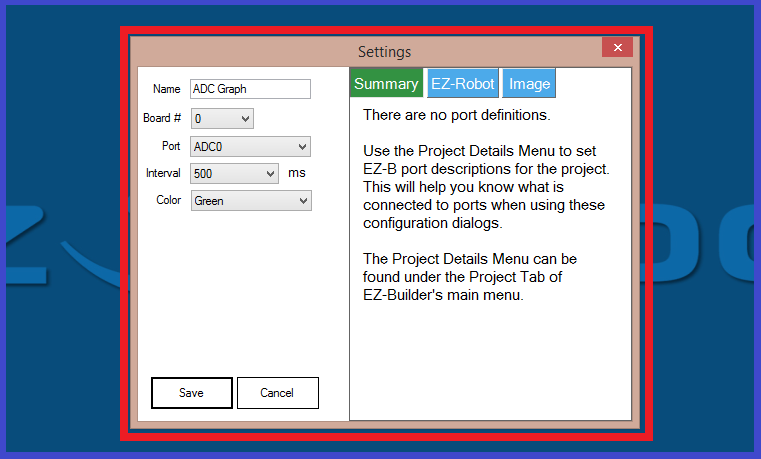
3.) On the "ADC Graph" and "Value" controls, click on the gear icon to open the configuration menu, and select the port the sensor is connected to, then click "Save".
4.) Now use a source to make smoke, and wave the smoke fumes in front of the sensor. You should now see the values change in the control windows. (Please take care with whatever source you are using to make the smoke with. Remember the old saying, "There's no smoke without fire").
5.) The more smoke that is detected, the higher the ADC values will reach. Make a note of the readings from the "ADC Value" control with a small amount of smoke, and a larger amount of smoke.
Now to make the smoke detector useful.
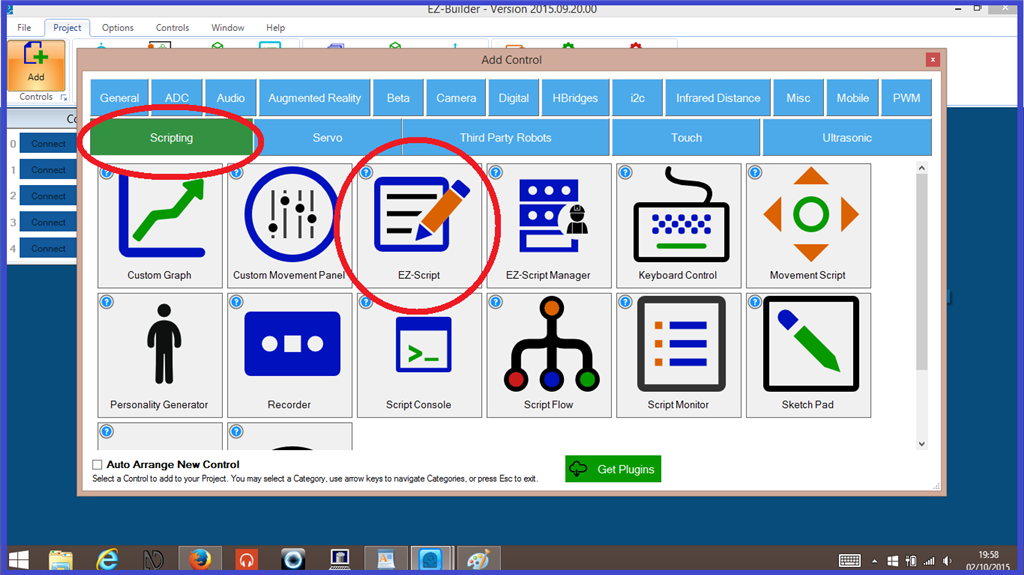
6.) From the menu ribbon, press "Project", "Add controls", "Scripting", then "EZ-Script" to add this to your project.
7.) Open the script configuration menu, and write or copy/paste the following script...
:loop
#Read's the value on EZ-B port A0
$smoke=getADC(adc0)

#Will detect LOW level smoke over 40
#Change the values if necessary.
if($smoke>40)
saywait("I am now sensing smoke, or gas fumes in the area.")
Sleep(10000)

#Will detect HIGH level smoke over 60
elseif($smoke>60)
saywait("Warning. I am now sensing an increased level of smoke, or gas fumes in the area.")
endif
goto(loop)
You can adjust the script above, and add a "greater than" 40 and "less then" 59 in the first half of the script, so only low levels of smoke will be detected. Anything over 60, and the second half will run. (Unable to post this example as using the greater than and less than symbols in this document. See screenshot below)...

Below, is a video demonstration showing the smoke sensor using both the "ADC Read" and "Script" controls in action...
And below is another video demonstration of the smoke sensor being used on a robot...
The next step will guide you through using sound sensors on an analog port. sound sensor

can this detect the audio for a jaw movement on a robot?
If you have a analog audio level sensor (has a microphone) hooked up to the ADC you can detect the strength of audio levels.
You may be able to run the audio from the speaker breakout on the EZ-B v4 or IoTiny to an analog pin, I've never tried it but in theory it would work. It's a 3.3V audio amplifier. Although, it might mess up your audio if you still want audio going to the speaker. Worth a try I suppose.