Step 5. Not Using a Soundboard for Auido.
Sometimes, using a soundboard may not be an option for you. This could be because the file size and amount of your sound effects or recorded speech phrases might be too large, or you want to make your robot become a jukebox and have access to your music library. As mentioned in "step 1", there are limits to how many audio files you can add to a soundboard which ultimately comes down to your own computers system resources.
So how do we play audio files without a soundboard? We use script. Here's one way of doing so.
1.) From the ARC menu ribbon, click "Project", "Add Controls", "Scripting", and "EZ-Script". Once the script control has been added, add another one. On one of the script controls, click on the "Script Config" tab to open the script editor.
2.) Rename it something like "Play Music". I would at this point say add the following script, but this script will not work for you...
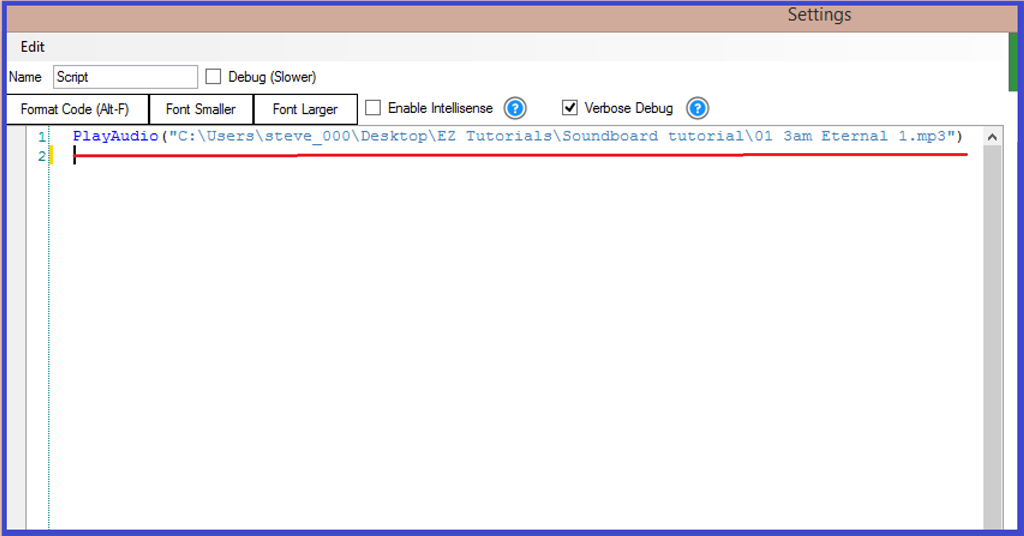
PlayAudio("C:\Users\steve_000\Desktop\EZ Tutorials\Soundboard tutorial\01 3am Eternal 1.mp3")
The reason why it most likely won't work for you, is because this is going to access a music file I have on my computer, and your command pathways will be different for you. So to help you, here is a breakdown of the script line.
PlayAudio("") is the command you can use. This will play the audio file. This you have to use, putting the rest of the command path in between the speech brackets.
C:\Users\steve_000 is the computers hard drive name and my user name I am using for this example. This will be different to yours.
Desktop\EZ Tutorials\Soundboard tutorial is the name of the three folders the audio file is stored in (Desktop, EZ Tutorials, and Soundboard tutorial.) Again, this will be different for you.
01 3am Eternal 1.mp3 is the name of the music track. This will also be different for you, but notice the end of the path... it ends with.mp3. As with the soundboards, only MP3 and WAV files can be used.
3.) To find the correct command path you need, open the folder stored on your computer where the audio file is stored.
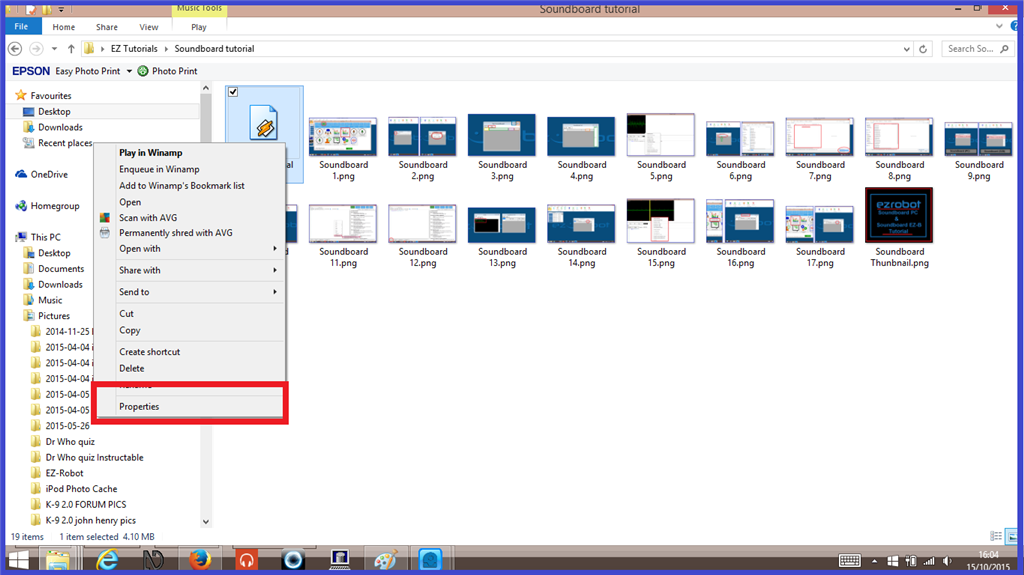
4.) Right click on the audio file name, then on the list, click on "Properties".
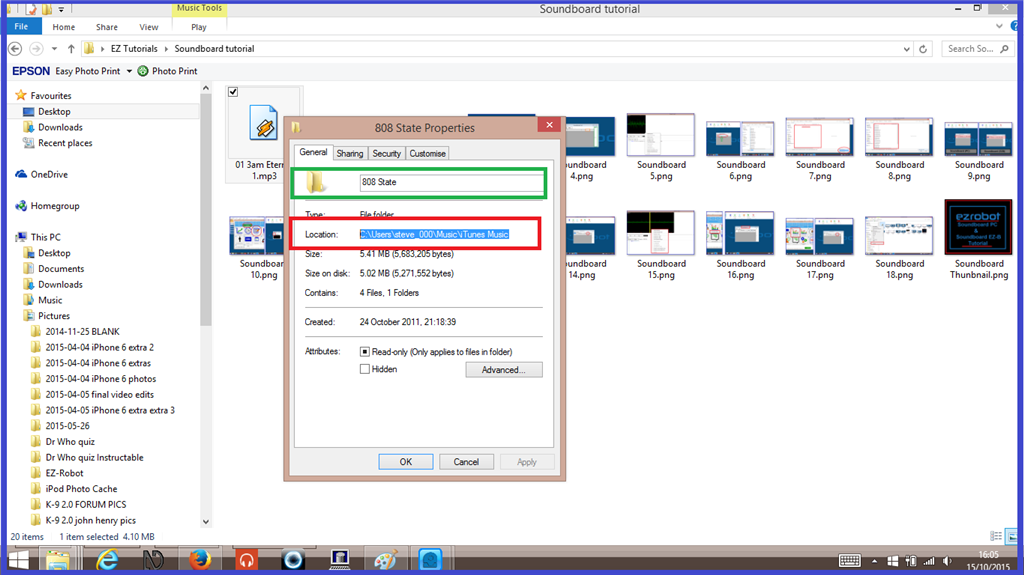
5.) On the "Properties window, you will see two parts of the command path you need. Copy and paste the part highlighted in red in to your scrip after "PlayAudio(" then go back to the properties window and copy/paste the audio files name, highlighted in green.
6.) Before you paste the file name, add a backslash [/b] at the end of the what you have pasted already, then paste the file name after the slash, and the closing [b]") so you will have something like the following...
7.) Save this script, then open the script editor on the other script control.
8.) Rename this "Stop Music", and write in the following script...
StopAudio()
9.) Save this script, and now you are ready to test it. Press "Start" on the "Play Music" control and your audio track will begin to play. To stop the track from playing, press "Start" on the "Stop Music" script.
Instead of using two script controls, you can use a script manager and add multiple tracks. The only limit to how many audio tracks you can have, is the amount of audio tracks you actually have.
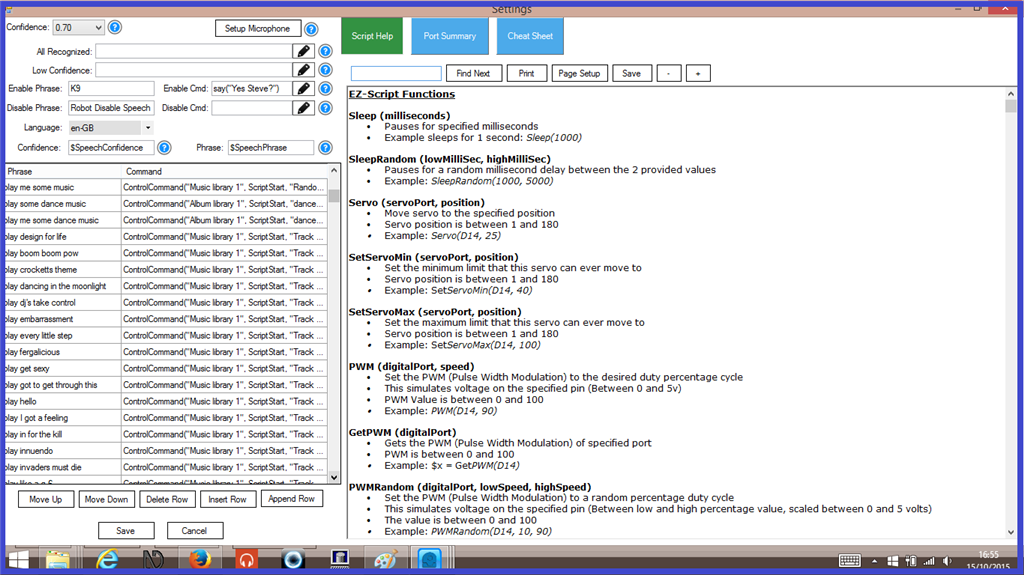
Another option is to add a "Speech Recognition" control, put in "Robot. Play track one" in the "Phrase" list, and add the ControlCommand in the "Command" list. Then you would have a voice activated audio system. Pretty cool. cool
There is another tutorial written by one of EZ-Robot's valued resident experts, Justin Ratliff, who explains different ways to play audio without a soundboard.
How To: Control Windows Media Player
And this one gives a solution to playing audio file using WinAmp media player and CLEveR command prompts that gives you more control over your media files.


