
Synthiam Support
Creating Frames By Moving The Robot Arm Servos
Create New Frames
The Auto Position consists of frames. Each frame is a position of your robot to complete a goal. The frames will later be added to an action. An action is a collection of frames. In this stage, we'll add frames based on the robot's position. We'll manually move the robot and save each position as a new frame.
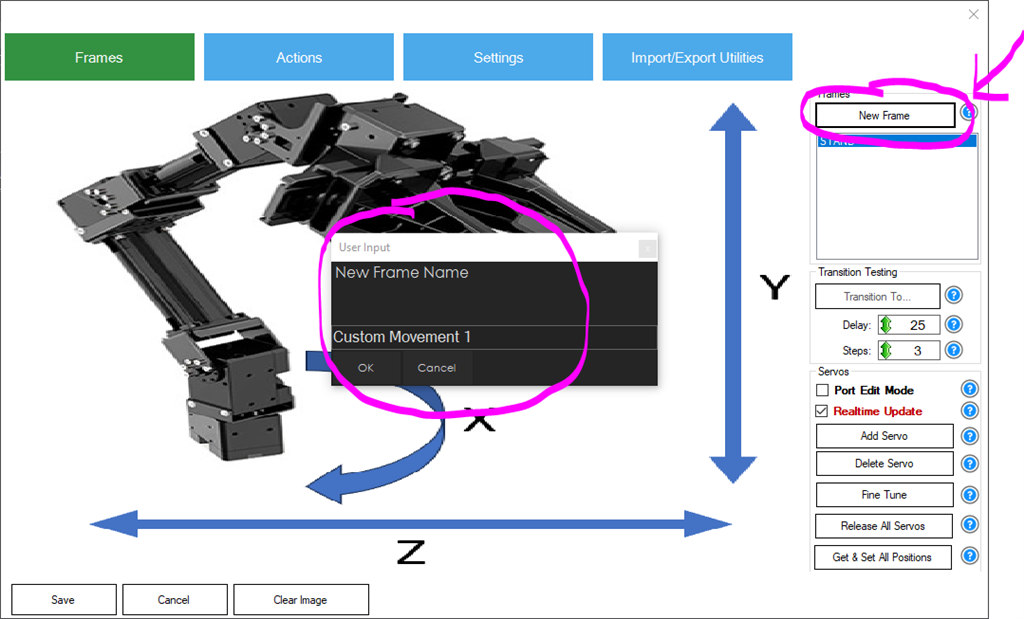
Press the NEW FRAME button. When this button is pressed, a dialog will be displayed prompting for the name of the new frame. The current selected frame's servo positions will be used for the new frame. We'll call this frame "Custom Movement 1" because the following frames will be called "Custom Movement 2" and so on...
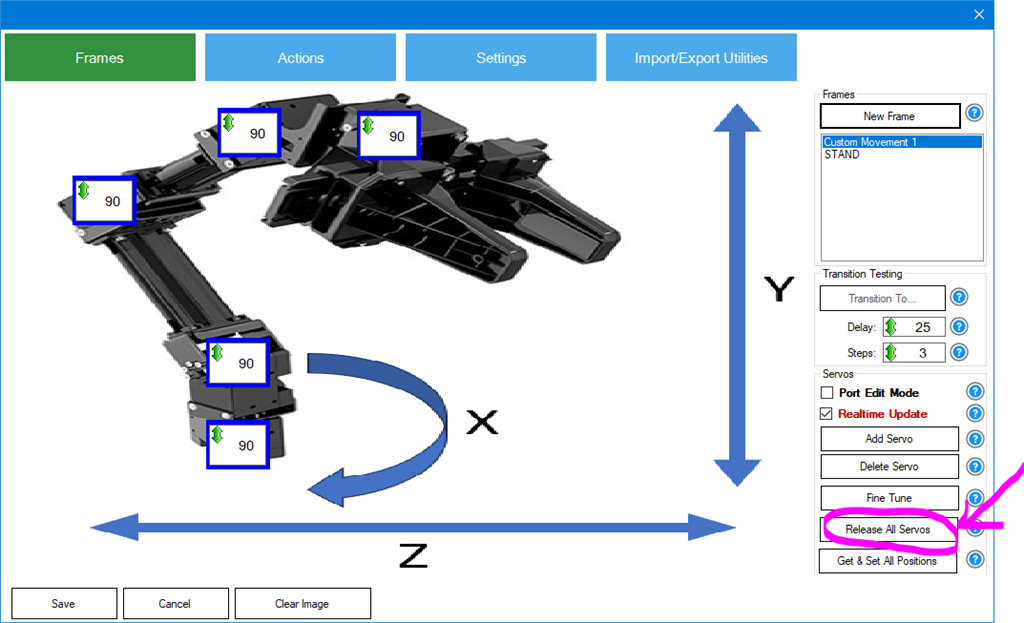
The robot will be in a holding position at this point. We want to move the robot so we need to release the servos. When this button is pressed, the servo will go limp and the robot will fall over.
*Note: Ensure you are holding the robot before pressing this button so it doesn't fall over and damage itself.
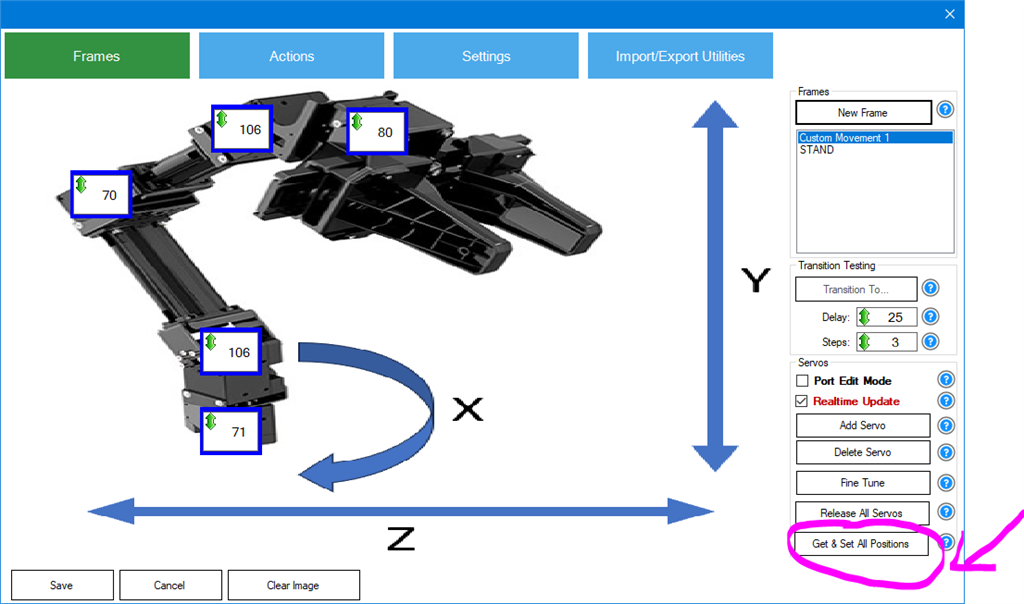
Now manually move the robot arm into a position. Once you have moved it into a position that you wish to save, press the Get & Set All Positions button. This will obtain the positions of the servos and set them to the frame respectively.
To continue adding more frames with custom positions, repeated the above steps. Continue adding new frames based on the most recent frame positions by pressing New Frame. When you're done adding frames, there will be several frames, one per position of the robot to complete the task.
Summary To summarize the process, this step consists of...
- Select a frame to start from
- Press New Frame to create a frame from the current frame positions
- Hold the robot and press Release All Servos
- Move the robot arm into a position for the current frame
- Press Get & Set All Positions
- Repeat
