
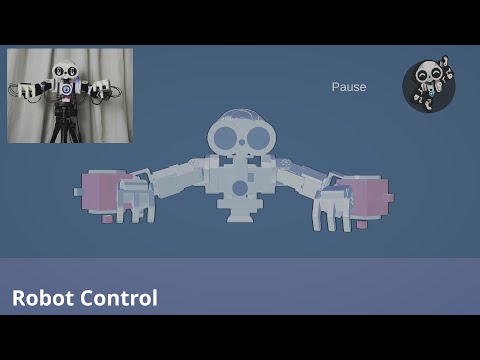
This is aimed towards anyone interested in how to link a 3D environment to the ARC software package... This example shows how to extract servo positions from the virtual model in Unity and send them to ARC.
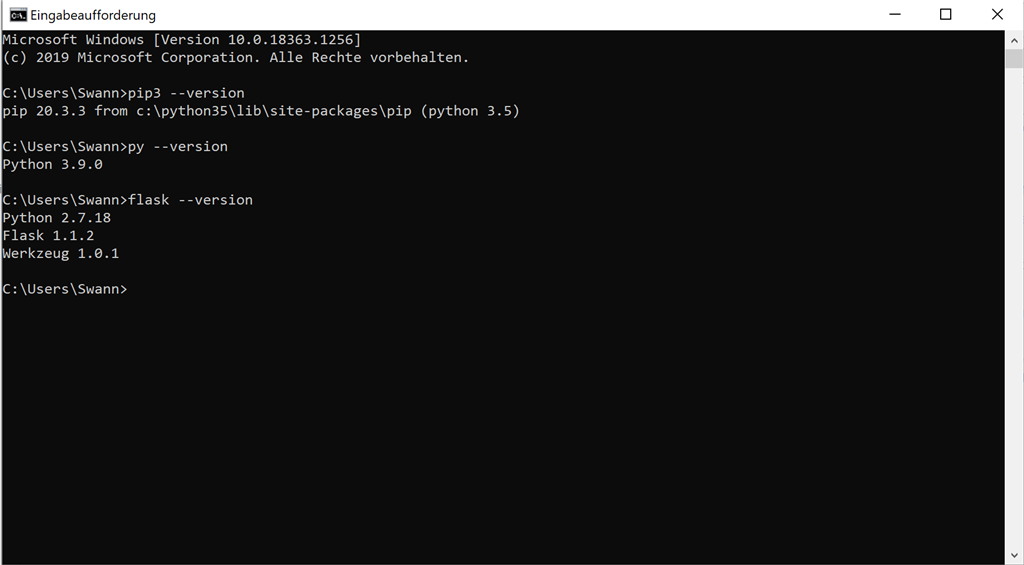
- Install Flask, which is a bit finicky, but just take your time and follow this tutorial to get Flask up and running!
https://timmyreilly.azurewebsites.net/python-flask-windows-development-environment-setup/
Once this is done, you did not only install Flask, but you also created your very first own local server...which is a great feeling, right?
- Download the Unity App, its early alpha...so just let me know if anything is not working out as expected!!
- Open ARC and create a new Python script...
Now, with all the prerequisites being sorted out you will just have to copy and paste this into your Python script! Change the line port = 'COM19' to the COM of your connected Serial Bus. And run the script...
from System.Net import HttpWebRequest
uri = "https://127.0.0.1:5000/get_positions";

from System.IO import StreamReader
import clr
clr.AddReference('System.Web.Extensions')
from System.Web.Script.Serialization import JavaScriptSerializer

port = 'COM19'
baud = 115200
#baud=1000000
COM.Close(port);
COM.Open(port, baud);

def readData():
  webRequest = HttpWebRequest.Create(uri)
  response = webRequest.GetResponse()
  streamReader = StreamReader(response.GetResponseStream())
  jsonData = streamReader.ReadToEnd()
  js = JavaScriptSerializer()
  dataDict = js.DeserializeObject(jsonData)
  return dataDict

def _command(servo_id, command,lbp,hbp,lbt,hbt):
    length = 7
    sum = (lbp+hbp+lbt+hbt)
    checksum = 255 - ((servo_id + length + command + sum) % 256)
    COM.Write(port,bytearray([
        0x55, 0x55, servo_id, length, command,lbp,hbp,lbt,hbt, checksum
    ]))

def move(servo_id, position, time=0):
    _command(
        servo_id, 1,
        lower_byte(position), higher_byte(position),
        lower_byte(time), higher_byte(time),
    )

def lower_byte(value):
    return int(value) % 256

def higher_byte(value):
    return int(value / 256) % 256

def moveServos():
  dataDict = readData()
  servo =(dataDict)
  for servo,position in enumerate(servo):
      move(servo+1,position,0)

while True:
  moveServos()
And copy and paste the following code into the file you created in step a) and run the script... You will get a message telling you, your server is up and running!
from flask import Flask, json ,request

servoArray = [500, 500, 500, 500, 500, 500, 500, 500, 500, 500, 500, 500, 500, 500]
startup = True

app = Flask(__name__)

@app.route('/set_positions/', methods=['GET','POST'])
def set_positions(position):
    position = str(position)
    global servoArray
    position = position[1:-1]
    servoArray = position.split(',')
    servoArray = list(map(int, servoArray))
    return json.dumps(servoArray)

@app.route('/get_positions', methods=['GET'])
def get_positions():
    return json.dumps(servoArray)

@app.route('/')
def index():
  return 'ARC REST Index Page'

if __name__ == '__main__':
    app.run()
Now just run the ZOE_2D.exe and control your virtual robot with a Gamepad or by using w,s,a,d and q,e on your keyboard!! Your real robot will update the servo positions in correspondence to the virtual robot!
If you are not having a real robot set up, you will still see the positions being updated in your server window! Also you can access the servo position updates in your browser https://127.0.0.1:5000/get_positions
If you would like to test this setup with another servo configuration just change the following line in your Python script...
move(servo+1,position,0)
to
Servo.SetPosition(servo, position, 0);
Have fun testing...
Discover more robots
Stiko's Henry The Enchanted Tree

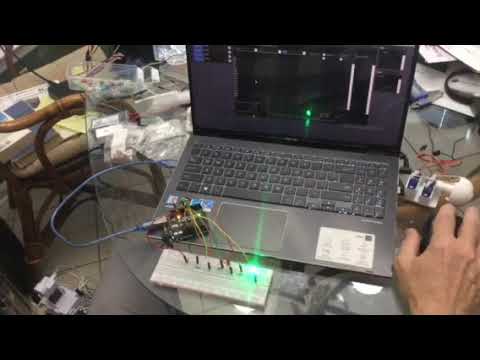
Foamtastic's Working On A Baby Dragon.

Thank you so much for this !!!! Can't wait to try it out!
Hi @Mickey Just tried to install unity robot comes up works with WASD keys and I rigged my robot arms similair to your servos. Really old version of python 2.7 and current virtualenv not working properly as I get error No module named importlib_metadata when I try to create the Hellowold virtualenv ? I guess I have to work that out. Are these old instructions can you use python 3? Not sure I understand com port setting is your robot connected vial serial uart so I need to connect ezb via serial and not IP? Thanks
Hey it all works with python3, I would actually recommend python3...since python2 being depreciated! But it will probably take a few google searches to get it all to work! At least in my case it did... You also don't need the virtual environment, just install the whole thing globally...I did the same!
Let me know if you need help!
You also don't need the virtual environment, just install the whole thing globally...I did the same!
Let me know if you need help!
I am using serial bus servos with my robot, but once you got Flask set up and the server is working, which is the most important step, I will modify the EZ-Scrip for you...its very simple, and you will be able to use your servos in ARC, just like you are using your servos now!!!
OK flask hello world is up in 3.9 :-) thanks
Sweet...now you will just have to copy the following code into your hello world example and run it...
After you did the app will send servo positions to the Flask Server, you can see it updating live or check by putting this into your browser... https://127.0.0.1:5000/get_positions
Here is the code once more...
Let me know if everything works so far...
Added function for live playback after recording motion...
@Nink let me know if you need help connecting your robot rig with PWM servos...I can set you up!!
Thanks @Mickey I have to get back to this. The NUC computer I was using just moved to another robot so I have to install python and ARC on another desktop PC.