Hello all,
I have been working for the past 6 months with James V. He has been building the physical R2D2 Model as I have been architecting and coding the electronics.
We are in the assembly and testing stages now. As we complete each step I will be posting the information here. There are a lot of folks working on R2D2 Projects and we have decided to open source the complete project. James has been posting a blog for the building of the physical robot and I will be posting a website for this project as well. Until we have a web design person in inplace I will be posting our progress here.
Updated:05/09/
I hope you find it useful in your project R2D2 or not.
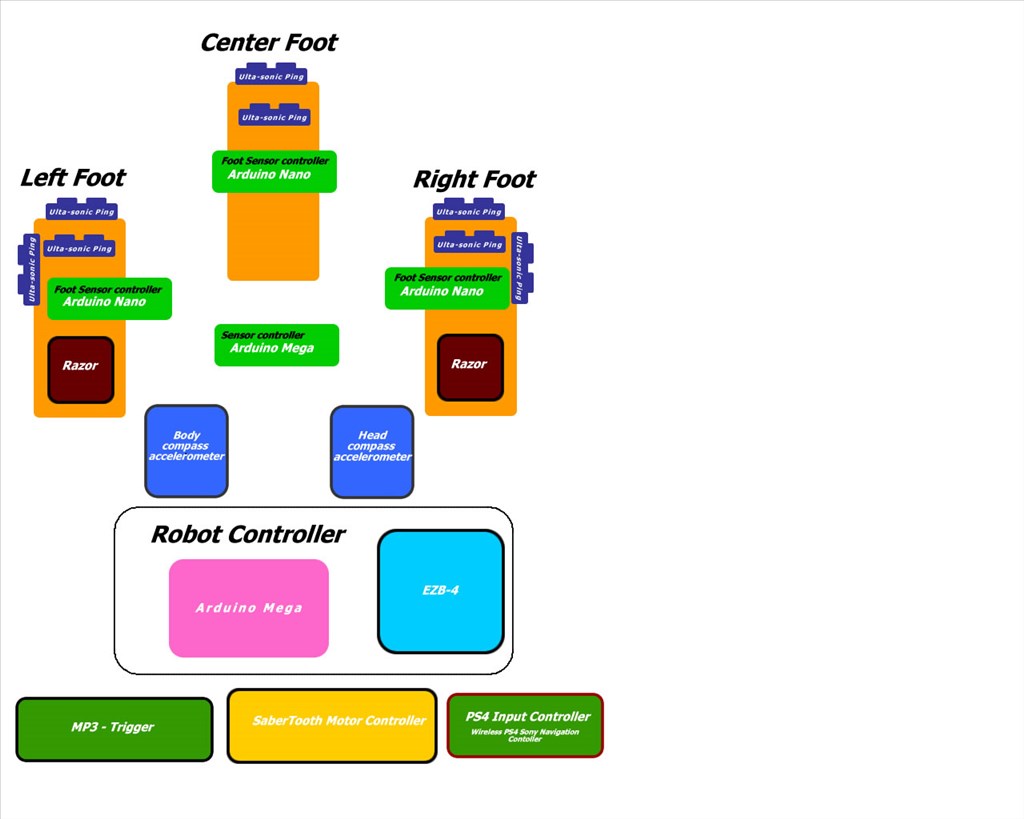
Foot Sensor Controller = X3
Left and Right Foot Sensor Controllers will have 3 Ping Sensors Using a total of 4 pins on the Foot Sensor Controller.
Center Foot Sensor Controllers will have 2 Ping Sensors Using a total of 3 pins on the Foot Sensor Controller.
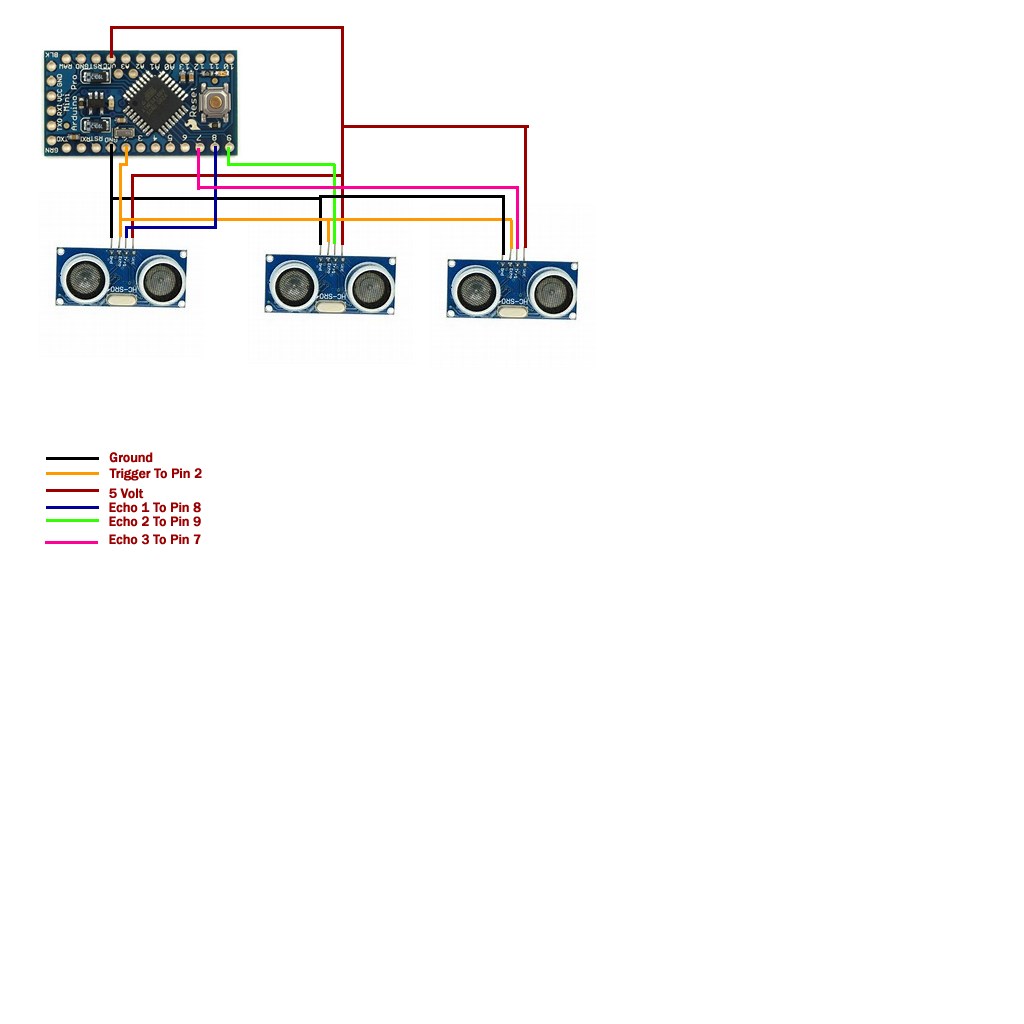
We will be using Arduino Nano V3 boards for processing. Pin = 2 = trigger port on all ultrasonic sensors. Pin = 7 = echo from ultrasonic sensor (1) - Front Pin = 8 = echo from ultrasonic sensor (2) - Down Pin = 9 = echo from ultrasonic sensor (3) - Side /Left or Right
Each Foot controller will use this same wire up to connect to sensors.
Each foot controller will connect to the master sensor controller using serial port connections.
Foot sensors will connect one of 3 port Left foot = serial 1 Right foot = serial 2 Center foot = serial 3
Actually the Sensor controller will poll these ports and determine what foot is on what port.
I have listed these ports as these are the ones we intend to use.
Foot sensors receive single by commands from the Sensor Controller.
Basic Command Set Follows:
"a" = Dec(97) = Hex(61) = OCT(141) = Bin(1100001) "b" = Dec(98) = Hex(62) = OCT(142) = Bin(1100010) "c" = Dec(99) = Hex(63) = OCT(143) = Bin(1100011) "I" = Dec(105) = Hex(69) = OCT(151) = Bin(1101001) "s" = Dec(115) = Hex(73) = OCT(163) = Bin(1110011)
These are internal commands to the R2D2 Robot Control System and are sent by the Sensor Controller. Results are routed to the Robot Controller Arduino Mega Board.
These commands are read the first incoming Byte and will drop the remaining. This allows for any type of line ending to be used or not. (no line ending, LF, LF/CR , CR, etc.)
Compass Accelerometer = X2
Body Compass / Head Compass Connects to the Sensor Controller via I2C
(Software is in Alpha Development now and will be added to Sensor Controller when it comes out of Alpha Development and moves to Beta.)
Sensor Controller
The Sensor Controller will connect to the Robot Controller Arduino Mega Via Serial Communication.
We will be using the Arduino Mega Board are out Sensor Controller.
The Sensor Controller will take commands from the Robot Controller Arduino Mega Via Serial (0).
The Sensor Controller receives complex commands from the Robot Controller Arduino Mega.
a:bb:c Command Pattern received by the Sensor Controller.
?Example: We want the distance on sensor 1 of the Left Foot.
D:LF:1 - command sent to Sensor Controller
Return Sent Back using the request above
D:LF:D1:15
D: = Distance
:LF: = Left Foot
:15 = 15 cm distance from Left Foot.
?Reserved tokens are:
D: = distance
I: = information
O: = Orientation
T: = temperature
(This is just a sample request and response. All commands are fully documented in the developers manuals.)
Razor
Razor motor drive system
Razor Motors connected by sprocket and chain to drive 2 wheels per foot.
2 Feet will be powered while the third foot will be passive.
Razor Motors will have a 12/24 volt DC Power and be controlled by a Saber Tooth Motor controller.
The Saber Tooth Motor Controller will take its commands from the Robot Controller Arduino Mega.
Saber Tooth Motor Controller[/]
Saber Tooth wire up information follows.
(we will post the wiring for this in the next post)
Connects and takes commands from the Robot controller Arduino mega.
[b]Robot Controller
The robot controller is made up of 2 controllers.
Arduino Mega Sensor controller Mp3 - trigger Saber tooth motor controller Ps4 input controller Speech recognitions Controller Ezb-4 (complex connection using Pulse wave modulation and serial combinations) This controller has a custom plug and play system to allow for changing and combining AI systems. ?The ezb-4 connects to the system in the same way C++ coded AI systems will plug in and are handled in the same. ?Connection = (complex connection using Pulse wave modulation and serial combinations) This type of connection is custom built for this project and will get a name soon.
Ez-robot EZB-4
Sensor Controller - i2c Ezb camera - dedicated connection Arduino mega (complex connection using Pulse wave modulation and serial combinations)
=============================================
This is the first post and has the setup for foot sensors and a sensor contnroller. We will be adding Temperature probes , sound sensors , Doppler radar and many others. As these systems are tested and implanted into the bot we will give all wire and code used.
============================================= update 5-12-2015 Mode operations.
The R2D2 build will run in 1 of 3 modes.
Mode 1 : User Controlled Mode 2: Self Automation - AI input Mode 3: Ezb-4 Mode
Mode 1 : User Controlled User will use a Sony Ps4 navigation controller. (add control functions here.) Movement commands pass through the Robot controller Arduino mega (RCAM). In return the RCAM will validate. (all commands are validated before the command is passed to the saber tooth motor controller.)
Self Automation - AI input (documentation coming soon) Movement commands pass through the Robot controller Arduino mega (RCAM). In return the RCAM will validate. (all commands are validated before the command is passed to the saber tooth motor controller.)
Mode 3: Ezb-4 Mode (documentation coming soon) Movement commands pass through the Robot controller Arduino mega (RCAM). In return the RCAM will validate. (all commands are validated before the command is passed to the saber tooth motor controller.)
RCAM: sensor validation system(SVS)
The sensor validation system contains a rule engine that will validate a rule set before final commands to all motor controllers, servos that extend the body, components that heat up or dislodge from the main chassis.
Rule example #1
=============================== 1. Movement : Forward : Restriction 2. D:CF:Front = < 5(cm) 3. Action: Forward movement: STOP
Line 1 denotes the type of rule. Line 2 the rule statement. (D:CF:Front = distance center foot front , =< less than or equal too, 5 distance in centimeters) Line 3 actions if line 2 is true
Rule sets can also load other rule sets as a merge or load to replace current rule set depending on the state of the Robot.
DragonTear software is developing a Windows desktop product to aid in writing the Arduino library for the rule engine so no coding on the end user part is needed. A friendly interface will allow for easy rule enter throw a point and click on 3d image of the R2D2 unit.
This is far from complete and we have a lot more to document.
Please ask any questions you have as we realize this is very general.
HippieGeek Luis A. Vazquez
Other robots from Synthiam community
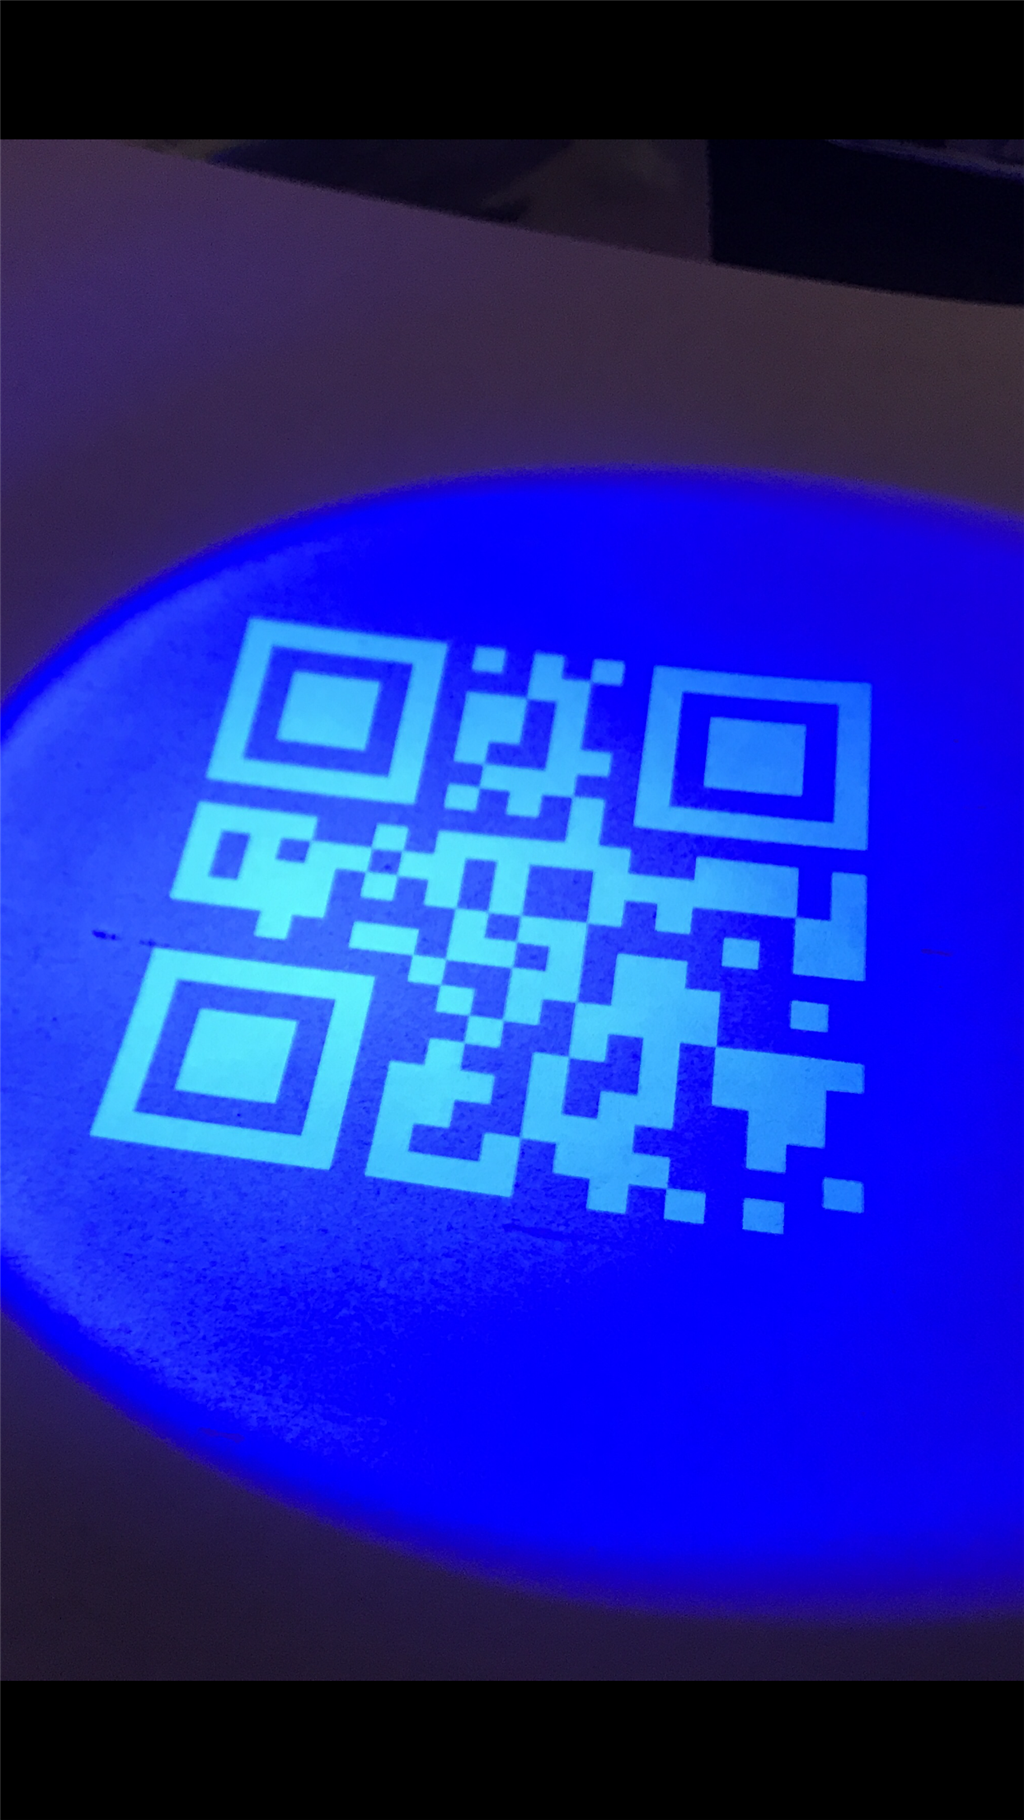
Jstarne1's Invisible Qr Code Project For Hackaday...
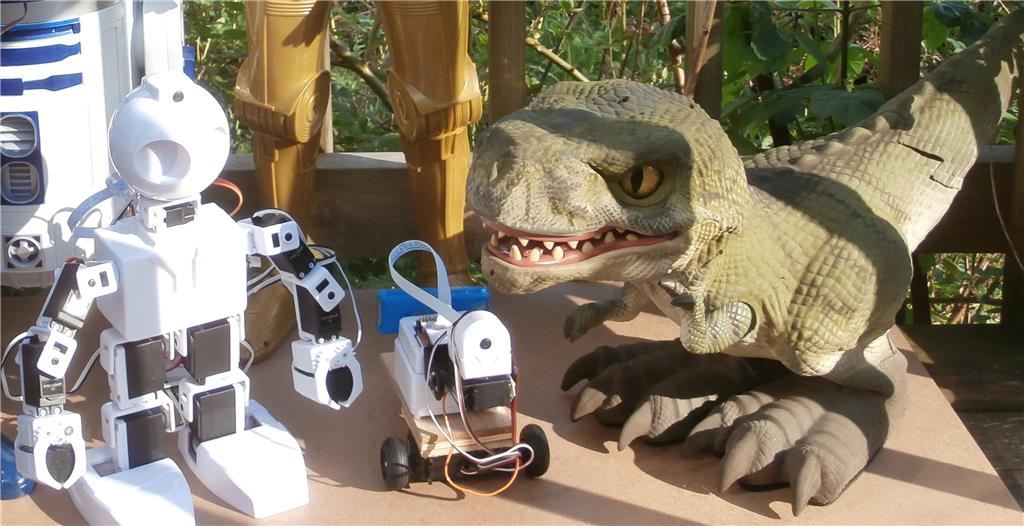
Mcsdaver's Ai Dino Robot

Awesome @Luis! I'm looking forward to hearing more about this R2D2 build. I'm definitely a fan of R2....not so much of that new BB-8.
Will you be putting a pico projector in it at all? It was always my dream to combine a tiny projector with a smoke machine so R2 might be able to project "Luke you are our only Hope!" hologram :D
Do you think you'll need all those microcontrollers on board? It seem like 8 Ultrasonics could run to the Mega or to the ez-b for that matter. Are you trying to alleviate excess noise or processing cycles on the main controllers?
I'm also wondering if you'll need an MP3 Trigger since you have an EZ-Bv4 on there.
I am really interested in this build I am about to reconfig my R2 and might snag some aspects from your work
 Bravo ! This looks like a fun build!
Thanks for the feed back Jayutmb.
Jeremie question returned
Will you be putting a projector in it at all? Absolutely.. I will document that when I get to the wiring and coding on the head! We have a micro projector to shine on walls. we have an RF modulation system as well so we can stream videos on to TV via channel 3 or 4 , we have a receiver too so it can get the RF and put out AV RCA or HDMI or Coax but our plan is to not have to do this.
Do you think you'll need all those microcontrollers on board? Yes because these are only a few of sensor show there are others that will be controlled. Later the foot sensor controller will handle other sensors and Leds. I'm working out a system to shoot compresses air through passed a device made for model train smoke to simulate the jet proportion in the arm sides. This controller will also have to handle that then only 2 wires back to the Sensor controller.
I'm also wondering if you'll need an MP3 Trigger since you have an EZ-Bv4 on there
All major function have to be duplicated because this robot will be automated with or without The Ezb-Connected. It runs in 1 of 3 states.
State 1 - Sony Navigation Controller State 2 - Ezb-Controller State 3 - AI - No external connection to human interaction other than sensors built in to the R2D2 Robot.
This is also why we will have a Speech recognition board . When in AI mode the Bot will have limited speech input. If running in state 2 - It will use the ezb and have a much wider ranger of speech it will understand and automate to.
I hope this helps to answer some question.
Luis, I am looking forward to learning more about this build, sounds awesome. You always add a different approach, glad to see back on the forum.
Sounds great @Luis! Thanks for answering my questions so quickly :)
It all makes sense with the 3 modes that you'll have.
Anthony-XLRobots: if you find this post can you try to contact me . I have decided to jump in to the 3d printing as well. I really respect you and have high regard for you advise.
My email is HippiegeekBook@gmail.com if its free to you , you can call 931 - 368-4190 . Ask for Hippie.
Luis - now I'm interested and also think some sort of Roomba can sneak into this configuration.
Luis, finally a great open source resource for an R2 project1 looking forward to your progress!
I'm watching this thread. After reading this through I think this little droid will be as close to the real thing as I've seen sense the movie.
I like the idea of your R2 being able to run in several modes. My B9 is able to do the same thing. I think it will come in handy if one system fails or is in an environment where one system is not viable.
Hi there! Where can I find James' blog for the build of the robot? Mike
A little off topic, but not totally. Watching all the work that is going into recreating the capabilities of these TV and movie robots (B9 and R2D2 particularly) I keep being struck by just how amazing the human body and sensory systems are. All these things were easy when it was a costume, and very hard as automation. Evolution (or God if that is your belief of how we got here) is pretty amazing. Except knees. Knees were designed by committee. Horrible cludge if parts that just barely hold together while doing critical work ;)
Back in topic... Thanks for sharing this project. It looks like it will be amazing.
Alan
Hello all, I have updated the original post to include a link to the R2D2 build blog.
R2D2 build
hello again.
folks are asking about the mode operations so I have started to document that section now.
The R2D2 build will run in 1 of 3 modes.
Mode 1 : User Controlled Mode 2: Self Automation - AI input Mode 3: Ezb-4 Mode
Mode 1 : User Controlled User will use a Sony Ps4 navigation controller. (add control functions here.) Movement commands pass through the Robot controller Arduino mega (RCAM). In return the RCAM will validate. (all commands are validated before the command is passed to the saber tooth motor controller.)
Self Automation - AI input (documentation coming soon) Movement commands pass through the Robot controller Arduino mega (RCAM). In return the RCAM will validate. (all commands are validated before the command is passed to the saber tooth motor controller.)
Mode 3: Ezb-4 Mode (documentation coming soon) Movement commands pass through the Robot controller Arduino mega (RCAM). In return the RCAM will validate. (all commands are validated before the command is passed to the saber tooth motor controller.)
RCAM: sensor validation system(SVS)
The sensor validation system contains a rule engine that will validate a rule set before final commands to all motor controllers, servos that extend the body, components that heat up or dislodge from the main chassis.
Rule example #1
=============================== 1. Movement : Forward : Restriction 2. D:CF:Front = < 5(cm) 3. Action: Forward movement: STOP
Line 1 denotes the type of rule. Line 2 the rule statement. (D:CF:Front = distance center foot front , =< less than or equal too, 5 distance in centimeters) Line 3 actions if line 2 is true
Rule sets can also load other rule sets as a merge or load to replace current rule set depending on the state of the Robot.
DragonTear software is developing a Windows desktop product to aid in writing the Arduino library for the rule engine so no coding on the end user part is needed. A friendly interface will allow for easy rule enter throw a point and click on 3d image of the R2D2 unit.
Awesome, Luis. You have the most interesting projects and this one is going to be helpful to me. I bookmarked this thread and the blog. Thank you for sharing!