

Hello all, while working this project I only updated the competition site but given I am using EZ Robot it’s roots are here in the community.
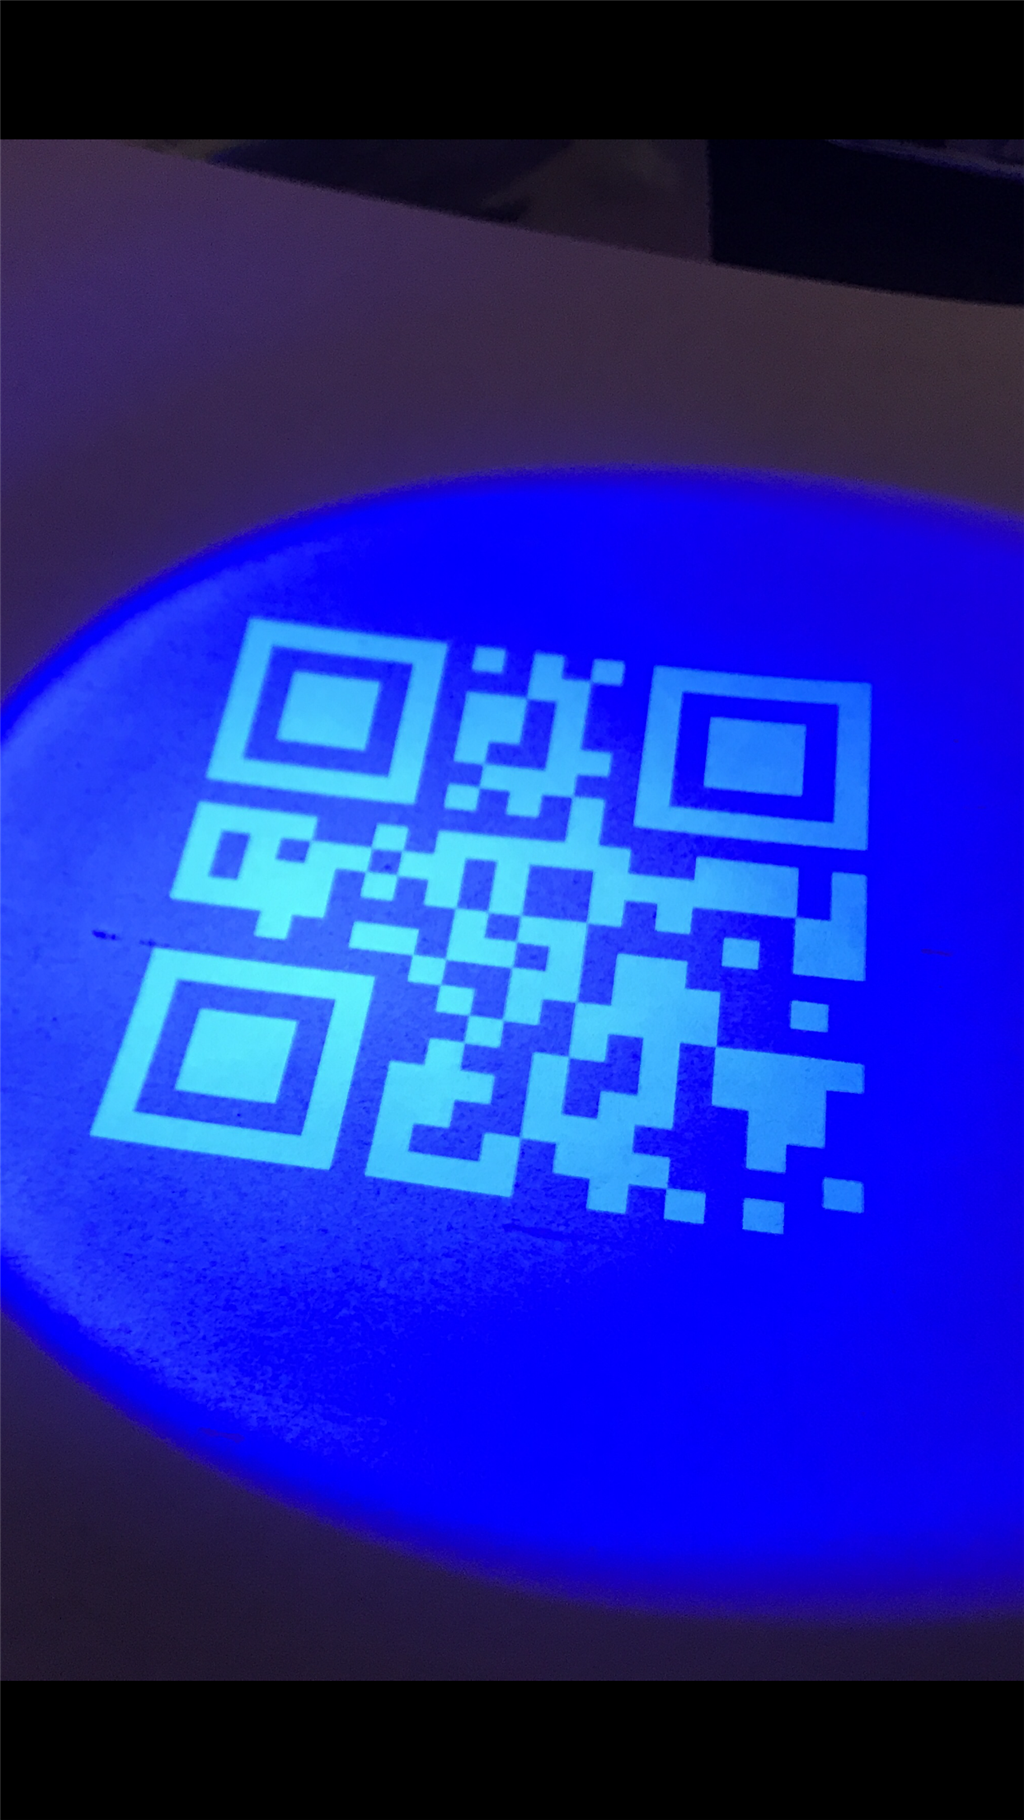
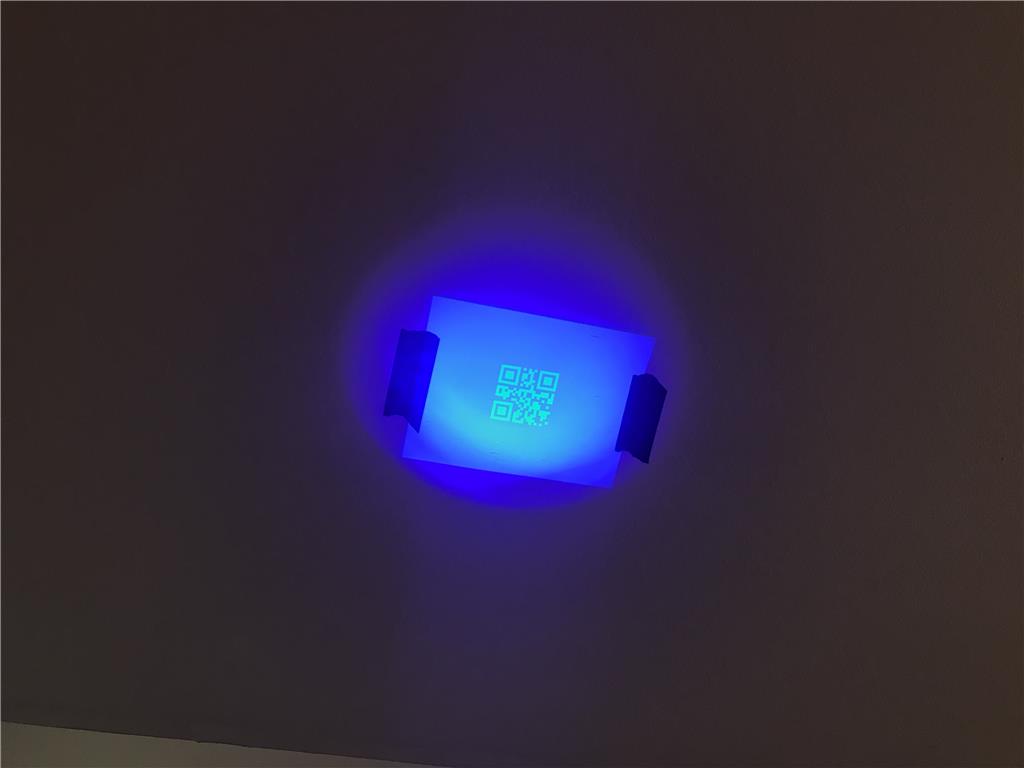
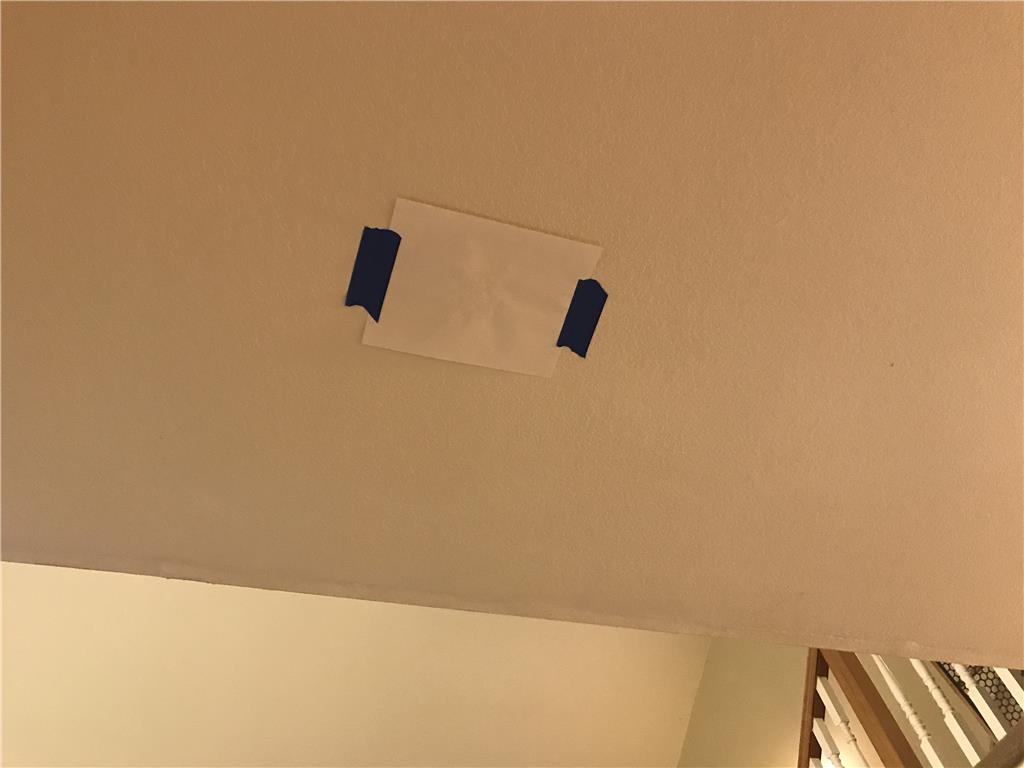
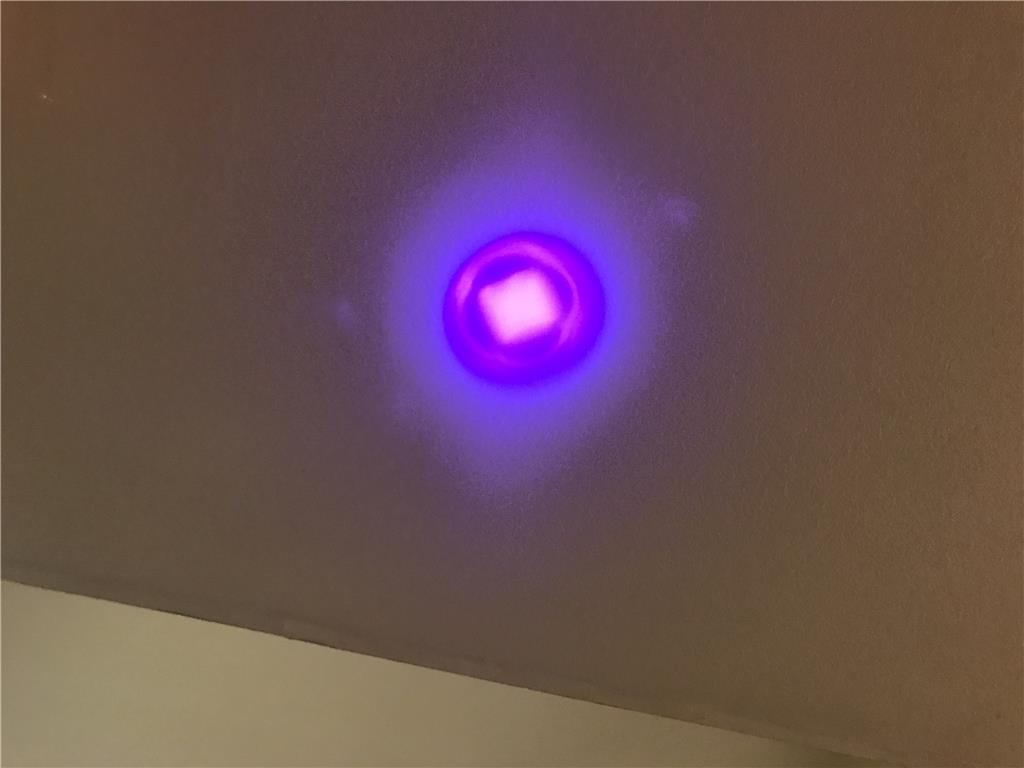
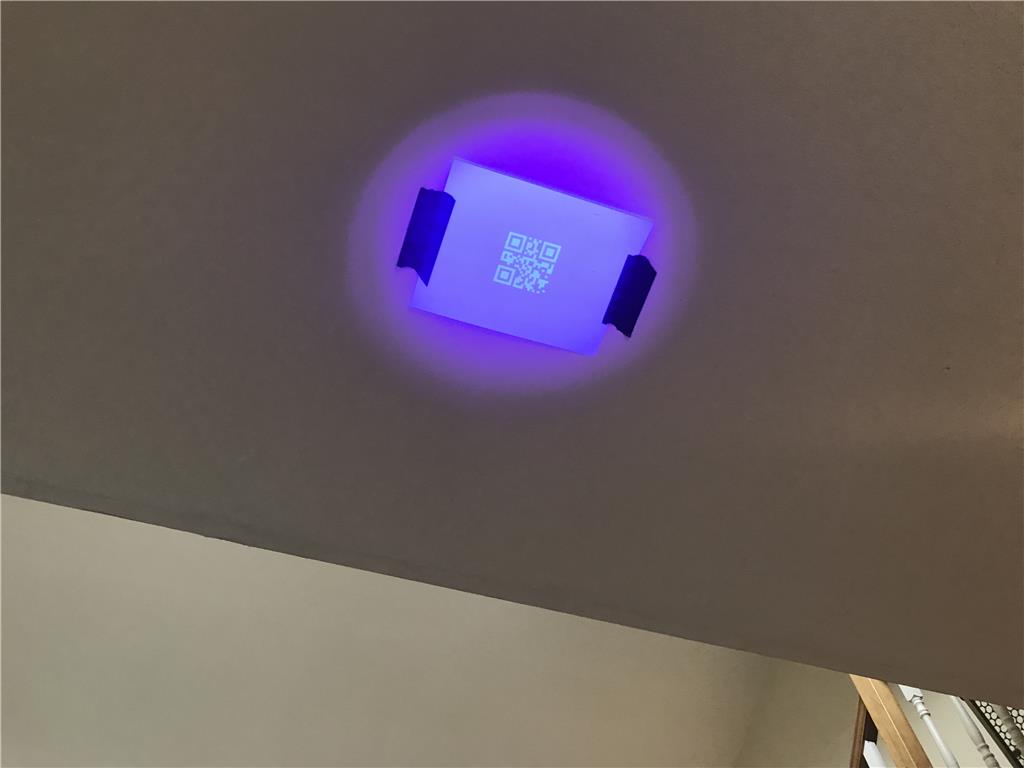
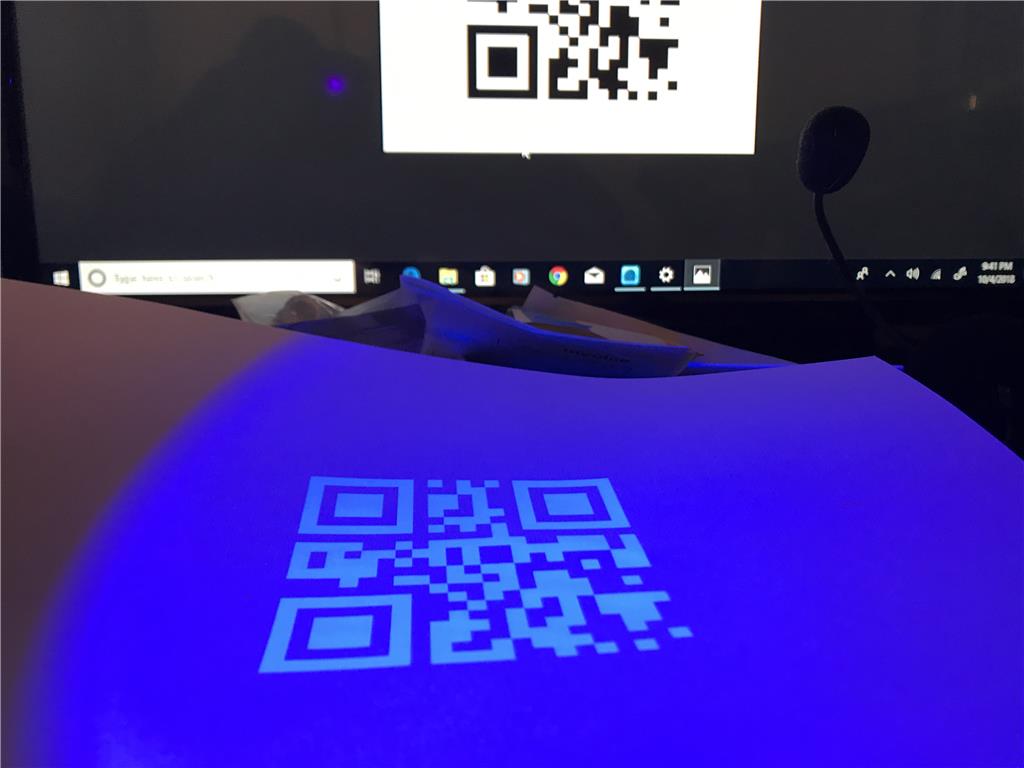
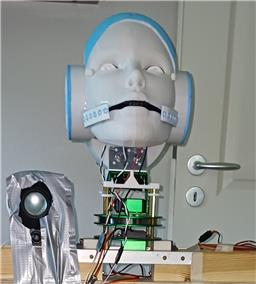
Here is the latest update on the custom invisible QR code for discretely marking the inside of your homes furniture, doors, floor, or ceiling with codes that only illuminate when you hit them with the correct nanometer light 405nm or 780nm IR/UV
By jstarne1
— Last update
Discover more robots
Cardboardhacker's Creeper Project
Minecraft Creeper robot build using Ez-B, motor controller, camera and 12V DC motors - 3'7" body, parts list, costs...
Jp15sil24's Samantha
Synthiam ARC powers Samantha, a humanoid robot with Python voice control, servo movement, sensors, face tracking, and...
Mitzeljk's Meet Modi
Modi mobile voice-recognition robot controls a computer via EZ-B scripting and H-Bridge, built on an RC car base from...

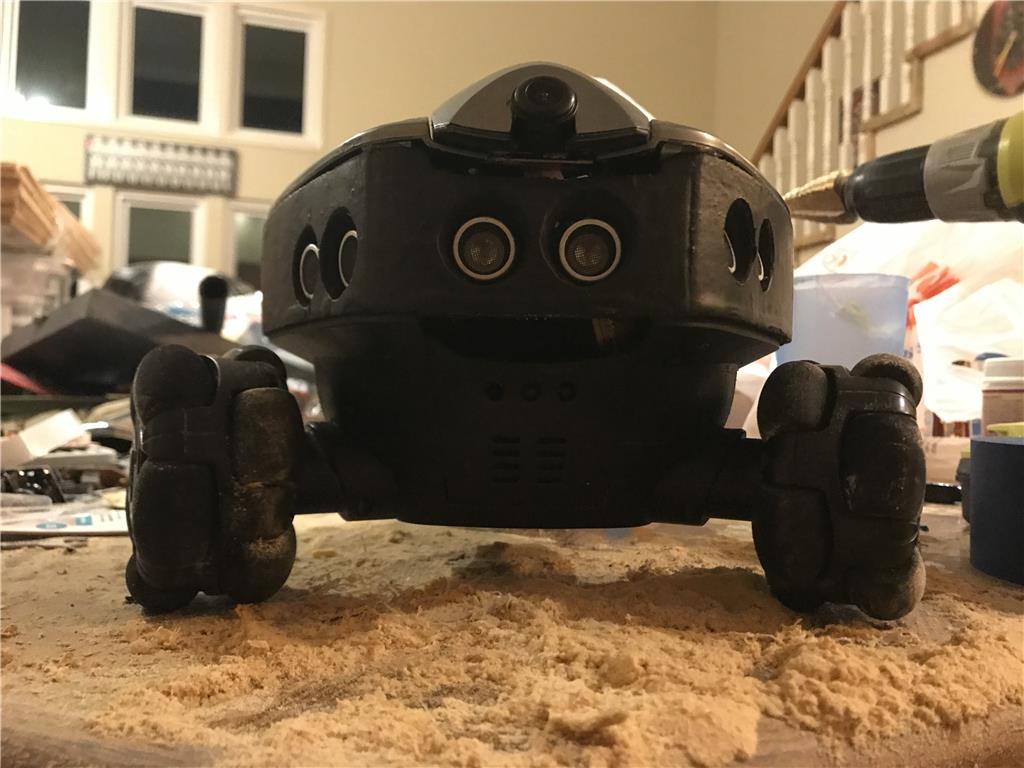
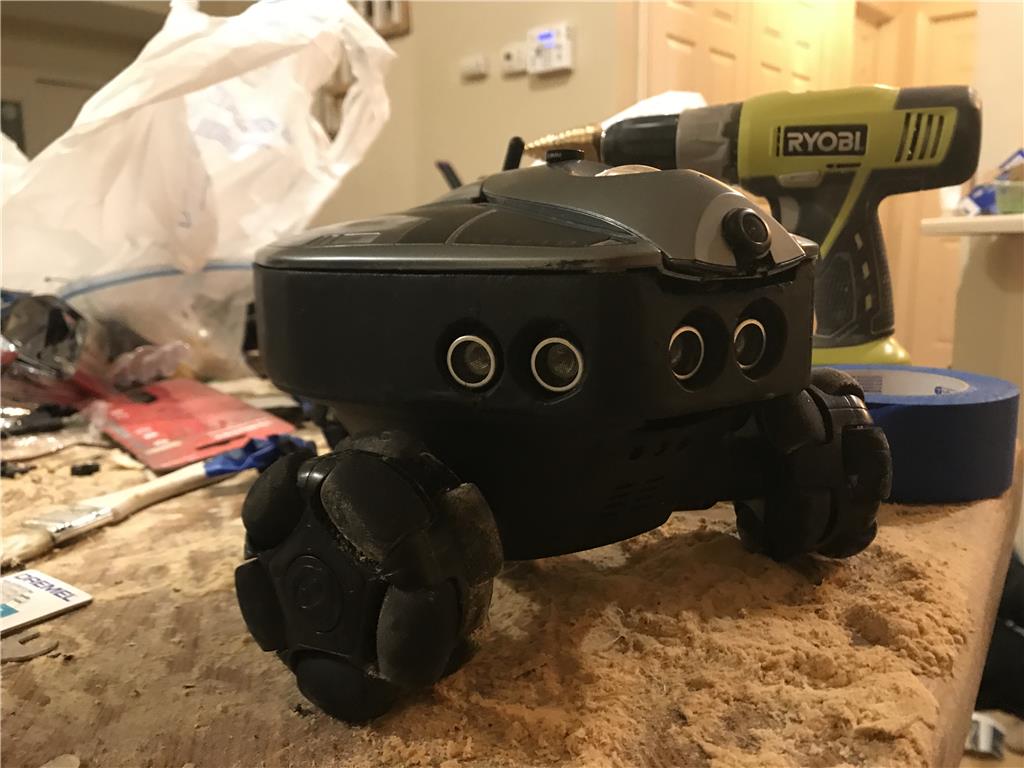
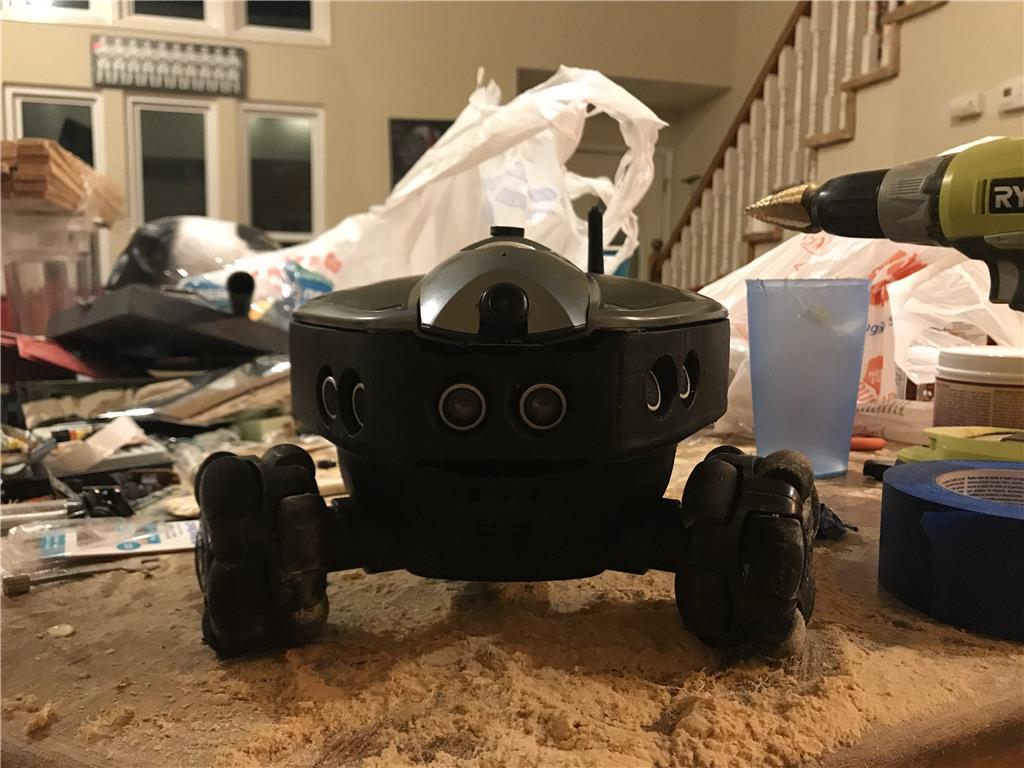
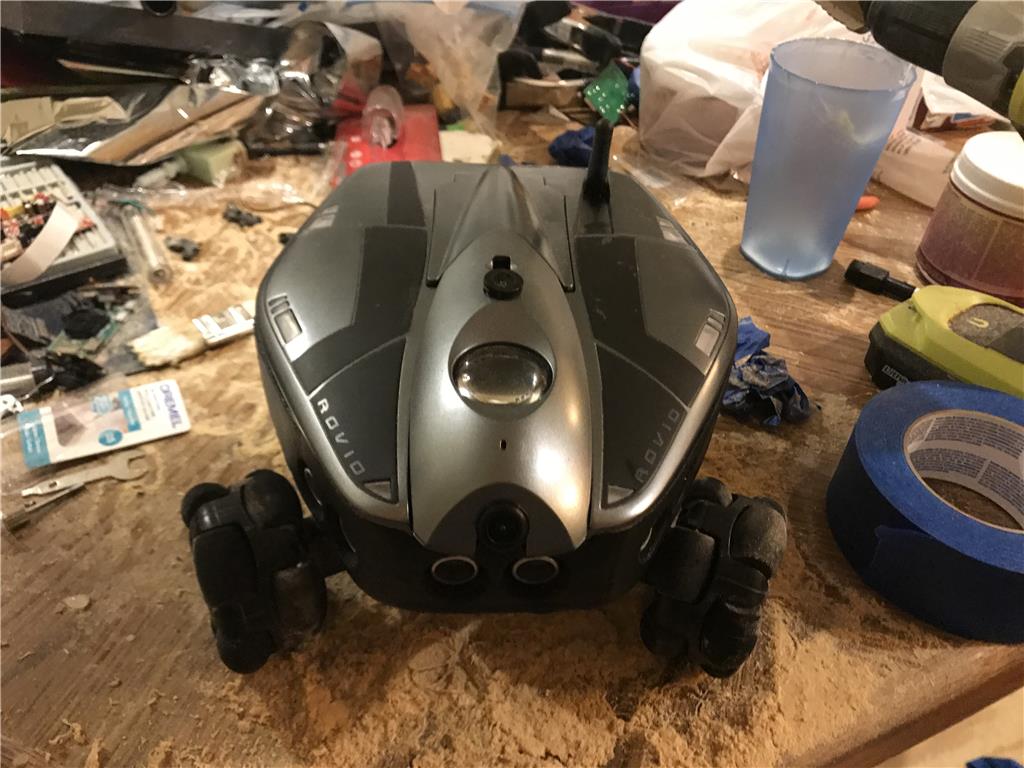
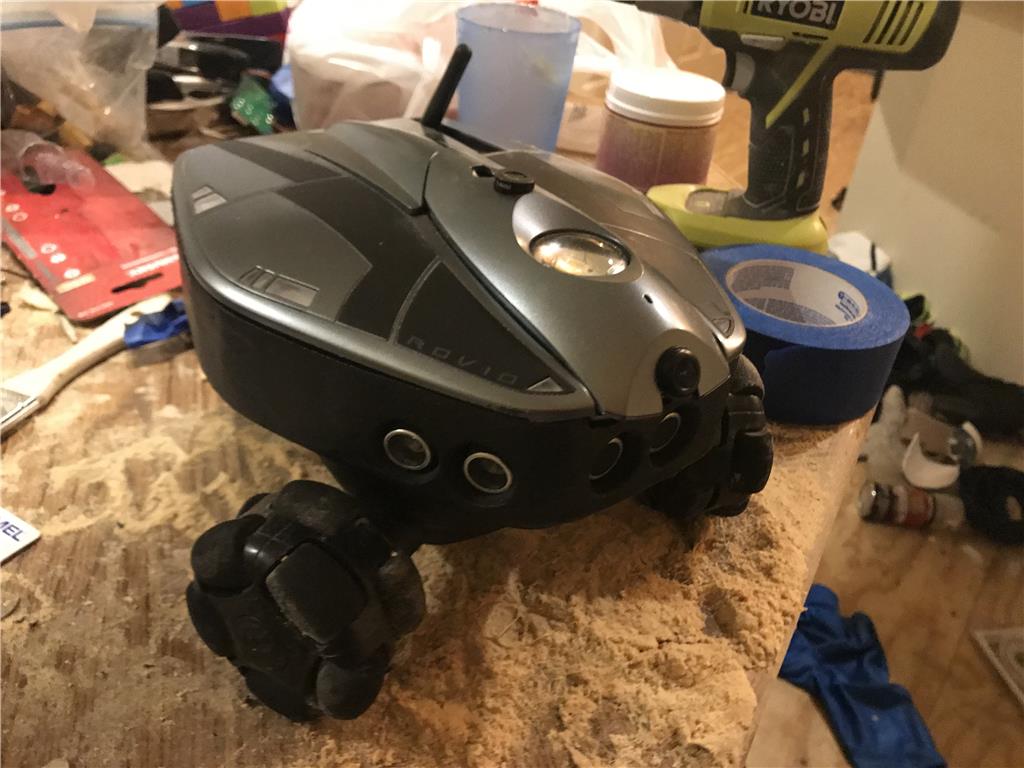
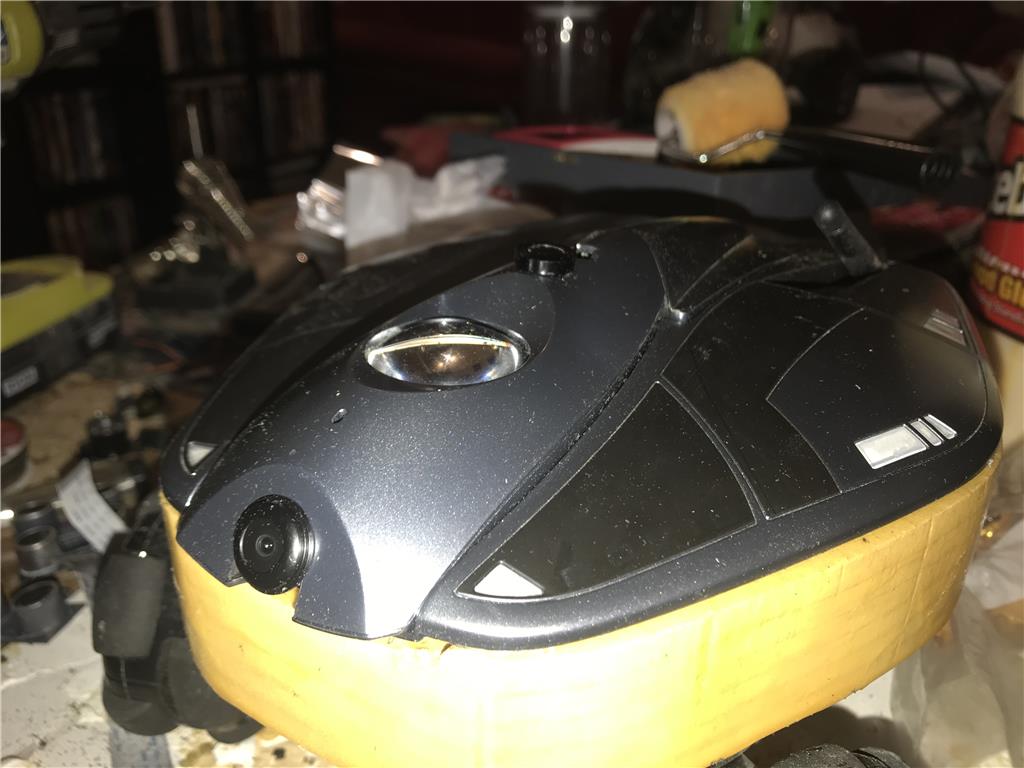
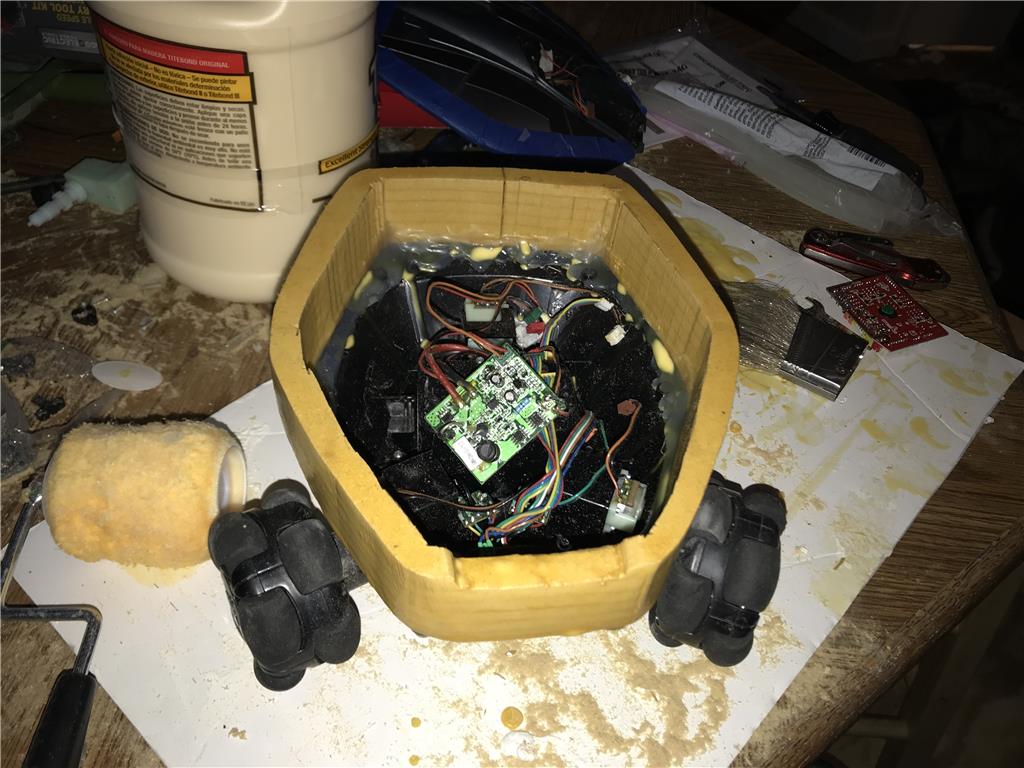
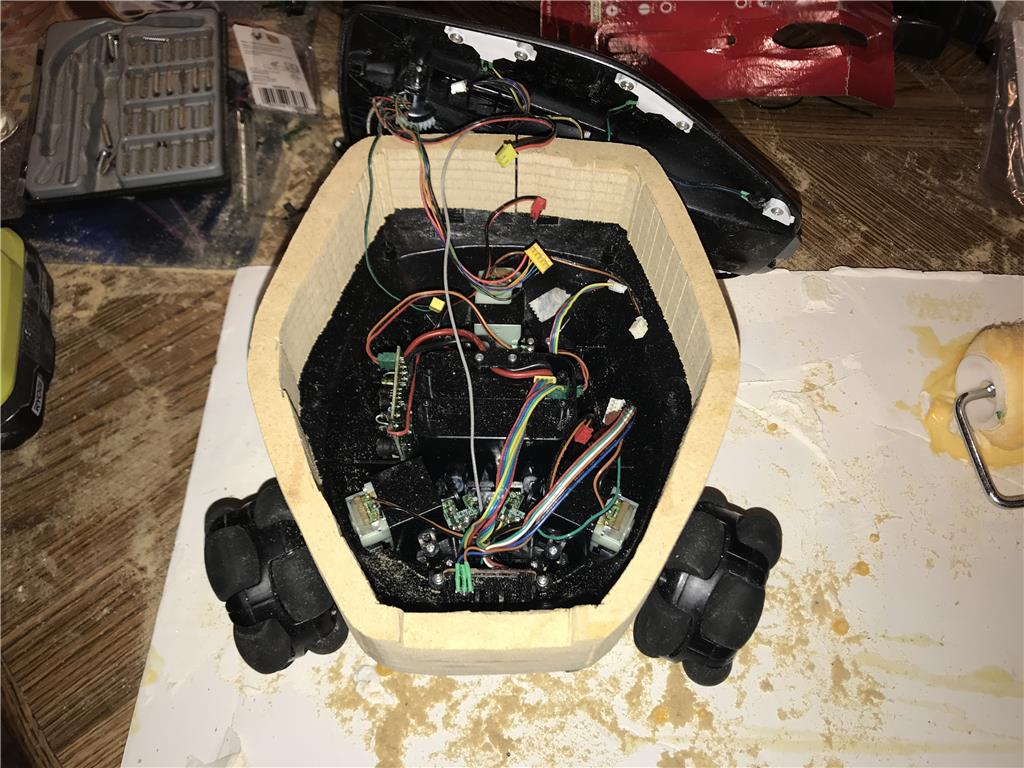
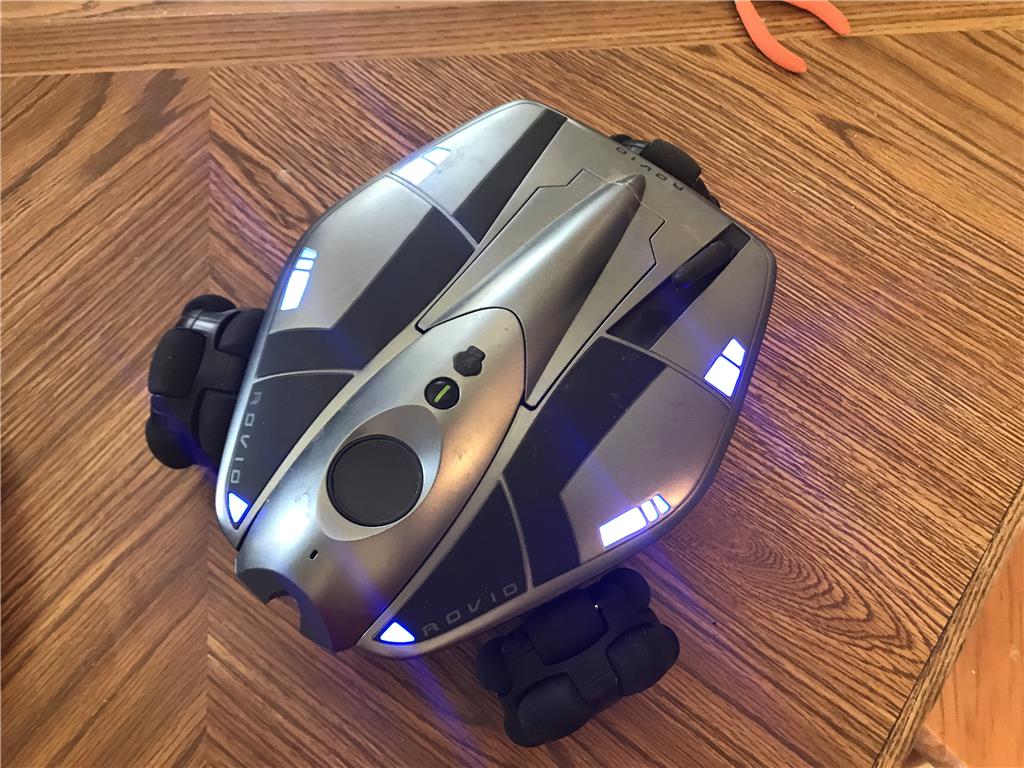
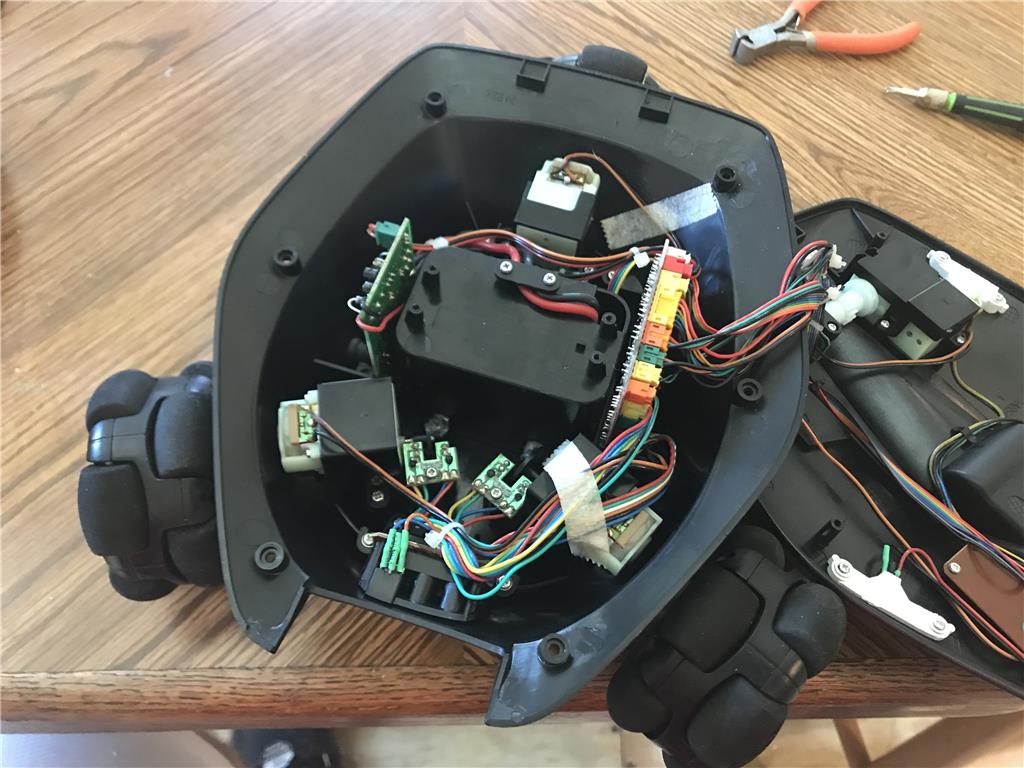
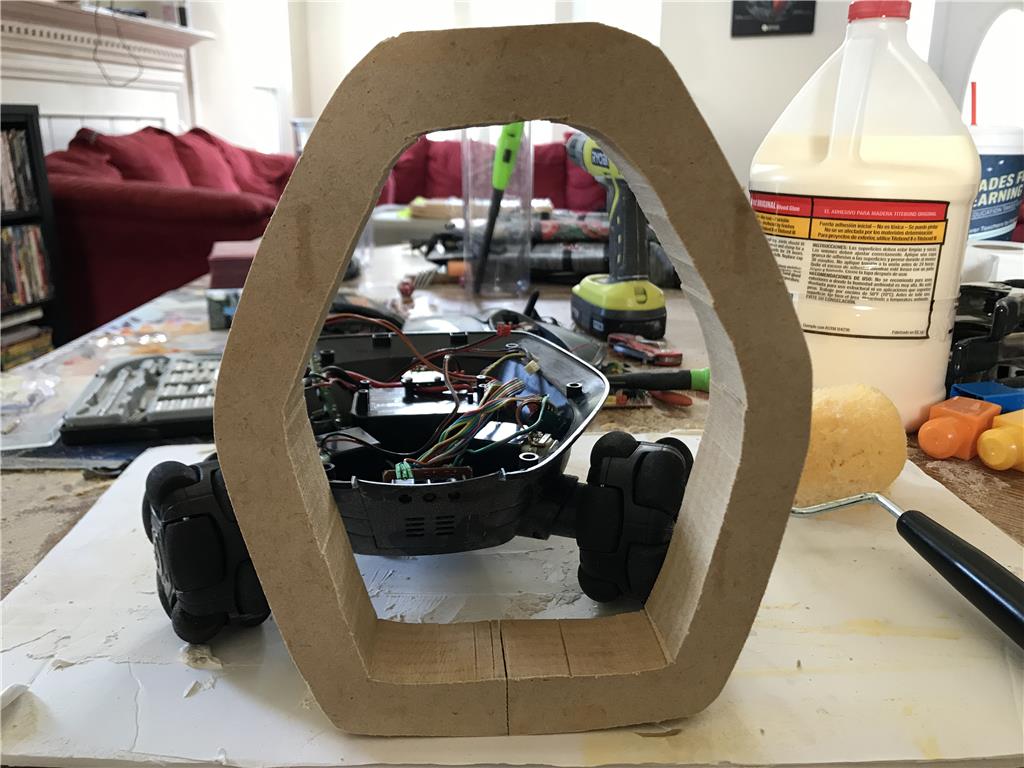
In this community we void warranties! So in true diy robotics fashion I am gutting a 2008 Rovio and putting modern EZ Robot equipment, ultrasonics, the QR code cams and LEDS and more.
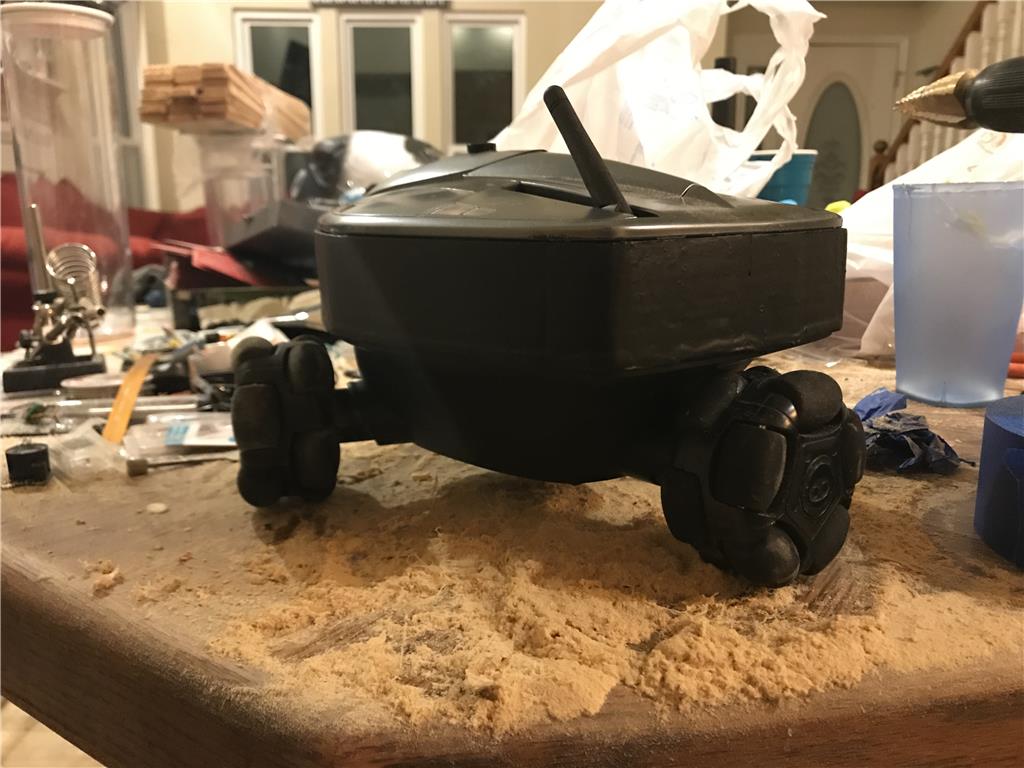
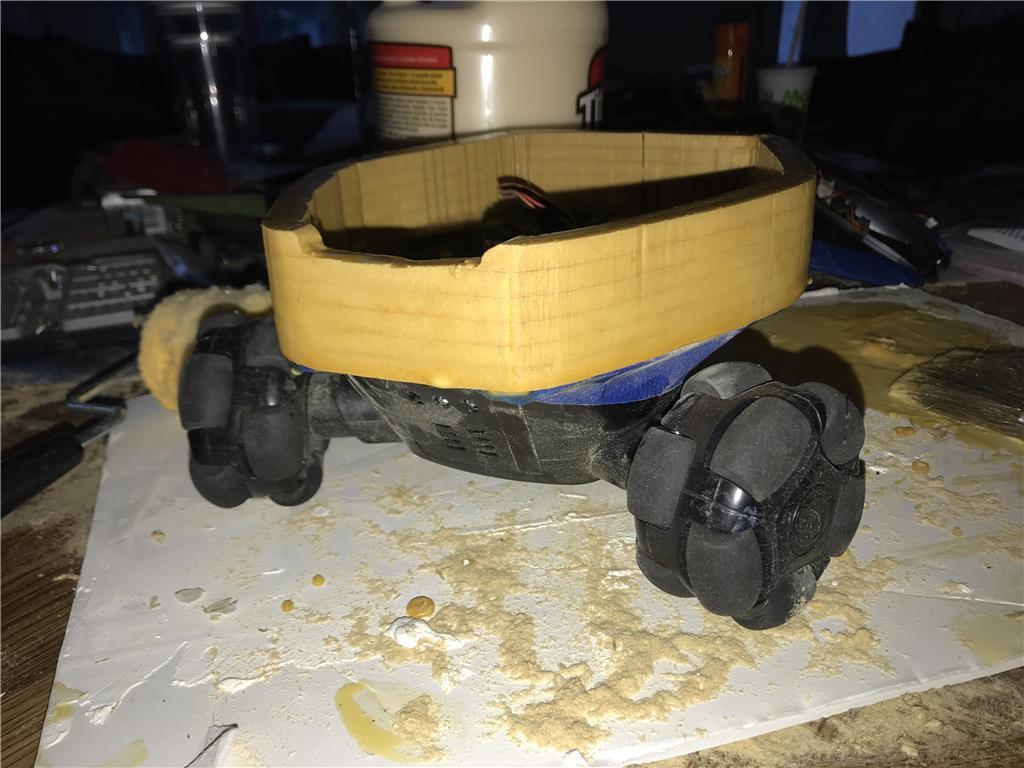
6 ply mdf wood glued together and clamped. I used a bandsaw to cut the shape of the body. A quick test fit shows I had to trim out the front so that the top will sit all the way down.
Wow that’s brilliant. Seriously absolutely brilliant!
Thankyou! Which part the invisible QR codes or the riser for more room?
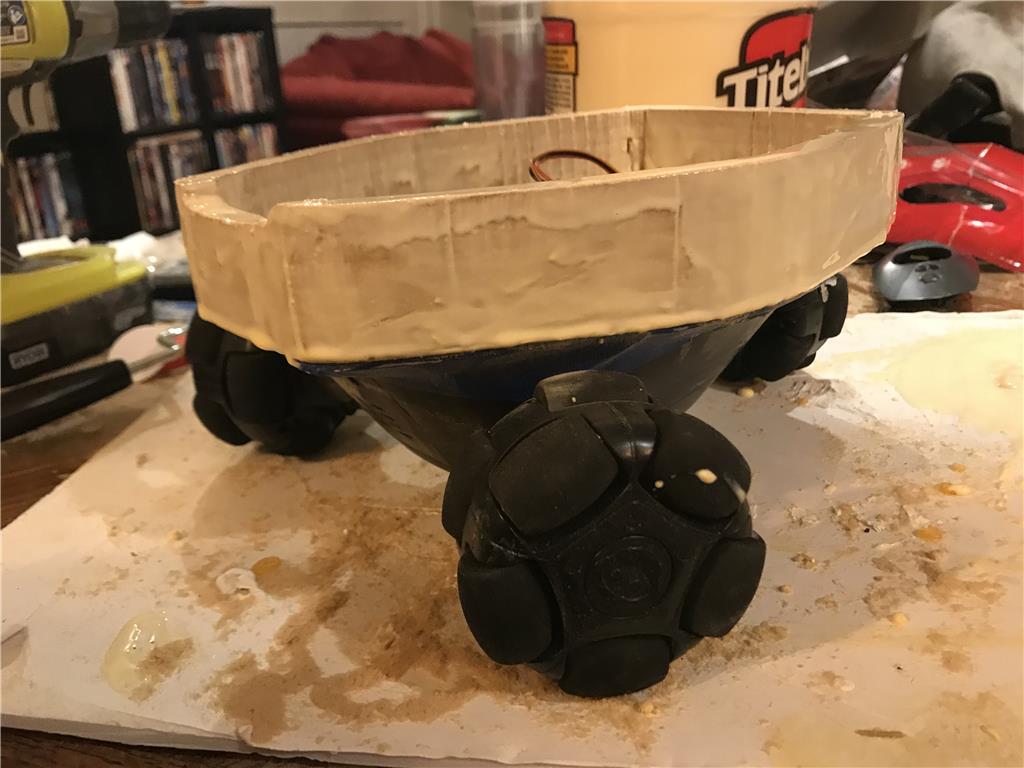
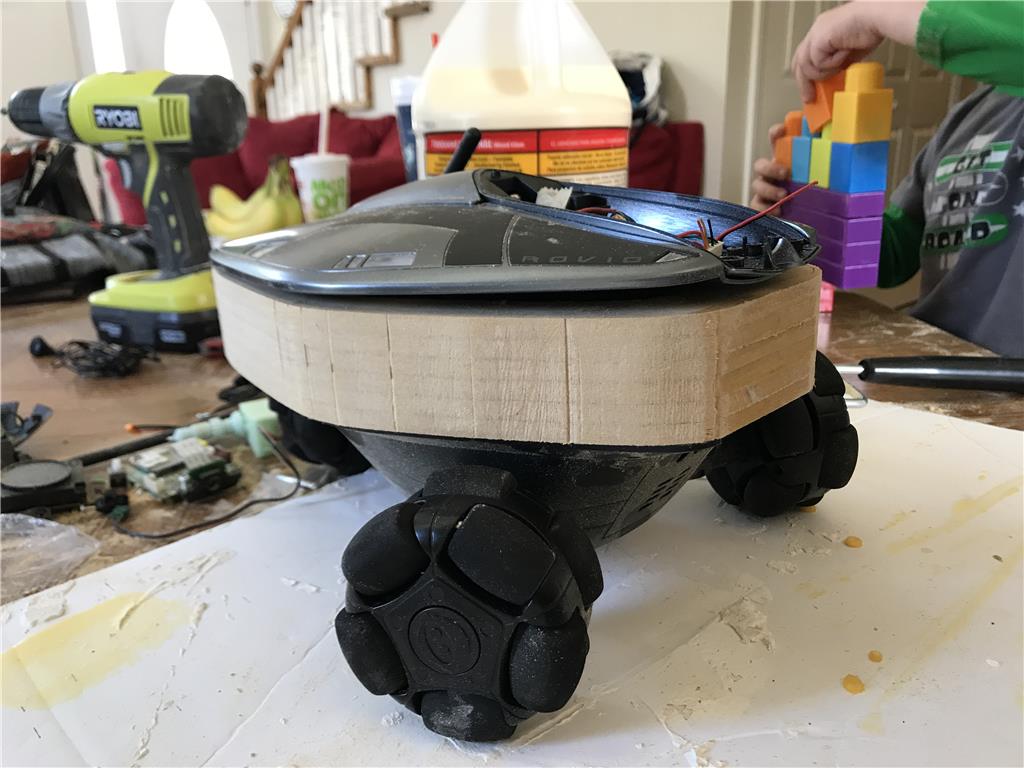
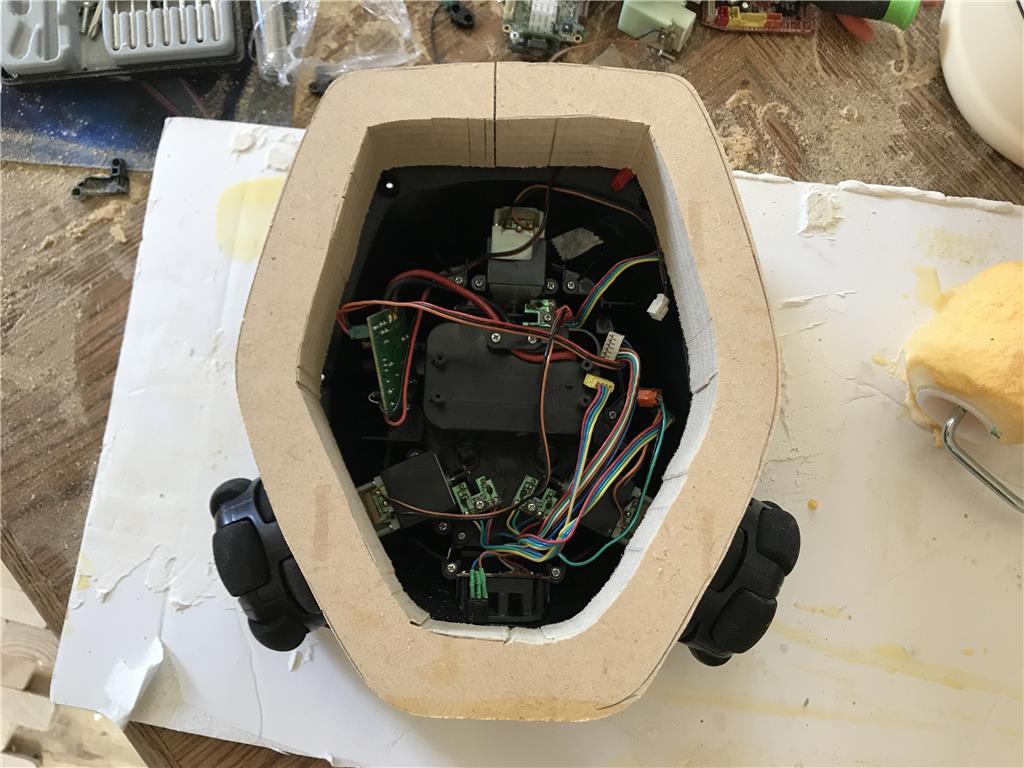
Ok another run through the saw and this riser dropped some weight and gained about 2 inches of space.
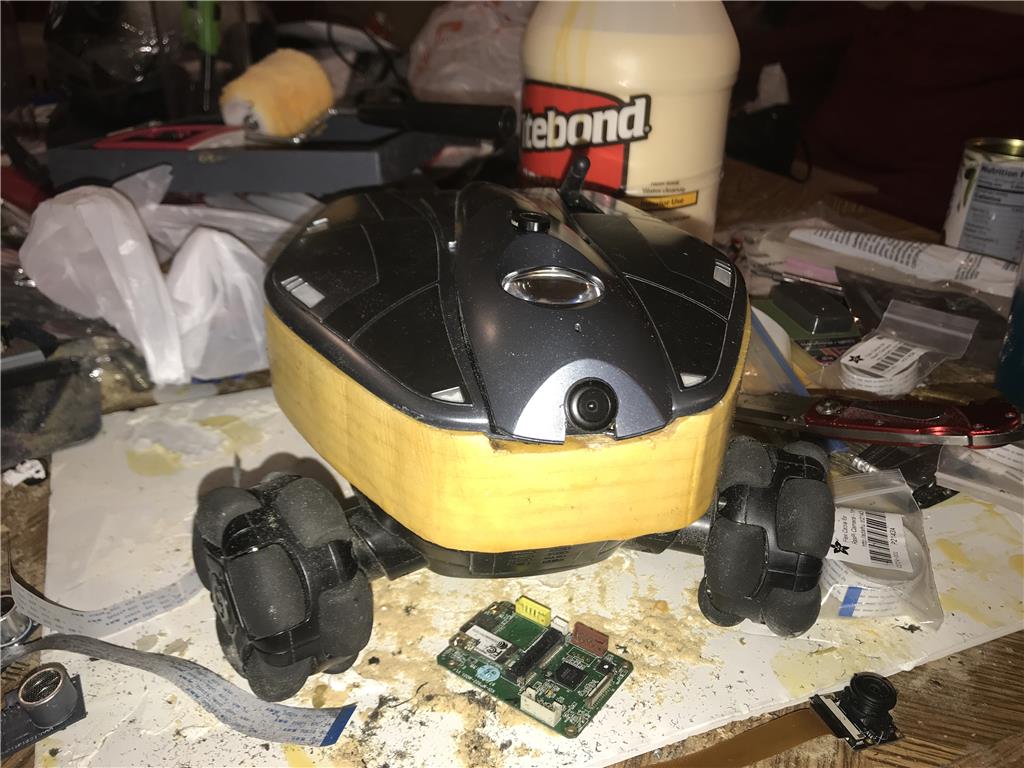
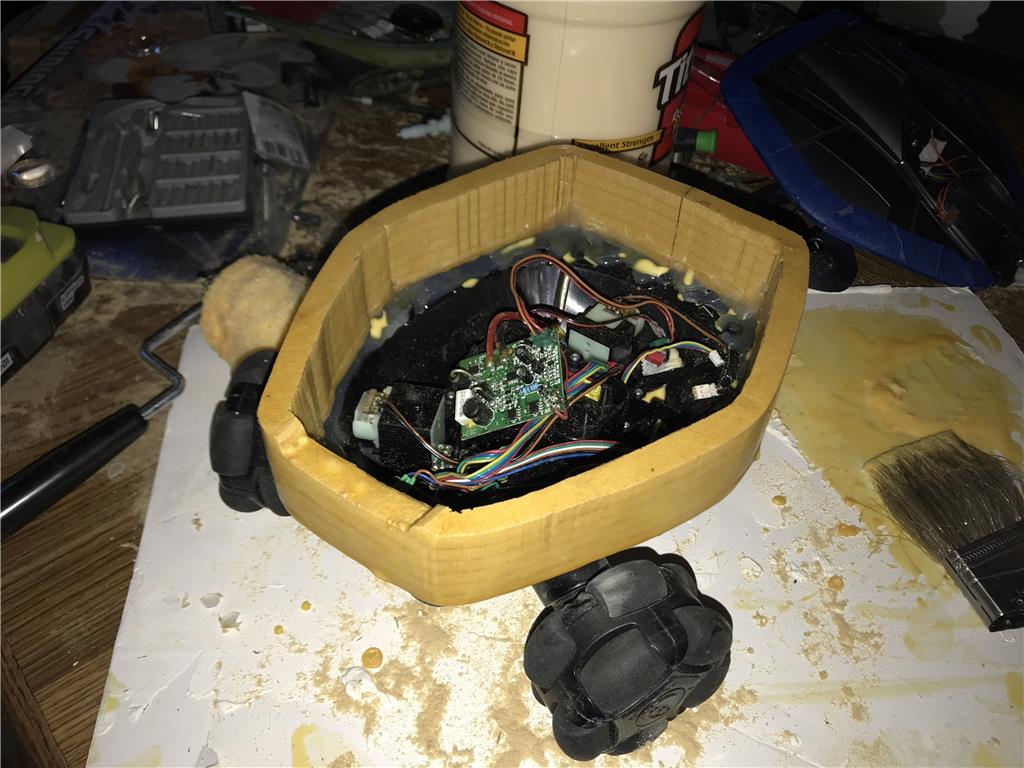
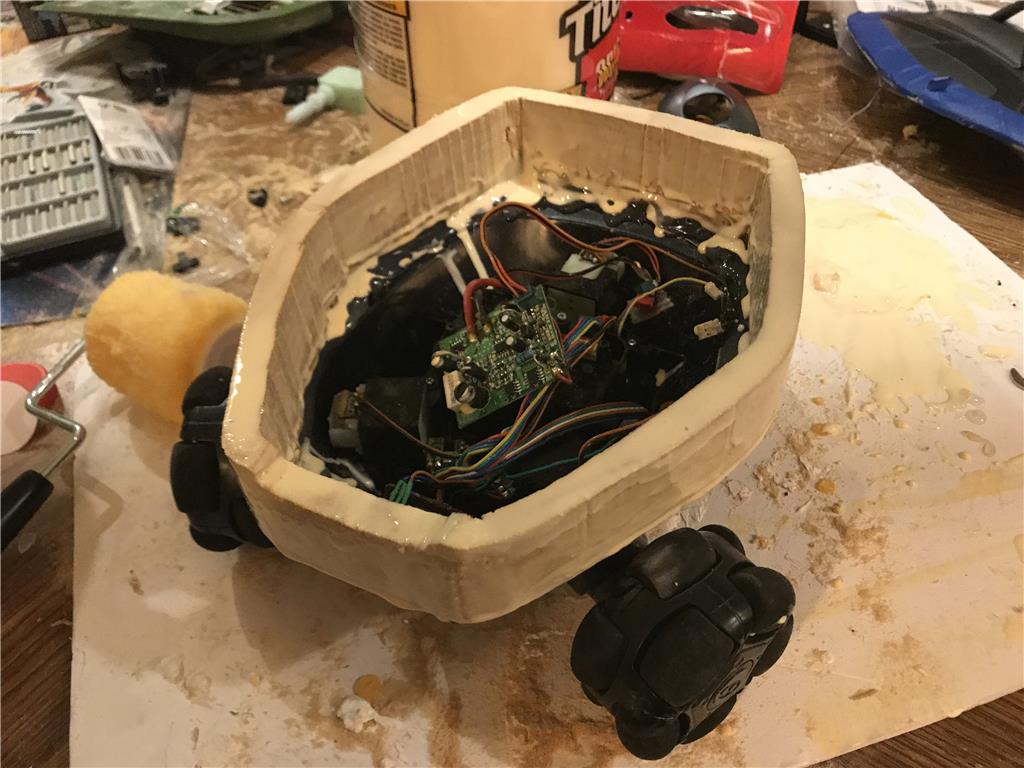
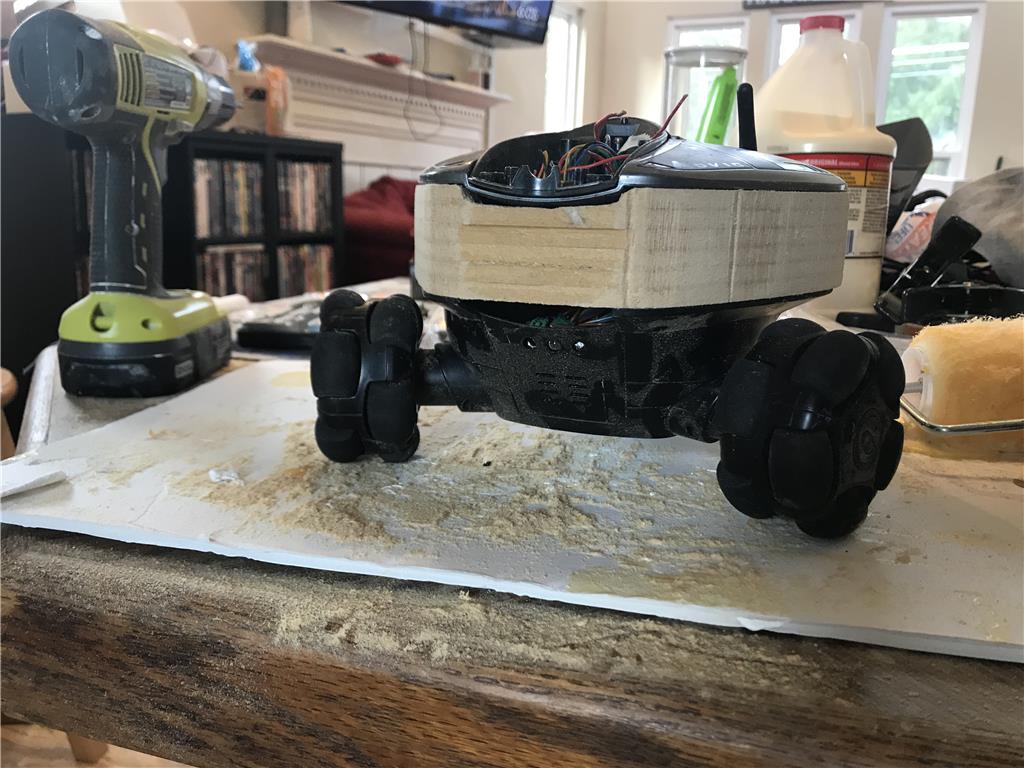
Wood glue Tite Bond brand is painted onto the mdf, it soaks it up a bit and seals the surface. Next I can hit it with the sander and paint it to match the bottom of the robot
It usually takes two coats as the first coat is usually partially absorbed by wood when you are trying to seal it.
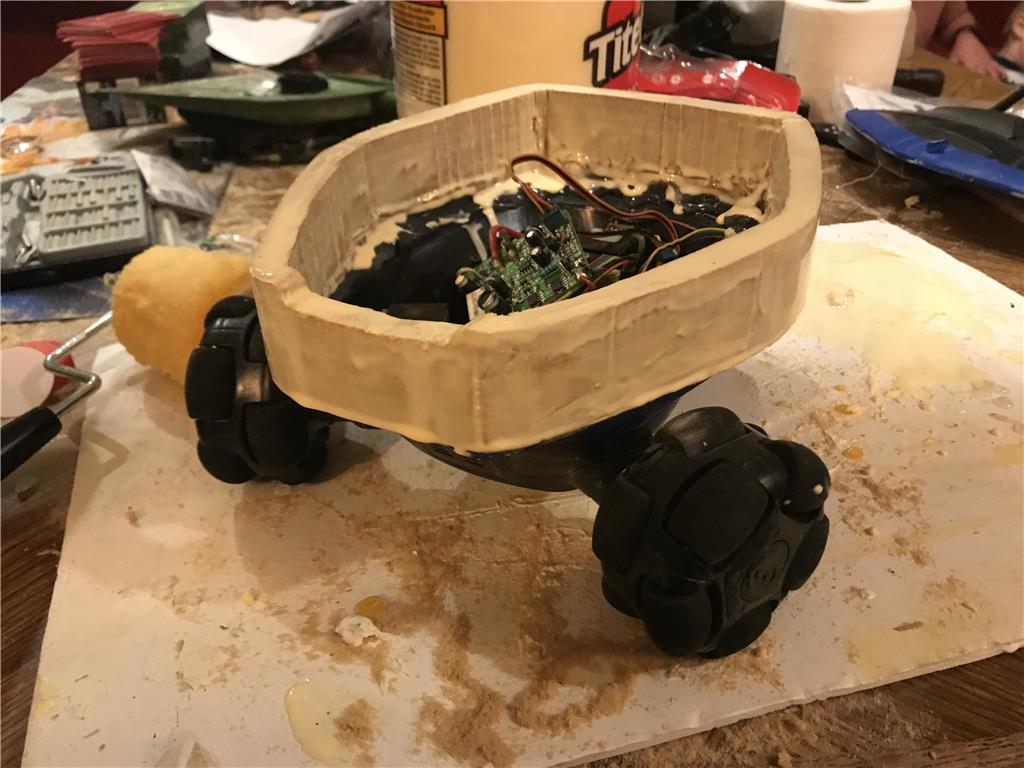
Two coats of PVA have dried and the look and texture is similar to plastic. It looks much better after it dries then the messy look before! Now I can give it a light sand and start mounting up sensors lights and stuff like that.
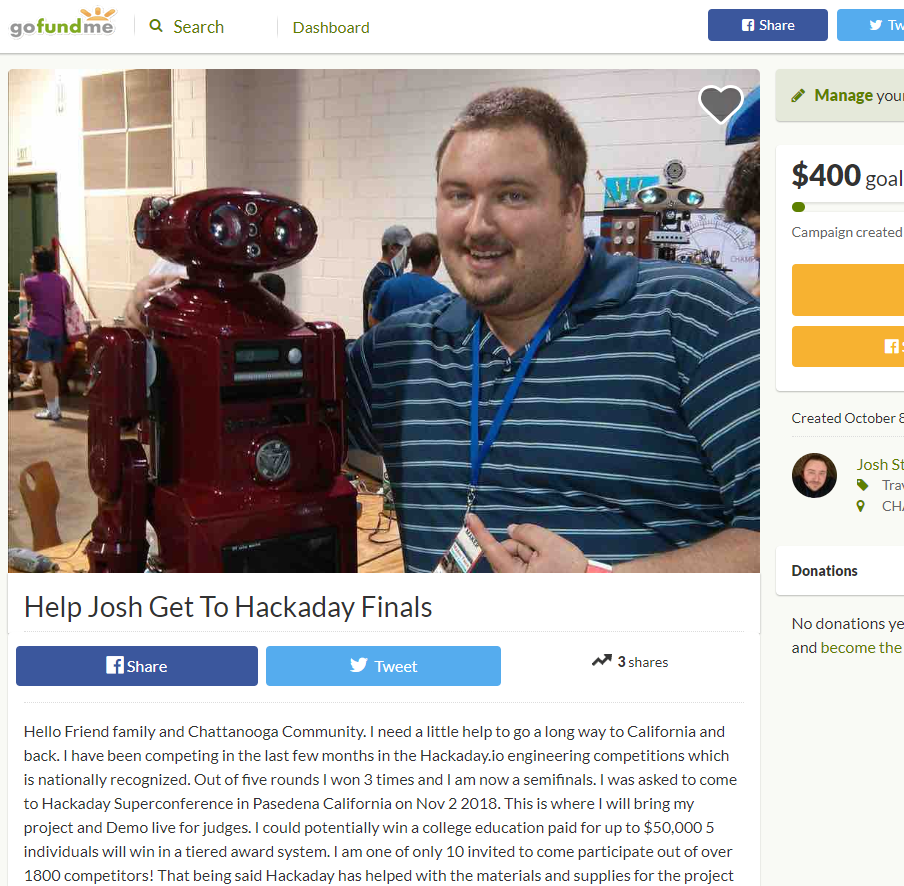
I setup a gofundme to help with the plane ticket to california , tickets are 340-400
https://www.gofundme.com/68cigk8
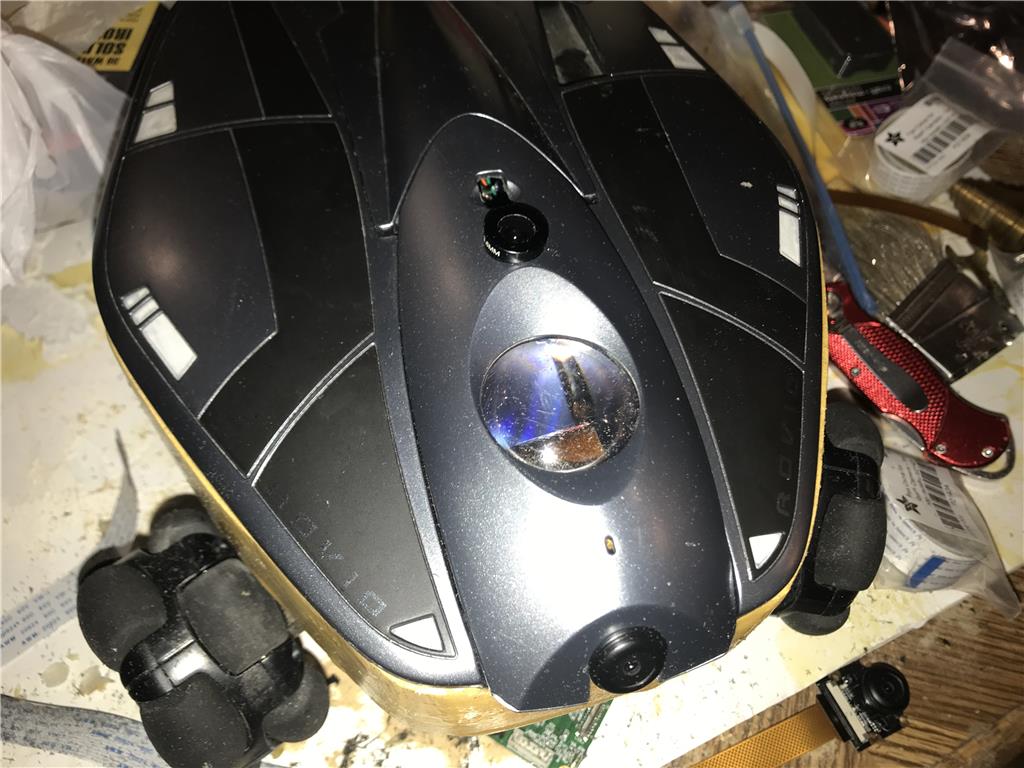
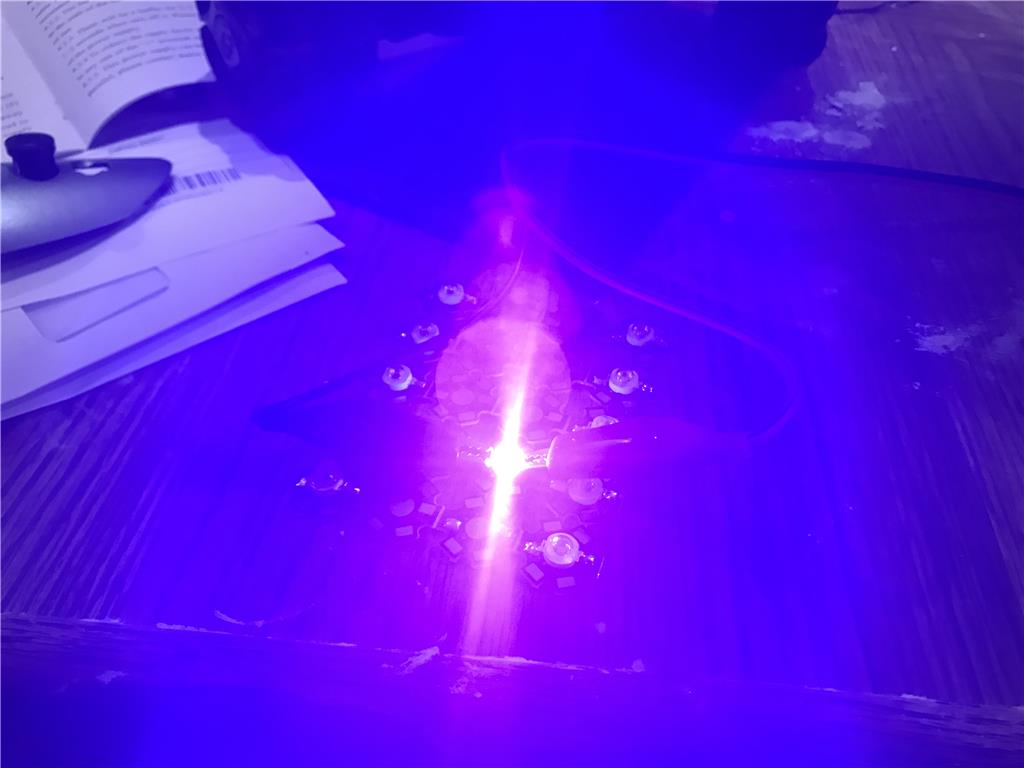
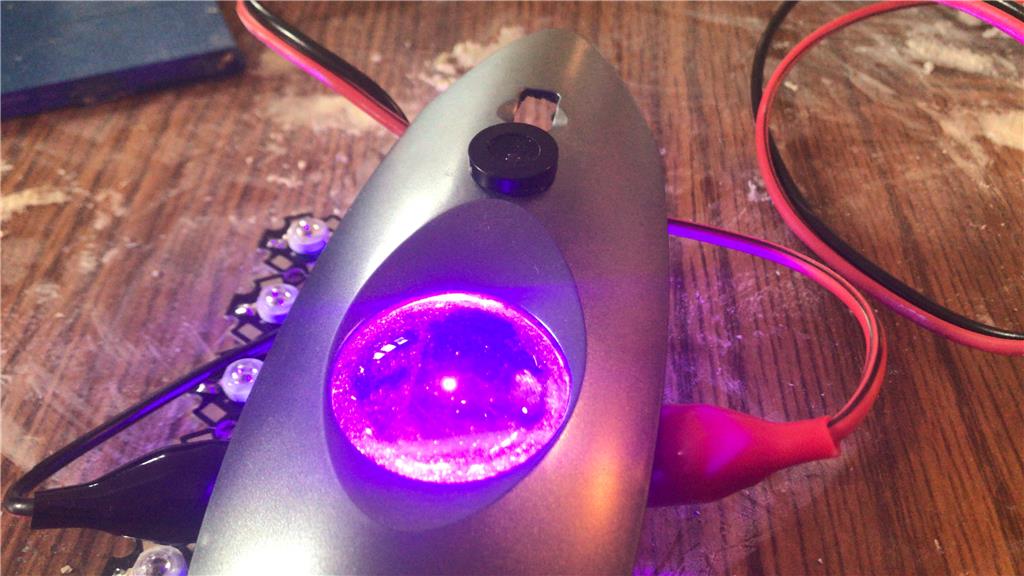
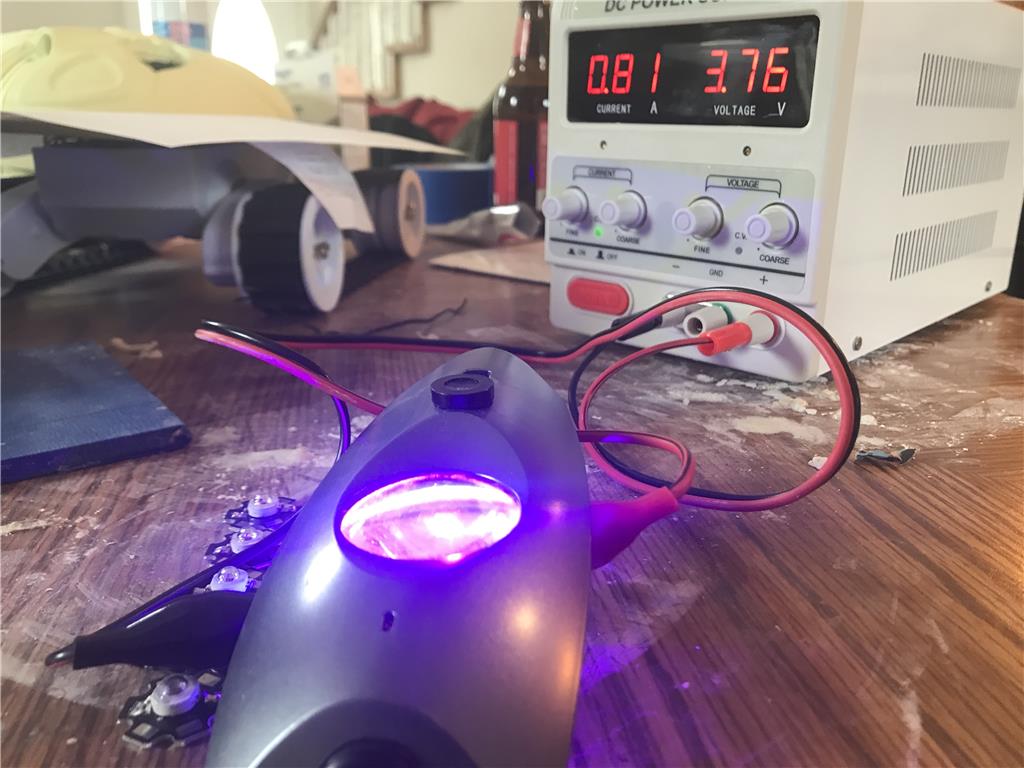
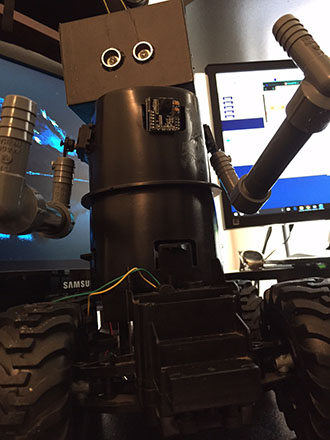
Coming along , ceiling cam and forward facing cam fitted. Installed a columating lens that gathers light from several small LEDs and focuses them into a clear circle on the ceiling. I didn’t get to the ultrasonics tonight, I ran out of time