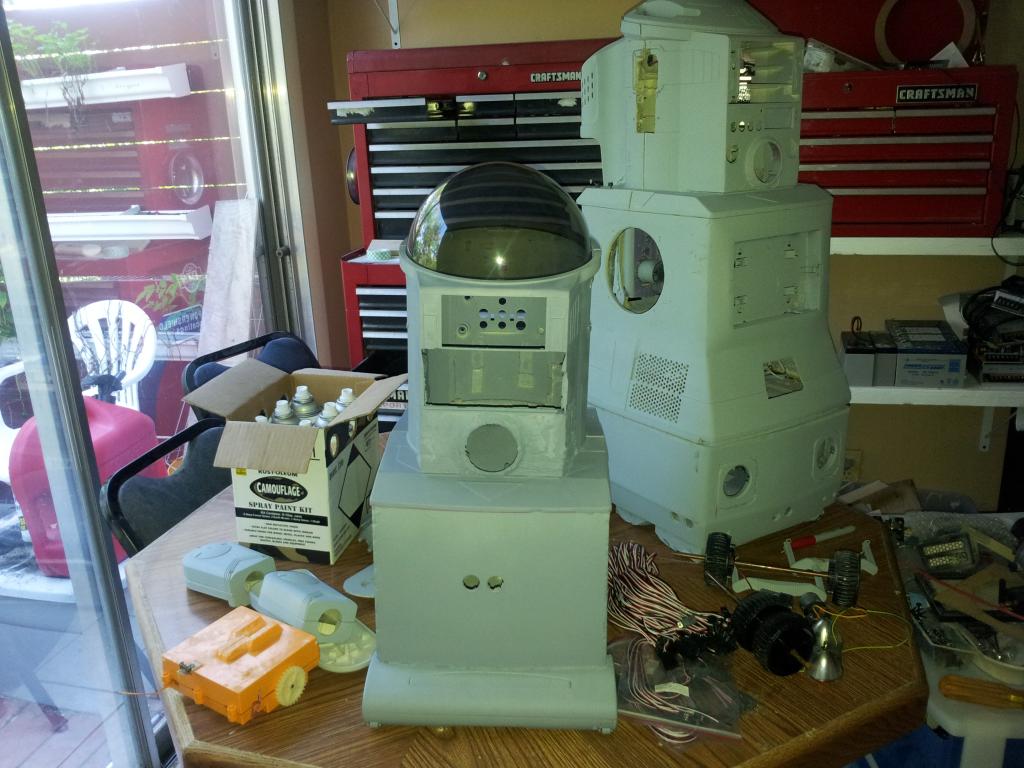
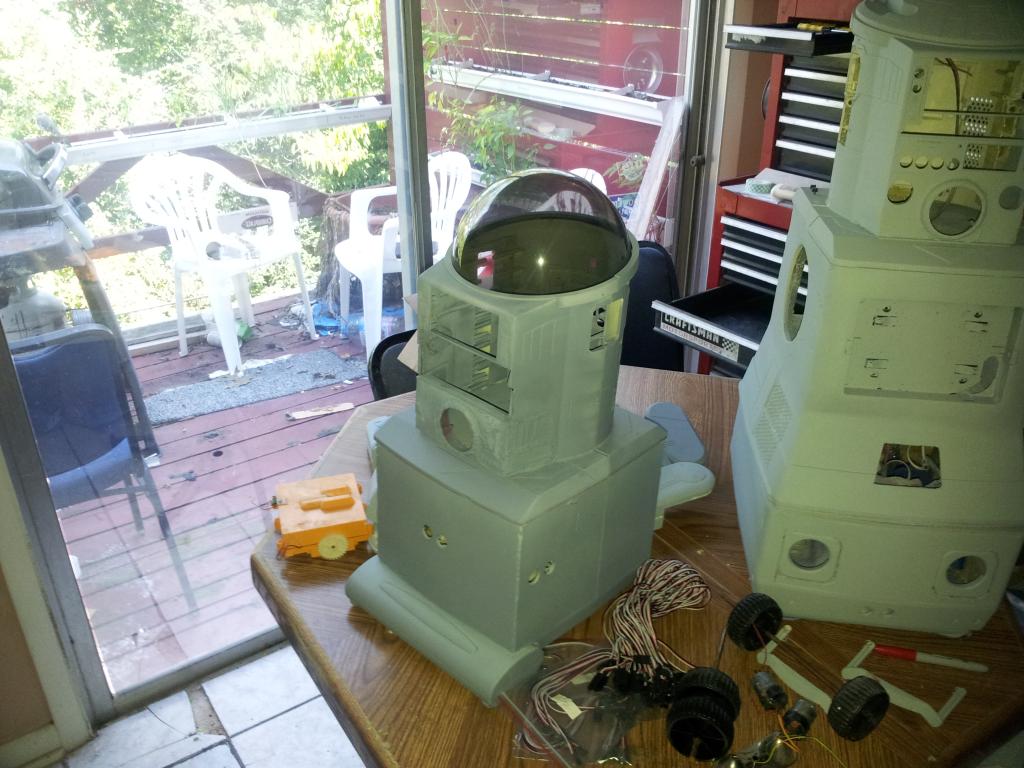
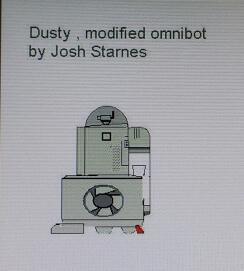
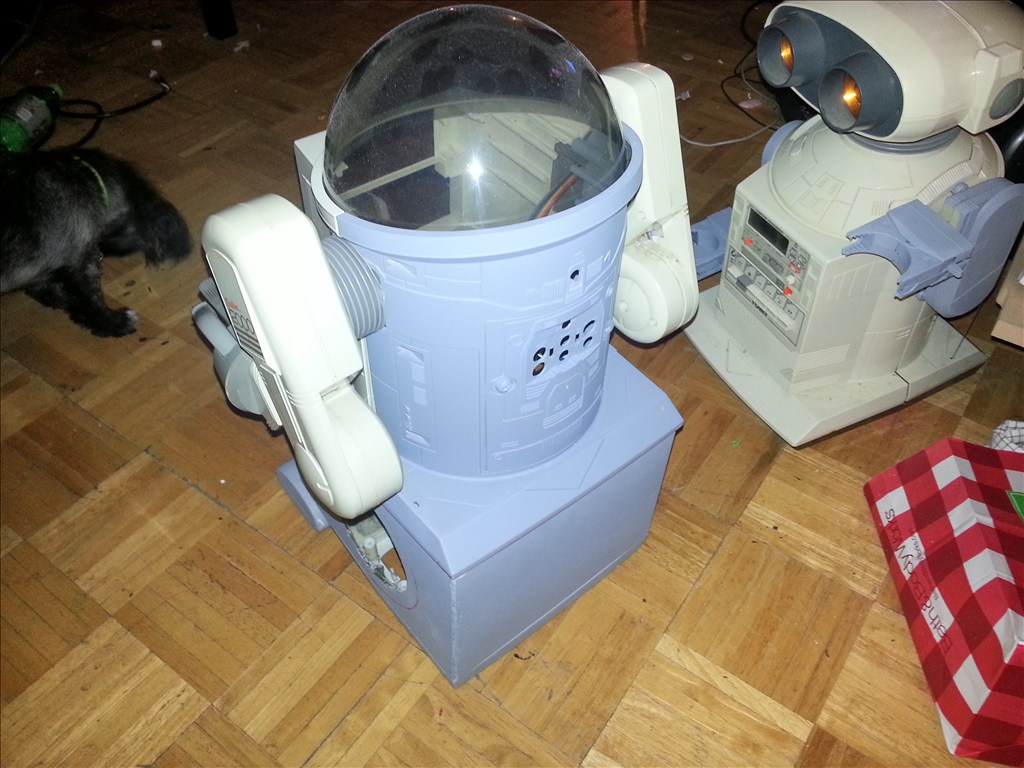
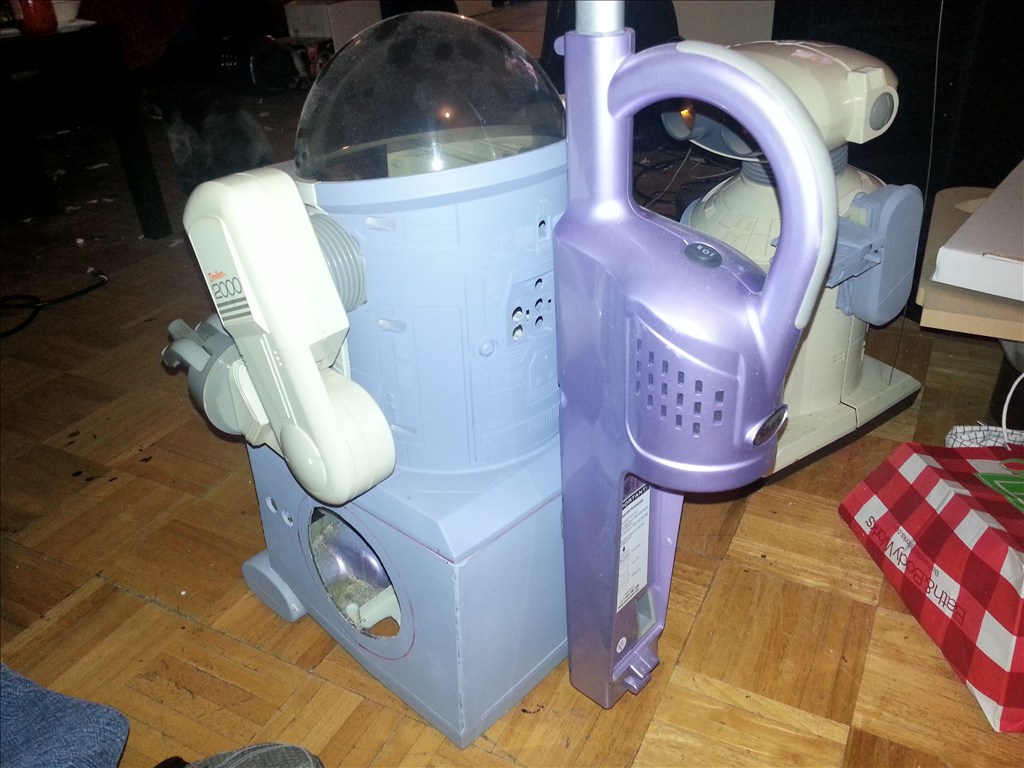
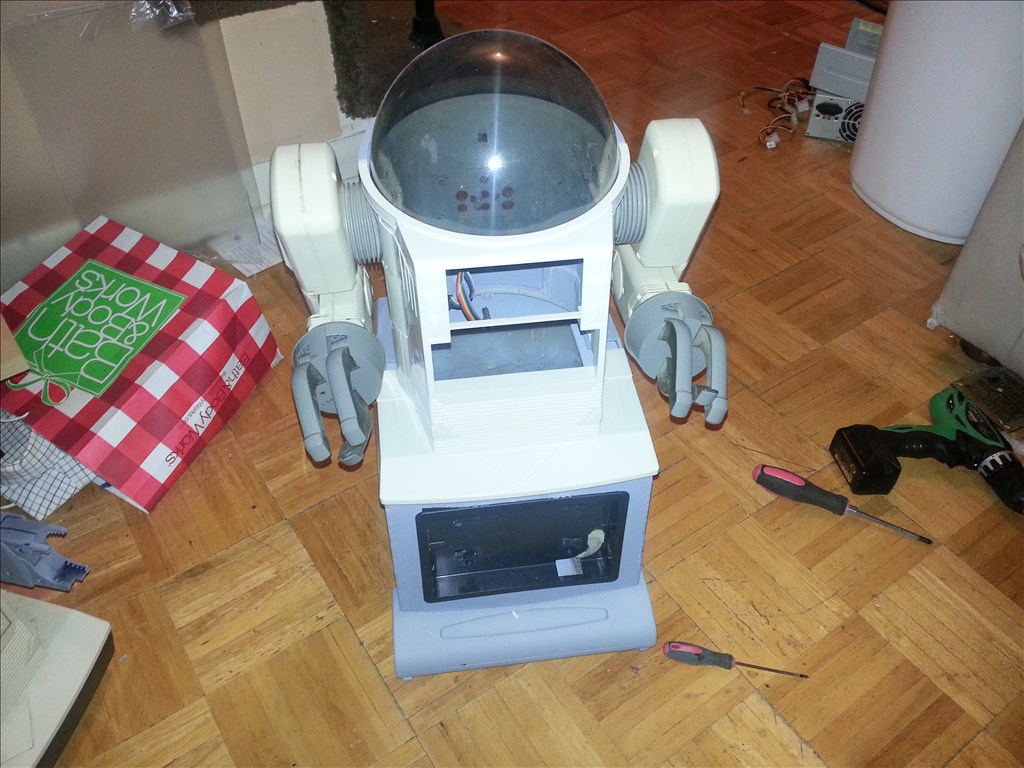
Hello EZ Robot! Meet Dusty, he is a omnibot torso and I currently have the choice of robbie at head or a omnibot done where you can see inside. He will handle a few basic functions and us made more simple than his big brother Jarvis.
- He can vacuum (which is loud) with power brush and impeller
- He can "sweep" nearly silent by running the power brush at a reduced voltage and a small DC blower providing low level auction. 3.dusty will have two germicidal bulbs ,.one facing downward to the floor and another behind intake fans that not only cool electronics but it pulls air through a Honeywell two stage carbon filter. 4.dusty has 4 build in filters foam pre filter , and 3 carbon filters.
- He will have a camera on pan tilt bracket. He will be controlled by Bluetooth or wifi.
- Long runtime , 2 x 12v 7ah batteries.
Any other suggestions guys?
]
By jstarne1
— Last update
Other robots from Synthiam community
Sweetn8's Teddy Ruxpin And Grubby
Hello EZ-B community! I am a new member and robot maker. For my first projects, I am looking to restore a duo of talking...
DJ's How Do I Shovel My Snow?
With a robot, of course! What did you expect? This is a robot shell that I built with some students in the summer for a...
Louis's The Real Wall-E By Louis T
Inspired by DJ Sures and many other Wall-E projects on here, i decided its time to make my own Wall-E and he will be my...
Very nice. Is there going to be enough room in that guy?
@jstarne1 Man, I am still working through your Jarvis build... now I will never get anything done
Go with the clear dome and interior lighting. Mount the camera on scaffolding like arrangement to allow view past and into the body.
Lol thanks gunner , makes me feel like a million bucks!
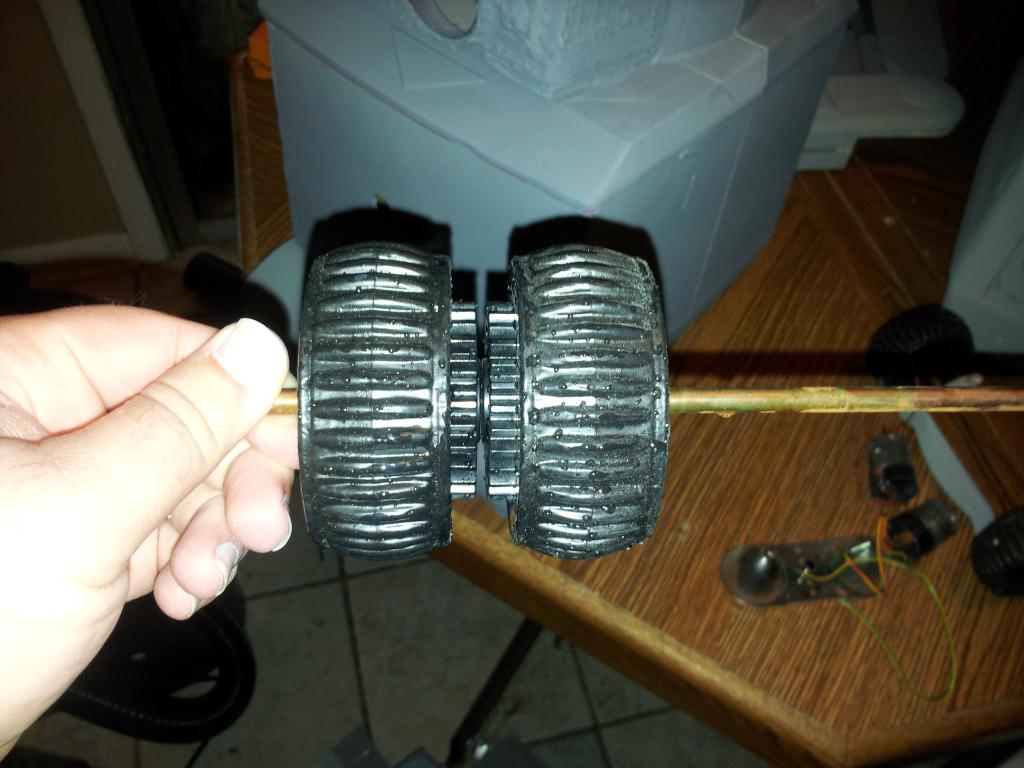
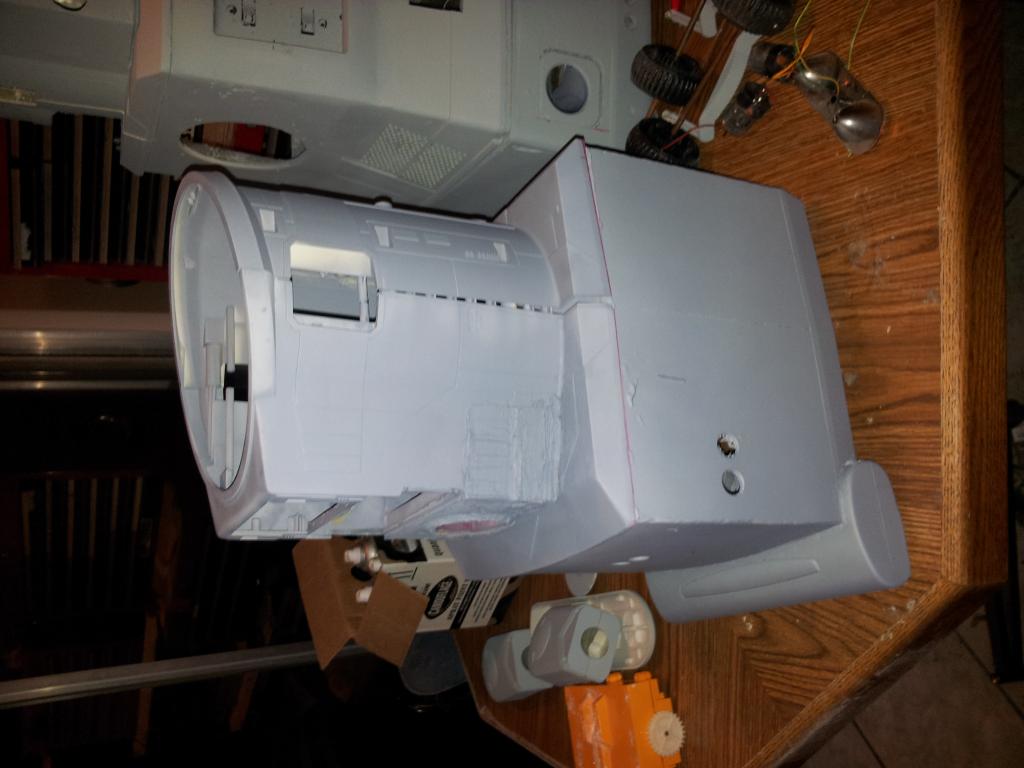
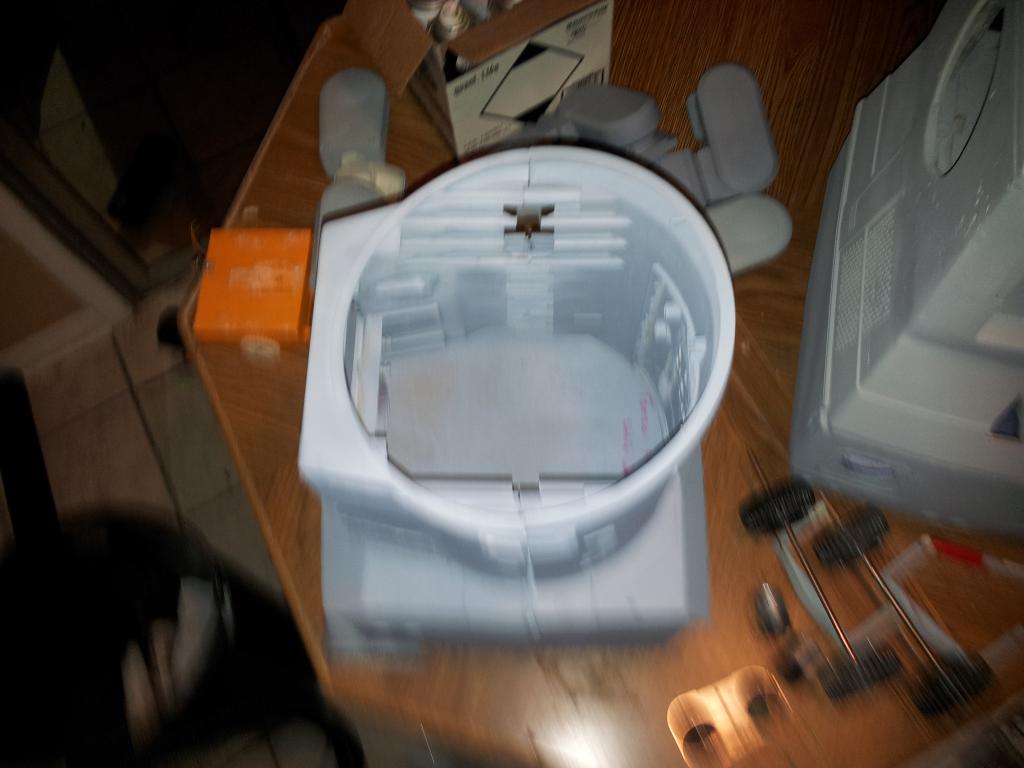
Here are some pics of the robot so far. The dome is in the mail and i already made the pan tilt bracket for the ezrobot.camera. I must install the vacuum on dusty's back and find ways to mount the roomba side brushes i bought to get closer to furniture and corners. I already made new black rubber tires.
Hard rubber tires replaced the old cracking and flat tires.
@gunner , so you think i should do accent lighting inside the dome somehow?
@jstarne1 inside the actual body, perhaps around the neck... like downward facing White LED's to highlight all the robo-guts when looking down through the dome. Somehow park the EZ-B in clear view, along with all the wiring and servos, etc. Ya know, ideas just to make you work as hard fixing up the inside as you do the outside
I could do etched plexiglass floating mounts for the electronics. My only concern is to not make it so bright it reflects off the inside of the dome preventing the camera from seeing out. As long as dusty can see then it sounds cool. I'll draw up a idea or two and post it , you tell me what you think.
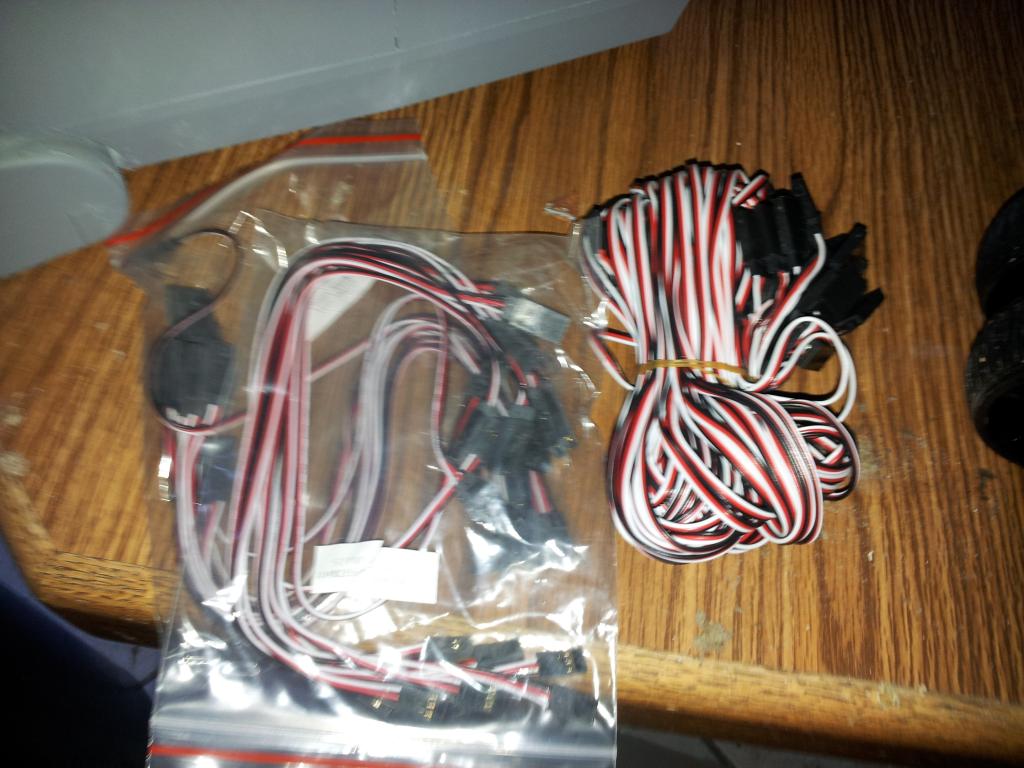
Im sick today so no working on robots. Good news though! The 340mm servo ext wires came in which are needed for both projects to hookup sensors , hbridge, and servos =)
I like the name "Dusty" I think it suits him!
Thanks brett , i named him after a smaller tomy robot that vacuums your desk named dusty.
Cute little guy
Omnibot dome came in!
Josh, Hope you are better soon. I had a question to ask about the wires that you got in. Are they heavy duty (not cheap and flimsy like the ones I ordered.) Where did you get them? I got mine off of Ebay. They were the cheapest ones. I got like a hundred for $10 with shipping. Not worth it , though.
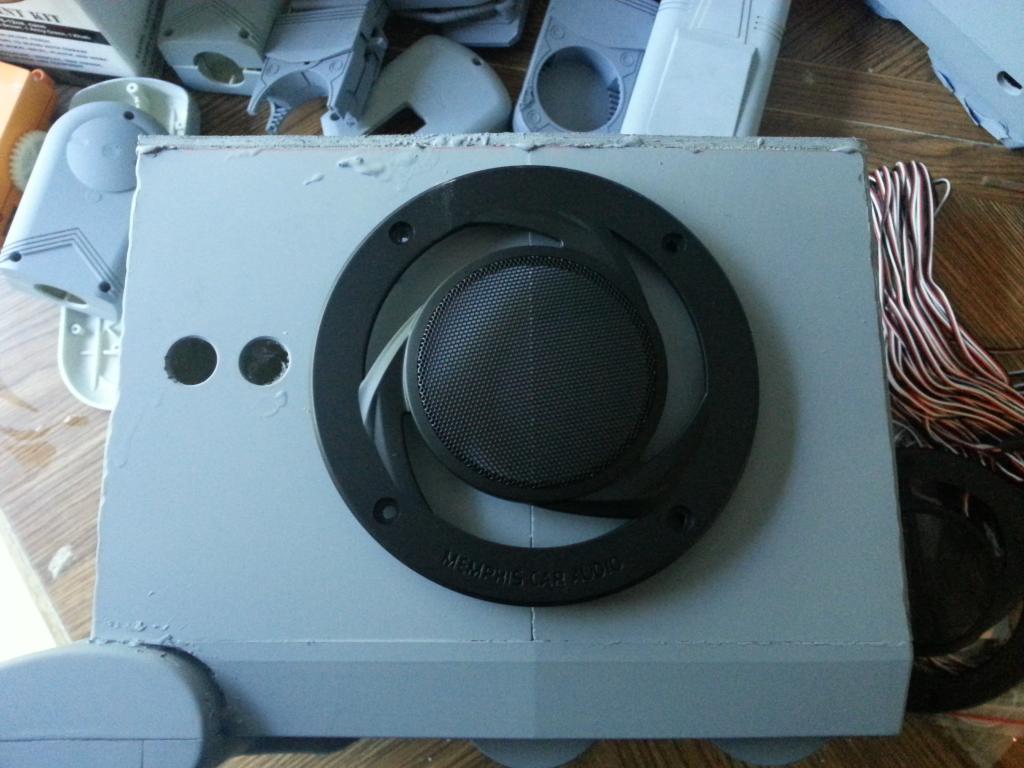
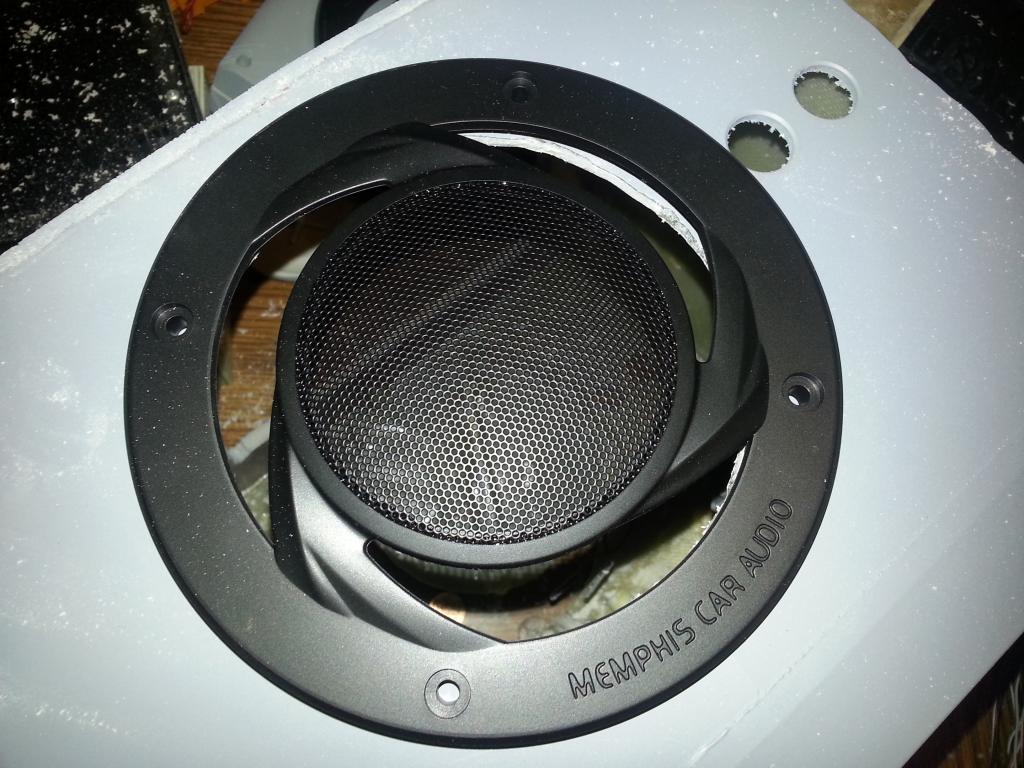
Ok so I dug up some new speaker grills to cover the fan holes. I will cut the hole later . I Just get bored being sick.
Being sick is poopie.
I have a little annoying bot that looks like the one that vacuums your desk. But this one I think is called Hi.Q and it is a line chaser. I'd like a little one that vacuums. That would be cute.
Another ezb on the way! Dusty gets his brain soon.
I found out Memphis makes nicer speaker grills now I like the three spoke style better. I already have two high flow fans on the way to put on the inside.
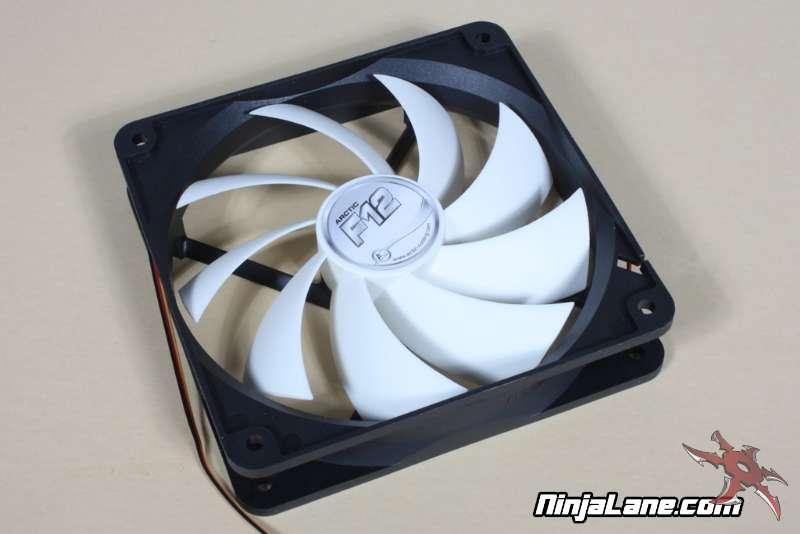
Fans are arctic cool f12 120mm
Flow 74 cfm
1350 rpm
.3 sone sound rating
Given I will have carbon filters inside the robot this 74 cfm rating will probably be 35 to 50 cfm but I will have two of them.
http://www.arctic.ac/en/p/cooling/case-fans/77/arctic-f.html
They are 6 dollars each yet havebwon multiple awards for high flow vs quiet and low cost ratio. Most fans with these ratings are 15 dollars or more each.
Ok I'm debating if I will have arms on dusty at all. Anyone know where I can get some omnibot 2000 arms. If I absolutly must it's possible I could take the extra time to make copies of the current omnibot 2000 upper and lower arm. I cannot simply make a fiberglass copy of the fingers because they are too complex.
I would give him arms, especially the Omnibot 2000 arms would look awesome. If you cant find them easily, why bother copying the original 2000 arms? You changed so much on these robots already, no need to bother trying to make exact copies, dont you think? Id probably go ahead and get some PVC pipe for water drainage or something, if you get the round pipes, it would also fit the round head....just a thought.
I want the arms to look like they belong there which is why using 2000 arms would be great. Especially since dusty is so much taller than the original omnibot parts donor lol.
I see what you mean, how about square PVC tubes, though? It will be hard to find the arm parts, there was a time when people offered parts on eBay but the last couple of months I havent seen any single arms on there. you might wanna send this fellow a message: http://omnibot2k.com/zencart/index.php?main_page=index&cPath=1 Seems to be very pricy, though! On the other hand, maybe hes got something cheap, since you would take extremly yellow arms anyway... Good luck on finding something....! =)
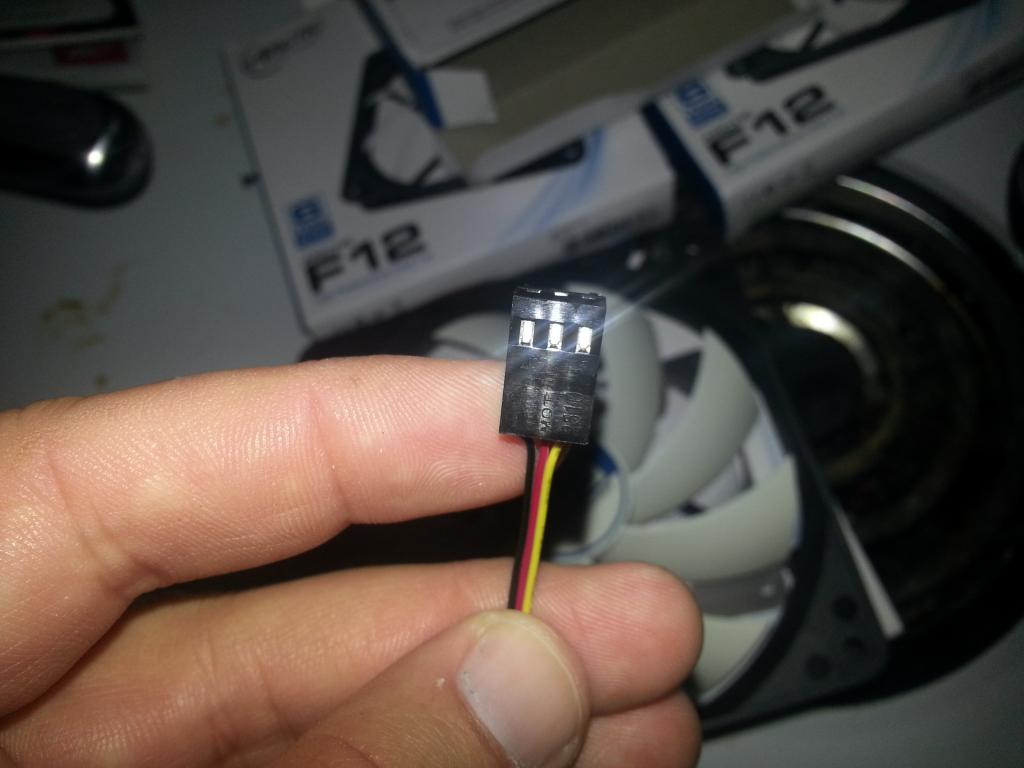
So apparently these fans are pwm controlled and have the same three prong connector similar to a servo plug. So I'm guessing that means ezb can control speed with pwm.
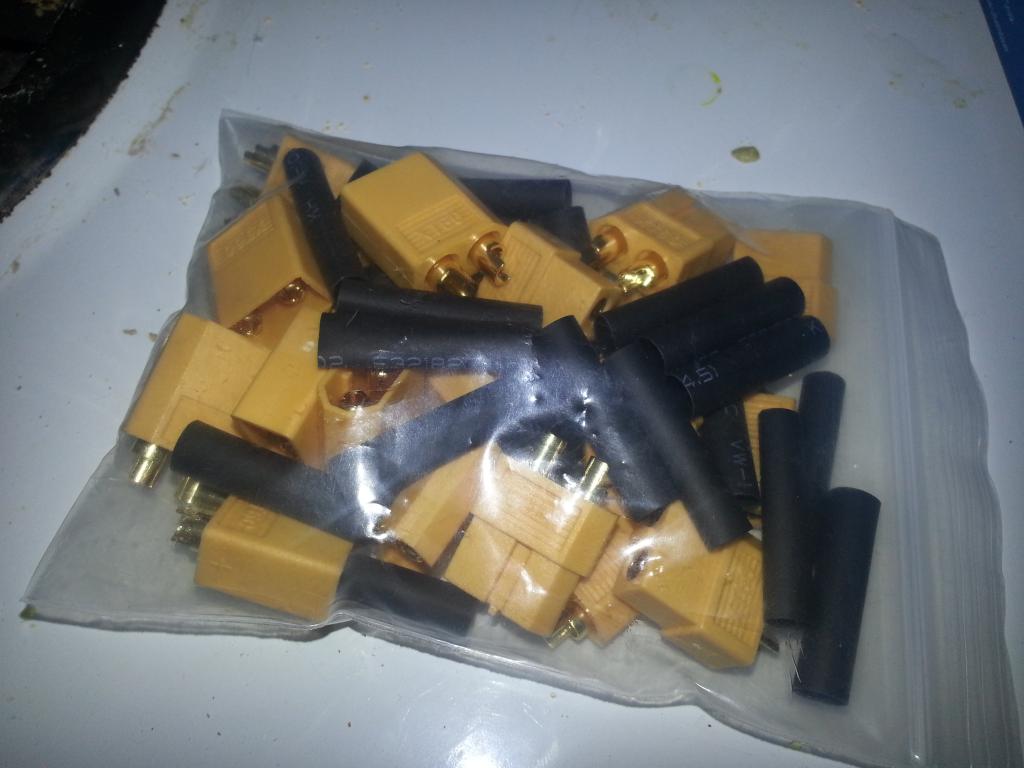
The XT60 turnigy connectors came in. I have a set of ten to make quick disconnects for the batteries . Motor controller etc.
If I recall my PC tech days... the three wire fans only feed back RPM (via the yellow wire) and while they are normally 12v, they will work, albeit slower, on 5v. Typically the fans that had speed control (via the motherboard/BIOS) had a 4th blue wire. That said, much has changed since I did that particular type of tech work for a living
Thanks for the reminder lol. Your absolutely right and I smacked myself in the head on that one. I will run it direct 12v .
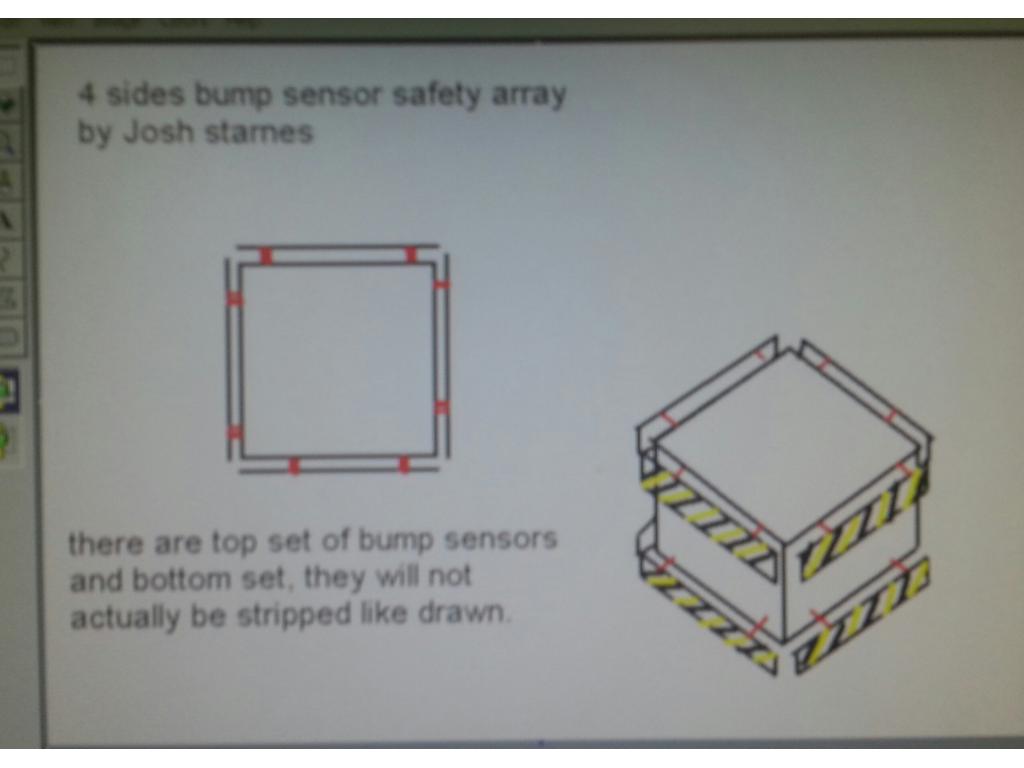
My idea is utilize two digital ports. All front bumper switches would be wired in parallel ans same goes for sides and rear bumper. The digital port would read zero or off but if a switch is pressed on any given side the robot knows it made contact with a wall or object (like pets or kids feet etc.) The bumpers would be discrete and have 2 or 3 lever type switches per bumper. This is a safety backup incase radar did not catch the object and avoid it so that no one gets hurt especially the robot. I think this is a simple switch system that will work.
I guess I will buy a handful of switches today to make the accidental collision sensor
Before you do, let me see what I have at home....
Ok cool
Josh I think you could use the robosapien sensors for this. The bumper ones. I do have more if needed.
Oooooh! I like that yes please how many do you have?
Im getting restless working on the gun robots for my little brother and sister. Dusty needs to be worked on lol
I already know jarvis is getting a bright red iron man type paint job. However im trying to think of colors to make dusty....dusty ofcourse will be together before jarvis
Any ideas for colors?
To have a front mount lcd or not. Hmmmm. I have a second 7 inch lcd and was thinking about putting it on the front of dusty s base. Also I will be installing the vacuum probably tonight and I will not mold it in the way I did Jarvis vacuum because it it a very hard angle to sand.
I can wait to see it in action when you get it finished. Nice!
It wont be long I have the other Ezb on order from Dj so the sooner I get it the sooner Dusty will come alive.
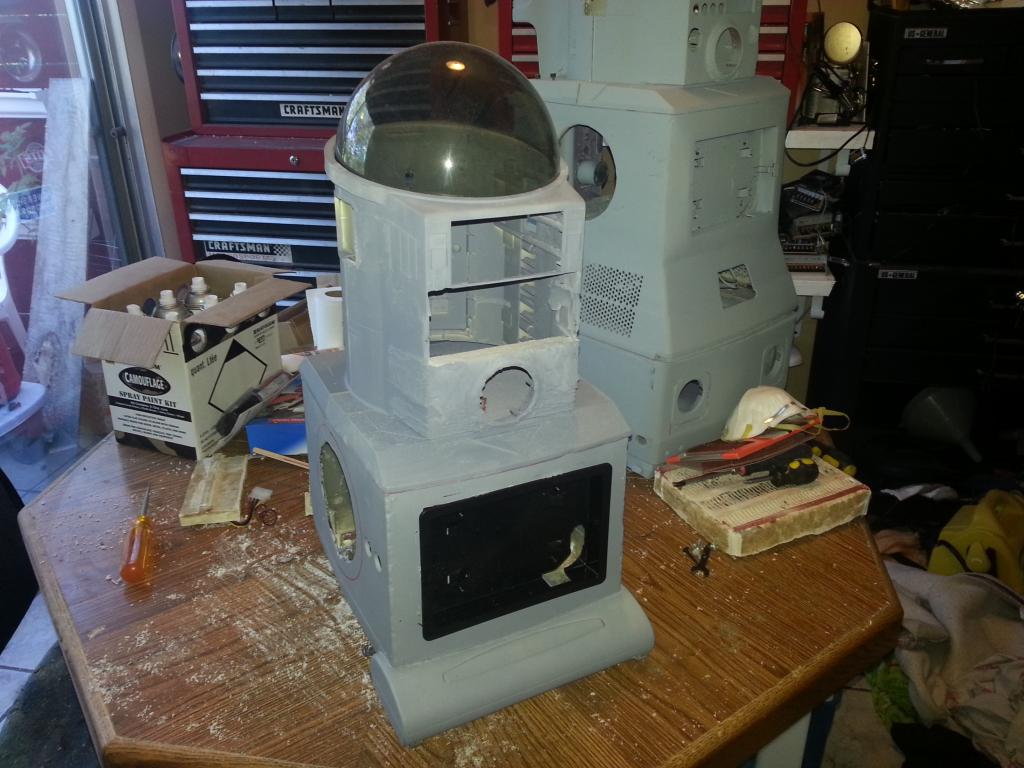
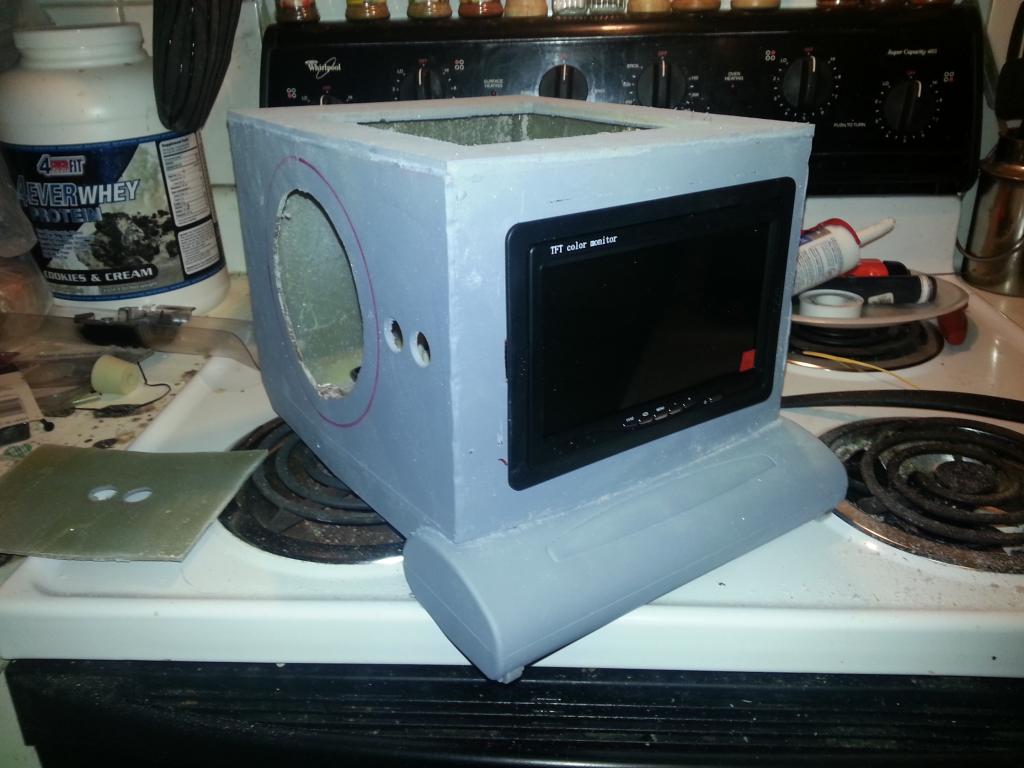
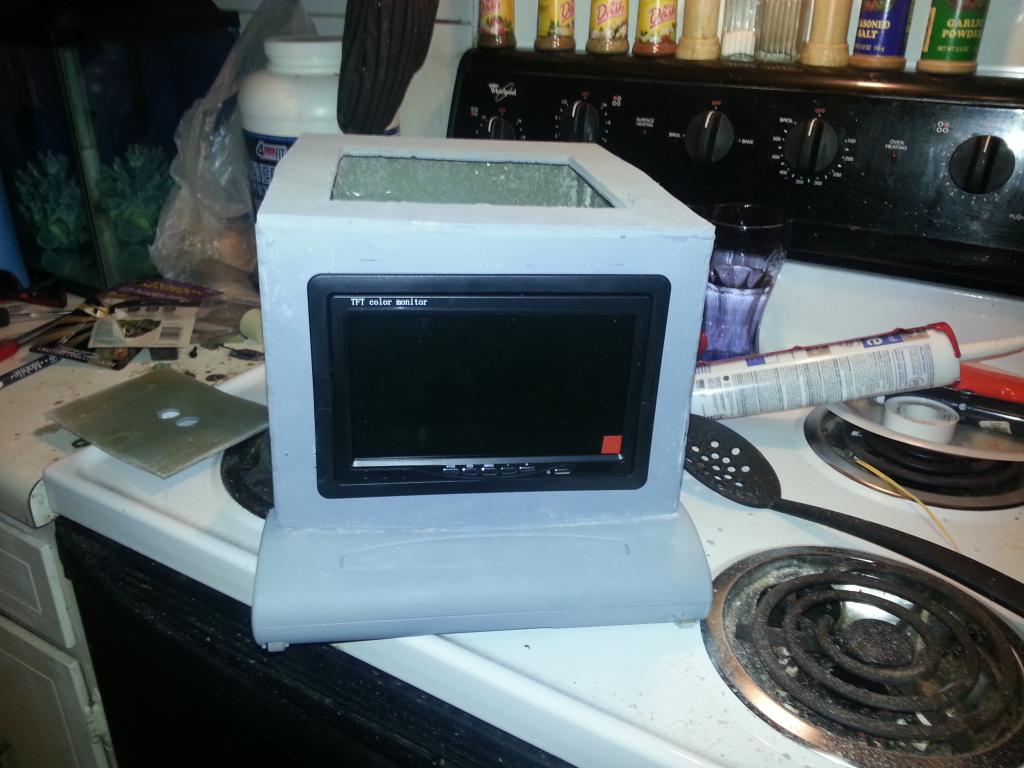
Here is dusty as of right now...
Dusty with the 7 inch screen up front... i can use a wifi remote display viewer so there is still no need to have a pc inside
merne,Is your avatar of a robot built from an Elvis-Alive! ? Is it on a robot. If so, have you posted pix of it.
I think I like the idea of the screen there up front. I will need to install a thick screen protector to prevent any accidental bumps from cracking the screen. At this moment im thinking the radar will be mounted in the chest area. Batteries would be in the torso..
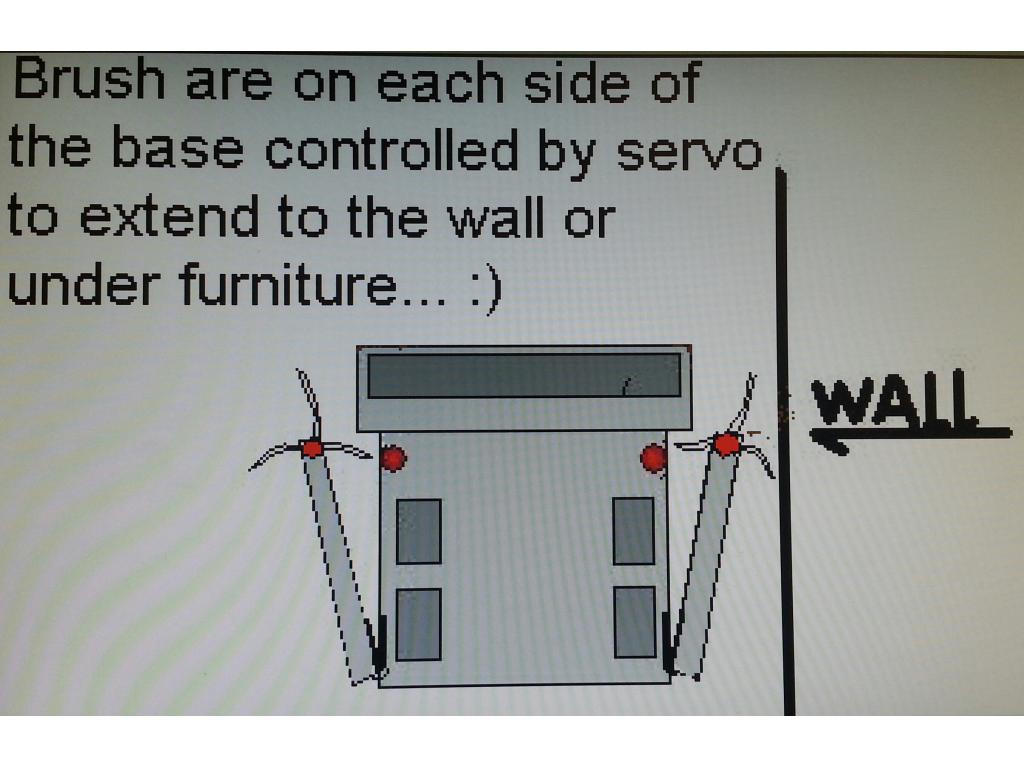
I got the bright idea I could make swinging arms on the sides of dusty to get closer to and possibly under the edge of. The bed or couch. The tip of the arm itself would need a sensor just to make sure it doesn't get snagged on anything. I think I would use a simple ir . It would only open when it senses a wall or object near but if it gets too close it closes.
Oops I posted this in a wrong post, sorry. Following many.
MovieMaker,
It's a combonation of ElvisAlive Mask, and A head from Rotbotsquared, I cut the lower jaw off and installed a moving mouth/teeth with servo. Removed the lower eye lids, then added the ElvisAlive mask. Then once I got the EZB, will the rest is history. Now it works without having to know how to program. I call him Ricky. I am going to use Ricky for Halloween.
Funny thing is, 4 months ago off work and bored and before I knew about EZ-Board. I bought the head and then added EZB and now it works! Go DJ! in the mean time while surfing the web, I found Robots and Androids who was selling the Wowwee Robotics' Alive Elvis. So I bought it. So I have Ricky and Elvis. And a used R2D2 on the way. This may be down the road maybe 2 years, but I plan on making Elvis mobile.
BTY this is all new to me and I am learning a lot and still know so little just on this borad alone. So thank you and everybody else for sharing. I will post some Pics tomorrow.
You didnt post it in the wrong place he asked the question on both threads lol
Great job ! Plz continue fast with your work. Wanna see more pic's and vid's.
Greetz,
PhG
I like the sweeper arms. You thinking about using the sharp IR sensors on those?
Josh, if you don't have a degree in Engineering, they should give you an honorary one.
It is something to realize that you have never done this before.
Amazing! Of course the EZB does make it easier.
:D
@Brett yes I was going to use short range 4cm to 30 cm IR on the tip of the brush arm so if somthing gets too close the arm closes. Thats how it works in my head anyways lol
@Mel thanks man. All the planning and designing and learning has made me want to go back to school. Im just not sure what for lol
Ok dusty gets a front facing display like his big brother. Since the computer controlling him is in another room I can wirelessly recieve the video signal to make adjustmentsbsee errors battery levels ect. This also sets dusty up in case he ever gets his own mini itx pc...
So Josh, just curious... do you ever actually "cook" on your stove or is it your permanent workbench
Dusty is looking good BTW ...and I am still working through your Omni thread, but peeked ahead only to see that it continues on in another... arrrgggg How do you do all that, keep up on other's projects AND surf ebay... amazing
Excellent time management ... lol. Im use to hopping from one thing to another because the nature of epoxy and adhesive s is they really need 24 hours to cure and that is only 80 percent cured! Fully cured can take 3 to 5 days to full hardness. Till then epoxy is soft and a huge pain to cut because it gums up drill bits and sand paper ect. It also fuels creativity because we find solutions to problems when we arent focused directly on that project. So im more productive having a smaller side project to work on when I need to think...... oh yeah we cook every couple of days I just like the lighting on the stove lol. I surf ebay and ez robot more than facebook
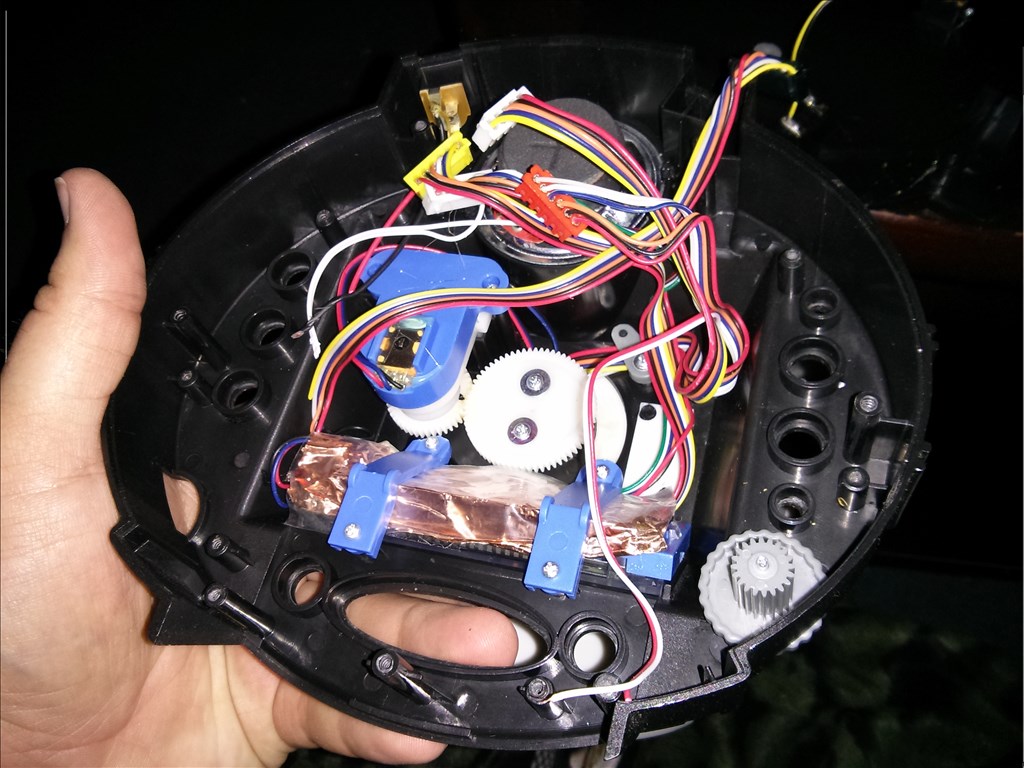
As far as dusty goes he will be moving shortly after recieving the ez board and ez robot camera. I assembled a pan and tilt bracket for the camera
As for as the sharp sensors, mine operated flaky. they would give me false ratings. I have used them on prior robots fine. But, they did not play well with the EZB. I think it had to do with the amount of voltage. But, that is my 2 cents.
Hope that this helped.
Thanks for the info maybe a ultrasonic would be better. The arms are optional I just want dusty to clean as well as he possibly can...
The lcd hole is cut and mount glued into place. Tonight I will mount the fan grills properly and create plugs for the inserts that cover the arm holes. I have contemplated placing a speaker somewhere but I have not come up with a place for it yet. I will probably use the speaker from the rad 1.0 robot that is currently getting ramboed up! The slot where the tape deck went is where the ultrasonic radar will be mounted in a slight downward tilt I believe. The vacuum gets added soon too but I want to make this one a tiny bit nicer then the previous one on Jarvis. I believe I will have the vacuum vent inside of the body through a carbon filter and this should slightly reduce the vacuum noise. This robot will usually be in a low light situation so I will have a couple IR illuminators for the camera.
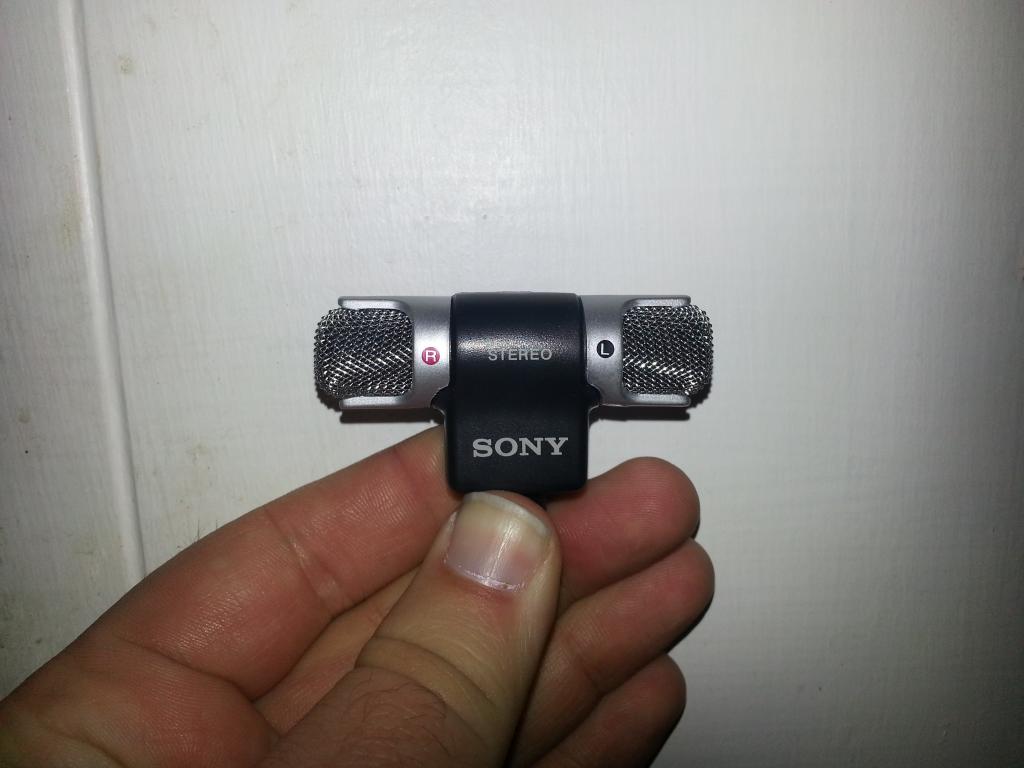
Dusty gets the gift of stereo hearing... well not yet but the stereo sony condenser mic came in...
NOW THAT IS AWESOME!
GOOD JOB!
eek eek eek eek eek eek
Tiny update pic
Too Cool!
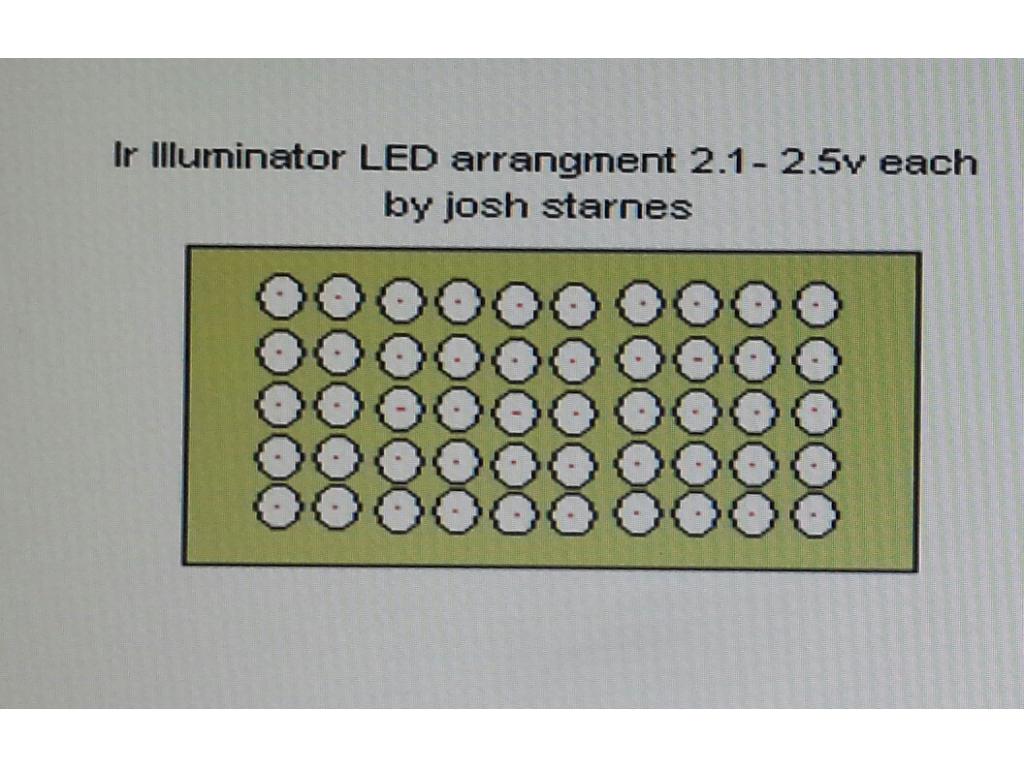
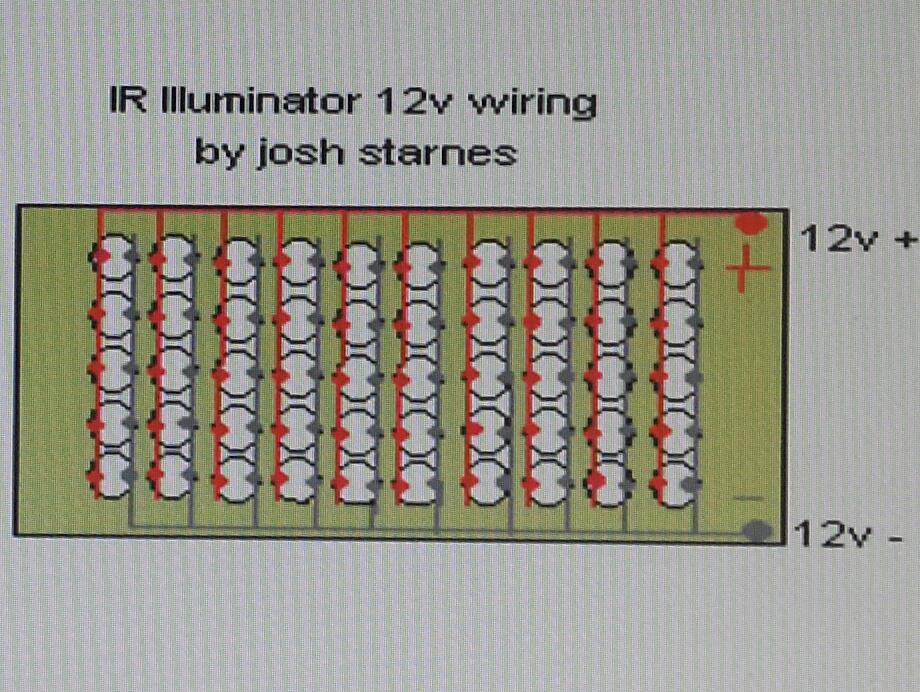
Thanks brett! I need to drill out mounts for the grills in each side , cut up the vacuum and attach it to the back of the base. Also I need to mount the camera and ultrasonic radar. I will use velcro I believe to hold down the camera. The area right above the ultrasonic will be a IR illuminator with about 25 collumns with 10 rows ( I will adjust these numbers as needed) that will fit in the area the original lcd was.
Ok for the front illumination I am using 50 leds and a perf board type mount. It will mount with one screw on each side just like the original led bezel did. This should light a dark room well for dusty to see. I will try using a pot to adjust the ir light level to fit my needs or perhaps have it auto adjust based on a light sensor. We will see later. Each led is 2.5 volts but can run at 2.
This is my current idea for wiring the leds
you are wiring the leds in parallel the will be fried with the 12v use a 2 v power supply instead
Woops drew it wrong ill fix it in a minute . I was going to draw 5 leds in series and 10 columns parallel
make sure your supply could handle 4 amps
I like that idea. Are you putting in resistors at each rung?
What is your calculation to figure that?
@gunner I avoid resistors when i can. They run 2 to 2.5 v 2.5 x 5 is 12.5 volts when 5 are wired in series. I may use a resistor .... shrug.... well see later this is just a idea.
As quickly cut and pasted from a web site...
"Calculate the value of the limiting resistor by subtracting the LED's forward voltage from the battery voltage and dividing the result by the LED's forward current. For example, assume the forward voltage is 1.2 volts, the forward current is 20 milliamperes, or mA, and the battery voltage is 3 volts. The limiting resistor value is (3V-1.2V)/.02A = 75 ohms."
I hate math but here we go on the fly... So add up the LED's in each rung - 5*2v=10v (12.5v-10v)/.02A = 125 ohm resistor per rung.
Now this is where I am guessing, but I think that each additional rung will just draw more amps... but will not really alter the above equation.
Do you have an android phone or tablet?
(12/(10*5))*10=2.4 amp sorry not four
Yes gunner. Got a nice app for me? Lol
@Gunner woops I forgot to check my spec sheet . 1-1.5 v forward current. 5 volt reverse current and 50ma current draw. So my wiring in the drawing is not even close. Lol. I remembered somthing was different about IR leds.
How did you wire yours gunner?
Hahahha Gunner I was thinking the same thing about Josh's stove... :o)
Dusty has come a long way. He looks good beside his big brother.
@Josh, you are correct that at 2.5v forward voltage each, then 5 in series would work with 12.5v without a resistor, but I believe they would overload at just 13v
Whereas with even a 10 ohm resistor, you have almost full brightness and a bit of protection in case your battery's are right full.
If you have an Android device, then an app called EveryCircuit is great at testing out the what-ifs without releasing the magic smoke
@sam Thanks Sam ! Yes I do cook not always everyday but it happens. Im trying to contain projects mostly to the kitchen table now lol.
@gunner Oh and gunner the leds are 1.5v and 50ma so I gotta figure out somthing. How many leds are you using?
At 1.5v FV I would sujest keepping them at 6 LED's per rung (9v FV max) with a resistor to make up the remaining load at 13v. 6*1.5v=9v (13v-9v)/.02A = 200 ohm resistor per rung. This of course assumes they are still rated for 20mA
EDIT, which I just noted they are not Thus I believe an 80 ohm resistor is the requirement.
They are rated at 50 ma
Yup, at 50 mA then an 80 Ohm will do the trick... IR light from 12-13v without smoke
I am actually using a pre-built IR rig from an old broken security cam. But I just found a collection of IR LEDs that I bought years ago... so I might start making my own illuminator rig for better placement on my Gunnerator.
Sorry for filling your thread with all those pics... they come out fairly large
Very nice schematics...
Its all good gunner. I will probably start the light array tonight. Its a "small" project. I may do half visible white led and half IR. That way it can switch based on ambient lighting. I will post picks tonight we will see
Ok I completely forgot to make the IR illumination the other night. I came straight home and passed out. Anyways it was better to wait because I had not recieved the camera shipment yet. I recieved them friday so im ready to mod som cams and create mounts inside the dome. I potentially will use plexi but most likely I will use wood.
Slacker...
Based on my tests, don't bother with white LED's, except for aesthetics... the IR will work much better with the IR filter removed. With the filter, I needed sooooo much LED lighting that it looked like a redneck pickup on a dear hunt OK, OK, so I like that look
I picked up perf board to use in making the illuminator. Also I have about 170 Ultrabright IR LEDS to use for all the robots which hopefully is enough because I paid a lot for these leds. They are 850 nm visible spectrum.
The illuminator I am using has 24... more light in total darkness then the camera can clearly make out distance wise.
Ah so I wont need many at all then....:) I cant wait to mod some of these cams to get more light sensitivity from them.
Hi Josh, did you manage to get another set of arms for your robot? Mike
Nope huge bummer
This would eliminate any need for spares and keep you busy for the next couple of years: 281012574709
:)
Mike
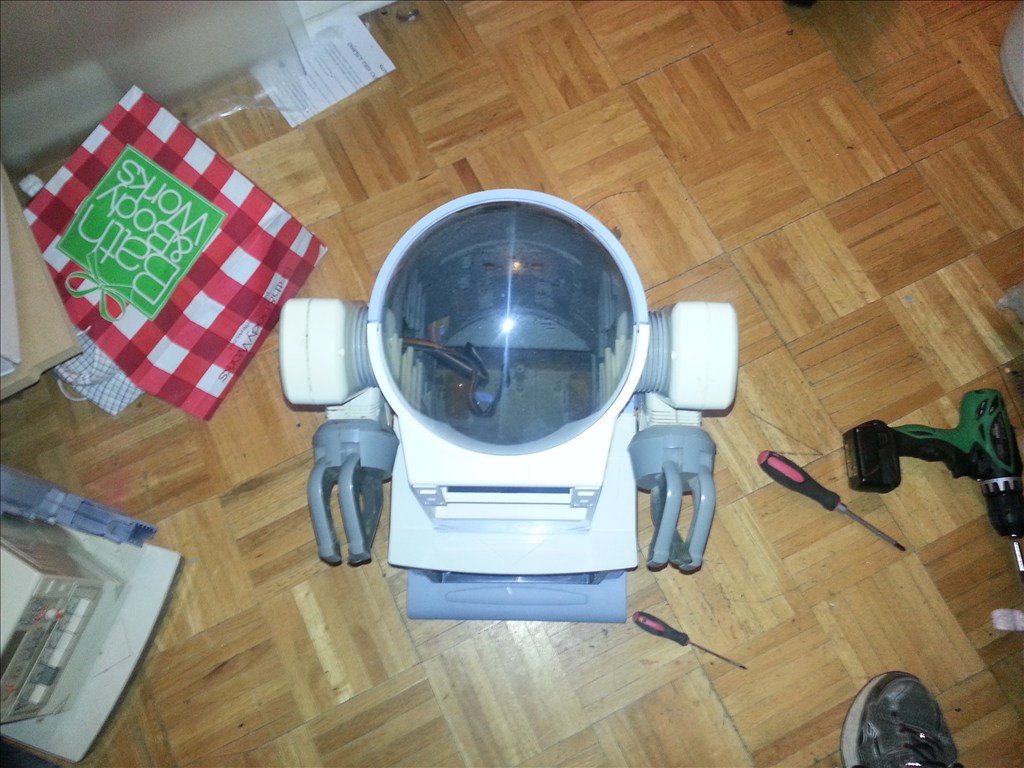
Dusty just got a little cooler. I managed to get omnibot 2000 arms for the Dusty project.
JOSH you need a girlfriend or wife,my girlfriend doesnt mind cleaning my floors,they dont get dirty that much and she knows i buy her good stuff,this is your second vacuum cleaner robot you must hate to clean
The cleaning robots are a childhood dream and to "do it myself" versus buying 6 roombas , three scoobas, and a robot pooper scooper (which prolly is not available anyways) is a huge personal accomplishment. I may never make a penny off of a robotic idea but I had the passion to create and overcome obstacles just the same.
WHY is 6 roomba's needed,almost every buys just one and does the house clean and big homes too my neice got one from me,she much much lazy and has a big house
Josh, I love those arms on Dusty. He is looking so cool. I am really amazed at all of your builds.
i guess you forgot about your omnibot 2000 project i have 3 of the omnibots just like the one you have in this post ,model 5402 i dont know what my design is going to be yet,maybe just a media center with a HD projector
also idea is a real good security robot i might use
@robotmaker - I am so excited to see pics of your builds. Please post some pics.
Trying to do that,i cut the aluminium angles and next is to make the frame and post the photos Between work,my girlfriend and vacations ,not much time,but good news retiring very early since i dont need money now, 2 months to go
This is really coming along nicely...keep up the good work, I cannot wait for more updates!
Hi HERO welcome to the club,i have 3 hero robots so far,and one using for EZB
Thanks Robot Maker!
I really want to use the EZB on my 914 Bot (Canadian Whitebox) but it will run DEBIAN, and I am not sure when programming will be developed for EZB. My old Hero is Debian also, integrated via RS232 using HERO BASIC subroutines driven by an onboard EEEPC.
THAT will be hard no linux YET,i ask about it too using ROS i have 914 bot made by whitebox,its a great robot,so far i have over 70 robots and just added 5 more comming in
Thankyou hero! The Dusty robot was a happy and unplanned accident. But where there are unplanned projects there are no unwanted robots. -Josh S
That is awesome. I cannot get ROS unfortunately, The program is not available, the Whitebox site is not really functional anymore (even the forum is shutdown) (. I am going to build mine like an RB5X, I talked to the owner of Whitebox in Canada 3 weeks ago, and he said I could have the body panels made for $3000, But that is insane, and they look like a Japanese car or something. I like the older cool type of look from the 80's myself.
This vacuum bot for example on this thread has a nice functional look. I cannot wait to see this this at work!
DUSTY looks like a good build if he ever gets done with it Check out his JARVIS it anoher good build he started on one i am getting is robokind by hanson ZENO version,its a high for most robot builders but for me its easy to buy it
Hey Josh, I had an idea for tracks on Dusty. What if you took a pair of the drive wheels from your donor bot and added those to the front of dusty? That way all 3 wheels on each side would be slotted for treads. Then maybe you could find a drive belt that would fit (or make one) and would wrap around all three. Add larger motors and you would have a powerful tracked bot with two wheels actually driving the belt on each side.
BRET hows your B9 ROBOT comming along havent heard much about it
Ok dusty is getting his vacuum backpack tommorow but one thing I have not planned is how to mount the UV sterilization will be mounted. Two things I want. First I want the vacuum exhuast to pass through a uv sterilizer. Also I want a light directly aimed to the floor so when vacuuming the surface area of the floor gets sanitized as well. Lastly IwI want a bright "spotlight" which primarily will be used to aim directly up at the ceiling but could also point it at things that need sterilization.
Squeegee- I learned a bit about liquid containment and spray control. I found that very easily a swiffer or microfiber pad can be velcro right behind the vacuum so dusty can do similar cleaning to squeegee though not specialized for wet work.
These are the uv tubes im thinking of using http://www.ebay.com/itm/321031585627?ssPageName=STRK:MEWAX:IT&_trksid=p3984.m1423.l2649
Then maybe I could use one or two bulbs for the bright directional light.
http://www.ebay.com/itm/321031585627?ssPageName=STRK:MEWAX:IT&_trksid=p3984.m1423.l2649
Hey, That's a very bright idea!
Happy New Year!
Dave Schulpius
Lol thanks for the first pun of the year . Happy new year!
Dusty being fitted for his vac pac.
Something I am going to do different on dusty is seal the air vents and reroute the exhaust through the body so air gets sterilized and mildly filtered as well. Also I will trim about a inch deep into the case from top to bottom so his vac pac is smaller and more streamlined than Jarvis. The top of the vac will be aprox two inches from the top of the torso much lower than Jarvis vac pac.
Dusty gets parts that squeegee has like fluid tank, sprayers and Velcro removable pad behind the vacuum. I might also have sprayers in the side ext arms that are meant to reach under furniture and edges of the cabinets in the kitchen. So far the arms I have planned will use brushes and motors from roombas I bought from fred.
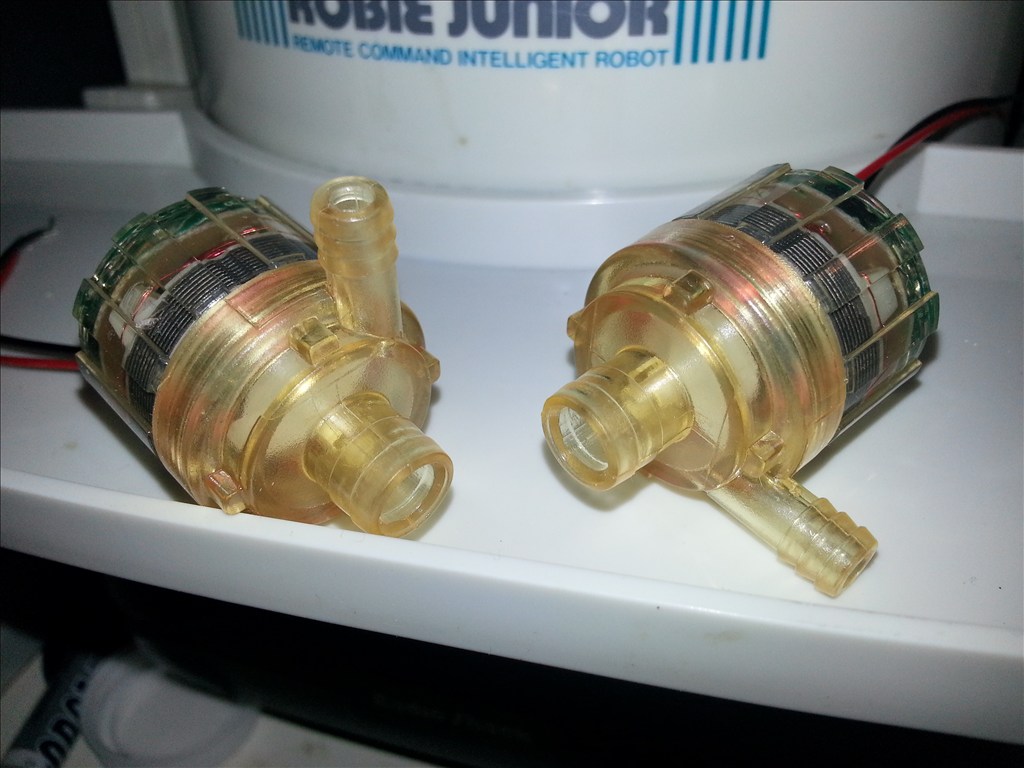
New mini pumps perfect for a small 1 liter liquid tank.
Wow Josh, this looks really impressive. Dusty is going to be one awesome bot. Once you get him done you should patent him and approach some companies about building a True Cleaning Robot. I would much rather have one like Dusty than a Roomba. He's so much more personable. But I really do like the additions and changes.
He could do a little more than most cleaning robots lol. If I can get him to do windows hes a winner!
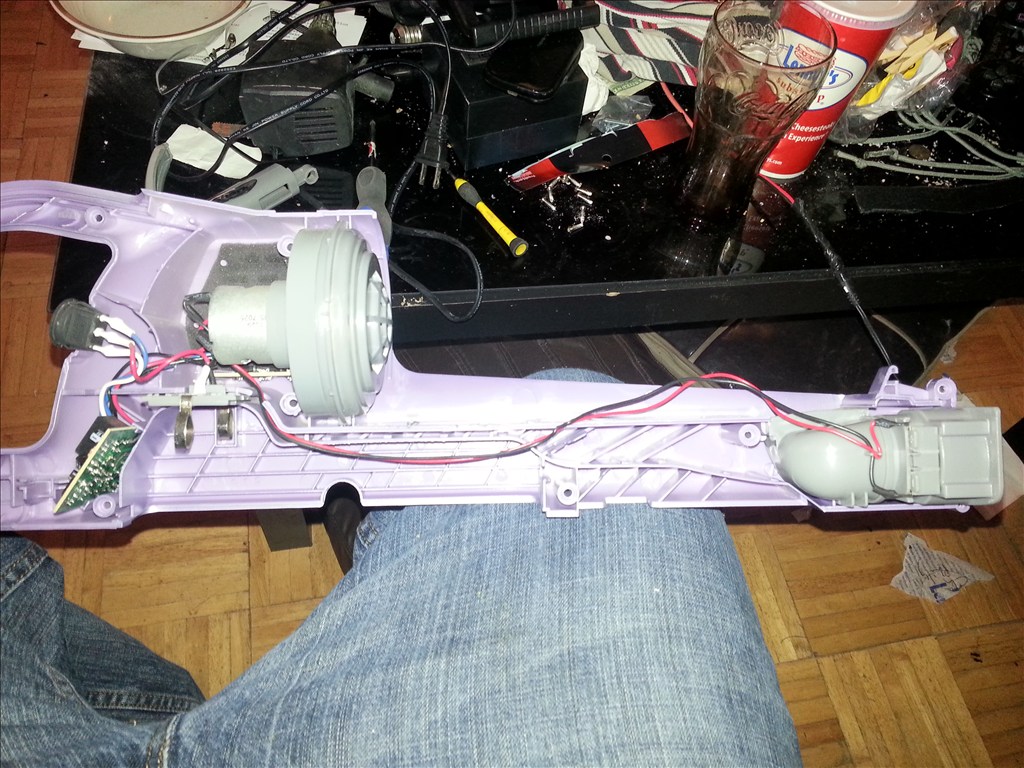
Ok so heres the power vacuum backpack.
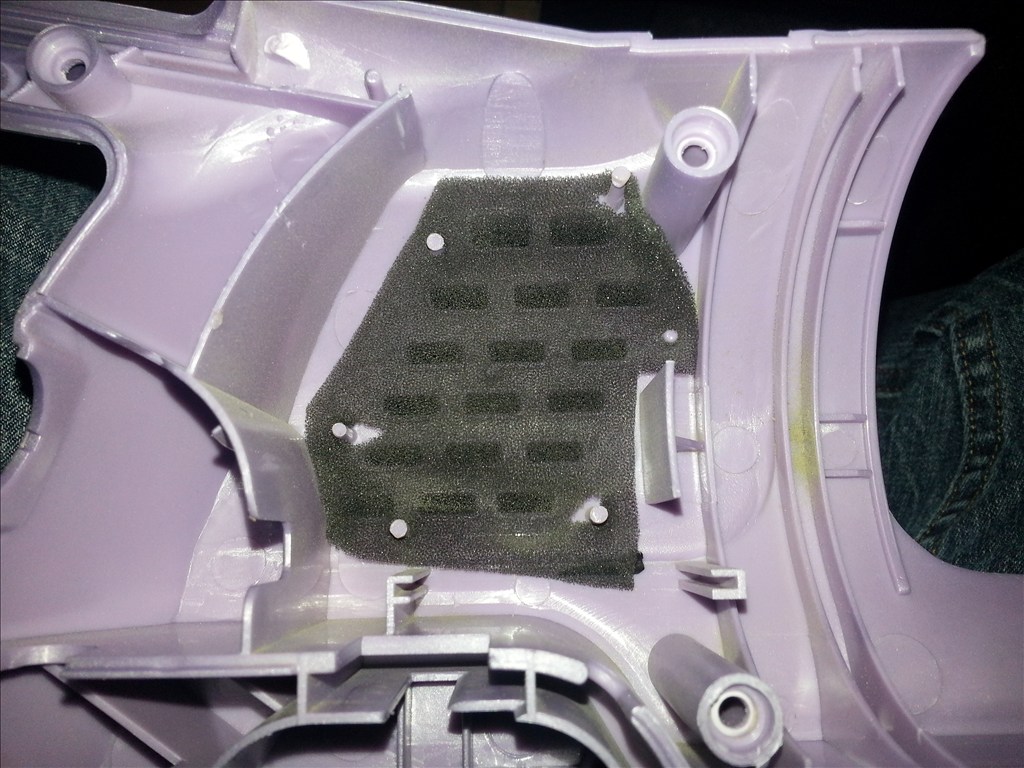
First step! Remove this super weak excuse for a dust filter
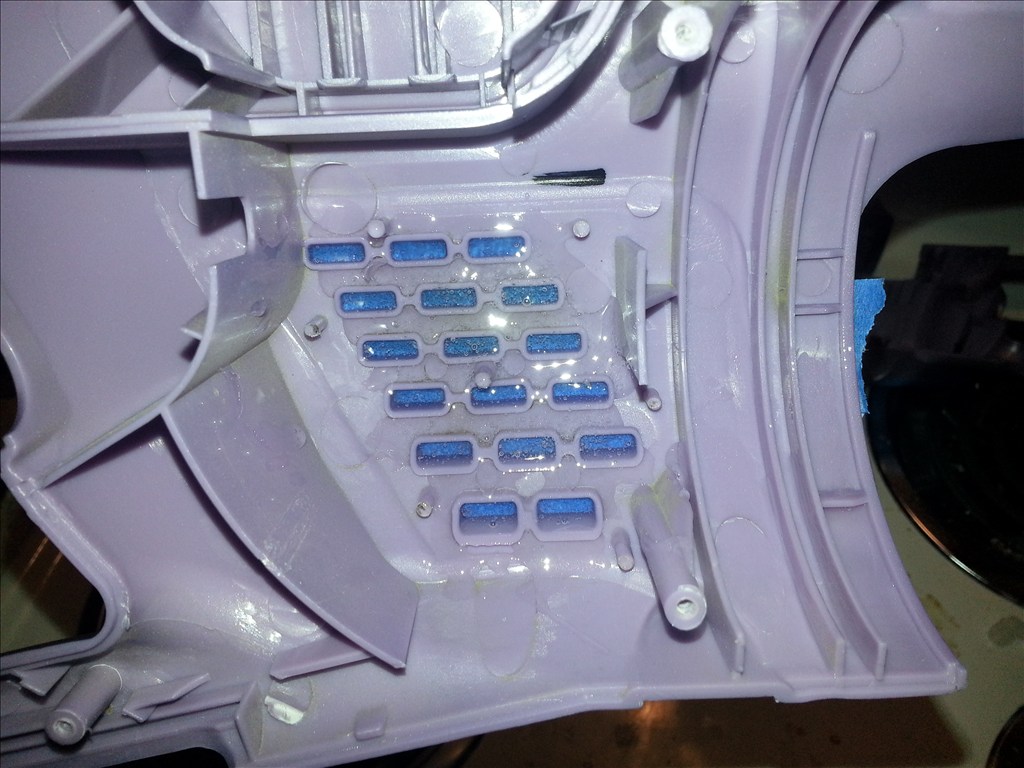
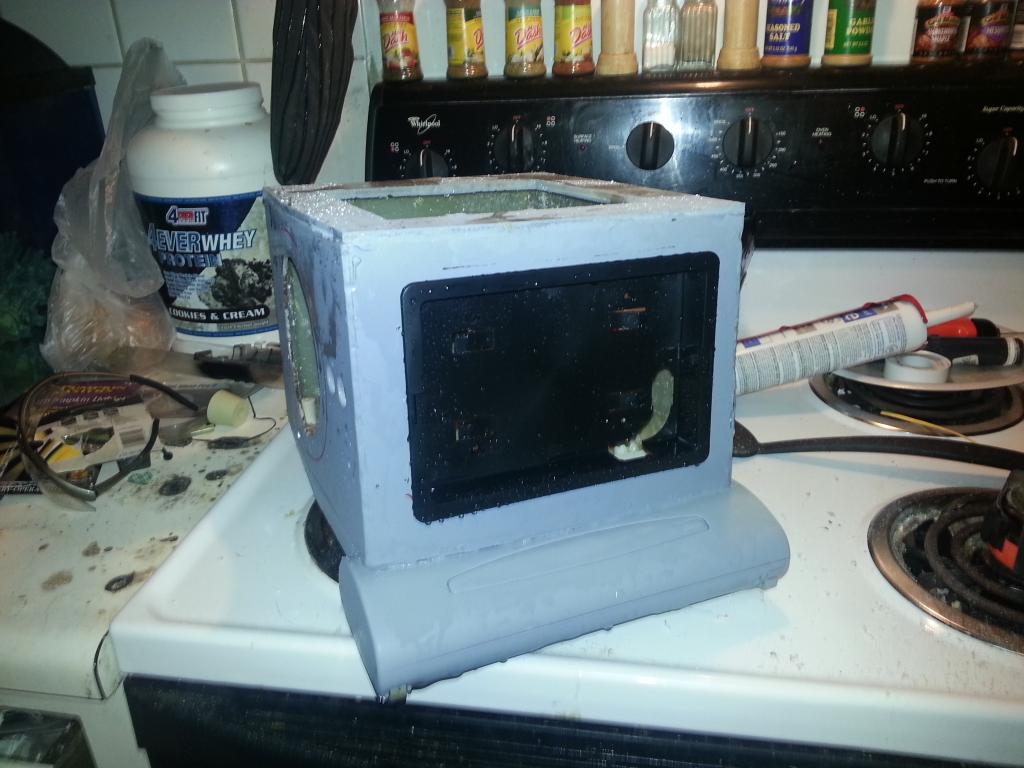
Ah now thats better... next step is to tape off the outside and fill these slots with epoxy
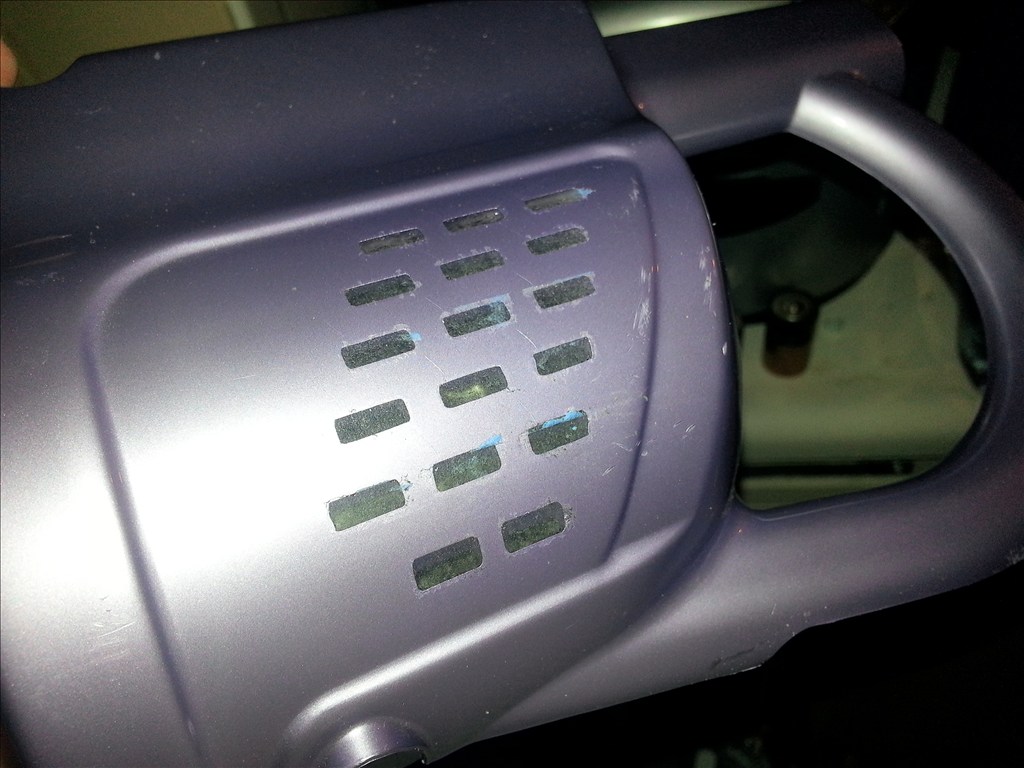
Ok so now that the vents are filled I need to start planning the next step.
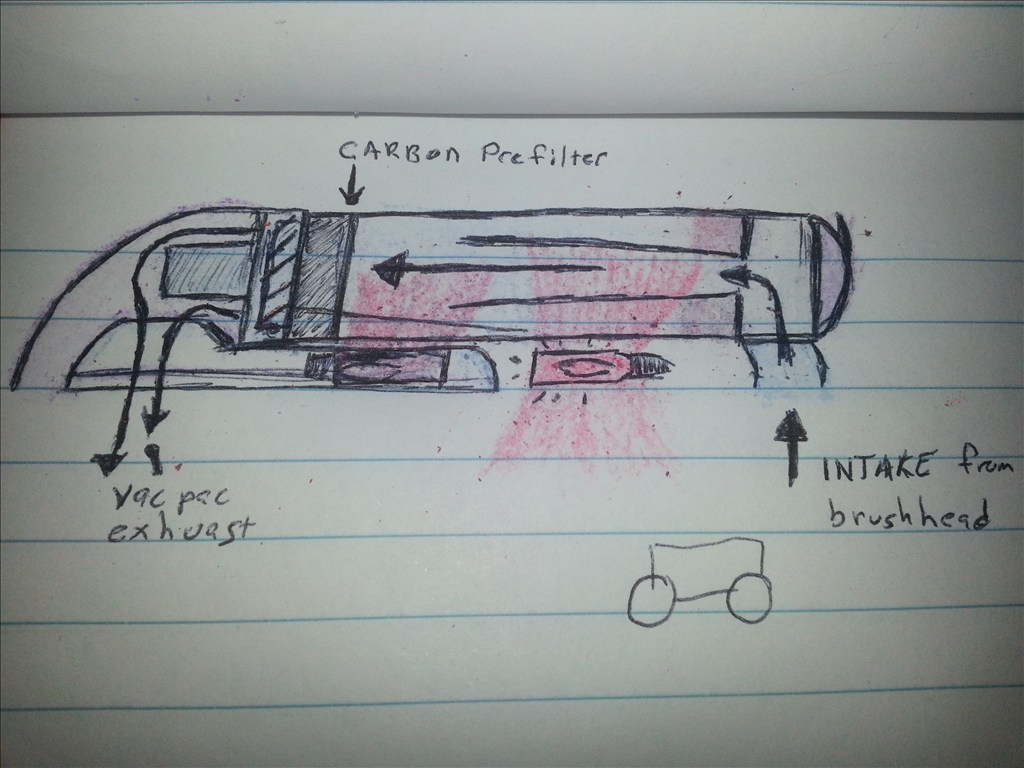
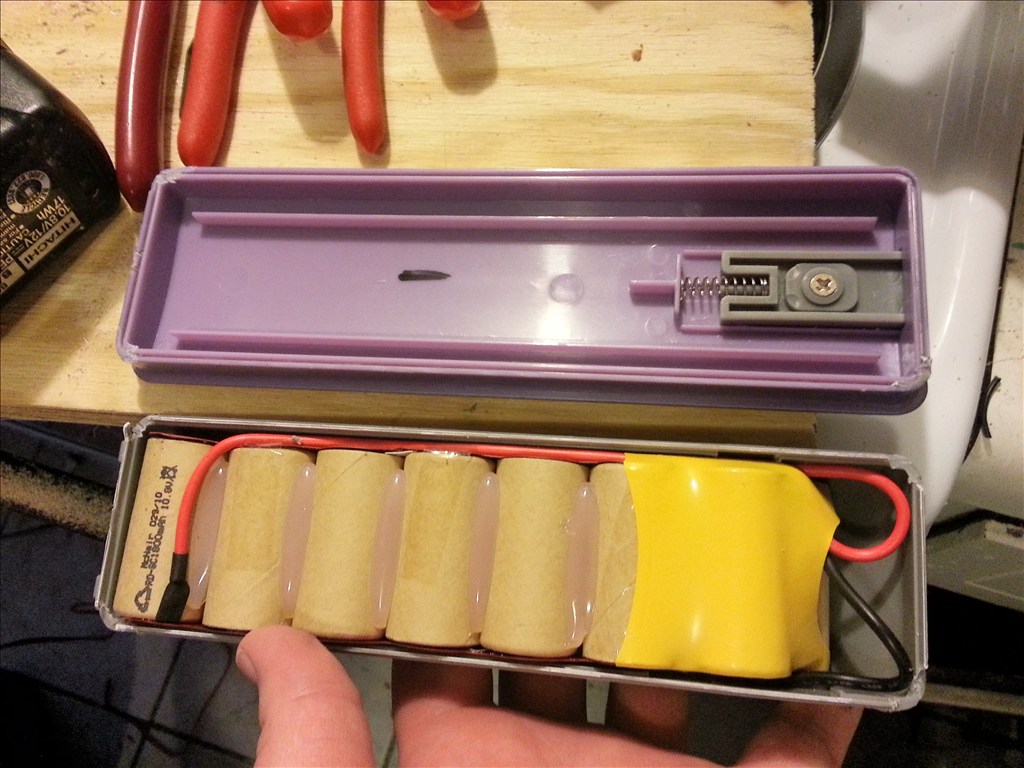
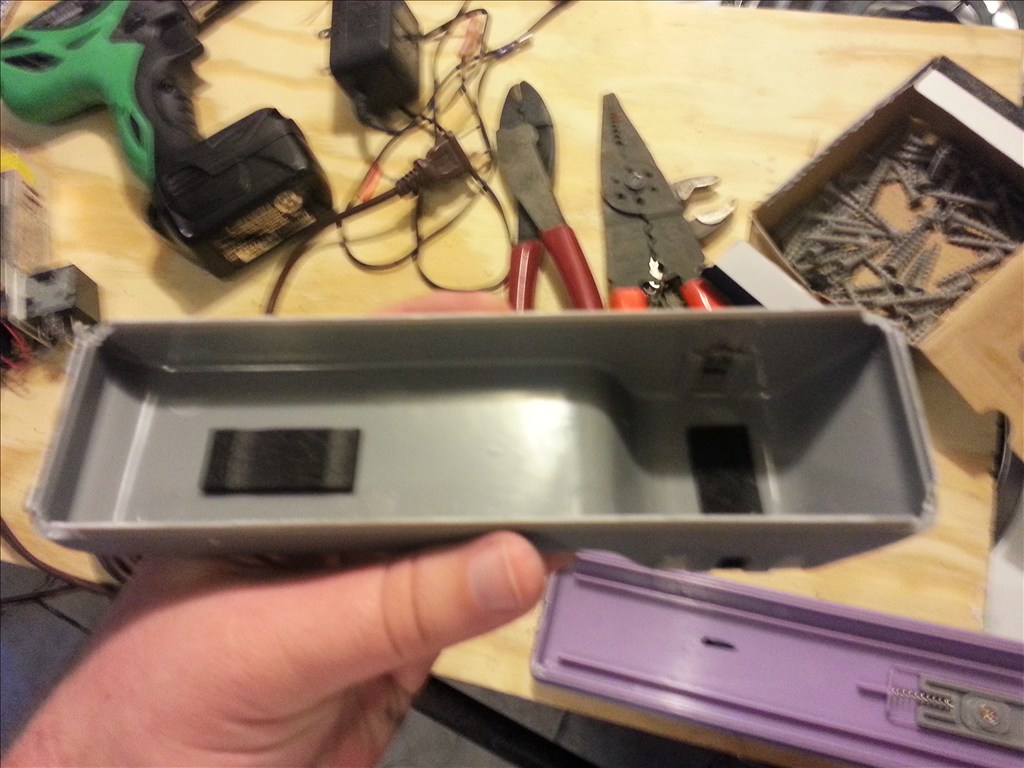
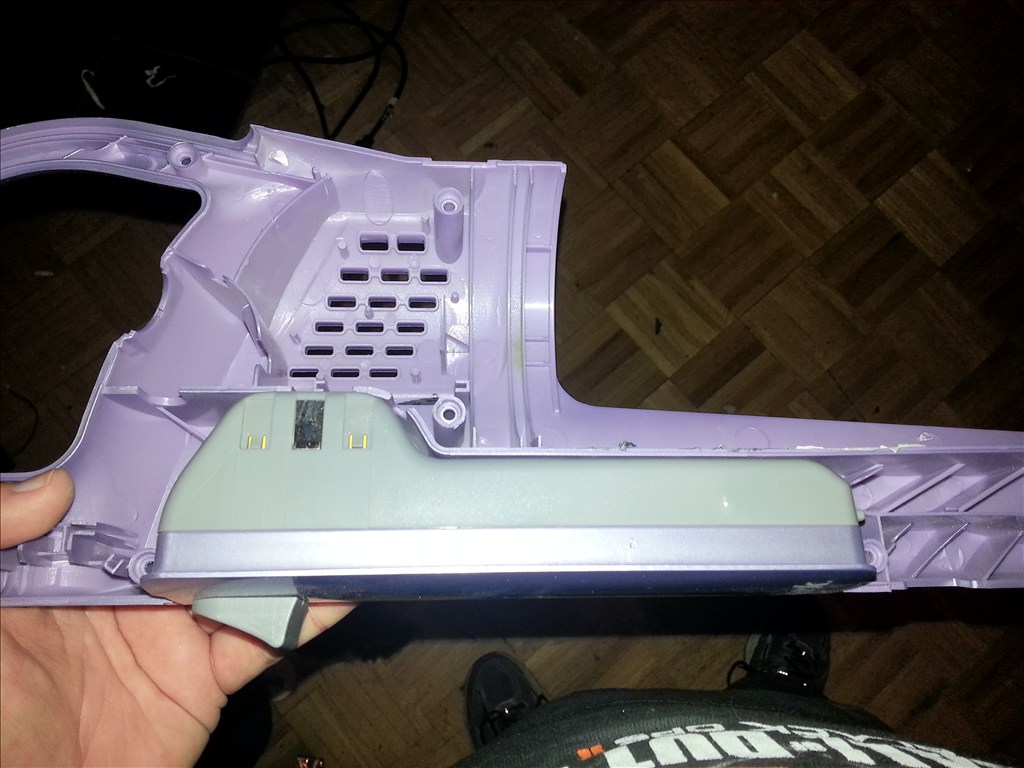
So the purpose if sealing the vents is to direct the vacuum exhaust into the torso to pass through a better filter and a UV light to kill germs , viruses and dust mites. Then a carbon filter will reduce recirculation if allergens and odors. Something I had a "ah ha!" Moment about is the now unused 10 volt battery pack. My idea is I could remove all the contents and use it to hold both the dust filter and UV light the Air will pass through. Because it already has a clasp it is easy to hold itself in place and also easy to remove. Any thoughts guys?
That's a good idea Josh,
Awesome ! Thankyou bret. I started it then....
First I cut tiny knotches in the corners to get a screwdriver into..
I repeated this with all four corners to get the case open without any more modification than the little corner knotches.
Vuala! The clasp mechanism still works and too can snuggly fit back together and be removed at any time. The battery pack literally fell out and I clipped the power leads off. Anyone need a 10 volt 2ah lithium battery? Free to a good home
I have a second battery pack that I could do this on and maybe do the same thing to Jarvis. Oooor I could keep it as a spare for Dusty. ANY ideas for the kind of filter I could buy? Or filter material to make custom filters? My best idea has been a three stage. First pass UV then through Carbon prefilter matt then through a electrostatic 700 micron filter made from a larger household style sheet. Does this generally sound effective?
i have used filter like that in my job for a special tester,so it should work OK,i think i used 4 stage filter also if you add more stages of filters ,suction is reduced
on removing a battery that is utrasonic welded like that one stick in hot water for awhile and mostly it will come off easy and they you can always dry the batteries,that s a trick from a company that does it sometimes
Your right about reducing suction with more filtration. I will be careful to not make it too restricted. Also the the unit ran at a little over 10 volts to to help compensate for the additional restriction of an allergen filter im running the motor at 12 volts. No worries on what the motor can handle. Its rated up to 18 volts.
Thankyou! ROBOTMAKER for sending me the Win Xp sp3 pro disc. Thats a awesome Christmas present I bet I will get plenty of use out of it.
the WINDOWS XP disc was never installed also
Ok here is a sketch. Take in mind this is NOT the whole filter system. The air is pulled into the acrylic canister where a 3 watt UV C bulb is shining directly into the canister. I am planning on having 2 of these bulbs focused in this area for plenty of sanitation power inside the dust bunny bin
Then step two... the carbon prefilter and 3M 300 micron filter catch finer dust particles before reaching the impeller of the vac pac motor.
Last step- 700 micro filters are placed over the vent holes and openings of the robots body to prevent recirculation of dust. Due to the uv sterilization and carbon filter the robot should emit very low amounts of odor from cleaning his home
Three planned modes for cleaning...
Silent... no blower running only 5.25 inch s7 fans and UV system both floor and floodlight at ceiling
Robo-whisper : uv system active , floodlight optional , brush running at 12v and impeller motor st 6 volts for reduced noice.
Performance mode : ideal for when no one is home the robo runs all systems at full power. Both vacuum , uv and pull through 5.25 inch lower torso fans refreshing air at a rate of 80 cfm cleaning a average rooms air every 2 to 4 hours for full exchange of air
Wet work options are being planned..... im open to suggestions
here is another idea add a steam cleaner to one of your omnibots to make steam ,one way is to use heaters ,other thats better is a pelter element ,you apply 12 volts and one side is cold and the other is hot,you put the hot side under a small aluminium pan and on the cold side you add a small fan made a design just like it for work to calibrate digital thermometers ,hot and cold test baths
MY brain thinks every second for ideas
Because steam rises and the crazy amount of power consumed.... and steam does not mix with electronics that wont work.
that can be fixed,i do see a shark that makes one,and seen ones with electronics too on power ,using a pelter element it uses less current then heater coils
one way to get rid of steam is use a fan to blow it away from the electronics another is use a vacuum to pullthe steam in and recirculated it
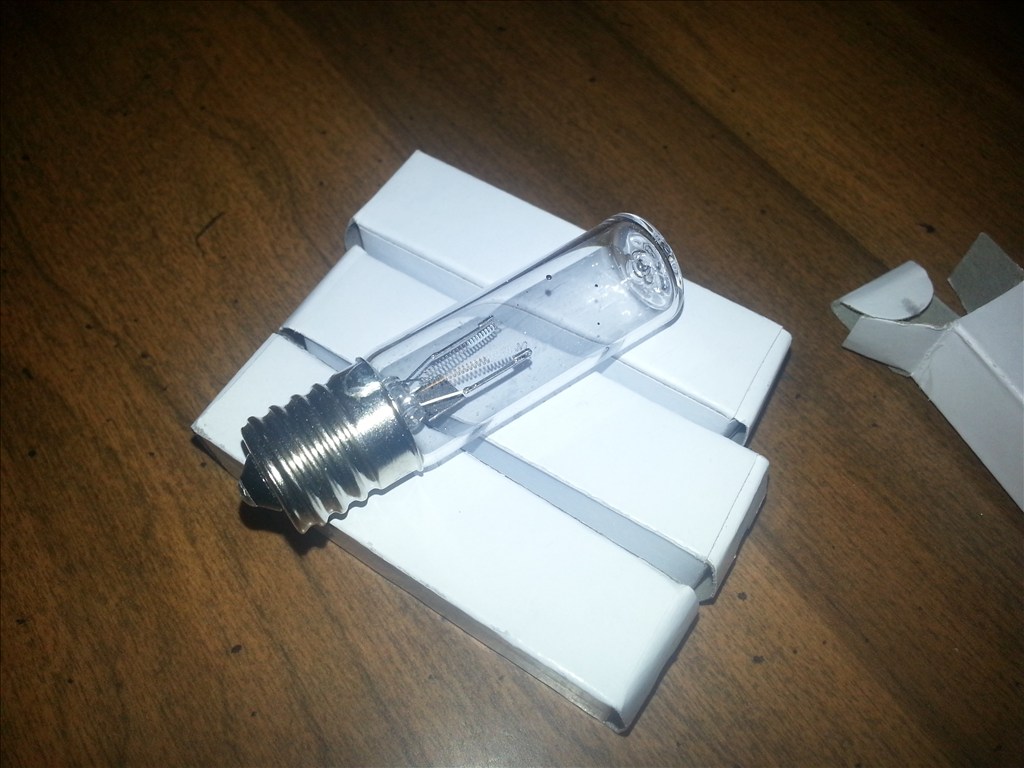
I finally recieved the uv bulbs for dusty , it took three weeks to get just 6 bulbs , and these were coming from the same region. I didn't want to continue till I could get fitment tests and such.
I also ordered cathode tube versions that use a inverter like a flouresent light does. I will compare them but my money is on the one with an inverter. I will use a light intensity sensor to determine which is best but I must avoid looking at the lights as its the most dangerous type of uv , UVC
Cool! The toughest thing is waiting for parts.
What i do is work on another project while waiting on parts,china takes the longest but a lot cheaper
Thats why I have a few projects in rotation lol
YEA me too when is omnibot going to get done ,trying to wait to see him move
OK now that the bigger projects parts were sent off to paint dusty can get a bit of attention. Right now he needs the vacuum pack attached and then we figure out what to do with the head / dome and also the chest area. I will leave the arms original for now. More updates for Dusty tommorow
:)
OK so I'm having fun today dreaming up stuff lol. Dusty is up next. He does not have a radar sensor So I'm thinking the chest may be ideal placement for the navigation sensor. Anyone have any suggestions for camera?
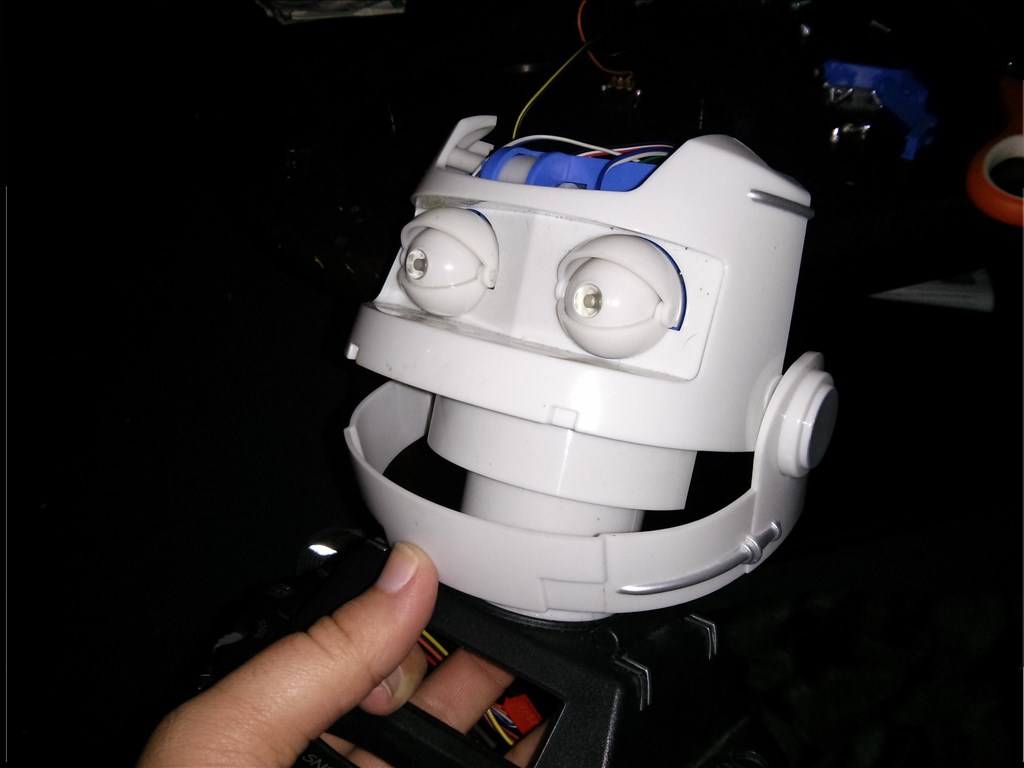
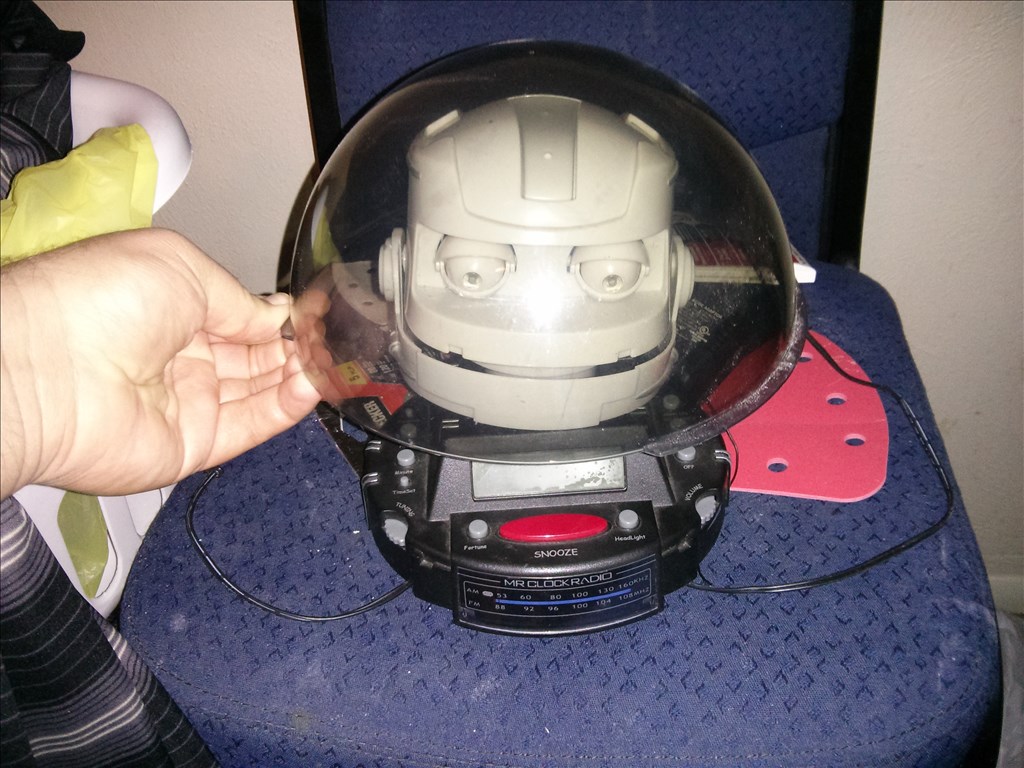
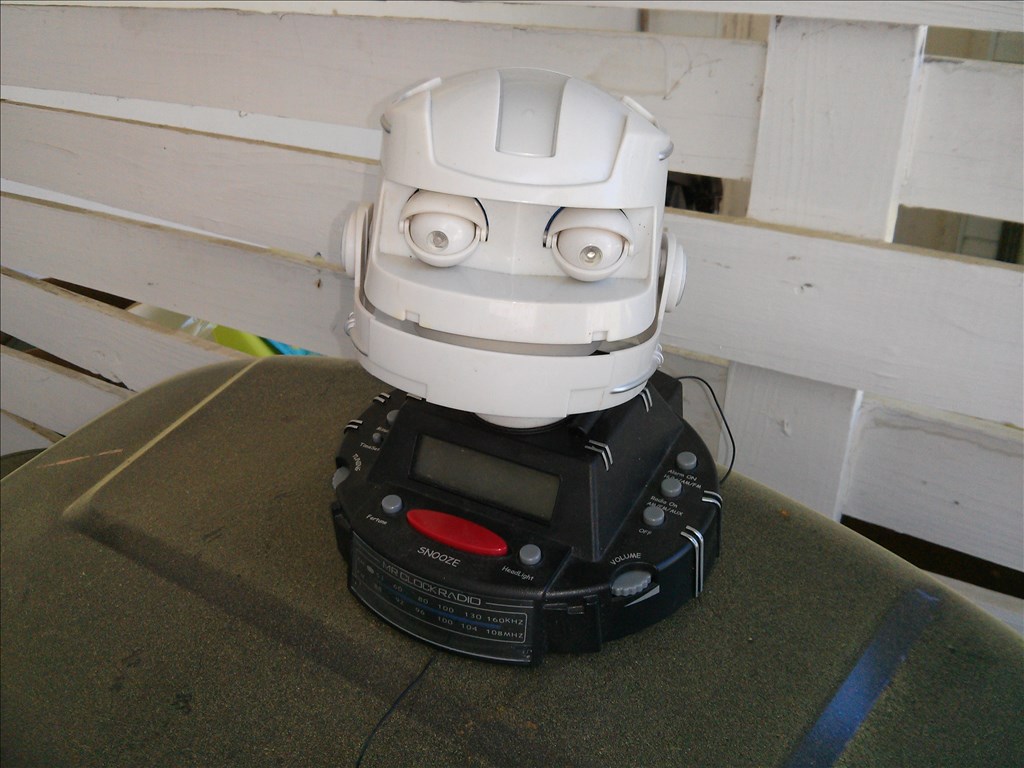
I have a ROB robotic operating buddy on my desk and I was thinking of how to do Dusty's internal head and can within the dome. I was considering a MR Clock Radio head that I have but I don't want to rip off someone else's idea before they get their robot going lol. I was considering putting the EZ Camera inside the ROB head because it is hollow. Here's pics.
Here's the Mr clock radio I have . I don't know if it works but physically looks good.
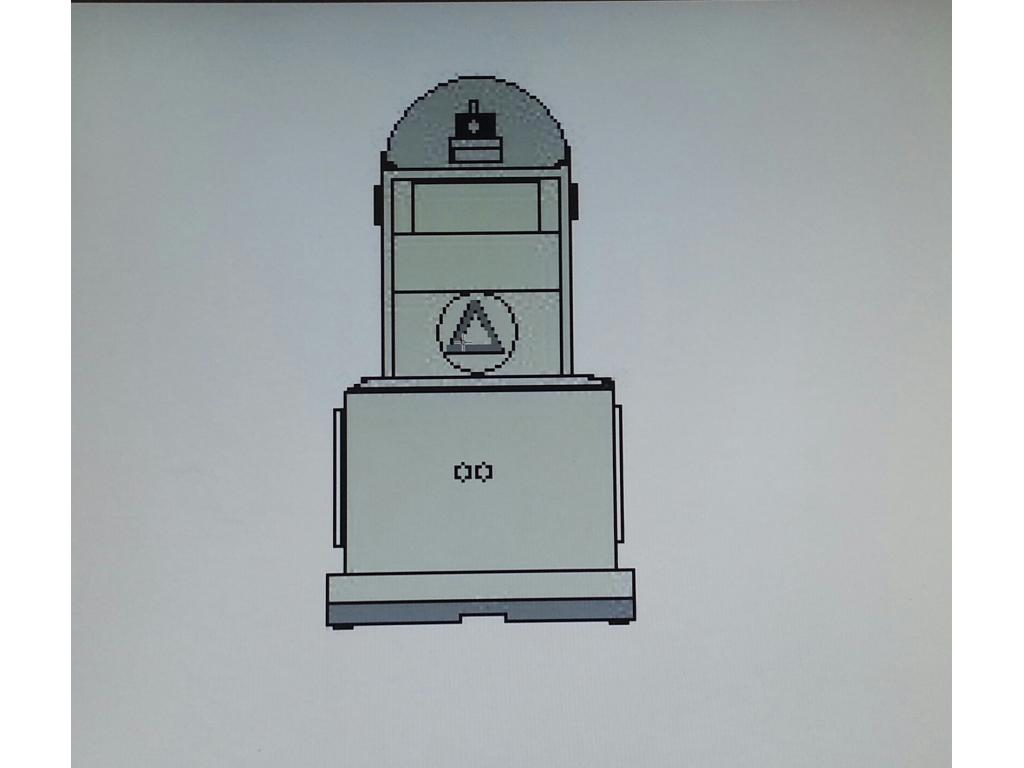
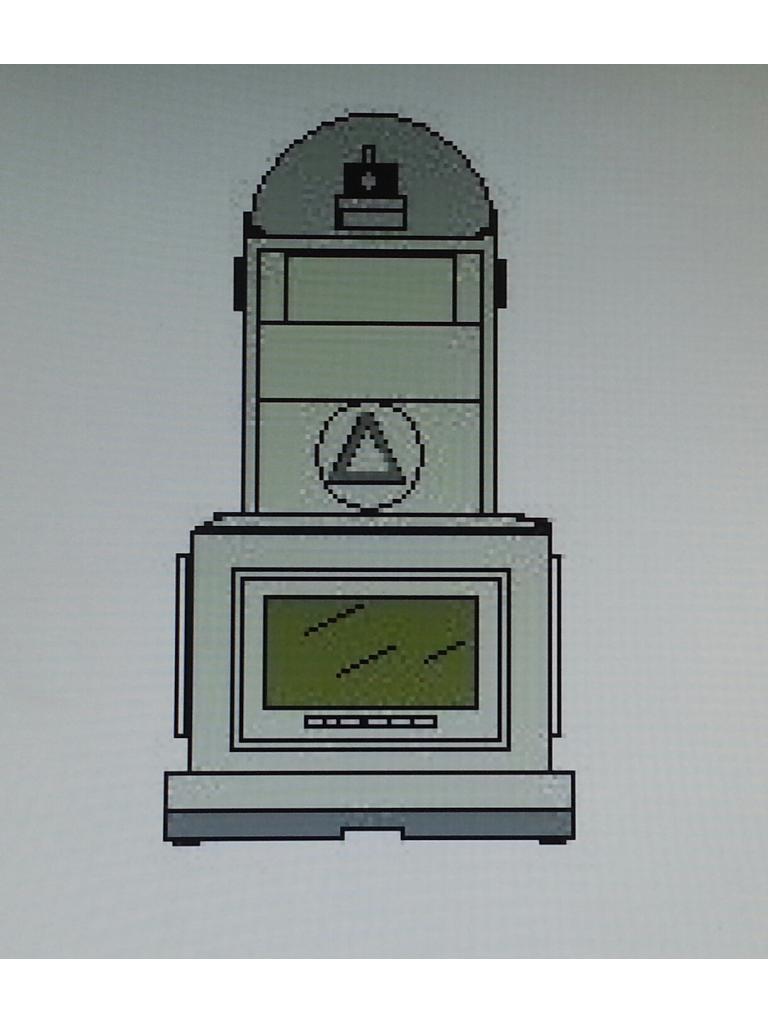
here's an idea for the head:
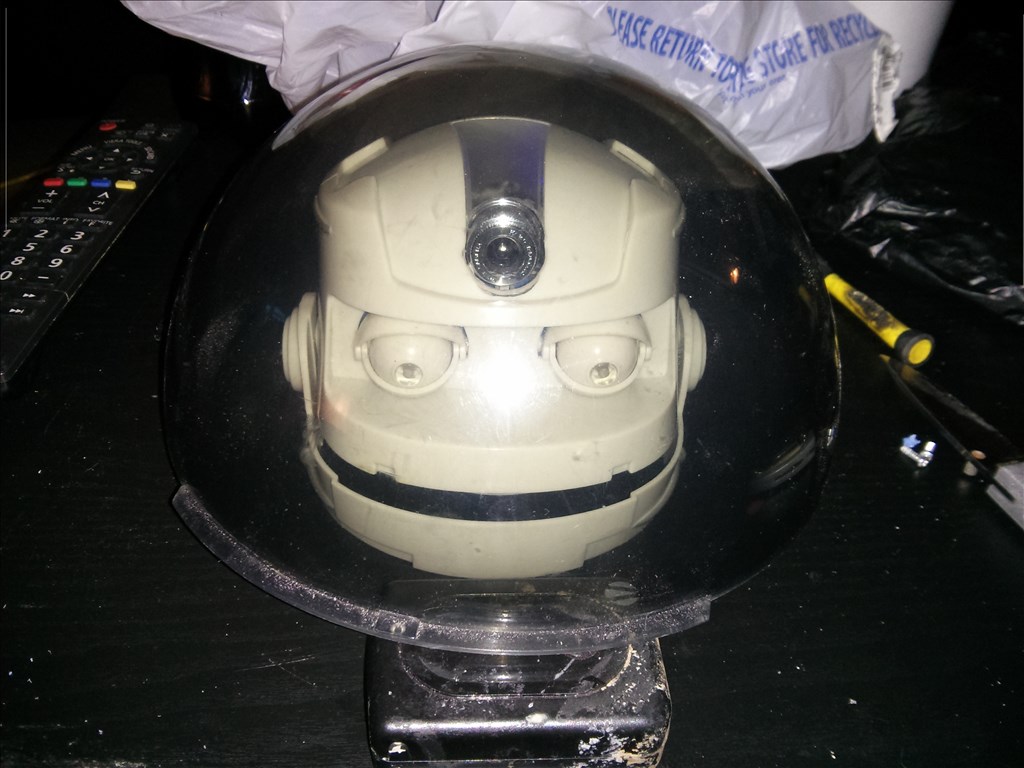
More test fitting is needed by I believe I'm partial to dusty having the MR Clock Radio Head..
I love it Josh! I don't think Troy would mind....
Yes I want to see pinhead progress! I don't think he minds he's the one who found me the Mr clock radio anyways. I bought it for 45 dollars I believe.
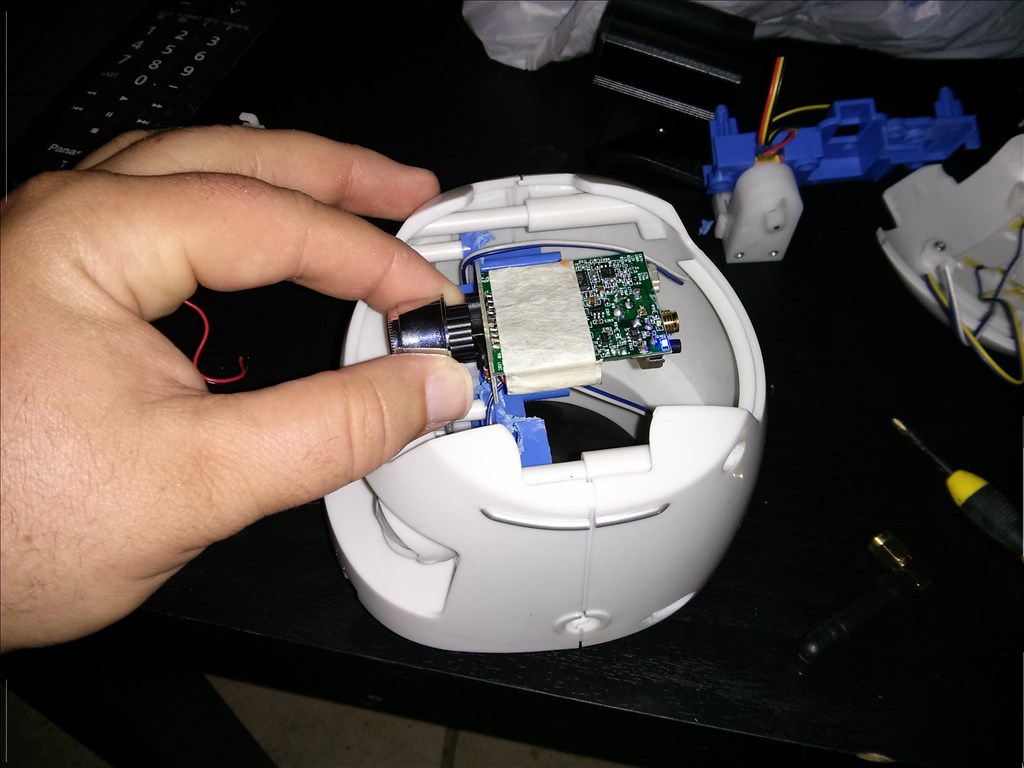
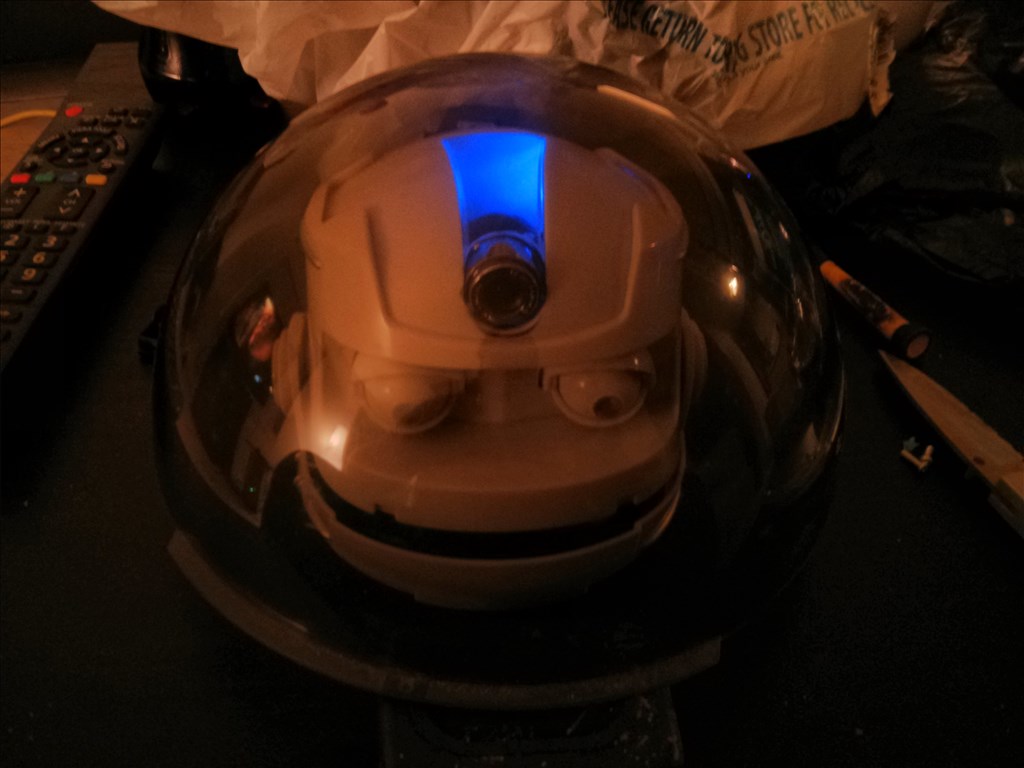
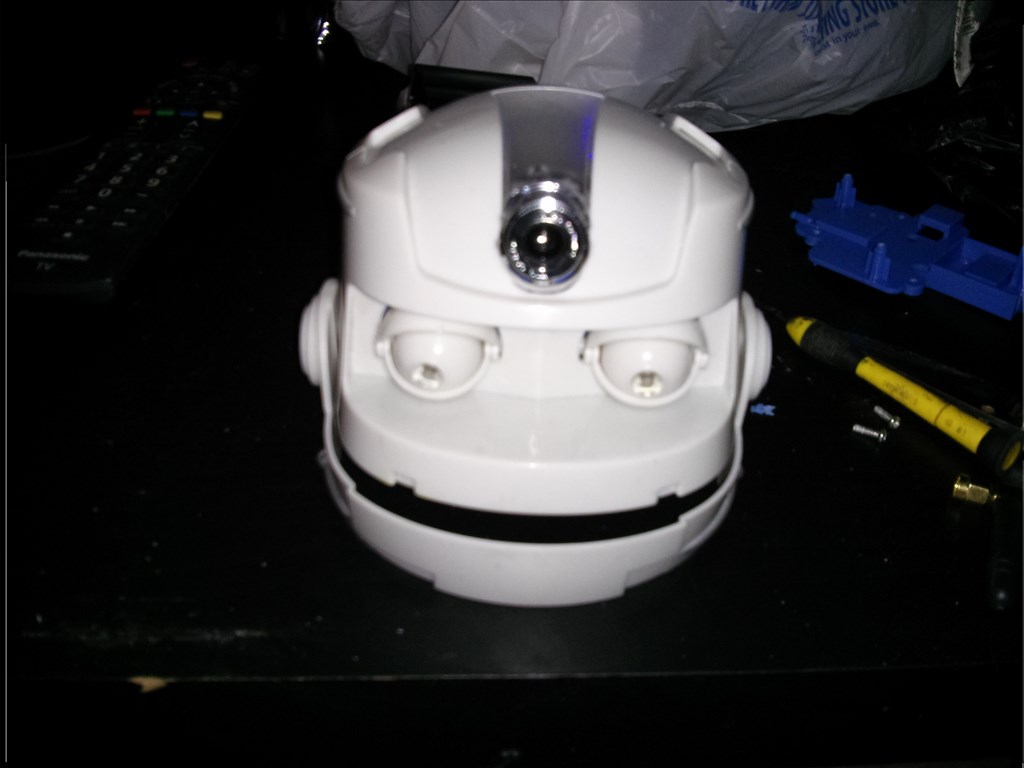
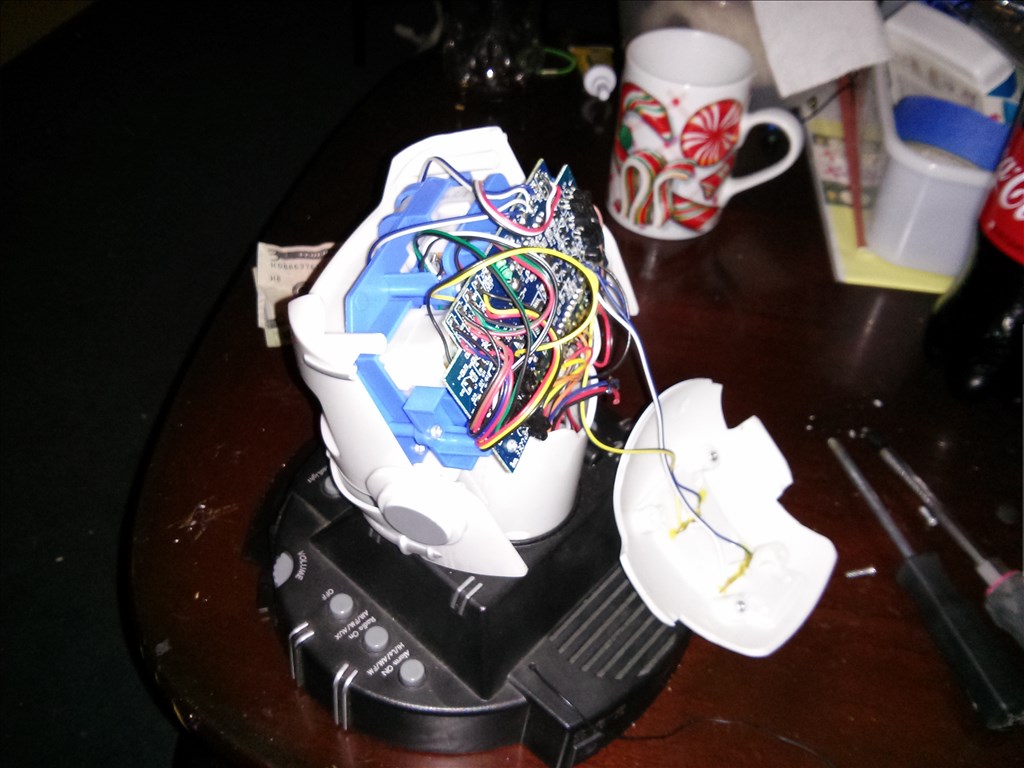
OK while waiting on a couple loads of laundry I started some brain surgery. One of my goals is to add an EZ Cam in the Mr clock radio head and still have basic head and eye movements. Soooo we will begin.
All this electronic mess has to go! I grit my teeth when I cut wires. From the look of his face it hurts..
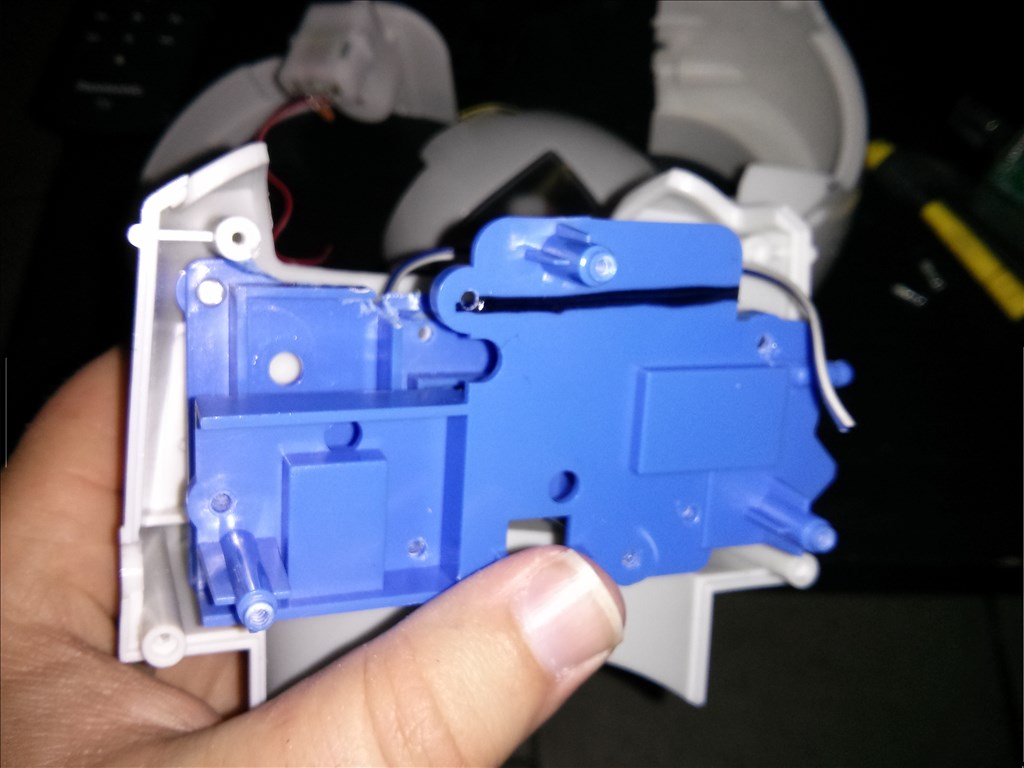
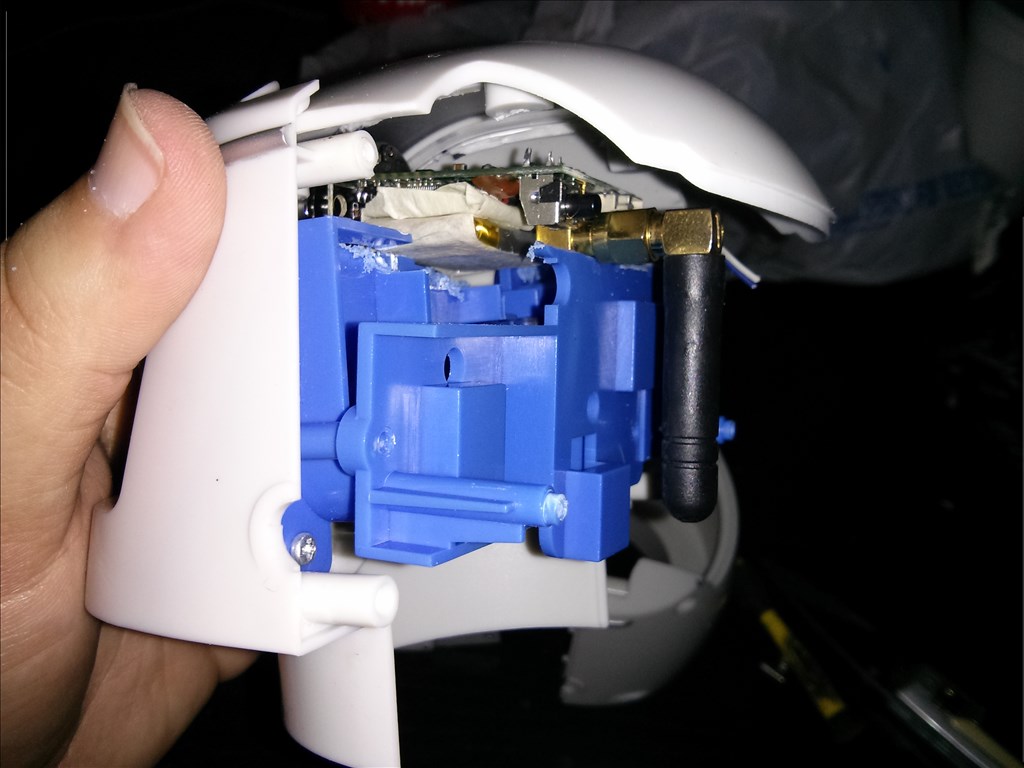
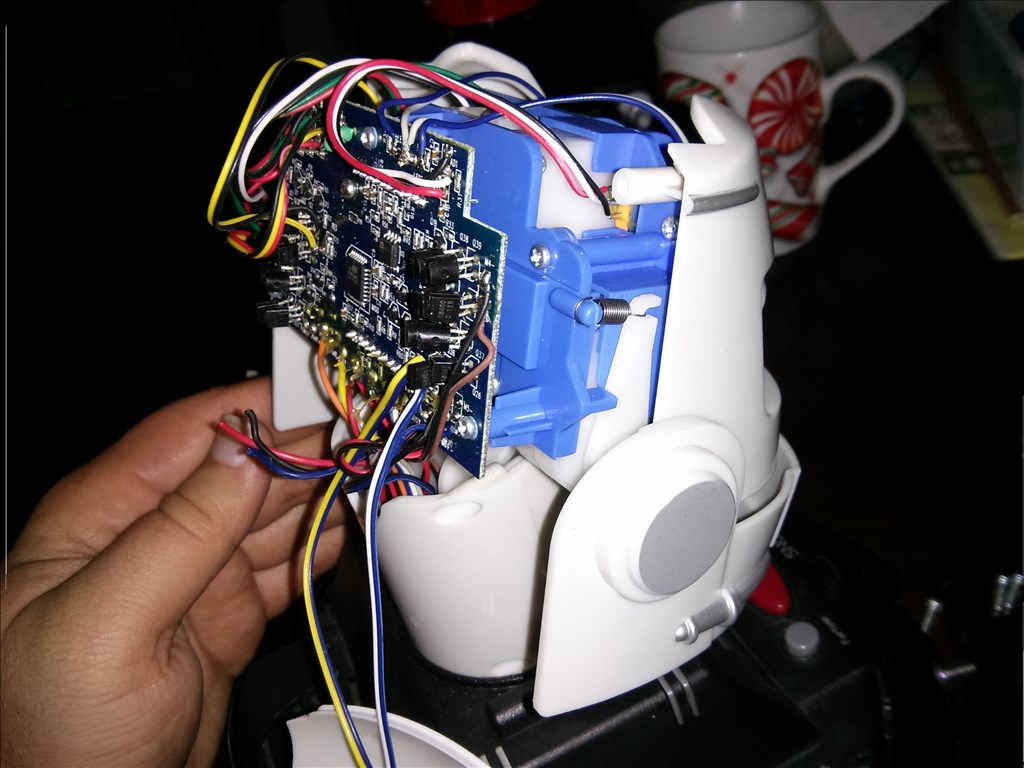
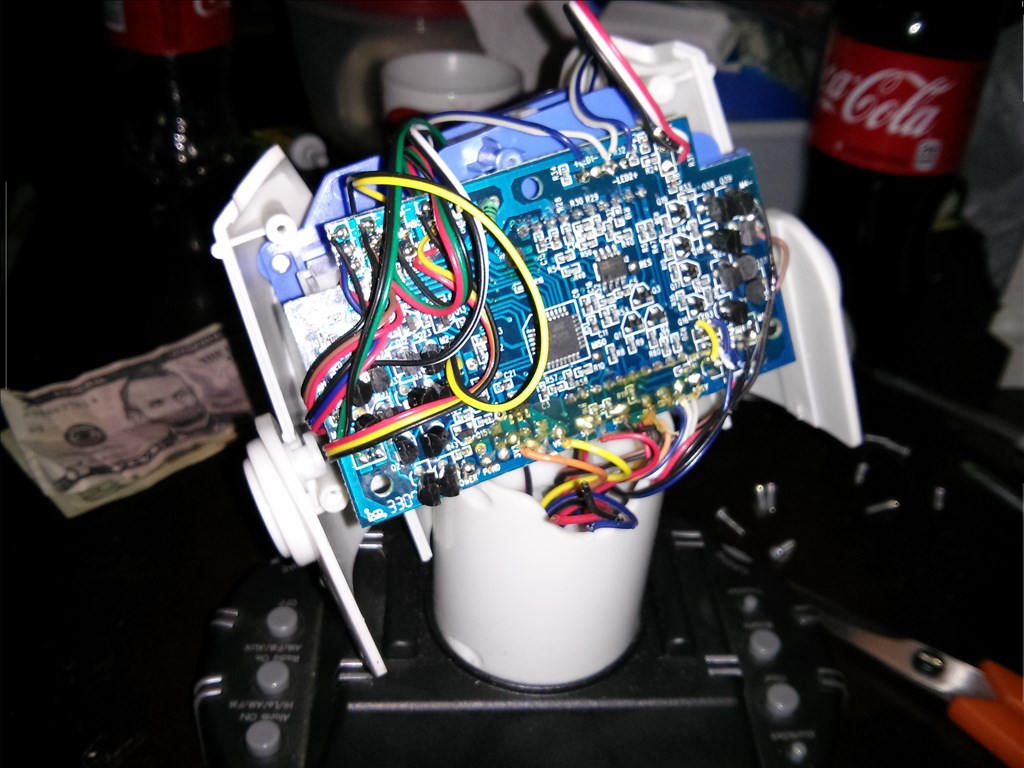
It appears with some cutting away with the dremel I could make room for a EZ Cam lenses, PCB and a wire antenna.
Here's the clock radio parts...
The base appears to have a usable motor , potentiometer and gear set. We will see if I will just swap it for a servo or keep it.
and who said brain surgery was difficult! .......nice pics and luv your Mr Clock ideas!
Ooo cool sorry I didn't see this before! I haven't been watching for new threads lately. Of course I don't mind. It's a good platform to mod. It has all the moving parts already there. BTW if you aren't going to use the old head, let me know.
I love the potential of this head. I cant wait to see how you get this one moving! I hope you spend a little time and talent on applying a cool paint scheme and LEDs. Plane white is so boring.
I was thinking as far as color either red or blue. I'm not sure if I will spare the expense of a automotive grade paint job like Jarvis but I agree , white is plain and basically standard for robots. We want to exceed the standard. Its already late tonight so I'll continue modding tommorow.
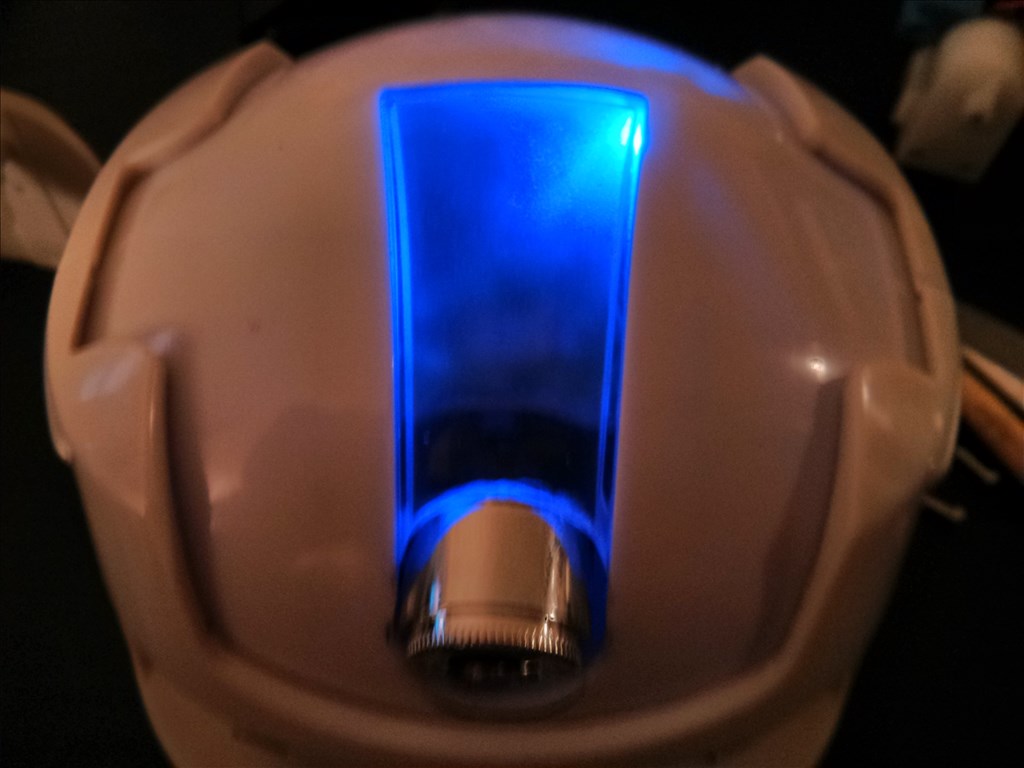
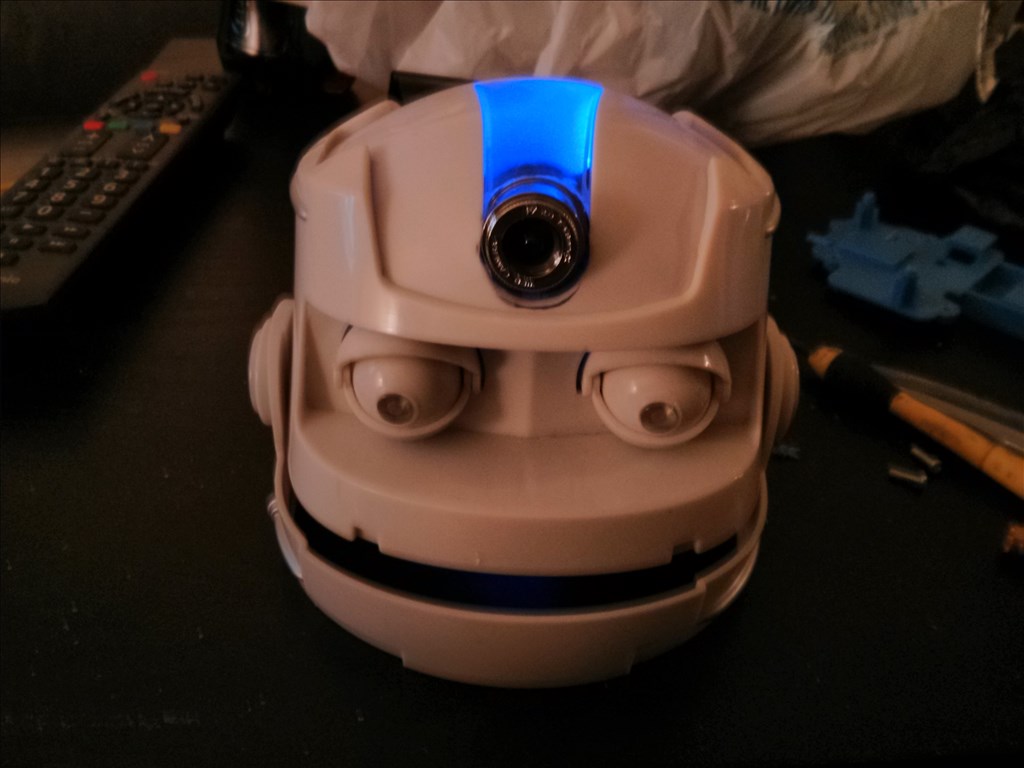
OK a couple hours with a careful hand and a dremel has yielded results. The area where the leds in the head were has been removed. I did keep the frosted plexiglass cover. I started cutting the hole for the lenses by tracing them with a marker. My secret to success was to hold the cutting tool at the same angle I wanted the lenses to peek through. .
When I use my flash my phone color corrects the picture and you cannot see the glow but I assure you its very cool looking. Only outside in the sun or a very bright room would it appear washed out. What does everyone think?
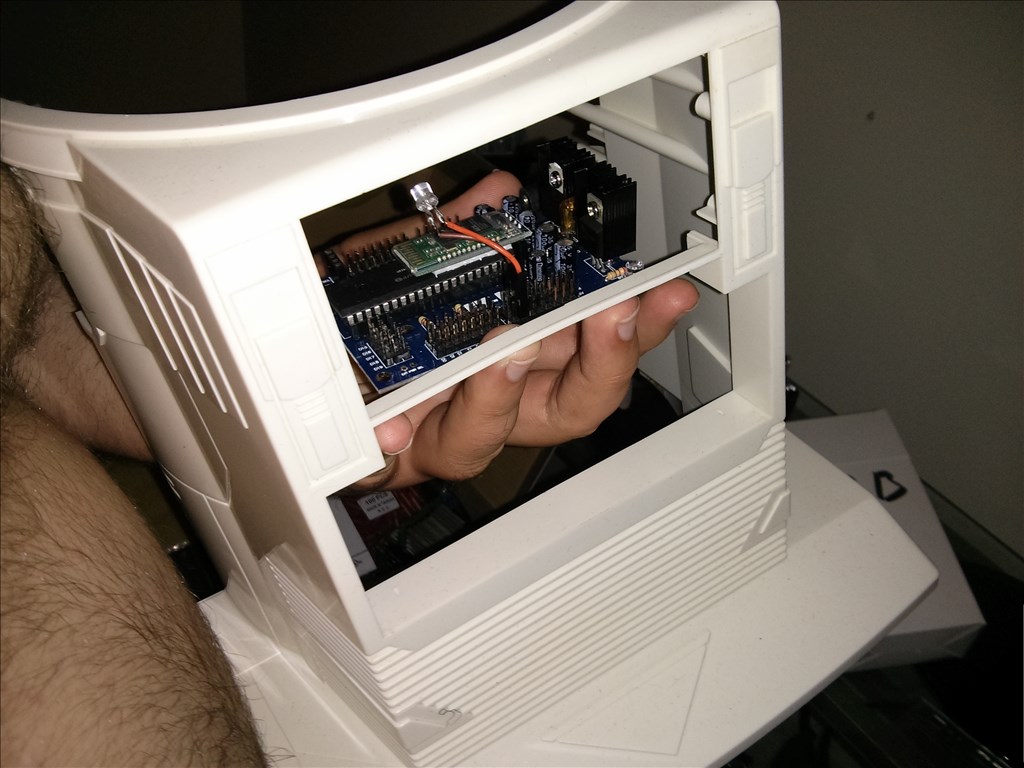
Just before I call it a night ( because I finished the cam mod at 1130 pm) I did some fitting in the chest area. I want to mount ezb either vertically where the plastic window is above the tape deck. If that's not possible then I want to do horizontal. I took pics of both positions...
looking awesome Josh!
Very nice! I like how the camera antenna fits perfectly at the back.
Thanks guys! The good news is I've only lost the ability to blink from the mod but I believe I can mount a micro servo on the bottom and use a pushrod to move them instead. Even if I ditch blinking its not a big deal , robots don't need to blink anyways lol.
I like that he has a blue Mohawk now ! All the plastic that was in the center that held LEDs is gone now so you can see through to the PCB of the camera.
That's a great idea. Maybe put 3-4 LEDs lighting it from different directions but make them flash randomly when he is thinking or concentrating. EDIT: I wouldn't add anything to bright though. Use low current LEDs.
Ah , I like that
awesome
OK tiny update. I believe I have decided to put the ezb in the drawer but I'm still fitting things. I'm concerned about the position of a ultrasonic sensor mostly. I'm gonna think about it a couple hours and get back at it.