
OK EZ Robot community, I've been a little absent for the past few weeks and that's because I received My Solidoodle 2 Pro. [Edited out because JStarnes1-XLRobots has sold his with all of the grunt work put in, case and filament.]
After seeing @jstarnes Solidoodle, I was inspired to buy mine and started saving up forgetting entirely about the good old U S of A and the Federal Tax Return. So after putting some money back to do some painting and flooring in the kitchen I had enough for an SD2 Pro and some supplies.
Here it is out of the box, as I got it.
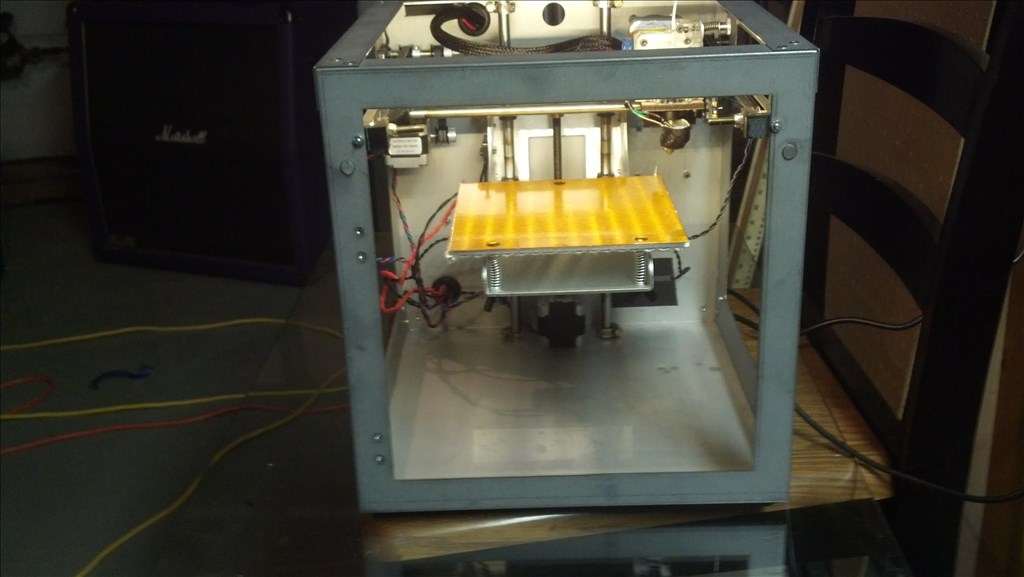
Here it is today.
I started out trying to set it up in my basement. Being in Ohio that was not working out. Simply too cold. So my ever awesome girlfriend suggested setting thing up in the office area of our master bedroom. So that's where we're broadcasting from today and probably for a while. The printer is now connected to my desktop on a good fairly stable stand.
OK Out of the box I had the slightly warped aluminum bed. Exactly like Jstarnes had. But I had already anticipated that so went and got 3 6x6 mirrors encased in cheap plastic frames at Family Dollar or Dollar General for $6. (I always confuse the 2 and they are basically side by side where I ususaly shop. Sorry I can't be more specific.) The frames simply unscrewed and I had my glass beds. (I've still only used 2 of them.) So I added my glass and adjusted the Z screw to lower the bed and then leveled it out. Not being from NYC, I didn't have a Metro card but I am having great luck with the cover torn of zig zag kutcorners cigarette rolling papers. They're under $2 almost everywhere. (Must be 18 or older in the US so, for you youngsters out there, be prepared for some odd looks when you ask mom and dad to get you a pack of these.) [Update 06/24/2014: I've found the instructions insert from Tranformers Construct Bots to be my tool of choice for this now. They are a little flimsy but doable and just a hair thinner.]
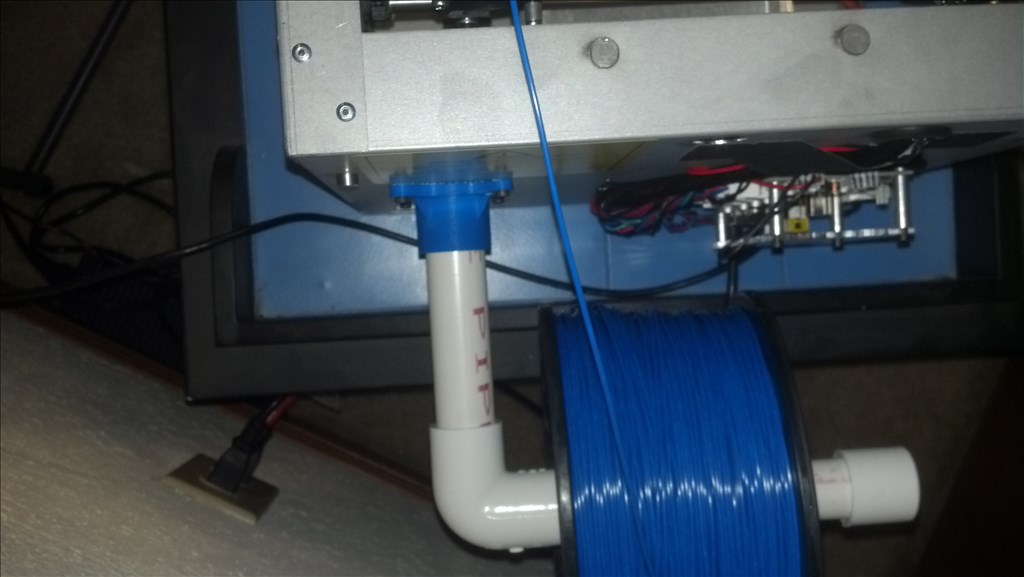
Out of the box my spool mount was damaged from shipping so I made a makeshift one to print a replacement. This time I tried just on glass and I couldn't get it to stick. So I added 3M Blue painters tape and it went a little something like this.
-635311777718089098.jpg)
That's an in process shot of my first successful print. I used a brim on this one just to help insure the part was usable when it was done. I ended up with this.
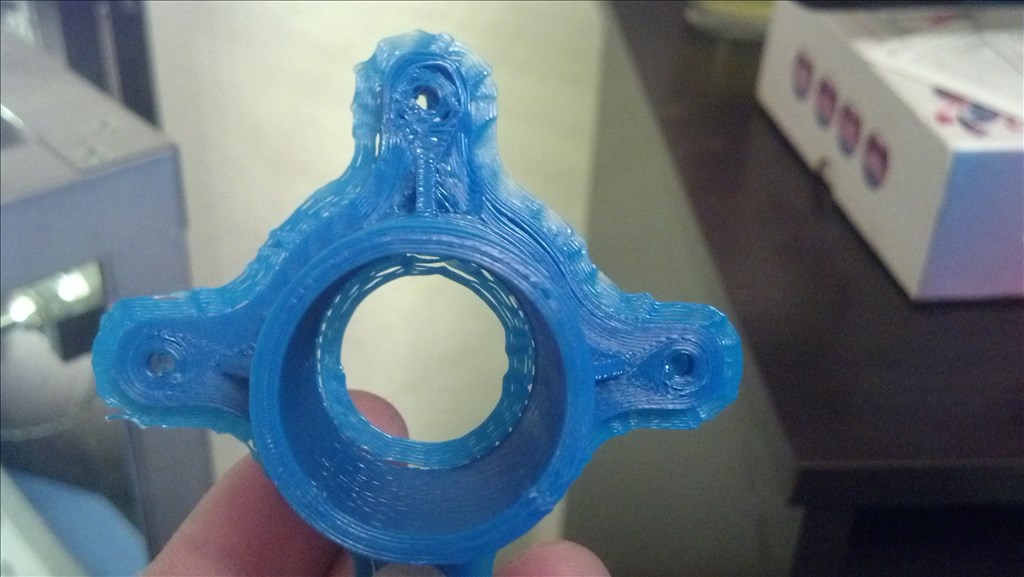
Trimmed off the brim and got this.

And installed it like so.
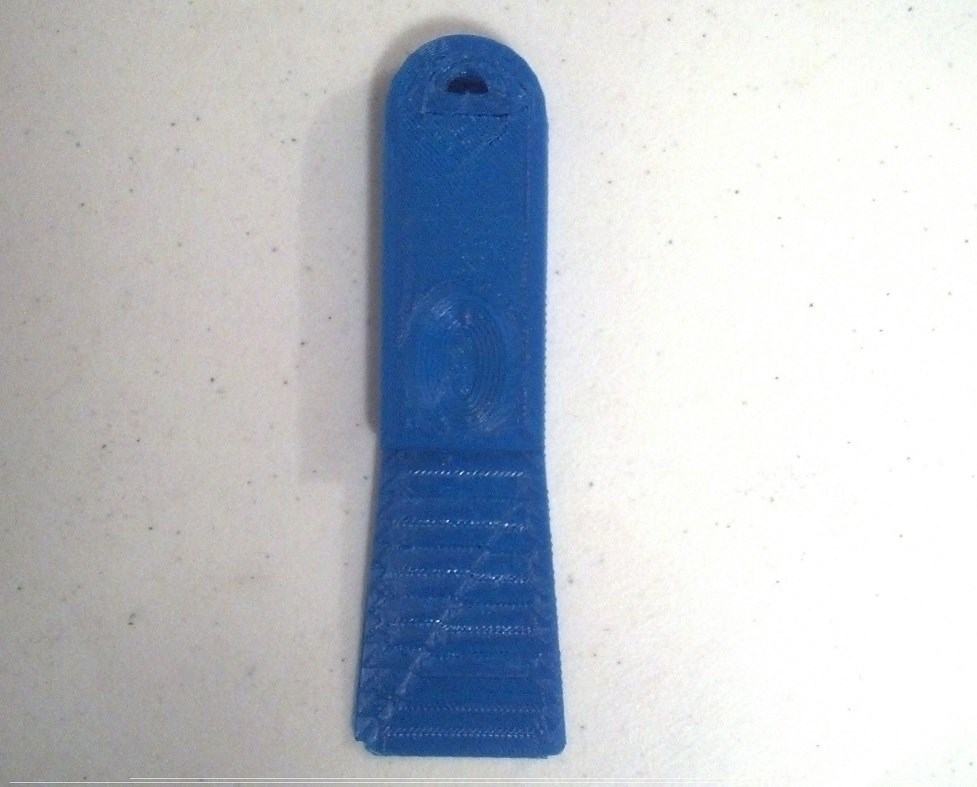
Then I printed a simple scraper.
These were at .3mm with ABS. You'll notice that they look pretty sloppy. My extruder had a lot of wobble in it so I printed a part that was supposed to fix that and as I went to install it I noticed the screws for the teflon blocks that sandwich the bar were very loose so I pushed my teflon blocks where they needed to be, tightened the screws properly and my head wobble was gone.
Next I started having issues with parts sticking. So I got frustrated and switched to PLA. I printed a few things with PLA just to dial the printer in better and do some experimenting.
I printed a few EZBits, Standard Vertical servo backs and arms and the camera shroud. I had to take the case off of my camera to get it inside the shroud. I should have used support material when I printed it so one side is really thin.
I didn't take any picks of the servo pieces because I broke most of them forcing them together. I made these while calibrating the printer so, they weren't the best parts.
I also printed a bumper/mount for my Arduino Uno.
Then I went on to the next post.

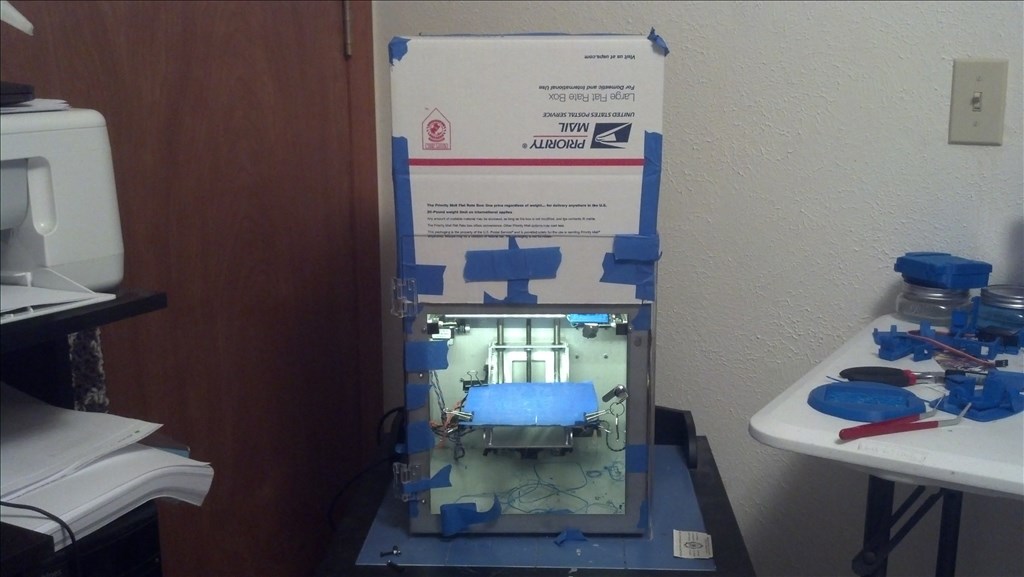
OK. So after calibrating my printer a little bit I decided to try to tackle the ABS sticking issue again. It appears that having the tape "broken in" helped a lot. At this point I'm still not using any kind of case or cover so, I taped some cardboard to the sides and got a priority mail box to go over the top. It's a loose fit and I have some spacers taped onto it to keep gravity from doing it's job.
So, now we get to printing EZ-Bits. I did all of these at .2mm with ABS.
I made 8 sets of the Vertical Standard servo pieces.
Here is one set on a pair of TowerPro MG995.
You can see they don't fit right. Last night I printed the HD servo Brackets and they fit pretty good.
Taking a cue form EZR and XL, I even opened the stl up in blender and added my little avatar logo.
I've printed a pair of the Standard Horizontal Brackets and some male connectors.
Just some more pics of random EZ Bit stuff I printed. A Blank standard servo is in there. I printed the body and top the glued them together with a little bit of acetone.
But wait, There's more... In the next post.
and so the learning curve begins! I appreciate your insights and pics! Very thrilling having your own in home manufacturing machine ...if only it was that simple for mold injection processing.
  Thanks so much Antron007
Thank you @irobot58, I'm always so happy to hear someone takes something away with them from my ramblings. I have a few more posts I think people will enjoy and some more tips. I've had my printer for almost three weeks now and all of that is still week 1/1.5. I'll do a couple more posts to finish the week out and then I'll start on this weekend. (Lots of tips learned this weekend. A great tale of woe, heartache, achievement and redemption. I hope to get all of this done today. I have to leave in a few hours so I may not get it all finished until later this evening when I get back in. Thanks again @irobot58.
OK So, now I have all of these servo brackets, what's next? I print bodies, that's what's next. I start out with Six.
Bottom that holds the batteries and ezbits.
Top: After printing I see I should have used support material for this but I didn't. The part will be usable so I'm happy with it.
I'm not sure what the scorch mark is from settings wise but I seem to have it corrected.
I'll make a project thread for EZThree when I get more pics. I'm not sure if it's a power or strength issue but I got him together but he can't stand without help. It's probably because I'm using 4 standard and 2 HD servos. (It's all I got right now )
)
Then I moved onto JD. I used support materials for theses. These are all still at .2mm with ABS. In Slic3r, I modified my Support Material>Pattern Spacing to 4 instead of the default 2.5. That makes it break away a little better and still seems to give good support for the bridges. I also have my Advanced>Flow set to .75 instead if the default 1. That keeps them a little lighter so they sag less.
I also printed the feet bottoms of JD but I for some reason didn't take pics yet. I'll get those in here soon.
That takes us to the next post.
So, things are going well in 3D Printing land for me. I had a small tear in my painters tape so I decided to replace it. Turns out cleanliness is next to the worst thing I could have done. I'm not saying it's a bad idea to change your tape once in a while but I learned quite a lot from this weekends adventures. Let's begin shall we?
Like I was saying I went and changed my tape and that got me into thinking about last weeks sticking issues so I went to try to use some PLA to get my tape "dirty" again.
So let me preface this by saying it was the first "warm" day we've had in a while so I had been printing things at a slightly higher temp. And while this may make no sense, I was printing PLA a lot higher because for some reason it just worked better and was less "sticky". I know that if I add a fan (In due time, I'm working on that. Maybe next weekend's project.) then I won't need to run it as hot. I think the way that works out is a fan hardens the pieces quickly so they don't get that "sticky" quality but since I don't have a fan the higher temp allows the filament to be more fluid and lay better. At least that's how it seems from my observations.
Anyway, I was printing the Han Solo in Carbonite piece on thingiverse in my clear PLA. (I do like the way stuff looks printed with this.) And long story short I over heated it and clogged my head. So after a few hours I concede to loosening the jigsaw to get at the filament stuck in there. As I'm tugging on the filament, It comes loose and I turn the 6 piece jigsaw into a 12 piece. Fortunatley, It was all clean breaks and went back together perfectly and the screws kept it all together. But I still have a clogged hot end. It's late I go to bed and go to work the next day. Light day so we go home at lunch. Now I never nap but that day I was just tired. So I napped a few hours. I got up and watched the hot end replacement video just to find out I could and should have just done this instead of cracking my jigsaw. Hot End Replacement.
So I get my hot end out, pull out the clogged filament and put it all back together again. Keep in mind that now with the cracked jigsaw I had to align all of the, now 12, pieces while putting it back together. But, after watching the vid I had it apart and back together in 30 minutes. I was quite proud of myself and I know quite a bit about my extruder and hot end now. I want to build a 3D Printer next so this was a good step in that direction.
So I get it all together and plugged back in and to my surprise, everything worked great. I was worried about damaging the hot end or heater core because I've read they're fragile but I had no issues. I get it heated up and some of the old PLA filament started dripping out so I fed in my ABS and started to extrude. I got all of the nasty old burnt PLA out and have been printing all weekend.
With a cracked jigsaw? No. I printed this based on a recommendation I got at soliforum.com. Jigsaw Replacement
I got that printed and installed with no real problems. I used the screws that came with my SD2 so no additional parts are needed. The top left screw is longer than it needs to be and it has no ill effects. I've been using it pretty much non stop all weekend. I don't even have a screw in the locking arm. I'll get one soon just to be proper but it also doesn't seem to be an issue.
So clogged and unclogged hot ends, cracked and replaced jigsaws, all of this over sticking parts and you still haven't solved the sticking parts issue? Well, yes, yes I have. TBH a couple of guys over at soliforum.com had the solution. Glue Stick. More specifically I went with Cra-Z-Art, Washable Glue Sticks, Disappearing Purple. Just a light coat on the warm bed will do you. If you use too much you're going to have to wait forever for the part to come off or have a heck of a time wrestling with it.
So right now my setup includes the replacement spool mount and jigsaw, stock hot end, cardboard enclosure. I'm using 3M Blue painters tape on a mirror bed with above mentioned glue stick. I'll be honest, I could do some more fine tuning to my machine. Fan and Z wobble most notably. TBH my Z doesn't seem too bad. I'll start getting into .1mm prints in the next week or so.
It's been running like a champ, printing away all weekend. "Printing what?", you might ask. Well, I think that's gonna all be in next weekends post. (Hopefully next weekend. We'll just say the next one is on Pre-Order. LOL! That's funny if you read the EZ Robot forums regularly. I think so anyway.)
That's awesome dude! I so glad that you are enjoying the printer. The solidoodle takes a lot of diy experience but little by little you can get better prints. The best for sure are .1mm . The .3mm to me seemed to not adhere well together , aka sloppy. Anytime you have questions just ask. It looks like you hit the ground running. I will tell you it's beneficial to have a heater inside the bottom of the printer , you can make a simple and cheap and safe one with a heastink +fan and Peltier element. Then of course either cover the machine with a plastic bag or make a acrylic case
Thanks Josh. You XL guys are alright. I may do that for next winter. I've learned to turn the bed on, close it all up and walk away for about 30 minutes. So I've been coming home from work and setting it up / turning it on and maybe start slicing something, so as I go about my Just Got Home routines, it's nice and ready for me when I can actually sit down to use it anyway.
I forgot to mention that I have an acrylic door that I pried off of a jewelry display case I happened to acquire a few months back. It's kinda just taped on right now. I'd like to upgrade from the cardboard case eventually so I haven't made anything too permanent.
I should also mention that I may have only had the printer for three weeks but I put in a ton of homework. I went on an extensive hunt to find a reason to buy something other than the SD2 because I've heard horrors of their customer support but, the more research I did the more I learned. It would have been great to have $1200-$1300 for a flashforge but for the $700 I had to work with the SD2 was clearly the best choice.
I also downloaded just about every free 3D related software available from Design programs for model making like Sketchup to Blender, to different 3D Printer software, Repetier, Cura, ReplicatorG. I got those mostly for the slicing to be honest. I've only been able to print with the Repetier for the Solidoodle website. I am using the newest version of slic3r though.
And I watched countless hours of you tube vids about those programs and 3D Printing in general.
I can honestly say I spent months on this research and I was pretty much prepared for any potential situations. So like Josh said, it's a DIY printer. I just got really lucky with mine so I was lucky to not have to deal with a lot of the issues others experience. And I'll tell you now that those issues are 90% shipping related. I'm only about a day away from Brooklyn so my printer didn't travel far so it was still all in pretty good alignment. My research shows that the farther from Brooklyn you are the worse the problems get. That can only be the fault of the guys who handle the boxes after they leave their warehouse.
And that's an open offer to anyone with questions. I'm more than happy to share what I know.
@Josh- Thanks again for all of your help and advice. Good luck selling your printer. That's a great deal you're offering. Seriously, Somebody, Buy Joshes Printer.
If it doesn't sell it will be great for making smaller odds and ends You can get a sheet of acrylic or polycarbonate from home depot and cut it up. I went with 1/4 inch but 1/8 is much easier to work with ( and CHEAPER). Then i bought a bundle pack of magnets from hobbylobby for 6 bucks and then use weather stripping with the peel away sticky to fill gaps from the thickness of the magnets. I just cut a foam square for the top so i had clearance for the filament. In all i spent about 60-80 between everything. So are you making a blue 6 ?