Beetlesmart
Hey guys, I've adapted the chassis of an Omnibot 2000 a bit and I need to extend the wires to reach the wheels/motors. I'm going to put in my EZ-B goodies when they arrive but it's back ordered and my sister's class needs a mascot for their new robotics team next week. Any advice?
I started with a glitchy omnibot but after some soldering repairs and a new capacitor the original system worked great, UNTIL I cut the wires to the drive train. I just attached a longer set of wires with a splice but now I've got no response from the wheels. I tried a wire nut and then a shrink tube but no response. I'm no electrical engineer, I learn by burning things up. Can anyone tell me what's wrong or suggest a work-around? I just need a solution that will last for a month until EZ-B arrives. Also, I admit it really bugs me that I can't get it to work myself. Maybe the new length and splice create a power drop? ANY ideas welcome, thanks.
Jenn

can you messure the power you have on the wire?
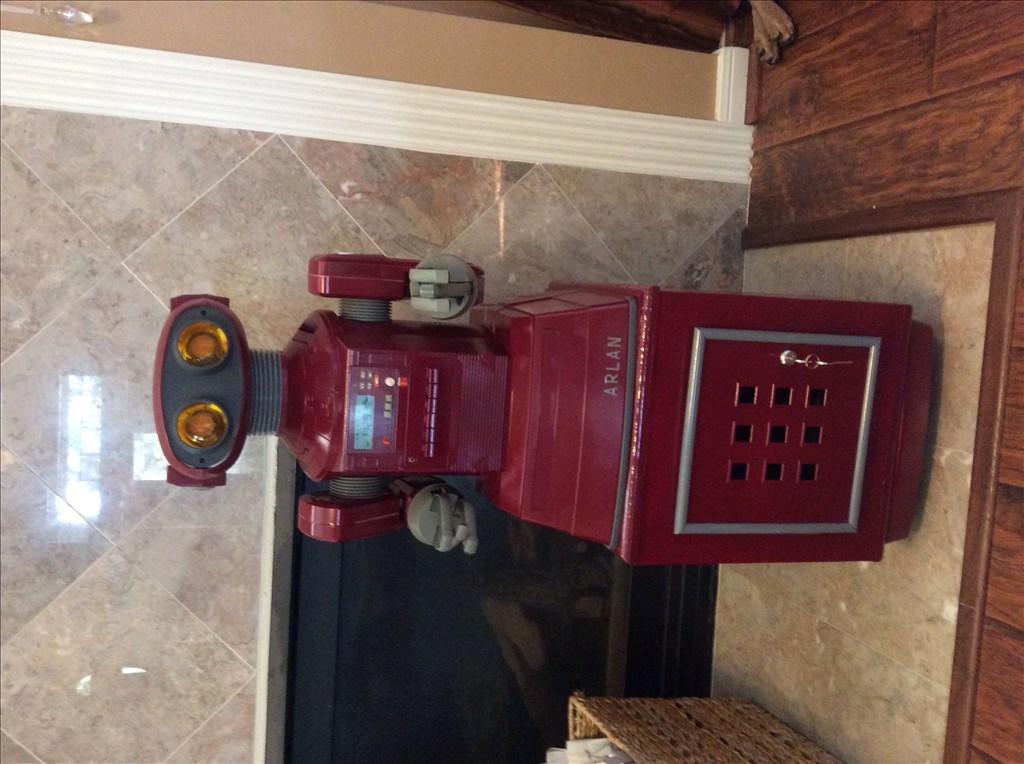
nice robot
You most likely have a break in the wire(s) somewhere... grab a multimeter and check your wire continuity... or you can re-trace the wiring, replacing or re-splice them again... Did you use the right gauge of wire (thickness)...? adding a couple of feet of wire (same gauge) wouldn't cause that much of a power drop...
The volt drop on that length of wire would be minimal and rather than not work would only slow the motors down. You would still get some movement or if nothing else some noises.
As Richard R suggested, check the wires with a multimeter set to ohms or continuity.
i solder one wire at the time.here are some video's.
https://www.youtube.com/watch?v=7wtbrmY5vr4
Very nice looking robot!
When I run into wiring issues, here is what I do:
1.) Make sure you battery is good and has a full charge and power is reaching you controller.
2.) Double check your work, this includes checking my solder joints and checking wire A goes to there it is suppose to and is not switched with wire B.
3.) Check your wires to continuity. You would want to touch one probe side to the metal tab on the motor and the other to then end of your wire (preferable disconnected from the motor controller or whatever it plugs into). You should get a reading that there is continuity (if not, something went wrong within the wire).
(Assuming you have a mulitimeter, there should be a little diode symbol or it might look like a speaker making noise symbol...if you have never used this, you can test it on a piece of wire you know is good or a piece of metal or touch the probe ends of the meter together....the value on the meter should change to perhaps show a .1 or it should make a noise....meters will vary. If you don't have a meter, if you have a Harbor Freight store near by they have pretty cheap digital meters for under $10...sometimes for under $3 if they are a sale item.)
4.) Next I like to make sure everything works as I would expect with power supplied while things are disconnected. In your case, if you take the motor wires and apply power to them (not sure the motor power requirements for an Omni bot...6volts maybe?) you should be able to make the motor move forward and reverse by switch the pos and neg of the battery to the motor wires. Once the motors check out good, make sure your controller works by connecting power to the controller and instead of connecting the motors to the motor output, you can connect your multimeter to those lines, just make sure you set your meter to a voltage range that can absorb what is being output. So if the motors are 6 volts, a setting of 20 volts DC on the meter should be fine. If the controller or remote commands the robot to go forward you should see a voltage reading on the meter, if you don't, something might be wrong with the controller. Your meter might show a neg or pos number for forward depending on how you connected your meter to the motor output of the controller (unless the output connecter is marked with a + or - it might be hard to determine until you check it with a meter).
5.) Last connect one component back at a time. After all, every thing should check out individually, so now you can reconnect one motor...make sure it works. Then reconnect the second motor. If one or the other motor work at this point but not both at the same time, it would seem to indicate a power issue (perhaps not enough).
Also, welcome to the group!
Your first question....are you looking for advice on what to do with your robot for your sisters class until your EZ-Robot order arrives? If the Omni bot guts are working, I'd say why not keep them in there until your order comes in? I'd consider it pretty cool to see the 80's style robot guts in action....then get to see what the robot can do with best of 2014 technology in it. Maybe do a before and after video?
Oh my ! MY " JARVIS2000 " has a cousin now!
On the drive train i would first test the motors and gearbox direct to battery and make sure they are good. You can give them 6 to 12 volts no problem. Once you are sure the motors and gearbox is functioning move on to checking the wires like others have noted. Breaks in wires can happen as well as a bad solder joint too.
Wow! I checked back in just in case someone replied but I didn't expect all the great input, you guys are awesome. I do have a multimeter and I didn't think to check the wires themselves (oops), I was concentrating on the solder joints. I'll check the wiring diagram too in case I switched up the connections.
The gauge on the new wire is good but I did use solid instead of matching the vintage stranded original. Problem? I'll also check each motor with power to make sure I didn't somehow burn up the motors and I'll use the multimeter to check everywhere.
Justin, I'm not sure what my sister has planned for the kids. The local high school robotics team is coming out to help her 5th grade team get started in a Lego First league. Her 5th graders are pretty excited. I showed her Josh Starnes's Jarvis omnibot and they wanted something like that for a mascot. Granted, Arlan is not nearly as cool but he does have a neat little keyed locker for her purse (that's girly robotics).
Looks like a long evening of trouble-shooting and football tonight. I'll post back to let you know how it goes. I really appreciate the help!
Jenn