
jstarne1
USA
Asked
— Edited
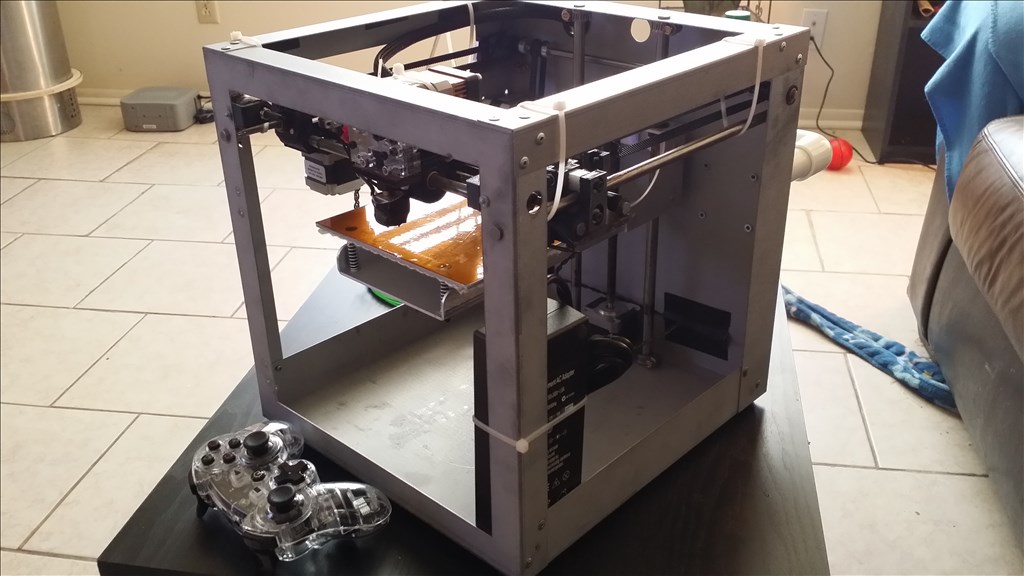
I ordered a Solidoodle 2 Pro which arrived today. I also ordered with that 2 rolls of filament. It should be 4 total pounds of material to start with.

Ok so a popular improvement to banding or layer alignment is the Z backlash mod. All it does is tighten the Z axis from play. Here is what I did. This is recommended by solidoodle but also voids warranty so if you need tech support be sure to remove this before they do a video session with you. This is not a permanent modification and utilizes unused m3 screw holes.
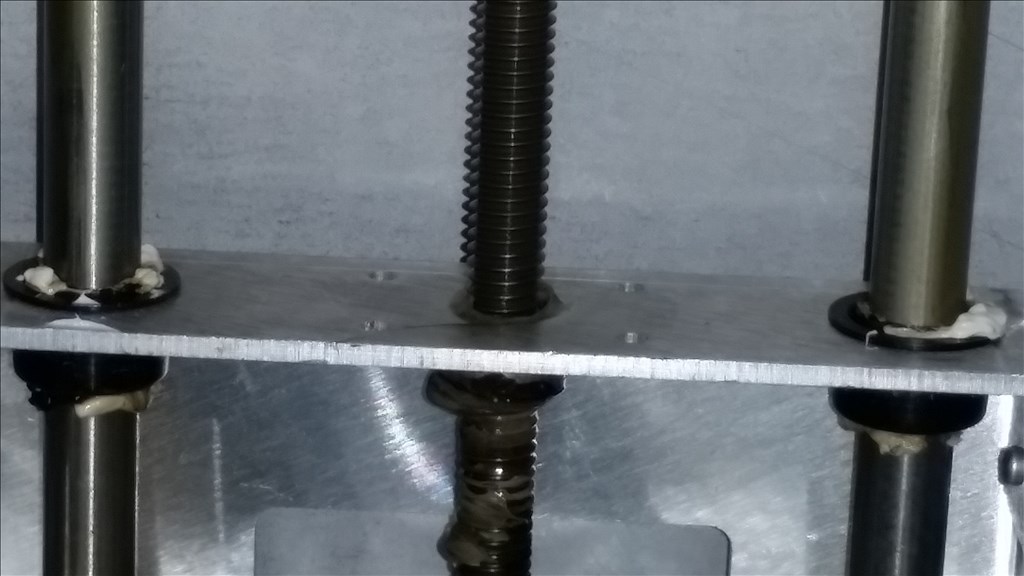
Oem z axis bung is on the bottom , previous models had one on top but my run of printers didn't have one.Be sure to apply lube above the new nuts. Lube not only aids movement but viscosity of the lube being so thick it provides hydrostatic pressure between the threads meaning even less play. This raise your bed up and down over the fresh lube.
The are the recommended steps however today I will pick up a rubber washer to put unter the nuts so they fit more snuggly. At this time they are not finger tight. With a washer I believe that will do the trick.
I will snap a update picture when I add the rubber washer but this is what your end product looks like. I plan to later paint any mods I do but I leave them white so they are easy to identify for the purposes of aiding other community members.
@Josh Seems like a useful engineering mod ...we are all hoping it will prove good! I don't have a 3D printer yet and this is all so very informative! Thanks for posting the "good, bad and ugly" news
Thanks I robot , from what I have seen on other printers the calibration and modifications for better prints are mostly universal from model to model. They all follow the reprap printer type and use either abs or pla.
Ok so here is my first print after adding the Z backlash mod but I have not added the rubber gasket yet. I am pleased with the obvious alignment improvments. This is a .3mm print so it's more obvious here than it would be with a .2 or .1mm
After the print I wiped the part with acetone to seal up and layers that might not have stuck well. Overall it prints 98 percent correct only a couple passes didnt stick in the air tunnel but this is a vast improvement from before the Z backlash mod. It costs like 3 dollars and a couple hours of printing. This particular part I printed was for the extruder fan , it cools the filament slightly to control oz and improve layer adhesions. This is also a recommended mod by solidoodle.
Ok so here is the printed extruder head fan shroud with mount on top. I may install this in a couple days but first I need to get a high flow fan to fit. I will post what I bought.
Here is the fan I ordered on amazon.com
Sunon 40x40x10mm Medium Speed fan, Model KDE1204PFV2 Low noise with Patented Vapo Bearing Model KDE1204PFV2 Specs Bearing Type: Vapo with MagLev tech RPM: 5800 Air Flow: 7.0 Noise Level: 27.0 dBA Power Connector: 3 Pin w RPM Monitoring Fan Dimensions 40x40x10mm Rated Voltage: 12V DC
most fans of this size can only move around 4 cfm and some 5 cfm. This fan is rated 7 cfm so i will have plenty of warm air moving across the extruder. This is the second most recommended modification to get clean prints , better bridging and sharper edges and corners. I've also heard the can assist with curves where layers have trouble sticking. There are options in the software for this to be controlled by the slicer as well or i can have it separate from the oem electronics so i have not done any permanent modifications. So in a few days I will have this new fan and I will put those suggestions to the test.
@Josh- From what I gathered the fan is for printing PLA. I'm not sure if it will be a positive or negative with ABS. I'm very interested in how this works out. I just ordered mine last week so I won't see it for a minute but I planned on doing the backlash mod. What thingiverse item number was that one you used?
@antron - sorry I don't know the number but search solidoodle fan and look for the artist username Lawsy. That's the moderator for solidoodle forums.
Yea there are lots of pages of posts with people who tried this and confirm the improvement. Here are before and after pictures using the same settings
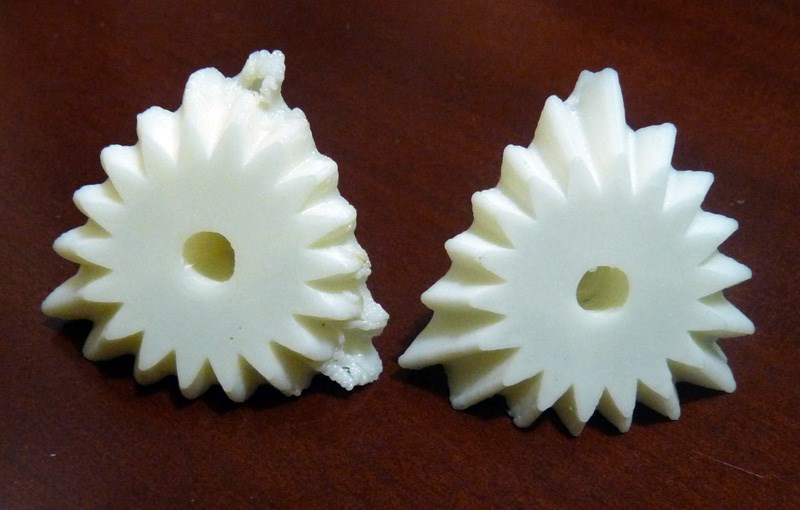
left no fan, right fan on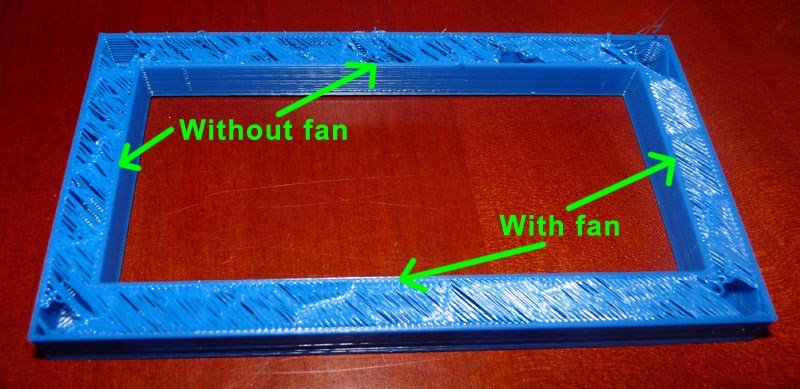
fan also helps bridging which is jumping a gap.