
rob.knight
France
Asked
How is it possible to access the servo information associated with virtual servos in the firmware of an EZB created with an Arduino mega?
Related Hardware (view all EZB hardware)
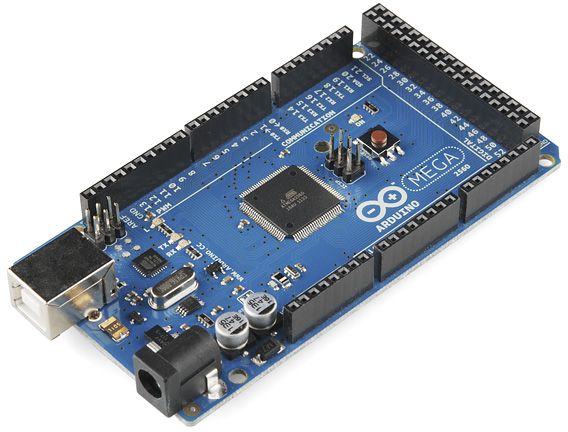
Arduino Due/Mega
by Arduino
Synthiam ARC enables Arduino Mega 2560 control with 8 ADC, 13 PWM, 21 digital ports and 24 servos; includes firmware, shield and tutorials
USB
Servos
24
Camera
Audio
UART
3
I2C
ADC
8
Digital
21
Related Robot Skills (view all robot skills)
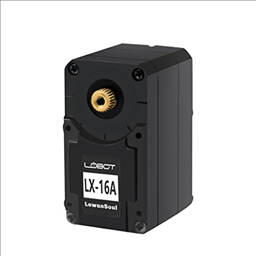
Lewansoul Servo
by LewanSoul
Control LewanSoul LX-16A servos via ARC (EZ-B v4/IoTiny): assign virtual ports, read positions, set speeds, and enable continuous rotation.
Requires ARC
v30

Wii Remote
by Nintendo
Control servos, movement panels and scripts via Wii Remote or mobile accelerometer; D-pad, buttons and Home-enabled accelerometer tracking.
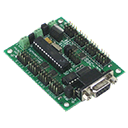
SSC-32 Servo Controller
by LynxMotion
ARC integration for SSC-32 servo controllers via PC COM or EZ-B/Arduino UART; maps V0-V31, configurable baud, enables servos in ARC skills.

Certainly! In the context of Synthiam ARC, there are two main types of servo ports: Dx and Vx. Each type serves a different purpose and is used in different scenarios. Here's a detailed explanation:
Dx servo Ports
Vx servo Ports
Servo Interface Menu
ARC displays a standard configuration dialog for configuring servos across all robot skills. This menu allows you to configure a servo (or multiple servos) to be moved from a robot skill. The configuration options include:
Advanced servo Interface Menu
The advanced menu provides additional options and allows you to add multiple servos to an option. Advanced settings include:
Popular servo Robot Skills
Many robot skills control servos, such as:
Hard Set servo Limits
You can set global servo positions across all robot skills using commands like
SetServoMinandSetServoMax.Example Testing a PWM Servo
Servo robot skill Drivers
There are various robot skills for different servo drivers, such as Robotis Dynamixel, LewanSoul, and more.
By understanding these servo port types and their configurations, you can effectively control and utilize servos in your robot projects using Synthiam ARC. If you have any specific questions or need further assistance, feel free to ask!
Thanks. What I actually need to do is send a sequence of angles over serial. I’m using an Xbee wireless network to control two arms and two hands which are all electrically separated. I’d like to be able to generate the angles as if they were servos as I believe that’s the easiest way to link up to the other skills. For now I’ve modified the firmware so the servo position update also updates an array which I use to generate the serial message. This limits the total number of angles I can generate to the maximum number of servos on the mega which is 24. Ideally I’d like to be able to control 52 servos in total. Is there a way to generate a custom serial output directly that would transmit over an Xbee connected via USB enumerated as a COM port?
Okay I think I understand a bit but as we go through some steps I can probably understand more
what robot controller are you using that can support that many servos? That’ll be the first thing to consider
will the servos be pwm hobby servos? That will limit each servo to have 180 positions. Is that what you expect?
This also might be of interest to the topic.
From this page: https://www.arduino.cc/reference/en/libraries/servo/
The Mega can use 48 servos if all other PWM functionality and I/O is disabled. I do not believe it will affect communication interrupts, so it should give you 48 of the 52 servos you need.
Thanks 48 would be much better! How do I make them show up in the Port editor in the Auto Position skill please?
The downstream motors are actually a mixture of serial servos and industrial servos on four different buses. The only link is the wireless network, for simplicity the same signal is broadcast to the four bus controllers which selectively trigger the correct motors.
Okay, if you read Athena's response, the Dx servo ports are limited to d0-d23, which means you can't use them. The EZB protocol is also limited to 24 servos. We'll need to use the Vx servos to create a custom firmware for the mega.
There are a few ways to do this...
Create a custom robot skill. The robot skill would subscribe to the servo move event and transmit the servo port ID and servo position to the Arduino Mega. This isn't a significant amount of effort, as it's pretty straightforward.
Use the servo Script robot skill. This allows sending the port and position to thArduinono mega without needing to create a robot skill: https://synthiam.com/Support/Skills/Scripting/Servo-Script?id=19068
Would you like Xbee to connect the Arduino mega? Is that baud rate 9600?
Thanks, both options sound interesting. Can you expand on Option 1 at all? I'll take a look at 2 now.
Yes the xbee just connects to one of the ports Serial1 in this case and forwards any bytes sent it's way, pending a bit of messing around with microsecond delays to prevent buffering problems.
Running at 115200 baud.
All I really want to do is broadcast a custom serial message by connecting xbee directly to ARC so maybe the mega is not the way to do it. The xbee plugs to an adaptor board which shows up as a com port. I'm reading about scripting now, could you give any advice please on the best way to take virtual servo movements package them in a custom serial message and send it to a COM port?