
Asked
— Edited
3D Printing Optimized Models
I am printing JD Humanoid but I noticed a lot of the parts don't have supports. Example servo connectors start about 3mm off the ground, the top of his feet don't print well upside up or upside down. Has anyone created a modified version of JD Humanoid (and other bots) with supports that are optimized for 3D printing.

That's not up to the design file. That's up to you as where to place the object in your slicer. Perhaps there's an online course you can start with to learn how to use your printer? We thought of doing a course before, but there's so many printers and so much software that's it's impossible to standardize.
When you load the part into your printer software, you can move it around and flip it to position the best printing angle.
Such as, you mentioned the bracket prints off the bed. That's incorrect - the object prints where ever you place it in the software slicer.
A little bit of time and you'll get it . If you mention the printer and software, maybe a community member is familiar with it and can help. Otherwise the printer manufacturer can explain more in their tutorials.
Thanks @DJ If someone in the community could please teach me how to use my Prusa I3 clone and start a print line 3mm above the surface of the print bed without the use of supports, I would really appreciate it.
@Nink Complicated STLs are going to need certain orientation and or supports in order to print right... It would be great if all stls were shaped like a box then printing them would be a breeze... With (as mentioned) complicated stls like ez robot's lever servo part there is no real way to print it without supports... In your slicer you need to enable supports for an angle usually greater than 45 deg... PLA "bridges" better than abs but printing parts with angles greater than 45deg usually will require supports...That lever servo part will need supports no matter what type of filament used... So bottom line where you see that 3mm gap is where supports will be needed. You can't print in mid air... As @DJ mentioned orientation and supports (among many other settings) is done in your slicer software prior to printing...
Thanks I found it, generate support material greater than 45 degrees. :-)
Thank you @Richard_R I will try it out.
Hi Nink, I have fairly extensive knowledge of 3D printing. Don't be afraid of using slicer driven supports. You slicer may just need some tweaks.
What slicer are you using? Type of filament? Judging from your photo of the part you are over extruding. This means too much filament is being pushed through the nozzle. It is an easy adjustment in the slicer. You may also be printing too hot and too fast. Once you have the settings right the part will come out cleaner and supports will separate easily. Here is link that will surely help. www.simplify3d.com/support/print-quality-troubleshooting/
Thank you @Holy1 I did not even realize I was over extruding. Learning ... I just switched from PLA to 1.75mm ABS as it was clogging all the time. I find my ABS prints are warping on large print jobs like the inmoove arms and also separating sometimes. Temp is 140 C on print head and 100 C on bed. Slic3r v 1.1.7 fill density 50% speed 60mm/s on perimeters and 40 mm/s on external perimeters.
thanks for the link will have a read and play
Warping is always an issue with ABS. Look into this, it is a game changer > spool3d.ca/pei-polyetherimide-sheet-200mm-x-200mm-x-2mm-8-inch-x-8-inch/ There are adhesion sheets available on a different page.
PEI will make a world of difference. 65c for PLA and 100C for ABS.
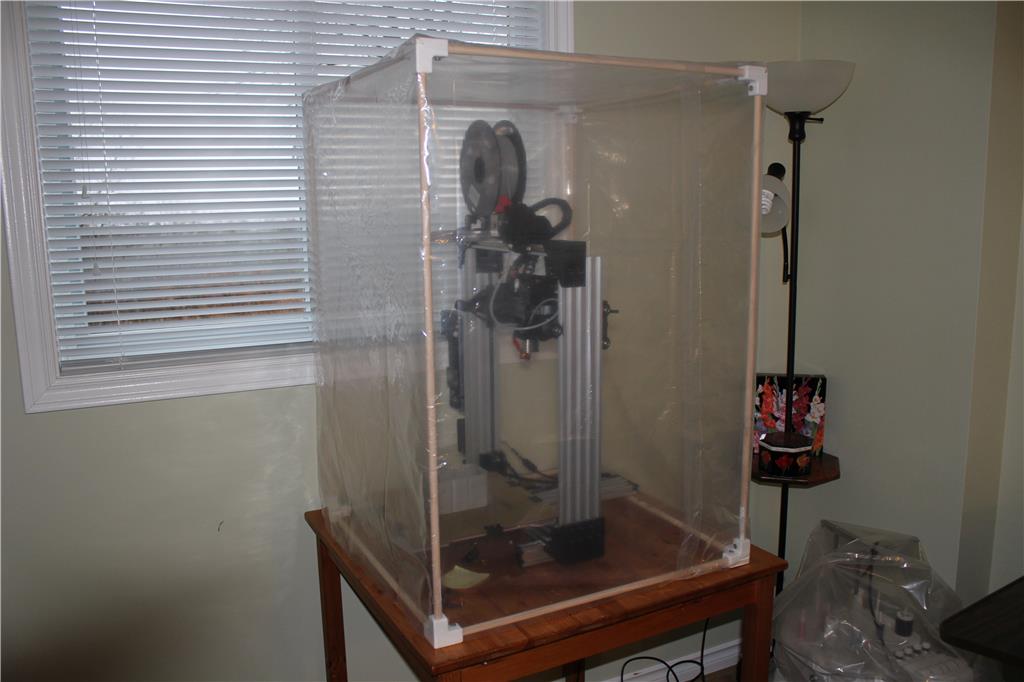
ABS for taller prints may need an enclosure. Doesn't need to be pretty just something to stop drafts. Even a cardboard box or something similar works wonders.
50% infill will cause warping too as it will cool at different speeds for the interior to the exterior. 15-20 % is all you need if you have a thicker exterior, say 3-4 perimeters.
I am hoping the 140c for the printhead is a typo. Should be 220-240 c for abs and 200ish c for PLA
Yes 240 :-) for ABS temp. I will try dropping to 220 ish after first layer and reduce fill density thanks for the guidance and info on PEI sheets. Today I use blue painters tape or a glue stick.