
UweP
The VR Rover - VR Robot For Meta Quest 2
My project is now ready to present it to you.
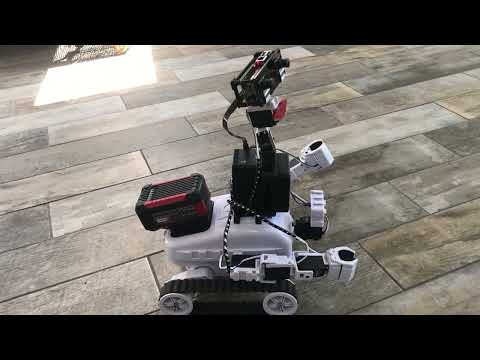
The VR Rover
VR Rover with 3D stereo camera, live voice chat, exchangeable battery system, onboard PC and Meta Quest VR App.
I wanted a platform to test and get familiar with ARC/EZB/VR. Unity was also new to me, my distant goal is to convert my inMoov to ARC/EZB/VR.
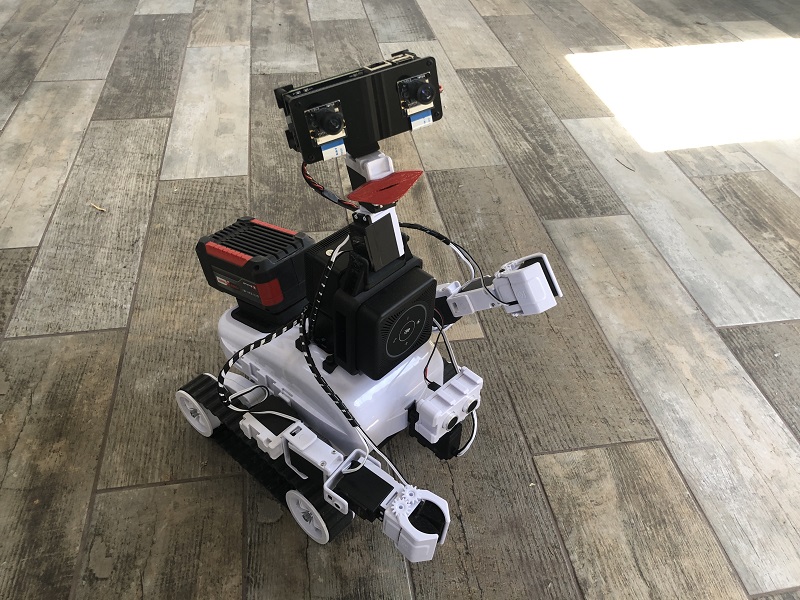
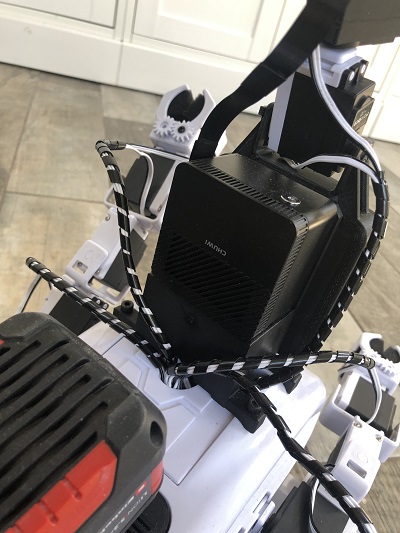
VR Rover hardware
The basis is the Rover Roli from ez-robot, I have changed/installed everything:
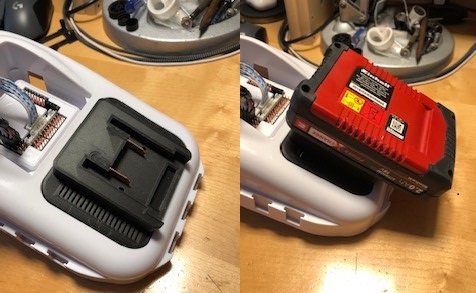
Exchangeable battery system 18V/5.2 Ah, more information here: Rover-Roli-on-steroids-battery-extension
3 x step down converters (18V to 7.5V ECB, 18V to 12V PC, 18V to 5V Stereopi and Fan) Voltage divider (EZB analog port) for battery monitoring 2x USB relay to turn on/off EZB and Stereopi via batch script Link
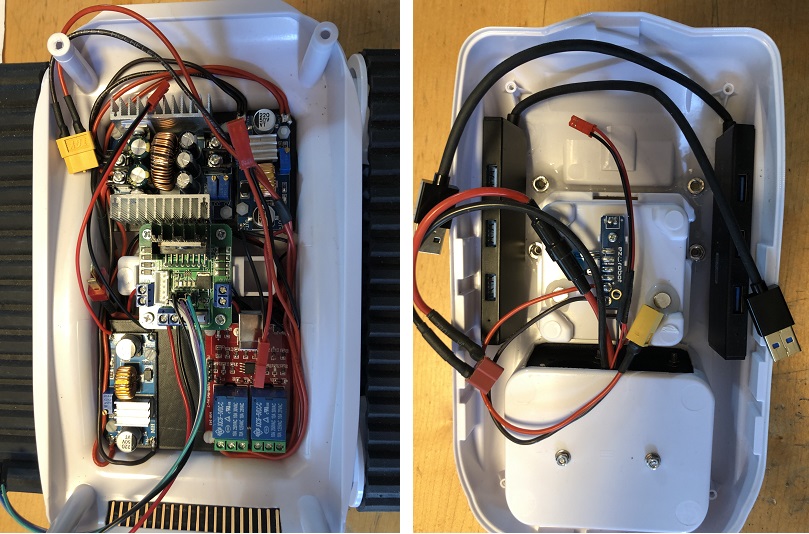
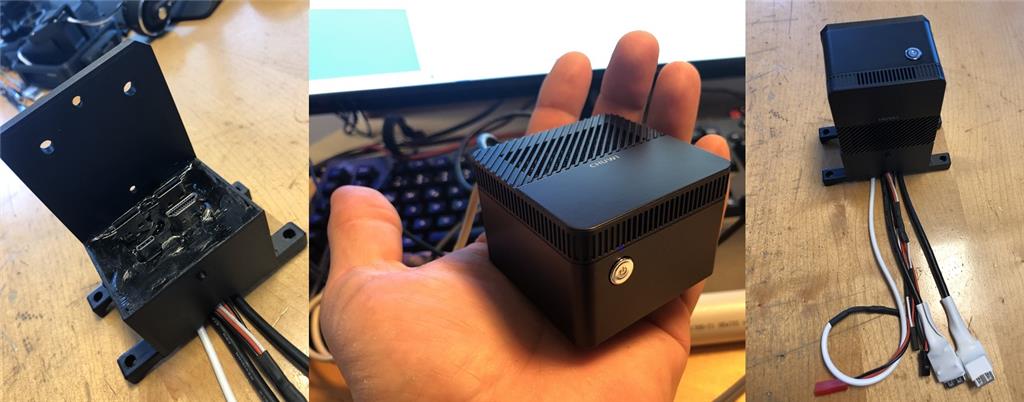
onboard PC (SBC) Chuwi Larkbox with docking station Link
2 buttons (EZB analog ports), one to switch off the system, one reserve, 2 USB 4 port hub
live voice chat with conference microphone/speaker eMeet Link
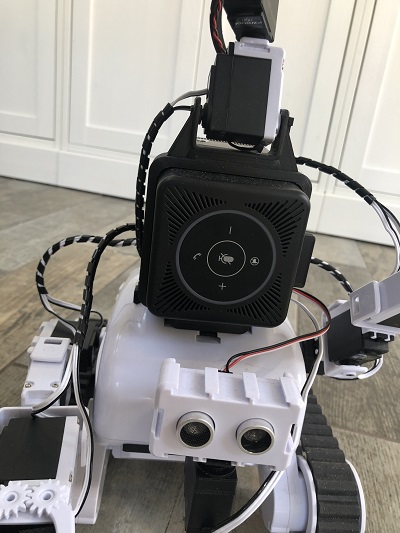
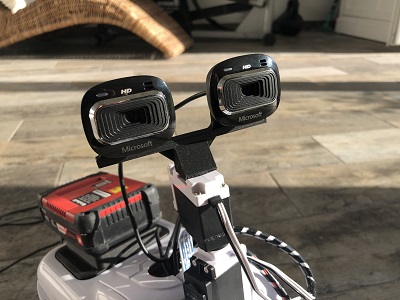
StereoPi V2 with HDMI to USB Capture, I still had this lying around Link Stereopi Link Capture
and most importantly -> lips
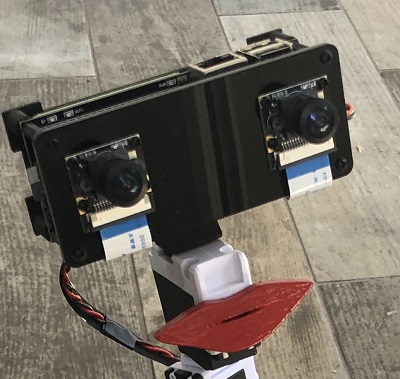
However, 2 USB cameras are also possible
VR Rover software
The basis is the skill Dual-Camera-Servo-Server
I created the VR Meta Quest app myself, it can work with both stereo streams, SideBySide (e.g. StereoPi) or 2 USB cameras, this can be set in the app setup.
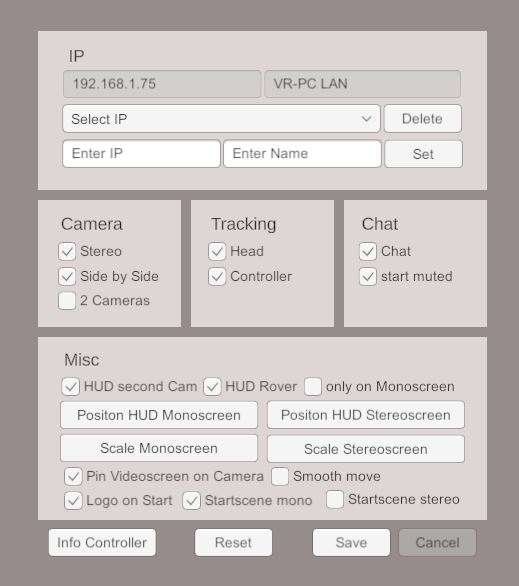
I also created a Windows program for the live voice chat function, this runs parallel to ARC on the MiniPC (SBC), it can be used to communicate in real time via the VR Rover and the Meta Quest (requires Visual Studio 2019 Redist).

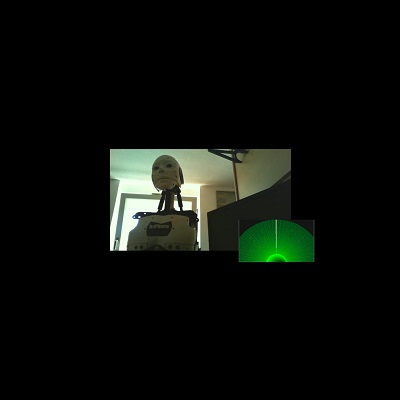
In SideBySide mode I still have the second video stream free, here I transfer the radar skill for a picture in a picture If you use the mode with 2 USB cameras and only one USB camera transmits, you can also display a picture with the second video stream.
For transferring ARC skill content, DJ created two new skills, thank you very much! Robot-Skill-to-Camera Screen-To-Camera
The HUD overlays can be placed and scaled freely, the video screens can be resized. The digital clone of the VR Rover can also be displayed and freely scaled and rotated (SideBySide only).
Previous experiences/insights
PC Chuwi Larkbox, this little guy is really powerful for its size, disadvantages are the price and the fact that you can only turn it on with the button. There is no way to switch it on, e.g. when there is a power supply (bios).
The Rock Pi was far too weak to meet my needs.
Rover Roli, a good platform with plenty of space for your own ideas, the chain drive is a disadvantage for me, he doesn't like carpet at all, wheels might be better here.
What's next?
Lidar, I already have it here... Integrate arms, control via controller ... Animate the digital clone of the VR Rover in the app to the current servo positions, I still have to see how I can get the current servo positions to Unity.
Here you can download the VR app and the chat program:
- VR Rover APP and VR Rover Windows Chat
STL files: https://synthiam.com/Community/3DParts/Miscellaneous/Adapter_plate_Einhell_battery--5d506d23-a6d6-423e-ae1f-d883eec71eee https://synthiam.com/Community/3DParts/Miscellaneous/Ventilation_grille_front_Rover--57350c9b-7963-4fc3-b300-e6a986710063 https://synthiam.com/Community/3DParts/Miscellaneous/PC_Dock--dbe0390e-fcd7-4342-9564-49f29311727c https://synthiam.com/Community/3DParts/Miscellaneous/SpeakerHolder--772c0077-b79e-403f-aa69-6edf847e35e7 https://synthiam.com/Community/3DParts/Sensors-Cameras/StereoPi--edb28a31-28ff-451d-bedc-6f9624a74acc https://synthiam.com/Community/3DParts/Sensors-Cameras/Stereocamera_rig--f0adc1f0-9df2-4d50-8588-e9670093b89b https://synthiam.com/Community/3DParts/Miscellaneous/Lips--e2f6f647-aaf2-4829-8fb4-122f0ab73c50
UweP
I was trying to make it a robot project, but sorry, that sucks. I did everything twice, but I couldn't save it in the end, the selected start image was always deleted ...

Wow, what a great presentation! You have done some wonderful work here. It's a pleasure to see and watch. So much to be excited about.
I knew you were going to try the Rock Pi X and grateful you placed your experience with it here. With everything you are demanding from the computer I can see how you would need a more powerful platform. I'm currently using the Rock Pi X in my robot but haven't gotten to the point in my rebuild/upgrades where I can really load it down to see how it handles my scripts flying at it. The first thing I found that I dislikes was it's very long bootup time into windows and then into ARC. It takes at least 2.25 minutes for the robot to start running the INT script. It looks like your startup time using the Chuwi Larkbox is much faster. Could you share how long it takes from power on to when ARC can start running scripts?
You state you can only start up the Chuwi Larkbox by pressing it's power button. I had the same issue with the Rock Pi X. I overcame this issue by using time delay relays wired to the Rock Pi X's power button circuit. Is there a way to replace that power button on the Chuwi Larkbox with timer relays?
Hello Dave,
thank you, yes I invested a lot of time.
I have created a video for you, switch it on and start EZB immediately, via autostart (1:10 minutes):
The Rock Pi starts as soon as it gets power, unfortunately the Chuwi doesn't do that. Yes there is a problem with turning on the Chuwi but there is no solution.
I disassembled it to see if I could solder a cable directly to the switch. But then I had the idea to attach it to the outside because I had no more space inside the Rover. And then I had the idea to create a Docking Station so I can quickly switch it for other projects. Of course it would be possible to solder a cable directly to the switch, it's just very, very small.
The internet is full of questions on this topic, but there are no solutions, and the manufacturer is not responding either.
Here's another creative idea :-)
https://forum.chuwi.com/t/larkbox-automatic-boot-on-power/16585/11
.
Thanks for taking the time to show this and answer my questions. Very interesting.
Your boot up to run time is about half of what my Rock Pi does.
I don't understand your creative idea. Sorry. Are you just plugging it in? EDIT: Oh, I see. The servo rotated and turns it on . LOL. Got it.
the video with the servo as a switch is not mine, I found it on the internet...
I've had enough for today, but it's already working quite well...
:- )
.
It's super great seeing your robot! This is wonderful . I'll pass a note to the web dev team about the robot profile. I'll make sure your credit is applied to the account. I'm a huge fan of videos so it's great that you posted a number of them - thanks!
Wait, what are analog ezb ports? I thought all the ports were digital
Wait, i remembered, but what were they for? And why didnt many of the ezb kits use them?