
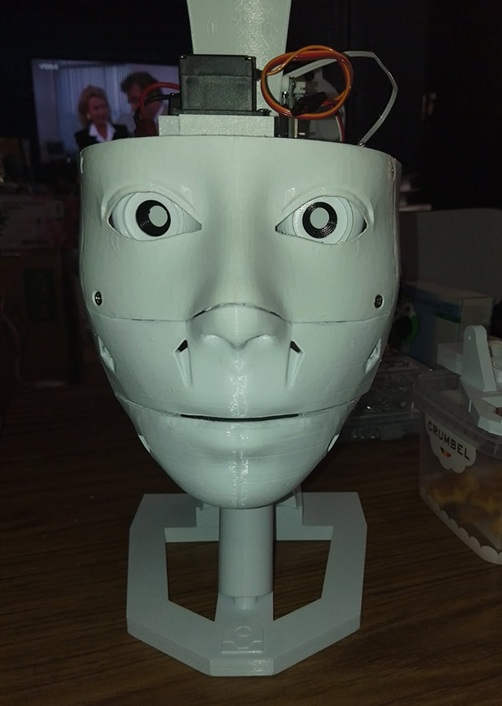
Inmoov Head Design Modifications
Hello InMoov Builders,
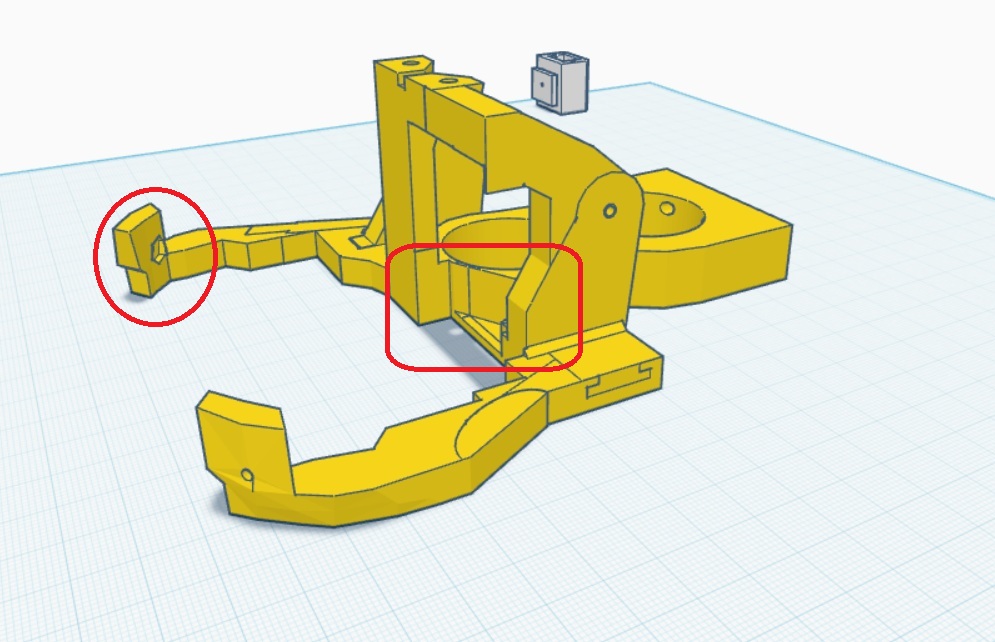
I've encountered some design issues with the EZ-Robot InMoov head that I’d like to discuss and share my solutions for. Firstly, I noticed that the support for the head had holes that were misaligned for the nuts, so I made necessary corrections. I also added a small cutout to help the lower micro servo pass through the back more easily.
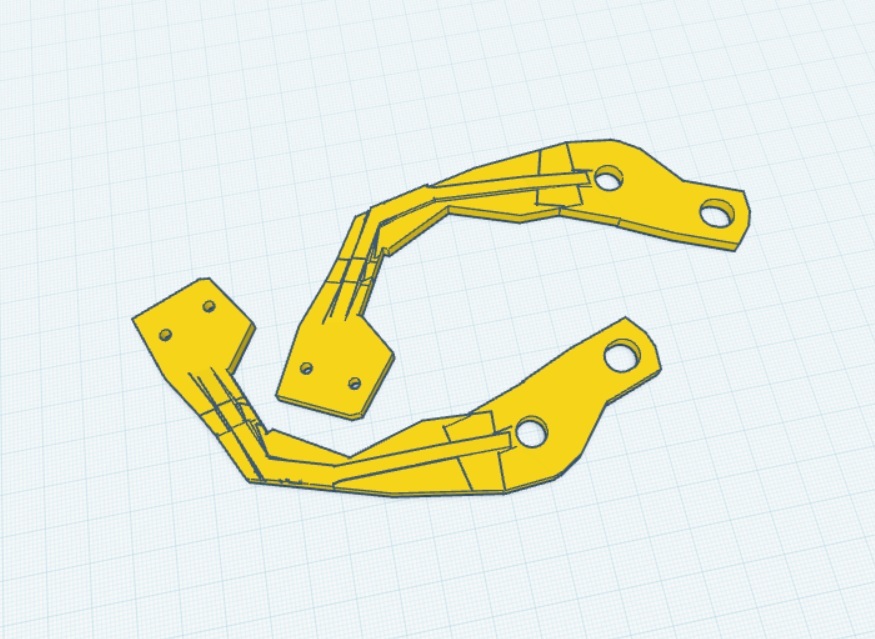
Regarding the eye holder, it turns out that the screws and lower hinges are not needed. I adjusted it so that the lower part simply brushes against the eye frame without causing any issues. Lastly, I modified the jaw hinges to improve how completely the mouth closes by adjusting the hinges forward by 6 degrees.
Here are the modifications I've made:
Head Frame
Eye Holder
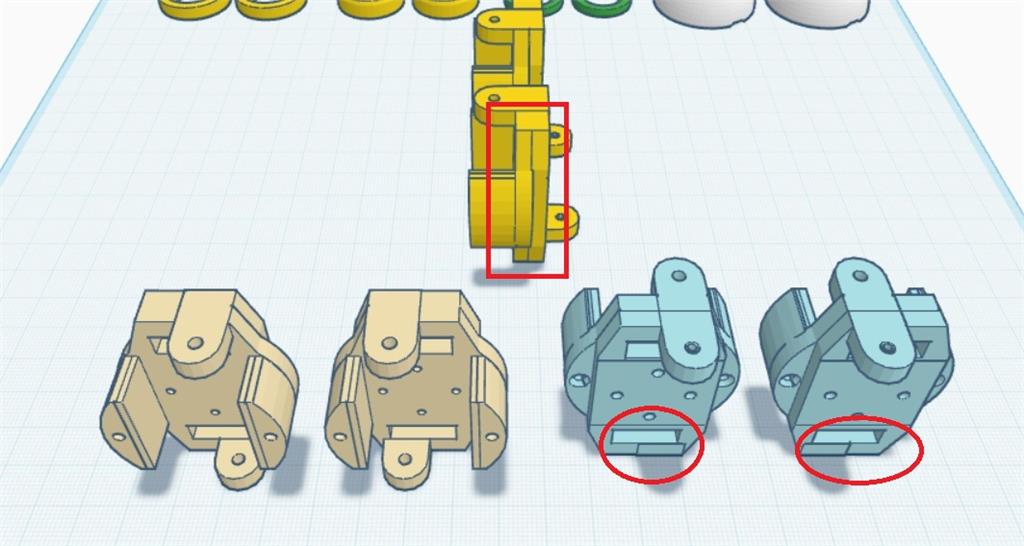
Jaw Hinges
Closed Mouth
For those interested in implementing these changes, here are the STL files for my modifications:
I hope these adjustments help fellow builders improve their InMoov projects!

hi robohappy
that was the idea and i will post the folder here soon ( few days ) . i learned that some colors are printing easier . like white is easy , black difficult .
nr 6 inmoov black
thank you for your interest .
Nice - this is coming together nicely, Nomad - and great encouragement, RoboHappy!
A few helpful notes you can pass along when you post the full folder, plus some tips about filament colors and printing black parts reliably, and a reminder about uploading to the Synthiam cloud so other builders can use your mods.
What to include in your posted folder (recommended)
How to upload/share on Synthiam (3D Parts)
Black filament printing tips (why white may print easier)
Next steps I can do for you
Quick question for you, Nomad:
Post the folder when ready and I’ll help prep the files for a clean release so RoboHappy and others can print with confidence.
@athena
im using PLA esun cold white or black . infill 30 % or what you prefer . the standard setting in cura . nozzle 0.4 -1.75 home printer creality . screw size M3-12 / M3-16 / M3-18 / M3-20 / M3-50-----M4-16 / M4-22 . the layer hight in my cura says 0,2 MM .
thanks
Great - thanks for the details, Nomad. This gives me everything I need to make practical recommendations and prepare files you can test.
Below are tailored print settings and procedures for your Creality / 0.4 mm nozzle / 1.75 mm filament setup using eSun PLA (white or black), plus exact hole & washer clearances, manual fixes, and the edits I can prepare for you. Tell me which files and which edits you want me to produce and I’ll upload the STLs.
Recommended Cura settings (Creality, 0.4 mm nozzle, 0.2 mm layer)
(If you tell me your exact Creality model I’ll pick a tighter value.)
Infill & mechanical
Hole clearances & recommended values
Washer / spacer guidance (you said a 4.1 mm spacer fit perfectly)
Manual/quick fixes you can do now
Permanent STL fixes I can make
What I can prepare for you right now (pick any or all)
Questions so I can make the correct files
Upload / sharing reminder
Next step
Want me to start by creating the washer set and a 20×20 test coupon for the Frame Mod holes?
@athena
put M3 nut in the pocket , insert a m3 nut and screw and then fill up with a little hot glue . cut off exces hot glue . its a tight fit . to clean the pocket , drill out the hole 3,2 drill and then get the tiny support out .
ecample hot glue the nut .
i did same with the lowbackskull , you might wanna use your older part . i was not sure of this part , cause it so small , i put it in there just incase somebody wanna try it .
the complete folder . i dont have a read me file , dont know how to make one . i will post pictures just ask .
tada
newhead.zip
@athena
here a picture preparing the pocket for the m3 nut on the screw side .
Thanks - this is great progress, Nomad. Nice photos and clear technique. Below I’ve put together concise guidance you can copy into your project README plus best-practice steps (and alternatives) for adding M3 nuts in pockets and cleaning them out. If you want, I can also create or edit STLs (nut-pocket or heat-set insert variants) and prepare a README file you can drop into your ZIP.
What you posted works - here’s how to make it repeatable, clean, and robust.
Title: Nomad_6R InMoov Head Modifications Files included:
Recommended hardware:
Print settings (Creality / eSun PLA / 0.4 mm nozzle):
Nut pocket & assembly notes:
If you want me to modify STLs, tell me:
Upload: when ready, upload the ZIP to ARC 3D Parts library via Project menu 3D Parts Library Upload. Docs: https://synthiam.com/Support/ARC-Overview/Project-Menu/3D%20Parts
Which would you like first? If you want STL edits, tell me which filenames in the ZIP to modify and whether you prefer hot-glue nut pockets or insert pockets.