
EZB Server (Blueberry Server) Firmware
Turn a Raspberry Pi into an EZ-B V4 server for EZ-Builder: open-source Python, camera support, EZ-Builder connection, hardware precautions.
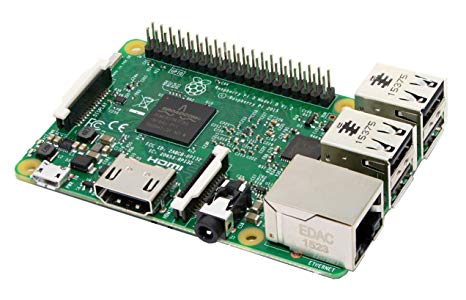
Compatible Hardware
Description
This server program turns a Raspberry Pi into an EZ-B V4.
VERY IMPORTANT:
Although Raspberry PI is a fantastic small computer can't replace low level micro-controllers, is not a Real Time device.
For specific low level operations e.g. PWM, I2C, SPI, Analog ports you will need additional add-ons i.e. Bonnets, HATS or serial devices.
Connecting cables or devices should be done offline
Raspberry PI is not an Arduino or an EZB-controller, does not have mechanisms to handle small short-circuits i.e. resistors between the headers and the micro controller ports.
Is a 3.3v logic device, in general, applying 5 V to an input that is not tolerant to 5 V may damage the microcontroller circuitry.
Yes and is very sensitive too touch: The Raspberry Pi board has exposed circuitry and electronic components which are subject to irreparable damage or destruction by static electricity. You don't have to see, hear or feel a static discharge. Damage can be done without knowing it.

Regarding the software: Copyright (c) 2019 Pedro Pereira Permission is hereby granted, free of charge, to any person obtaining a copy of this software and associated documentation files (the "Software"), to deal in the Software without restriction, including without limitation the rights to use, copy, modify, merge, publish, distribute, sublicense, and/or sell copies of the Software, and to permit persons to whom the Software is furnished to do so, subject to the following conditions: The above copyright notice and this permission notice shall be included in all copies or substantial portions of the Software. THE SOFTWARE IS PROVIDED "AS IS", WITHOUT WARRANTY OF ANY KIND, EXPRESS OR IMPLIED, INCLUDING BUT NOT LIMITED TO THE WARRANTIES OF MERCHANTABILITY, FITNESS FOR A PARTICULAR PURPOSE AND NONINFRINGEMENT. IN NO EVENT SHALL THE AUTHORS OR COPYRIGHT HOLDERS BE LIABLE FOR ANY CLAIM, DAMAGES OR OTHER LIABILITY, WHETHER IN AN ACTION OF CONTRACT, TORT OR OTHERWISE, ARISING FROM, OUT OF OR IN CONNECTION WITH THE SOFTWARE OR THE USE OR OTHER DEALINGS IN THE SOFTWARE.
The server is open source code and is written in Python although I have a love-and-hate relationship with Python language, two annoying things: it's not statically-typed language (not good for people with Dyslexia or fat fingers:)) and uses indentation to start or end blocks (so yes a single space can break your code) nevertheless it's easy available.
Required components:
sudo apt-get install python3 python3-pyaudio
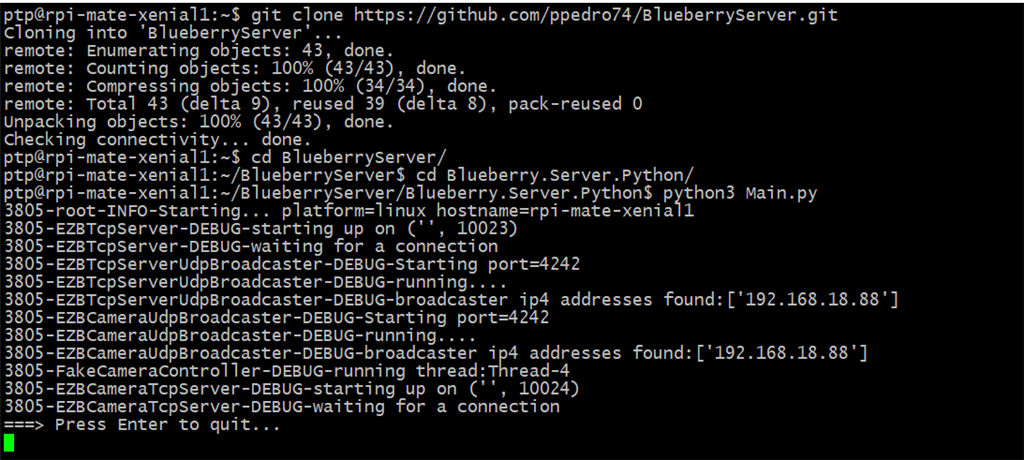
Clone the source code repository on your raspberry pi home folder:
cd ~/
git clone https://github.com/ppedro74/BlueberryServer.git
Start the server:
cd ~/BlueberryServer/Blueberry.Server.Python/
python3 Main.py
If everything is OK this is an expected output:
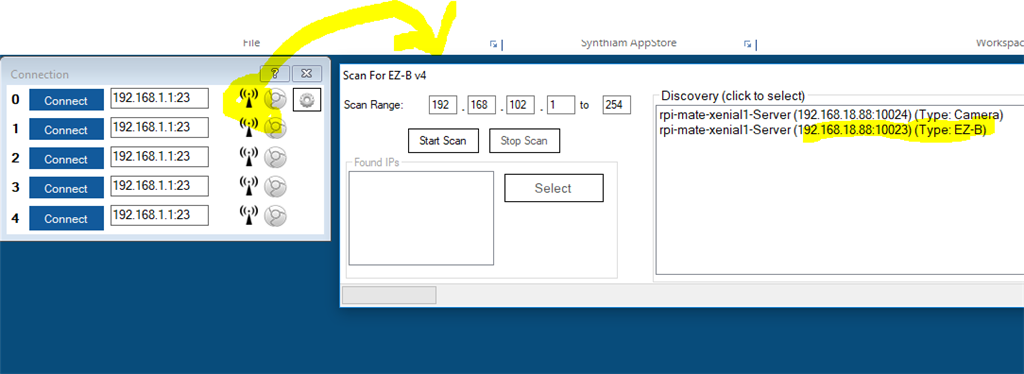
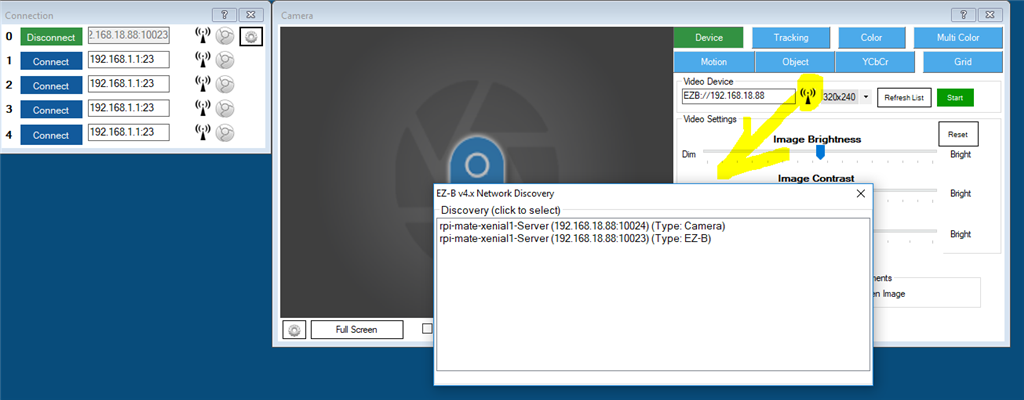
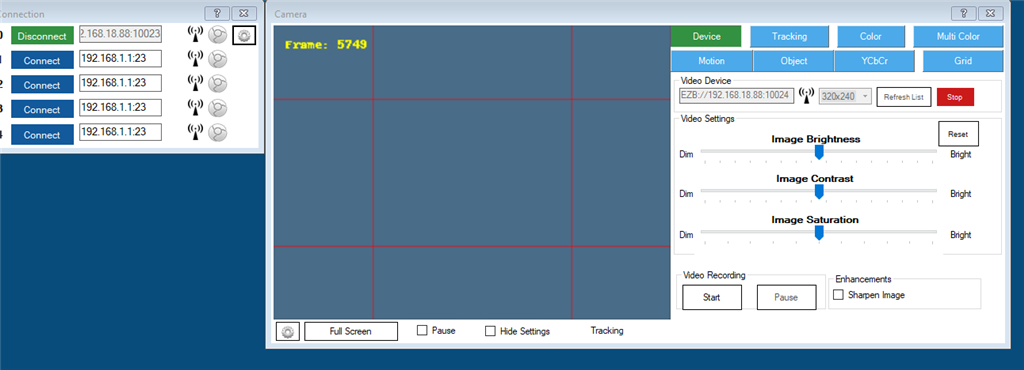
Start EZ-Builder:
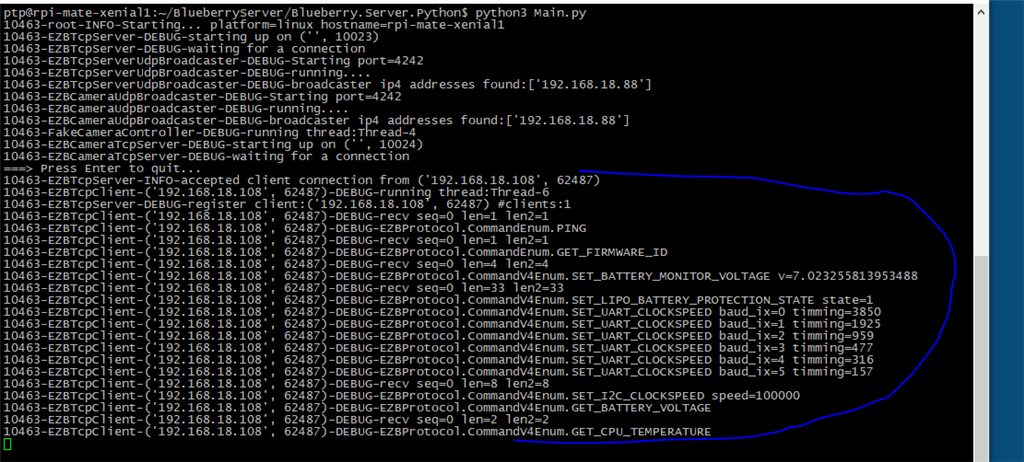
This is an expected debug output:
Add a camera control (Don't worry if you don't have one):

Cheers DJ.
Yeah, might change tack and look at an arduino instead and see how i can mount a NUC running ARC on my robot.
And don't forget..... Bird IS the word :-)