Tutorial
JustANerd
USA
Published
— Updated
Step 6 of 10
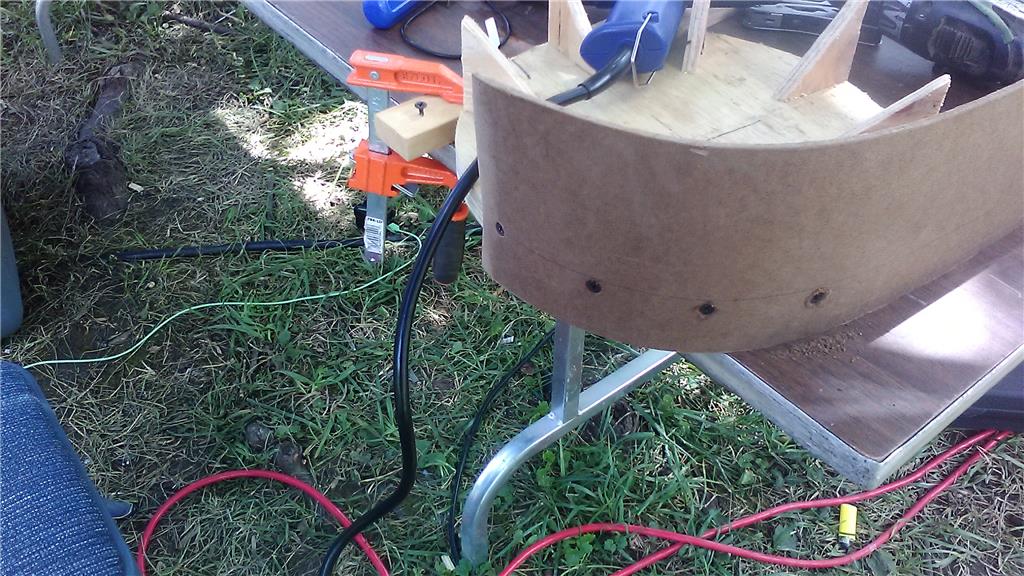
adding the tire
Okay, after you have let this dry overnight, you have something that looks like a paddlewheel. Trust me, it's supposed to look like this! Here is where it starts to get tricky. On a work surface you can make a mess of, clamp one board to the surface about 2 inches back from the diameter of the wheel at a right angle to the side edge.
Then take your other clamp and fasten it to the front edge about 2 feet from the side edge that you clamped the board to. The back board you just clamped on is to push your wheel against while you screw the wheel together, and the clamp on the front is to "park" your hardboard against while you are heating and securing. Here I've already started attaching the tire to the wheel.