Step 6. Array Script Commands.
This step will explain what the "Array" script commands do. We will use the "Append Array" project example that can be found in EZ-Builder, and give some quick demonstrations of each array command.
Append Array: This creates an array of the variable to the specified size. (This will add a new line to the variable watcher as seen in this step).
Define Array: Describes the nature of the array with variable name.
Fill Array: Fill an existing array with the default value.
Get Array Size: Returns the size of the specified array variable.
Append Array and Define Array.
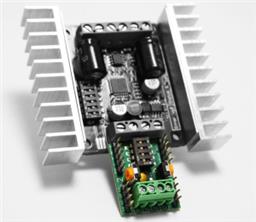
The "Append Array" example consists of two control which are a "Script Control", and a "Variable Watcher" control. Clicking on the script configuration tab, you will see the following script. Have a look through it and read the comments prefixed with a # tag which will explain what each part of the script does...
ClearVariables()
# This will clear the list on the "Variable Watcher" .

DefineArray($x, 1, "orange")
# "DefineArray" Describes the nature of the array with variable.

# "$x" is the variable.

# "1" is the size of the array, which here is one line

# And "Orange" is the and a value name,

repeat ($z, 0, 5, 1)
# The "$z" variable is added to make two variables...
# two variables = 1 array.

#$z is part of the array will repeat.
# "0" is the first array line on the variable watcher.
# "5" will repeat the array this many times.
# "1" multiplies the previous array, 5 times in this case.

AppendArray($x, $z)
# When this runs, it will add a new line to the variable watcher.

endrepeat
# The repeat will now end.
# The following message will display in the script window.

print("Now look at the Variable list to see how the array grew from the initial defined size")
So you can see the "Append Array" and "Define Array" commands are being used here. Let's take a look at the script when it runs...
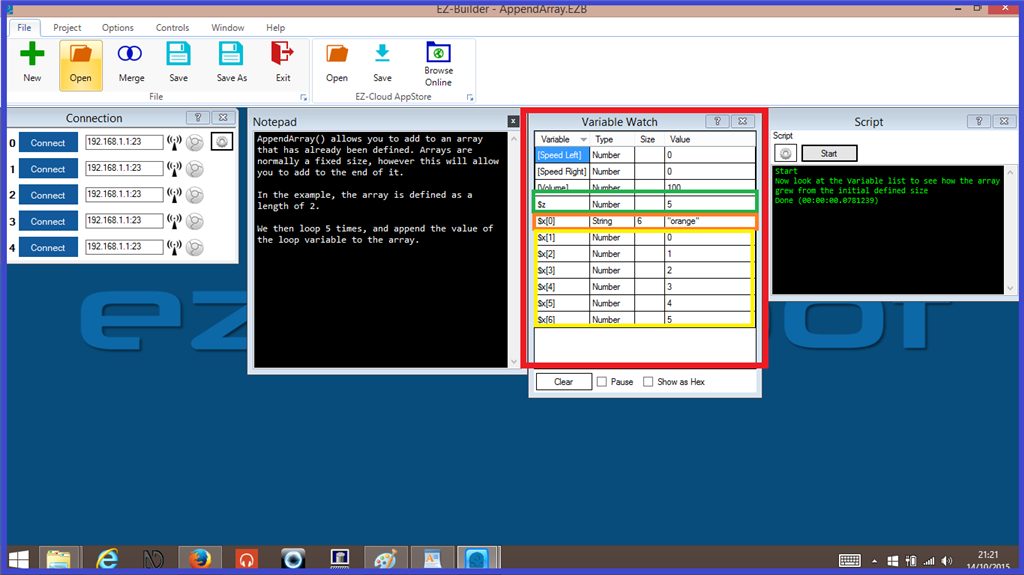
We see in green, that the "Z" variable will repeat the "X" array 5 times. In orange, the array runs the called "Orange" has six variables in it. And in yellow, the "X" array runs for the first time, then after that it repeats five more times.
repeat ($z, 0, 5, 1)
! The "$z" variable is added to make two variables (two variables = 1 array).
! $z is part of the array will repeat.
! "0" is the first array line on the variable watcher.
! "5" will repeat the array five more times.
! "1" multiplies the previous array, 5 times in this case.
Get Array Size
This command will display how many values there are of the array that is defined. For this example, we add a script control which will contain the array size script. Below is an example of this...
# We first need to set a variable for the "Get Array Size" command and add the array name...

$y = GetArraySize("$x")

# The variable will be called, which will get the size of the array that was just run.
if($y)

Print("Now look in the Variable Watcher, and look for variable Y.")
endif
So we run the repeat array script (seen on the left) then we run the array size script...
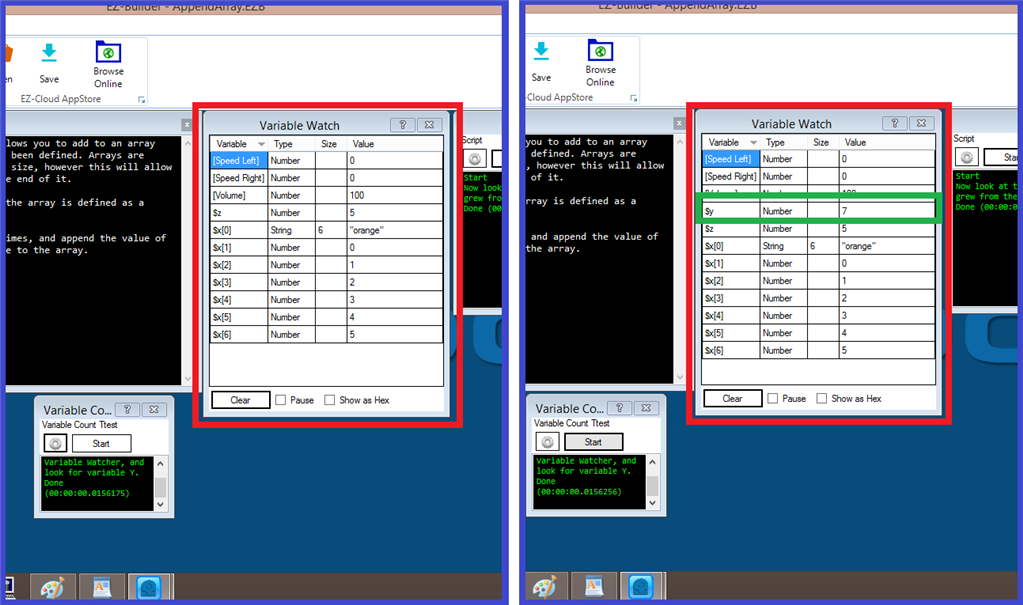
You can see on the image on the right, that there is a new line in the variable watcher. This is telling us the full size of the "X" array which we can see, is "7" (seven lines in the array).
Fill Array
The final array script command will fill an existing array with the default value. So for this final example, we add another script control, and add the following script...
FillArray($x,"Hello")
When the "X" array has been run, we start the "Fill Array" script and we get the following...
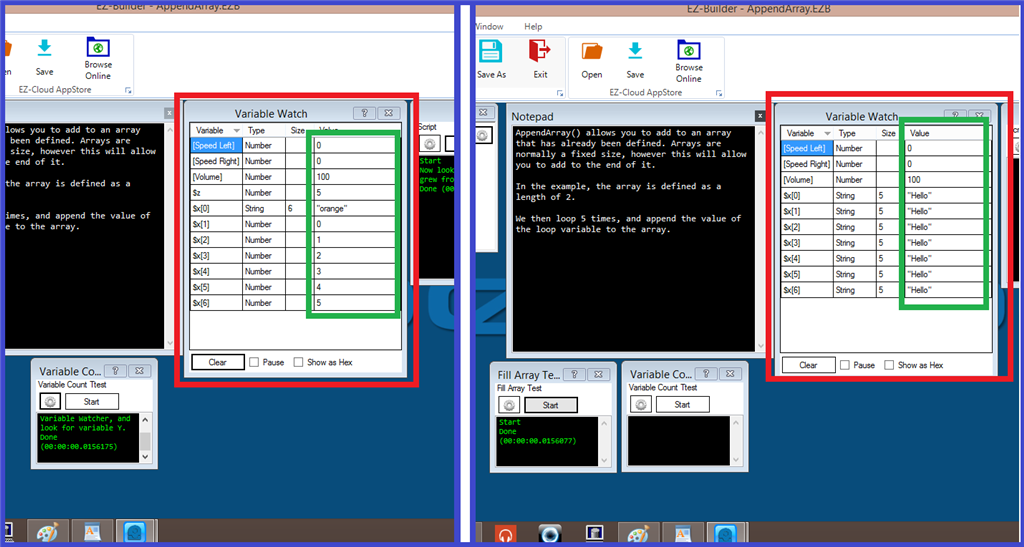
You can see that the values have changed to what we have put in the script. That finishes our short example of variable arrays and almost brings us to the end of this "Arrays" tutorial.
