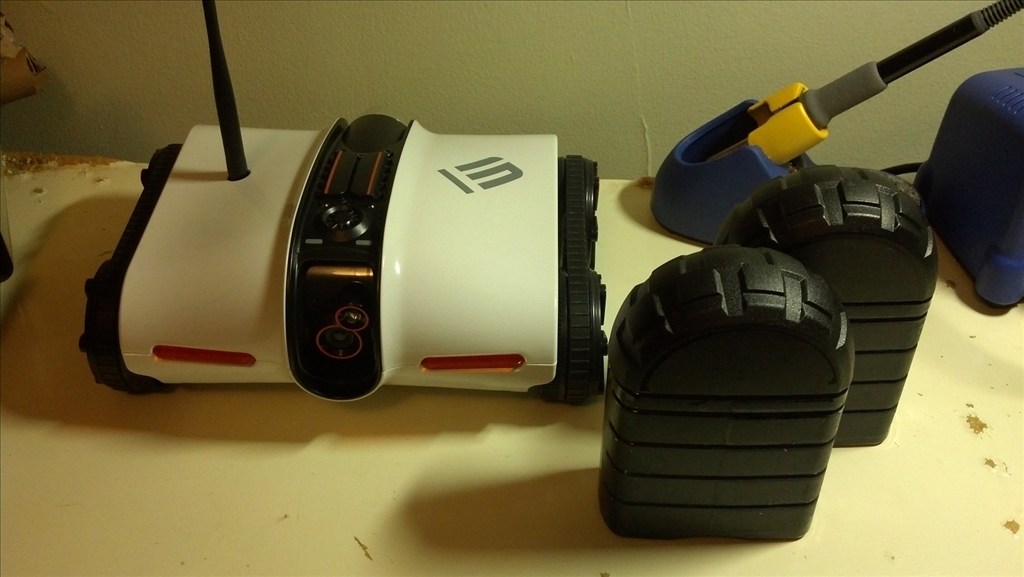
I'd like to introduce you to my Brookstone Rover/EZ-B Robot.

My goal with this 'bot was to stretch my legs with the ARC software, learn how to solder, and do little to no modification of the original Rover chassis as possible. I also needed to make the removal of the EZ-B, well.easy, because I have a Robie Sr that will be my next project and it's going to hop from one 'bot to the other.
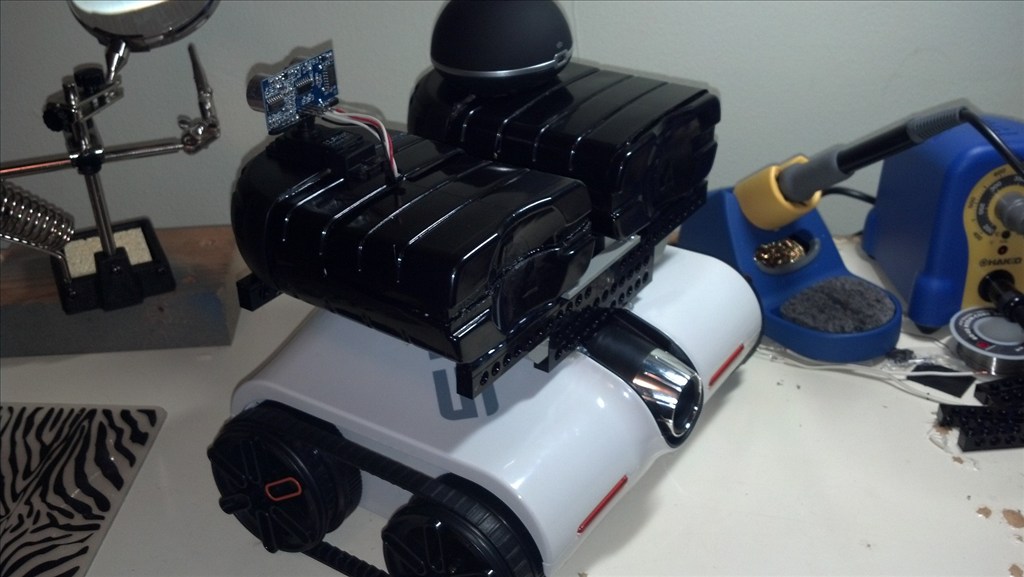
With that in mind, I decided to attach all the EZ-B accessories to the outside of the Rover. I probably spent a week eyeballing various bottles, left-over boxes, and other assorted recyclables before I finally raided my son's old toy box. I found a couple of old Lego racers boxes that were nearly perfect for what I wanted to do.
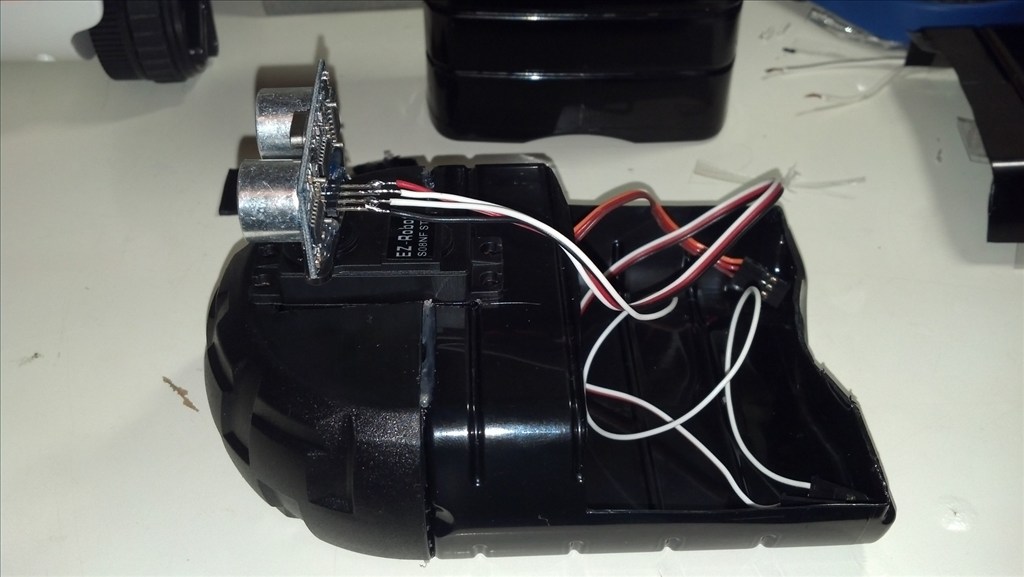
I stripped the boxes of their God awful labels using degreaser and, I can't believe this actually worked, peanut butter. The PB removed all the left over glue gunk, like a Boss. My original idea was to try and mount both the EZ-B and the battery pack within the same pod, but I just couldn't get them to fit correctly, so I opted for two pods. Adding a second pod allowed me to also add sound to my 'bot using a $30 Bluetooth speaker I found at TargetT. (Right now, I'm using MP3's of the voice for the Portal 1 and 2 turrets.)
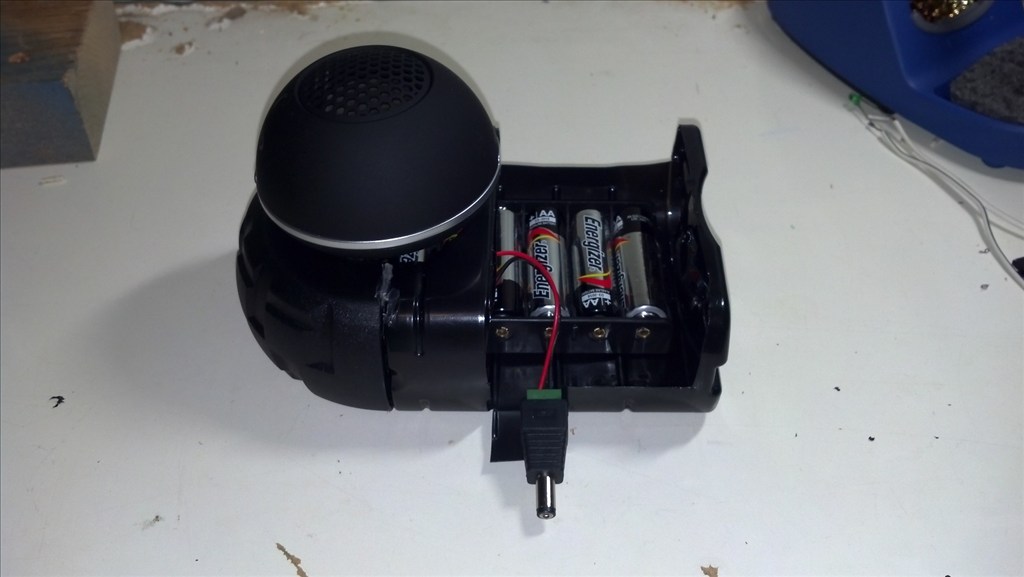
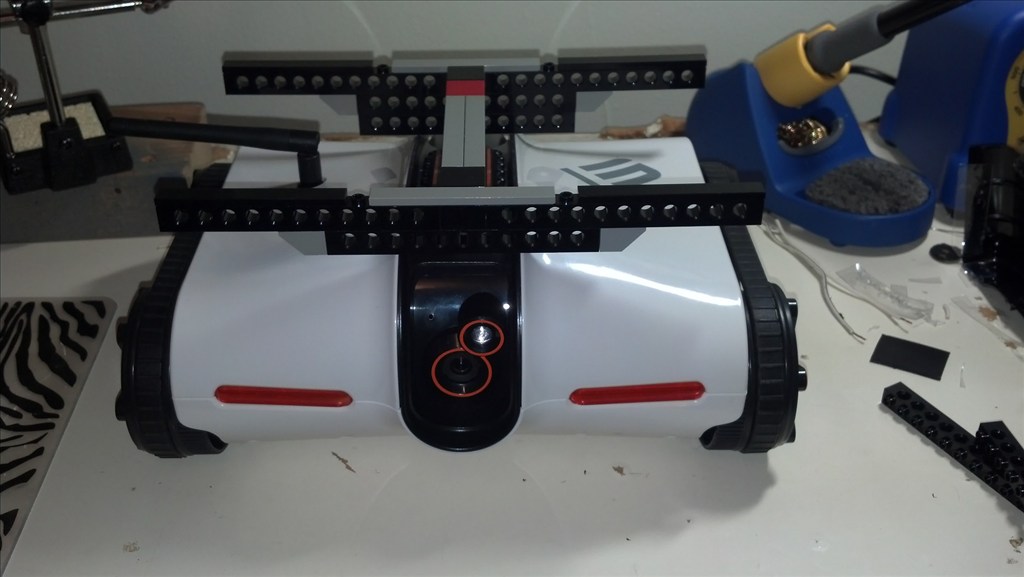
My next problem was how to mount these pods. The Rover has nice, swooping lines, but nothing very "mount" friendly. Again, I pondered this for a couple of weeks, but it wasn't until I started cutting into the pods that I decided to use some old Lego bricks. Not a sexy as the original Rover designs, but I'll take function over form in a pinch. I assembled the platform, then dug through a 20 gallon Rubbermaid tub full of Legos for an hour looking for flat, black plates to give it a nice clean area to hot glue the pods to. (You may notice that not all of the flat plates are black. That's because She-Who-Is-Known-As-The-Queen had quite enough of my digging through 20 Gallons of Lego bricks for one night and declared the search over.)
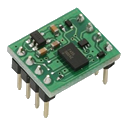
(Insert a wall of text regarding the use of a hot glue gun, my fear of soldering the Ping Sensor incorrectly, and the multiple attempts by the Rover to commit suicide when I mouse clicked the forward motion control instead of using the arrow keys.)
I would never call my build "complete", but it's definitely functional. Next steps are possibly adding a servo with a "tendon" attached to the camera housing in order to control the camera tilt. Before that, though, it's all about software scripting tests. If this were SQL, I'd have it driving me to work while performing open heart surgery. Luckily between this forum, the script editor, and all the example files, there is a freak'n cornucopia of information to help me out.
I'll see about getting video up soon. Comments and suggestions are most welcome. Thanks for looking.
Discover more robots
Chris9's Jd's Adventures At Microsoft
Fisha's Wall-E Wall-E From Poland - Tribute To My Newborn...

it was easy to add IR sensors to it and other parts also more of a expert on sensors any type or how to place them on a robot ,plus other mods,let me know
that paperclip is very old idea from college ,to learn how to solder